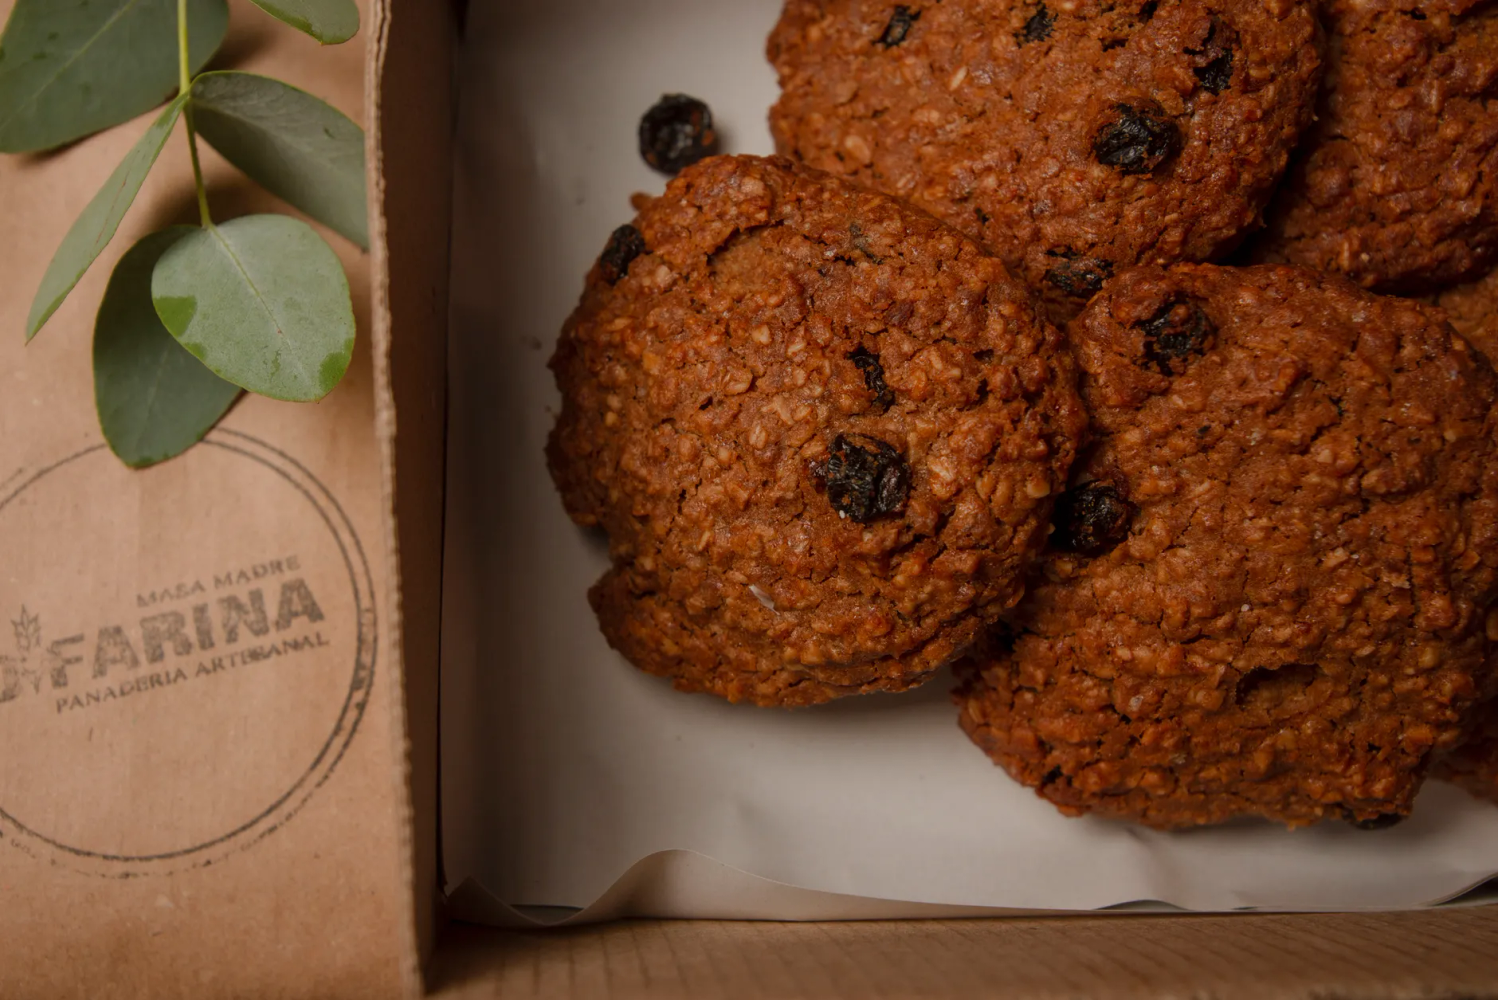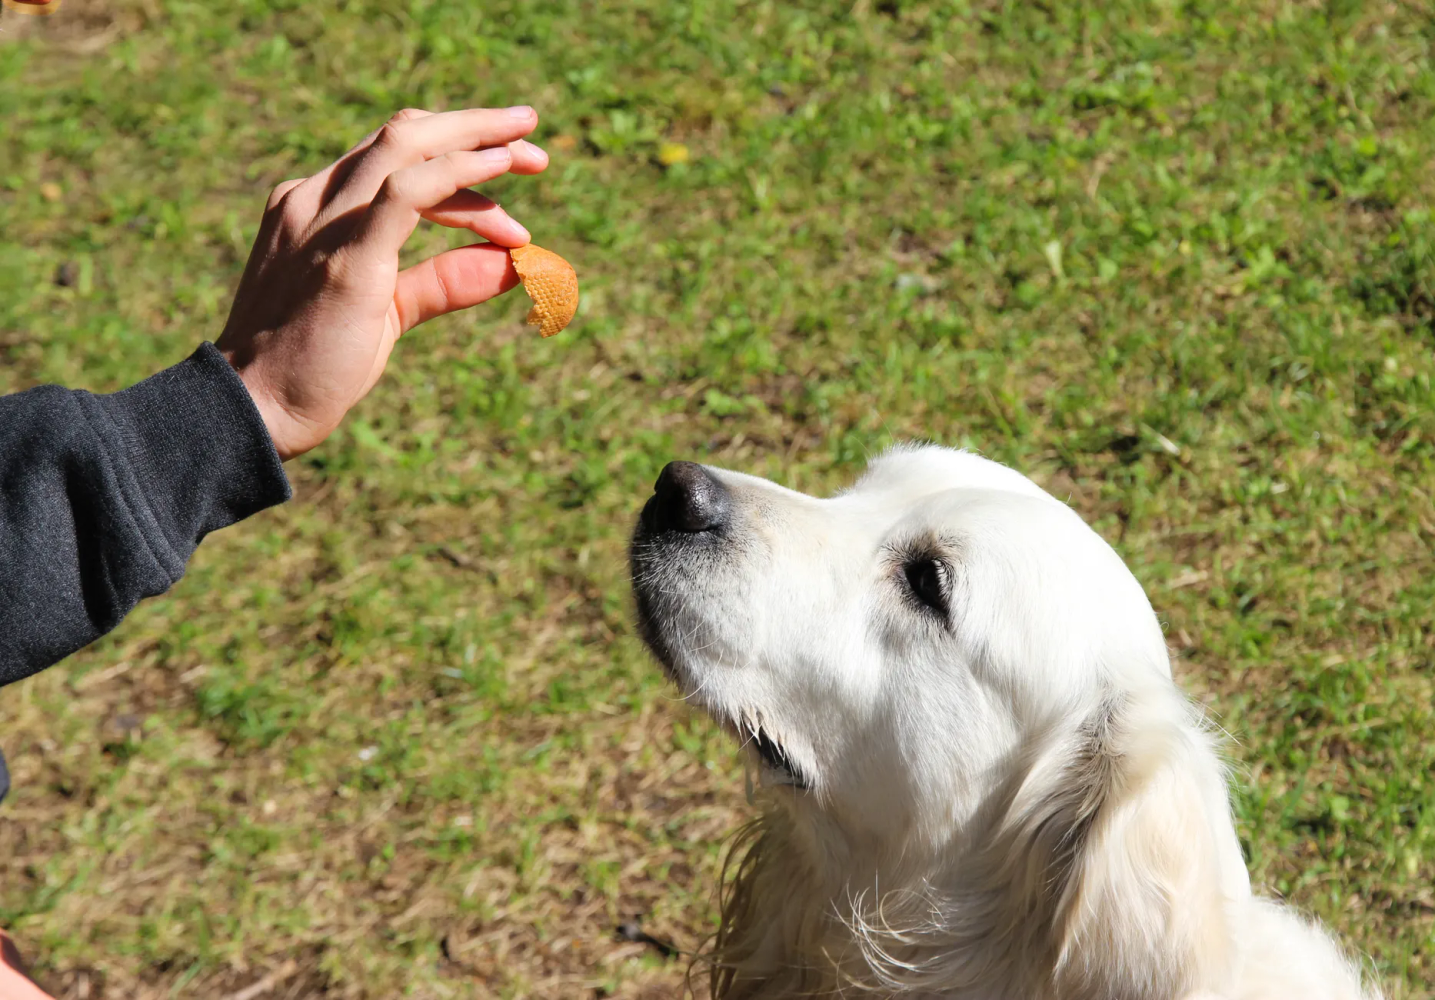
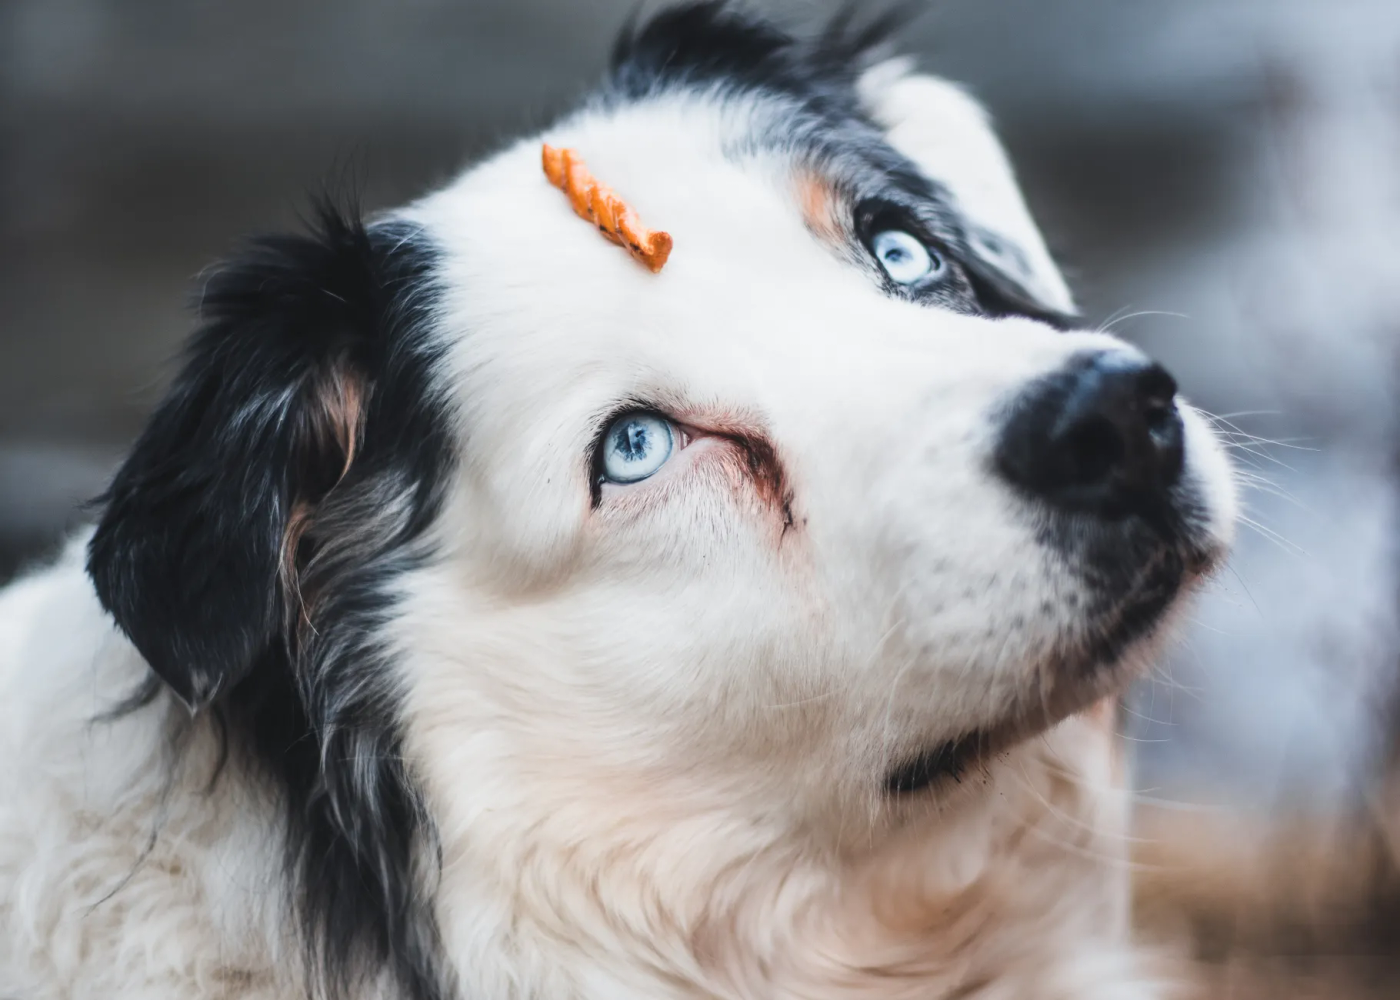
Meatloaf Dog Treats

Meatloaf Dog Treats

Why this recipe works

These mini meatloaf dog treats smell just like regular people food while they bake, but they are 100 percent safe for your pup. They are perfect for a doggy birthday party or when you just want to spoil your furry best friend with something homemade.

The magic of this recipe is that it uses simple, wholesome ingredients you probably already have in your kitchen. It gives you a dense, sliceable treat that holds its shape and doesn’t crumble all over your clean floor.

Here is why dogs go crazy for this specific combination:

  • Lean ground beef or turkey for high protein flavor
  • Rolled oats to bind everything without heavy wheat flour
  • Grated carrots for moisture and a hint of natural sweetness

You can cut the baked loaf into tiny training cubes or larger chunks depending on your dog’s size. Keep a batch in the fridge and watch your dog sit faster than ever.

Flavor snapshot

When you pull these treats out of the oven, your kitchen will smell just like a cozy Sunday dinner. The warm, meaty aroma gets every dog running straight to the kitchen.

You want to serve these at room temperature so your dog doesn’t burn their mouth. They have a firm exterior with a tender inside that is super easy to chew.

The flavor is all about simple ingredients that dogs naturally love. Here is what you will notice when your pup takes a bite:

  • Rich, savory beef flavor right away
  • A subtle hint of sweet carrot in the middle
  • A satisfying, meaty aftertaste that keeps them begging for more

It is a well-balanced snack that feels like real food instead of dry kibble. Your dog will definitely appreciate the homemade effort.

Ingredients checklist

Hey friend, making these dog treats is super easy once you grab the right stuff. You only need a few simple groceries from your regular local store.

Let us start with the meat base and binders. You will want cheap, lean ingredients that will not upset your pup’s tummy.

  • 1 pound ground turkey or lean beef (grab the 90/10 blend)
  • 1 cup rolled oats (quick oats work fine too)
  • 2 large eggs (to hold it all together)
  • 1/2 cup shredded carrots (fresh is better than frozen)

Finally, grab a little something special for the top of the mini loaves. This makes them look like a fun little dinner for your dog.

  • 2 tablespoons plain Greek yogurt (check the label to avoid xylitol)
  • 3 whole baby carrots (for decoration on top)

That is literally all you need for your shopping cart today. Let me know if you have trouble finding any of this stuff at the store.

Method & timing

Let’s get these treats in the oven so your pup can snack. It only takes about 40 minutes total from mixing to baking.

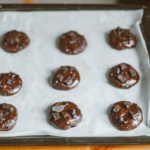
  1. Preheat your oven to 350 degrees and lightly grease a standard muffin tin.
  2. Mix 1 pound of ground beef, 1 cup of rolled oats, 1 egg, and half a cup of shredded carrots in a large bowl. Don’t overmix because it makes the texture too tough.
  3. Press the meat mixture evenly into the muffin cups, filling each about three-quarters full.
  4. Bake for 25 to 30 minutes until the centers are completely cooked through.

Let them cool completely before you serve any to your dog. Store leftovers in the fridge for up to four days or freeze them for later.
Homemade Salmon Dog Food Recipes

Homemade Salmon Dog Food Recipes

Why this recipe works

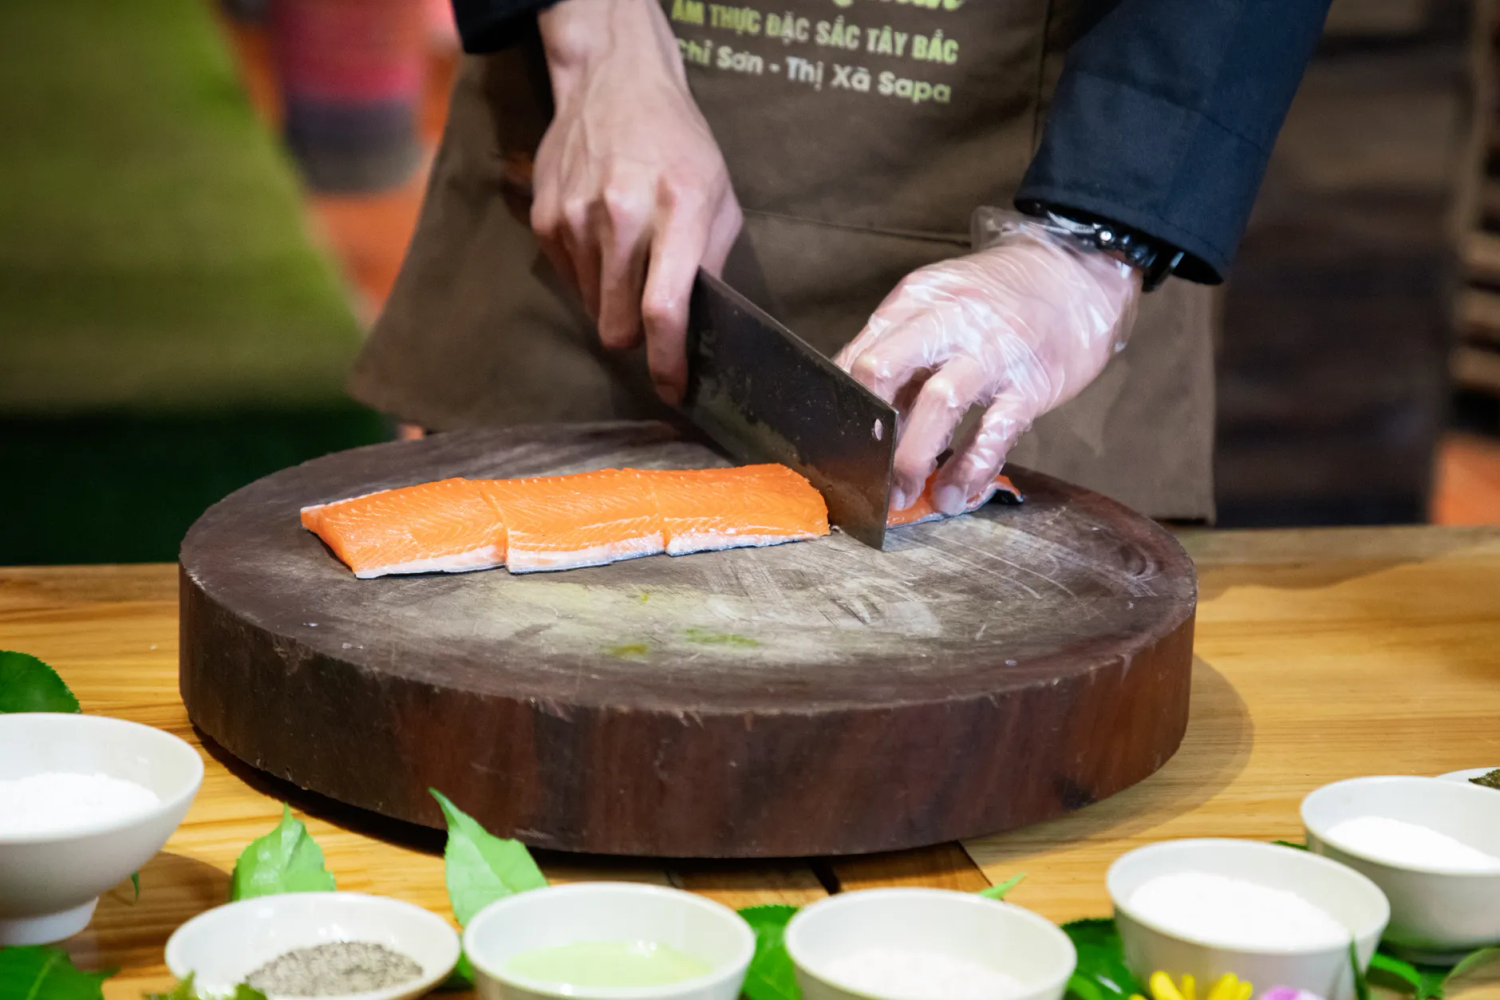
Making dog food at home lets you control every single ingredient that goes into your pet’s bowl. This salmon recipe is packed with omega-3 fatty acids, which give your dog a shiny coat and healthy skin.

It is especially great for dogs with chicken or beef allergies or senior pups needing extra joint support. You can whip up a large batch on Sunday afternoon and keep it ready for the busy week ahead.

Here is why this homemade meal works so well:

  • Uses simple ingredients like fresh salmon fillets and sweet potatoes.
  • Takes less than 30 minutes of total cooking time.
  • Portions freeze wonderfully for quick weekday thawing.

Your dog is going to go crazy for the rich taste of real fish. Just remember to check the fillets for tiny bones before you start cooking.

Flavor snapshot

When you scoop this homemade salmon dog food into a bowl, you will notice a rich, savory aroma that gets dogs excited immediately. It smells like fresh fish and earthy vegetables without that awful commercial pet food smell.

The texture is chunky yet tender, packed with flaky pieces of fish and soft grains. You want to serve it at room temperature so the natural oils release their full scent and the food is gentle on your dog’s digestion.

The flavor is completely balanced between the protein and the vegetables. Here is what you will experience:

  • Mild natural sweetness from mashed sweet potatoes
  • Rich, savory flavor from the salmon
  • A clean, satisfying finish with zero greasy residue left behind

The lingering scent in your kitchen stays pleasantly mild after you wash the bowls. Your dog will probably spend a few extra minutes licking the bowl because the taste is just that good.

Ingredients checklist

Let’s get all our ingredients ready before we start cooking this healthy meal for the dogs. You can grab these items at any standard grocery store without making a trip to a specialty pet shop.

Here is the exact shopping list divided by how we use them in the pot. Buying frozen vegetables is a great budget-friendly shortcut that works perfectly.

  • Base: 2 pounds of fresh salmon fillets, and 3 cups of cooked brown rice.
  • Modifiers: 2 cups of chopped spinach, 1 cup of diced carrots, and 2 tablespoons of olive oil.
  • Garnish: 1/4 cup of plain, unsweetened Greek yogurt for a nice finishing touch.

When you buy the salmon, check the fillets for any stray bones very carefully. Frozen veggies work just fine here if you thaw them out completely before mixing them in.

Method & timing

Let us get this salmon cooked up for your hungry pup today. It takes about 30 minutes total and smells surprisingly good while it bakes in the oven.

  1. Preheat your oven to 350 degrees and line a baking sheet with parchment paper.
  2. Place 1 pound of salmon fillets on the sheet, checking very carefully for any stray bones. Removing every bone is critical so your dog stays safe and doesn’t choke.
  3. Bake for 15 to 20 minutes until the fish flakes easily with a fork and is fully cooked through.

Let the fish cool completely on the counter before mixing it into your rice and veggies. Always use your fingers to break the meat apart so you can double check for missed bones.

Homemade Cheese Dog Biscuits

Homemade Cheese Dog Biscuits

Why this recipe works

These homemade cheese dog biscuits are way better than the store-bought stuff because you control every single ingredient. Your pup will go crazy for the real cheddar flavor, and you will love knowing there are no weird chemical preservatives inside.

You only need a few simple pantry staples to whip up a batch this weekend. Here is why this recipe is a total winner for busy pet parents:

  • Uses basic whole wheat flour and sharp cheddar cheese.
  • Takes less than 30 minutes from mixing to baking.
  • Freezes great for a long-lasting treat stash.

They make the perfect homemade gift for a dog-loving friend or a special birthday snack for your own furry best friend. Bake them a little longer if you want an extra crunchy texture that helps clean their teeth.

Flavor snapshot

When you pull a batch of these Homemade Cheese Dog Biscuits out of the oven, your whole kitchen is going to smell like a cozy little bakery. Dogs go absolutely crazy for this warm scent long before the treats even finish cooling down on the counter.

Here is what your dog will actually experience with every single bite:

  • Aroma: A rich, savory blast of baked cheddar cheese that fills the room.
  • Texture: A deeply satisfying, hard crunch that helps scrape their teeth clean.
  • Taste: A perfectly balanced flavor that hits the spot without any artificial junk.

Make sure you let the warm treats drop completely to room temperature before handing one over to your hungry pup. The best part is the happy tail wagging you get to see

Ingredients checklist

Let’s gather the simple stuff you need to bake these cheesy treats for your pup. You probably already have most of these items sitting in your pantry right now.

Here’s everything you need to pull the dough together, broken down into the base, modifiers, and a little topping:

  • Base: 2 cups whole wheat flour and 1/2 cup rolled oats.
  • Modifiers: 1 cup sharp cheddar cheese (grated fresh), 3/4 cup low-sodium chicken broth, and 2 tablespoons melted coconut oil.
  • Garnish: An extra 2 tablespoons of shredded cheese for sprinkling on top.

Try to buy a block of cheese and grate it yourself instead of buying the pre-bagged kind. Those store-bought bags contain anti-caking powders that your dog doesn’t need to eat.

Method & timing

Let us bake up a quick batch of these cheesy treats for your eager pup. The whole process takes about 40 minutes from start to finish.

  1. Preheat your oven to 350 degrees F and line a baking sheet with parchment paper.
  2. Mix 2 cups whole wheat flour, 1/2 cup shredded cheddar cheese, and 3/4 cup water in a bowl until a dough forms. Why it matters: Mixing just until combined keeps the biscuits tender instead of tough.
  3. Roll the dough out to about 1/4 inch thickness on a floured surface and cut out your shapes with a small cutter.
  4. Bake for 20 to 25 minutes until the edges are golden brown and crisp.

Let the treats cool completely on a wire rack before handing one to your dog. Store any leftover biscuits in an airtight container for up to a week.

Holiday Dog Treats

Holiday Dog Treats

Why this recipe works

These homemade holiday dog treats let your furry best friend join in on the seasonal snacking without getting sick. Store-bought boxes are often full of weird preservatives, but these use simple whole foods you probably already have in your pantry.

They make incredible gifts for your neighbors with pets or just a fun weekend baking project in December. You only need a few basic ingredients to make a whole batch:

  • Whole wheat flour for the healthy base
  • Pumpkin puree to keep their tummies happy
  • Natural peanut butter for that flavor dogs go crazy for
  • A pinch of cinnamon for that festive smell

Roll out the dough and use cute snowflake or tree cookie cutters to make them look extra festive. Bake them until they are completely crisp so they last in a jar on your counter all month long.

Flavor snapshot

When you pull these holiday treats out of the oven, your kitchen will smell like warm cinnamon and roasted pumpkin. Dogs go crazy for that cozy scent, and you will know right away that they are going to love them.

These cookies have a satisfying crunch that holds up well in a treat jar. They balance earthy whole wheat with a hint of sweet molasses. Here is what your dog will experience in every bite:

  • A firm texture that encourages chewing rather than just swallowing whole.
  • A warm, savory flavor profile backed by real pumpkin.
  • A mild sweetness that comes naturally from applesauce without any added sugars.

Serve them at room temperature so the flavors really come through. The lingering taste is mostly nutty whole grain, which keeps your pup sniffing around for more long after the treat is gone.

Ingredients checklist

Hey there! Here is everything you need to bake a fun batch of festive treats for your pup this month. You only need a few simple items that are totally safe for dogs to eat.

Gather your supplies before you start mixing so you are not running around the kitchen looking for things. Here is the exact shopping list broken down by category:

  • Base: 2 and 1/2 cups whole wheat flour, and 1/2 cup plain canned pumpkin purée.
  • Modifiers: 2 tablespoons melted coconut oil, and 1 large egg to bind the dough.
  • Garnish: 1/4 cup unsweetened coconut flakes to create a snowy holiday look on top.

Always double check the pumpkin label at the grocery store before buying. You want pure pumpkin without any sneaky added sugars or spices like nutmeg, which can upset sensitive dog bellies.

Method & timing

Let’s make these festive treats for your pup. It only takes about 30 minutes total from start to finish.

Follow these simple steps to get them right:

  1. Preheat your oven to 350 degrees and line a baking sheet with parchment paper.
  2. Roll out your dough to about 1/4 inch thick on a floured surface. Why it matters: If you roll them too thin, the edges will burn before the centers bake.
  3. Cut out shapes with your cookie cutters and place them on the prepared tray.

Bake for 20 to 25 minutes until the edges turn golden brown. Why it matters: Extra time in the oven removes moisture so the treats stay crunchy in storage.

Let them cool completely on a wire rack before sharing. Store leftovers in an airtight container for up to two weeks.

Dog Treats for Bad Breath

Dog Treats for Bad Breath

Why this recipe works

These homemade treats actually fix dog breath instead of just masking it with fake chicken flavor. You will use real herbs like fresh mint and parsley to neutralize stinky odors right at the source.

This recipe is ideal for older dogs or stubborn pups who refuse to let you brush their teeth. Here is what makes the ingredient list so effective for your dog’s mouth:

  • Fresh mint leaves to naturally cool down dog breath.
  • Organic coconut oil to fight plaque-building bacteria.
  • Whole wheat flour for a sturdy, crunchy texture.

Baking these at home lets you completely avoid the weird chemical preservatives found in store-bought dental chews. Store the batch in an airtight container so your dog gets a crisp, fresh reward all week long.

Flavor snapshot

When you pull these breath-freshening treats from the oven, your kitchen will smell surprisingly fresh instead of like typical baked meat. The dominant aroma is earthy mint mixed with warm oats, which completely masks any strong wheat smells.

Dogs experience a satisfying crunch followed by a clean herbal finish that won’t overwhelm their sensitive palates. You want a very firm texture that actively helps scrape teeth while they chew. Here is what you will notice during snack time:

  • Aroma: Fresh mint and parsley dominating the cooling rack.
  • Taste: Savory whole wheat balanced by cool, refreshing mint.
  • Texture: Hard and dry snap for natural plaque removal.

Always serve these treats completely cooled to room temperature so your dog gets the best possible crunch. The lingering note is a subtle, clean herbal freshness that actually helps neutralize doggy breath for a couple of hours.

Ingredients checklist

Let us gather what we need to make these breath-freshening dog treats in your own kitchen. You only need a few simple items that are probably already sitting in your pantry.

Here is the exact shopping list grouped by how we use them in the recipe:

  • Base: 2 cups whole wheat flour (or oat flour if your dog is sensitive to wheat), 1/2 cup rolled oats
  • Modifiers: 1/4 cup fresh parsley leaves (finely chopped), 1/4 cup fresh mint leaves, 1 large egg, 1/3 cup coconut oil (melted)
  • Garnish: A pinch of dried parsley for dusting the tops before baking

Grab fresh herbs from the refrigerated produce section instead of the dried spice aisle. Fresh mint and parsley do the heavy lifting to neutralize that funky dog breath.

Method & timing

Let us make these breath-freshening treats right now. You will need about 30 minutes total from start to finish.

  1. Preheat your oven to 350 degrees F and line a baking sheet with parchment paper.
  2. Mix 2 cups whole wheat flour, 1 cup fresh parsley, 1/2 cup mint, 1 large egg, and 1/4 cup coconut oil in a large bowl until a dough forms. Why it matters: Parsley and mint are natural breath neutralizers that tackle stinky dog odors at the source.
  3. Roll the dough out to about 1/4 inch thickness on a floured surface and cut into small shapes.
  4. Bake for 20 to 25 minutes until the edges are golden brown and completely dry.

Let the treats cool completely on a wire rack before giving one to your dog. Store leftovers in an airtight container for up to two weeks.

Calming Herbal Broth for Anxious Pups

Calming Herbal Broth for Anxious Pups

Why this recipe works

When your dog gets nervous during thunderstorms, fireworks, or car rides, this simple homemade broth helps them settle down naturally. It uses real, dog-safe herbs that actually take the edge off their stress without any heavy sedatives or weird chemicals.

The secret is combining soothing plant extracts into a warm liquid they already love to drink. Here is what goes into the pot:

  • Brewed chamomile tea for gentle nervous system support
  • A small pinch of fresh ginger to settle anxious tummies
  • Plain, low-sodium bone broth as a tasty protein base

This recipe is ideal for rescue dogs adjusting to a new environment or any sensitive pup facing a loud day. Just keep a batch ready in your fridge and warm up a small splash over their regular food whenever they need real comfort.

Flavor snapshot

When you pull this broth off the stove, you will notice a gentle, earthy aroma right away. It smells deeply comforting and warm, much like a quiet garden after a light spring rain.

The flavor is naturally savory from the base, but rounded out by the subtle, sweet notes of chamomile. You want to serve it to your dog lukewarm, never hot. At this ideal temperature, the liquid feels silky and incredibly soothing on the tongue.

  • Aroma: Earthy chamomile and rich, meaty broth
  • Texture: Silky, thin, and deeply hydrating
  • Finish: A clean, relaxing aftertaste that lingers

Those gentle lingering notes will stick around just long enough to help your nervous pup settle down for a long nap. It is simple, comforting, and honestly smells good enough for you to have a small sip too.

Ingredients checklist

Hey, let’s grab what you need to make this calming broth for your nervous pup. You probably already have most of these simple items in your kitchen right now.

  • Base: 4 cups of filtered water and 1 large organic turkey neck or plain chicken wings for a soothing, meaty foundation.
  • Modifiers: 2 tablespoons of dried chamomile flowers and 1 teaspoon of dried passionflower, both sourced from a local herb shop or bought online.
  • Garnish: 1 tablespoon of freshly chopped parsley to freshen their breath right before serving.

Make sure you avoid any store-bought broths with added onions or garlic, because those are toxic to dogs.

Stick to organic herbs whenever you can to keep things gentle on their tummy. Your dog will thank you after just one warm bowl of this stuff.

Method & timing

Making this soothing broth is pretty simple, and your kitchen is going to smell amazing while it simmers on the stove. You just need a few basic ingredients and about 30 minutes of your time.

  1. Add 4 cups of water and your measured herbs to a medium cooking pot.
  2. Bring the liquid to a gentle boil, then immediately turn the heat down to low.
  3. Simmer uncovered for 20 minutes so the beneficial properties release into the water. Why it matters: This slow simmer extracts the calming qualities without burning the herbs.
  4. Strain out the plant material completely and let the liquid cool down until it is just lukewarm.

Pour about 2 tablespoons over your dog’s regular food to help them settle down during stressful times. Keep the leftover broth in a sealed glass jar in the fridge for up to 5 days.

Dog Skin Allergies Home Remedies

Dog Skin Allergies Home Remedies

Why this recipe works

Dealing with a constantly scratching dog is exhausting for both of you, but natural remedies can bring fast relief without a pricey vet visit. This guide is perfect for pet parents whose dogs suffer from seasonal itching, dry paws, or mild hot spots.

These simple homemade treatments use basic kitchen ingredients to calm inflamed skin safely. You can whip up a soothing soak or a topical spray in just a few minutes using items you probably already own.

  • Oatmeal baths grind down easily to lock in moisture and stop the itch.
  • Coconut oil hydrates flaky skin and fights bacteria naturally.
  • Apple cider vinegar mixed with water deters yeast on paws.

Grab these everyday supplies and give your furry friend some real comfort tonight. You will notice less scratching and a much happier pup in no time.

Flavor snapshot

When you mix up this soothing herbal broth for your dog, you will notice a comforting earthy smell right away. It smells just like a warm kitchen, which usually gets tails wagging before they even taste a single drop.

Here is what your furry friend actually experiences with this homemade remedy:

  • Taste: Mild and savory from the bone broth, with a gentle herbal backing from the chamomile.
  • Texture: Completely smooth and liquid, so it drinks just like gravy poured over their regular kibble.
  • Temperature: Serve it lukewarm so it feels soothing and never shocks their mouth.

The lingering note is a mild hint of coconut that stays on their muzzle for a little while. It is a simple and comforting bowl that makes healing their itchy skin feel like a treat.

Ingredients checklist

Hey there, dealing with a scratchy pup is no fun for anyone involved. I put together a simple soothing rinse using things you probably already have in your pantry.

Here is what you will need to grab from your kitchen:

  • Base: 1 cup of plain, unflavored organic oatmeal
  • Base: 4 cups of warm water
  • Modifier: 2 tablespoons of pure coconut oil
  • Garnish: 3 drops of chamomile essential oil (totally optional)

Try to buy organic oats if you can, just to avoid any leftover pesticide residue on your dog’s raw skin. Ground oat flour works best, but you can just toss regular rolled oats into a blender to grind them up yourself.

Method & timing

When your pup is constantly scratching, you need a quick way to soothe their skin at home. These simple steps will help you give your dog some fast relief without harsh chemicals.

  1. Mix colloidal oatmeal in a warm bath and let your dog soak for 10 minutes. Oatmeal calms inflammation and stops the itching immediately.
  2. Apply pure coconut oil to dry patches after the bath, using about one teaspoon for medium dogs. It hydrates the skin and fights bacteria.
  3. Add a small pump of omega-3 fish oil to their dinner bowl daily. Healthy fats heal the skin from the inside out.

Keep an eye on their paws and belly over the next few days to see if the redness fades. If the itching doesn’t stop, it is always best to check in with your vet.

Natural Remedies for Yeast Infection in Dogs

Natural Remedies for Yeast Infection in Dogs

Why this recipe works

Dealing with your dog’s itchy, yeasty paws and ears is super frustrating, but this simple home remedy actually brings them fast relief. It is perfect for pet parents who want to avoid harsh chemicals and soothe their dog’s irritated skin naturally.

This approach works because it targets the root cause of the fungus without wrecking your dog’s delicate skin barrier. You only need a few basic items from your kitchen to get started right away.

  • Apple cider vinegar to balance skin pH levels
  • Coconut oil for natural antifungal power
  • Plain kefir to support healthy gut flora

Consistency is the real secret here, so stick with the daily routine for at least two weeks. You will notice less scratching and a much happier pup in no time.

Flavor snapshot

When you mix up this soothing topical remedy for your dog, you will notice a distinct, earthy profile right away. It smells mostly like tart apple cider vinegar mixed with the rich, tropical scent of coconut oil.

The texture is a big deal when applying it to irritated skin. Here is what you can expect when you touch and apply the mixture:

  • Starts as a soft, melting solid if stored at room temperature.
  • Turns into a smooth, silky liquid once it hits your warm hands.
  • Leaves a light, protective barrier on your dog’s skin without feeling overly greasy.

The lingering scent is a mild, clean tang that fades quickly so your dog will not spend all day trying to lick it off. That balance of sharp vinegar and soothing fat makes it gentle yet effective.

Ingredients checklist

Hey friend, when your dog gets a stubborn yeast infection, you want to tackle it gently with simple ingredients. Here’s the exact shopping list you need to whip up a soothing rinse and a daily gut-healthy meal topper.

Base ingredients:

  • 1 cup of warm distilled water
  • 2 tablespoons of raw apple cider vinegar

Modifiers and extras:

  • 1 teaspoon of organic coconut oil
  • 1 capsule of canine probiotic powder

You can find organic apple cider vinegar at any local grocery store, but make sure to grab the raw kind that has the mother. For the coconut oil, pick a cold-pressed jar from the baking aisle and check that it has no added ingredients.

Always patch test the vinegar rinse on a small area of skin before treating larger itchy spots. Your pup will be feeling much better in no time.

Method & timing

Hey friend, dealing with dog yeast infections is no fun, but simple home treatments really help soothe their skin. You will want to start with a gentle apple cider vinegar rinse to balance their skin pH.

  1. Mix equal parts organic apple cider vinegar and warm water in a clean spray bottle.
  2. Spray the affected itchy areas gently, avoiding open wounds or their eyes. Let it air dry for about 5 to 10 minutes so it can start working. Why it matters: ACV creates an acidic environment where yeast simply cannot survive.
  3. Apply a thin layer of pure coconut oil to dry, flaky patches after the rinse dries.

Repeat this routine once daily for about a week until you see improvement. If things do not get better or look worse, definitely call your vet.

No Bake Dog Treats

No Bake Dog Treats

Why this recipe works

These no bake dog treats come together in about ten minutes without ever turning on your hot oven. They are a total lifesaver when you want to spoil your pup on a sticky summer afternoon or when you need a quick, high value reward during obedience training.

You only need a handful of wholesome pantry staples that are completely safe and healthy for your dogs. Mixing everything in one simple bowl makes cleanup take less than a minute.

  • Rolled oats for steady fiber
  • Natural peanut butter for rich protein
  • Plain pumpkin puree for a happy stomach

Just roll the sticky mixture into bite sized balls and pop them in the fridge to firm up. Store your batch in an airtight container so you always have a fresh snack ready for your furry best friend.

Flavor snapshot

When you pull these treats straight from the fridge, they have a wonderfully firm yet chewy texture that dogs go crazy for. You will notice a rich, nutty aroma of peanut butter immediately filling the kitchen.

The flavor hits a great balance between earthy rolled oats and savory peanut butter without any weird sweetness. Because they are served chilled, they offer a refreshing bite on a hot afternoon.

Here is what you can expect your dog to experience:

  • A satisfying, dense bite that takes a moment to chew
  • A rich peanut butter taste that lingers happily on their tongue
  • A cool temperature that feels extra soothing

Store them in an airtight container so they keep that perfect consistency. Your pup will thank you the second you open the fridge door.

Ingredients checklist

Hey friends, making these easy dog treats takes just a few wholesome items you probably already have in your pantry. Let us grab everything before we get started on the mixing process.

  • Base: 1 cup of rolled oats and 1/2 cup of natural peanut butter. Always check the label to avoid xylitol.
  • Modifiers: 1/4 cup of canned pumpkin puree and 2 tablespoons of unsweetened applesauce to bind it together.
  • Garnish: 2 tablespoons of finely shredded coconut flakes for rolling the outside balls.

Make sure your peanut butter is plain without any artificial sweeteners that harm pets. Rolled oats work better than instant oats here because they hold the shape much better.

Method & timing

Let’s make these quick snacks without ever turning on the oven. You just need a large mixing bowl and about 10 minutes of active prep time to get everything ready.

  1. Stir 1 cup of creamy natural peanut butter and 2 cups of rolled oats together in your bowl. Make sure the peanut butter has no xylitol, since that ingredient is toxic to dogs.
  2. Mix in 1/3 cup of plain pumpkin puree to help bind the dough. This adds helpful fiber for your dog’s digestion.
  3. Roll the sticky mixture into small bite-sized balls using your hands. Place them on a baking sheet lined with parchment paper.

Pop the baking sheet into the fridge for at least 30 minutes so the treats can firm up. Store any leftovers in a sealed container in the refrigerator for up to a week.

Garnish & presentation ideas

Making these treats look cute is half the fun, especially if you’re gifting them to a dog-loving friend or taking photos. A few simple touches add great texture and color contrast without any extra hassle.

  • Roll the finished balls in finely grated unsweetened coconut flakes for a snowy, textured look that really stands out.
  • Drizzle a small amount of melted dog-safe carob chips over the top for a dark brown contrast against lighter peanut butter dough.
  • Press a fresh blueberry right into the center of each treat while the mixture is still soft.

Store your finished treats in a clear glass jar so the fun colors and textures show right through. It looks great on the kitchen counter and makes it super easy to grab one quickly.

Pairs well with

These simple treats fit right into your daily routine with your pup. Here are three fun ways to enjoy treat time together.

  • Post-walk reward: Hand one over right after wiping muddy paws to help your dog settle down quickly after a long walk.
  • Iced coffee for you: Grab a cold brew while your dog happily chews so you both get a nice afternoon break on the porch.
  • Acoustic puppy playlist: Put on some soft guitar tunes on Spotify to create a calm vibe in the living room while you relax.

These little pairings make ordinary days feel a bit more special. You will both look forward to this cozy afternoon routine every single day.

Tips, fixes, upgrades

Making these treats is pretty simple, but a few quick tricks will save you some messy frustration in the kitchen. Here are my go-to tips for getting the texture just right every single time.

  • If your dough feels too crumbly and won’t hold together, add a tiny splash of water or melted coconut oil just a teaspoon at a time.
  • Always check your peanut butter label to make sure it is completely free of xylitol, which is super toxic to dogs.
  • Roll the balls using slightly wet hands so the sticky oat mixture doesn’t glue itself to your fingers.

Store your finished treats in an airtight container in the fridge for up to a week. You can also freeze half the batch for later if your dog won’t finish them fast enough.

Puppy Popsicles Frozen Dog Treats

Puppy Popsicles Frozen Dog Treats

Why this recipe works

These simple frozen treats are a total lifesaver when your dog gets restless on a hot summer afternoon. They take just five minutes of active prep time and use basic items you probably already have in your kitchen.

Dogs go crazy for them because the frozen texture takes some work to lick down, which naturally keeps them busy and cool. This recipe is especially great for teething puppies or anxious dogs who need a soothing distraction.

  • Plain yogurt for a gut-friendly, creamy base
  • Ripe bananas mashed up for natural sweetness
  • Real peanut butter with zero xylitol added

You can easily pour the blended mixture into standard ice cube trays or silicone molds for bite-sized portions. Just pop out one or two whenever your furry friend needs a refreshing reward after a long walk.

Flavor snapshot

When your dog bites into one of these frozen treats, they get a wonderful mix of cold and creamy textures. It is the perfect snack to cool them down on a hot afternoon.

You will notice the sweet, earthy smell of peanut butter right away when you pull them from the freezer. The taste is a balanced blend of rich yogurt and nutty goodness that dogs love. As the treat melts, your pet experiences a smooth mouthfeel instead of chewing on a hard ice block.

The lingering taste leaves a mild, comforting flavor that keeps them licking their chops long after the treat is gone. Just watch out for happy tail wags and cold noses while they finish every last bite.

Ingredients checklist

Hey friend, making these dog treats at home is super easy and way cheaper than buying them at the pet store. You just need a few basic grocery items that are probably already sitting in your kitchen right now.

Here is the exact shopping list you will need, broken down by category:

  • Base: 32 ounces plain Greek yogurt, making sure to check the label so there is zero xylitol, and 1 cup canned pumpkin puree.
  • Modifiers: 2 tablespoons creamy peanut butter without any artificial sweeteners, plus 1/4 cup water if the mixture is too thick to pour.
  • Garnish: A small handful of fresh blueberries and a few crunchy dog biscuits to use as fun edible popsicle sticks.

Grab a large mixing bowl and a silicone mold tray to get started on this quick project. Your pup is going to go crazy for these refreshing snacks on a hot summer afternoon!

Method & timing

Making these simple treats takes just 10 minutes of active prep time in your kitchen. You definitely don’t need any fancy equipment, just a basic countertop blender and a standard ice cube tray.

  1. Blend 32 ounces of plain, xylitol-free yogurt with 1 cup of fresh blueberries and one ripe banana until completely smooth. Why it matters: Blending thoroughly prevents choking hazards and texture issues for smaller dogs.
  2. Pour the fruit and yogurt mixture evenly into your ice cube trays or silicone molds, leaving a little room at the top for expansion.
  3. Freeze the trays flat for at least 4 hours until the treats are completely solid.

Giving your dog a frozen snack is a fantastic way to keep them cool on hot summer afternoons. Pop the finished treats out of the tray and store them in a freezer bag so you always have a reward ready.

Garnish & presentation ideas

Make those homemade dog treats look extra cute before you serve them to your pup. A little visual flair makes snack time fun for photos.

Here are three easy ways to style your frozen treats with great color and texture:

  • Press a fresh blueberry or raspberry into the top of each mold before freezing for a bright pop of color.
  • Dip the frozen treat in plain Greek yogurt and roll it in crushed dog kibble for a crunchy, two-tone finish.
  • Sprinkle finely chopped parsley over the top for a nice green contrast and fresh breath benefits.

Pop them back in the freezer for about 10 minutes to set any added toppings. Your dog will probably eat it in two seconds, but the pictures will look amazing.

Pairs well with

These frozen treats make a hot afternoon much better for your furry best friend. You’ll easily match these snacks with a few simple things to make regular yard time feel extra special.

  • Backyard patio lounging: Hand your dog a cold popsicle while you sit outside on the grass with your own iced coffee or lemonade.
  • Chill acoustic playlist: Put on some soft indie folk tunes on your portable speaker to keep the afternoon mood nice and relaxed.
  • Human fruit sorbet: Grab a bowl of dairy-free berry sorbet for yourself so you and your pup can actually enjoy a cold snack together.

These little additions turn a basic afternoon snack into a fun bonding moment for both of you. Just grab your respective goodies and head outside to enjoy the sunshine.

Tips, fixes, upgrades

Making these frozen treats for your dog is pretty straightforward, but a few little tricks make the process much easier. Here are some practical things I learned after making a massive mess in my own kitchen.

Keep these quick tips in mind when you prep your next batch:

  • Use flexible silicone ice cube trays so the frozen popsicles pop right out without breaking.
  • Always check your peanut butter labels carefully to avoid xylitol, which is extremely toxic to dogs.
  • Stick a crunchy baby carrot or a bully stick into the center before freezing to act as an edible handle.

If your hungry dog inhales the treat too fast and gets brain freeze, just give them smaller portions next time. Store any leftover pops in a sealed ziplock freezer bag so they don’t pick up weird tastes from your freezer.

homemade sweet potato dog treats

homemade sweet potato dog treats

Why this recipe works

These homemade sweet potato dog treats require just two simple ingredients, making them way cheaper and healthier than store-bought bags. Your dog gets a chewy, flavorful snack without any mystery preservatives, artificial colors, or hidden sugars.

Baking them low and slow is the real secret to getting that great chewy texture dogs go crazy for. Slicing the sweet potatoes to an even quarter-inch thickness helps them dry out properly in the oven without burning the edges.

They are ideal for dogs with sensitive stomachs or grain allergies since you control every single ingredient. You can easily whip up a batch on Sunday afternoon, and they store well in an airtight container for weeks.

Flavor snapshot

When you pull these sweet potato chews out of the oven, your kitchen smells like a cozy fall bakery. The warm, earthy aroma of roasted root vegetables fills the room, and your hungry dog will definitely notice the scent right away.

These treats strike a great balance between a chewy bite and a tough snack that lasts longer than a soft biscuit. When served at room temperature, they offer:

  • A satisfyingly tough texture that keeps eager chewers busy.
  • A naturally sweet taste with zero weird chemical additives.
  • A clean, earthy finish that doesn’t leave a greasy mess on your floors.

Just let them cool completely on a wire rack before handing one over to your pet. Your pup gets a wholesome snack with a lingering, comforting flavor they will beg for every single day.

Ingredients checklist

Hey! Making these treats is super easy, and you only need a few simple things from the grocery store. Let’s grab what you need for the base and the binders.

  • Base: 1 large sweet potato, which yields about one cup of mashed potato once cooked.
  • Modifiers: 2 cups whole wheat flour, plus a little extra for dusting your counter, and 1 large egg to hold it together.
  • Extras: 1 tablespoon coconut oil if you want to give their coat a nice shine.

Pick up regular fresh sweet potatoes instead of canned yams loaded with extra sugar. Whole wheat flour works great for this recipe, but you can easily swap in oat flour if your dog has a sensitive tummy.

That is really all it takes for the shopping list. You probably already have most of these items sitting in your pantry right now.

Method & timing

Hey, making these simple chews is really easy, but you do need some patience while they dry out in the oven. Low and slow is the secret here so they get wonderfully chewy instead of burning.

  1. Preheat your oven to 250 degrees F and line two large baking sheets with clean parchment paper.
  2. Slice your sweet potatoes uniformly to about 1/4 inch thick. Why it matters: Even slices dry at the exact same rate so you avoid half-burnt edges.
  3. Arrange the potato slices in a single layer without overlapping them on the baking pans.
  4. Bake for 3 hours, then flip each piece over carefully and bake for another 1 to 2 hours until dry.

You will know they are completely done when they look shrunken, feel leathery, and have no moisture left in the center. Let them cool on the counter before storing them in a sealed container.

Soothing Salmon and Pumpkin Recipe for Allergic Dogs

Soothing Salmon and Pumpkin Recipe for Allergic Dogs

Why this recipe works

If your dog is constantly scratching or has a sensitive tummy, you know how hard it is to find food they can actually eat. This soothing salmon and pumpkin recipe uses a limited set of ingredients to calm itchy skin and settle upset digestion without triggering common food allergies.

The magic is in the simple, high-tolerance proteins and fibers. Here is why your allergic pup will benefit:

  • Wild-caught salmon provides rich omega-3 fatty acids that fight inflammation and heal dry skin.
  • Canned pumpkin adds gentle soluble fiber to firm up stool and soothe the gut.
  • Quinoa acts as a safe carbohydrate instead of wheat or corn.

This meal is ideal for dogs dealing with seasonal flare-ups or chronic food sensitivities. You can easily whip up a batch on Sunday and keep it in the fridge for the week ahead.

Flavor snapshot

When you prep this salmon and pumpkin mix, you will notice a clean, earthy smell right away. It smells naturally savory without any of the heavy artificial odors found in commercial dog food.

Your dog is going to experience a really nice balance of rich fish and mild squash. Here is what stands out when they dig in:

  • Rich savory salmon flavor balanced by smooth pumpkin.
  • A soft, moist texture that is easy to chew and gentle on sensitive stomachs.
  • A warm or room temperature serving style that brings out the natural fats.

The lingering scent is mild and fresh, so your kitchen won’t smell terrible afterward. Dogs usually lick the bowl clean because this combination is genuinely comforting for them.

Ingredients checklist

Hey, getting the right ingredients is super important when you are cooking for a sensitive pup. Here is everything you need to grab to make this gentle, allergy friendly meal for your dog.

Here is the exact shopping list, broken down into simple categories so you can find everything easily at your local grocery store:

  • Base: 1 pound fresh salmon fillets and 1 cup pure canned pumpkin. Make sure you buy plain pumpkin, and definitely avoid the pie mix with added sugar.
  • Modifiers: 2 cups cooked white rice for sensitive stomachs and 1 tablespoon virgin coconut oil for healthy skin.
  • Garnish: 1 teaspoon finely chopped fresh parsley to help freshen up their breath after eating.

Always double check your canned pumpkin labels for hidden spices or additives. Your allergic dog is going to digest this soothing meal so easily.

Method & timing

Let’s get this soothing meal ready for your sensitive pup. You will need about 30 minutes total from start to finish to whip up a fresh batch.

  1. Bake 1 pound of salmon fillets at 375 degrees for 15 minutes until fully cooked and flaky. Why it matters: Baking preserves the beneficial omega fatty acids that calm itchy skin.
  2. Boil 2 cups of peeled pumpkin chunks for 10 minutes until fork tender, then drain the water completely.
  3. Mash the warm pumpkin and flake the cooled salmon together in a large mixing bowl, making sure to check for any tiny bones.

Let the food cool down completely before dishing it out to your hungry dog. Store any extra portions in a sealed container in the fridge for up to 3 days.

Garnish & presentation ideas

Making dog food look nice isn’t just for us, because a little extra visual appeal makes mealtime much more fun. Here are a few simple ways to style this salmon and pumpkin dish for your sensitive pup.

  • Parsley sprinkle: Finely chop a little fresh flat-leaf parsley on top for a bright green color contrast against the rich orange pumpkin.
  • Pumpkin seed crunch: Press a few raw pepitas into the bowl for a fun texture difference that gives them something extra to chew.
  • Salmon skin flake: Save a crispy piece of baked salmon skin and stick it upright in the center like a little flag.

These small additions make the bowl look like a gourmet meal without adding any common allergen ingredients. Just remember to keep the toppings small so you don’t accidentally upset their sensitive tummy.

Pairs well with

When you are feeding a sensitive dog, mealtime should feel both special and calm. Here are three simple ways to make this salmon and pumpkin dish even better for your pup.

  • Warm bone broth: Pour a tablespoon of allergy-friendly, onion-free bone broth over the top to add extra hydration and savory flavor.
  • A textured lick mat: Spread the cooled mixture onto a silicone mat to slow down fast eaters and soothe anxious dogs through repetitive licking.
  • A low-frequency acoustic playlist: Play soft instrumental music in the background to help dogs with skin allergies or environmental anxiety fully relax while they digest.

These small touches turn a basic allergy meal into a truly comforting ritual. Your dog will appreciate the extra attention and the delicious food.

Tips, fixes, upgrades

Making food for a sensitive dog takes a little trial and error. Here are a few practical tips I learned while making this soothing salmon and pumpkin batch in my own kitchen.

  • Check your salmon fillets very carefully for stray bones. Even boneless cuts can occasionally hide sharp little bones that are dangerous for pets.
  • Always use plain canned pumpkin, not pumpkin pie mix. The pie filling contains extra spices and sugar that will definitely upset your dog’s sensitive stomach.
  • Start with small portions if your dog is not used to fresh fish. Mix just a spoonful into their current food at first to test their digestion safely.

Store any leftovers in an airtight container in the fridge for up to three days maximum. You can also freeze individual portions in silicone ice cube trays for easy quick meals on busy days.

Sweet Potato Chews for Dogs

Sweet Potato Chews for Dogs

Why this recipe works

Store-bought dog chews cost a fortune and often come with mystery ingredients you cannot pronounce. These homemade sweet potato chews require just one simple ingredient and cost a fraction of the price.

They are fantastic for puppies with sensitive stomachs, dogs with grain allergies, or any pup who just loves a good gnaw. You can whip up a big batch on Sunday and have healthy treats ready for the entire month.

Here is why this method actually works in a real kitchen:

  • Slicing them to a consistent 1/4 inch thickness helps them dry evenly.
  • Low and slow baking draws out the moisture so they get chewy instead of burnt.

Your dog will happily wait by the oven while these bake because the kitchen smells amazing. It is a great win for your wallet and a huge win for your pup’s snack time.

Flavor snapshot

When you pull these sweet potato chews out of the oven, your kitchen will fill with a warm, earthy aroma that smells a lot like roasted marshmallows. Dogs go crazy for this scent because it highlights the natural sugars inside the vegetable.

Biting into a fully dehydrated slice gives a satisfying, chewy resistance rather than a soft snap. The flavor hits the palate with a concentrated sweetness that is entirely natural and balanced by a slightly rustic, toasted finish.

Here is what your dog will experience with every bite:

  • Warm, inviting aroma of naturally roasted root vegetables.
  • Dense, chewy texture that provides a good workout for their jaws.
  • Pure, sweet flavor with zero added salt, sugar, or weird preservatives.

The lingering note is a mild, starchy goodness that keeps pups licking their chops long after the treat is gone. Just make sure to let the chews cool completely to room temperature before handing them over so the texture firms up properly.

Ingredients checklist

Making these simple homemade dog chews only requires a couple of basic items you probably already have sitting in your kitchen pantry right now. You do not need any weird chemical preservatives or fancy additives, just honest whole food ingredients for your furry best friend.

Here is the exact shopping list organized by category so you can easily gather everything:

  • Base ingredient: 2 large sweet potatoes, washed and thoroughly scrubbed clean
  • Modifiers: 1 tablespoon melted coconut oil, used to lightly grease your baking sheets
  • Garnish or extra: A tiny pinch of organic ground cinnamon

    Method & timing

    Making these simple dog chews takes some time in the oven, but the actual process is super easy. You just need a couple of sweet potatoes and a good knife to get started.

    1. Preheat your oven to 250 degrees F and line two baking sheets with parchment paper.
    2. Wash and scrub the sweet potatoes well. You don’t even need to peel them, just slice them lengthwise into 1/3-inch thick strips.
    3. Arrange the slices in a single layer on the baking sheets without overlapping them so they dry out evenly.
    4. Bake for 3 hours, then flip each piece over and bake for another 1 to 2 hours until they are tough and chewy.

    Let the chews cool completely on the pans before handing them to your pup. If they still feel a bit flexible, just pop them back in the oven for another thirty minutes.

    Garnish & presentation ideas

    Making these simple treats look nice is really fun, especially if you want to gift them to a furry friend for the holidays or a birthday. A little presentation goes a long way when you package them up in a cute jar or paper bag.

    Here are a few easy ways to make your homemade dog chews look extra special:

    • Tie a small bundle of orange chews together tightly using natural jute twine for a rustic, bakery-style look.
    • Layer the dried slices in a clear glass mason jar to show off their vibrant color contrast and keep them crisp.
    • Dust a tiny pinch of finely chopped parsley over the top for a pop of green color contrast that also helps freshen dog breath.

    These little styling touches take just seconds to set up. Your pup definitely will not care how they look, but your friends will love receiving them.

    Pairs well with

    These homemade sweet potato chews are great on their own, but a few simple pairings make treat time even better. Whether you are training your pup or just relaxing on the couch, these ideas fit right in.

    Here are three ways to make treat time extra special for your dog:

    • Post-walk hydration: Pair a chewy snack with a bowl of fresh ice water after a long walk outside.
    • Training sessions: Cut the chews into tiny bite-sized pieces to use as high-value rewards during obedience practice.
    • Couch movie night: Put on some calming acoustic guitar music in the background while you both relax on the rug.

    Keep a stash of these chews in your treat jar for quick access. Your dog will thank you every single time.

    Tips, fixes, upgrades

    Making these dog chews is pretty simple, but a few small adjustments will save you some frustration. Here are my best tips for getting the texture just right every single time in your own kitchen.

    • Slice thickness matters. Aim for a steady one-quarter inch so the pieces get chewy instead of rock-hard.
    • Don’t skip parchment paper. Sweet potatoes get super sticky as the natural sugars caramelize during the long bake time.
    • Store them right. If your batches still feel slightly flexible after cooling, keep them in the fridge so they don’t spoil.

    If your dog tends to swallow treats whole, cut the raw slices into smaller strips or bite-sized squares. You want to encourage a good chewing session, not create a choking hazard.

Pumpkin Oatmeal Pup Cookies

Pumpkin Oatmeal Pup Cookies

Why this recipe works

These simple pumpkin oatmeal pup cookies are a huge hit with dogs because they use wholesome, everyday ingredients that are actually good for their bellies. If you have a dog with a sensitive stomach or you just want to know exactly what goes into their treats, this recipe is for you.

The combination of canned pumpkin puree and rolled oats makes these treats super easy to digest and naturally chewy. You do not need any fancy equipment to whip up a batch on a lazy Sunday afternoon.

Here is why these treats work so well for most dogs:

  • Uses basic pantry items like whole wheat flour and plain oats.
  • Bakes up firm so they will not crumble into a huge mess in your treat pouch.
  • Contains zero artificial preservatives or added sugars.

Just mix the dough, roll it out, and cut your favorite shapes. Your furry best friend will thank you with plenty of tail wags.

Flavor snapshot

When you pull these cookies out of the oven, you’ll immediately notice a warm, earthy aroma of baked pumpkin and cinnamon. They taste naturally sweet and hearty, without any overpowering spices that might upset a dog’s stomach.

Serve them at room temperature so your dog gets the best experience. The texture hits a nice balance between chewy and firm, thanks to the rolled oats and whole wheat flour.

Your pup will finish every crumb and likely look for more. Here is what you can expect from each bite:

  • A mild, nutty flavor from the oatmeal base
  • A soft crunch that holds together well without crumbling everywhere
  • A comforting, subtle finish of pure pumpkin that lingers just a bit

These treats are simple, wholesome, and taste just like a cozy autumn day. Your dog is going to love them.

Ingredients checklist

Hey! Let us grab everything you need to bake these easy pumpkin oatmeal dog treats at home. You probably already have most of these simple pantry items in your kitchen right now.

Here is the main base and the binding ingredients to get started. Make sure you buy plain canned pumpkin and not the spiced pie mix.

  • 2 cups rolled oats (old-fashioned or quick oats both work fine)
  • 1 cup pure canned pumpkin puree
  • 1/4 cup natural peanut butter (check the label to avoid xylitol, which is toxic to dogs)
  • 2 large eggs

If you want to make them look a little cute, you can add a simple topping. Grab these final items to finish the batch.

  • 1 tablespoon coconut oil (melted)
  • 2 tablespoons plain Greek yogurt (optional, for decorating)

Just remember to let the cookies cool completely before your pup tries to steal one from the counter. Store them in an airtight container to keep them fresh all week.

Method & timing

Let’s get these dog treats baked so your furry best friend can snack happy. You will only need about 30 minutes total from start to finish.

  1. Preheat your oven to 350 degrees and line a baking sheet with parchment paper.
  2. Mix 1 cup of rolled oats, 1/2 cup of canned pumpkin, and 1 large egg in a bowl until a sticky dough forms. Always use plain pumpkin because pie filling contains harmful nutmeg and sugar.
  3. Roll the dough into small balls and flatten them on the sheet since these treats will not spread much in the oven.

Bake for 20 to 25 minutes until the edges turn golden and feel dry to the touch. Let the cookies cool completely on a wire rack before serving so your dog stays safe.

Garnish & presentation ideas

You can make these homemade dog treats look extra special with a few simple presentation tricks. Dogs won’t care how they look, but it makes taking photos or gifting them so much fun.

Here are a few easy ways to style your cookies for a nice color contrast and fun texture.

  • Drizzle with plain Greek yogurt for a bright white pop against the orange pumpkin color.
  • Press a single, whole pumpkin seed into the center of each cookie before baking for a crunchy texture contrast.
  • Dust the cooled cookies with a tiny pinch of cinnamon for a warm, finished look.

Store your decorated treats in a clear glass jar with a ribbon if you are giving them as a gift. Just make sure the yogurt dries completely before stacking them so they don’t stick together.

Pairs well with

These dog cookies are a big hit at my house, and they fit right into a few fun routines. Sharing a treat with your dog is the best way to bond after a long walk.

Here are three simple things that go great with these snacks:

  • Post-walk hydration: Grab a glass of iced coffee for yourself while your dog catches their breath with a bowl of fresh water and a cookie.
  • A rainy day movie marathon: Put on a cozy movie like Homeward Bound and hand out a couple of these snacks during the opening credits.
  • Puppy training sessions: Break these cookies into smaller pieces to use as high-value rewards when you are working on basic commands in the living room.

These little moments make baking from scratch totally worth it. Your dog will appreciate the extra attention just as much as the food.

Tips, fixes, upgrades

Here are a few quick tips to help you nail these dog treats on your first try. Dog baking is pretty forgiving, but these small tricks make a big difference.

  • Watch your moisture levels closely because pumpkin puree brands vary a lot in water content. If your dough feels too sticky to roll, just add a tablespoon of extra oats at a time.
  • Always double check that your canned pumpkin is pure pumpkin puree and not pumpkin pie mix. The pie filling has added spices and sugar that can make your pup sick.
  • Flatten the cookies out before baking since they won’t spread much in the oven. What you shape on the baking sheet is pretty much what you get after 20 minutes of drying out.

Store these in an airtight container in the fridge so they stay fresh for weeks. Your dog is going to go crazy for them!

Cheesy Bacon Dog Training Rewards Recipe

Cheesy Bacon Dog Training Rewards Recipe

Why this recipe works

Dogs will do practically anything for these cheesy bacon treats because the smell alone drives them wild. If you have a stubborn puppy or an older dog learning new tricks, these homemade rewards are your secret weapon.

Store-bought snacks are often too big and crumbly for quick training sessions. This recipe works so well because you can cut the baked dough into tiny, pea-sized pieces that your dog can swallow instantly. Here is why your dog will pay attention:

  • Real bacon bits provide a strong scent for high motivation.
  • Real cheddar cheese creates a savory flavor dogs crave.
  • Soft texture means no chewing delays during fast-paced learning.

You can keep a small handful in your pocket without making a greasy mess. Just store the rest in the fridge so they stay fresh all week.

Flavor snapshot

When you pull these little treats out of the oven, your whole kitchen smells like a smoky diner. Dogs go absolutely crazy for the intense aroma of real bacon mixed with sharp cheddar cheese.

These bites turn out firm and slightly chewy instead of rock hard, which means they won’t crumble in your pocket during a training walk. Here is the exact flavor profile you can expect:

  • Rich, savory bacon flavor upfront that hits their sense of smell immediately
  • A warm, cheesy middle note that keeps your dog staring intently at your treat pouch
  • A dry exterior that leaves zero grease on your hands

They cool down to room temperature within ten minutes on a wire rack. That lingering meaty scent will give you a massive advantage during outdoor obedience practice.

Ingredients checklist

Let us gather the stuff we need to make these smelly, highly motivating training treats for your dog. You want items that pack a big punch of flavor so your pup actually pays attention during outdoor sessions.

  • Base: 2 cups whole wheat flour, or oat flour if your dog has a sensitive stomach, plus 1/2 cup yellow cornmeal for a crunchy texture.
  • Modifiers: 1/3 cup real bacon bits, chopped very fine, and 1/2 cup shredded sharp cheddar cheese for that cheesy smell dogs love.
  • Wet ingredients: 1 large egg, 1/2 cup low-sodium chicken broth, and 2 tablespoons melted coconut oil.

Grab your bacon from the regular grocery store and fry it up extra crisp at home. Skip the fake shelf-stable bacon bits since they are often loaded with extra sodium and weird preservatives.

Method & timing

Let’s get these little treats baked so you can start training your pup right away. The whole process takes about 30 minutes from mixing to cooling.

  1. Preheat your oven to 350 degrees and line a baking sheet with parchment paper.
  2. Mix your dough ingredients in a medium bowl until it forms a workable, slightly sticky ball.
  3. Roll the dough into tiny quarter-inch balls so they fit easily in your pocket or treat pouch. Small sizes matter because they keep your dog focused during fast training sessions without spoiling their dinner.
  4. Bake for 12 to 15 minutes until they look golden brown and feel completely firm.

Let the treats cool completely on the baking sheet before you touch them. Store the batch in an airtight container in the fridge for up to a week.

Garnish & presentation ideas

Presenting these treats nicely makes training sessions way more fun, plus it keeps your kitchen counters looking neat. Let us look at a few simple ways to style and store your cheesy bacon bites so they look as good as they smell.

  • Add a light sprinkle of finely grated parmesan cheese right after baking to create a snowy, high-contrast look against the dark bacon.
  • Toss in a few extra-crispy bacon bits at the very end for added crunch and obvious texture variation.
  • Store the finished rewards in a clear glass jar on your counter so you can easily admire the golden-brown color.

When you head out the door for a walk, toss a handful into a bright silicone treat pouch. Your dog will appreciate the tasty rewards, and you will love how easy they are to grab.

Pairs well with

When you’re working on new tricks with your pup, having the right setup makes all the difference. Here are three fun ways to pair these homemade treats for a successful session.

  • A backyard agility course: Use these high-value treats outside where real-world distractions happen so your dog learns to stay focused on you.
  • A calm acoustic playlist: Playing soft guitar music in the background keeps your own energy steady, which directly helps your dog stay relaxed while learning.
  • A handy silicone treat pouch: Clip a pocket-sized pouch right to your waistband so you can grab the bacon pieces instantly when your dog obeys.

Keeping things organized makes training a breeze for both of you. Grab your supplies and have a wonderful time working together today.

Tips, fixes, upgrades

Making these little treats is pretty straightforward, but a few quick tricks will save you a mess. You want these rewards tiny so your dog can eat them fast and stay focused during training sessions.

  • Cut the dough into pea-sized pieces before baking. Bigger chunks defeat the purpose of a quick training reward.
  • Bake them a bit longer if they feel even slightly spongy. You want them completely dry so they don’t get sticky in your treat pouch.
  • Store the extras in the fridge, or freeze half the batch. Real bacon and cheese spoil quickly without chemical preservatives.

If your dog seems uninspired by the first batch, try swapping the cheddar for parmesan cheese. That extra punch of stinky goodness always gets their attention.