No Bake Dog Treats

No Bake Dog Treats

Why this recipe works

These no bake dog treats come together in about ten minutes without ever turning on your hot oven. They are a total lifesaver when you want to spoil your pup on a sticky summer afternoon or when you need a quick, high value reward during obedience training.

You only need a handful of wholesome pantry staples that are completely safe and healthy for your dogs. Mixing everything in one simple bowl makes cleanup take less than a minute.

  • Rolled oats for steady fiber
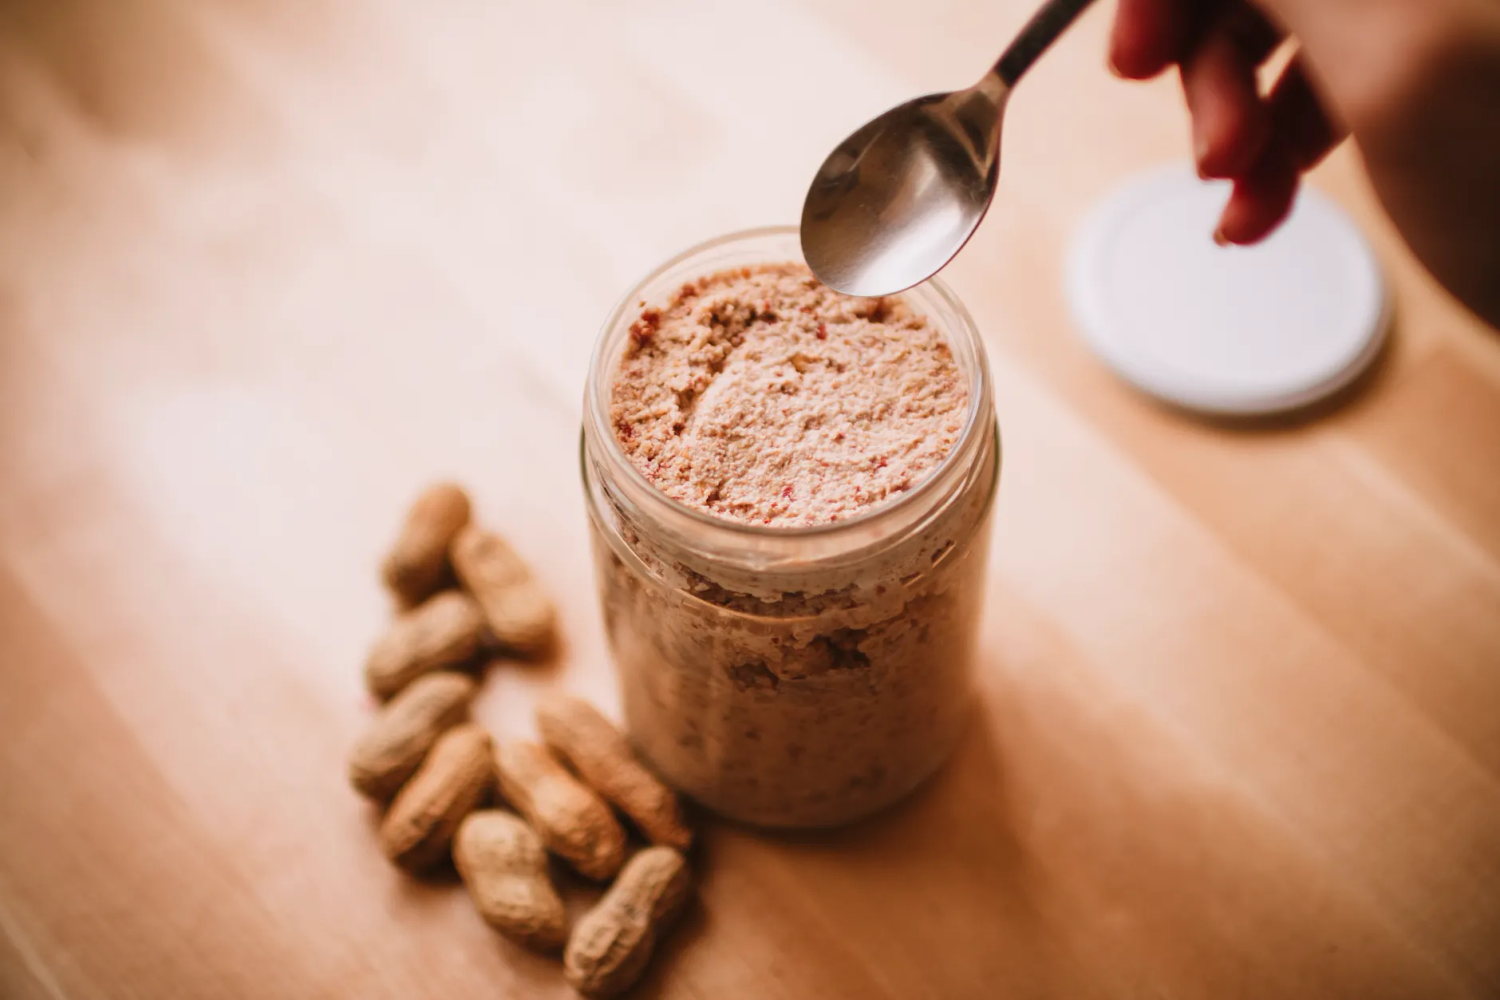
  • Natural peanut butter for rich protein
  • Plain pumpkin puree for a happy stomach

Just roll the sticky mixture into bite sized balls and pop them in the fridge to firm up. Store your batch in an airtight container so you always have a fresh snack ready for your furry best friend.

Flavor snapshot

When you pull these treats straight from the fridge, they have a wonderfully firm yet chewy texture that dogs go crazy for. You will notice a rich, nutty aroma of peanut butter immediately filling the kitchen.

The flavor hits a great balance between earthy rolled oats and savory peanut butter without any weird sweetness. Because they are served chilled, they offer a refreshing bite on a hot afternoon.

Here is what you can expect your dog to experience:

  • A satisfying, dense bite that takes a moment to chew
  • A rich peanut butter taste that lingers happily on their tongue
  • A cool temperature that feels extra soothing

Store them in an airtight container so they keep that perfect consistency. Your pup will thank you the second you open the fridge door.

Ingredients checklist

Hey friends, making these easy dog treats takes just a few wholesome items you probably already have in your pantry. Let us grab everything before we get started on the mixing process.

  • Base: 1 cup of rolled oats and 1/2 cup of natural peanut butter. Always check the label to avoid xylitol.
  • Modifiers: 1/4 cup of canned pumpkin puree and 2 tablespoons of unsweetened applesauce to bind it together.
  • Garnish: 2 tablespoons of finely shredded coconut flakes for rolling the outside balls.

Make sure your peanut butter is plain without any artificial sweeteners that harm pets. Rolled oats work better than instant oats here because they hold the shape much better.

Method & timing

Let’s make these quick snacks without ever turning on the oven. You just need a large mixing bowl and about 10 minutes of active prep time to get everything ready.

  1. Stir 1 cup of creamy natural peanut butter and 2 cups of rolled oats together in your bowl. Make sure the peanut butter has no xylitol, since that ingredient is toxic to dogs.
  2. Mix in 1/3 cup of plain pumpkin puree to help bind the dough. This adds helpful fiber for your dog’s digestion.
  3. Roll the sticky mixture into small bite-sized balls using your hands. Place them on a baking sheet lined with parchment paper.

Pop the baking sheet into the fridge for at least 30 minutes so the treats can firm up. Store any leftovers in a sealed container in the refrigerator for up to a week.

Garnish & presentation ideas

Making these treats look cute is half the fun, especially if you’re gifting them to a dog-loving friend or taking photos. A few simple touches add great texture and color contrast without any extra hassle.

  • Roll the finished balls in finely grated unsweetened coconut flakes for a snowy, textured look that really stands out.
  • Drizzle a small amount of melted dog-safe carob chips over the top for a dark brown contrast against lighter peanut butter dough.
  • Press a fresh blueberry right into the center of each treat while the mixture is still soft.

Store your finished treats in a clear glass jar so the fun colors and textures show right through. It looks great on the kitchen counter and makes it super easy to grab one quickly.

Pairs well with

These simple treats fit right into your daily routine with your pup. Here are three fun ways to enjoy treat time together.

  • Post-walk reward: Hand one over right after wiping muddy paws to help your dog settle down quickly after a long walk.
  • Iced coffee for you: Grab a cold brew while your dog happily chews so you both get a nice afternoon break on the porch.
  • Acoustic puppy playlist: Put on some soft guitar tunes on Spotify to create a calm vibe in the living room while you relax.

These little pairings make ordinary days feel a bit more special. You will both look forward to this cozy afternoon routine every single day.

Tips, fixes, upgrades

Making these treats is pretty simple, but a few quick tricks will save you some messy frustration in the kitchen. Here are my go-to tips for getting the texture just right every single time.

  • If your dough feels too crumbly and won’t hold together, add a tiny splash of water or melted coconut oil just a teaspoon at a time.
  • Always check your peanut butter label to make sure it is completely free of xylitol, which is super toxic to dogs.
  • Roll the balls using slightly wet hands so the sticky oat mixture doesn’t glue itself to your fingers.

Store your finished treats in an airtight container in the fridge for up to a week. You can also freeze half the batch for later if your dog won’t finish them fast enough.

Puppy Popsicles Frozen Dog Treats

Puppy Popsicles Frozen Dog Treats

Why this recipe works

These simple frozen treats are a total lifesaver when your dog gets restless on a hot summer afternoon. They take just five minutes of active prep time and use basic items you probably already have in your kitchen.

Dogs go crazy for them because the frozen texture takes some work to lick down, which naturally keeps them busy and cool. This recipe is especially great for teething puppies or anxious dogs who need a soothing distraction.

  • Plain yogurt for a gut-friendly, creamy base
  • Ripe bananas mashed up for natural sweetness
  • Real peanut butter with zero xylitol added

You can easily pour the blended mixture into standard ice cube trays or silicone molds for bite-sized portions. Just pop out one or two whenever your furry friend needs a refreshing reward after a long walk.

Flavor snapshot

When your dog bites into one of these frozen treats, they get a wonderful mix of cold and creamy textures. It is the perfect snack to cool them down on a hot afternoon.

You will notice the sweet, earthy smell of peanut butter right away when you pull them from the freezer. The taste is a balanced blend of rich yogurt and nutty goodness that dogs love. As the treat melts, your pet experiences a smooth mouthfeel instead of chewing on a hard ice block.

The lingering taste leaves a mild, comforting flavor that keeps them licking their chops long after the treat is gone. Just watch out for happy tail wags and cold noses while they finish every last bite.

Ingredients checklist

Hey friend, making these dog treats at home is super easy and way cheaper than buying them at the pet store. You just need a few basic grocery items that are probably already sitting in your kitchen right now.

Here is the exact shopping list you will need, broken down by category:

  • Base: 32 ounces plain Greek yogurt, making sure to check the label so there is zero xylitol, and 1 cup canned pumpkin puree.
  • Modifiers: 2 tablespoons creamy peanut butter without any artificial sweeteners, plus 1/4 cup water if the mixture is too thick to pour.
  • Garnish: A small handful of fresh blueberries and a few crunchy dog biscuits to use as fun edible popsicle sticks.

Grab a large mixing bowl and a silicone mold tray to get started on this quick project. Your pup is going to go crazy for these refreshing snacks on a hot summer afternoon!

Method & timing

Making these simple treats takes just 10 minutes of active prep time in your kitchen. You definitely don’t need any fancy equipment, just a basic countertop blender and a standard ice cube tray.

  1. Blend 32 ounces of plain, xylitol-free yogurt with 1 cup of fresh blueberries and one ripe banana until completely smooth. Why it matters: Blending thoroughly prevents choking hazards and texture issues for smaller dogs.
  2. Pour the fruit and yogurt mixture evenly into your ice cube trays or silicone molds, leaving a little room at the top for expansion.
  3. Freeze the trays flat for at least 4 hours until the treats are completely solid.

Giving your dog a frozen snack is a fantastic way to keep them cool on hot summer afternoons. Pop the finished treats out of the tray and store them in a freezer bag so you always have a reward ready.

Garnish & presentation ideas

Make those homemade dog treats look extra cute before you serve them to your pup. A little visual flair makes snack time fun for photos.

Here are three easy ways to style your frozen treats with great color and texture:

  • Press a fresh blueberry or raspberry into the top of each mold before freezing for a bright pop of color.
  • Dip the frozen treat in plain Greek yogurt and roll it in crushed dog kibble for a crunchy, two-tone finish.
  • Sprinkle finely chopped parsley over the top for a nice green contrast and fresh breath benefits.

Pop them back in the freezer for about 10 minutes to set any added toppings. Your dog will probably eat it in two seconds, but the pictures will look amazing.

Pairs well with

These frozen treats make a hot afternoon much better for your furry best friend. You’ll easily match these snacks with a few simple things to make regular yard time feel extra special.

  • Backyard patio lounging: Hand your dog a cold popsicle while you sit outside on the grass with your own iced coffee or lemonade.
  • Chill acoustic playlist: Put on some soft indie folk tunes on your portable speaker to keep the afternoon mood nice and relaxed.
  • Human fruit sorbet: Grab a bowl of dairy-free berry sorbet for yourself so you and your pup can actually enjoy a cold snack together.

These little additions turn a basic afternoon snack into a fun bonding moment for both of you. Just grab your respective goodies and head outside to enjoy the sunshine.

Tips, fixes, upgrades

Making these frozen treats for your dog is pretty straightforward, but a few little tricks make the process much easier. Here are some practical things I learned after making a massive mess in my own kitchen.

Keep these quick tips in mind when you prep your next batch:

  • Use flexible silicone ice cube trays so the frozen popsicles pop right out without breaking.
  • Always check your peanut butter labels carefully to avoid xylitol, which is extremely toxic to dogs.
  • Stick a crunchy baby carrot or a bully stick into the center before freezing to act as an edible handle.

If your hungry dog inhales the treat too fast and gets brain freeze, just give them smaller portions next time. Store any leftover pops in a sealed ziplock freezer bag so they don’t pick up weird tastes from your freezer.

homemade sweet potato dog treats

homemade sweet potato dog treats

Why this recipe works

These homemade sweet potato dog treats require just two simple ingredients, making them way cheaper and healthier than store-bought bags. Your dog gets a chewy, flavorful snack without any mystery preservatives, artificial colors, or hidden sugars.

Baking them low and slow is the real secret to getting that great chewy texture dogs go crazy for. Slicing the sweet potatoes to an even quarter-inch thickness helps them dry out properly in the oven without burning the edges.

They are ideal for dogs with sensitive stomachs or grain allergies since you control every single ingredient. You can easily whip up a batch on Sunday afternoon, and they store well in an airtight container for weeks.

Flavor snapshot

When you pull these sweet potato chews out of the oven, your kitchen smells like a cozy fall bakery. The warm, earthy aroma of roasted root vegetables fills the room, and your hungry dog will definitely notice the scent right away.

These treats strike a great balance between a chewy bite and a tough snack that lasts longer than a soft biscuit. When served at room temperature, they offer:

  • A satisfyingly tough texture that keeps eager chewers busy.
  • A naturally sweet taste with zero weird chemical additives.
  • A clean, earthy finish that doesn’t leave a greasy mess on your floors.

Just let them cool completely on a wire rack before handing one over to your pet. Your pup gets a wholesome snack with a lingering, comforting flavor they will beg for every single day.

Ingredients checklist

Hey! Making these treats is super easy, and you only need a few simple things from the grocery store. Let’s grab what you need for the base and the binders.

  • Base: 1 large sweet potato, which yields about one cup of mashed potato once cooked.
  • Modifiers: 2 cups whole wheat flour, plus a little extra for dusting your counter, and 1 large egg to hold it together.
  • Extras: 1 tablespoon coconut oil if you want to give their coat a nice shine.

Pick up regular fresh sweet potatoes instead of canned yams loaded with extra sugar. Whole wheat flour works great for this recipe, but you can easily swap in oat flour if your dog has a sensitive tummy.

That is really all it takes for the shopping list. You probably already have most of these items sitting in your pantry right now.

Method & timing

Hey, making these simple chews is really easy, but you do need some patience while they dry out in the oven. Low and slow is the secret here so they get wonderfully chewy instead of burning.

  1. Preheat your oven to 250 degrees F and line two large baking sheets with clean parchment paper.
  2. Slice your sweet potatoes uniformly to about 1/4 inch thick. Why it matters: Even slices dry at the exact same rate so you avoid half-burnt edges.
  3. Arrange the potato slices in a single layer without overlapping them on the baking pans.
  4. Bake for 3 hours, then flip each piece over carefully and bake for another 1 to 2 hours until dry.

You will know they are completely done when they look shrunken, feel leathery, and have no moisture left in the center. Let them cool on the counter before storing them in a sealed container.

Soothing Salmon and Pumpkin Recipe for Allergic Dogs

Soothing Salmon and Pumpkin Recipe for Allergic Dogs

Why this recipe works

If your dog is constantly scratching or has a sensitive tummy, you know how hard it is to find food they can actually eat. This soothing salmon and pumpkin recipe uses a limited set of ingredients to calm itchy skin and settle upset digestion without triggering common food allergies.

The magic is in the simple, high-tolerance proteins and fibers. Here is why your allergic pup will benefit:

  • Wild-caught salmon provides rich omega-3 fatty acids that fight inflammation and heal dry skin.
  • Canned pumpkin adds gentle soluble fiber to firm up stool and soothe the gut.
  • Quinoa acts as a safe carbohydrate instead of wheat or corn.

This meal is ideal for dogs dealing with seasonal flare-ups or chronic food sensitivities. You can easily whip up a batch on Sunday and keep it in the fridge for the week ahead.

Flavor snapshot

When you prep this salmon and pumpkin mix, you will notice a clean, earthy smell right away. It smells naturally savory without any of the heavy artificial odors found in commercial dog food.

Your dog is going to experience a really nice balance of rich fish and mild squash. Here is what stands out when they dig in:

  • Rich savory salmon flavor balanced by smooth pumpkin.
  • A soft, moist texture that is easy to chew and gentle on sensitive stomachs.
  • A warm or room temperature serving style that brings out the natural fats.

The lingering scent is mild and fresh, so your kitchen won’t smell terrible afterward. Dogs usually lick the bowl clean because this combination is genuinely comforting for them.

Ingredients checklist

Hey, getting the right ingredients is super important when you are cooking for a sensitive pup. Here is everything you need to grab to make this gentle, allergy friendly meal for your dog.

Here is the exact shopping list, broken down into simple categories so you can find everything easily at your local grocery store:

  • Base: 1 pound fresh salmon fillets and 1 cup pure canned pumpkin. Make sure you buy plain pumpkin, and definitely avoid the pie mix with added sugar.
  • Modifiers: 2 cups cooked white rice for sensitive stomachs and 1 tablespoon virgin coconut oil for healthy skin.
  • Garnish: 1 teaspoon finely chopped fresh parsley to help freshen up their breath after eating.

Always double check your canned pumpkin labels for hidden spices or additives. Your allergic dog is going to digest this soothing meal so easily.

Method & timing

Let’s get this soothing meal ready for your sensitive pup. You will need about 30 minutes total from start to finish to whip up a fresh batch.

  1. Bake 1 pound of salmon fillets at 375 degrees for 15 minutes until fully cooked and flaky. Why it matters: Baking preserves the beneficial omega fatty acids that calm itchy skin.
  2. Boil 2 cups of peeled pumpkin chunks for 10 minutes until fork tender, then drain the water completely.
  3. Mash the warm pumpkin and flake the cooled salmon together in a large mixing bowl, making sure to check for any tiny bones.

Let the food cool down completely before dishing it out to your hungry dog. Store any extra portions in a sealed container in the fridge for up to 3 days.

Garnish & presentation ideas

Making dog food look nice isn’t just for us, because a little extra visual appeal makes mealtime much more fun. Here are a few simple ways to style this salmon and pumpkin dish for your sensitive pup.

  • Parsley sprinkle: Finely chop a little fresh flat-leaf parsley on top for a bright green color contrast against the rich orange pumpkin.
  • Pumpkin seed crunch: Press a few raw pepitas into the bowl for a fun texture difference that gives them something extra to chew.
  • Salmon skin flake: Save a crispy piece of baked salmon skin and stick it upright in the center like a little flag.

These small additions make the bowl look like a gourmet meal without adding any common allergen ingredients. Just remember to keep the toppings small so you don’t accidentally upset their sensitive tummy.

Pairs well with

When you are feeding a sensitive dog, mealtime should feel both special and calm. Here are three simple ways to make this salmon and pumpkin dish even better for your pup.

  • Warm bone broth: Pour a tablespoon of allergy-friendly, onion-free bone broth over the top to add extra hydration and savory flavor.
  • A textured lick mat: Spread the cooled mixture onto a silicone mat to slow down fast eaters and soothe anxious dogs through repetitive licking.
  • A low-frequency acoustic playlist: Play soft instrumental music in the background to help dogs with skin allergies or environmental anxiety fully relax while they digest.

These small touches turn a basic allergy meal into a truly comforting ritual. Your dog will appreciate the extra attention and the delicious food.

Tips, fixes, upgrades

Making food for a sensitive dog takes a little trial and error. Here are a few practical tips I learned while making this soothing salmon and pumpkin batch in my own kitchen.

  • Check your salmon fillets very carefully for stray bones. Even boneless cuts can occasionally hide sharp little bones that are dangerous for pets.
  • Always use plain canned pumpkin, not pumpkin pie mix. The pie filling contains extra spices and sugar that will definitely upset your dog’s sensitive stomach.
  • Start with small portions if your dog is not used to fresh fish. Mix just a spoonful into their current food at first to test their digestion safely.

Store any leftovers in an airtight container in the fridge for up to three days maximum. You can also freeze individual portions in silicone ice cube trays for easy quick meals on busy days.

Sweet Potato Chews for Dogs

Sweet Potato Chews for Dogs

Why this recipe works

Store-bought dog chews cost a fortune and often come with mystery ingredients you cannot pronounce. These homemade sweet potato chews require just one simple ingredient and cost a fraction of the price.

They are fantastic for puppies with sensitive stomachs, dogs with grain allergies, or any pup who just loves a good gnaw. You can whip up a big batch on Sunday and have healthy treats ready for the entire month.

Here is why this method actually works in a real kitchen:

  • Slicing them to a consistent 1/4 inch thickness helps them dry evenly.
  • Low and slow baking draws out the moisture so they get chewy instead of burnt.

Your dog will happily wait by the oven while these bake because the kitchen smells amazing. It is a great win for your wallet and a huge win for your pup’s snack time.

Flavor snapshot

When you pull these sweet potato chews out of the oven, your kitchen will fill with a warm, earthy aroma that smells a lot like roasted marshmallows. Dogs go crazy for this scent because it highlights the natural sugars inside the vegetable.

Biting into a fully dehydrated slice gives a satisfying, chewy resistance rather than a soft snap. The flavor hits the palate with a concentrated sweetness that is entirely natural and balanced by a slightly rustic, toasted finish.

Here is what your dog will experience with every bite:

  • Warm, inviting aroma of naturally roasted root vegetables.
  • Dense, chewy texture that provides a good workout for their jaws.
  • Pure, sweet flavor with zero added salt, sugar, or weird preservatives.

The lingering note is a mild, starchy goodness that keeps pups licking their chops long after the treat is gone. Just make sure to let the chews cool completely to room temperature before handing them over so the texture firms up properly.

Ingredients checklist

Making these simple homemade dog chews only requires a couple of basic items you probably already have sitting in your kitchen pantry right now. You do not need any weird chemical preservatives or fancy additives, just honest whole food ingredients for your furry best friend.

Here is the exact shopping list organized by category so you can easily gather everything:

  • Base ingredient: 2 large sweet potatoes, washed and thoroughly scrubbed clean
  • Modifiers: 1 tablespoon melted coconut oil, used to lightly grease your baking sheets
  • Garnish or extra: A tiny pinch of organic ground cinnamon

    Method & timing

    Making these simple dog chews takes some time in the oven, but the actual process is super easy. You just need a couple of sweet potatoes and a good knife to get started.

    1. Preheat your oven to 250 degrees F and line two baking sheets with parchment paper.
    2. Wash and scrub the sweet potatoes well. You don’t even need to peel them, just slice them lengthwise into 1/3-inch thick strips.
    3. Arrange the slices in a single layer on the baking sheets without overlapping them so they dry out evenly.
    4. Bake for 3 hours, then flip each piece over and bake for another 1 to 2 hours until they are tough and chewy.

    Let the chews cool completely on the pans before handing them to your pup. If they still feel a bit flexible, just pop them back in the oven for another thirty minutes.

    Garnish & presentation ideas

    Making these simple treats look nice is really fun, especially if you want to gift them to a furry friend for the holidays or a birthday. A little presentation goes a long way when you package them up in a cute jar or paper bag.

    Here are a few easy ways to make your homemade dog chews look extra special:

    • Tie a small bundle of orange chews together tightly using natural jute twine for a rustic, bakery-style look.
    • Layer the dried slices in a clear glass mason jar to show off their vibrant color contrast and keep them crisp.
    • Dust a tiny pinch of finely chopped parsley over the top for a pop of green color contrast that also helps freshen dog breath.

    These little styling touches take just seconds to set up. Your pup definitely will not care how they look, but your friends will love receiving them.

    Pairs well with

    These homemade sweet potato chews are great on their own, but a few simple pairings make treat time even better. Whether you are training your pup or just relaxing on the couch, these ideas fit right in.

    Here are three ways to make treat time extra special for your dog:

    • Post-walk hydration: Pair a chewy snack with a bowl of fresh ice water after a long walk outside.
    • Training sessions: Cut the chews into tiny bite-sized pieces to use as high-value rewards during obedience practice.
    • Couch movie night: Put on some calming acoustic guitar music in the background while you both relax on the rug.

    Keep a stash of these chews in your treat jar for quick access. Your dog will thank you every single time.

    Tips, fixes, upgrades

    Making these dog chews is pretty simple, but a few small adjustments will save you some frustration. Here are my best tips for getting the texture just right every single time in your own kitchen.

    • Slice thickness matters. Aim for a steady one-quarter inch so the pieces get chewy instead of rock-hard.
    • Don’t skip parchment paper. Sweet potatoes get super sticky as the natural sugars caramelize during the long bake time.
    • Store them right. If your batches still feel slightly flexible after cooling, keep them in the fridge so they don’t spoil.

    If your dog tends to swallow treats whole, cut the raw slices into smaller strips or bite-sized squares. You want to encourage a good chewing session, not create a choking hazard.

Pumpkin Oatmeal Pup Cookies

Pumpkin Oatmeal Pup Cookies

Why this recipe works

These simple pumpkin oatmeal pup cookies are a huge hit with dogs because they use wholesome, everyday ingredients that are actually good for their bellies. If you have a dog with a sensitive stomach or you just want to know exactly what goes into their treats, this recipe is for you.

The combination of canned pumpkin puree and rolled oats makes these treats super easy to digest and naturally chewy. You do not need any fancy equipment to whip up a batch on a lazy Sunday afternoon.

Here is why these treats work so well for most dogs:

  • Uses basic pantry items like whole wheat flour and plain oats.
  • Bakes up firm so they will not crumble into a huge mess in your treat pouch.
  • Contains zero artificial preservatives or added sugars.

Just mix the dough, roll it out, and cut your favorite shapes. Your furry best friend will thank you with plenty of tail wags.

Flavor snapshot

When you pull these cookies out of the oven, you’ll immediately notice a warm, earthy aroma of baked pumpkin and cinnamon. They taste naturally sweet and hearty, without any overpowering spices that might upset a dog’s stomach.

Serve them at room temperature so your dog gets the best experience. The texture hits a nice balance between chewy and firm, thanks to the rolled oats and whole wheat flour.

Your pup will finish every crumb and likely look for more. Here is what you can expect from each bite:

  • A mild, nutty flavor from the oatmeal base
  • A soft crunch that holds together well without crumbling everywhere
  • A comforting, subtle finish of pure pumpkin that lingers just a bit

These treats are simple, wholesome, and taste just like a cozy autumn day. Your dog is going to love them.

Ingredients checklist

Hey! Let us grab everything you need to bake these easy pumpkin oatmeal dog treats at home. You probably already have most of these simple pantry items in your kitchen right now.

Here is the main base and the binding ingredients to get started. Make sure you buy plain canned pumpkin and not the spiced pie mix.

  • 2 cups rolled oats (old-fashioned or quick oats both work fine)
  • 1 cup pure canned pumpkin puree
  • 1/4 cup natural peanut butter (check the label to avoid xylitol, which is toxic to dogs)
  • 2 large eggs

If you want to make them look a little cute, you can add a simple topping. Grab these final items to finish the batch.

  • 1 tablespoon coconut oil (melted)
  • 2 tablespoons plain Greek yogurt (optional, for decorating)

Just remember to let the cookies cool completely before your pup tries to steal one from the counter. Store them in an airtight container to keep them fresh all week.

Method & timing

Let’s get these dog treats baked so your furry best friend can snack happy. You will only need about 30 minutes total from start to finish.

  1. Preheat your oven to 350 degrees and line a baking sheet with parchment paper.
  2. Mix 1 cup of rolled oats, 1/2 cup of canned pumpkin, and 1 large egg in a bowl until a sticky dough forms. Always use plain pumpkin because pie filling contains harmful nutmeg and sugar.
  3. Roll the dough into small balls and flatten them on the sheet since these treats will not spread much in the oven.

Bake for 20 to 25 minutes until the edges turn golden and feel dry to the touch. Let the cookies cool completely on a wire rack before serving so your dog stays safe.

Garnish & presentation ideas

You can make these homemade dog treats look extra special with a few simple presentation tricks. Dogs won’t care how they look, but it makes taking photos or gifting them so much fun.

Here are a few easy ways to style your cookies for a nice color contrast and fun texture.

  • Drizzle with plain Greek yogurt for a bright white pop against the orange pumpkin color.
  • Press a single, whole pumpkin seed into the center of each cookie before baking for a crunchy texture contrast.
  • Dust the cooled cookies with a tiny pinch of cinnamon for a warm, finished look.

Store your decorated treats in a clear glass jar with a ribbon if you are giving them as a gift. Just make sure the yogurt dries completely before stacking them so they don’t stick together.

Pairs well with

These dog cookies are a big hit at my house, and they fit right into a few fun routines. Sharing a treat with your dog is the best way to bond after a long walk.

Here are three simple things that go great with these snacks:

  • Post-walk hydration: Grab a glass of iced coffee for yourself while your dog catches their breath with a bowl of fresh water and a cookie.
  • A rainy day movie marathon: Put on a cozy movie like Homeward Bound and hand out a couple of these snacks during the opening credits.
  • Puppy training sessions: Break these cookies into smaller pieces to use as high-value rewards when you are working on basic commands in the living room.

These little moments make baking from scratch totally worth it. Your dog will appreciate the extra attention just as much as the food.

Tips, fixes, upgrades

Here are a few quick tips to help you nail these dog treats on your first try. Dog baking is pretty forgiving, but these small tricks make a big difference.

  • Watch your moisture levels closely because pumpkin puree brands vary a lot in water content. If your dough feels too sticky to roll, just add a tablespoon of extra oats at a time.
  • Always double check that your canned pumpkin is pure pumpkin puree and not pumpkin pie mix. The pie filling has added spices and sugar that can make your pup sick.
  • Flatten the cookies out before baking since they won’t spread much in the oven. What you shape on the baking sheet is pretty much what you get after 20 minutes of drying out.

Store these in an airtight container in the fridge so they stay fresh for weeks. Your dog is going to go crazy for them!

Cheesy Bacon Dog Training Rewards Recipe

Cheesy Bacon Dog Training Rewards Recipe

Why this recipe works

Dogs will do practically anything for these cheesy bacon treats because the smell alone drives them wild. If you have a stubborn puppy or an older dog learning new tricks, these homemade rewards are your secret weapon.

Store-bought snacks are often too big and crumbly for quick training sessions. This recipe works so well because you can cut the baked dough into tiny, pea-sized pieces that your dog can swallow instantly. Here is why your dog will pay attention:

  • Real bacon bits provide a strong scent for high motivation.
  • Real cheddar cheese creates a savory flavor dogs crave.
  • Soft texture means no chewing delays during fast-paced learning.

You can keep a small handful in your pocket without making a greasy mess. Just store the rest in the fridge so they stay fresh all week.

Flavor snapshot

When you pull these little treats out of the oven, your whole kitchen smells like a smoky diner. Dogs go absolutely crazy for the intense aroma of real bacon mixed with sharp cheddar cheese.

These bites turn out firm and slightly chewy instead of rock hard, which means they won’t crumble in your pocket during a training walk. Here is the exact flavor profile you can expect:

  • Rich, savory bacon flavor upfront that hits their sense of smell immediately
  • A warm, cheesy middle note that keeps your dog staring intently at your treat pouch
  • A dry exterior that leaves zero grease on your hands

They cool down to room temperature within ten minutes on a wire rack. That lingering meaty scent will give you a massive advantage during outdoor obedience practice.

Ingredients checklist

Let us gather the stuff we need to make these smelly, highly motivating training treats for your dog. You want items that pack a big punch of flavor so your pup actually pays attention during outdoor sessions.

  • Base: 2 cups whole wheat flour, or oat flour if your dog has a sensitive stomach, plus 1/2 cup yellow cornmeal for a crunchy texture.
  • Modifiers: 1/3 cup real bacon bits, chopped very fine, and 1/2 cup shredded sharp cheddar cheese for that cheesy smell dogs love.
  • Wet ingredients: 1 large egg, 1/2 cup low-sodium chicken broth, and 2 tablespoons melted coconut oil.

Grab your bacon from the regular grocery store and fry it up extra crisp at home. Skip the fake shelf-stable bacon bits since they are often loaded with extra sodium and weird preservatives.

Method & timing

Let’s get these little treats baked so you can start training your pup right away. The whole process takes about 30 minutes from mixing to cooling.

  1. Preheat your oven to 350 degrees and line a baking sheet with parchment paper.
  2. Mix your dough ingredients in a medium bowl until it forms a workable, slightly sticky ball.
  3. Roll the dough into tiny quarter-inch balls so they fit easily in your pocket or treat pouch. Small sizes matter because they keep your dog focused during fast training sessions without spoiling their dinner.
  4. Bake for 12 to 15 minutes until they look golden brown and feel completely firm.

Let the treats cool completely on the baking sheet before you touch them. Store the batch in an airtight container in the fridge for up to a week.

Garnish & presentation ideas

Presenting these treats nicely makes training sessions way more fun, plus it keeps your kitchen counters looking neat. Let us look at a few simple ways to style and store your cheesy bacon bites so they look as good as they smell.

  • Add a light sprinkle of finely grated parmesan cheese right after baking to create a snowy, high-contrast look against the dark bacon.
  • Toss in a few extra-crispy bacon bits at the very end for added crunch and obvious texture variation.
  • Store the finished rewards in a clear glass jar on your counter so you can easily admire the golden-brown color.

When you head out the door for a walk, toss a handful into a bright silicone treat pouch. Your dog will appreciate the tasty rewards, and you will love how easy they are to grab.

Pairs well with

When you’re working on new tricks with your pup, having the right setup makes all the difference. Here are three fun ways to pair these homemade treats for a successful session.

  • A backyard agility course: Use these high-value treats outside where real-world distractions happen so your dog learns to stay focused on you.
  • A calm acoustic playlist: Playing soft guitar music in the background keeps your own energy steady, which directly helps your dog stay relaxed while learning.
  • A handy silicone treat pouch: Clip a pocket-sized pouch right to your waistband so you can grab the bacon pieces instantly when your dog obeys.

Keeping things organized makes training a breeze for both of you. Grab your supplies and have a wonderful time working together today.

Tips, fixes, upgrades

Making these little treats is pretty straightforward, but a few quick tricks will save you a mess. You want these rewards tiny so your dog can eat them fast and stay focused during training sessions.

  • Cut the dough into pea-sized pieces before baking. Bigger chunks defeat the purpose of a quick training reward.
  • Bake them a bit longer if they feel even slightly spongy. You want them completely dry so they don’t get sticky in your treat pouch.
  • Store the extras in the fridge, or freeze half the batch. Real bacon and cheese spoil quickly without chemical preservatives.

If your dog seems uninspired by the first batch, try swapping the cheddar for parmesan cheese. That extra punch of stinky goodness always gets their attention.

Pumpkin Spice Dog Birthday Cake

Pumpkin Spice Dog Birthday Cake

Why this recipe works

This dog birthday cake tastes like a cozy fall treat, but it is totally safe for your pup to eat. It relies on real pumpkin puree and a dash of cinnamon instead of any weird artificial flavorings.

It is the best way to celebrate your dog’s gotcha day or autumn birthday without giving them a stomach ache. We skipped the refined sugar and heavy dairy that usually cause digestive trouble.

You probably already have the simple ingredients sitting in your kitchen right now:

  • Whole wheat flour for a sturdy base
  • Plain pumpkin puree for natural moisture
  • A spoonful of dog-safe peanut butter

The frosting uses plain Greek yogurt for a tangy spread that holds its shape nicely. Just bake the batter in a small pan so your furry friend gets a properly sized portion.

Flavor snapshot

When you pull this little cake from the oven, your whole kitchen smells just like a cozy autumn coffee shop. Dogs go absolutely crazy for the warm, earthy scent of real pumpkin and mild spices.

The texture is wonderfully soft and moist, making it super easy for dogs of all ages to chew. Here is what your pup will experience with every single bite:

  • Sweet pumpkin flavor that comes through naturally without needing any added sugar.
  • A hint of warm cinnamon that creates a lovely bakery aroma.
  • A tender, crumbly bite that doesn’t stick to the roof of their mouth.

Serve this treat completely cooled or at room temperature so the flavors really pop for your furry friend. Your dog will be licking their chops for a good ten minutes after the last crumb is gone because of the comforting peanut butter lingering notes.

Ingredients checklist

Hey friend, let us gather everything you need to bake a fun birthday cake for your pup. You probably already have most of these simple items in your kitchen.

Here is what you will need for the base and wet modifiers:

  • 1 cup whole wheat flour (or oat flour if your dog is sensitive to wheat)
  • 1 teaspoon baking powder
  • 1/4 cup pure pumpkin puree (just plain pumpkin, not the pie mix)
  • 1/4 cup plain unsweetened applesauce
  • 1 large egg
  • 2 tablespoons melted coconut oil

Do not forget the garnish to make it look like a real party cake. Grab 1/2 cup of plain Greek yogurt for the frosting and a few of your dog’s favorite crunchy biscuits for the top.

Just double-check that pumpkin label to avoid any added sugars or artificial sweeteners. Your furry best friend is going to go nuts for this.

Method & timing

Let us get this dog cake baked and ready for the party. It takes just a few minutes to prep and smells amazing in the oven.

  1. Preheat your oven to 350°F and grease a small 4-inch cake pan with a bit of coconut oil.
  2. Mix 1/4 cup whole wheat flour, 2 tablespoons pumpkin puree, 1 tablespoon peanut butter, and 1 egg in a bowl until a dough forms. Make sure your peanut butter does not contain xylitol, which is toxic to dogs.
  3. Pour the batter into your pan and bake for 20 to 25 minutes until the edges turn golden brown.
  4. Insert a toothpick into the center to test it. If it comes out clean, take the pan out of the oven.

Let the cake cool completely on a wire rack before adding any frosting. This matters because warm cake will melt your plain Greek yogurt frosting into a messy puddle.

Homemade Peanut Butter Pup Treats

Homemade Peanut Butter Pup Treats

Why this recipe works

Store-bought dog biscuits often hide weird preservatives and extra salt, but these homemade peanut butter pup treats use just three simple ingredients you probably already have in your pantry. They are perfect for spoiling your dog on their birthday, rewarding them after a long walk, or just because you want to know exactly what goes into their belly.

Using natural peanut butter means you completely avoid dangerous sweeteners like xylitol, keeping your furry best friend safe and happy. The dough comes together in under ten minutes without any fancy kitchen equipment, so you can whip up a batch whenever you want.

Here is why this recipe works so well:

  • They bake up with a satisfying crunch that dogs love.
  • The dry texture means they will not get sticky in your treat pouch.
  • They store well in a jar on the counter for weeks.

Flavor snapshot

When you pull these peanut butter treats out of the oven, your kitchen smells just like freshly baked cookies. Dogs go crazy for the scent before the pan even cools down.

The taste is simple and wholesome, relying heavily on natural peanut butter and whole wheat flour without any added salt or sugar. They have a crunchy texture that holds up well in your pocket without crumbling into dust. Here is what you will notice:

  • Aroma: Warm, nutty, and completely irresistible to dogs.
  • Taste: Earthy peanut flavor with a subtle hint of oats.
  • Texture: Firm and snap-worthy once fully cooled.

Serve them at room temperature so your dog gets the full flavor profile. The lingering notes leave a mild, nutty scent on their breath that you will actually find pretty cozy.

Ingredients checklist

You only need a few simple items from your kitchen to make these healthy dog biscuits. Let us round up the exact groceries your furry best friend will love.

Here is the shopping list you need for the base and liquid binders. Always check the peanut butter label closely to completely avoid dangerous artificial sweeteners like xylitol.

  • 2 cups whole wheat flour or oat flour if your dog has a sensitive stomach
  • 1/2 cup natural creamy peanut butter check the back label for safety
  • 2/3 cup water or warm low-sodium chicken broth
  • 1 large whole egg

You can also toss in 3 tablespoons of rolled oats for extra texture and a nice crunch. Keep these pantry items ready because your hungry pup will definitely beg for another batch very soon.

Method & timing

Let’s get these dog biscuits in the oven so your pup can taste test them. You will only need about 30 minutes total from start to finish.

  1. Preheat your oven to 350 degrees and line a baking sheet with parchment paper.
  2. Mix 2 cups whole wheat flour, 1/2 cup natural peanut butter, and 3/4 cup water in a bowl until a dough forms. Make sure your peanut butter has zero xylitol, because that ingredient is toxic to dogs.
  3. Roll the dough out to about a 1/4 inch thickness on a floured surface and cut into shapes.
  4. Bake for 20 minutes until golden brown and crunchy. Letting them get crisp helps them store better in your pantry.

Let the treats cool completely on a wire rack before handing them over to your furry best friend. Store any leftovers in an airtight container for up to two weeks.

Homestyle Blueberry Dog Treats

Homestyle Blueberry Dog Treats

Why this recipe works

These homemade dog treats are packed with fresh blueberries and whole oats, making them a healthy snack your pup will actually beg for. If you want to ditch store-bought biscuits with weird preservatives, this simple recipe is for you.

Using just four basic ingredients, you can whip up a batch in under thirty minutes on a busy weeknight. Blueberries provide a natural burst of antioxidants, while the whole wheat flour keeps them filling and cheap to bake.

Here is why these treats are a total win in our kitchen:

  • They use pantry staples like rolled oats and flour.
  • There are no hidden sugars or artificial dyes.
  • They freeze great for long-term storage.

Bake them until they are crispy and dry so they last longer in the treat jar. Your furry best friend is going to love these fresh-baked goodies.

Flavor snapshot

When you pull these blueberry dog treats out of the oven, your kitchen will smell like warm, baked fruit and wholesome oats. They have a comforting, bakery-style aroma that actually makes humans want a bite too.

The texture is crispy on the outside with a satisfying snap when your dog bites down. Inside, the treat is sturdy enough not to crumble immediately in your pocket. Here is what you will notice:

  • Taste: Earthy whole wheat mixed with the mild sweetness of real baked blueberries.
  • Temperature: Serve them at room temperature after they cool completely on a wire rack.

The lingering note is a simple, nutty flavor from the oats that leaves dogs licking their chops for more. They are not overly sugary, so you get a clean, honest snack.

Ingredients checklist

Hey, let’s grab what you need for these simple dog treats. You probably have most of these baking items in your kitchen pantry right now.

Here is the exact shopping list you’ll need, broken down simply by how we mix them together:

  • Base ingredients: 2 cups of whole wheat flour and 1/2 cup

    Method & timing

    Let’s get these simple dog treats baked and ready for your hungry pup. The whole process takes about 30 minutes from start to finish.

    1. Preheat your oven to 350 degrees and line a baking sheet with parchment paper.
    2. Mix 2 cups whole wheat flour, 1/2 cup fresh blueberries, 1 large egg, and 1/3 cup water in a bowl until a dough forms. Why it matters: Mixing just until combined keeps the final treat tender instead of tough.
    3. Roll the dough out to about 1/4 inch thickness on a lightly floured countertop.
    4. Bake for 20 to 25 minutes until the edges turn a nice golden brown.

    Let the treats cool completely on a wire rack before handing one to your furry friend. Store any leftover snacks in a sealed airtight container for up to one week.

7 Essential Steps for Designing Modern Farmhouse Dog Trot Plans

Building a home with a

1. Glass-Enclosed Central Breezeway Connection

Glass-Enclosed Central Breezeway Connection

Traditional dog trot breezeways are great for hot summers, but they leave you freezing in January and eaten alive by bugs. Adding glass panels fixes this weather problem without ruining the open-air vibe you bought the house for in the first place. You get all the lovely natural light without sacrificing your heating bill.

A glass-enclosed central breezeway simply means framing in that open walkway between your living quarters and sleeping rooms with floor-to-ceiling windows or sliding glass doors. It creates a weather-tight hallway that still feels like you are walking right outside through the trees.

Use oversized glass sliding doors on both sides so you can still open the whole thing up when the weather is nice. Toss a couple of comfortable armchairs in there to make a sunny reading spot that naturally connects both sides of the house.

2. Separated Primary Suite Wing Layout

Separated Primary Suite Wing Layout

Feature Traditional Layout Dog Trot Wing
Noise Level Shared walls Breezeway buffer
Privacy Standard hallway Complete separation

Imagine waking up early for a morning shift while the rest of the household is still fast asleep. Putting your main bedroom on the opposite side of the breezeway makes early noise a total non-issue. You get complete peace without having to tiptoe around your own floors.

This layout takes the classic dog trot concept and updates it for modern privacy needs. Connecting the sleeping wing to the main living area with a covered outdoor hallway creates a natural sound barrier. It gives you a quiet retreat at the end of a long day.

You will especially appreciate this smart separation when guests stay over for the weekend. Everyone gets their own dedicated space to unwind.

3. Vaulted Great Room with Exposed Beams

Vaulted Great Room with Exposed Beams

High ceilings are non-negotiable if you actually want that authentic dog trot feel in your modern farmhouse build. A vaulted great room bridges the gap between the indoor living spaces and the open-air breezeway heritage of these classic homes. You get that massive, sweeping vertical volume that makes small footprints feel enormous, all while pulling hot air up and out of the living area during sticky summer months.

Tossing in some heavy timber or exposed beams anchors all that overhead space so the room still feels cozy instead of like a drafty barn. You should look for reclaimed oak or pine with natural knots, saw marks, and dings to make the ceiling look like it was salvaged from an old structure. Paint the drywall crisp white in between those dark beams to create a high contrast look that defines modern farmhouse style better than any basic shiplap wall ever could.

4. Dual-Zoned Climate Control Layout

Dual-Zoned Climate Control Layout

Dog trot homes are famous for that open central breezeway, but keeping the interior temperatures comfortable can be a real headache. Splitting your HVAC system into two distinct zones lets you heat or cool the main living quarters separately from the bedroom wing.

Without this setup, you’ll end up wasting a fortune trying to condition empty space.

  • Install a dedicated mini-split heat pump to handle the main living area easily.
  • Use smart thermostats to schedule temperatures based on which side of the house you are actually using.
  • Add insulated glass doors to seal off the central breezeway when extreme weather hits.

You’ll save a ton on monthly energy bills without sacrificing that classic open-air aesthetic.

5. Board and Batten Exterior Profile

Board and Batten Exterior Profile

If you want that authentic modern farmhouse look on your dog trot build, you really need to consider a board and batten exterior profile. It adds instant texture and height that flat siding just cannot touch.

I usually recommend sticking with wider boards and narrower battens to keep the proportions feeling right on a larger country home. Engineered wood products hold up best against the elements while still giving you that classic painted timber appearance.

This vertical siding style also works wonders for drawing the eye upward, especially around the open central breezeway. When the afternoon sun hits those shadows, the depth of the pattern really pops. It grounds the whole structure in traditional roots while keeping the aesthetic fresh.

Just make sure your builder installs proper flashing behind the battens to avoid any moisture issues down the road. A little extra care here saves you from major headaches later.

6. Outdoor Living Fireplace in Breezeway

Outdoor Living Fireplace in Breezeway

Putting a fireplace right in the middle of your breezeway changes how you use the whole house. It turns that covered walkway into an extra living room where you will actually want to hang out when the weather turns chilly.

You need to plan the layout carefully so smoke does not blow back into the main house entries. Here is what you should focus on to get it right.

  1. Choose a tall stone chimney that matches the exterior siding to ground the central breezeway structure.
  2. Run a gas line during the initial framing phase so you do not have to haul heavy firewood through the house.
  3. Position comfortable seating facing inward rather than outward to create a cozy conversation space.
  4. Install high output outdoor rated ceiling fans to push trapped heat down during late fall evenings.

7. Symmetrical Double Gable Roof Design

Symmetrical Double Gable Roof Design

You can either connect the two main cabins with a continuous roofline or go with a symmetrical double gable roof design that treats each side as its own distinct structure. A single connected ridge line sometimes looks a bit too heavy, and it misses out on that classic historic charm you’re probably aiming for. On the flip side, matching dual gables create a balanced silhouette while letting the open breezeway in the middle really pop.

I definitely recommend sticking with the twin gable approach for a true modern farmhouse look. It keeps the exterior proportions right and gives you extra ceiling height inside for loft spaces or tall windows. You’ll get that authentic dog trot feel without making the house look like a giant suburban ranch.

Wrapping Up

Bringing these ideas together helps you create a home

Dog Crate Ideas

Transform Your Dog’s Crate Into Stylish Home Furniture

You know that moment when your dog’s crate is just sitting there in the corner of your beautiful living room like an eyesore? You’ve spent months getting your home to look perfect, and then there’s this hulking metal cage absolutely destroying the vibe.

Here’s the truth: your dog deserves a safe space, AND your home deserves to look amazing. These two things aren’t mutually exclusive — and these dog crate ideas prove it.

Why Dog Crate Ideas Matter (Beyond Looking Pretty)

Before we jump into the beautiful stuff, let’s talk about why crates matter. A well-designed crate isn’t just furniture — it’s your dog’s den, their safe space, their sanctuary. Dogs are naturally den animals. They want enclosed spaces where they feel secure.

But here’s where most people go wrong: they buy a cheap wire crate, throw a blanket over it, and hope nobody notices. That approach? It makes your dog feel less secure, and it ruins your decor.

The solution is treating the crate like actual furniture. And when you do? Everything changes.

12 Dog Crate Ideas That Transform Your Space

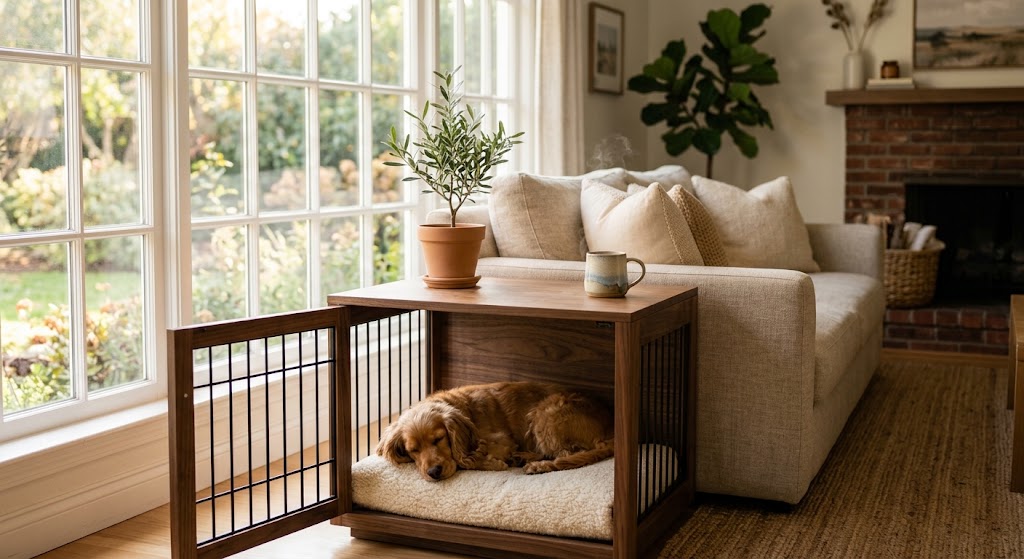
#1: The Furniture-Grade Sideboard Crate

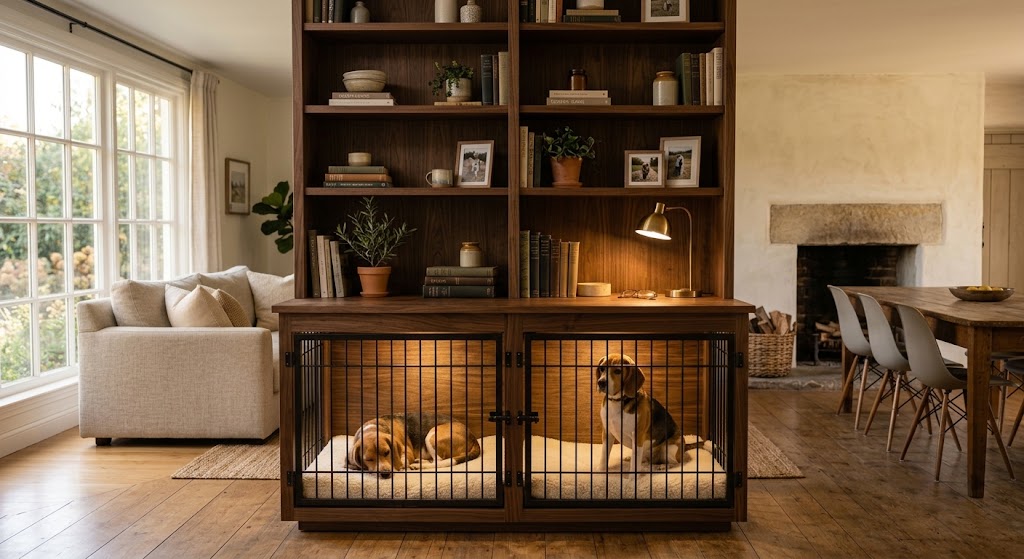
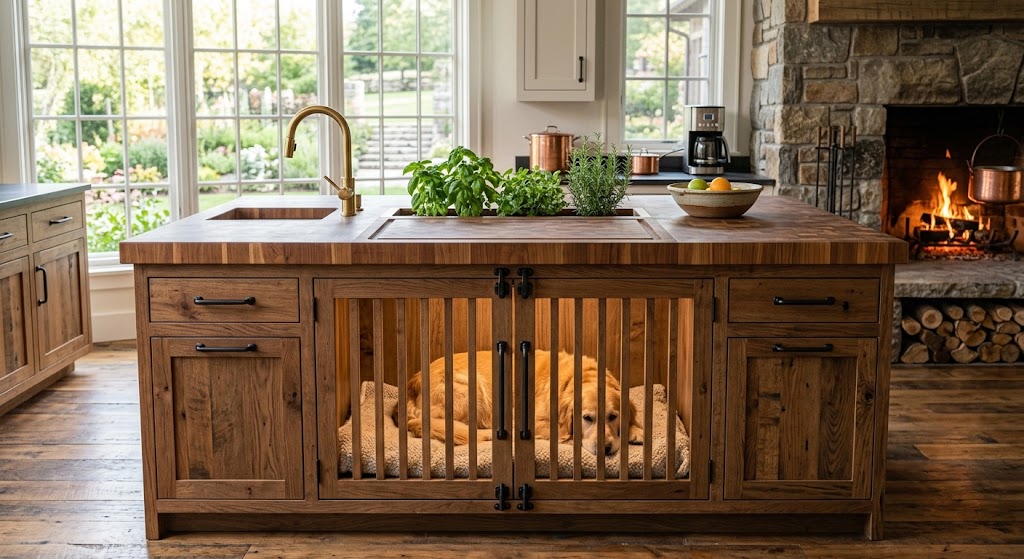
This is the setup that changed everything for me. Picture a crate that looks like a high-end sideboard — because it basically is one. We’re talking stained pine wood with black metal bar panels, a solid wood top that actually functions as a surface, and barn-style hardware.

What you need:

  • Dog crate furniture piece (42–48 inches wide)
  • Neutral-tone cushioned dog bed
  • Decorative items for the top (plants, candles, framed photo)
  • Matching throw blanket for draping

Place this in your living room entryway or under a sloped ceiling. Style the top like you would a real sideboard — lamp, plant, small decor. Your guests won’t even realize it’s a crate until they see your golden poke her head out.

The benefit: Your dog gets a den. Your living room gets furniture that works double duty. Everyone wins.

#2: The Glass-Panel Modern Crate

If your aesthetic runs modern and minimalist, this one’s for you. A black powder-coated steel frame with clear acrylic or glass panels on all four sides creates an open, airy feel while still giving your dog that enclosed-space security.

The transparency means your dog can see you, you can see your dog, and the whole thing basically disappears into your room’s architecture. Pair it with a grey memory foam bed, a stainless steel feeding station, and a light gray silicone mat to contain any mess.

Pro tip: Position it near your main seating area. Dogs with anxiety settle faster when they can see their people. Visibility is the feature, calm is the benefit.

#3: The Built-In Walnut Dog Den

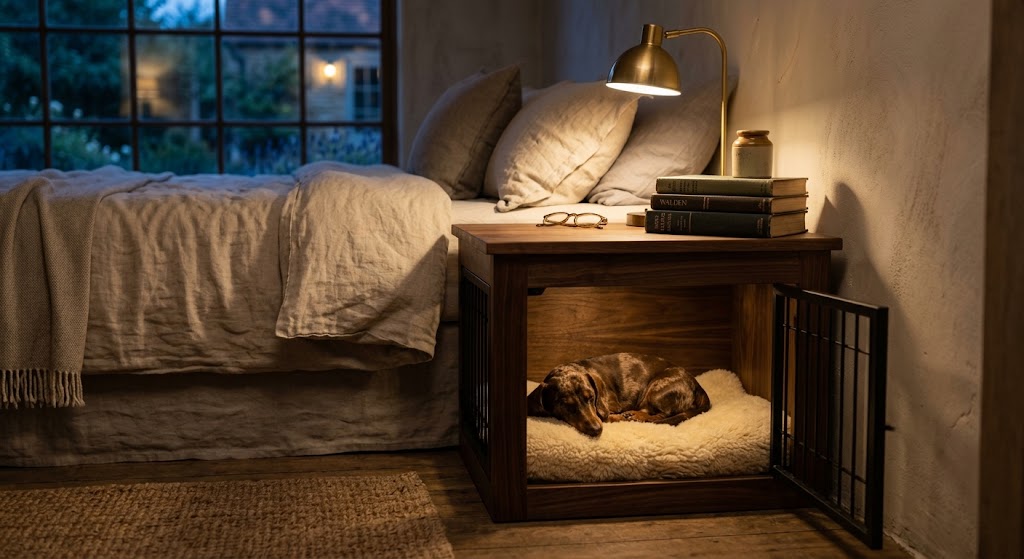
This is furniture-level craftsmanship. A custom walnut wood den with vertical slatted panels blends into any room like it was built into the wall. Add a tan linen cushion and a decorative wicker basket on top, and nobody would guess this is a dog crate.

This works especially well if you have other walnut or warm-wood furniture in your space — the repetition makes everything feel intentional and cohesive.

Investment level: Higher. But you’re essentially buying a custom furniture piece that also happens to be a crate. That’s worth it.

#4: The Coastal Sage Green Crate

Soft, calming, beautiful. A sage green double-door crate cabinet with a natural wood butcher-block top and matte black hardware brings that coastal aesthetic everyone loves right into your living room.

The color is key here — it’s warm enough to feel inviting but soft enough to work with almost any color palette. Style the top with a ceramic bowl, a trailing pothos plant, and maybe a small decorative tray.

Measurements matter: Look for a double crate that’s at least 42 inches wide for a large breed. Your dog needs room to stretch out without feeling cramped.

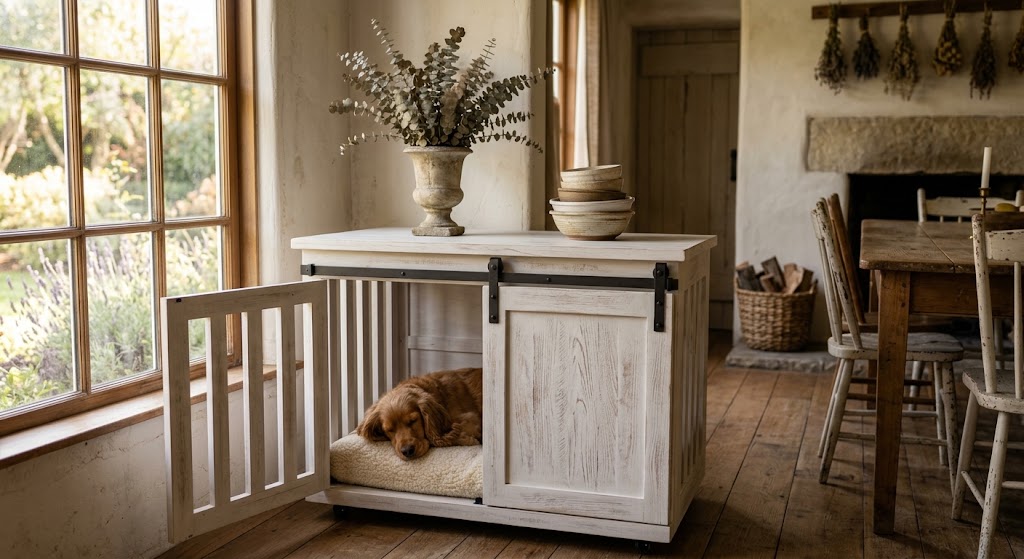
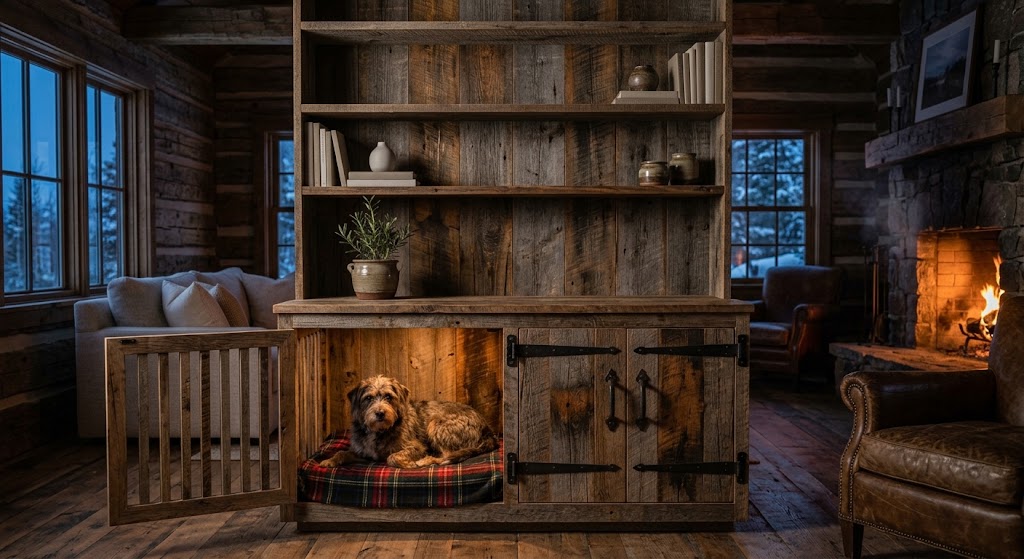
#5: The Industrial Barn Door Crate

Heavy-duty, gorgeous, and absolutely functional. This crate uses stained pine wood paired with barn door sliding hardware instead of traditional swinging doors. The sliding mechanism saves floor space (no door swing) and adds serious design appeal.

The front doors can feature rebar-style steel bars that give it that farmhouse-industrial vibe without looking rough or unfinished. Inside, a navy and paisley cushion makes it cozy.

DIY level: Medium. If you’ve ever built furniture before, this is totally doable.

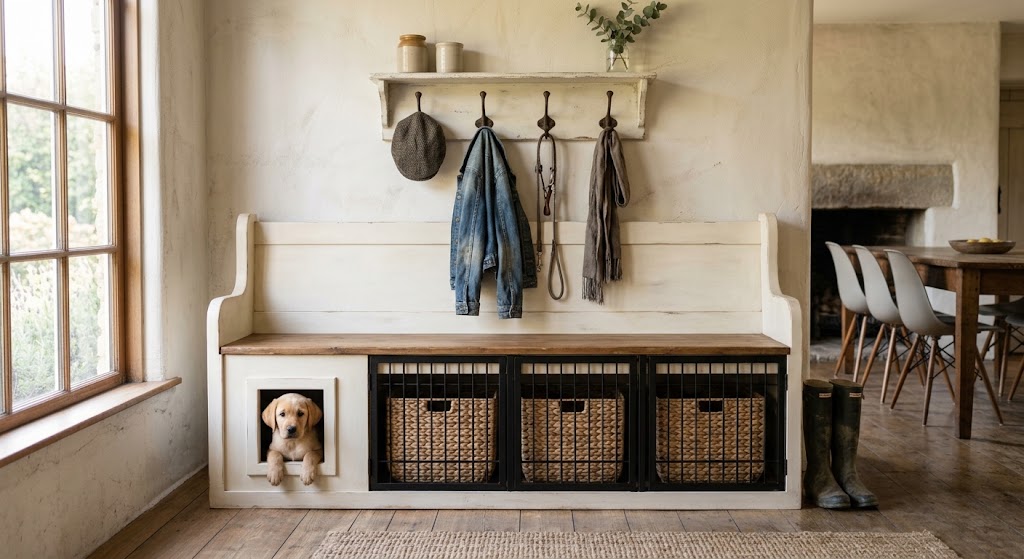
#6: The Under-Stair Built-In Nook

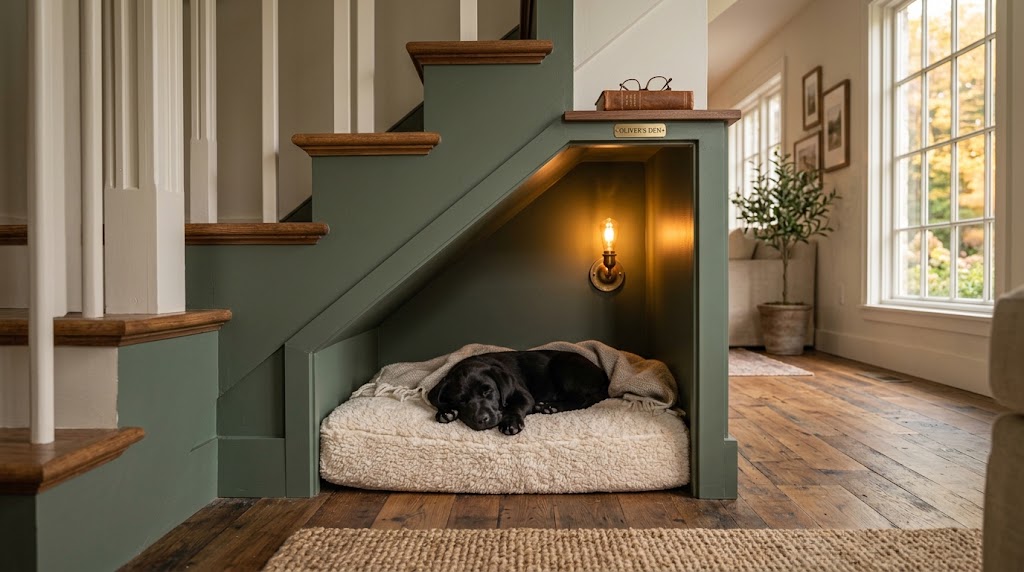
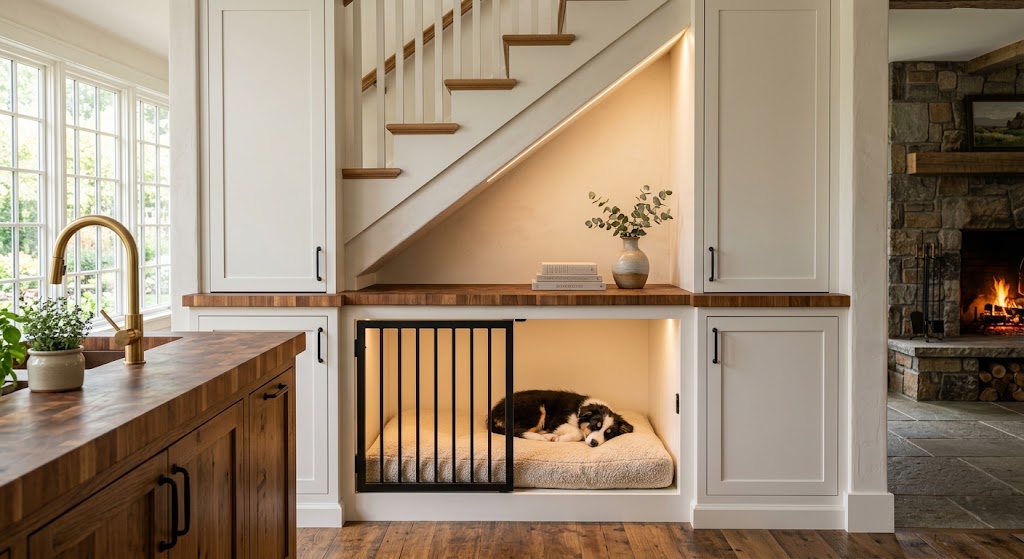
If you have the space, this is *the* move. A custom-framed cavity under your staircase becomes a dog den entrance with a maple wood frame, black wrought-iron bars, and a hinged door with black iron hardware.

The whole thing blends into your staircase like it was always meant to be there. Line the interior with a washable flat mat in a pattern or solid color. Your dog gets the coziest nook. Your hallway stays open and beautiful.

Real talk: This requires framing work or a contractor. But if your home’s layout allows for it? Absolutely worth the investment.

#7: The Furniture-Style Triple Crate

Got two dogs? Or just want maximum style? A natural pine triple-bay crate on locking caster wheels looks like a stunning farmhouse sideboard — and it holds up to three dogs comfortably.

Black mesh-panel doors with ornate butterfly hinges give it that boutique furniture store energy. Three shallow drawers on top store leashes, treats, and poop bags — hidden in plain sight.

The wheels mean you can roll it for cleaning, and the mesh panels provide airflow that keeps large breeds comfortable all day.

#8: The Minimalist White Crate

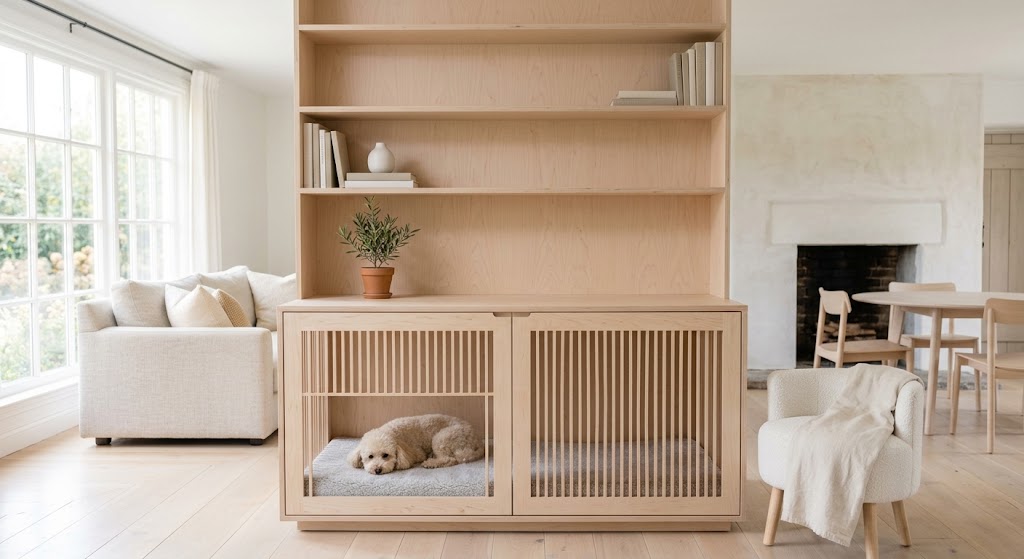
Sometimes the most beautiful design is the simplest one. A white wood-frame crate with black metal wire panels in a clean, geometric design becomes a modern side table when you add a natural wood top.

Style it with a small potted plant, a ceramic decorative object, and a chunky knit mat inside the crate. It reads as intentional, modern furniture — not a pet cage.

#9: The Sage Green Sideboard (The Instagrammable One)

This is the crate that makes people ask where you bought your furniture. A soft sage green double-door crate with black cup-pull hardware, a natural wood top, and locking caster wheels.

The color + hardware combo is everything. It’s trendy without being trendy — timeless enough that it’ll look good for years. Style the top with a blue ceramic planter, a white pillar candle, and a **small wooden tray**.

#10: The Pink Personalized Crate

If your dog is your girl, make it look like it. A standard black wire crate dressed up with a soft pink pom-pom trimmed fabric cover, a matching pink cushioned mat, and a personalized canvas toy bag reading “Property of [Your Dog’s Name].”

Add framed photos of your pup on the windowsill nearby, and suddenly this corner of your home is an entire mood. It’s fun, it’s personalized, and it celebrates your dog in the most adorable way possible.

#11: The A-Frame Modern Dog House

This one’s stunning in person. A white-painted wood frame with **dark charcoal trim** and a **clear acrylic sliding door** makes a modern A-frame dog house that looks like designer pet furniture.

The door hardware is everything — black metal latches give it that farmhouse-meets-modern edge. Place it near a **potted plant** and suddenly your entryway has an entire moment happening.

Best for: Small-to-medium dogs. You can scale up for larger breeds, but the proportions work best at this size.

#12: The Open-Plan Glass Panel Luxury Crate

Maximum transparency, maximum style. A black powder-coated steel frame with **clear acrylic panels** on all sides sits on a **plush white shag rug**. Inside: a **grey cushioned bed**, **stainless steel double-bowl feeder**, and **grey silicone mat**.

This setup says, “My dog’s comfort is part of my home’s design.” Because it is.

The Crate Size Mistake Everyone Makes (And How to Fix It)

Here’s the thing nobody tells you: bigger is NOT better with dog crates.

A crate that’s too large actually makes dogs feel less safe. Dogs want den-like spaces — just enough room to stand, turn around, and lie down. Too much open space triggers anxiety instead of calm.

The solution: Get a crate with a divider panel. You buy one larger crate upfront, then gradually open it up as your dog gets older and more comfortable.

For large breeds specifically: Most goldens and labs need at least a 42–48 inch crate. Anything smaller feels cramped. Anything much larger defeats the purpose.

Styling Your Dog Crate Like Actual Furniture

Here’s the secret that separates “dog crate” from “design statement”: treat it like furniture.

  • Top styling: Add a lamp, plant, or framed photo. Make the top surface *functional*, not just decorative.
  • Color coordination: Match your crate’s finish to other metal finishes in the room — chrome, matte black, brushed nickel.
  • Placement: Put it in a high-traffic area, not hidden in a corner. It should be part of your room’s design flow.
  • Cushion choice: Upgrade from plastic to a proper cushion in neutral tones or your room’s accent color.
  • Rug placement: Anchor the crate with a quality rug underneath. It grounds the piece and defines the space.

The Real Benefit of a Beautiful Crate

Here’s what surprised me: when the crate looks like furniture, I stopped resenting it. I stopped hiding it. I stopped feeling guilty about having it in my beautiful home.

And you know what? My dog settled faster, stayed calmer, and actually wanted to use it. Because a crate that blends into your home feels less like confinement and more like a safe, cozy den.

Your dog gets security. Your home gets beautiful furniture. And you get to stop choosing between pet-friendly and interior-design-approved.

Your Next Step

Pick one crate idea from this list that matches your aesthetic. Just one. Look at measurements, materials, and whether it fits your space and budget.

The crate that’s actually going to work is the one you’ll want to keep visible in your home. And when you find it? Your whole room changes.

So tell me — which dog crate idea are you eyeing for your space?

Dog Crate Ideas

So here’s the thing — your dog needs a safe space. A real one. But your living room? It’s been styled *too carefully* to just shove an industrial metal cage in the corner and call it a day.

I get it. For years, I thought dog crates and beautiful homes were mutually exclusive. Then I started treating my dog’s crate like actual furniture instead of an afterthought, and everything changed.

These aren’t your grandmother’s plastic crates. We’re talking pieces that look so intentional, your guests won’t even realize there’s a dog living inside. Here are the dog crate ideas that prove your home doesn’t have to look like a kennel.

Table of Contents

The Furniture-Style Dog Crate That Looks Like a Sideboard

Under-Stairs Built-In Dog Crate Pin

Okay, picture this: you walk into your living room and there’s this beautiful console table with smooth wood finishes, matte black hardware, and styled decor on top. Then a dog stretches inside and you realize… it’s a crate.

That’s the whole game right there.

A furniture-grade dog crate painted in soft neutrals — think sage green, warm gray, or off-white — with a solid wood top immediately reads as intentional design. Brands like Fable and Omlet make versions that cost what a real sideboard would, but honestly? The double-duty functionality justifies every penny.

Here’s what makes it work:

  • Stain color: Match your existing wood furniture (walnut, oak, or gray-washed finishes)
  • Top surface: Use a solid wood or thick veneer top to style with lamps, plants, or decor
  • Hardware: Black or bronze pulls tie into existing handles throughout your home
  • Interior cushion: A neutral linen or memory foam mat in gray, cream, or soft taupe
  • Size: 42–48 inches wide for golden retrievers and large breeds

Place it against a white shiplap wall or under a window — natural light hitting the wood grain makes the whole setup look elevated, not utilitarian.

Built-In Dog Crate Ideas That Blend Into Your Home

The Under-Stair Dog Crate (The Space You Forgot You Had)

Transparent Playpen : Open Crate Idea

Your hallway has this awkward dead space under the stairs. Your golden uses it as a highway to chaos every single day. This is the fix.

A custom framed door mounted flush with the staircase opening creates an instant den. Use natural maple or walnut wood for the frame, paired with black wrought-iron vertical bars that mirror your stair balusters — that matching detail ties the whole thing together.

DIY materials you’ll need:

  • 1×3 wood boards in your chosen stain
  • ⅝-inch iron rods or rebar for the door panels
  • Black iron hinges (wrought-iron style, not modern)
  • A washable floor mat in blue, gray, or patterned tile design

Mount the door frame flush with existing trim so it reads as original cabinetry, not an addition. And skip standard latches — use black iron hook-and-eye hardware to keep it looking intentional.

The Laundry Room Dog Crate (Storage + Safe Space)

Here’s something most people don’t think about: your laundry room is the *perfect* place for a built-in crate. It’s isolated from living spaces, easy to clean, and your dog gets a calm corner away from household chaos.

Mount a two-compartment crate cabinet into the lower cabinetry with steel bar fronts, a matching cushioned mat, and a built-in feeding station in one bay. Add open-face cubbies on the side for dogs who prefer less enclosure — everyone wins.

Styling touch: Add a woven basket on top for leashes and toys. Suddenly that laundry room corner looks intentional, not chaotic.

Modern Wood Dog Crate Designs for Minimal Spaces

The Minimalist Black & White Dog House

Modern Minimalist Dog Crate

Your living room is all clean lines and neutral tones. A clunky crate would destroy that vibe.

Instead, consider a modern A-frame dog house in white with charcoal trim, featuring a sliding acrylic door with black latches. It reads like a design object, not a cage. Pair it with a matching monochrome cushion, and suddenly that corner has a whole moment going on.

Pro tips:

  • Keep the interior simple — one quality cushion, zero clutter
  • Position it near natural light but not in direct sun (overheating happens fast)
  • Mount it on a non-slip rug so it doesn’t shift when your dog climbs in

The Industrial Walnut Dog Crate

If you love that farmhouse-industrial vibe, this one’s for you.

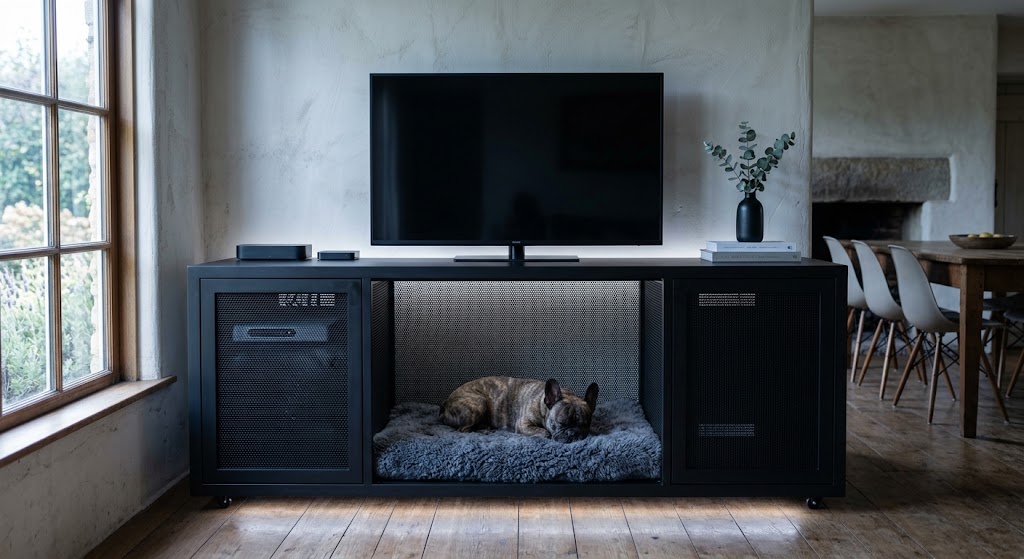
Picture a double-bay steel crate with expanded metal mesh panels, **solid walnut accents**, and a **matte black powder-coated frame**. The front doors open with a **split-door configuration** — top and bottom latch separately — so your dog can pop her head out without the whole door swinging open.

Style the top with a live-edge walnut slab — that natural edge keeps it from reading too industrial. Add a ceramic water bowl and a trailing pothos, and you’ve got a piece worth showing off.

Transparent Dog Playpens That Don’t Dominate the Room

Your golden doesn’t need a full crate — she just needs a contained play space where toys stay *contained* and paws don’t destroy your rugs.

A clear mesh playpen with a white aluminum frame practically disappears against sheer linen curtains. Light passes straight through. You see your dog. Your dog sees you. Zero visual clutter eating your room alive.

What makes this work:

  • Mesh height: 47–55 inches tall depending on your breed and jumping ability
  • Flooring: A herringbone or tile-pattern mat protects floors while looking intentional
  • Toys: Keep soft plushies inside — hard plastic scratches mesh and weakens the frame
  • Placement: Near a window for natural light and calming views

The mesh panels let air circulate freely, meaning less overheating and a happier, sleepier dog by noon. Lock the door *every* time, even when you’re home.

DIY Dog Crate Ideas on a Budget

The Wire Crate Makeover (Under $50)

You’ve already got a basic wire crate. Let’s make it look intentional.

Grab a fitted fabric crate cover in a pattern or solid color that matches your decor — blush pink, navy, sage green, whatever speaks to you. Add a matching cushion inside, and suddenly that basic crate looks curated, not chaotic.

Bonus touches:

  • A personalized canvas toy bag on the side
  • A matching dog bed (slightly oversized so it sticks out the front)
  • Framed dog photos on the wall above — two frames, staggered heights

The PVC Pipe Frame Crate (DIY Friendly)

This one takes a weekend and basic tools.

Build a frame using ½-inch PVC pipes and corner connectors, then fit clear acrylic panels into the slots. Line the bottom with **plush mattresses** in white or cream. The whole thing looks modern and modular — and you built it yourself.

Cost breakdown:

  • PVC pipe + connectors: ~$25–30
  • Acrylic panels: ~$40–60
  • Mattresses: ~$30–50
  • Total: Under $150

And it’s completely customizable to your space.

Double-Bay Crates for Multi-Pet Homes

One dog, or three? A double-bay crate sideboard handles both scenarios.

Paint it in your chosen color — soft sage, warm gray, or natural wood stain. Add a solid wood or butcher-block top, **black cup-pull hardware**, and **locking caster wheels** underneath so cleaning stays easy.

The layout:

  • Two separate compartments with mesh or bar doors
  • Optional divider panel inside if you want to section the space
  • Storage drawers on top for treats and leashes
  • Solid side panels so the crate blends into furniture, not cages

Style the top surface like a real sideboard — a ceramic bowl, a plant tray, a pretty vase. Your guests won’t even notice it’s a crate.

The Most Common Dog Crate Sizing Mistakes (And How to Fix Them)

Here’s what everyone gets wrong, and it cost me a whole weekend of stressed-out puppy energy before I figured it out.

Bigger is NOT always better with crates.

A crate that’s too large actually makes dogs feel *less* safe. Dogs are den animals. Your girl needs just enough room to stand, turn around, and stretch. That’s it. Too much open space triggers anxiety instead of calm.

The sizing breakdown:

  • Small breeds (under 30 lbs): 24–30 inches long
  • Medium breeds (30–60 lbs): 36–42 inches long
  • Large breeds (60+ lbs): 42–48 inches long
  • Height clearance: At least 6–8 inches above your dog’s head when sitting

Pro move: Get a crate with a **divider panel**. You buy one large crate upfront, then *shrink* the interior while she’s settling in. As she gets comfortable, you open it up gradually. That’s the feature-benefit-payoff right there.

Material considerations:

  • Wire crates: Best ventilation, but read “cage”
  • Plastic crates: Portable, but can feel claustrophobic for big dogs
  • Furniture-style wood crates: Most aesthetically pleasing, better for anxiety
  • Metal mesh playpens: Best for active dogs who don’t need full enclosure

Creating the Complete Dog Corner

Here’s what changed everything for me: I stopped treating my dog’s crate like dog stuff and started treating it like *home stuff*.

That meant choosing materials and colors that matched my existing decor. That meant styling the top like an actual furniture piece. That meant placing it with intention — not cramming it in a corner and hoping nobody noticed.

Your complete dog corner should include:

  • The crate itself (styled and sized right)
  • A quality cushion or mat inside
  • A feeding station nearby (matching style, low-profile mat)
  • Storage for toys and leashes (basket, bin, or built-in drawer)
  • Decor that ties it to the room (matching colors, framed photos, plants)

Done right, your dog gets a safe, calm space. You get a living room that actually looks intentional. Everybody wins.

Your Dog-Proof Home Starts Right Now

Pick one idea from this list. Just one. And actually commit to it this week.

I know it feels like a lot, but honestly? One good swap changes everything. Once I put together a crate that matched my living room instead of clashing with it, I stopped dreading the aesthetics. My dog got a calm den. I got a beautiful home. It was a total game-changer.

So which dog crate idea are you going to try first? Tell me in the comments — I’m genuinely curious which setup speaks to you.

Ultimate Collection of Heartwarming Dog Quotes

Dogs have a unique way of touching our hearts and changing our lives. Here are 50 inspiring and heartwarming dog quotes that celebrate the special bond between humans and their canine companions.

50 Heartwarming Dog Quotes

  1. “A dog is the only thing on earth that loves you more than he loves himself.” – Josh Billings
  2. “The greatest fear dogs know is the fear that you will not come back when you go away.” – Stanley Coren
  3. “Dogs have a way of finding the people who need them, and filling an emptiness we didn’t even know we had.” – Thom Jones
  4. “A dog’s love is pure sunshine should always be our aspiration.” – Alfred Lord Tennyson
  5. “Every dog has its day.” – Unknown
  6. “Dogs are not our whole life, but they make our lives whole.” – Roger Caras
  7. “The world would be a nicer place if everyone had the ability to love as unconditionally as a dog.” – M.K. Clinton
  8. “Dogs are better than human beings because they know but do not tell.” – Emily Dickinson
  9. “A puppy is but a dog, plus high spirits, and minus sense.” – Agnes Repplier
  10. “Dogs cannot lie. People can, but dogs cannot.” – Unknown
  11. “In dogs, we find a purpose, devotion, and pure, unconditional love.” – Unknown
  12. “Happiness is a warm puppy.” – Charles Schulz
  13. “Dogs are my favorite people.” – Richard Dean Anderson
  14. “The dog is a gentleman; I hope to go to his heaven not man’s.” – Ambrose Bierce
  15. “My dog is my life. If I didn’t have my dog, I don’t know what I would do.” – Unknown
  16. “A dog teaches a boy fidelity, perseverance, and to turn around three times before lying down.” – Robert Frost
  17. “Dogs never bite me. Just humans.” – Marilyn Monroe
  18. “Acquiring a dog may be the only opportunity a human ever has to choose a relative.” – Mordecai Wyatt Johnson
  19. “A dog is for life, not just for Christmas.” – Unknown
  20. “Dogs are not ‘just’ animals. They are beings with emotions, intelligence, and personalities.” – Unknown
  21. “Somewhere in every life a little dog fur must fall.” – Unknown
  22. “A dog’s purpose is to love and be loved.” – Unknown
  23. “Dogs are the only ones who love you more than they love themselves.” – Unknown
  24. “The more I see of humans, the more I adore my dog.” – Unknown
  25. “A dog doesn’t care how much money you have. A dog won’t care if you are famous.” – Unknown
  26. “Dogs have given us their absolute all. We are the center of their universe.” – Roger Caras
  27. “To love someone who doesn’t love you back takes courage. To love your dog is no effort at all.” – Unknown
  28. “Dogs are like angels sent to us in furry coats.” – Unknown
  29. “If you don’t have a dog, at least one, there is not necessarily anything wrong with you, but there may be something wrong with you.” – Roger Caras
  30. “A dog’s love is unlike any other love. It is pure, honest, and unconditional.” – Unknown
  31. “I think I am getting a dog, which is the most logical thing to do if you’re missing love in your life.” – Kasey Chambers
  32. “Dogs never made a human being wiser, but they have often made a human being happier.” – Unknown
  33. “My little dog – a heartbeat at my feet.” – Edith Wharton
  34. “A dog is the best way to measure how much a human can love someone other than themselves.” – Unknown
  35. “Dogs are always there to help you find your smile again if you’ve lost it.” – Unknown
  36. “The dog is a missionary in disguise.” – Ulysses S. Grant
  37. “Dogs have a tendency to interpret every act of a human being as a potential sign of love.” – Unknown
  38. “In the eyes of a dog, you will see pure, unbiased love.” – Unknown
  39. “A dog is the only creature that loves you unconditionally, no matter what.” – Unknown
  40. “Dogs are not objects, toys, or accessories – they are living beings.” – Unknown
  41. “A dog’s greatest gift is their constant, unconditional love.” – Unknown
  42. “In a dog’s world, everything you do is right.” – Unknown
  43. “Dogs are the universe’s way of telling us we’re not alone.” – Unknown
  44. “A dog in your lap is better than a therapist in your wallet.” – Unknown
  45. “The love of a dog is something special, a bond that can never be broken.” – Unknown
  46. “Dogs come into our lives to teach us about love, loyalty, and friendship.” – Unknown
  47. “A dog doesn’t care about your past mistakes. A dog only cares about your love.” – Unknown
  48. “In the presence of a dog, you are always home.” – Unknown
  49. “A dog’s love is a reflection of the best parts of ourselves.” – Unknown
  50. “No matter how bad your day was, a dog will always be happy to see you.” – Unknown
  51. “A dog is not just a pet; they are a family member, a protector, and a best friend.” – Unknown

Conclusion

These 50 dog quotes remind us why dogs are so special. They love unconditionally, stay loyal through thick and thin, and bring joy to our everyday lives. Whether you’re a long-time dog owner or thinking about getting your first furry friend, let these quotes inspire you to appreciate the incredible bond you share with your canine companion.

Your dog doesn’t just live in your house – they live in your heart.

Dog Trot Floor Plans: 10 Layouts That Actually Work

Your dog comes barreling in from the yard — wet paws, muddy belly, tail going like a metronome — and leaves a trail straight across your clean floors. Most floor plans were never designed for a 70-pound fur tornado. Dog trot homes were. That open breezeway running through the center of the house acts as a built-in mudroom, an airflow channel, and a natural dog zone all at once. Here are 10 dog trot floor plans worth your scroll.


1: The Classic Two-Pen Dogtrot

This is the original. Two separate “pens” — one for living, one for sleeping — joined by an open-air breezeway down the middle. The passage stays markedly cooler than the enclosed rooms, so your dog claims that shaded corridor as her personal kingdom all summer. Recreate it with: hand-hewn or board-and-batten siding, a metal or shake roof, and wide-plank porch decking. Pro tip: Orient the breezeway to catch your region’s prevailing wind, and pour a sealed concrete or stone floor in the passage — never wood — for easy hose-downs.

2: The Glass-Walled Modern Breezeway

A contemporary take where floor-to-ceiling glass lines the connector, flooding the pass-through with light and giving your dog panoramic yard views without tracking mud into the living wing. Recreate it with: large-format slate or porcelain tile in the breezeway, slim black or bronze window frames, and warm wood accents to soften the glass. Pro tip: Tile or slate handles wet paws far better than hardwood here — it wipes clean in seconds.

3: The Covered Porch Dogtrot

A full-length covered breezeway turns the center of the home into a shaded outdoor room. Cross-ventilation keeps it cool, so your dog stays comfortable without you constantly refilling the water bowl. Recreate it with: treated hardwood decking, black powder-coated railings, and simple outdoor seating. Pro tip: Leave both sides completely open — closing them in defeats the passive cooling the whole design is built around.

4: The Metal-Clad Farmhouse Dogtrot

Corrugated or standing-seam metal siding paired with a low-pitched roof gives a rugged, low-maintenance shell. The wood-deck breezeway between the two volumes becomes the dog’s pass-through zone. Recreate it with: galvanized or charcoal metal panels, a warm cedar-toned deck, and matte black hardware. Pro tip: A deep roof overhang (at least 24 inches) shades the deck so paws don’t burn on hot days.

5: The Forest Retreat Dogtrot

Two cedar-clad pavilions linked by an open breezeway, nested into the trees. Your dog gets a natural decompression corridor between zones, and mud stays contained to one entry point. Recreate it with: horizontal tongue-and-groove cedar in a warm stain, exposed rafter tails, and large fixed-pane windows flanking the breezeway. Pro tip: Keep the breezeway floor as brick pavers or sealed concrete for stress-free cleanup after forest runs.

6: The Double-Height Loft Dogtrot

A vaulted ceiling with skylights over the breezeway makes a compact footprint feel huge. The open corridor flows from living to kitchen with no walls breaking the path — a clear runway for your dog and full sightlines for you. Recreate it with: large-format concrete tile (scratch-resistant and easy to clean), tongue-and-groove ceilings, and a loft tucked above one pen. Pro tip: Leave a door-free nook at the end of a cabinet run as a built-in dog station — bowl, leash hook, all tucked away.

7: The Courtyard Dogtrot

Instead of a straight pass-through, the breezeway opens onto an enclosed courtyard, giving your dog a safe, contained outdoor space framed by the house itself. Recreate it with: an L- or U-shaped layout, a paved or gravel courtyard, and wide sliding doors connecting both wings to the center. Pro tip: A gravel or stone courtyard drains fast and stays mud-free far better than grass in a high-traffic dog zone.

8: The Screened Breezeway Dogtrot

A screened-in center passage keeps the airflow and openness of a classic dogtrot while keeping bugs out and your dog safely contained. Recreate it with: full-height screen panels, a sturdy screen door at each end, and a wipeable floor. Pro tip: Choose heavy-duty pet-resistant screen mesh so an excited dog doesn’t push through it.

9: The Single-Story L-Shaped Dogtrot

An accessible, all-on-one-level take that swaps the straight breezeway for an open, covered connector at the bend of an L. Great for older dogs (and owners) who’d rather skip stairs. Recreate it with: a continuous low-pile or sealed floor throughout, wide doorways, and a covered link between the two wings. Pro tip: Keep thresholds flush so senior dogs and those with joint issues move between zones easily.

10: The Compact Cabin Dogtrot

A small-footprint cabin version that proves you don’t need acreage. Two tidy rooms, one narrow breezeway, big impact. Perfect for a weekend place or a downsized home where the dog still needs her own pass-through. Recreate it with: simple wood or metal cladding, a single covered breezeway wide enough for comfortable passage, and built-in storage along one pen wall. Pro tip: Even here, keep the breezeway at least 8–10 feet wide so it works as a room, not a wind tunnel.


The One Mistake That Costs You Later

The biggest dog trot regret is building the breezeway too narrow. Under about 10 feet, it stops being a usable room and starts funneling wind like a tunnel. Orient it perpendicular to your area’s dominant wind, size your connecting rooms with the dog in mind, and always choose a hard, sealed floor for the passage. Get those three right and the layout pays you back every rainy day.

Your Floors Deserve a Break — and So Do You

A dog trot floor plan isn’t just charming architecture; it’s a layout that works with how your dog actually lives. Pick the version that fits your land and your climate, keep that breezeway open and easy to clean, and you’ll have a home that breathes better, stays cleaner, and gives your dog a space that’s genuinely her own.