DIY Dog Run Ideas

5 DIY Dog Run Ideas That Save Your Yard (And Your Sanity)

You know that moment when your golden just launched herself through your freshly mulched flower bed for the third time this week, and now she’s standing there looking proud, covered in dirt, tail wagging like she just won a medal? Yeah. That was me last Tuesday.

My dog Winnie has exactly two speeds: dead asleep and full-throttle zoomies. And my backyard used to look like a construction site because of it. Bare patches, dug-up flower beds, one very confused rosebush that never quite recovered.

The fix wasn’t more training. It wasn’t less exercise. It was a proper DIY dog run — a dedicated zone where she could go absolutely feral without murdering the landscaping. Below are five of the best DIY dog run setups I’ve found, sized for everything from a tiny side yard to a full backyard, with the exact materials and dimensions you need to build each one.

#1: The Classic Side-Yard Chain-Link Run

The Classic Side-Yard Chain-Link Run

The workhorse. If you’ve got a strip of unused space between your house and the fence, this is your cheapest, sturdiest, most dog-proof option. Nothing fancy. Nothing pretty. Just a fully enclosed zone where your dog can be outside without you white-knuckling every squirrel sighting.

Materials: Galvanized chain-link fence panels (6 ft tall for large breeds, 5 ft for medium), metal fence posts, post-hole concrete mix, a walk-through gate with latch, and either pea-free decomposed granite or synthetic pet turf for the ground surface. Rough cost: $400–$800 depending on size.

Sizing: Aim for a run at least 4 ft wide by 20 ft long for a medium dog, or 6 ft by 30 ft for a large breed. Anything shorter and your dog paces instead of runs.

What to do: Dig post holes 24 inches deep, set the corner and gate posts in concrete, and let them cure for 48 hours before attaching the chain-link mesh. Grade the ground with a one-inch slope every four feet so water drains out instead of pooling. Skip pea gravel — it gets stuck in paw pads and flings everywhere. Decomposed granite or pet turf is the way.

Pro Tip: Add a shade sail or plant a fast-growing tree at the far end. Even the toughest chain-link run turns into a solar oven in July if there’s no shade.

#2: The Enclosed Turf Run With Net Fencing (For Smaller Yards)

The Enclosed Turf Run With Net Fencing

Chain-link isn’t always the right vibe. If you rent, have HOA rules, or just want something less industrial-looking, a net-fenced turf run is your friend. Lightweight, removable, and way better looking than metal panels.

Materials: PVC or aluminum pipe framing (adjustable connectors make this way easier), heavy-duty garden netting with small openings (1-inch mesh or less so paws don’t get stuck), UV-stabilized zip ties, ground stakes, and interlocking artificial turf tiles for the floor.

Sizing: A 10×10 ft footprint works for small breeds. Scale up to 12×20 ft for medium dogs. The whole thing can be assembled in a single afternoon with two people and a rubber mallet.

What to do: Frame the perimeter first with PVC pipe (2-inch diameter for stability), then drape and secure the netting with zip ties every 6 inches along the frame. Anchor the base to the ground with U-shaped landscape stakes so nothing lifts in wind. Lay the turf tiles inside — no glue needed, they interlock.

Pro Tip: If your dog is a chewer, run a PVC-coated cable along the bottom edge of the netting. It stops the classic “chew through the bottom and escape” move that ruins a lot of budget net runs.

#3: The Rooftop or Balcony Dog Run (For Apartment Dwellers)

The Rooftop or Balcony Dog Run

Living in an apartment doesn’t mean your dog is stuck with 15-minute leash breaks. A rooftop or balcony dog run gives them a real outdoor zone that’s actually theirs, without ever leaving the building.

Materials: Interlocking artificial turf tiles (perforated drainage backing is essential), an outdoor pen or modular fence panels (usually 30–36 inches tall), landscape fabric underlayment, and a small watering can or spray bottle for daily rinse-down.

Sizing: Even a 6×6 ft footprint works for small breeds. If you have a full rooftop, 10×15 ft turns into a proper mini-park.

What to do: Lay landscape fabric first to protect the underlying deck surface, then click together the turf tiles like puzzle pieces on top. Set up the pen around the perimeter for containment — especially critical on balconies or unfenced rooftops. Rinse the turf with water and a splash of enzymatic cleaner once a week to keep odor down.

Pro Tip: Get turf tiles with drainage holes on the underside, not solid backing. Otherwise urine pools underneath and your rooftop becomes a chemistry experiment by August.

#4: The Elevated Deck-Style Wooden Run

The Elevated Deck-Style Wooden Run

For anyone who wants their dog run to look like an intentional part of the yard — not a cage bolted onto the side of the house — an elevated wooden run doubles as landscaping. Bonus: elevation solves half the drainage problems built-in.

Materials: Pressure-treated 4×4 posts for the frame, cedar or composite decking for the platform surface, 2×2 vertical rails for the sides (spaced no more than 3 inches apart for medium dogs, 2 inches for small), a hinged gate, and outdoor wood stain in a dark walnut or espresso finish.

Sizing: An elevated run doesn’t need to be huge — an 8×12 ft platform raised 8–10 inches off the ground gives your dog a proper “deck” feel while staying manageable to build.

What to do: Build the base frame first with 4×4 posts and 2×6 joists spaced 16 inches apart. Screw the decking down with a small 1/8-inch gap between planks for drainage. Frame the vertical rails around the perimeter, and add a hinged gate on the side closest to the house. Seal everything with a waterproof outdoor stain — that’s what makes the difference between a five-year run and a fifteen-year run.

Pro Tip: Add a shallow ramp at one corner for older dogs, puppies, or short-legged breeds. A 30-degree ramp made from the same decking is a five-minute add-on that saves a lot of joints.

#5: The Long Zoomie Alley With Rinse Station

The Long Zoomie Alley With Rinse Station

Some dogs don’t need a room. They need a runway. If your dog is a sprinter — huskies, greyhounds, working Labs, high-drive shepherds — the classic square run isn’t long enough. This one goes long and narrow, ending in a paw-wash station so muddy zoomies don’t become muddy floors.

Materials: Cedar fence posts (6 ft tall), white vinyl-coated wire mesh fencing (blends better with landscaping than chain-link), compacted decomposed granite or short-cut warm-season turf like Bermuda for the floor, and a garden hose bib mounted to the closing gate post.

Sizing: Go long — 50 to 80 feet of straight running length is the goal. Width can be as tight as 6–8 feet. The longer, the better; sprinting dogs need real distance to actually stretch out.

What to do: Set posts every 8 feet along both sides, sunk 24 inches into the ground with concrete footings. Stretch the vinyl-coated wire mesh between posts and secure with heavy-duty fence staples. Grade the run with a slight slope (1 inch per 4 feet) so water drains toward one end. At the exit end, mount a hose bib to a cedar post and build a shallow gravel trough underneath for a quick paw rinse before your dog re-enters the house.

Pro Tip: Plant Bermuda or zoysia grass instead of Kentucky bluegrass. High-traffic warm-season grasses hold up to sprint claws way better and recover faster from bare patches.

The One Mistake That Ruins Every DIY Dog Run

Most people build the run and then notice they have a drainage problem. My neighbor spent $700 on a beautiful cedar run last summer. After the first rain, it turned into a mud swamp — her golden was tracking brown paw prints across white carpet for months.

Here’s the fix nobody puts in the tutorials: grade the ground before you build. Aim for a one-inch slope for every four feet of run length. That’s just enough angle for water to flow out instead of pooling in. Use a carpenter’s level and a bag of packed gravel to shape the base before a single post goes in.

The other big one: skip pea gravel. It wedges into paw pads, gets flung across the yard, and dogs end up limping. Decomposed granite compacts firmer, stays cooler in the sun, and doesn’t get tracked into the house.

And one more thing — build for your dog’s actual size, not their current size. A Great Dane puppy needs the same run a full-grown Dane will use in a year. Don’t undersize the build and regret it in six months.

Your Yard Deserves This

Pick one idea. Not all five. Just the one that fits your yard, your budget, and your dog’s energy level, and knock it out this weekend. The relief of watching your dog burn 40 minutes of zoomie energy in a space that isn’t your flower bed is worth every hour of build time.

While you’re at it, check out our 5 dog spaces in the house for indoor companion ideas — pair a solid outdoor run with a cozy indoor nook and your dog basically has a two-home setup, which honestly is more real estate than most humans I know.

Which one is going in your yard first?

Yeast Infection in Dogs

5 Signs Your Dog Has a Yeast Infection (And Exactly What to Do)

It’s 2 AM. Your dog is scratching so hard the whole bed is shaking. You reach over half-asleep, catch a whiff of something that smells like stale bread and corn chips, and suddenly you’re very, very awake.

Welcome to a yeast infection.

Roughly 15% of dogs develop a yeast infection every single year, and the average vet visit for one runs about $300 — more if it’s been left to fester into a secondary bacterial infection. The itchy truth is that every dog carries Malassezia pachydermatis, a naturally occurring yeast, on their skin and ears already. It only becomes a problem when the balance tips — allergies, antibiotics, moisture, stress — and suddenly your dog is a walking bakery.

Below are the five warning signs every dog owner should know, where they show up on the body, and exactly what to do about each one. Catch it in the first 72 hours and you’re looking at a week of treatment. Miss it, and you’re looking at six to eight.

#1: Ear Scratching, Head Shaking, and That Stale-Bread Smell

Ear Scratching, Head Shaking, and That Stale-Bread Smell

The ears are ground zero for yeast infections — the warm, dark, moisture-trapping canal is basically a yeast spa. If your dog is shaking her head 20+ times a day, tilting her head to one side, or scratching at her ears until they’re raw, this is the number-one suspect.

What to look for: Thick, dark brown or coffee-ground-like discharge inside the ear flap. A musty, fermented, “old bread” smell when you lift the ear. Red or inflamed skin along the canal.

Who’s at highest risk: Floppy-eared breeds — Cocker Spaniels, Basset Hounds, Labs, Goldens, Beagles. That gorgeous ear flap seals in moisture and heat every time they swim or bathe.

What to do: Clean the ears with a vet-recommended ear cleaner solution (avoid Q-tips — they push debris deeper; use cotton pads). If the discharge is heavy or the ear is very red, book a vet visit within 48 hours. Most confirmed ear yeast infections are treated with medicated ear drops (often combined with an antibiotic) applied twice daily for 10–14 days.

Pro Tip: After every bath and swim, gently dry the ear canal with a cotton pad within 30 minutes. This one habit prevents the majority of recurring ear infections.

#2: Constant Paw Licking and “Frito Feet”

If your dog is licking her paws for 15 minutes or more — especially between the toes — and her feet smell exactly like the bottom of a corn chip bag, yeast has set up shop.

What to look for: Brown or reddish staining in the fur between the toes. A strong, savory smell when you press the fur near the pads. Redness on the underside of the paw. Obsessive nighttime licking.

What’s driving it: Environmental allergies are the biggest trigger — grass, pollen, mold. Every walk exposes the thin paw skin, tiny inflammation opens the door, and yeast colonizes within 3–5 days. The licking adds more moisture and feeds the cycle.

What to do: A twice-daily paw soak in a diluted mixture of one part 3% hydrogen peroxide to two parts water for 3–5 minutes. Pat completely dry between the toes afterward — “bone dry” is the goal. Most dogs stop licking within 48 hours. For chronic cases, your vet may recommend an oral antifungal like ketoconazole or fluconazole.

Pro Tip: Keep a portable paw washer or a small basin by the front door. A 30-second post-walk rinse removes 90% of the allergens driving the infection in the first place.

#3: Greasy, Smelly Skin Folds That Wipe Away Brown

Wrinkly breeds like Bulldogs, Shar-Peis, Pugs, and Mastiffs live with dozens of little moisture pockets on their face, neck, and tail. When those folds don’t get cleaned and dried daily, yeast moves in fast.

What to look for: Slick, greasy patches inside the folds. Brown or darkened skin. A musty, sour odor when you spread the fold open. In more severe cases, raw red skin and hair loss along the crease.

What to do: Clean each fold daily with an unscented dog-safe wipe, then dry completely — a soft cloth or even a hairdryer on cool setting works. For active infections, your vet will typically prescribe a chlorhexidine or ketoconazole shampoo used twice a week for 4–6 weeks, with the lather left on for 10 full minutes before rinsing.

Pro Tip: Set a timer on your phone. “Fold check” every night at the same time (right after dinner works well) turns it into a two-minute habit instead of a Saturday-morning-crisis situation.

#4: Scooting, Groin Redness, or Under-the-Tail Irritation

The groin, armpits, and area under the tail are the forgotten yeast zones. They’re warm, they’re sweaty, they rub against each other constantly, and they’re easy to miss during a normal petting session.

What to look for: Scooting across the carpet (yes, sometimes it’s the anal glands — sometimes it’s yeast). Sitting with legs spread wider than usual to air the groin out. Sticky, moist patches under the armpits. A yeasty odor near the tail base. Redness or discoloration in the perivulvar area in female dogs, especially spayed or overweight ones.

What to do: Book a vet exam within 48 hours if the perivulvar area is involved — symptoms overlap with urinary tract infections, vaginitis, and life-threatening pyometra. Do not self-diagnose these. For groin and armpit yeast confirmed by your vet, topical antifungal wipes plus a low-carb diet make a noticeable difference within 7–10 days.

Pro Tip: Overweight dogs and dogs with underactive thyroids are at highest risk in this zone. If your dog is battling recurrent groin yeast, ask your vet for a full thyroid panel — the root cause may be hormonal.

#5: Recurring Infections Every Few Months (The Root-Cause Problem)

Here’s the honest truth: if your dog gets a yeast infection, clears it with medication, and gets another one three months later, the infection isn’t the problem. It’s a symptom.

The five real root causes:

Food allergies (40% of chronic cases). High-carb kibble with chicken, beef, wheat, corn, or soy is the top offender. Try an 8–12 week elimination diet using a novel protein — duck, venison, rabbit.

Antibiotic overuse. Antibiotics wipe out gut bacteria along with the bad, leaving yeast unchecked. Always run a probiotic alongside antibiotic courses and for a month afterward.

Environmental allergies. Pollen, grasses, and molds inflame the skin barrier every spring and summer. If infections spike July–August every year, this is your culprit.

Underlying health conditions. Hypothyroidism, Cushing’s disease, and diabetes all suppress the immune system. Bloodwork rules these in or out.

Moisture and heat. Yeast thrives above 80°F and 60% humidity. Poor drying after baths and swims is the single most preventable trigger.

What to do: Pick one root cause to address per month rather than trying everything at once. A vet-guided elimination diet, a good probiotic (or plain unsweetened yogurt at 2 tablespoons per 20 lbs of body weight), and a habit of thorough drying after every wet activity handle about 80% of recurring cases.

Pro Tip: Coconut oil is your friend — lauric acid in it fights yeast both topically and internally. Add 1 tsp per 10 lbs of body weight to food daily, and rub a small amount into dry paws or fold areas after cleaning. Most dogs show noticeable improvement within 2–3 weeks.

When to Skip the Home Remedies and Go Straight to the Vet

Some red flags aren’t worth waiting on. Call your vet the same day if you see any of these:

Bleeding from scratched-open sores. Fever above 102.5°F. Lethargy or loss of appetite alongside the itching. Head tilt or balance problems (may indicate the infection has moved into the inner ear). Blood-filled swelling on the ear flap (a hematoma from violent head shaking — needs surgical drainage). No improvement after two weeks of at-home treatment.

Yeast infections are easily treatable when caught early. They become expensive, painful, and sometimes permanent (chronic ear infections can cause hearing loss) when they’re ignored. Don’t wait for the smell to knock you out of a chair.

Your Next Step

Pick one change today. Not five. One.

Maybe it’s swapping the chicken kibble for a novel-protein diet. Maybe it’s adding a paw rinse by the door. Maybe it’s a nightly fold check for your wrinkly Bulldog. Small, consistent habits crush recurring yeast infections faster than any six-week medication course, because they attack the moisture-and-inflammation cycle at the source.

And while you’re fixing the itch, check out our best service dog breeds guide for insight into the breeds most affected by allergies and coat-related infections — the same knowledge helps you tailor care to your own dog’s risk profile.

This article is informational and should not replace veterinary advice. Always consult your vet before starting new treatments, supplements, or dietary changes, especially for dogs with existing health conditions.

Best Big Dog Breeds

5 Best Big Dog Breeds That Are Gentle Giants and Family Favorites

Everyone wants a dog. But some of us? We want a lot of dog.

You know the type. The one that leans against your leg and nearly knocks you over. The one whose water bowl is basically a small bathtub. The one that scares the delivery driver into leaving packages at the end of the driveway even though he’s just standing there wagging his enormous tail.

My aunt had a Newfoundland named Bruno who tipped the scales at 165 pounds and thought he was a lap dog. Every visit ended with all 165 pounds of him draped across whoever sat on the couch first. Total gentle giant. Total love.

If you’re dreaming of a big dog but worried about temperament, drool, or fitting one into your family life, this list is for you. These are the five best big dog breeds known for their calm, affectionate, family-first personalities — plus the honest realities of what it’s actually like to live with them.

#1: Great Dane — The Apollo of Dogs

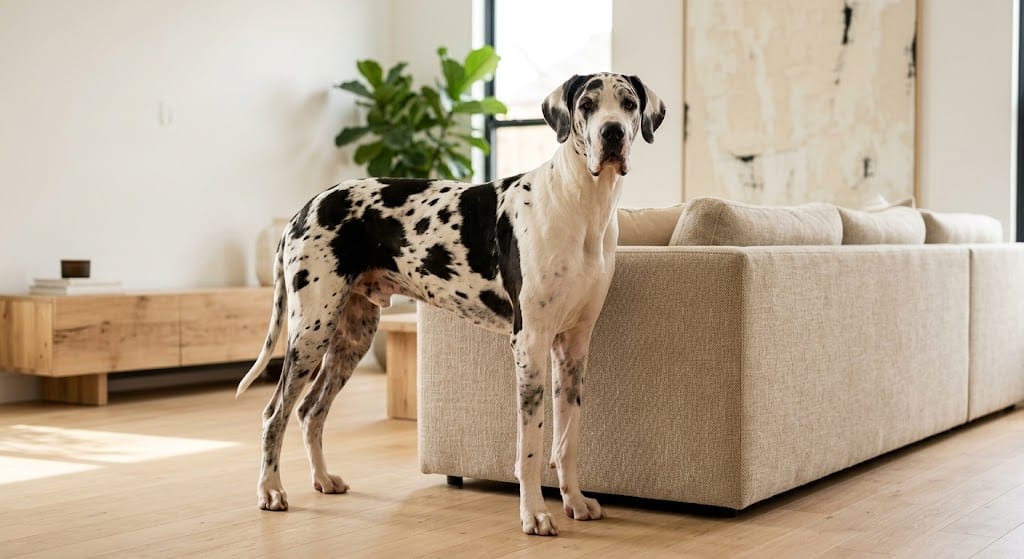
Standing up to 32 inches at the shoulder and easily eyeballing you from across the dinner table, the Great Dane is arguably the most iconic big dog on the planet. And despite the towering height, they’re some of the most laid-back dogs you’ll ever meet.

Height: 28–32 inches | Weight: 110–175 lbs | Lifespan: 7–10 years

Great Danes were originally bred as boar hunters, but modern Danes are more “professional couch occupant.” They’re gentle, playful, deeply people-oriented, and typically fantastic with children when raised alongside them. They don’t bark much, don’t need marathon exercise, and often behave more like a giant, low-energy roommate than a dog.

Best for: Families with space (a small apartment is not it), patient owners who can afford giant-breed food and vet bills, and anyone who wants a dog that looks intimidating but greets guests with a wagging tail.

Watch for: Bloat is the biggest health concern in Danes and other deep-chested giants — feed multiple small meals daily, use a slow-feeder bowl, and avoid vigorous exercise around mealtimes. Also, that heartbreakingly short lifespan is real. Loving a Great Dane is a shorter but incredibly rich commitment.

Pro Tip: Start training early and firmly. A 30-pound Great Dane puppy who jumps up is cute. A 130-pound adult who jumps up is a broken hip.

#2: Bernese Mountain Dog — The Swiss Cuddle Machine

Bernese Mountain Dog

If a dog could be described as “a warm blanket that follows you around,” it’s the Bernese Mountain Dog. That tri-color coat, those soulful eyes, that goofy grin — Berners are basically walking Instagram content, and they know it.

Height: 23–27 inches | Weight: 70–115 lbs | Lifespan: 7–10 years

Bred in the Swiss Alps as farm and cart dogs, Berners are hardworking, calm-natured, and deeply loyal. They form intense bonds with their families and tend to shadow their favorite person around the house all day. They’re patient with children, tolerant of other pets, and generally friendly with strangers once introduced.

Best for: Cool climates (that thick double coat is a real handicap in heat), families who want a cuddly dog with just enough working-dog structure to enjoy hikes and outdoor time, and anyone who doesn’t mind constant, gentle shadowing.

Watch for: Berners are notoriously prone to cancer and joint issues. Buy only from health-tested lines that screen for hips, elbows, heart, and von Willebrand disease. Their lifespan is heartbreakingly short — make every year count.

Pro Tip: Get on a good grooming rhythm from puppyhood — twice-weekly brushing and monthly baths. Berners shed like it’s their full-time job, and staying on top of it saves your house.

#3: Newfoundland — The Water Rescue Bear

Newfoundland

Nicknamed “Nana dogs” after the famous nanny in Peter Pan, Newfoundlands are giant, sweet-natured water rescue dogs who genuinely think of themselves as protectors of small humans. If a dog was designed by committee to be the perfect family teddy bear, it would look exactly like a Newfoundland.

Height: 26–28 inches | Weight: 100–150 lbs | Lifespan: 9–10 years

Newfies were bred to jump off Canadian fishing boats and retrieve people from freezing water. Their webbed feet, waterproof double coat, and incredible strength make them born swimmers — and their patience with kids is basically legendary. They’re slow-moving, deeply affectionate, and almost impossible to provoke.

Best for: Families with young children, homes near water, and owners who don’t mind a whole lot of drool and a whole lot of shedding. Also excellent for people who’ve always wanted a large, warm rug that follows them around.

Watch for: The drool situation is real. Keep “slobber towels” in every room. Newfoundlands also overheat easily — they’re built for cold water, not August afternoons. Provide plenty of shade, water, and air conditioning.

Pro Tip: If you live near a lake, ocean, or river, let your Newfie swim regularly. It’s incredible exercise for their joints, and they will love you forever for it.

#4: Saint Bernard — The Alpine Rescue Icon

Saint Bernard

Barrel of brandy optional. The Saint Bernard is the classic gentle giant — originally bred by Swiss monks at the Great St. Bernard Pass to find travelers lost in the snow. That legendary calm, patience, and rescue instinct still runs strong in the modern Saint Bernard.

Height: 26–30 inches | Weight: 120–180 lbs | Lifespan: 8–10 years

Saint Bernards are gentle, protective, and deeply devoted to their families. They’re not high-energy — a couple of good walks a day and some backyard puttering is plenty — but they need to be part of family life. Left alone too much, they get sad, and a sad Saint is a giant sad experience for everyone.

Best for: Families with kids of all ages, cooler climates, and homes with enough square footage to accommodate 150 pounds of dog spread across the living room floor.

Watch for: Massive drool. Massive shedding. And massive food and vet bills. Also, brachycephalic-adjacent breathing issues in some lines — look for a breeder producing dogs with proper muzzle length and open airways.

Pro Tip: Get pet insurance the day you bring a Saint home. Giant-breed emergency vet visits can hit five figures fast, and insurance turns catastrophic bills into manageable ones.

#5: Irish Wolfhound — The Tallest of Them All

Irish Wolfhound

Standing eye-to-eye with an average adult, the Irish Wolfhound is the tallest dog breed in the world. Originally bred to hunt wolves and elk, today they’re one of the most laid-back, quiet, dignified dogs you can invite into a family home.

Height: 30–35 inches | Weight: 105–180 lbs | Lifespan: 6–8 years

Wolfhounds are sighthounds — they’re built for short bursts of speed followed by long hours of luxurious lounging. They’re calm indoors, gentle with children, and remarkably quiet for their size. Think of them as a horse-sized greyhound with the temperament of a poet.

Best for: Owners who want an impressive, gentle companion; homes with fenced yards (that sighthound prey drive is real); and people willing to accept a heartbreakingly short average lifespan in exchange for one of the most magnificent dogs on Earth.

Watch for: The shortest lifespan on this list. Wolfhounds are also prone to bloat, heart disease (particularly dilated cardiomyopathy), and bone cancer. Only buy from breeders doing full cardiac and orthopedic screening.

Pro Tip: Puppies grow fast — too fast. Feed a large-breed puppy formula and avoid over-exercising them until their growth plates close around 18–24 months. Slow, correct growth = fewer joint problems later.

The One Mistake People Make With Big Dogs

Everyone falls in love with the size. Almost nobody plans for the space, cost, and time commitment that comes with it.

A big dog needs a big car (that Prius isn’t going to cut it). A big dog eats big food — budget $80–$150 a month, minimum. A big dog needs big vet care — anesthesia, X-rays, and medications all scale with body weight. And a big dog leaves a big footprint on your daily life, from the dog bed that eats a whole corner of the living room to the crate that’s the size of a small piece of furniture (see our dog crate furniture guide for how to make that work in a real home).

The fix: plan the logistics before you fall in love with the puppy. Measure the vehicle. Price the food. Get quotes on pet insurance. Look at your yard, your flooring, and your daily schedule with brutal honesty. Big dogs are worth every dollar and every square foot — but only if you’re prepared for both.

The Bottom Line

Big dogs aren’t for everyone. They’re expensive, they don’t live as long as smaller breeds, and they take up real physical and emotional space in your home. But if you have the room, the resources, and the heart for it? There is nothing on Earth like coming home to 150 pounds of dog who has been waiting all day just to lean on your leg.

Pick the breed whose temperament, coat, and climate needs match your life — not just the one that photographs best. And when you find your gentle giant, give them the space, care, and love that a dog their size absolutely deserves.

Looking to give your big dog their own corner? Check out our 5 dog spaces in the house guide for ideas that scale up beautifully.

Which one is calling your name?

5 Dog Spaces in the House That Actually Look Like Home Decor

Your dog just claimed the entire couch. Again. The one you spent three paychecks and a full weekend of decision paralysis picking out.

My golden Winnie does the same thing — she has three dog beds, a crate, and roughly $200 of enrichment toys, and yet somehow the only spot she wants is exactly where I am trying to sit. I get it. The truth is, dogs don’t just want a bed. They want a space. A little corner of the house that feels like theirs, near where the family actually hangs out.

The good news? Building a proper dog space in your house doesn’t require a full renovation or a spare bedroom. It takes one thoughtful corner, the right materials, and a little intentional styling. Below are five of the best dog space ideas I’ve found — each one gives your pup a real den while blending seamlessly into your existing home.

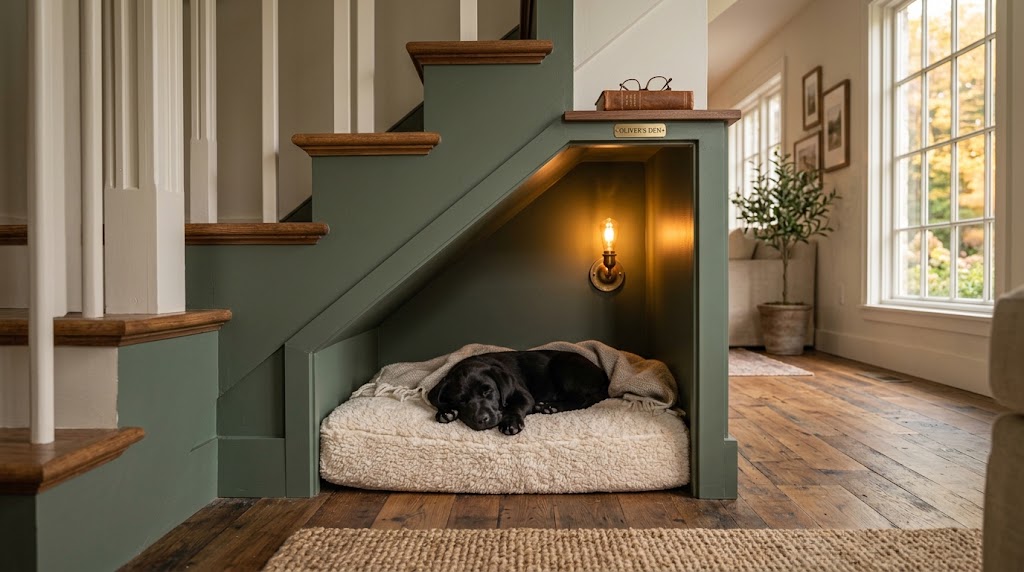
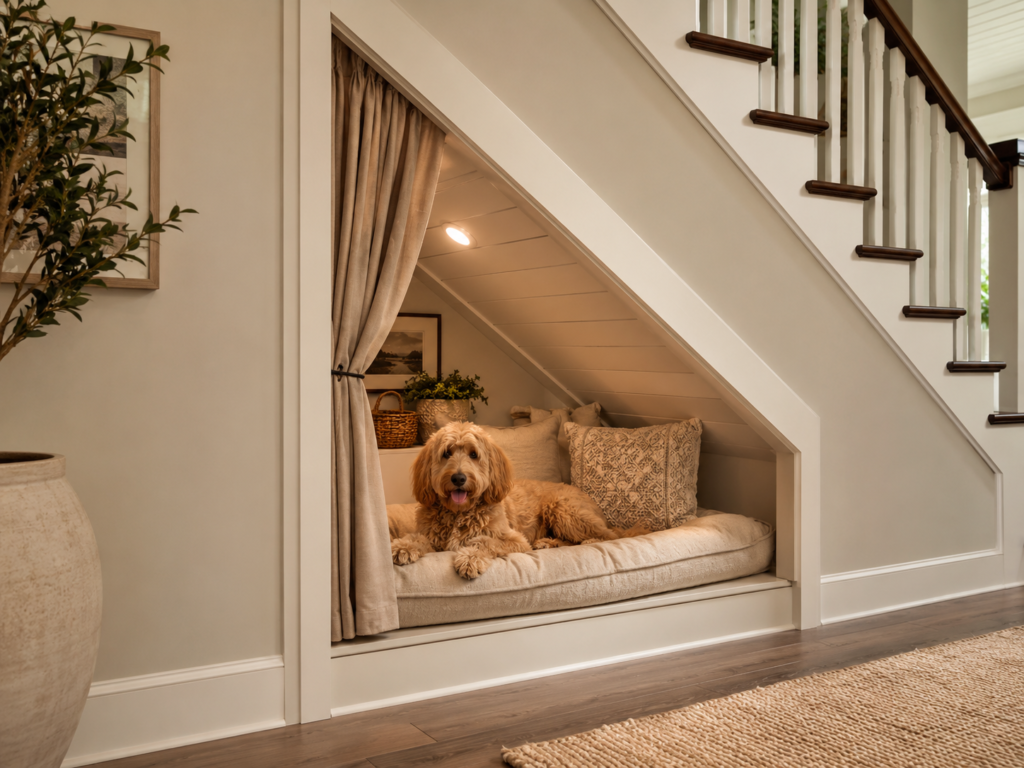
#1: The Under-Stair Dog Den (The Ultimate Dead-Space Hack)

You know that awkward triangle of dead space under your staircase that’s currently holding a broken vacuum and three empty Amazon boxes? Yeah. That’s prime real estate for the coziest dog den in the house.

Frame out the opening with cabinet-grade plywood, then paint the interior a moody deep sage green (Sherwin-Williams Rosemary SW 6187 photographs beautifully) so the space feels like a proper little cave. Add a plush memory-foam mattress sized to the opening, a soft throw blanket in a matching earth tone, and one small brass wall sconce on a dimmer for that warm nighttime glow.

The best part? You can add trim molding around the outside so it reads as an intentional architectural feature, not an afterthought. Guests walk past it and ask if the house was built that way. Nope — you did that.

Pro Tip: Install a small pull-out drawer just above the den opening for leashes, poop bags, and grooming basics. It keeps clutter off the floor and makes walk-time about ten seconds faster.

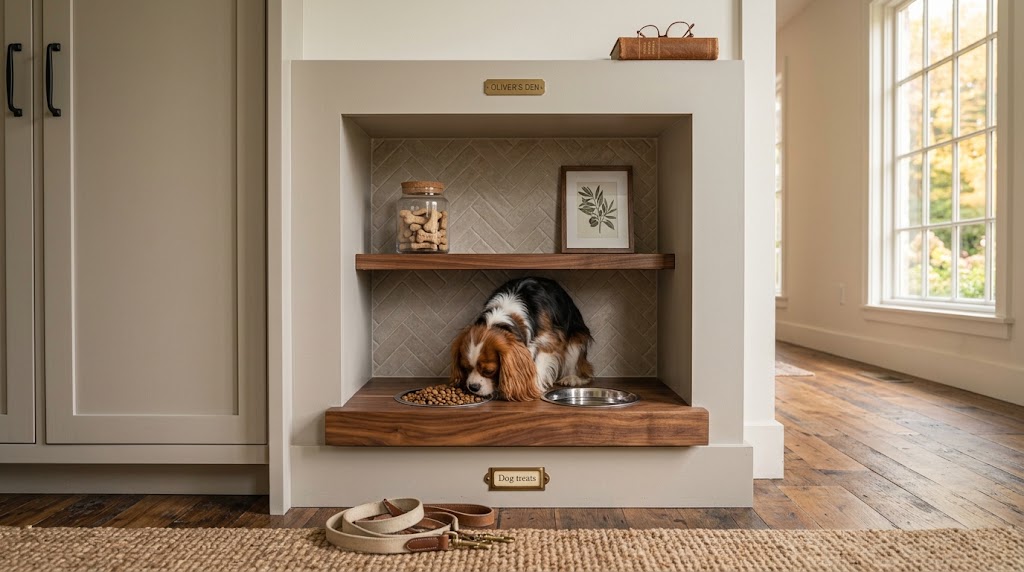
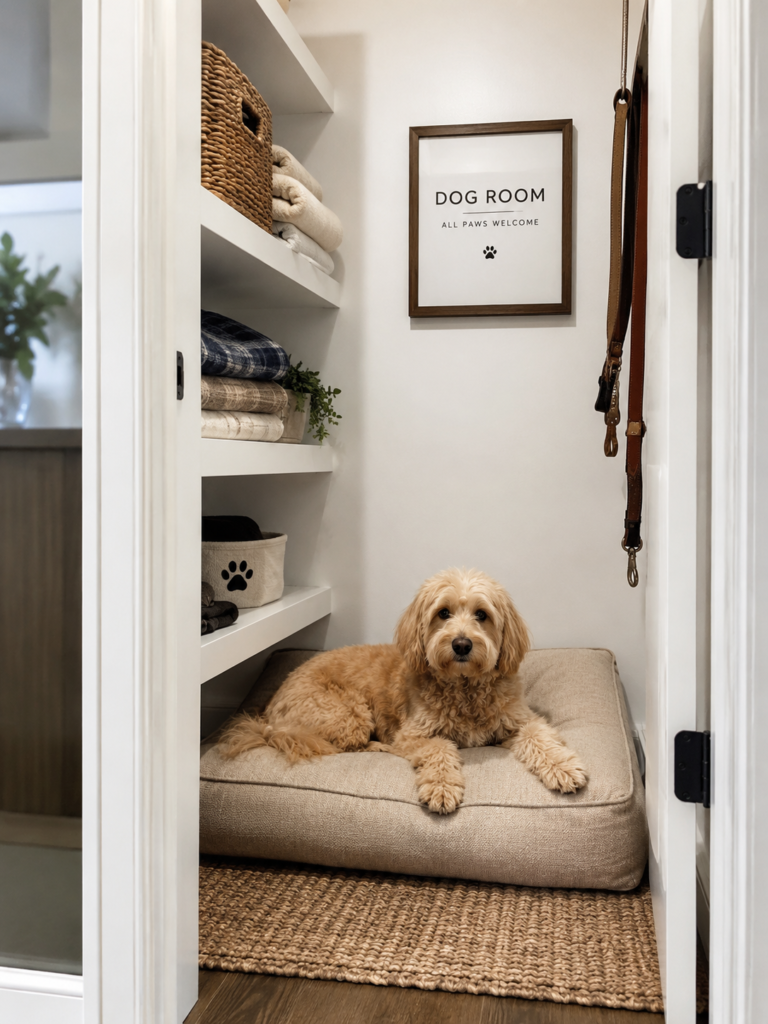
#2: The Hallway Feeding Station Nook

The Hallway Feeding Station Nook

Most dog bowls live on the kitchen floor, where they get kicked, tripped over, and slide across the tile every time your pup takes a drink. There’s a better way, and it doesn’t require you to remodel the kitchen.

Pick a wall in a hallway or mudroom transition zone and build a recessed feeding niche about 24 inches wide, 18 inches deep, and just tall enough to fit your dog’s food and water bowls comfortably. Line the back and sides with a wipeable material — large-format porcelain tile in a soft warm greige works beautifully. Recess two stainless steel bowls into a solid oak or walnut shelf so they sit flush and can’t be dragged around.

Add a small shelf above the niche for a treat jar (glass with a wooden lid, please, not plastic) and a hand-labeled measuring scoop. Underneath, tuck a woven jute mat that catches drips and dry kibble spills without looking like a placemat.

Pro Tip: Position the niche at your dog’s shoulder height, not floor level. Elevated feeders reduce neck strain for medium and large breeds and cut down on that classic post-drink chin drip trail across the hallway.

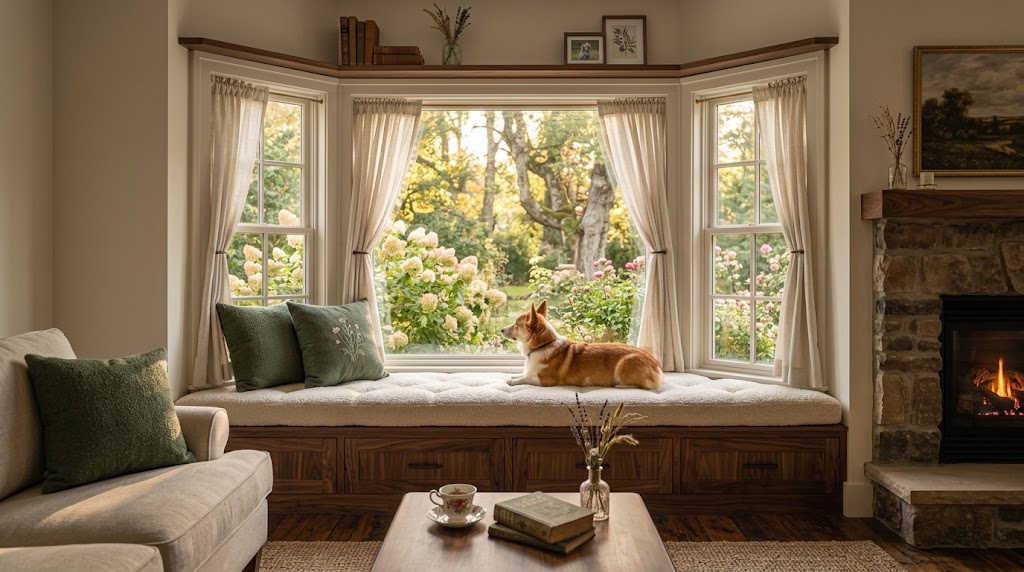
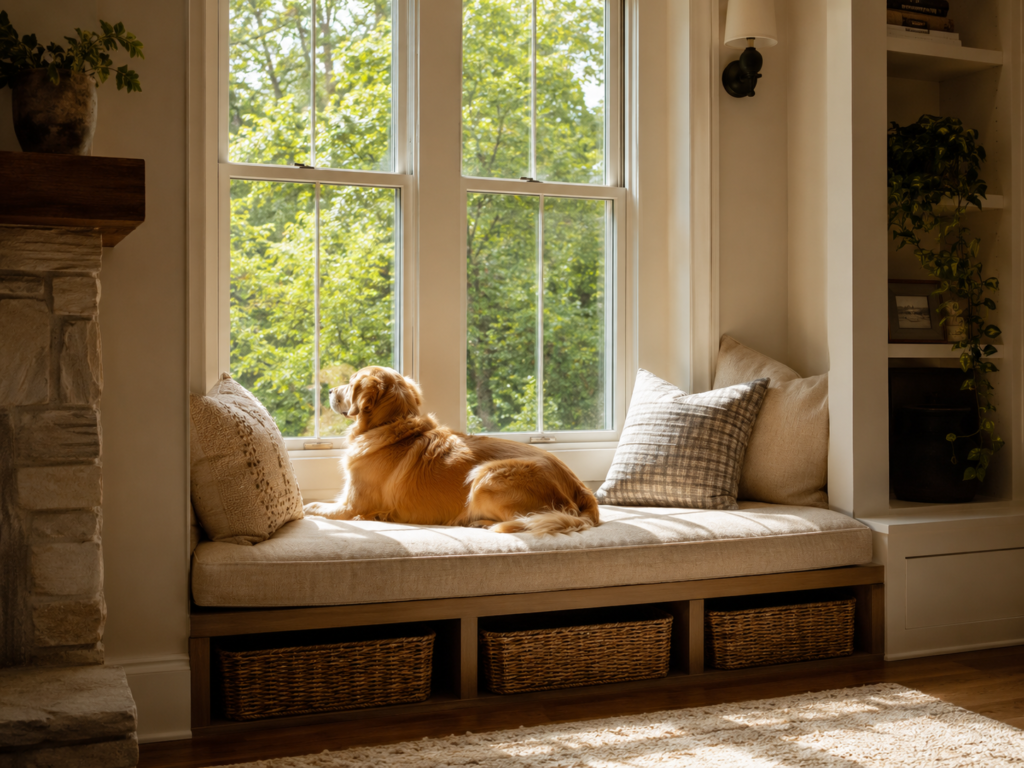
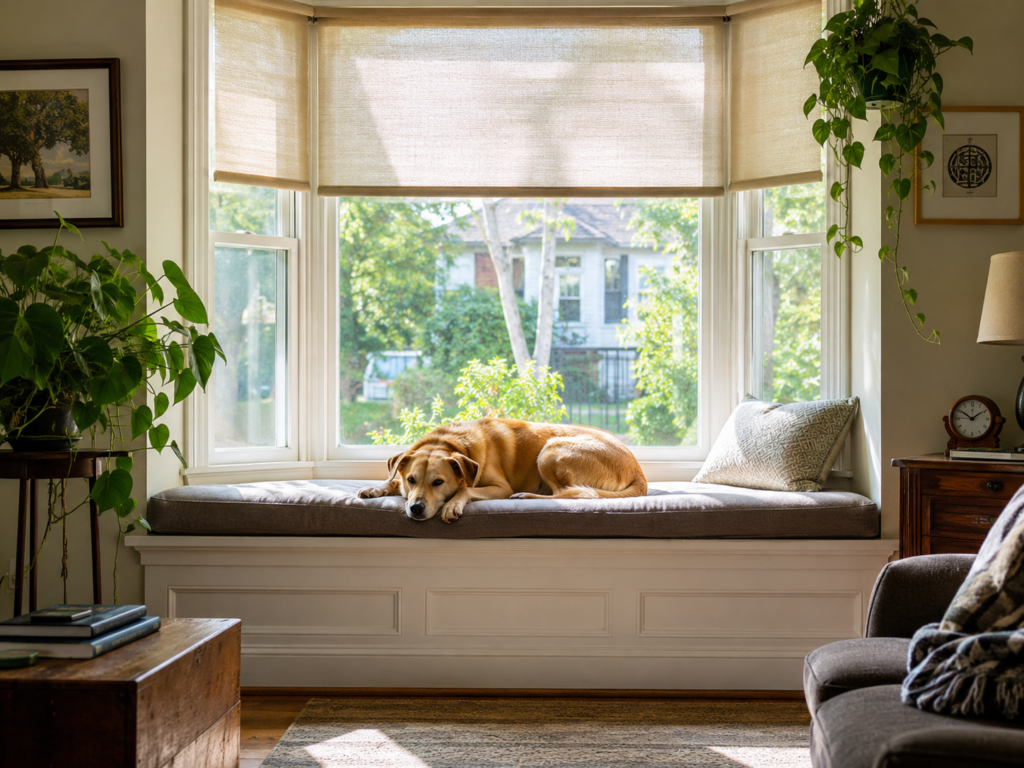
#3: The Bay Window Lounge Perch

Bay Window Lounge Perch

If your dog is the type that spends 80% of their day watching the mailman, the squirrels, and the leaves — give them a proper viewing station. A bay window bench built specifically for the dog turns their favorite spying spot into the most beautiful piece of furniture in your living room.

Build a low bench (about 16–18 inches tall) into the bay window recess with a hinged lid for hidden storage underneath — perfect for toys, extra beds, and the seasonal sweaters you’d rather not admit you own. Top the bench with a custom-cut foam cushion covered in a durable, washable fabric. Cream boucle is having a moment, but if you have a shedder, go with a woven wool in a muted heather grey that hides fur like magic.

Toss in two matching throw pillows so the bench doubles as human seating when the dog isn’t hogging it (they always are). Frame the window with light linen curtains for that soft, dreamy light your pup naps in for hours.

Pro Tip: Use a removable, zippered cushion cover you can pull off and wash monthly. Dog fur builds up in cushion seams faster than you think, and a fresh-looking bench cover keeps the whole room feeling clean.

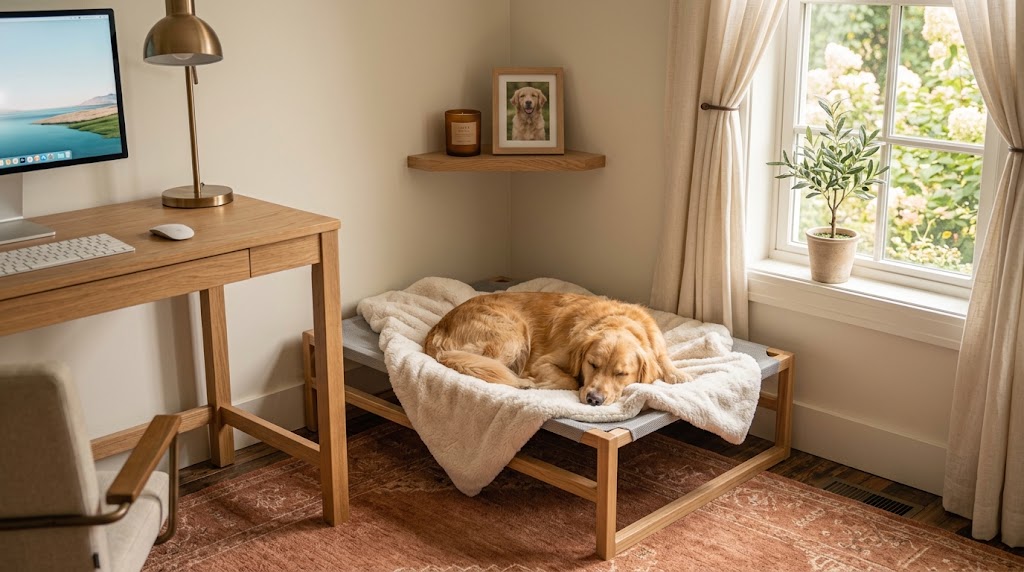
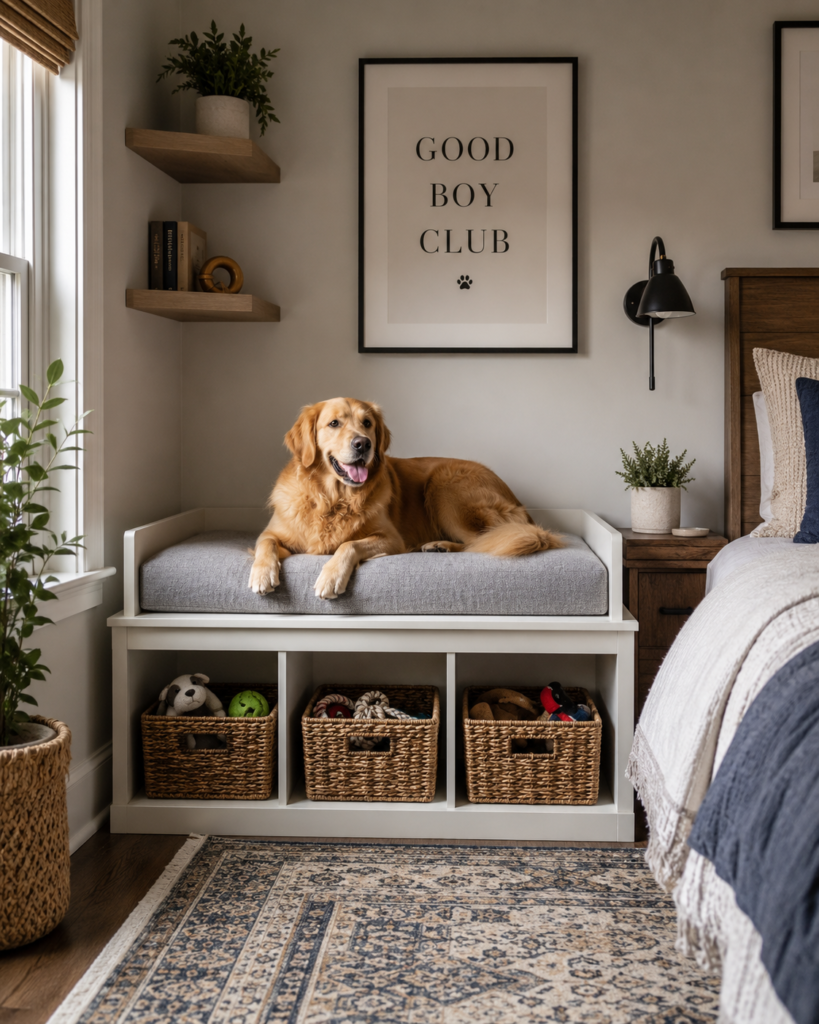
#4: The Home Office Dog Corner (For Your Work-From-Home Buddy)

Home Office Dog Corner

Your dog spends nine hours a day watching you type. Give them their own corner of the office so they can supervise in style instead of stretched across your feet like a warm, judgmental blanket.

Set aside a corner within eye-line of your desk. Add a raised elevated dog cot (the mesh kind that stays cool in summer) in a size big enough for your pup to stretch out fully. Above the cot, mount a small floating oak shelf with a photo of your dog, a candle, and a little ceramic bowl for water — basically a dog altar, and honestly, they earned it.

Layer a large, low-pile rug underneath in a warm terracotta or muted forest green so the corner feels distinct from the rest of the office. Add one soft plush blanket draped over the cot for the naps they will absolutely take through your Zoom calls.

Pro Tip: Skip the fluffy bed and go with a slightly firmer cot cushion. It supports joints better for the long hours dogs spend in offices, and the taller platform keeps them off drafty floors in winter.

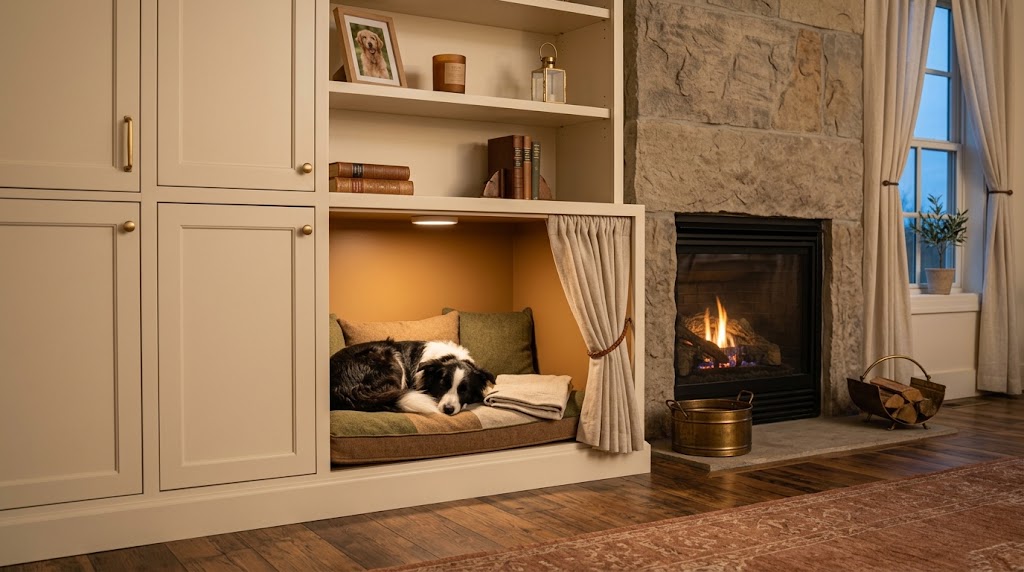
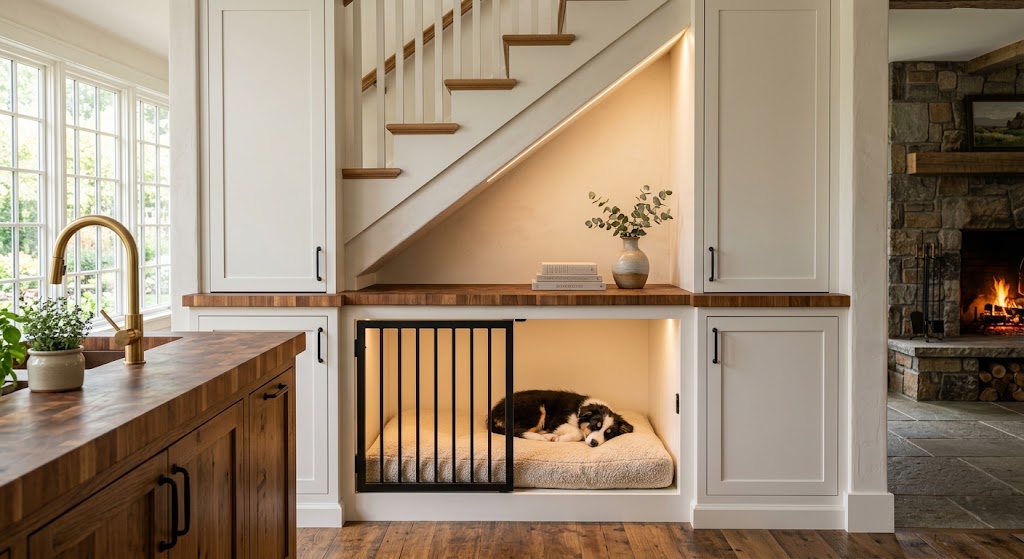
#5: The Living Room Built-In Dog Nook (The Pinterest Endgame)

Living Room Built-In Dog Nook

This is the big one. The forever answer to “where does the dog bed go in a room I actually want to look at.” Build a proper built-in nook directly into your living room cabinetry — flanked by bookshelves, tucked beside the fireplace, or integrated into a media wall.

Frame the opening about 30 inches wide, 22 inches deep, and 24 inches tall (adjust for your dog’s size). Paint the interior a color that contrasts subtly with your surrounding built-ins — if the cabinets are cream, go with a warm caramel or soft charcoal inside the nook. This tiny color shift makes the space feel intentionally designed for your dog, not like a leftover hole in your millwork.

Add a custom-sized cushion in a fabric that pulls from your existing decor palette. Layer a small throw across one corner, and drop a plush toy or two so the nook always looks “lived in” without looking messy. Optional but glorious: install a low LED puck light on a warm dimmer inside the nook so it glows softly at night.

Pro Tip: If your dog is anxious in open spaces, add a soft curtain across the front of the nook on a small rod — tied back during the day, drawn at night. It gives them the enclosed “den” feel without needing a full crate build.

The One Mistake That Ruins Every Dog Space

Most people design the space for how it looks in a photo. Then their dog uses it for one week and never goes back.

Here’s the secret: watch your dog before you build. Where do they actually choose to sleep already? Which corner do they gravitate toward when they want peace? Which spot do they run to during a thunderstorm? That’s where the dog space belongs. Not the “empty wall you could put a nook against.”

My golden picked the corner between the living room and hallway as her spot years before I ever thought to build her one. When I finally built the under-stair den six feet away, she used it twice. When I moved the whole setup to her original corner? She hasn’t left it in eight months. Design to her habits, not around the room’s empty spots.

The other big one: always start with the flooring. Luxury vinyl plank or sealed tile beats carpet every single time in a dog space — muddy paws, water bowl splashes, and shedding all clean up in thirty seconds. Beautiful carpet under a dog bed is a six-month countdown to regret.

Your Dog’s Dream Corner Starts With One Weekend

Pick one idea from this list. Not all five. Not a full renovation. Just one corner, one weekend, one small win.

My cousin started with the hallway feeding niche — the smallest project on this list — and it changed her whole relationship with the kitchen mess. Six months later she added the under-stair den. Now her golden has two dedicated spaces and her living room actually looks like the home she wanted, dogs and all.

While you’re planning your build, check out our 10 dog crate furniture ideas for even more ways to integrate your pup’s space into real home decor.

Which corner is your dog already claiming? Start there. That’s the one.

Dog Crate Furniture Ideas

10 Dog Crate Furniture Ideas That Blend Into Your Home Like Real Decor

Most dogs love their crate. Give them a soft blanket, a cozy corner, and a bit of quiet, and it becomes their personal little cave. But let’s be real — the standard wire crate parked in the middle of your living room looks like a jail cell, and no amount of throw pillows fixes it.

The good news? A well-built dog crate furniture piece completely changes the equation. You get a piece that functions like an end table, a sideboard, a TV stand, or even a full built-in — while your pup gets a proper, quiet den underneath. It looks like real furniture, works like real furniture, and everyone in the house (four legs included) wins.

Below are ten of the best dog crate furniture ideas out there, with materials, difficulty levels, and step-by-step guidance for each. Some are afternoon projects. Some are weekend builds. All of them beat the wire crate look by a mile.

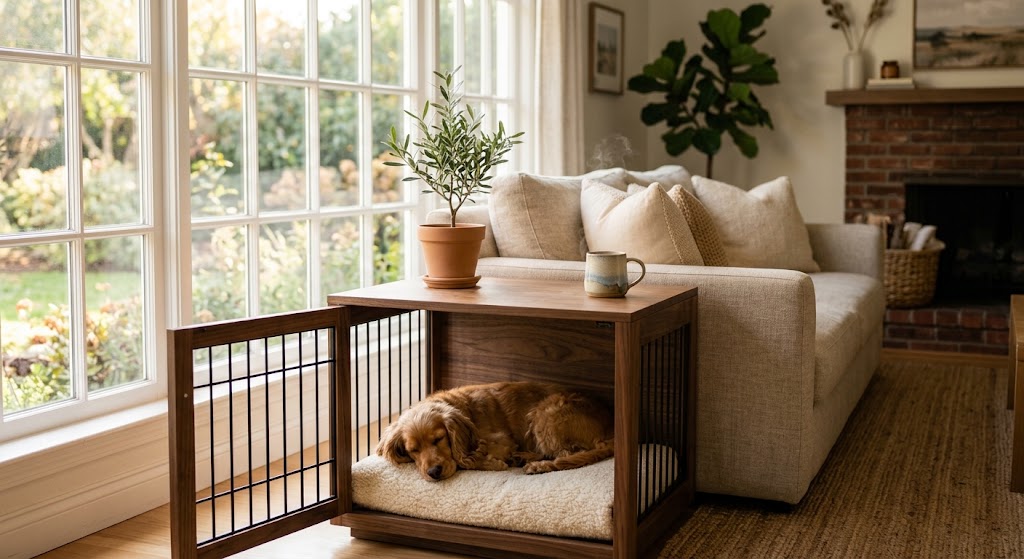
#1: End Table Dog Crate

The classic starter build. This one turns a standard wire crate into a stylish side table that lives right next to your couch — perfect for a lamp, a coffee mug, or the remote your dog keeps stealing.

Materials & Tools You’ll Need:

  • Wire crate sized to your dog
  • 3/4-inch plywood or hardwood boards (pine, oak, or walnut)
  • Wood screws, hinges, and a small door latch
  • Wood stain or paint
  • Drill, saw, sandpaper, tape measure

Prep Time: 45 minutes | Active Project Time: 4–5 hours | Difficulty Level: Intermediate

Instructions

Measure the outer dimensions of the wire crate and cut plywood panels for the top, two sides, and the back — leave the front open for the door. Sand every edge smooth so nothing catches on your pup’s fur.

Assemble the panels into a three-sided cabinet with the top screwed on. On the front, build a simple frame door with hinges and a latch that matches the wire crate’s door opening.

Stain or paint the whole piece in a color that matches your living room — walnut and matte black are the most forgiving. Slide the wire crate inside so the door lines up with your new frame door.

Tip: Drill small ventilation holes along the back panel to keep airflow steady, especially in warmer months.

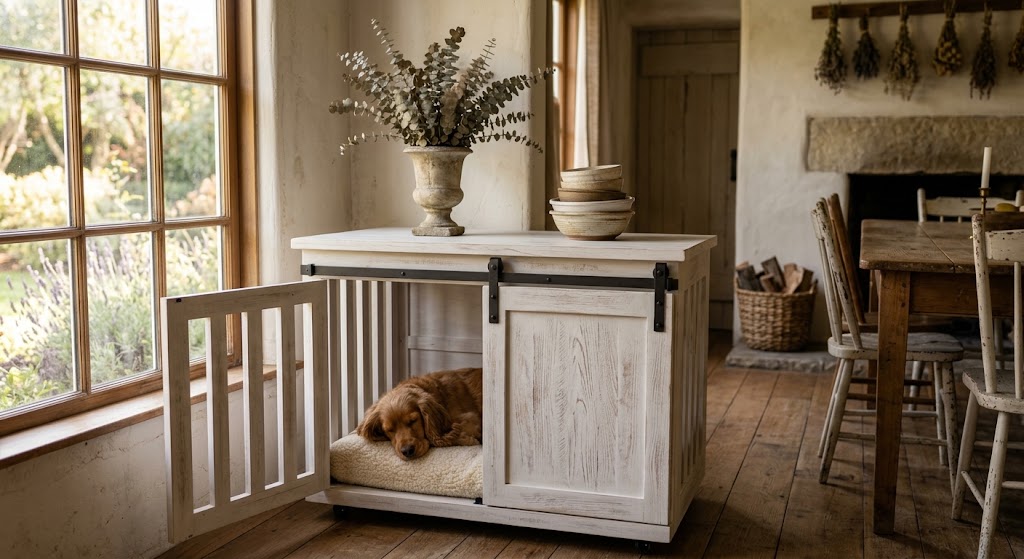
#2: Farmhouse Sideboard Crate

This one takes a bigger crate and hides it inside a full sideboard — the kind of piece that looks stunning in a dining room or entryway. Extra storage on top, quiet den for the pup underneath.

Materials & Tools You’ll Need:

  • Large wire crate (36″ or 42″)
  • Pine or reclaimed barn wood boards
  • Cabinet-style hinges and iron pulls
  • Wood glue, screws, pocket-hole jig
  • Whitewash or milk paint finish

Prep Time: 1 hour | Active Project Time: 8–10 hours | Difficulty Level: Advanced

Instructions

Build a rectangular frame from 2x2s sized to fit around your crate with about an inch of clearance on all sides. Attach shiplap or tongue-and-groove pine boards to the sides and back for that farmhouse texture.

Cut two barn-style doors for the front, sized to match the crate opening. Attach with strap hinges and iron pulls for full farmhouse energy.

Finish the top with a thick plank of stained pine — wide enough to hold decor, a runner, and even a bit of overhang for that furniture-store look.

Tip: Use whitewash instead of solid white paint so the wood grain still shows through and it doesn’t look plastic.

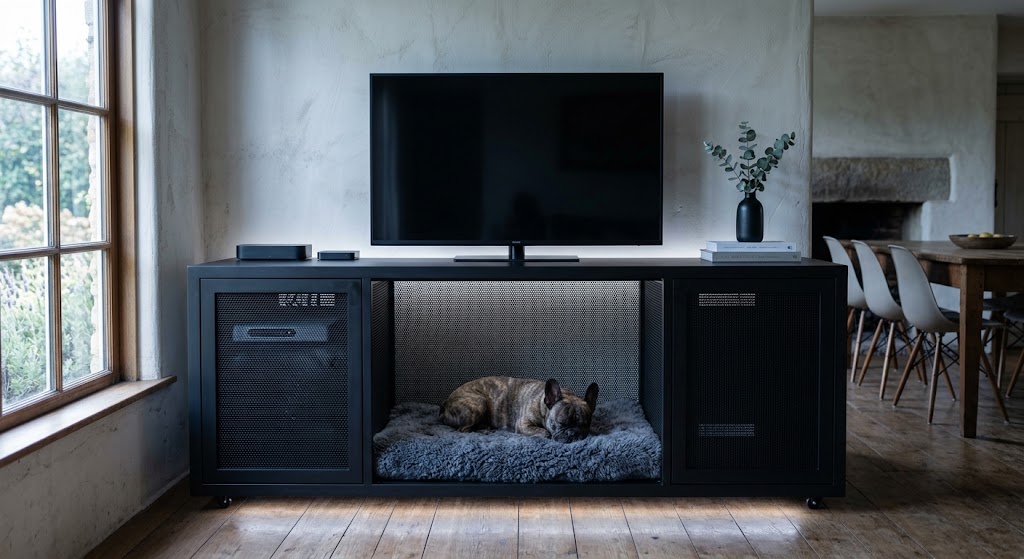
#3: TV Stand Dog Crate Console

Perfect for anyone whose crate lives in the living room. This design combines your TV console and dog den into one long, low piece — saving floor space and making the crate almost invisible.

Materials & Tools You’ll Need:

  • Long low wire crate or metal panel enclosure
  • 3/4-inch MDF or plywood
  • Cable-management grommets
  • Metal mesh panels for ventilation
  • Modern black hardware

Prep Time: 45 minutes | Active Project Time: 6–8 hours | Difficulty Level: Intermediate

Instructions

Build a long TV-stand box in a modern rectangular shape. Divide the interior into three compartments: a center section for the crate and two flanking cabinets for electronics and storage.

Cover the crate section’s front with a hinged panel that has a metal-mesh insert so your pup can see out and air can circulate. Add grommets in the back for HDMI and power cables.

Finish in matte black, warm walnut, or a two-tone combo. Set your TV on top and your dog quietly parks below.

Tip: Position speakers away from the crate compartment — loud bass right against the wire wall stresses most dogs out.

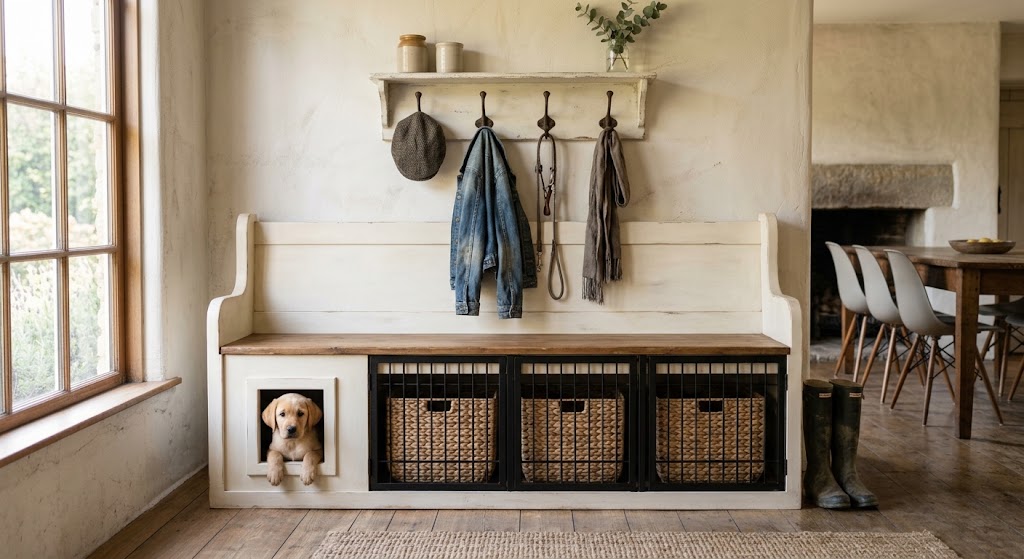
#4: Bench-Style Entryway Crate

Kill three birds with one build: a mudroom bench, a shoe cubby underneath, and a hidden crate at one end for the pup to relax while you unload groceries.

Materials & Tools You’ll Need:

  • Medium wire crate
  • Pine or plywood
  • Bench cushion or foam pad
  • Basket organizers
  • Coat hooks (optional)

Prep Time: 30 minutes | Active Project Time: 5–6 hours | Difficulty Level: Intermediate

Instructions

Build a long bench frame divided into two sections. One side becomes cubby storage for shoes and baskets, the other holds the crate.

Cover the crate section with slat panels or a mesh door for ventilation. Top the whole bench with a thick padded cushion for seating.

Optional: mount coat hooks or a small shelf on the wall above for the full mudroom vibe.

Tip: Choose stain-friendly fabric for the bench cushion. Muddy paws come home with you whether you plan for them or not.

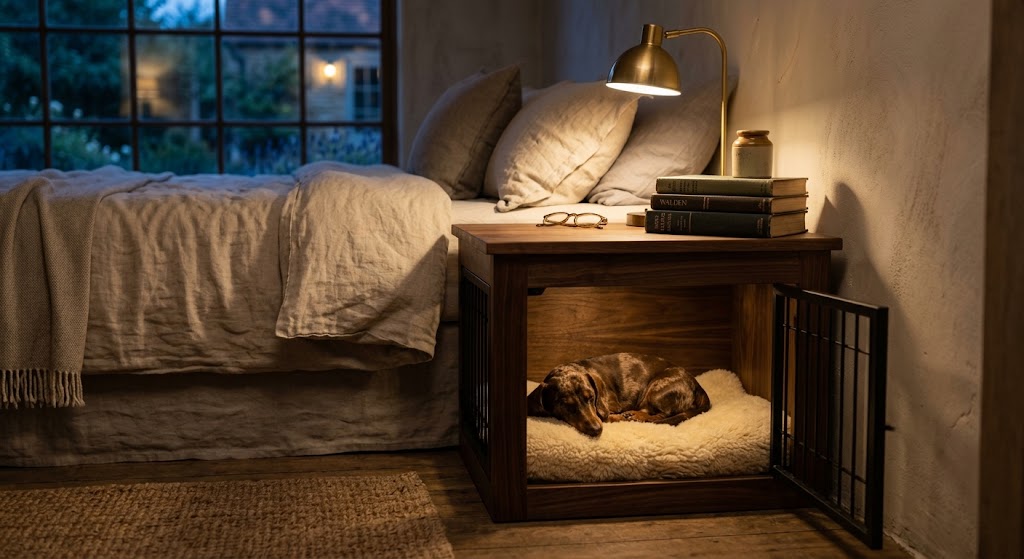
#5: Nightstand Crate for the Bedroom

For dogs who sleep best right next to you. This build looks like a proper nightstand — flat top for a lamp and a book, hidden crate below where your pup can settle in for the night.

Materials & Tools You’ll Need:

  • Small to medium wire crate
  • Solid oak, walnut, or maple boards
  • Soft-close hinges
  • Discreet drawer pull
  • Dark wood stain

Prep Time: 30 minutes | Active Project Time: 4–5 hours | Difficulty Level: Intermediate

Instructions

Build a tall, narrow cabinet frame that matches the height of your existing nightstand. Include a small pull-out drawer at the top for the lamp and phone charger essentials.

The lower two-thirds becomes the crate compartment. Add a front door with hidden hinges so it looks seamless, and drill discreet ventilation holes near the back.

Finish in dark walnut or espresso for a moody, warm bedroom vibe.

Tip: Use soft-close hinges. A slamming crate door at 3 a.m. wakes both of you up.

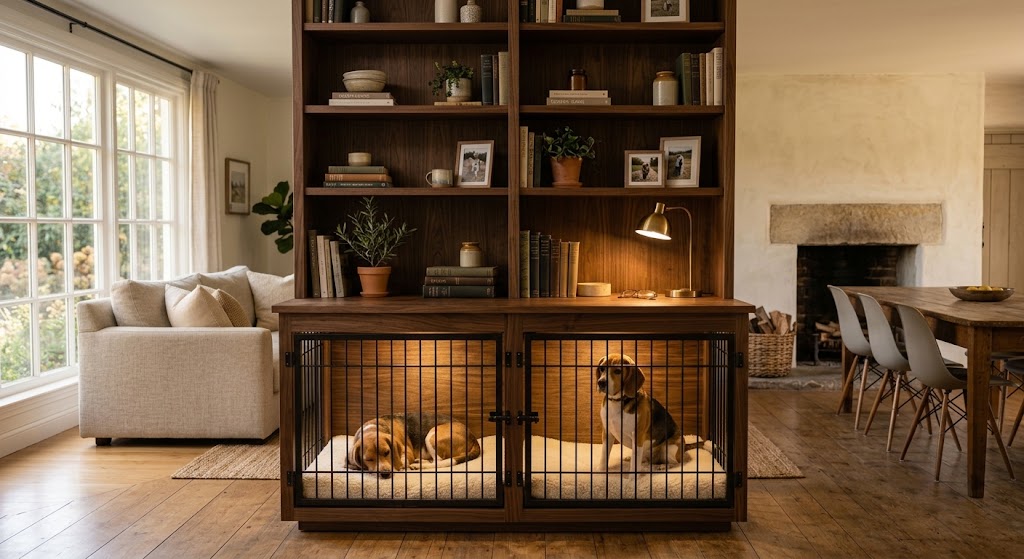
#6: Double-Crate Room Divider

Got two dogs? This build gives each pup their own den while doubling as a room divider between your living and dining space.

Materials & Tools You’ll Need:

  • Two matching wire crates
  • Plywood and 2×4 framing
  • Book cubbies or open shelves for the top
  • Strap hinges
  • Solid dark stain

Prep Time: 1 hour | Active Project Time: 8–10 hours | Difficulty Level: Advanced

Instructions

Build a wide base cabinet with two side-by-side compartments — one crate per section. Add a common tabletop across the full width for shared storage.

Build open bookcases or cubbies above, keeping the total height under 6 feet so the piece still functions as a divider without feeling like a wall.

Finish in a single tone across the whole build so it reads as one intentional piece of furniture, not a stacked pile of storage.

Tip: Leave a small gap between the two crates so each dog has visual privacy from the other — helps a lot with separation-anxiety pups.

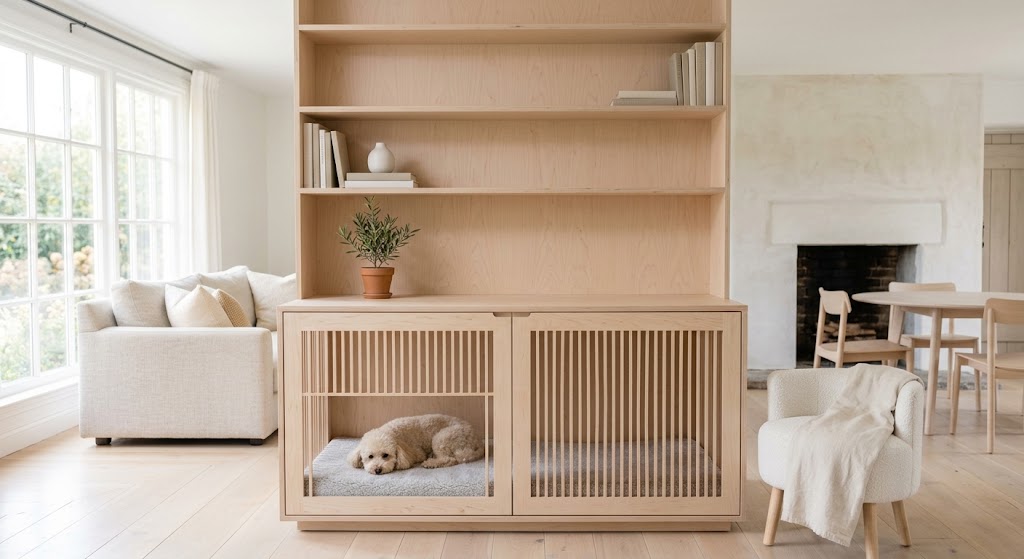
#7: Minimalist Scandinavian Crate

Clean lines, blonde wood, no visible hardware. This one looks like it walked straight out of a Copenhagen showroom.

Materials & Tools You’ll Need:

  • Wire crate sized to your dog
  • Birch or ash plywood
  • Push-latch hinges (no visible pulls)
  • Natural matte wood sealer
  • Wool felt padding

Prep Time: 30 minutes | Active Project Time: 5–6 hours | Difficulty Level: Intermediate

Instructions

Build a simple rectangular cabinet around the crate with birch plywood panels and mitered corners for that seamless Scandi finish. Skip decorative trim entirely.

The front door uses push-to-open hinges so there’s no visible hardware. Add a vertical slat pattern for ventilation instead of a mesh insert.

Finish with clear matte sealer so the natural wood grain shows through. Top with a small wool felt runner for texture.

Tip: Round the exterior corners with a hand plane or router. It’s the tiny detail that separates a good Scandi build from a great one.

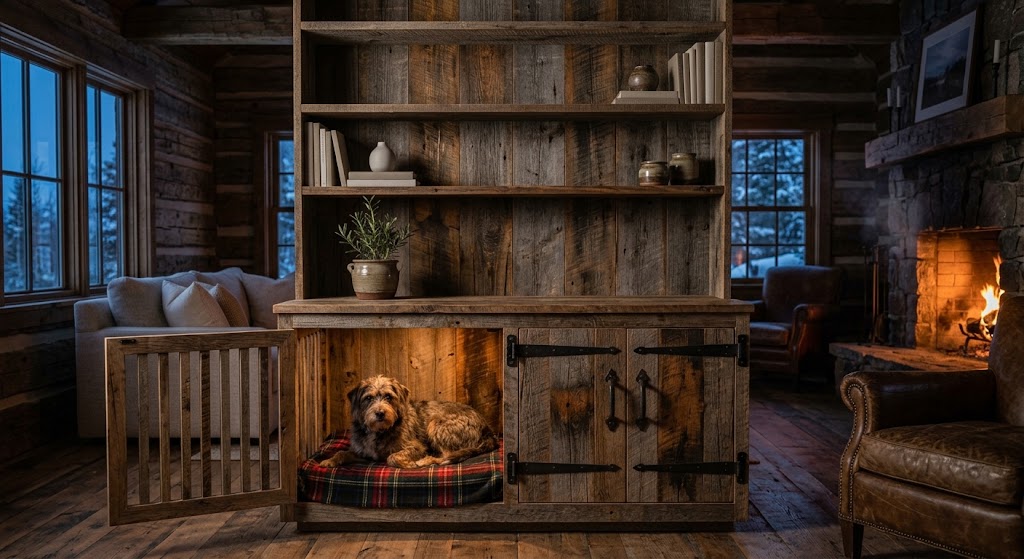
#8: Rustic Reclaimed Wood Crate

Perfect for cabin-style, farmhouse, or industrial-loft homes. This one leans into knots, weathering, and imperfection.

Materials & Tools You’ll Need:

  • Wire crate
  • Reclaimed barnwood or salvaged pallet boards
  • Iron hinges and heavy pulls
  • Wire brush for distressing
  • Sealer

Prep Time: 45 minutes | Active Project Time: 6–8 hours | Difficulty Level: Intermediate

Instructions

Sort your reclaimed boards by color and texture. Build the frame as in Idea #1, but arrange the boards vertically for a stronger rustic effect.

Distress edges with a wire brush and hammer marks for that authentic worn look. Attach iron strap hinges and matching pulls.

Skip stain — just seal with a matte polyurethane to lock in the natural weathered patina.

Tip: Always sand reclaimed wood thoroughly and check for old nails before installation. Splinters and pet fur are a bad combination.

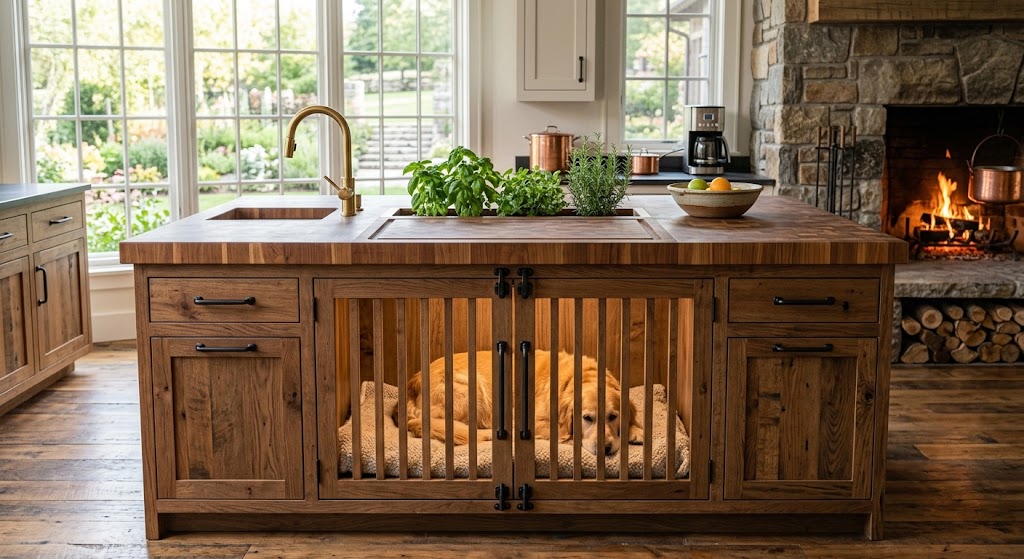
#9: Kitchen Island Crate

For open-plan kitchens, this one hides the crate inside a working kitchen island — butcher block on top, hidden den below, plus storage all around.

Materials & Tools You’ll Need:

  • Extra-large wire crate
  • Butcher block or hardwood countertop
  • Cabinet-grade plywood
  • Casters (optional, for a mobile island)
  • Matte metal hardware

Prep Time: 1 hour | Active Project Time: 10–12 hours | Difficulty Level: Advanced

Instructions

Build a base cabinet island with a central crate compartment and flanking storage cabinets or open shelves for baskets and cookware.

Vent the crate section carefully — kitchens run hot. Use a slatted door plus small side vents to keep airflow moving.

Finish with a butcher-block top and cabinet-style pulls that match your kitchen hardware. Add casters if you want the island to move for cleaning.

Tip: Position the crate opening away from the stove side. Cooking smells and heat can drive even the calmest dog out of a den.

#10: Built-In Crate Nook

The endgame. This turns the crate into a fully built-in element of your home — flanked by bookshelves, tucked under a window seat, or built into the base of a staircase. Zero visible “crate” anywhere.

Materials & Tools You’ll Need:

  • Custom-sized wire panels or a fitted crate
  • MDF and plywood
  • Trim moldings to match existing built-ins
  • Paint matched to walls or cabinetry
  • Ventilation grate

Prep Time: 2 hours | Active Project Time: 12–16 hours | Difficulty Level: Advanced

Instructions

Choose your location: a bookshelf wall, a window seat, or under-stair space are the classic choices. Frame out the opening exactly to your crate dimensions plus 2 inches on all sides.

Build cabinetry around and above the crate opening so the whole wall reads as one continuous built-in. Match trim profiles to the rest of your baseboards and casings.

Install a metal grate for the crate door so it looks intentional and architectural. Paint everything the same color as the surrounding wall or cabinetry.

Tip: Add a small LED puck light on a timer inside the nook. A soft glow inside the den at night is oddly comforting for anxious pups.

How to Pick the Right Style for Your Home

The best dog crate furniture piece is the one that actually fits your space, your dog’s size, and your DIY skill level. Small apartments do better with double-duty pieces like end tables or nightstands. Bigger homes with open floor plans benefit from sideboards and TV consoles. And if you’re renovating anyway, a built-in nook is worth every hour.

Whichever direction you go, three rules apply to every build: always vent generously, always finish with pet-safe sealers and paints, and always make cleaning easy. A crate that looks like furniture is only worth building if your dog is comfortable inside and you can actually keep it clean.

Conclusion

Dog crate furniture is the rare home project where everyone wins. Your dog gets a proper, quiet den. Your living room gets its style back. And you get to point at the piece and say “yeah, I made that” for the next ten years.

Start with the idea that matches your space and skill — the end table build (#1) is the easiest entry point, while the built-in nook (#10) is the ultimate flex. Whichever you choose, your pup is going to love their new furniture just as much as you do.

While you’re upgrading their setup, check out our 12 DIY dog collar ideas to give them a matching accessory worthy of their new den.

12 Adorable DIY Dog Collar Ideas Your Pup Will Actually Wear

12 Adorable DIY Dog Collar Ideas Your Pup Will Actually Wear

You know that sad little wall of identical nylon collars at the pet store? The ones that all look like they came out of the same lonely factory? Yeah. Your pup deserves better than a boring black strap that clashes with literally everything.

Between the endless dog aisles and the sky-high “designer” boutique prices, finding a collar that actually feels like your dog gets impossible fast. You want something soft, safe, and cute enough to show off on Instagram — without dropping fifty bucks on something they’ll outgrow in three months.

Don’t worry. I’ve got you.

I rounded up twelve gorgeous DIY dog collar projects that anyone can pull off with a rainy Sunday and a trip to the craft aisle. Grab your coffee. Let’s make something your pup will actually love wearing.

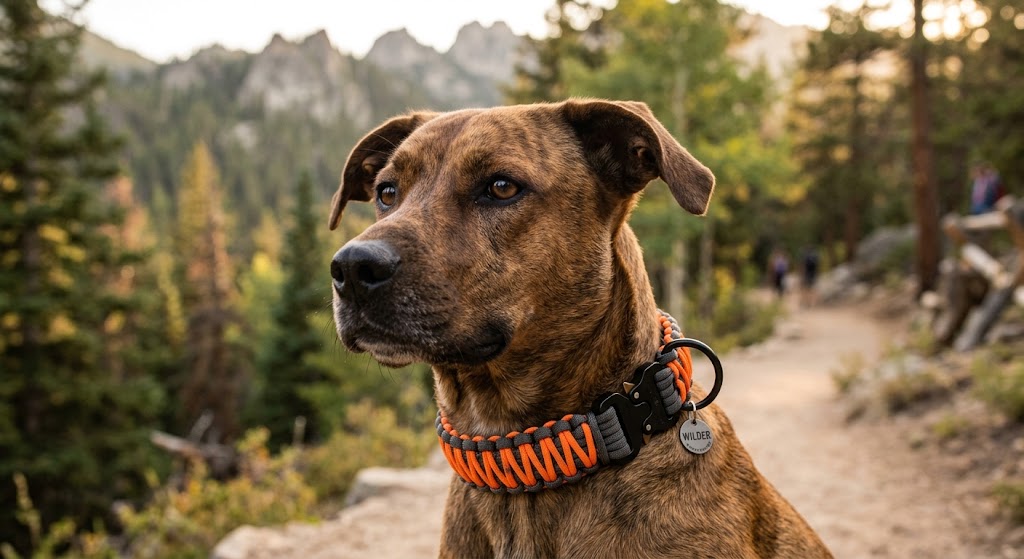
#1: The Classic Braided Paracord Collar

ParacordThis one project alone will make you feel like a full-blown craft wizard.
Paracord is basically the workhorse of the DIY world — tough, water-resistant, and comes in every color combo you can dream of. This collar uses a cobra weave in charcoal grey and safety orange, giving off a rugged outdoor vibe that pairs perfectly with hiking days and muddy park romps.

All you need is about 10 feet of 550 paracord, a matching plastic side-release buckle, and a lighter to seal the ends. It sits flat against the neck, holds up to serious wear, and honestly looks way more expensive than the $8 in materials suggests.

Pro Tip: Always attach the leash to a separate flat collar or harness — paracord is for style and ID tags, not for pulling.

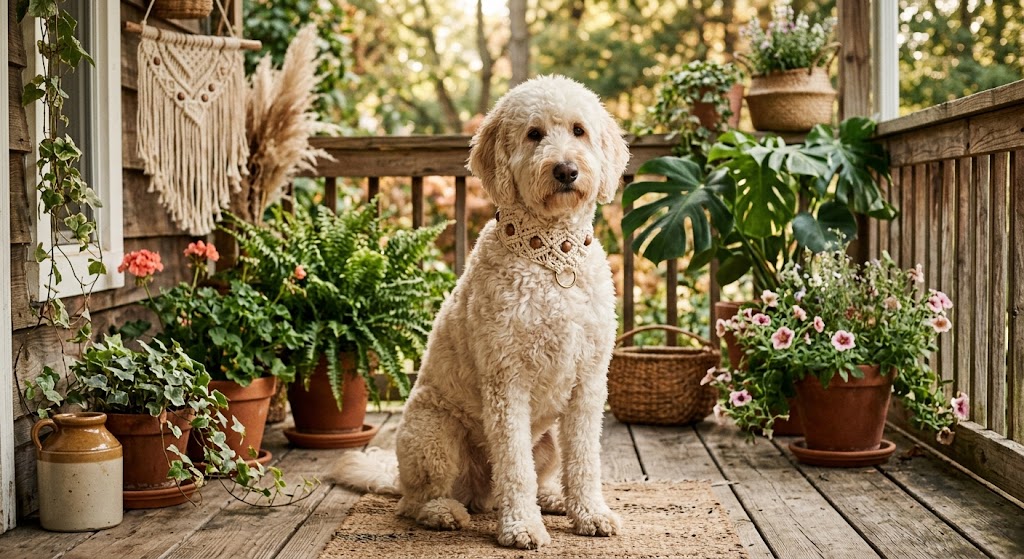
#2: Boho Macramé Collar With Wooden Beads

Boho Macramé Collar With Wooden BeadsEver wish your pup’s accessories matched your Pinterest-worthy living room? Same, girl.
This macramé collar uses natural cream cotton cord knotted in a simple half-hitch pattern, punctuated with warm walnut wooden beads and a chunky brass D-ring. It gives off major earthy cottagecore vibes without feeling stiff or scratchy against fur.

Best of all, you can size it to your pup exactly and swap the bead colors anytime you get bored. My friend made one for her golden and it’s the only collar the dog hasn’t tried to shake off within five minutes.

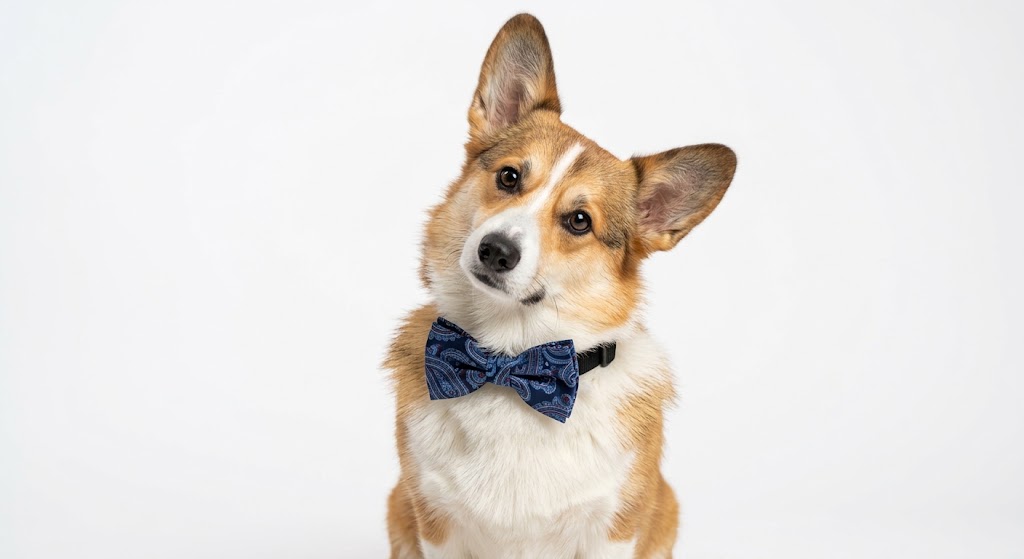
#3: Upcycled Necktie Bow Collar

Upcycled Necktie Bow CollarGot a thrift store nearby? Then you’ve got the raw material for the cutest gentleman collar on the block.

Grab a silk or satin men’s necktie in a fun pattern — think navy paisley, burgundy plaid, or forest green herringbone — and fold it into a slip-on bow that clips right over an existing flat collar. Total cost: about two dollars. Total effort: fifteen minutes with a hot glue gun.

It’s the perfect move for weddings, holiday photos, or just Tuesday when your pup deserves to look sharp.

Pro Tip: Stick with real silk over polyester — it drapes softer and photographs way better in natural light.

#4: No-Sew Fleece Braided Collar

Can’t sew? Don’t own a glue gun? Doesn’t matter.

This no-sew fleece collar takes three strips of soft fleece in complementary colors — I love dusty pink, mustard, and cream together — braided tight and knotted around a metal ring. It’s wildly soft against the neck, warm in winter, and honestly looks boutique-tier for something you made during a Netflix binge.

Perfect for puppies with sensitive skin who react to nylon or leather.

#5: Custom Embroidered Canvas Collar

Nothing beats a collar with your dog’s actual name stitched right on it.

Grab a plain canvas or cotton webbing collar in oatmeal or forest green, thread a needle with contrasting embroidery floss, and stitch your pup’s name in a simple backstitch or chain stitch. Even beginners can pull this off in an afternoon.

Add tiny embroidered daisies, hearts, or a little bone motif at each end and you’ve just made a personalized piece that would cost forty bucks on Etsy.

#6: Bandana-Style Slip Collar

The bandana collar is that classic country-dog look, but sewn as an actual collar so it never slides off crooked mid-walk.

Cut a triangle of your favorite cotton print — gingham, ditsy floral, or cowboy paisley — sew a channel along the top, and thread it onto a plain flat collar. The result: your pup looks like they just walked out of a farmhouse Instagram feed, and the bandana stays put no matter how much they shake.

Bonus: it’s machine-washable, so muddy adventures don’t ruin the aesthetic.

#7: Leather Cord and Copper Ring Collar

Want something that ages beautifully? Leather is your friend.

This minimalist design uses a single strand of vegetable-tanned leather cord hand-punched to fit, sealed with a raw hammered copper ring that patinas gorgeously over time. It feels weighty and substantial without being heavy, and the leather softens with wear until it fits like a second skin.

Best on medium and large dogs — the aesthetic really lands on a big goofy lab or a stately shepherd.

Pro Tip: Condition the leather with a drop of beeswax salve every few months to keep it supple and water-resistant.

#8: Reversible Fabric Bowtie Collar

Two collars in one? Yes please.

This project sandwiches two coordinating fabrics — say, a busy floral on one side and a solid navy on the other — around a strip of interfacing, with a matching removable bowtie snapped on with velcro. Flip it around depending on the day’s outfit or mood.

Slightly more sewing-heavy than the others, but if you’ve got a machine and thirty minutes, you’re set. The bowtie snaps off for washdays or when your pup needs to look serious.

#9: Beaded Turquoise Southwestern Collar

Feeling a little more Sedona than suburbia? This one’s calling your name.

String small turquoise, cream, and terracotta glass beads onto a strong nylon-coated wire, alternating with tiny silver spacer beads for that authentic Southwestern feel. Finish with a lobster clasp and a hammered pendant charm for a boho statement piece.

Best kept for photo shoots and short outings — beaded collars aren’t built for tug-and-pull play, but they photograph like a dream.

#10: Reflective Safety Collar (Actually Cute Edition)

Safety doesn’t have to look like a construction cone.

Take a plain flat collar in a bold color — cherry red, deep teal, or hot pink — and stitch or glue a strip of high-visibility reflective ribbon straight down the middle. Add a small brass name tag with your phone number etched in, and you’ve got a collar that keeps your pup visible on early morning walks without looking like leftover trail gear.

Pro Tip: Test the reflective strip with a phone flashlight in a dark room before you commit — not all ribbon labeled “reflective” actually is.

#11: Floral Crown Collar for Special Occasions

Okay, this one is pure extra. And I love it.

Build a base collar out of a simple ribbon or fabric strip, then hot-glue small silk flowers — peonies, daisies, baby’s breath, and eucalyptus sprigs — all along the top edge. It looks absolutely magical in wedding photos, birthday shoots, or spring garden portraits.

Store it flat between uses to keep the flowers from crushing, and swap in seasonal blooms for holidays.

#12: The Chunky Chain Link Statement Collar

Ever thought your pup could pull off streetwear chic? This is the one.

Take a lightweight aluminum or gold-tone chain in a chunky link style (the kind sold as belt hardware works perfectly), fit it to your pup’s neck with a quick-release clasp, and add a heavy engraved dog tag as the pendant.

It reads part hip-hop icon, part high-fashion runway, and gets stopped at the park by every stranger who wants to ask where you bought it. Answer: you didn’t. You made it.

Pro Tip: Skip real metal chains and use lightweight aluminum — heavier options put strain on your dog’s neck over time.

Level Up Your DIY Dog Collar Game

Listen, making a dog collar isn’t just cute craft time — it’s a small design project that has to actually hold up on a live, moving, occasionally chaotic animal. Most first-timers make the same rookie mistakes. Skip the fluffy yarn, skip the button closures, and please, please skip anything sharp.

Here’s the golden rule: always start with a hardware backbone. That means a real quick-release buckle or D-ring rated for your dog’s pull weight, not a decorative clasp from the jewelry aisle. Your beautiful macramé or leather braid wraps around that backbone, giving you all the aesthetic with none of the “my dog just Houdini’d out of their collar at the dog park” drama.

Second rule: measure twice, cut once. A collar should fit with exactly two fingers of space between the strap and the neck. Too tight, and you risk irritation; too loose, and a determined pup will back right out of it.

Third: reserve decorative collars for supervised time. Beaded, floral, and delicate handmade collars are for walks, photos, and coffee-shop patios — not for solo backyard time where they can snag on a fence or a stick.

Time to Get Crafting

Making a handmade dog collar is such a satisfying way to spoil your furry best friend. You get a piece nobody else at the dog park has, you get to control the fit and safety, and you get bragging rights when strangers ask where you found it.

All you need is a free afternoon, a few dollars of materials, and a pup willing to sit still for the fitting session (bribe with treats accordingly).

While you’re in DIY mode, don’t forget to check out our best service dog breeds guide to learn which breeds thrive on hands-on care and creative enrichment like this.

Which one of these designs are you casting on first?

Best Service Dog Breeds

Best Service Dog Breeds: 10 Loyal Companions Who Change Lives

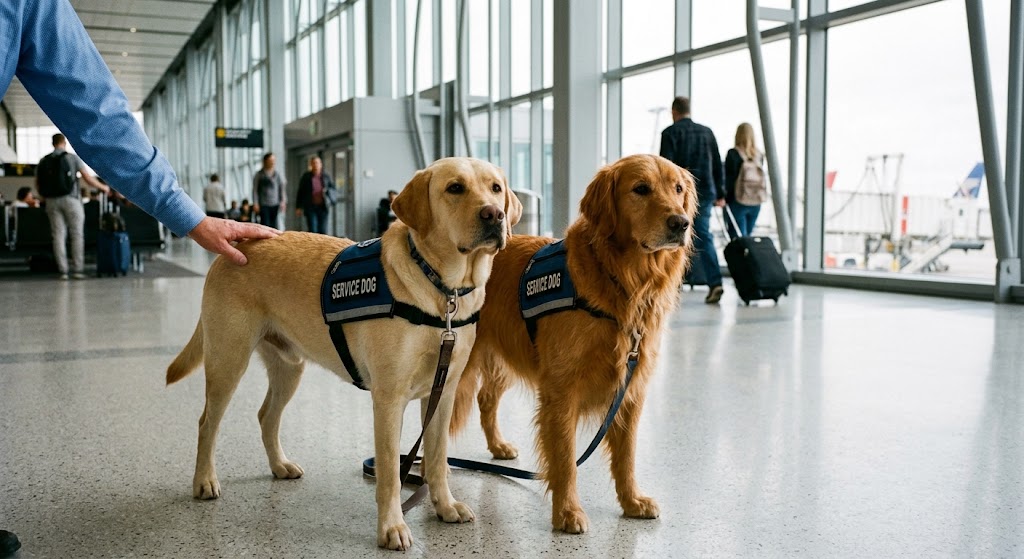
Service dogs are more than pets — they are working partners who guide the blind, alert to seizures, steady a wheelchair, and bring calm to a veteran mid-flashback. The right breed matters. A dog wired for the job learns faster, works longer, and lives a happier life alongside its handler. Below are the ten breeds most consistently chosen by service-dog programs worldwide, why they excel, and where each one fits best.

What Makes a Great Service Dog?

Before diving into the breeds, it helps to know what trainers actually look for. A strong service candidate combines four traits: a stable, unflappable temperament; high biddability (the desire to work with a person); moderate-to-high intelligence paired with a willingness to repeat tasks; and physical soundness suited to the task — a Chihuahua cannot brace a falling adult, and a Great Dane cannot curl under an airplane seat. Reputable programs screen for hips, eyes, heart, and temperament long before formal training begins.

1. Labrador Retriever


If there is a “default” service dog, it is the Labrador. Guide Dogs for the Blind, Canine Companions, and most major programs breed Labs at scale for good reason: they are food-motivated (making training easy), gentle-mouthed (originally bred to retrieve game without damage), athletically capable of mobility work, and socially bombproof around crowds, children, and other dogs.

Best for: Guide work, mobility assistance, medical alert (diabetes, seizure), autism support.
Watch for: Weight gain — a chubby Lab is not a working Lab. Feed to condition, not to appetite.

2. Golden Retriever

Golden Retriever

The Golden brings almost every strength of the Lab plus an extra dose of emotional sensitivity. That sensitivity is why Goldens dominate psychiatric service and facility-therapy work: they read human distress quickly and respond with calm, close proximity rather than agitation.

Best for: PTSD support, autism companion work, mobility, guide work, hospital and courthouse therapy.
Watch for: Coat maintenance and a shorter average lifespan than Labs; screen breeders for cancer history.

3. German Shepherd

How Much Does a German Shepherd Cost

The original guide dog — the first formal guide programs after WWI used German Shepherds — the breed remains a top choice for handlers who need presence, protection instincts, and serious working drive. GSDs excel where the handler benefits from a dog that notices the environment: mobility handlers navigating unpredictable spaces, veterans with PTSD, and diabetic-alert work.

Best for: Mobility, PTSD, medical alert, hearing assistance.
Watch for: Hip and elbow dysplasia. Insist on OFA-cleared parents. Their working intensity is not a fit for every handler — a low-drive GSD is a happier service dog than an over-driven one.

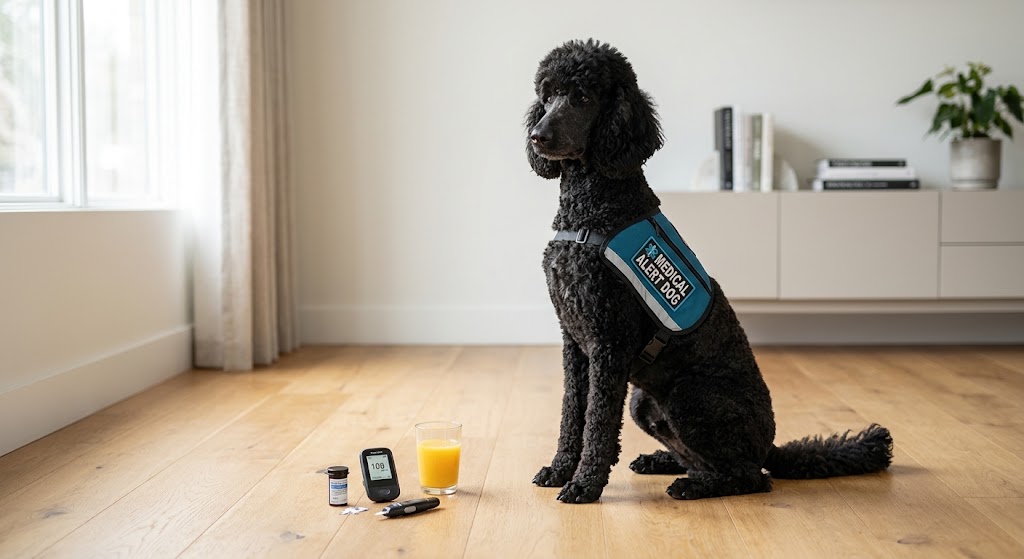
4. Standard Poodle

Do not let the show-ring haircut fool you: Standard Poodles are athletic, brilliant, and among the most trainable breeds on Earth. Their curly coat sheds minimally, which makes them a leading choice for handlers with allergies or those in food-service and medical environments where dander is a concern.
Best for: Handlers with allergies, medical alert, mobility (in the larger Standards, 45+ lb), diabetic alert.
Watch for: Boredom. Poodles need a job or they invent one — usually one you will not like.

5. Border Collie

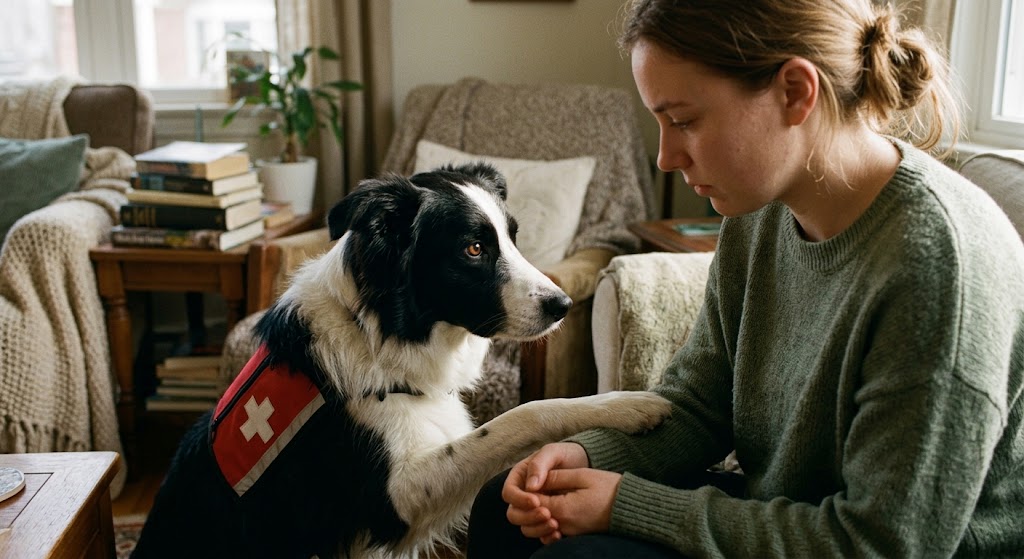
Border Collies are the sports cars of the dog world: fast, precise, and demanding. They shine in medical-alert and psychiatric service roles because they read subtle cues — a shift in breathing, a change in posture — before a person notices it themselves.
Best for: Seizure alert, diabetic alert, psychiatric service for handlers who can meet their exercise and mental-stimulation needs.
Watch for: Under-stimulation. This is not the breed for a sedentary lifestyle. They also can be sound- and motion-sensitive, which requires careful early socialization.

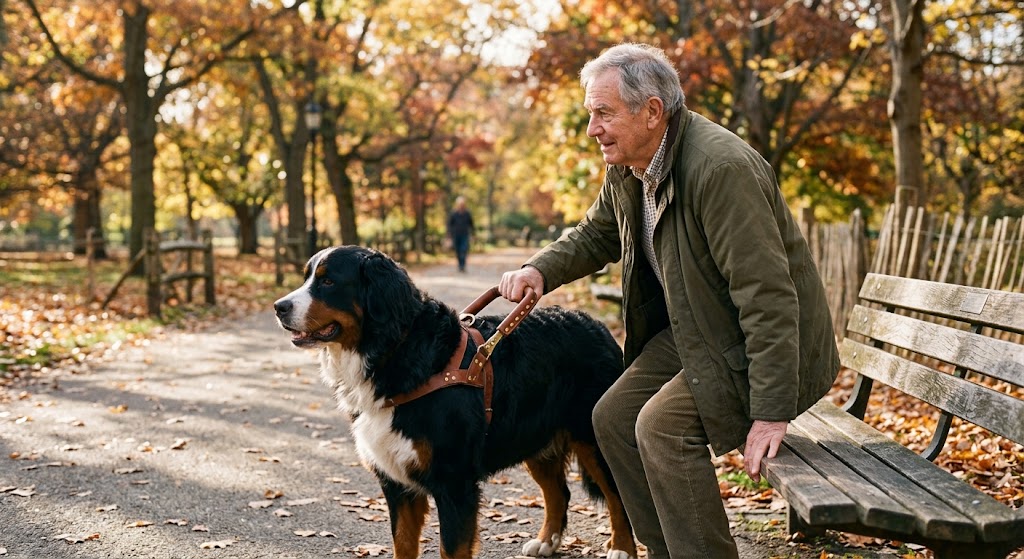
6. Bernese Mountain Dog

Big, calm, and steady, the Berner is a mobility handler’s dream — provided the dog comes from health-tested lines. Their natural inclination toward slow, deliberate movement and close human contact makes them ideal for wheelchair users and handlers who need counter-balance support.

Best for: Mobility assistance, deep pressure therapy, autism support.
Watch for: Lifespan and heat tolerance. Berners average only 7–9 years and struggle in hot climates. Their size is a strength and a limitation.

7. Boxer

Boxers combine muscle with an almost puppyish devotion to their people. They are used less commonly than Labs or Goldens but shine in psychiatric and mobility work for handlers who want a medium-large, short-coated dog with strong intuition.

Best for: PTSD support, mobility, medical response (bringing meds, phones).
Watch for: Brachycephalic breathing issues in poorly-bred lines. Look for longer-muzzled working lines and cardiac clearances.

8. Great Dane

For a tall handler or someone needing serious bracing and counter-balance work, few breeds match the Great Dane. They are surprisingly gentle, quiet indoors, and calm in public. Their sheer size lets them stabilize an adult during a stand or transfer.

Best for: Mobility and counter-balance for tall or heavier handlers.
Watch for: Short lifespan (7–10 years), bloat risk (feed multiple small meals, no exercise around meals), and the practical realities of housing, feeding, and transporting a 130-lb dog.

9. Portuguese Water Dog

Increasingly popular in service programs, PWDs offer Poodle-like intelligence and low-shedding coats in a slightly sturdier, more athletically driven package. They excel in medical alert and are often chosen by handlers who want a hypoallergenic option smaller than a Standard Poodle.

Best for: Medical alert, hearing assistance, allergy-sensitive handlers.
Watch for: Grooming demands and high exercise needs. Not a “low-maintenance” option despite the modest size.

10. Collie (Rough and Smooth)

The classic “Lassie” breed remains one of the most underrated service dogs in the modern era. Collies are gentle, herding-smart, deeply attuned to their people, and typically less intense than Border Collies — a combination that suits psychiatric service, autism support, and hearing-alert work.

Best for: Hearing assistance, autism support, psychiatric service, children’s programs.
Watch for: The MDR1 gene mutation — insist on tested parents. Coat care for Rough Collies is a real commitment.

Breeds to Approach With Caution

Certain breeds are romanticized as service dogs but rarely succeed at scale. Huskies and Malamutes are independent by design and struggle with the “work with me” demand. Livestock guardians like the Great Pyrenees are bred to make autonomous decisions — the opposite of what service work requires. Small toy breeds can excel at medical alert and psychiatric work but cannot perform mobility tasks. And any breed with known aggression concerns or fear-reactivity should not be pushed into service work, no matter how much the handler loves the individual dog.

Choosing the Right Breed for Your Needs

Start with the task, not the breed. A handler needing wheelchair pull work should look at Labs, Goldens, GSDs, Berners, or Danes. A handler with severe allergies is looking at Poodles or PWDs. A handler with unpredictable seizures benefits from a breed with sharp environmental awareness — Border Collies, GSDs, or Poodles. Then filter by lifestyle: how much dog can you actually exercise, groom, feed, and afford? A perfectly matched Lab from a working line will outperform a mismatched “dream breed” every time.

Finally, go through a reputable program or breeder. Owner-training is legal in many jurisdictions but is a two-to-three-year commitment involving hundreds of hours and thousands of dollars. Established programs like Assistance Dogs International maintain member directories with vetted breeding and training standards.

The Bottom Line

The “best” service dog breed is the one whose temperament, size, energy, and health match the handler’s needs. Labs and Goldens earned their reputation for good reason — they succeed across the widest range of tasks and handlers. But a well-bred Poodle, an intuitive Golden, a steady Berner, or a sharp Border Collie can transform a life just as completely. Choose deliberately, screen for health, invest in training, and you will end up with far more than a pet: a partner.

7 Essential Steps for Designing Modern Farmhouse Dog Trot Plans

Building a home with a

1. Glass-Enclosed Central Breezeway Connection

Glass-Enclosed Central Breezeway Connection

Traditional dog trot breezeways are great for hot summers, but they leave you freezing in January and eaten alive by bugs. Adding glass panels fixes this weather problem without ruining the open-air vibe you bought the house for in the first place. You get all the lovely natural light without sacrificing your heating bill.

A glass-enclosed central breezeway simply means framing in that open walkway between your living quarters and sleeping rooms with floor-to-ceiling windows or sliding glass doors. It creates a weather-tight hallway that still feels like you are walking right outside through the trees.

Use oversized glass sliding doors on both sides so you can still open the whole thing up when the weather is nice. Toss a couple of comfortable armchairs in there to make a sunny reading spot that naturally connects both sides of the house.

2. Separated Primary Suite Wing Layout

Separated Primary Suite Wing Layout

Feature Traditional Layout Dog Trot Wing
Noise Level Shared walls Breezeway buffer
Privacy Standard hallway Complete separation

Imagine waking up early for a morning shift while the rest of the household is still fast asleep. Putting your main bedroom on the opposite side of the breezeway makes early noise a total non-issue. You get complete peace without having to tiptoe around your own floors.

This layout takes the classic dog trot concept and updates it for modern privacy needs. Connecting the sleeping wing to the main living area with a covered outdoor hallway creates a natural sound barrier. It gives you a quiet retreat at the end of a long day.

You will especially appreciate this smart separation when guests stay over for the weekend. Everyone gets their own dedicated space to unwind.

3. Vaulted Great Room with Exposed Beams

Vaulted Great Room with Exposed Beams

High ceilings are non-negotiable if you actually want that authentic dog trot feel in your modern farmhouse build. A vaulted great room bridges the gap between the indoor living spaces and the open-air breezeway heritage of these classic homes. You get that massive, sweeping vertical volume that makes small footprints feel enormous, all while pulling hot air up and out of the living area during sticky summer months.

Tossing in some heavy timber or exposed beams anchors all that overhead space so the room still feels cozy instead of like a drafty barn. You should look for reclaimed oak or pine with natural knots, saw marks, and dings to make the ceiling look like it was salvaged from an old structure. Paint the drywall crisp white in between those dark beams to create a high contrast look that defines modern farmhouse style better than any basic shiplap wall ever could.

4. Dual-Zoned Climate Control Layout

Dual-Zoned Climate Control Layout

Dog trot homes are famous for that open central breezeway, but keeping the interior temperatures comfortable can be a real headache. Splitting your HVAC system into two distinct zones lets you heat or cool the main living quarters separately from the bedroom wing.

Without this setup, you’ll end up wasting a fortune trying to condition empty space.

  • Install a dedicated mini-split heat pump to handle the main living area easily.
  • Use smart thermostats to schedule temperatures based on which side of the house you are actually using.
  • Add insulated glass doors to seal off the central breezeway when extreme weather hits.

You’ll save a ton on monthly energy bills without sacrificing that classic open-air aesthetic.

5. Board and Batten Exterior Profile

Board and Batten Exterior Profile

If you want that authentic modern farmhouse look on your dog trot build, you really need to consider a board and batten exterior profile. It adds instant texture and height that flat siding just cannot touch.

I usually recommend sticking with wider boards and narrower battens to keep the proportions feeling right on a larger country home. Engineered wood products hold up best against the elements while still giving you that classic painted timber appearance.

This vertical siding style also works wonders for drawing the eye upward, especially around the open central breezeway. When the afternoon sun hits those shadows, the depth of the pattern really pops. It grounds the whole structure in traditional roots while keeping the aesthetic fresh.

Just make sure your builder installs proper flashing behind the battens to avoid any moisture issues down the road. A little extra care here saves you from major headaches later.

6. Outdoor Living Fireplace in Breezeway

Outdoor Living Fireplace in Breezeway

Putting a fireplace right in the middle of your breezeway changes how you use the whole house. It turns that covered walkway into an extra living room where you will actually want to hang out when the weather turns chilly.

You need to plan the layout carefully so smoke does not blow back into the main house entries. Here is what you should focus on to get it right.

  1. Choose a tall stone chimney that matches the exterior siding to ground the central breezeway structure.
  2. Run a gas line during the initial framing phase so you do not have to haul heavy firewood through the house.
  3. Position comfortable seating facing inward rather than outward to create a cozy conversation space.
  4. Install high output outdoor rated ceiling fans to push trapped heat down during late fall evenings.

7. Symmetrical Double Gable Roof Design

Symmetrical Double Gable Roof Design

You can either connect the two main cabins with a continuous roofline or go with a symmetrical double gable roof design that treats each side as its own distinct structure. A single connected ridge line sometimes looks a bit too heavy, and it misses out on that classic historic charm you’re probably aiming for. On the flip side, matching dual gables create a balanced silhouette while letting the open breezeway in the middle really pop.

I definitely recommend sticking with the twin gable approach for a true modern farmhouse look. It keeps the exterior proportions right and gives you extra ceiling height inside for loft spaces or tall windows. You’ll get that authentic dog trot feel without making the house look like a giant suburban ranch.

Wrapping Up

Bringing these ideas together helps you create a home

Dog Trot Floor Plans: 10 Layouts That Actually Work

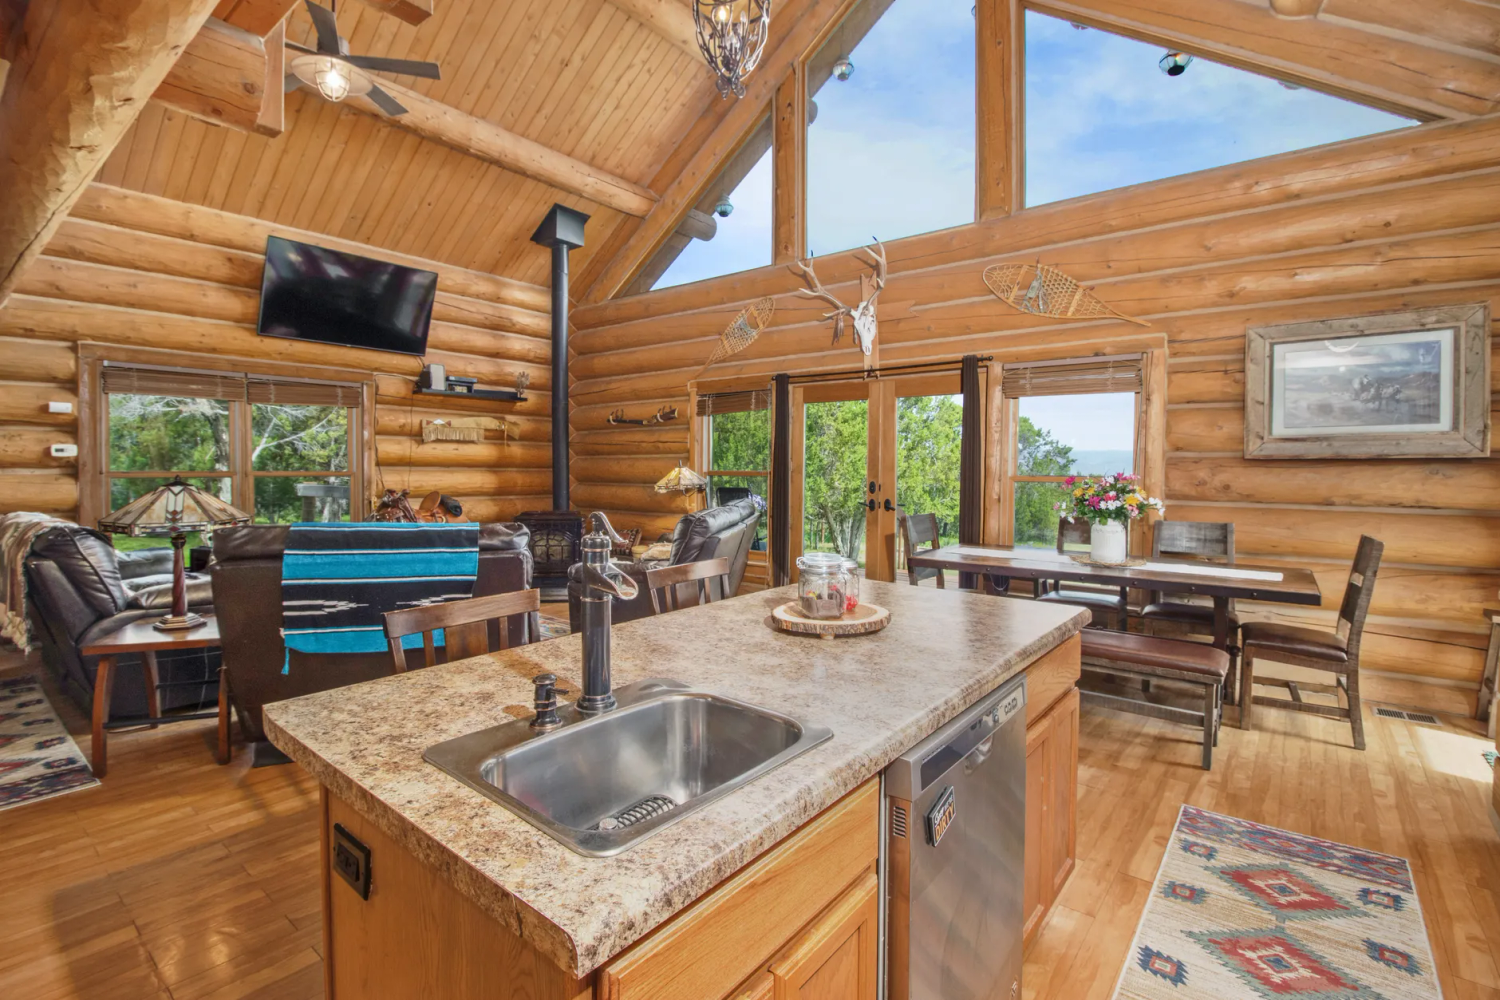
Your dog comes barreling in from the yard — wet paws, muddy belly, tail going like a metronome — and leaves a trail straight across your clean floors. Most floor plans were never designed for a 70-pound fur tornado. Dog trot homes were. That open breezeway running through the center of the house acts as a built-in mudroom, an airflow channel, and a natural dog zone all at once. Here are 10 dog trot floor plans worth your scroll.


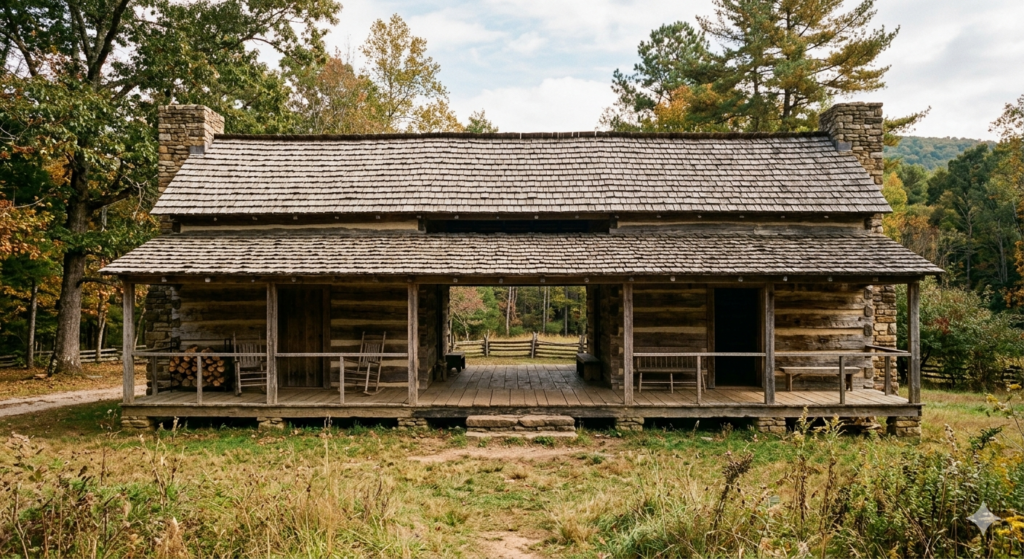
1: The Classic Two-Pen Dogtrot

This is the original. Two separate “pens” — one for living, one for sleeping — joined by an open-air breezeway down the middle. The passage stays markedly cooler than the enclosed rooms, so your dog claims that shaded corridor as her personal kingdom all summer. Recreate it with: hand-hewn or board-and-batten siding, a metal or shake roof, and wide-plank porch decking. Pro tip: Orient the breezeway to catch your region’s prevailing wind, and pour a sealed concrete or stone floor in the passage — never wood — for easy hose-downs.

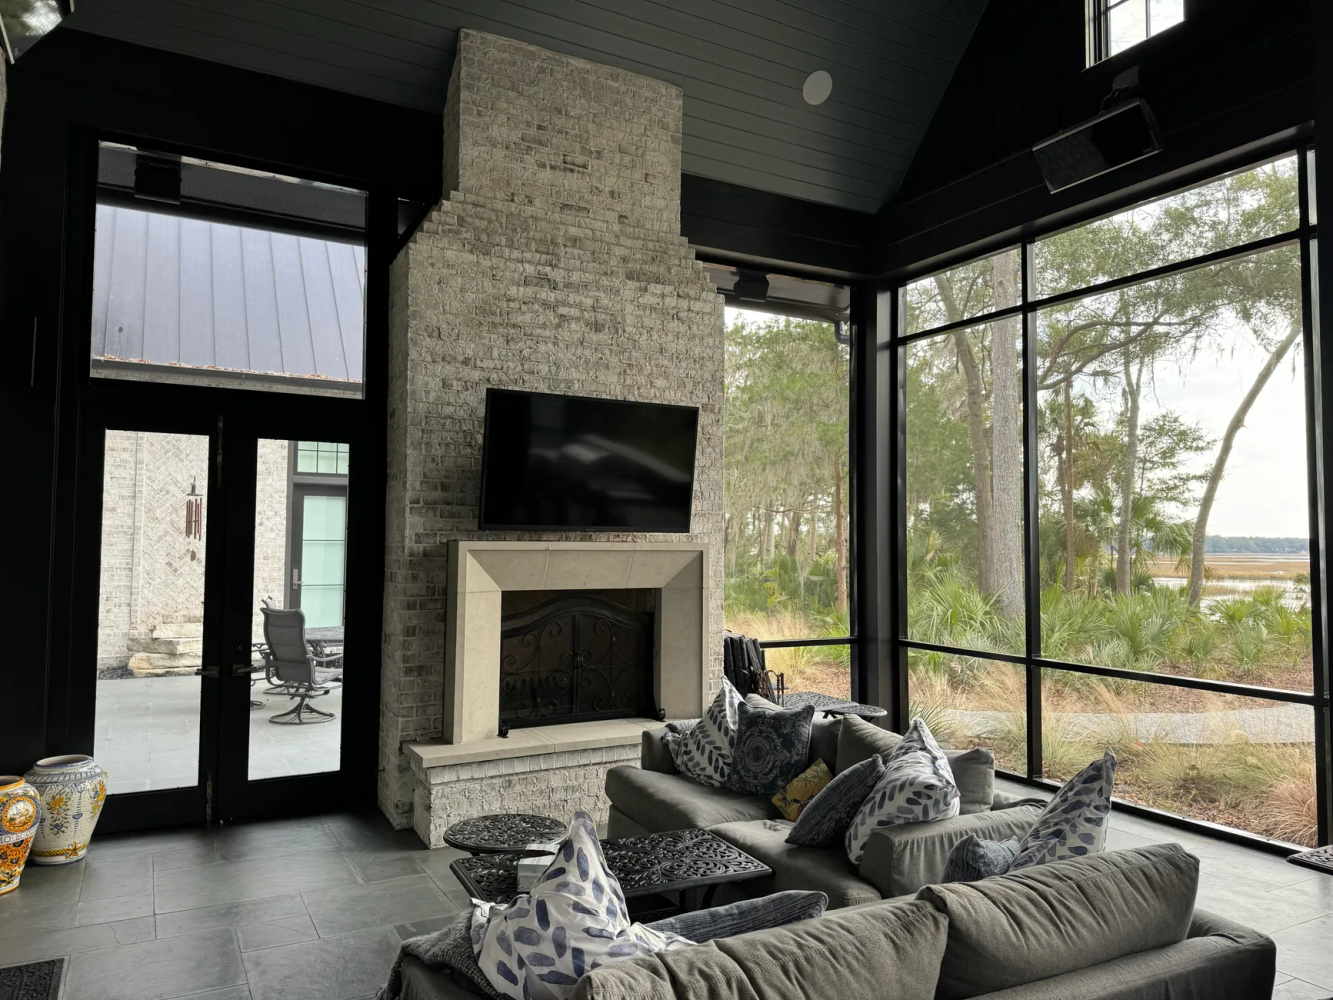
2: The Glass-Walled Modern Breezeway

A contemporary take where floor-to-ceiling glass lines the connector, flooding the pass-through with light and giving your dog panoramic yard views without tracking mud into the living wing. Recreate it with: large-format slate or porcelain tile in the breezeway, slim black or bronze window frames, and warm wood accents to soften the glass. Pro tip: Tile or slate handles wet paws far better than hardwood here — it wipes clean in seconds.

3: The Covered Porch Dogtrot

A full-length covered breezeway turns the center of the home into a shaded outdoor room. Cross-ventilation keeps it cool, so your dog stays comfortable without you constantly refilling the water bowl. Recreate it with: treated hardwood decking, black powder-coated railings, and simple outdoor seating. Pro tip: Leave both sides completely open — closing them in defeats the passive cooling the whole design is built around.

4: The Metal-Clad Farmhouse Dogtrot

Corrugated or standing-seam metal siding paired with a low-pitched roof gives a rugged, low-maintenance shell. The wood-deck breezeway between the two volumes becomes the dog’s pass-through zone. Recreate it with: galvanized or charcoal metal panels, a warm cedar-toned deck, and matte black hardware. Pro tip: A deep roof overhang (at least 24 inches) shades the deck so paws don’t burn on hot days.

5: The Forest Retreat Dogtrot

Two cedar-clad pavilions linked by an open breezeway, nested into the trees. Your dog gets a natural decompression corridor between zones, and mud stays contained to one entry point. Recreate it with: horizontal tongue-and-groove cedar in a warm stain, exposed rafter tails, and large fixed-pane windows flanking the breezeway. Pro tip: Keep the breezeway floor as brick pavers or sealed concrete for stress-free cleanup after forest runs.

6: The Double-Height Loft Dogtrot

A vaulted ceiling with skylights over the breezeway makes a compact footprint feel huge. The open corridor flows from living to kitchen with no walls breaking the path — a clear runway for your dog and full sightlines for you. Recreate it with: large-format concrete tile (scratch-resistant and easy to clean), tongue-and-groove ceilings, and a loft tucked above one pen. Pro tip: Leave a door-free nook at the end of a cabinet run as a built-in dog station — bowl, leash hook, all tucked away.

7: The Courtyard Dogtrot

Instead of a straight pass-through, the breezeway opens onto an enclosed courtyard, giving your dog a safe, contained outdoor space framed by the house itself. Recreate it with: an L- or U-shaped layout, a paved or gravel courtyard, and wide sliding doors connecting both wings to the center. Pro tip: A gravel or stone courtyard drains fast and stays mud-free far better than grass in a high-traffic dog zone.

8: The Screened Breezeway Dogtrot

A screened-in center passage keeps the airflow and openness of a classic dogtrot while keeping bugs out and your dog safely contained. Recreate it with: full-height screen panels, a sturdy screen door at each end, and a wipeable floor. Pro tip: Choose heavy-duty pet-resistant screen mesh so an excited dog doesn’t push through it.

9: The Single-Story L-Shaped Dogtrot

An accessible, all-on-one-level take that swaps the straight breezeway for an open, covered connector at the bend of an L. Great for older dogs (and owners) who’d rather skip stairs. Recreate it with: a continuous low-pile or sealed floor throughout, wide doorways, and a covered link between the two wings. Pro tip: Keep thresholds flush so senior dogs and those with joint issues move between zones easily.

10: The Compact Cabin Dogtrot

A small-footprint cabin version that proves you don’t need acreage. Two tidy rooms, one narrow breezeway, big impact. Perfect for a weekend place or a downsized home where the dog still needs her own pass-through. Recreate it with: simple wood or metal cladding, a single covered breezeway wide enough for comfortable passage, and built-in storage along one pen wall. Pro tip: Even here, keep the breezeway at least 8–10 feet wide so it works as a room, not a wind tunnel.


The One Mistake That Costs You Later

The biggest dog trot regret is building the breezeway too narrow. Under about 10 feet, it stops being a usable room and starts funneling wind like a tunnel. Orient it perpendicular to your area’s dominant wind, size your connecting rooms with the dog in mind, and always choose a hard, sealed floor for the passage. Get those three right and the layout pays you back every rainy day.

Your Floors Deserve a Break — and So Do You

A dog trot floor plan isn’t just charming architecture; it’s a layout that works with how your dog actually lives. Pick the version that fits your land and your climate, keep that breezeway open and easy to clean, and you’ll have a home that breathes better, stays cleaner, and gives your dog a space that’s genuinely her own.

14 Dog Bedroom Ideas Your Dog Would Choose Themselves

Your dog’s bed is shoved in a corner, half-buried under blankets, with toys scattered across three rooms. You love your pup — but the mess clashes with the home you worked hard to make nice. Here’s the good news: a dedicated dog bedroom solves the clutter and gives your dog a calm, secure space of their own. These 14 ideas prove comfort and style can live under the same roof.


#1: Under-Stairs Den Nook

That awkward triangle under your staircase is prime real estate. The low, sloped ceiling creates a natural cave that taps right into your dog’s denning instinct. Add a flat platform with an orthopedic cushion, paint the walls a warm neutral, and hang a curtain at the entry for privacy. Pro tip: Mount two floating shelves at the back for blankets and toys so nothing spills into the hallway.

#2: Spare Room Full Conversion

If you’ve got a spare bedroom collecting dust, hand it over. A full conversion gives multi-dog homes room to spread out — place beds against opposite walls with a few feet between them so each dog owns their space. Sheer curtains soften the morning light, and a sealed vinyl-plank floor wipes clean in minutes. Pro tip: Add a low feeding station and a wall hook for leashes to keep everything in one room.

#3: Window-Seat Bed

Dogs are natural watchers. A built-in window seat lets your pup track the backyard, soak up sun, and nap in the same spot. Raise the platform about 18 inches so you can tuck storage baskets underneath. Pro tip: Use a washable cushion cover in a fabric that matches your room — it reads as furniture, not a dog bed.

#4: Built-In Platform with Storage Cubbies

A raised bed over cube organizers is the budget hero of dog bedrooms. A simple storage bench plus a thick cushion gives you a custom look for very little. Baskets below hold toys, grooming tools, and backup bedding. Pro tip: Label each basket so your evening tidy-up takes under five minutes.

#5: Walk-In Closet Conversion

A small or unused walk-in closet becomes a private suite with almost no renovation. Remove the doors, paint it bright, and slide in a low bed. The enclosed shape feels secure, while the open doorway keeps air flowing. Pro tip: Use the existing shelving for sealed food containers and folded blankets.
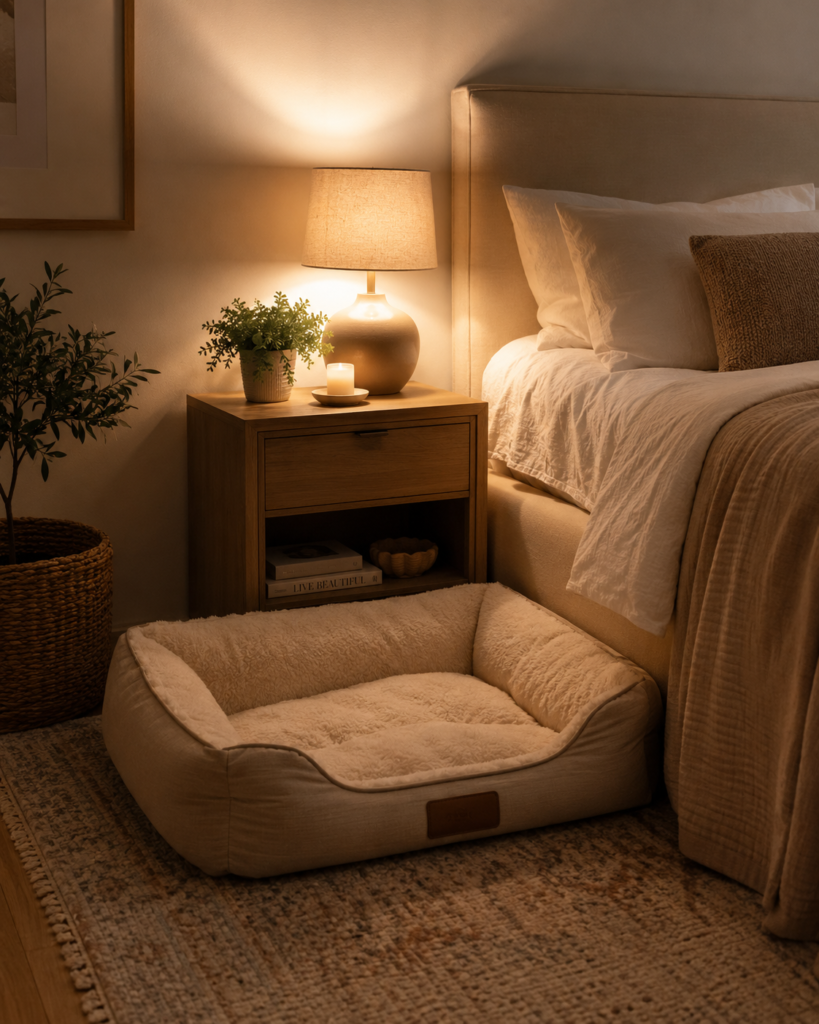
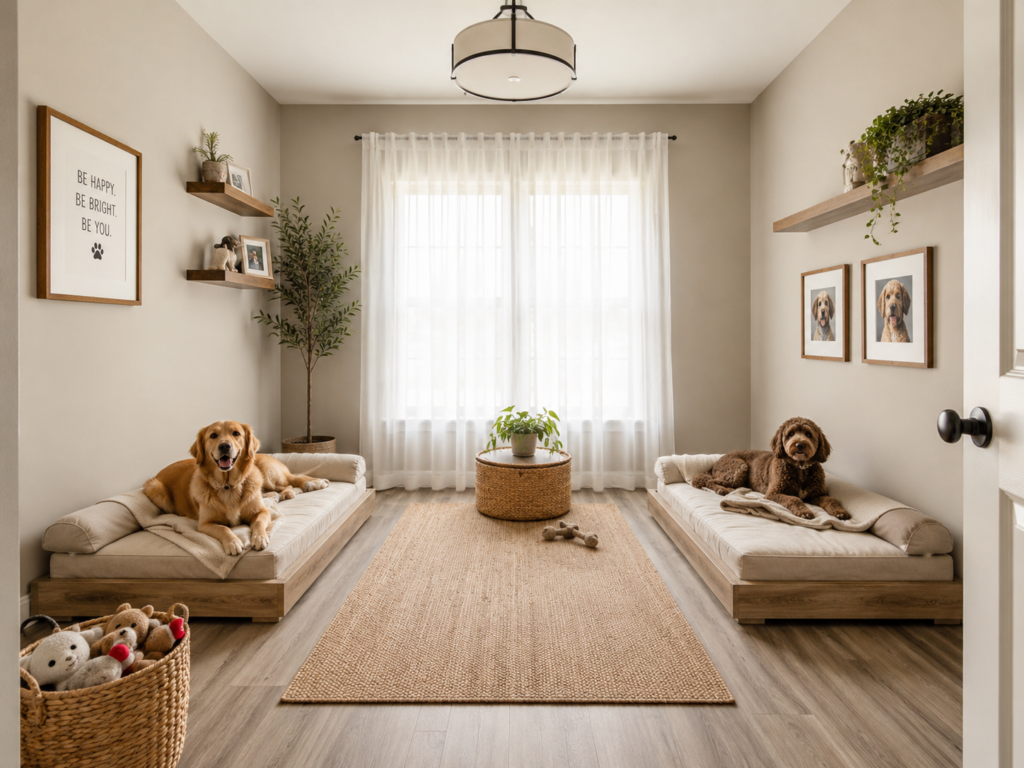
#6: Bedside Floor Nook

Some dogs just want to be near you. Set a low, padded nook on your side of the bed so your pup sleeps close without taking over the mattress. A washable rug underneath catches stray fur. Pro tip: A soft, low nightlight helps anxious dogs settle and makes midnight potty trips easier.

#7: Bay Window Sunbed

A bay window is a built-in lounge waiting to happen. Lay a firm cushion across the ledge (or a low platform beneath it) so your dog gets warmth and a view. Pro tip: Add a roller shade so you can block harsh afternoon sun without moving the bed.

#8: Cozy Canopy Corner

Drape a sheer canopy from a ceiling hook over a corner bed and you’ve created an instant retreat. The fabric softens the space and signals “this is mine” to your dog. Pro tip: Test the canopy over a temporary setup for a few nights before committing — you’ll quickly see if your dog loves the enclosed feel.

#9: Repurposed Furniture Den

An old dresser or sideboard can hide a whole dog bedroom. Remove a center panel to open a cave, lay a cushion inside, and keep the drawers for toys and supplies. The top becomes a display shelf. Pro tip: Paint it to match your walls and guests will read it as décor, not a dog zone.

#10: Bunk Beds for Two Dogs

Two dogs, one footprint. Stacked platforms in a nook or laundry room give each dog their own level. Build steps with pull-out drawers so the climb doubles as storage, and keep the lower bed close to the floor for older pups. Pro tip: Use removable, washable covers on both mattresses for easy laundry days.

#11: Mudroom Sleeping Station

The mudroom is already built for muddy paws, so it’s a natural fit. A bench-style bed with a wipeable floor, leash hooks, and a towel rack keeps the mess where it belongs — right by the door. Pro tip: Keep a stack of washable mats nearby so post-walk cleanup is a quick swap.

#12: Shared Reading Nook

If you have a quiet reading corner, share it. A small dog bed beside your armchair turns it into a two-being sanctuary. The calm, low-traffic spot helps your dog wind down alongside you. Pro tip: A woven basket within reach keeps a chew toy and a blanket tidy and close.

#13: Crate-Inside-Cabinet Hideaway

For dogs who feel safe in a crate but you’d rather not see one, tuck it inside a slatted cabinet. The vertical slats allow airflow while the closed look blends with your furniture. Open the door at bedtime, close it during the day. Pro tip: Match the cushion inside to your dog’s main bed so they enter willingly.

#14: Floor Cushion Sanctuary Corner

The simplest idea on the list, and often the one dogs pick on their own. A thick, textured floor cushion in a corner near natural light gives a den-like feel without a full build. The corner walls offer security; the soft fibers invite nesting. Pro tip: Place it where your dog already likes to settle — they’ll claim it instantly.


Your Pup’s Dream Space Starts Today

You don’t need a renovation or a big budget to give your dog a bedroom they’ll love — just one well-chosen corner and a comfortable bed. Start small, watch where your dog naturally gravitates, and build the space around their habits. A little planning means a calmer dog, a tidier home, and a lot more tail wags.

Cat BMI Calculator: Is My Cat a Healthy Weight?

Use our free cat BMI calculator to check whether your cat is underweight, ideal, overweight, or obese — based on body weight, body condition score (BCS), and breed size. Includes a personalised daily calorie target for weight loss or maintenance.

What Is a Healthy Weight for a Cat?

Most domestic cats have a healthy weight of 8–10 lb (3.6–4.5 kg), but ideal weight varies by breed, sex, and body frame. A large Maine Coon may be healthy at 18 lb, while a petite Siamese is ideal at 6–8 lb. Weight alone is less accurate than a Body Condition Score (BCS) — the vet-standard method for assessing feline body composition.

Breed TypeTypical Healthy Weight (Female)Typical Healthy Weight (Male)
Small breeds (Singapura, Devon Rex)4–6 lb (1.8–2.7 kg)5–8 lb (2.3–3.6 kg)
Medium breeds (DSH, Siamese, Abyssinian)6–9 lb (2.7–4.1 kg)8–12 lb (3.6–5.4 kg)
Large breeds (Ragdoll, Norwegian Forest)10–15 lb (4.5–6.8 kg)12–20 lb (5.4–9.1 kg)
Maine Coon8–12 lb (3.6–5.4 kg)13–18 lb (5.9–8.2 kg)

Cat Body Condition Score (BCS): The Real Cat BMI

Unlike humans, cats don’t have a direct BMI formula. Vets use the 9-point Body Condition Score (BCS) scale developed by Purina, which assesses fat coverage over ribs, spine, and waist definition. This is the most accurate way to assess your cat’s weight status at home.

BCS ScoreCategoryWhat You Feel & SeeAction
1–2Severely underweightRibs, spine, and hip bones clearly visible with no fat cover. Severe muscle loss.Vet visit immediately
3UnderweightRibs easily visible, minimal fat cover, obvious waist and abdominal tuck.Increase calories; vet check
4–5✅ IdealRibs easily felt with slight fat cover. Visible waist from above. Abdominal tuck present.Maintain current diet
6–7OverweightRibs felt with firm pressure. Waist barely visible. Slight abdominal rounding.Reduce calories 10–20%
8–9ObeseRibs very difficult to feel. No waist. Heavy abdominal fat pad. Fat deposits on neck and limbs.Vet-supervised weight loss

How to Check Your Cat’s BCS at Home

  • Rib check: Run your fingers along your cat’s ribcage with light pressure. You should be able to feel individual ribs easily — like running your hand over the back of your own knuckles. If you have to press hard to find them, your cat is overweight. If they protrude visibly, your cat is underweight.
  • Waist check: Look at your cat from above. There should be a visible narrowing behind the ribs — a defined waist. No visible waist = overweight.
  • Abdominal tuck: Look at your cat from the side. The belly should tuck upward behind the ribcage. A sagging belly or prominent fat pad = overweight or obese.

Cat Weight Status Calculator by Current Weight

Use this quick reference to estimate your cat’s weight status by current body weight for a typical domestic shorthair:

Current WeightLikely Status (DSH / average cat)Estimated Ideal Weight
Under 5 lb (2.3 kg)Underweight7–9 lb depending on frame
6–9 lb (2.7–4.1 kg)✅ Ideal (female) / Low-normal (male)Maintain
8–11 lb (3.6–5 kg)✅ Ideal (male)Maintain
12–14 lb (5.4–6.4 kg)OverweightTarget 9–11 lb
15–17 lb (6.8–7.7 kg)ObeseTarget 9–11 lb (gradual loss)
18 lb+ (8.2 kg+)Severely obeseVet-supervised plan required

Cat Weight Loss Calorie Calculator

If your cat is overweight, safe weight loss requires a calorie reduction — never starving, as cats can develop hepatic lipidosis (fatty liver disease) when food is restricted too severely.

Safe weight loss calorie formula:

  • Calculate RER at your cat’s ideal body weight (not current): RER = 70 × (ideal weight in kg)^0.75
  • Multiply by 0.8 for weight loss
  • Never feed less than the RER at ideal weight (no multiplier)
Ideal Target WeightRER (kcal/day)Weight Loss Target (0.8× RER)Maintenance (1.2× RER)
7 lb (3.2 kg)168 kcal134 kcal/day202 kcal/day
8 lb (3.6 kg)185 kcal148 kcal/day222 kcal/day
9 lb (4.1 kg)203 kcal163 kcal/day244 kcal/day
10 lb (4.5 kg)218 kcal175 kcal/day262 kcal/day
11 lb (5 kg)234 kcal187 kcal/day281 kcal/day

Target weight loss rate: 0.5–2% of body weight per week. For a 15 lb cat targeting 10 lb, expect 6–12 months of gradual loss under veterinary supervision.

Health Risks of Feline Obesity

Obesity is the most common preventable disease in cats. An overweight or obese cat is at significantly higher risk of:

  • Type 2 diabetes mellitus — overweight cats are 4× more likely to develop diabetes
  • Hepatic lipidosis (fatty liver disease) — can develop within days of food restriction or illness in obese cats
  • Osteoarthritis — excess weight accelerates joint damage, especially in older cats
  • Urinary tract disease (FLUTD) — obesity is a major risk factor for feline lower urinary tract disease
  • Heart disease — hypertrophic cardiomyopathy risk increases with excess body fat
  • Reduced lifespan — studies show obese cats live on average 2.5 years less than healthy-weight cats

How to Help Your Cat Lose Weight

  • Switch to a measured diet: Stop free-feeding. Weigh food with a kitchen scale — cup measurements are inaccurate by up to 80%.
  • Use a weight management food: High-protein, low-carb, calorie-controlled formulas (e.g., Hill’s Prescription Diet r/d, Royal Canin Satiety) are most effective.
  • Split meals: Feed 2–4 small meals per day. Puzzle feeders slow eating and increase mental stimulation.
  • Increase activity: 2 × 10-minute interactive play sessions daily burn calories and reduce boredom eating.
  • Monthly weigh-ins: Track progress monthly. A food scale at home makes this easy — weigh yourself holding and not holding the cat, subtract the difference.
  • Work with your vet: For cats over BCS 7, a vet-supervised weight loss plan with regular check-ins is strongly recommended to avoid hepatic lipidosis.

Frequently Asked Questions

How do I calculate my cat’s BMI?

Cats don’t use a BMI formula the way humans do. The veterinary equivalent is the Body Condition Score (BCS) — a 9-point scale assessed by feeling your cat’s ribs, observing their waist from above, and checking for an abdominal tuck from the side. A BCS of 4–5 is ideal. BCS 6–7 is overweight; BCS 8–9 is obese.

What is a healthy weight for a cat?

Most domestic cats are healthy at 8–10 lb (3.6–4.5 kg), but ideal weight varies by breed and sex. Petite breeds like Siamese may be healthy at 6–8 lb, while large breeds like Maine Coons can be healthy at 13–18 lb. Focus on body condition score rather than a single weight number for the most accurate assessment.

How many calories should an overweight cat eat per day?

For safe weight loss, feed your cat 80% of their RER calculated at their ideal (target) body weight — not their current weight. For most cats targeting 9–10 lb, this works out to approximately 140–175 kcal per day. Never restrict below the RER without veterinary guidance, as severe restriction can cause hepatic lipidosis.

Is my cat fat or just big-boned?

Do the rib check: place your hands on your cat’s sides and feel for ribs with light finger pressure. If you can feel them easily (like knuckles under skin), your cat is a healthy weight. If you have to press firmly or can’t feel them at all, your cat is overweight regardless of frame size. A visible waist from above and abdominal tuck from the side are the clearest signs of healthy weight.

How long does it take for a cat to lose weight?

Safe feline weight loss is slow — target 0.5–2% of body weight per week. A cat losing 1% per week at 14 lb targeting 10 lb would take approximately 20–25 weeks (5–6 months). Faster weight loss increases the risk of hepatic lipidosis. Patience and consistency are essential; most cats reach their target weight within 6–12 months.

Pet Nutrition Calculator: Daily Calories & Nutrients for Any Pet

Use our free pet nutrition calculator to find your pet’s daily calorie needs, macronutrient targets, and feeding amounts — covering dogs, cats, rabbits, guinea pigs, and birds based on weight, age, and life stage.

What Is a Pet Nutrition Calculator?

A pet nutrition calculator helps you determine exactly how many calories and nutrients your pet needs each day based on their species, weight, age, reproductive status, and activity level. It takes the guesswork out of portion sizes and helps you compare food labels to ensure your pet gets complete, balanced nutrition.

How to Calculate Your Pet’s Daily Calorie Needs

The foundation of pet nutrition is the Resting Energy Requirement (RER) — the calories your pet needs at rest. From there, a life stage multiplier gives the Daily Energy Requirement (DER).

The RER Formula (All Species)

RER = 70 × (body weight in kg)^0.75

Quick examples:

Pet WeightWeight in kgRER (kcal/day)
5 lb2.3 kg~121 kcal
10 lb4.5 kg~206 kcal
20 lb9.1 kg~352 kcal
30 lb13.6 kg~482 kcal
50 lb22.7 kg~697 kcal
70 lb31.8 kg~899 kcal

DER Multipliers by Life Stage

Multiply RER by the appropriate factor for your pet’s life stage:

Life Stage / StatusMultiplier
Neutered adult (maintenance)1.2× RER
Intact adult (maintenance)1.4× RER
Inactive / obese-prone adult1.0× RER
Weight loss0.8× RER
Light work / active pet1.6× RER
Moderate work2.0× RER
Heavy work (sled dogs, sport)2.0–5.0× RER
Puppy / kitten (0–4 months)3.0× RER
Puppy / kitten (4 months–adult)2.0× RER
Pregnant (last 3 weeks)1.5–25.0× RER (species-specific)
Lactating2.0–6.0× RER

Pet Nutrition Calculator by Species

Dog Nutrition Calculator

Adult dogs need a diet that meets AAFCO nutrient profiles for maintenance. Key daily targets for a neutered adult dog:

NutrientMinimum (% of DM)Notes
Protein18%25–30% recommended for active dogs
Fat5.5%12–18% typical for maintenance
Fibre<5% (NRC guideline)Higher for weight management
Calcium0.5%1.0–1.8% for puppies
Phosphorus0.4%Ca:P ratio should be 1:1 to 2:1

Cat Nutrition Calculator

Cats are obligate carnivores with higher protein requirements than dogs. Key targets for an adult neutered cat:

  • Calories: 200–300 kcal/day for a 8–10 lb cat (varies with activity)
  • Protein: Minimum 26% DM (30–40% recommended)
  • Fat: Minimum 9% DM
  • Taurine: 0.1% DM (essential — cats cannot synthesise it)
  • Arachidonic acid: Required — cats cannot convert linoleic acid

Rabbit Nutrition Calculator

Rabbits are herbivores with specialised digestive needs. Daily nutrition targets for an adult rabbit (4.4 lb / 2 kg):

  • Calories: ~100–120 kcal/day
  • Unlimited timothy hay: Should make up 80–90% of diet
  • Fresh leafy greens: 1–2 cups per 5 lb body weight daily
  • Pellets: ¼ cup per 5 lb body weight (adult, maintenance)
  • Water: 50–100 ml per kg body weight per day

Guinea Pig Nutrition Calculator

Guinea pigs require dietary vitamin C (they cannot synthesise it). Daily targets for an adult guinea pig (~1 kg):

  • Calories: ~75–100 kcal/day
  • Timothy hay: Unlimited (foundation of diet)
  • Fresh vegetables (vitamin C-rich): 1 cup daily (bell peppers, kale, parsley)
  • Vitamin C: 25–50 mg/day minimum (90 mg if pregnant)
  • Pellets: 1/8 cup daily

Bird (Parrot) Nutrition Calculator

Parrot nutrition varies by species, but general guidelines for a medium parrot (e.g., African Grey, Amazon):

  • Pelleted diet: 60–70% of total diet
  • Fresh vegetables and fruit: 20–30% (leafy greens, carrots, berries)
  • Seeds/nuts: Less than 10% (high in fat — treats only)
  • Avoid: Avocado, chocolate, onion, caffeine, alcohol, xylitol

How to Read a Pet Food Label for Nutrition

When comparing pet foods, use the dry matter (DM) basis — not the as-fed percentages on the label — for an accurate comparison:

DM% = As-fed% ÷ (1 − moisture%)

Example: A wet food showing 10% protein with 75% moisture = 10 ÷ 0.25 = 40% protein on a dry matter basis — much higher than it appears.

Frequently Asked Questions

How do I calculate my pet’s nutritional needs?

Start by calculating your pet’s RER using the formula: 70 × (body weight in kg)^0.75. Then multiply by the appropriate life stage factor (1.2 for a neutered adult, 2.0–3.0 for puppies and kittens). This gives your pet’s daily calorie target. Divide by the calorie density of your chosen food (kcal per cup or per 100g) to get the daily feeding amount.

What nutrients do pets need every day?

All pets need protein, fat, carbohydrates (varies by species), vitamins, minerals, and water daily. Dogs and cats specifically require certain nutrients they cannot synthesise: cats need taurine and arachidonic acid from animal sources; dogs need specific essential fatty acids. Guinea pigs and primates need dietary vitamin C. Always feed a complete, balanced commercial diet formulated for your pet’s species and life stage.

How do I know if my pet is getting enough nutrition?

Signs of good nutrition include a shiny coat, healthy weight, good energy levels, normal digestion, and clear eyes. Signs of nutritional deficiency can include dull coat, lethargy, weight loss or gain, digestive issues, and skin problems. Annual vet checkups with bloodwork are the most reliable way to assess your pet’s nutritional status.

Is a homemade pet diet nutritionally complete?

Most homemade pet diets are not nutritionally complete without careful formulation by a board-certified veterinary nutritionist. Studies show the majority of DIY pet food recipes found online are deficient in at least one essential nutrient. If you want to feed homemade, consult a specialist or use a service like BalanceIT to formulate a complete recipe for your pet’s specific needs.

What is the best pet nutrition calculator online?

For dogs specifically, the best free online nutrition calculators include PetSmush’s dog nutrition and calorie calculators, the Pet Nutrition Alliance calculator, and the NRC-based tools provided by many veterinary school websites. For cats and exotic pets, the Ohio State University Veterinary Medical Center and the House Rabbit Society offer reliable species-specific nutrition guidance.

Pet Store Valuation Calculator: What Is Your Pet Business Worth?

Use our free pet store valuation calculator to estimate what your pet retail business is worth — based on annual revenue, inventory value, profit margins, location, and current market multiples in 2026.

How Much Is a Pet Store Worth?

A pet store in the US is typically valued at 0.3–0.5× annual revenue or 2–4× annual net profit (EBITDA). Retail businesses generally trade at lower revenue multiples than service businesses, but pet stores with grooming services, loyalty programs, or exclusive products command significantly higher valuations.

Pet Store TypeRevenue MultipleEBITDA MultipleAverage Value Range
Small independent pet shop0.3–0.5×2.0–3.0×$50,000–$200,000
Mid-size pet retail store0.4–0.7×2.5–3.5×$150,000–$600,000
Pet store + grooming services0.6–1.0×3.0–4.5×$250,000–$900,000
Pet store + boarding / daycare0.8–1.2×3.5–5.0×$400,000–$1,500,000
Online pet retail business0.5–1.5×2.5–4.0×Varies widely

Pet Store Valuation Calculator: Step-by-Step

Step 1: Calculate Annual Revenue

Tally all income for the past 12 months:

  • Product sales (food, supplies, accessories, toys)
  • Live animal sales (fish, birds, small animals — if applicable)
  • Grooming services revenue (if offered)
  • Boarding or daycare revenue (if offered)
  • Online/e-commerce sales

Step 2: Calculate EBITDA (Net Operating Profit)

Expense CategoryTypical % of Revenue
Cost of goods sold (COGS)40–55%
Rent / lease8–15%
Staff wages15–25%
Utilities2–5%
Insurance1–3%
Marketing1–3%
Net profit margin5–20%

Example: $400,000 annual revenue × 12% net margin = $48,000 EBITDA.

Step 3: Value the Inventory Separately

Inventory is typically valued at cost (not retail price) and added on top of the business valuation. For most pet stores, inventory is worth $20,000–$150,000 at cost depending on store size.

Step 4: Apply Valuation Multiples

  • Revenue method: $400,000 × 0.5× = $200,000
  • EBITDA method: $48,000 × 3.0× = $144,000
  • Inventory (at cost): + $60,000
  • Total estimated value: $200,000–$260,000

What Increases Pet Store Value?

  • Loyalty program with active members: A documented repeat customer base reduces revenue risk and increases buyer confidence.
  • Long lease at favorable rent: 3+ years remaining on a below-market lease is a significant asset.
  • Exclusive or specialty products: Stores carrying unique brands or live animals that competitors don’t stock command premiums.
  • Add-on services (grooming, boarding): Service revenue has higher margins than retail and dramatically increases multiples.
  • Strong Google Maps presence: 4.5+ stars with 200+ reviews drives foot traffic and increases perceived value.
  • Clean financial records: 3 years of tax returns and P&L statements make due diligence smooth and build buyer trust.

What Decreases Pet Store Value?

  • Declining sales trend over 2+ years
  • High reliance on owner’s personal relationships with suppliers
  • Outdated POS system or no inventory management software
  • Month-to-month lease with uncertain renewal
  • No documented customer database
  • Lease in a declining foot-traffic location

Pet Industry Market Context (2026)

The US pet industry generated over $150 billion in revenue in 2025, with pet food and supplies accounting for the largest share. Independent pet stores are under competitive pressure from chains like PetSmart and Petco as well as online retailers like Chewy.com. However, specialty stores focused on premium nutrition, exotic pets, or local community engagement continue to thrive and command strong valuations.

Frequently Asked Questions

How do you value a pet store business?

Pet stores are typically valued using a combination of revenue multiples (0.3–0.7× annual revenue) and EBITDA multiples (2–4× net profit), with inventory value added separately at cost. Stores with grooming or boarding services are valued more like service businesses and command higher multiples.

How much does a pet store owner make per year?

The average independent pet store owner earns $30,000–$80,000 per year in owner’s compensation, depending on store size, location, and whether they work in the store themselves. Stores with grooming or boarding services can generate owner salaries of $60,000–$150,000+.

Is buying a pet store a good investment?

Buying a pet store can be a good investment if it has a loyal customer base, favorable lease terms, and diversified revenue beyond basic retail (e.g., grooming, boarding, or specialty products). Pure retail pet stores face strong competition from online sellers and big-box chains, so differentiation is key to long-term value.

How do I sell my pet store?

To sell your pet store: (1) Prepare 3 years of financial statements and tax returns, (2) document inventory at cost, (3) compile a customer loyalty or mailing list, (4) get a professional business valuation, (5) list on BizBuySell or work with a business broker specialising in retail, and (6) plan for a 30–90 day transition to retain staff and customer relationships.

What is the profit margin of a pet store?

The average net profit margin for an independent pet store is 5–15%. Stores that add grooming services typically see overall margins of 15–25%, while those with boarding and daycare can reach 20–30% net margins. Premium and specialty pet stores outperform mass-market retailers on margin.

Pet Grooming Business Valuation Calculator: What Is Your Salon Worth?

Use our free pet grooming business valuation calculator to estimate what your grooming salon is worth — based on annual revenue, profit margins, equipment, client base, and local market conditions in 2026.

How Much Is a Pet Grooming Business Worth?

A pet grooming business in the US is typically valued at 1–3× annual revenue or 2–4× annual net profit (EBITDA), depending on size, location, client retention, and whether the owner is the primary groomer. Mobile grooming businesses often command higher multiples due to lower overhead and growing demand.

Business TypeTypical Revenue MultipleTypical EBITDA Multiple
Solo home-based groomer0.5–1.0×1.5–2.0×
Single-location salon (staff)1.0–2.0×2.0–3.0×
Mobile grooming (van/trailer)1.5–2.5×2.5–4.0×
Multi-location salon chain2.0–3.0×3.0–5.0×
Franchise grooming location1.5–2.5×2.5–4.0×

Pet Grooming Business Valuation Calculator

Follow these steps to estimate your grooming business value:

Step 1: Calculate Annual Revenue

Add up all revenue streams for the past 12 months:

  • Grooming services (baths, haircuts, nail trims)
  • Add-on services (teeth brushing, de-shedding, flea treatments)
  • Retail product sales (shampoos, brushes, accessories)
  • Boarding or daycare (if applicable)

Example: If your salon generates $180,000/year in grooming services + $20,000 in retail = $200,000 total annual revenue.

Step 2: Calculate Net Profit (EBITDA)

Subtract operating expenses from revenue:

Expense CategoryTypical % of Revenue
Staff wages (if applicable)30–40%
Rent / lease8–15%
Supplies & products10–15%
Insurance2–5%
Marketing & advertising2–5%
Equipment maintenance2–4%
Net profit margin (owner-operated)25–40%

Example: $200,000 revenue × 30% net margin = $60,000 annual net profit.

Step 3: Apply the Valuation Multiple

Choose your multiple based on business type and quality factors:

  • Revenue method: $200,000 × 1.5× = $300,000 estimated value
  • EBITDA method: $60,000 × 2.5× = $150,000 estimated value

Most buyers will average these two approaches. A realistic asking price for this example would be $200,000–$275,000 depending on market conditions and deal structure.

Factors That Increase Pet Grooming Business Value

  • Recurring client base: Businesses with 60%+ repeat clients within 90 days command higher multiples.
  • Online booking system: Automated scheduling reduces owner dependency and increases buyer confidence.
  • Staff groomers (not owner-dependent): A salon that runs without the owner is worth significantly more.
  • Strong Google reviews: 4.5+ stars with 100+ reviews is a significant value driver in local markets.
  • Long lease term remaining: 3+ years left on a lease at favorable rates increases value for salon locations.
  • Mobile unit owned outright: A paid-off grooming van with low mileage adds $20,000–$60,000 to value.

Factors That Decrease Pet Grooming Business Value

  • Owner is the sole groomer (buyer must replace a key person)
  • No documented client list or booking software
  • Month-to-month lease with uncertain renewal
  • High staff turnover or ongoing HR issues
  • Equipment nearing end of life (tubs, dryers, clippers)
  • Declining revenue trend over the past 2–3 years

Average Pet Grooming Business Revenue & Profit Benchmarks (2026)

Business SizeAnnual RevenueEstimated Value Range
Solo home groomer$40,000–$80,000$30,000–$80,000
1-groomer salon$80,000–$150,000$80,000–$200,000
2–3 groomer salon$150,000–$350,000$175,000–$500,000
Mobile grooming (1 van)$80,000–$180,000$100,000–$300,000
Multi-location / franchise$500,000+$750,000–$2,000,000+

Frequently Asked Questions

How do you value a pet grooming business?

Pet grooming businesses are typically valued using a revenue multiple (1–3× annual revenue) or an EBITDA multiple (2–4× annual net profit). The most accurate valuation averages both methods and adjusts for business-specific factors like client retention, owner dependency, lease terms, and equipment condition.

What is a good profit margin for a pet grooming business?

A healthy profit margin for an owner-operated grooming salon is 25–40%. Mobile groomers often see higher margins (35–50%) due to lower overhead. Salons with multiple staff groomers typically see lower margins (15–25%) but higher total profit due to greater revenue volume.

How much does a pet grooming business make per year?

A single-groomer salon typically generates $80,000–$150,000 in annual revenue, with the owner taking home $30,000–$60,000 after expenses. A 2–3 groomer operation can generate $150,000–$350,000 per year. Mobile groomers in high-demand urban areas often earn $80,000–$180,000 annually.

Is a pet grooming business a good investment?

Pet grooming is generally considered recession-resistant — pet owners continue grooming their pets even in economic downturns. The US pet grooming industry generates over $11 billion annually and is growing at approximately 7% per year. A well-run grooming business with a loyal client base can be a solid investment, especially mobile operations with low overhead.

How do I sell my pet grooming business?

To sell your grooming business: (1) Organise 3 years of financial records, (2) document your client list and booking data, (3) get a professional valuation or use a business broker, (4) list on platforms like BizBuySell or work with a pet-industry broker, and (5) structure a transition period to retain clients and staff confidence.

Pet Transport Cost Calculator: Flights, Ground & International (2026)

Use our free pet transport cost calculator to estimate what it costs to move your pet by car, plane, or professional service — including carrier fees, health certificates, and airline pet policies in 2026.

How Much Does It Cost to Transport a Pet?

Pet transport costs in the US range from $25 for a short car trip (carrier + supplies) to $2,000–$10,000+ for international pet relocation. The price depends on transport method, distance, pet size, and whether you use a professional pet transport service.

Transport TypeEstimated Cost (US)Best For
Personal vehicle (local)$0–$50Short trips, any pet size
Airline cabin (in-cabin)$95–$200 each waySmall pets under 20 lb
Airline cargo (checked)$150–$500 each wayMedium/large dogs
Ground pet transport service$1–$3 per mileLong-distance, no flying
Professional pet relocation$1,000–$5,000+International or complex moves
International pet shipping$2,000–$10,000+Overseas relocation

Pet Transport Cost Calculator

Use the guide below to estimate your pet transport cost based on your specific situation:

Step 1: Choose Your Transport Method

  • Flying with your pet in-cabin: Airline fee ($95–$200) + health certificate ($50–$150) + approved carrier ($30–$80) = $175–$430 total
  • Flying with your pet as checked baggage: Airline fee ($150–$500) + health certificate ($50–$150) + IATA-approved crate ($60–$200) = $260–$850 total
  • Ground transport service: Base rate + mileage ($1–$3/mile) + fuel surcharge = $150–$900+ depending on distance
  • Professional pet relocation service: Includes documentation, transport, and care = $1,000–$5,000+

Step 2: Add Required Documentation Costs

DocumentCostRequired For
Health certificate (USDA)$50–$150All air travel, most interstate moves
Rabies vaccination update$20–$50International travel, some states
USDA accreditation endorsement$38International travel
Import permit (destination country)$0–$300International travel
Microchip (if not already done)$25–$75International travel, most airlines

Step 3: Factor in Pet Size

Pet size significantly affects transport cost and options:

  • Small pets (under 20 lb): Can fly in-cabin on most US airlines. Lower carrier and crate costs.
  • Medium pets (20–50 lb): Usually must fly as checked baggage or cargo. Larger crate required ($60–$200).
  • Large pets (over 50 lb): Cargo or ground transport only on most airlines. Extra-large crates ($100–$300). Some breeds are restricted by airline breed policies.
  • Brachycephalic breeds (French Bulldogs, Pugs, Persians): Many airlines ban them from cargo due to breathing risk. Ground transport or cabin-only options recommended.

Airline Pet Fees by Carrier (2026)

AirlineIn-Cabin Fee (each way)Checked Cargo FeeNotes
American Airlines$150$200Cats and dogs only
Delta Airlines$95–$200$200No cargo program currently
United Airlines$150$500+PetSafe cargo program available
Southwest Airlines$95Not availableIn-cabin only, cats and dogs
JetBlue$125Not availableIn-cabin only via JetPaws program

Note: Airline pet policies and fees change frequently. Always confirm directly with the airline before booking.

Pet Transport Cost by Distance

DistanceGround Service CostAir Cost (small pet)Air Cost (large pet)
Under 100 miles$100–$300N/A (drive instead)N/A
100–500 miles$200–$600$250–$450$350–$700
500–1,500 miles$500–$1,500$250–$450$350–$750
Cross-country (US)$800–$2,500$300–$500$400–$900
InternationalN/A$800–$3,000+$2,000–$10,000+

How to Reduce Pet Transport Costs

  • Drive instead of fly for distances under 500 miles — far cheaper and less stressful for your pet.
  • Book early — airlines limit the number of in-cabin pets per flight. Early booking secures your spot.
  • Get your health certificate last — most are valid for only 10 days for air travel, so time it close to your departure date.
  • Check breed and size restrictions in advance — some airlines restrict brachycephalic breeds, and cargo size limits vary.
  • Compare pet transport companies — services like CitizenShipper, PetRelocation, and Happy Tails Travel have varying rates; get at least 3 quotes.

Frequently Asked Questions

How much does it cost to transport a pet on a plane?

Flying a small pet in-cabin on a US domestic flight typically costs $95–$200 each way in airline fees, plus $50–$150 for a vet health certificate. For large dogs flying as cargo, expect $150–$500 in airline fees plus crate and documentation costs, totalling $300–$900+ for a domestic flight.

How much does a pet transport service cost?

Professional ground pet transport services typically charge $1–$3 per mile, with minimum fees of $100–$200. A 500-mile cross-state move might cost $500–$1,500 depending on the service level, number of pets, and whether door-to-door pickup is included.

How much does it cost to ship a dog across the country?

Shipping a dog cross-country (e.g., New York to Los Angeles) via air cargo typically costs $400–$900 for a medium dog, including airline fees, health certificate, and an IATA-approved crate. Ground pet transport for the same route would cost $800–$2,500 with a professional service.

Do I need a health certificate to transport my pet?

Yes — most airlines require a USDA-accredited veterinary health certificate issued within 10 days of travel. Many states also require health certificates for interstate travel by car. For international travel, additional documentation including import permits and country-specific vaccinations are typically required.

What is the cheapest way to transport a pet?

The cheapest way to transport a pet is in your own vehicle. For air travel, Southwest Airlines currently offers the lowest in-cabin pet fee at $95 each way. For long-distance ground transport, CitizenShipper is a marketplace where independent drivers bid on pet transport jobs, often at lower rates than traditional services.