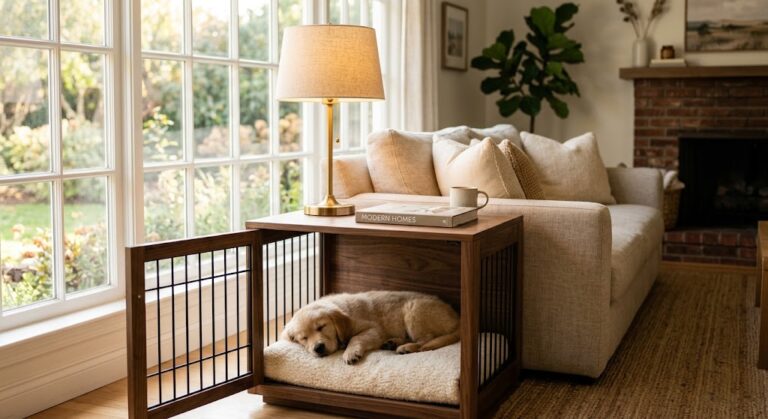
Most dogs love their crate. Give them a soft blanket, a cozy corner, and a bit of quiet, and it becomes their personal little cave. But let’s be real — the standard wire crate parked in the middle of your living room looks like a jail cell, and no amount of throw pillows fixes it.
The good news? A well-built dog crate furniture piece completely changes the equation. You get a piece that functions like an end table, a sideboard, a TV stand, or even a full built-in — while your pup gets a proper, quiet den underneath. It looks like real furniture, works like real furniture, and everyone in the house (four legs included) wins.
Below are ten of the best dog crate furniture ideas out there, with materials, difficulty levels, and step-by-step guidance for each. Some are afternoon projects. Some are weekend builds. All of them beat the wire crate look by a mile.
#1: End Table Dog Crate
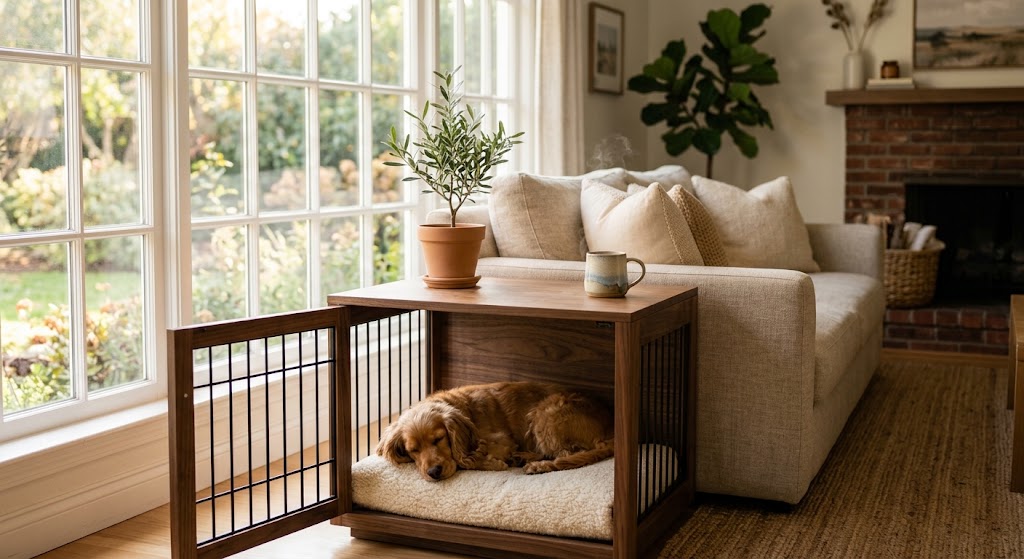
The classic starter build. This one turns a standard wire crate into a stylish side table that lives right next to your couch — perfect for a lamp, a coffee mug, or the remote your dog keeps stealing.
Materials & Tools You’ll Need:
- Wire crate sized to your dog
- 3/4-inch plywood or hardwood boards (pine, oak, or walnut)
- Wood screws, hinges, and a small door latch
- Wood stain or paint
- Drill, saw, sandpaper, tape measure
Prep Time: 45 minutes | Active Project Time: 4–5 hours | Difficulty Level: Intermediate
Instructions
Measure the outer dimensions of the wire crate and cut plywood panels for the top, two sides, and the back — leave the front open for the door. Sand every edge smooth so nothing catches on your pup’s fur.
Assemble the panels into a three-sided cabinet with the top screwed on. On the front, build a simple frame door with hinges and a latch that matches the wire crate’s door opening.
Stain or paint the whole piece in a color that matches your living room — walnut and matte black are the most forgiving. Slide the wire crate inside so the door lines up with your new frame door.
Tip: Drill small ventilation holes along the back panel to keep airflow steady, especially in warmer months.
#2: Farmhouse Sideboard Crate
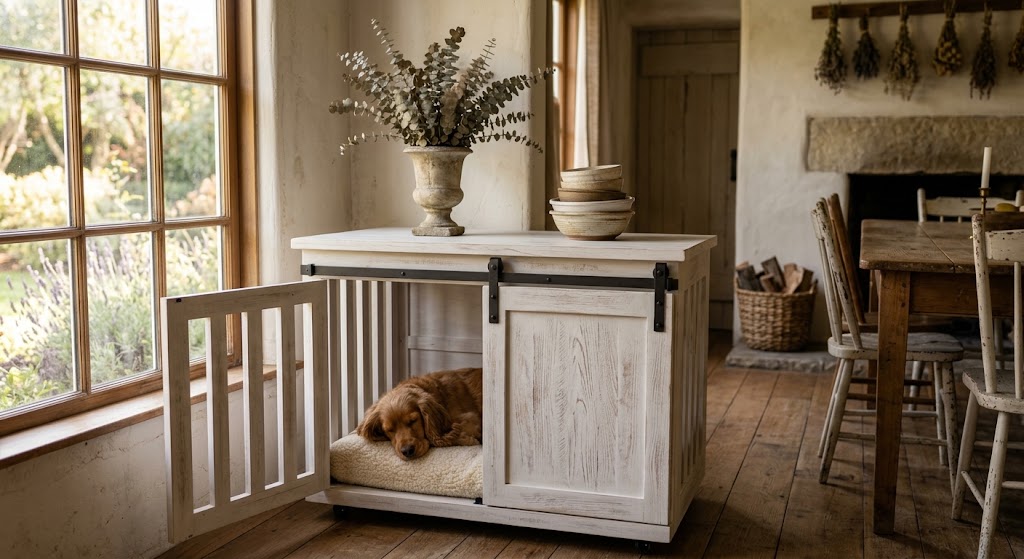
This one takes a bigger crate and hides it inside a full sideboard — the kind of piece that looks stunning in a dining room or entryway. Extra storage on top, quiet den for the pup underneath.
Materials & Tools You’ll Need:
- Large wire crate (36″ or 42″)
- Pine or reclaimed barn wood boards
- Cabinet-style hinges and iron pulls
- Wood glue, screws, pocket-hole jig
- Whitewash or milk paint finish
Prep Time: 1 hour | Active Project Time: 8–10 hours | Difficulty Level: Advanced
Instructions
Build a rectangular frame from 2x2s sized to fit around your crate with about an inch of clearance on all sides. Attach shiplap or tongue-and-groove pine boards to the sides and back for that farmhouse texture.
Cut two barn-style doors for the front, sized to match the crate opening. Attach with strap hinges and iron pulls for full farmhouse energy.
Finish the top with a thick plank of stained pine — wide enough to hold decor, a runner, and even a bit of overhang for that furniture-store look.
Tip: Use whitewash instead of solid white paint so the wood grain still shows through and it doesn’t look plastic.
#3: TV Stand Dog Crate Console
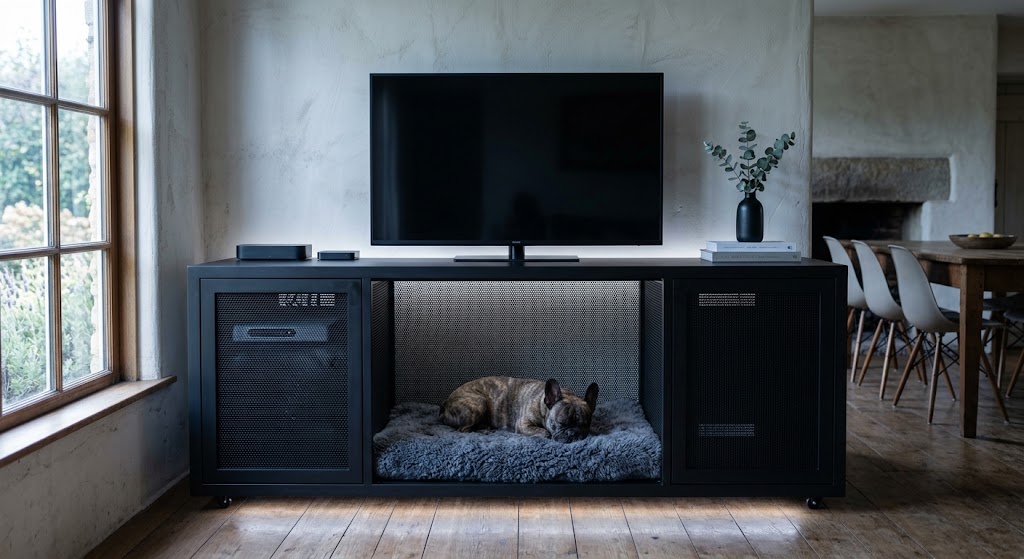
Perfect for anyone whose crate lives in the living room. This design combines your TV console and dog den into one long, low piece — saving floor space and making the crate almost invisible.
Materials & Tools You’ll Need:
- Long low wire crate or metal panel enclosure
- 3/4-inch MDF or plywood
- Cable-management grommets
- Metal mesh panels for ventilation
- Modern black hardware
Prep Time: 45 minutes | Active Project Time: 6–8 hours | Difficulty Level: Intermediate
Instructions
Build a long TV-stand box in a modern rectangular shape. Divide the interior into three compartments: a center section for the crate and two flanking cabinets for electronics and storage.
Cover the crate section’s front with a hinged panel that has a metal-mesh insert so your pup can see out and air can circulate. Add grommets in the back for HDMI and power cables.
Finish in matte black, warm walnut, or a two-tone combo. Set your TV on top and your dog quietly parks below.
Tip: Position speakers away from the crate compartment — loud bass right against the wire wall stresses most dogs out.
#4: Bench-Style Entryway Crate
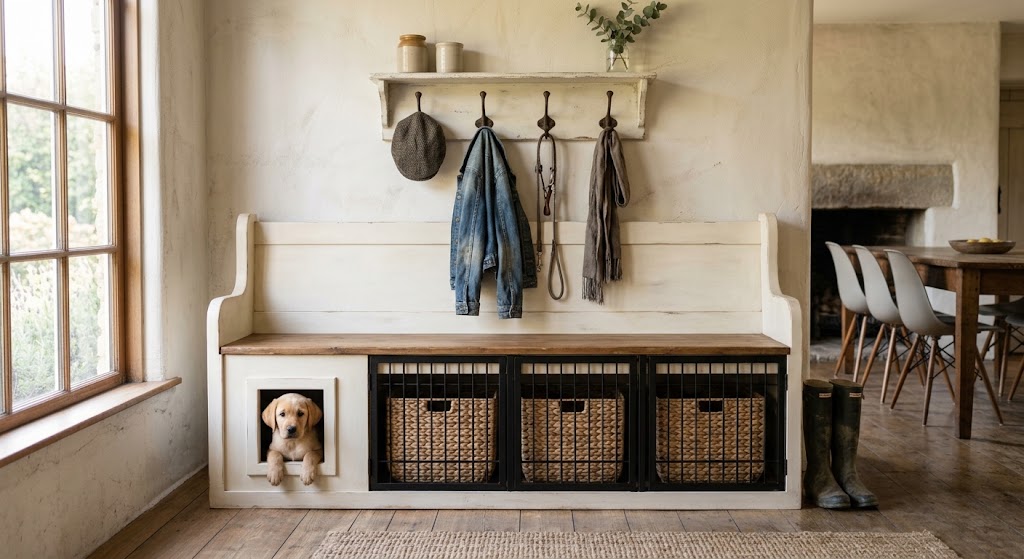
Kill three birds with one build: a mudroom bench, a shoe cubby underneath, and a hidden crate at one end for the pup to relax while you unload groceries.
Materials & Tools You’ll Need:
- Medium wire crate
- Pine or plywood
- Bench cushion or foam pad
- Basket organizers
- Coat hooks (optional)
Prep Time: 30 minutes | Active Project Time: 5–6 hours | Difficulty Level: Intermediate
Instructions
Build a long bench frame divided into two sections. One side becomes cubby storage for shoes and baskets, the other holds the crate.
Cover the crate section with slat panels or a mesh door for ventilation. Top the whole bench with a thick padded cushion for seating.
Optional: mount coat hooks or a small shelf on the wall above for the full mudroom vibe.
Tip: Choose stain-friendly fabric for the bench cushion. Muddy paws come home with you whether you plan for them or not.
#5: Nightstand Crate for the Bedroom
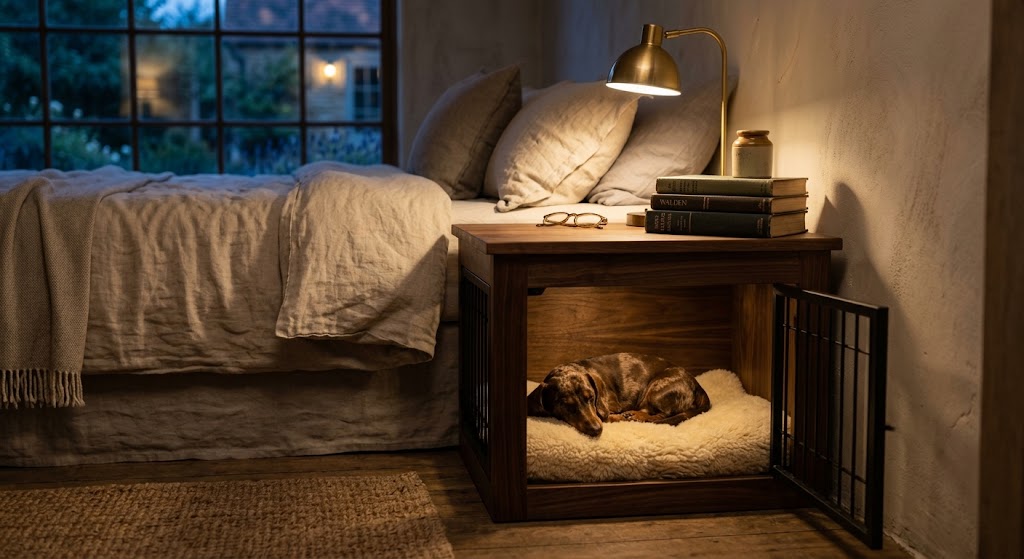
For dogs who sleep best right next to you. This build looks like a proper nightstand — flat top for a lamp and a book, hidden crate below where your pup can settle in for the night.
Materials & Tools You’ll Need:
- Small to medium wire crate
- Solid oak, walnut, or maple boards
- Soft-close hinges
- Discreet drawer pull
- Dark wood stain
Prep Time: 30 minutes | Active Project Time: 4–5 hours | Difficulty Level: Intermediate
Instructions
Build a tall, narrow cabinet frame that matches the height of your existing nightstand. Include a small pull-out drawer at the top for the lamp and phone charger essentials.
The lower two-thirds becomes the crate compartment. Add a front door with hidden hinges so it looks seamless, and drill discreet ventilation holes near the back.
Finish in dark walnut or espresso for a moody, warm bedroom vibe.
Tip: Use soft-close hinges. A slamming crate door at 3 a.m. wakes both of you up.
#6: Double-Crate Room Divider
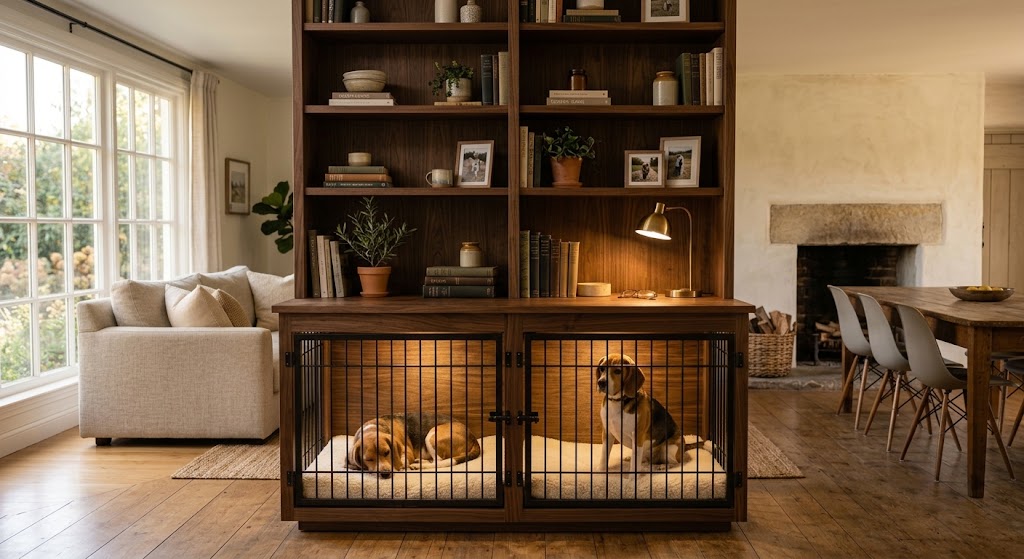
Got two dogs? This build gives each pup their own den while doubling as a room divider between your living and dining space.
Materials & Tools You’ll Need:
- Two matching wire crates
- Plywood and 2×4 framing
- Book cubbies or open shelves for the top
- Strap hinges
- Solid dark stain
Prep Time: 1 hour | Active Project Time: 8–10 hours | Difficulty Level: Advanced
Instructions
Build a wide base cabinet with two side-by-side compartments — one crate per section. Add a common tabletop across the full width for shared storage.
Build open bookcases or cubbies above, keeping the total height under 6 feet so the piece still functions as a divider without feeling like a wall.
Finish in a single tone across the whole build so it reads as one intentional piece of furniture, not a stacked pile of storage.
Tip: Leave a small gap between the two crates so each dog has visual privacy from the other — helps a lot with separation-anxiety pups.
#7: Minimalist Scandinavian Crate
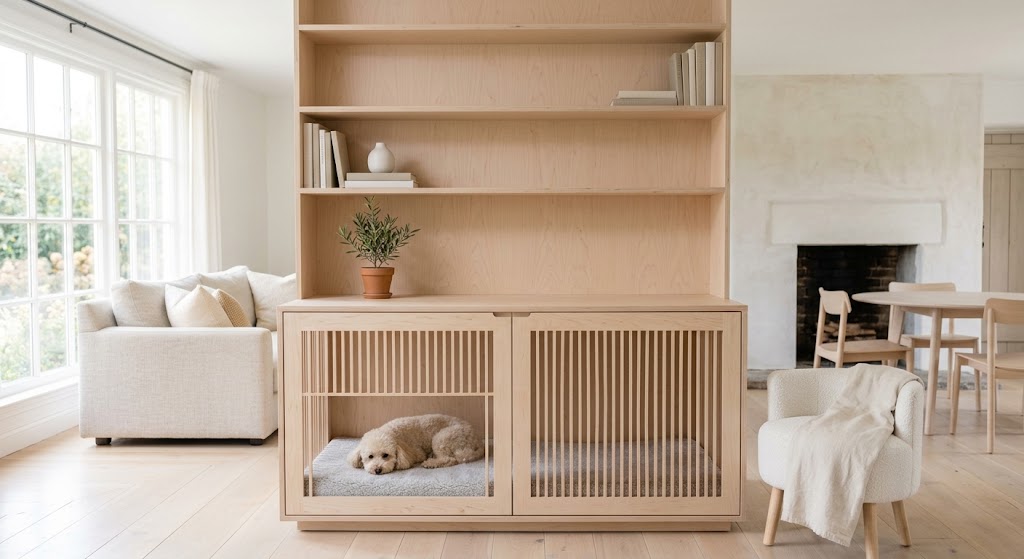
Clean lines, blonde wood, no visible hardware. This one looks like it walked straight out of a Copenhagen showroom.
Materials & Tools You’ll Need:
- Wire crate sized to your dog
- Birch or ash plywood
- Push-latch hinges (no visible pulls)
- Natural matte wood sealer
- Wool felt padding
Prep Time: 30 minutes | Active Project Time: 5–6 hours | Difficulty Level: Intermediate
Instructions
Build a simple rectangular cabinet around the crate with birch plywood panels and mitered corners for that seamless Scandi finish. Skip decorative trim entirely.
The front door uses push-to-open hinges so there’s no visible hardware. Add a vertical slat pattern for ventilation instead of a mesh insert.
Finish with clear matte sealer so the natural wood grain shows through. Top with a small wool felt runner for texture.
Tip: Round the exterior corners with a hand plane or router. It’s the tiny detail that separates a good Scandi build from a great one.
#8: Rustic Reclaimed Wood Crate
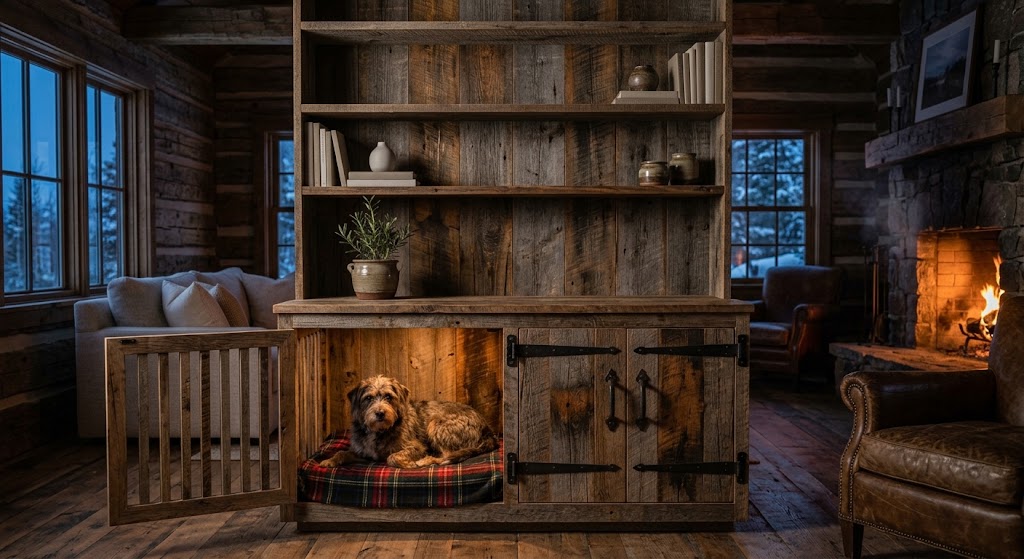
Perfect for cabin-style, farmhouse, or industrial-loft homes. This one leans into knots, weathering, and imperfection.
Materials & Tools You’ll Need:
- Wire crate
- Reclaimed barnwood or salvaged pallet boards
- Iron hinges and heavy pulls
- Wire brush for distressing
- Sealer
Prep Time: 45 minutes | Active Project Time: 6–8 hours | Difficulty Level: Intermediate
Instructions
Sort your reclaimed boards by color and texture. Build the frame as in Idea #1, but arrange the boards vertically for a stronger rustic effect.
Distress edges with a wire brush and hammer marks for that authentic worn look. Attach iron strap hinges and matching pulls.
Skip stain — just seal with a matte polyurethane to lock in the natural weathered patina.
Tip: Always sand reclaimed wood thoroughly and check for old nails before installation. Splinters and pet fur are a bad combination.
#9: Kitchen Island Crate
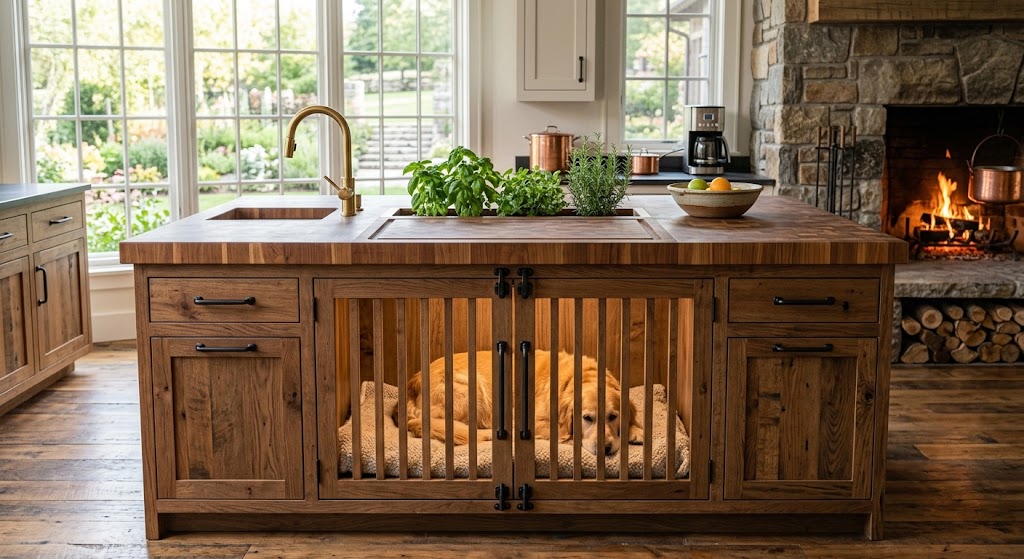
For open-plan kitchens, this one hides the crate inside a working kitchen island — butcher block on top, hidden den below, plus storage all around.
Materials & Tools You’ll Need:
- Extra-large wire crate
- Butcher block or hardwood countertop
- Cabinet-grade plywood
- Casters (optional, for a mobile island)
- Matte metal hardware
Prep Time: 1 hour | Active Project Time: 10–12 hours | Difficulty Level: Advanced
Instructions
Build a base cabinet island with a central crate compartment and flanking storage cabinets or open shelves for baskets and cookware.
Vent the crate section carefully — kitchens run hot. Use a slatted door plus small side vents to keep airflow moving.
Finish with a butcher-block top and cabinet-style pulls that match your kitchen hardware. Add casters if you want the island to move for cleaning.
Tip: Position the crate opening away from the stove side. Cooking smells and heat can drive even the calmest dog out of a den.
#10: Built-In Crate Nook
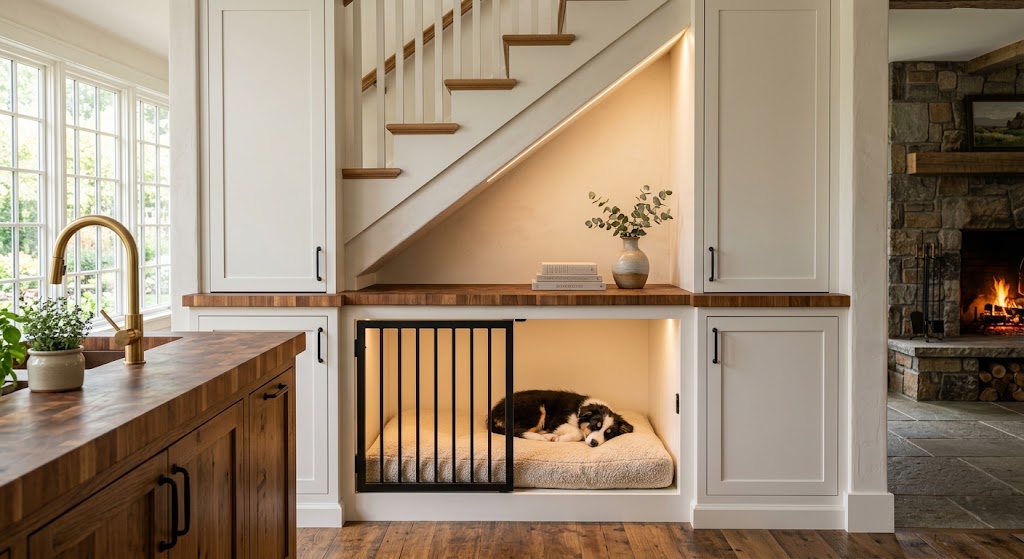
The endgame. This turns the crate into a fully built-in element of your home — flanked by bookshelves, tucked under a window seat, or built into the base of a staircase. Zero visible “crate” anywhere.
Materials & Tools You’ll Need:
- Custom-sized wire panels or a fitted crate
- MDF and plywood
- Trim moldings to match existing built-ins
- Paint matched to walls or cabinetry
- Ventilation grate
Prep Time: 2 hours | Active Project Time: 12–16 hours | Difficulty Level: Advanced
Instructions
Choose your location: a bookshelf wall, a window seat, or under-stair space are the classic choices. Frame out the opening exactly to your crate dimensions plus 2 inches on all sides.
Build cabinetry around and above the crate opening so the whole wall reads as one continuous built-in. Match trim profiles to the rest of your baseboards and casings.
Install a metal grate for the crate door so it looks intentional and architectural. Paint everything the same color as the surrounding wall or cabinetry.
Tip: Add a small LED puck light on a timer inside the nook. A soft glow inside the den at night is oddly comforting for anxious pups.
How to Pick the Right Style for Your Home
The best dog crate furniture piece is the one that actually fits your space, your dog’s size, and your DIY skill level. Small apartments do better with double-duty pieces like end tables or nightstands. Bigger homes with open floor plans benefit from sideboards and TV consoles. And if you’re renovating anyway, a built-in nook is worth every hour.
Whichever direction you go, three rules apply to every build: always vent generously, always finish with pet-safe sealers and paints, and always make cleaning easy. A crate that looks like furniture is only worth building if your dog is comfortable inside and you can actually keep it clean.
Conclusion
Dog crate furniture is the rare home project where everyone wins. Your dog gets a proper, quiet den. Your living room gets its style back. And you get to point at the piece and say “yeah, I made that” for the next ten years.
Start with the idea that matches your space and skill — the end table build (#1) is the easiest entry point, while the built-in nook (#10) is the ultimate flex. Whichever you choose, your pup is going to love their new furniture just as much as you do.
While you’re upgrading their setup, check out our 12 DIY dog collar ideas to give them a matching accessory worthy of their new den.