Easy Homemade Dog Treats Without Flour

Easy Homemade Dog Treats Without Flour

Looking for simple, flour-free dog treat recipes? You’ve come to the right place! These homemade dog treats are packed with wholesome ingredients and are free from common allergens like wheat flour. They’re easy to make and your pup is sure to love them. We’ve included a few of our favorites below, complete with images of the finished products!

1. Sweet Potato & Peanut Butter Bites

These soft and chewy bites are a classic for a reason. The combination of sweet potato and peanut butter is irresistible to most dogs.

Ingredients:

  • 1 cup cooked, mashed sweet potato

  • 1/2 cup creamy peanut butter (xylitol-free)

  • 2 eggs

Instructions:

  1. Preheat your oven to 350°F (175°C) and line a baking sheet with parchment paper.

  2. In a bowl, mix all the ingredients until well combined.

  3. Roll the dough into small balls and place them on the baking sheet. You can flatten them slightly with a fork.

  4. Bake for 15-20 minutes, or until they are firm to the touch.

  5. Let them cool completely before serving.

2. Pumpkin & Apple Dog Cookies

Pumpkin is great for digestion, and the apple adds a nice crunch and sweetness. These heart-shaped cookies are perfect for showing your pup some love!

Ingredients:

  • 1 cup pure pumpkin puree (not pumpkin pie filling)

  • 1 apple, peeled, cored, and grated

  • 1 egg

  • 2 1/2 cups rolled oats (or oat flour for a smoother texture)

Instructions:

  1. Preheat oven to 350°F (175°C). Line a baking sheet with parchment paper.

  2. Combine pumpkin, grated apple, and egg in a bowl.

  3. Gradually add the oats until a dough forms that you can roll out.

  4. Roll the dough to about 1/4 inch thickness on a floured surface (use oat flour) and cut out shapes with a cookie cutter.

  5. Place on the baking sheet and bake for 25-30 minutes until golden and firm.

  6. Cool completely before serving.

3. Frozen Yogurt & Banana Pupsicles

These frozen treats are a perfect way to cool your dog down on a hot day. They’re super simple to make and only require three ingredients!

Ingredients:

  • 1 ripe banana

  • 1 cup plain, unsweetened yogurt

  • 1 tablespoon honey (optional)

Instructions:

  1. In a blender or food processor, combine all ingredients until smooth.

  2. Pour the mixture into a silicone mold (like the paw print ones pictured) or an ice cube tray.

  3. Freeze for at least 4 hours, or until solid.

  4. Pop them out and give one to your pup for a refreshing treat!

4. Chicken & Rice Balls

A simple and bland option, perfect for dogs with sensitive stomachs. These are a great way to use up leftover chicken and rice.

Ingredients:

  • 1 cup cooked, shredded chicken breast

  • 1/2 cup cooked white or brown rice

  • 1 egg

  • 1 tablespoon parsley (optional)

Instructions:

  1. Preheat oven to 350°F (175°C).

  2. In a bowl, mix all ingredients until well combined.

  3. Roll the mixture into bite-sized balls.

  4. Place on a parchment-lined baking sheet and bake for 15-20 minutes.

  5. Let them cool before serving.

5. Carrot & Coconut Drops

These small, crunchy treats are packed with fiber and healthy fats. They’re a perfect size for training!

Ingredients:

  • 1 cup grated carrots

  • 1/2 cup coconut flour

  • 2 eggs

  • 2 tablespoons coconut oil, melted

Instructions:

  1. Preheat oven to 325°F (165°C). Line a baking sheet with parchment paper.

  2. In a large bowl, whisk the eggs and melted coconut oil.

  3. Stir in the grated carrots and coconut flour. Mix until a dough forms.

  4. Scoop small amounts of dough (about a teaspoon) and roll into balls, then flatten slightly.

  5. Place on the baking sheet and bake for 20-25 minutes or until golden.

  6. Cool completely on a wire rack.

Homemade Dog Treats Without Flour

Homemade Dog Treats Without Flour

Flour-free dog treats offer an excellent solution for dogs with grain sensitivities, allergies, or digestive issues. By eliminating flour entirely, you create treats that are naturally gentle on sensitive systems while maintaining delicious flavors dogs love.
These five recipes showcase how simple ingredients like fruits, vegetables, proteins, and natural binders can create satisfying treats without any grain products. Whether your dog requires a grain-free diet or you simply prefer alternative options, these recipes deliver wholesome nutrition in convenient treat form.

Recipe 1: Banana and Peanut Butter Bites

Mash two ripe bananas with one-half cup natural peanut butter until well combined. Spoon the mixture into silicone molds or ice cube trays and freeze for at least four hours. These naturally sweet treats require no baking, making them quick and convenient. The banana provides natural sweetness and fiber while peanut butter adds protein and healthy fats.

Recipe 2: Sweet Potato and Egg Patties

Combine two cups grated sweet potato with two beaten eggs and one-quarter teaspoon turmeric. Drop spoonfuls onto a baking sheet and bake at 350°F for twenty-five minutes until golden and firm. These vegetable-based patties provide excellent nutrition from sweet potatoes’ beta-carotene and fiber without any grain products.

Recipe 3: Chicken and Vegetable Nuggets

Mix two cups shredded cooked chicken with one cup finely grated zucchini, one-half cup grated carrot, and one egg. Form into small nuggets and bake at 375°F for twenty minutes until cooked through. These protein-rich treats combine lean meat with nutrient-dense vegetables for balanced nutrition.

Recipe 4: Apple and Cinnamon Frozen Treats

Blend two cups unsweetened applesauce with one-half cup plain Greek yogurt and one-quarter teaspoon cinnamon. Pour into ice cube trays and freeze overnight. These refreshing treats offer probiotics from yogurt, fiber from apples, and anti-inflammatory benefits from cinnamon, all without any flour.

Recipe 5: Pumpkin and Coconut Oil Bites

Combine one cup pumpkin puree with two tablespoons coconut oil and one tablespoon honey. Spoon into silicone molds and freeze for six hours. These simple treats provide pumpkin’s digestive benefits, coconut oil’s healthy fats, and honey’s natural sweetness without requiring any flour or baking.

Benefits of Flour-Free Treats

Flour-free treats eliminate common allergens that affect many dogs, particularly wheat and grains. These treats often digest more easily, making them ideal for dogs with sensitive stomachs or inflammatory bowel conditions. The natural ingredients used in flour-free recipes typically provide superior nutrition compared to commercial treats containing grain fillers and artificial additives.

Storage and Serving Guidelines

Refrigerate unbaked treats for up to one week or freeze for up to three months. Baked treats remain fresh at room temperature for five days or refrigerated for two weeks. Serve one to three treats daily depending on your dog’s size, incorporating them into the recommended 10% daily treat allowance. Always introduce new treats gradually to monitor for any adverse reactions.

Conclusion

Flour-free homemade dog treats provide nutritious, delicious options for dogs requiring grain-free diets. These five recipes demonstrate how simple, wholesome ingredients create satisfying treats without flour. Your dog will enjoy these healthy alternatives while you enjoy the confidence of knowing exactly what they’re consuming.
Long-Lasting Homemade Dog Treats

Long-Lasting Homemade Dog Treats

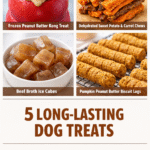
Long-lasting homemade dog treats serve a dual purpose: they provide mental stimulation and entertainment while keeping your dog occupied for extended periods. Unlike quick-consumption treats, these durable chews encourage natural chewing behaviors and can help reduce destructive tendencies. By making these treats at home, you control every ingredient, ensuring your dog receives wholesome nutrition without artificial additives. These five recipes offer variety in flavors and textures while maintaining the durability dogs need for extended enjoyment.

Recipe 1: Frozen Peanut Butter Kong Treats

Mix one cup natural peanut butter with one-half cup plain yogurt. Stuff the mixture into Kong toys and freeze for at least four hours. This combination creates a long-lasting treat that takes dogs considerable time to work through, providing mental engagement and satisfying their natural chewing instincts.

Recipe 2: Sweet Potato and Carrot Chews

Slice sweet potatoes and carrots lengthwise into quarter-inch strips. Arrange on a baking sheet and bake at 250°F for three hours until completely dehydrated and hardened. These naturally chewy treats provide fiber and nutrients while lasting significantly longer than fresh vegetables, offering hours of chewing satisfaction.

Recipe 3: Beef Broth Ice Cubes

Simmer low-sodium beef broth for thirty minutes, then pour into ice cube trays and freeze overnight. These savory frozen treats melt slowly in your dog’s mouth, providing hydration and flavor while keeping them engaged during warm weather. The gradual melting process extends treat duration considerably.

Recipe 4: Pumpkin and Peanut Butter Biscuit Logs

Combine one cup pumpkin puree, one-half cup natural peanut butter, one and one-half cups whole wheat flour, and one egg. Roll the dough into thick logs, approximately one inch in diameter. Bake at 325°F for forty-five minutes until extremely hard and dense. These substantial biscuits require significant chewing effort, making them ideal for extended entertainment.

Recipe 5: Chicken and Rice Stuffed Bones

Simmer shredded chicken with cooked rice until well combined. Pack this mixture into marrow bones or hollowed beef bones, then freeze for at least six hours. Dogs must work diligently to extract the filling, providing extended mental stimulation and satisfying their natural foraging instincts.

Benefits of Long-Lasting Treats

Long-lasting treats offer multiple advantages beyond simple entertainment. They promote dental health through natural abrasion, reduce anxiety through focused activity, and provide appropriate outlets for chewing behavior. These treats also help manage weight by providing satisfaction without excessive calories when portions are controlled appropriately.

Storage and Safety Guidelines

Store frozen treats in the freezer for up to three months. Refrigerated treats remain fresh for up to one week. Always supervise your dog while enjoying treats, and remove any small pieces that could pose choking hazards. Consult your veterinarian before introducing new treats, especially for dogs with dietary sensitivities or health conditions.

Conclusion

Long-lasting homemade dog treats combine entertainment, nutrition, and behavioral benefits into simple, affordable options. By rotating these five recipes, you provide variety while keeping your dog mentally stimulated and physically satisfied. Your dog will reward your effort with contentment and healthy chewing habits.

Homemade Gluten Free Dog Biscuits

Homemade Gluten Free Dog Biscuits are an excellent choice for dogs with sensitivities, allergies, or digestive issues. By making treats at home, you maintain complete control over ingredients, eliminating gluten and other potential allergens. These biscuits provide the same nutritional benefits and delicious taste as traditional treats while being gentle on sensitive digestive systems. Whether your dog has celiac-like sensitivities or you simply prefer grain-free options, this recipe delivers wholesome nutrition in a form your dog will love.

Ingredients

1 cup brown rice flour
1/2 cup coconut flour
1/2 cup natural peanut butter (xylitol-free)
1 ripe banana, mashed
1 egg
1/4 teaspoon turmeric (optional, supports joint health)
2-3 tablespoons water (as needed)

Instructions

Step 1: Prepare Your Workspace
Preheat your oven to 350°F (175°C) and line a baking sheet with parchment paper. This prevents sticking and ensures easy cleanup. Gather all ingredients and have them ready before beginning.
Step 2: Combine Wet Ingredients
In a large mixing bowl, combine the mashed banana with the natural peanut butter. Stir thoroughly until well blended and smooth. The banana provides natural sweetness and binding properties while peanut butter adds protein and healthy fats. Ensure no lumps remain in the mixture.
Step 3: Add Dry Ingredients
Add the brown rice flour and coconut flour to the wet mixture. If using turmeric, add it now for anti-inflammatory benefits. Stir until all dry ingredients are incorporated. Brown rice flour provides a mild, neutral flavor while coconut flour adds nutrition and slight sweetness. The combination creates an excellent gluten-free base.
Step 4: Bind the Dough
Crack the egg into the mixture and stir thoroughly. The egg acts as a binder, holding all ingredients together. If the dough seems too dry, add water one tablespoon at a time until you achieve a workable consistency similar to sugar cookie dough. Gluten-free doughs often require slightly more moisture than traditional recipes.
Step 5: Shape and Cut
On a lightly floured surface (use rice flour), roll out the dough to approximately 1/4 inch thickness. Using cookie cutters, cut out your desired shapes. Bone-shaped cutters work beautifully for a fun presentation. Place shaped biscuits on the prepared baking sheet with about an inch of space between each one.
Step 6: Bake Until Golden
Bake for 18-22 minutes until golden brown and firm to the touch. The exact time depends on your oven and biscuit size. Remove from the oven and allow to cool completely on a wire rack before serving to your dog.

Storage and Nutrition

Store cooled biscuits in an airtight container at room temperature for up to five days, in the refrigerator for up to two weeks, or in the freezer for up to three months. These biscuits provide excellent nutrition from brown rice flour’s B vitamins, coconut flour’s fiber and healthy fats, and banana’s potassium and natural sweetness.

Serving and Safety

Offer one to three biscuits daily depending on your dog’s size, incorporating them into the 10% treat allowance. Always use natural peanut butter without xylitol. Consult your veterinarian if your dog has specific allergies or health conditions before introducing new treats.

Conclusion

Homemade Gluten Free Dog Biscuits offer a simple, nutritious solution for dogs with sensitivities. With minimal ingredients and straightforward preparation, these treats are accessible to any pet parent. Your dog will enjoy delicious, wholesome treats while you enjoy the peace of mind knowing exactly what they’re eating.
Pumpkin Dog Biscuits with Peanut Butter

Pumpkin Dog Biscuits with Peanut Butter

Pumpkin Dog Biscuits with Peanut Butter combine two of the most beloved flavors in the canine world into one irresistible treat. The natural sweetness of pumpkin pairs beautifully with the rich, savory appeal of peanut butter, creating a flavor profile that dogs find absolutely compelling. These biscuits are perfect for training rewards, special occasions, or simply showing your furry friend how much you care.
Ingredients
1 cup pure pumpkin puree
1/2 cup natural peanut butter (xylitol-free)
1 1/2 cups whole wheat flour
1/2 cup rolled oats
1 egg
1/2 teaspoon cinnamon (optional)
2-3 tablespoons water (as needed)

Instructions

Step 1: Preheat and Prepare
Preheat your oven to 350°F (175°C) and line a baking sheet with parchment paper. This prevents sticking and makes cleanup easier.
Step 2: Mix Wet Ingredients
In a large mixing bowl, combine the pure pumpkin puree with the natural peanut butter. Stir thoroughly until well blended and smooth. The mixture should have a uniform consistency without any lumps.
Step 3: Add Dry Ingredients
Add the whole wheat flour, rolled oats, and optional cinnamon to the pumpkin-peanut butter mixture. Stir until all dry ingredients are incorporated. The cinnamon adds warmth and depth to the flavor while providing digestive support.
Step 4: Bind the Dough
Crack the egg into the mixture and stir thoroughly. The egg acts as a binder, holding all ingredients together. If the dough seems too dry, add water one tablespoon at a time until you achieve a workable consistency similar to sugar cookie dough.
Step 5: Shape the Biscuits
On a lightly floured surface, roll out the dough to approximately 1/4 inch thickness. Using cookie cutters, cut out your desired shapes—bone shapes work wonderfully for a fun presentation. Place shaped biscuits on the prepared baking sheet with about an inch of space between each one.
Step 6: Bake
Bake for 18-22 minutes until golden brown and firm to the touch. The exact time depends on your oven and biscuit size. Remove from the oven and allow to cool completely on a wire rack before serving.

Storage and Nutrition

Store cooled biscuits in an airtight container at room temperature for up to five days, in the refrigerator for up to two weeks, or in the freezer for up to three months. These biscuits provide excellent nutrition from pumpkin’s fiber and beta-carotene, peanut butter’s protein and healthy fats, and whole grains’ sustained energy.

Serving Suggestions

Offer one to three biscuits daily depending on your dog’s size, incorporating them into your dog’s 10% treat allowance. These biscuits work wonderfully as training rewards, puzzle toy fillers, or special treats for your beloved companion.

Safety Notes

Always use natural peanut butter without xylitol, which is toxic to dogs. Use pure pumpkin puree, never pumpkin pie filling. Supervise your dog while enjoying treats, and consult your veterinarian if your dog has dietary sensitivities or health conditions.
Conclusion
Pumpkin Dog Biscuits with Peanut Butter offer a simple, nutritious way to show your dog love through homemade treats. With minimal ingredients and straightforward preparation, these biscuits are accessible to any pet parent. Your dog will reward your effort with tail wags and excitement every treat time.

Homemade Pumpkin Applesauce Dog Treats

Pumpkin and applesauce are two of the most beloved ingredients in homemade dog treats, and for good reason. This dynamic duo combines natural sweetness, digestive support, and seasonal appeal into treats that dogs absolutely crave. Homemade Pumpkin Applesauce Dog Treats represent the perfect balance of nutrition and indulgence—wholesome enough for regular treats, yet special enough for seasonal celebrations or training rewards.
Unlike commercial treats that often contain artificial flavors and preservatives, these homemade treats let you control every ingredient that goes into your dog’s mouth. The combination of pumpkin’s fiber and nutrients with applesauce’s natural sweetness and vitamins creates a treat that’s as good for your dog’s health as it is delicious on their palate.

Why Pumpkin and Applesauce Are Excellent for Dogs

Pumpkin is a nutritional powerhouse for canines. Rich in fiber, pumpkin supports healthy digestion and can help regulate bowel movements in dogs experiencing either constipation or diarrhea. It’s low in calories yet nutrient-dense, providing beta-carotene (which converts to vitamin A), potassium, and manganese. Pumpkin’s soluble fiber content promotes beneficial gut bacteria growth, supporting overall digestive health and immune function.
Applesauce complements pumpkin beautifully by adding natural sweetness without refined sugar. Apples contain pectin, a type of soluble fiber that works synergistically with pumpkin’s fiber to support digestive health. Applesauce provides vitamin C, which supports immune function and acts as an antioxidant. The natural sugars in applesauce provide quick energy, making these treats perfect for active dogs or training sessions.
Together, pumpkin and applesauce create treats that support digestive health, provide sustained energy, and deliver concentrated nutrition in a form dogs find irresistible. These ingredients are particularly beneficial for senior dogs, dogs with sensitive stomachs, or those recovering from digestive upset.
About This Recipe
The Homemade Pumpkin Applesauce Dog Treats recipe is designed for simplicity and nutrition. Using pure pumpkin puree and unsweetened applesauce ensures authentic flavor without added sugars or preservatives. The recipe yields approximately 24-30 treats, depending on your cookie cutter size, and bakes in just 18-22 minutes.
These treats store exceptionally well—up to two weeks in the refrigerator or three months in the freezer. This makes them ideal for batch preparation, allowing you to maintain a supply of healthy treats year-round. The recipe is also easily customizable with complementary ingredients like cinnamon, ginger, or additional vegetables.

Ingredients

To create these delightful seasonal treats, you’ll need the following simple, dog-safe ingredients:
Ingredient
Amount
Notes
Pure pumpkin puree
1 cup
Use 100% pure pumpkin, not pumpkin pie filling
Unsweetened applesauce
1/2 cup
Choose unsweetened varieties without added sugars
Whole wheat flour
1 1/2 cups
Provides structure and fiber
Rolled oats
1/2 cup
Adds texture and nutrition
Egg
1 large
Binds ingredients together
Cinnamon (optional)
1/2 teaspoon
Dog-safe warming spice, adds flavor depth
Ginger (optional)
1/4 teaspoon
Dog-safe, supports digestion
Water
2-3 tablespoons
Adjust as needed for consistency
Important Quality Notes: Always use pure pumpkin puree, not pumpkin pie filling, which contains added sugars and spices not suitable for dogs. Select unsweetened applesauce to avoid unnecessary sugar. These quality choices ensure your treats provide maximum nutrition without hidden additives.

Step-by-Step Instructions

Preparation Phase

Begin by preheating your oven to 350°F (175°C). Line a baking sheet with parchment paper to prevent sticking and simplify cleanup. Have all ingredients measured and ready before you start—this ensures a smooth preparation process and prevents ingredient substitutions mid-recipe.

Mixing the Base Ingredients

In a large mixing bowl, combine the pure pumpkin puree with the unsweetened applesauce. Stir these together thoroughly until well blended. The mixture should have a smooth, uniform consistency. Next, add the whole wheat flour and rolled oats to the pumpkin-applesauce mixture. Stir to combine all dry ingredients with the wet mixture.
If you’re using the optional cinnamon and ginger, add them now. These warming spices complement the pumpkin and applesauce beautifully, adding depth to the flavor profile while providing additional digestive support. Stir until evenly distributed.

Binding the Dough

Crack the egg into the mixture and stir thoroughly. The egg acts as a binder, helping all the ingredients hold together into a cohesive dough. Mix until you achieve a dough consistency that holds together when squeezed but isn’t overly sticky. If the mixture seems too dry and crumbly, add water one tablespoon at a time until you reach the right consistency. The dough should be similar in texture to sugar cookie dough.

Shaping the Treats

On a lightly floured surface, roll out the dough to approximately 1/4 inch thickness. This thickness ensures even baking and creates treats that are easy for your dog to chew. Using cookie cutters, cut out your desired shapes. Pumpkin-themed cutters like leaves or pumpkins work beautifully for seasonal appeal, though bone-shaped or simple round cutters work equally well.
Place the shaped treats on the prepared baking sheet, leaving about an inch of space between each treat to allow for even baking and air circulation.

Baking

Place the baking sheet in the preheated 350°F oven and bake for 18-22 minutes, or until the treats are golden brown and firm to the touch. The exact baking time may vary depending on your oven and the size of your treats. Check them during the final minutes of baking to ensure they don’t overbake.
The treats should be golden brown on the outside and firm throughout. If they’re still soft in the center after 22 minutes, bake for an additional 2-3 minutes.

Cooling

Remove the baking sheet from the oven and allow the treats to cool completely on a wire rack before serving them to your dog. This cooling period is crucial because it allows the treats to firm up and become easier to handle. Serving treats while they’re still warm can cause them to crumble, and warm treats may be too soft for your dog to enjoy properly.

Storage and Shelf Life

Proper storage ensures your homemade treats remain fresh and safe for your dog to enjoy.
Room Temperature Storage: Place cooled treats in an airtight container and store at room temperature for up to 3-5 days. This is ideal if you plan to use the treats quickly and your home remains at a comfortable temperature.
Refrigerator Storage: For extended freshness, store treats in an airtight container in the refrigerator for up to two weeks.
This method is particularly useful during warmer months or if you want to preserve treats longer than a few days.
Freezer Storage: To maintain a supply of treats over several months, freeze them in an airtight container or freezer bag for up to three months. Simply thaw treats at room temperature for 30 minutes before serving, or serve them directly from the freezer as a refreshing, cool treat on warm days.

Nutritional Benefits

Each ingredient in this recipe contributes specific nutritional value to support your dog’s health and wellbeing.
Pumpkin Puree provides soluble fiber that supports digestive health and regularity. It’s rich in beta-carotene, which converts to vitamin A for eye health and immune function. Pumpkin contains potassium for heart health and manganese for bone development. Its low calorie content makes it ideal for weight management while providing concentrated nutrition.
Applesauce delivers natural sweetness without refined sugar. It provides pectin, a soluble fiber that works synergistically with pumpkin to support digestion. Applesauce contains vitamin C for immune support and antioxidant protection. The natural sugars provide quick energy for active dogs.
Whole Wheat Flour provides complex carbohydrates and fiber, promoting sustained energy and digestive health. It contains B vitamins and minerals like iron and magnesium. The fiber content supports healthy digestion and promotes satiety.
Rolled Oats are an excellent source of soluble fiber, which supports digestive health. Oats contain beta-glucans, compounds with potential immune-supporting properties. They provide a satisfying texture that dogs enjoy and contribute to sustained energy.
Eggs provide complete protein with all essential amino acids. They contain choline, which supports brain health and cognitive function. Eggs also provide lutein and zeaxanthin, antioxidants that support eye health.
Cinnamon (optional) contains antioxidants and may support blood sugar regulation. It has warming properties that complement the pumpkin flavor and may support digestive comfort.
Ginger (optional) is traditionally used to support digestive health and may help with mild nausea or digestive discomfort. It provides warming properties and adds subtle spice to the treat flavor.

Serving Suggestions and Portion Guidelines

While these treats are made with wholesome ingredients, they should still be given in moderation as part of a balanced diet. Treats should comprise no more than 10% of your dog’s daily caloric intake, with the remaining 90% coming from their regular dog food.
For small dogs (under 20 pounds), offer one to two treats per day. Medium dogs (20-50 pounds) can enjoy two to three treats daily, while large dogs (over 50 pounds) can have three to four treats per day. Adjust portions based on your individual dog’s size, activity level, and overall diet.
These treats work wonderfully as training rewards, post-exercise snacks, or simple expressions of affection. Some pet parents enjoy using them as puzzle toy fillers or breaking them into smaller pieces for training sessions. During fall and winter months, these seasonal treats make perfect holiday gifts for dog-loving friends and family members.
Blueberry Peanut Butter Chew Sticks for Dogs

Blueberry Peanut Butter Chew Sticks for Dogs

These Blueberry Peanut Butter Chew Sticks are a wholesome and delicious treat that your dog will adore. Combining the antioxidant power of blueberries with the irresistible flavor of peanut butter, these homemade chew sticks are a healthier alternative to many store-bought options. They are perfect for rewarding good behavior, providing a satisfying chew, or simply showing your furry friend some extra love. Plus, you can feel good knowing exactly what ingredients go into their treats.

Ingredients

1 cup oat flour (you can make this by blending rolled oats into a fine powder)
1/2 cup natural peanut butter (ensure it is xylitol-free)
1/2 cup fresh or frozen blueberries, lightly mashed
1 large egg
1/4 cup water (or low-sodium chicken/vegetable broth, plus more if needed)
1 tablespoon ground flaxseed (optional, for added omega-3s)

Instructions

1.Preheat Oven: Preheat your oven to 350°F (175°C). Line a baking sheet with parchment paper.
2.Combine Wet Ingredients: In a medium bowl, whisk together the peanut butter, mashed blueberries, egg, and water (or broth) until well combined.
3.Combine Dry Ingredients: In a separate large bowl, combine the oat flour and ground flaxseed (if using). Stir well.
4.Mix Dough: Pour the wet ingredients into the dry ingredients. Mix until a stiff dough forms. If the dough is too dry, add more water or broth, one tablespoon at a time, until it comes together. If it’s too sticky, add a little more oat flour.
5.Form Chew Sticks: On a lightly floured surface (using oat flour), roll out the dough to about 1/2-inch thickness. Cut the dough into stick shapes, approximately 3-4 inches long and 1/2 inch wide. You can also use a cookie cutter for other shapes if preferred.
6.Bake: Place the chew sticks on the prepared baking sheet.
7.Bake for 20-25 minutes, or until the treats are firm and lightly golden brown. For a harder, chewier stick, you can bake for an additional 5-10 minutes or turn off the oven and leave them inside as it cools.
8.Cool and Store: Allow the chew sticks to cool completely on a wire rack before storing. This is crucial to prevent them from becoming soggy.

Storage

Store homemade Blueberry Peanut Butter Chew Sticks in an airtight container at room temperature for up to 1 week. For longer storage, they can be kept in the refrigerator for up to 2 weeks or frozen for up to 2-3 months. Thaw frozen treats before serving.

Important Considerations

Peanut Butter Safety: ALWAYS use natural peanut butter that does NOT contain xylitol, an artificial sweetener that is highly toxic to dogs.
Blueberry Benefits: Blueberries are rich in antioxidants and vitamins, making them a healthy addition to your dog’s diet.
Moderation: While these treats are healthy, they should be given in moderation as part of a balanced diet.
Avoid Harmful Ingredients: Ensure all ingredients are safe for dogs. Never use ingredients like chocolate, grapes, raisins, onion, garlic, or xylitol.

Liver Brownie Dog Treats

Liver brownies are a classic, high-value treat for dogs, often used for training due to their irresistible smell and taste. Packed with essential vitamins and minerals, liver is a superfood for canines, providing iron, B vitamins, and Vitamin A. This recipe makes a soft, cake-like treat that can be easily cut into small pieces, perfect for rewarding good behavior or simply spoiling your furry friend.

Ingredients

1 pound (approx. 450g) fresh beef, chicken, or lamb liver
1 large egg
1 cup whole wheat flour (or oat flour for a gluten-free option)
1/4 cup water or low-sodium chicken/beef broth (optional, for consistency)

Instructions

1.Preheat Oven: Preheat your oven to 350°F (175°C). Lightly grease and flour an 8×8 inch (20×20 cm) baking pan, or line with parchment paper.
2.Prepare Liver: Rinse the liver thoroughly under cold water and pat dry. Trim any tough membranes or connective tissue. Cut the liver into smaller pieces that will fit easily into your blender or food processor.
3.Blend Ingredients: In a blender or food processor, combine the liver, egg, and water/broth (if using). Blend until the mixture is completely smooth and liquid-like. It should have the consistency of a thick batter.
4.Combine with Flour: Pour the liver mixture into a large mixing bowl. Gradually add the whole wheat flour, mixing until just combined. Be careful not to overmix. The batter will be quite wet.
5.Bake: Pour the batter into the prepared baking pan and spread evenly.
6.Bake for 25-35 minutes, or until the brownie is firm to the touch and a toothpick inserted into the center comes out clean. The top should be slightly springy.
7.Cool and Cut: Allow the liver brownie to cool completely in the pan before inverting it onto a cutting board. Once cool, cut into small, bite-sized squares. For training, smaller pieces are ideal.

Storage

Store liver brownie dog treats in an airtight container in the refrigerator for up to 5-7 days. For longer storage, portion and freeze the treats for up to 2-3 months. Thaw frozen treats in the refrigerator before serving.

Important Considerations

Liver Source: You can use beef, chicken, or lamb liver. Ensure it is fresh and from a reputable source.
Moderation: While liver is very nutritious, it is also rich in Vitamin A. Too much Vitamin A can be harmful. These treats should be given in moderation as a supplement to a balanced diet, not as a primary food source.
Allergies: If your dog has sensitivities to certain proteins or grains, consider using an alternative flour like oat flour or chickpea flour.
Avoid Harmful Ingredients: Ensure all ingredients are safe for dogs. Never add seasonings, salt, onion, garlic, or xylitol.
Best Homemade Liver Dog Treat

Best Homemade Liver Dog Treats

Liver is one of the most nutrient-dense ingredients you can offer your dog. Rich in essential vitamins, minerals, and proteins, liver-based treats provide exceptional nutritional value while satisfying your dog’s natural taste preferences. Dogs have an innate attraction to organ meats, and liver is no exception—it’s a flavor they find irresistible.
This comprehensive guide presents ten distinct homemade liver dog treat recipes, each offering unique flavor combinations and preparation methods. Whether you’re looking for simple baked treats, no-bake options, or creative variations, these recipes provide variety while maintaining the nutritional excellence that makes liver treats so beneficial for your dog’s health.

Why Liver Treats Are Excellent for Dogs

Liver is a nutritional powerhouse for canines. It contains high levels of protein, which supports muscle development and maintenance. Additionally, liver is rich in B vitamins, particularly B12, which supports energy metabolism and nervous system function. Iron content in liver supports healthy blood oxygen transport, while selenium provides antioxidant protection.
The amino acid profile in liver is complete, meaning it contains all essential amino acids dogs need. Liver also contains choline, which supports brain health and cognitive function. For senior dogs or those with declining appetites, the strong flavor and aroma of liver can encourage eating and provide concentrated nutrition in smaller portions.

Recipe 1: Simple Baked Liver Treats

Ingredients

1 pound beef liver, finely chopped
1 cup whole wheat flour
1/2 cup rolled oats
1 egg
1/4 cup water

Instructions

Preheat your oven to 350°F (175°C). Line a baking sheet with parchment paper. In a food processor, blend the beef liver until it reaches a paste-like consistency. In a large bowl, combine the liver paste with whole wheat flour, rolled oats, and egg. Mix thoroughly until a dough forms. If the mixture is too dry, add water one tablespoon at a time until you achieve the right consistency.
Roll the dough between two pieces of parchment paper to about 1/4 inch thickness. Cut into bite-sized pieces using a knife or cookie cutter. Place on the prepared baking sheet and bake for 20-25 minutes until golden and firm. Cool completely on a wire rack before storing.

Yield: Approximately 30-40 treats

Storage: Refrigerate for up to 2 weeks or freeze for up to 3 months

Recipe 2: Liver and Sweet Potato Treats

Ingredients

1/2 pound beef liver, finely chopped
1 medium sweet potato, cooked and mashed
1 cup whole wheat flour
1/2 cup rolled oats
1 egg
1/4 teaspoon cinnamon (optional, dog-safe)

Instructions

Preheat oven to 350°F (175°C). Process the liver until finely minced. In a bowl, combine mashed sweet potato with the liver. Add whole wheat flour, rolled oats, egg, and cinnamon if using. Mix until a dough forms, adding water if needed for consistency.
Roll out to 1/4 inch thickness and cut into shapes. Bake for 22-27 minutes until golden brown. The sweet potato adds natural sweetness and beta-carotene, making these treats both nutritious and appealing.

Yield: Approximately 35-45 treats

Storage: Refrigerate for up to 2 weeks or freeze for up to 3 months

Recipe 3: Liver and Carrot Crunch Treats

Ingredients

1/2 pound beef liver, finely chopped
1 cup finely grated carrots
1 cup whole wheat flour
1/2 cup rolled oats
1 egg
2 tablespoons coconut oil, melted

Instructions

Preheat oven to 350°F (175°C). Process liver until fine. In a mixing bowl, combine liver with grated carrots, whole wheat flour, rolled oats, and egg. Add melted coconut oil for richness and coat shine. Mix until combined, adding water if needed.
Roll out and cut into shapes. Bake for 20-25 minutes until firm. The carrots provide additional vitamins and create a pleasant texture contrast.

Yield: Approximately 40-50 treats

Storage: Refrigerate for up to 2 weeks or freeze for up to 3 months

Recipe 4: No-Bake Liver and Peanut Butter Bites

Ingredients

1/2 pound beef liver, cooked and finely chopped
1/2 cup natural peanut butter (xylitol-free)
1 cup rolled oats
1/4 cup coconut flour
2 tablespoons honey

Instructions

Cook the liver by simmering in water for 10-15 minutes until fully cooked, then finely chop. In a bowl, combine cooked liver with peanut butter, rolled oats, coconut flour, and honey. Mix thoroughly until well combined.
Roll the mixture into small balls (about 1 inch diameter) and refrigerate for at least 2 hours before serving. These no-bake treats are perfect for quick preparation and provide excellent nutrition without oven time.

Yield: Approximately 25-30 bites

Storage: Refrigerate for up to 1 week or freeze for up to 2 months

Recipe 5: Liver and Pumpkin Spice Treats

Ingredients

1/2 pound beef liver, finely chopped
1/2 cup pure pumpkin puree
1 cup whole wheat flour
1/2 cup rolled oats
1 egg
1/2 teaspoon cinnamon
1/4 teaspoon ginger (optional, dog-safe)

Instructions

Preheat oven to 350°F (175°C). Process liver until fine. Combine liver with pumpkin puree, whole wheat flour, rolled oats, egg, cinnamon, and ginger. Mix until a dough forms.
Roll out to 1/4 inch thickness and cut into shapes. Bake for 20-25 minutes until golden. Pumpkin provides fiber and digestive support while the warming spices add appeal.

Yield: Approximately 35-45 treats

Storage: Refrigerate for up to 2 weeks or freeze for up to 3 months
Recipe 6: Liver and Apple Treats

Ingredients

1/2 pound beef liver, finely chopped
1 medium apple, peeled and finely grated
1 cup whole wheat flour
1/2 cup rolled oats
1 egg
1/4 cup water

Instructions

Preheat oven to 350°F (175°C). Process liver until fine. In a bowl, combine liver with grated apple, whole wheat flour, rolled oats, and egg. Add water as needed for consistency.
Roll out and cut into shapes. Bake for 20-25 minutes until firm. Apples provide natural sweetness and fiber, complementing the savory liver flavor beautifully.

Yield: Approximately 35-45 treats

Storage: Refrigerate for up to 2 weeks or freeze for up to 3 months
Recipe 7: Liver and Green Bean Treats

Ingredients

1/2 pound beef liver, finely chopped
1 cup fresh green beans, finely chopped
1 cup whole wheat flour
1/2 cup rolled oats
1 egg
2 tablespoons olive oil

Instructions

Preheat oven to 350°F (175°C). Process liver until fine. Finely chop green beans and combine with liver, whole wheat flour, rolled oats, egg, and olive oil. Mix until a dough forms.
Roll out and cut into shapes. Bake for 20-25 minutes until golden. Green beans add vegetables and fiber while keeping treats low in calories.

Yield: Approximately 40-50 treats

Storage: Refrigerate for up to 2 weeks or freeze for up to 3 months

Recipe 8: Liver and Blueberry Antioxidant Treats

Ingredients

1/2 pound beef liver, finely chopped
1/2 cup fresh blueberries, mashed
1 cup whole wheat flour
1/2 cup rolled oats
1 egg
1/4 cup water

Instructions

Preheat oven to 350°F (175°C). Process liver until fine. Mash blueberries and combine with liver, whole wheat flour, rolled oats, and egg. Add water as needed for consistency.
Roll out and cut into shapes. Bake for 20-25 minutes until firm. Blueberries are packed with antioxidants and provide a unique flavor combination with liver.

Yield: Approximately 35-45 treats

Storage: Refrigerate for up to 2 weeks or freeze for up to 3 months
Recipe 9: Liver and Spinach Power Treats

Ingredients

1/2 pound beef liver, finely chopped
1 cup fresh spinach, finely chopped
1 cup whole wheat flour
1/2 cup rolled oats
1 egg
2 tablespoons coconut oil, melted

Instructions

Preheat oven to 350°F (175°C). Process liver until fine. Finely chop spinach and combine with liver, whole wheat flour, rolled oats, egg, and melted coconut oil. Mix thoroughly.
Roll out and cut into shapes. Bake for 20-25 minutes until golden. Spinach provides iron, vitamins, and minerals, making these treats nutritionally dense.

Yield: Approximately 40-50 treats

Storage: Refrigerate for up to 2 weeks or freeze for up to 3 months

Recipe 10: Liver and Beef Broth Savory Treats

Ingredients

1/2 pound beef liver, finely chopped
1/2 cup low-sodium beef broth
1 cup whole wheat flour
1/2 cup rolled oats
1 egg
1/4 teaspoon garlic powder (optional, use sparingly)

Instructions

Preheat oven to 350°F (175°C). Process liver until fine. In a bowl, combine liver with beef broth, whole wheat flour, rolled oats, and egg. The broth adds moisture and savory flavor. Mix until a dough forms.
Roll out and cut into shapes. Bake for 20-25 minutes until firm. These treats have an intensely savory flavor that dogs find irresistible.

Yield: Approximately 35-45 treats

Storage: Refrigerate for up to 2 weeks or freeze for up to 3 months
Long-Lasting Homemade Dog Treats

For dogs who love to chew, long-lasting treats are a fantastic way to keep them entertained, promote dental health, and provide a satisfying reward. While many store-bought options exist, making your own allows you to control ingredients, avoiding unwanted additives and ensuring wholesome goodness. These homemade recipes are designed to be durable and delicious, perfect for extended chewing sessions.

1. Baked Sweet Potato Chews

Naturally tough and packed with vitamins, these chews are a healthy alternative to rawhide.
Ingredients:
1-2 large sweet potatoes
Instructions:
1.Preheat your oven to 250°F (120°C). Line a baking sheet with parchment paper.
2.Wash and peel the sweet potatoes. Slice them into 1/4 to 1/2-inch thick rounds or sticks. Thicker slices will result in a chewier treat, while thinner slices will be crispier.
3.Arrange the slices in a single layer on the prepared baking sheet, ensuring they do not overlap.
4.Bake for 3-5 hours, flipping the slices every hour or so, until they are dry, leathery, and firm. The baking time will vary depending on the thickness of the slices and your oven.
5.Turn off the oven and leave the sweet potato chews inside for another 1-2 hours (or even overnight) as the oven cools. This helps to further dry them out and achieve maximum durability.
Storage: Store in an airtight container at room temperature for up to 2-3 weeks, or in the refrigerator for longer. For best results, keep them in the fridge.

2. Hard-Baked Peanut Butter & Oat Biscuits

These crunchy biscuits are baked until very hard, providing a satisfying chew.
Ingredients:
1 cup whole wheat flour
1/2 cup rolled oats
1/2 cup natural peanut butter (xylitol-free)
1/4 cup water (plus more if needed)
1 large egg
Instructions:
1.Preheat your oven to 325°F (160°C). Line a baking sheet with parchment paper.
2.In a large bowl, combine the whole wheat flour and rolled oats.
3.In a separate bowl, whisk together the peanut butter, water, and egg until smooth.
4.Pour the wet ingredients into the dry ingredients and mix until a stiff dough forms. If the dough is too dry, add water one tablespoon at a time until it comes together. If too sticky, add a little more flour.
5.On a lightly floured surface, roll out the dough to about 1/4-inch thickness. Use a sturdy cookie cutter to cut out shapes.
6.Place the treats on the prepared baking sheet.
7.Bake for 30-40 minutes, or until the biscuits are very hard and golden brown. For extra crunch and longevity, turn off the oven and leave the biscuits inside to cool completely.
Storage: Store in an airtight container at room temperature for up to 2-3 weeks.
3. Beef & Vegetable Jerky Strips
Lean meat jerky combined with healthy vegetables for a savory, long-lasting chew.
Ingredients:
1 lb lean ground beef (90% lean or higher)
1/2 cup finely grated carrots
1/4 cup finely chopped fresh parsley
1 large egg
Instructions:
1.Preheat your oven to 200°F (93°C). Line a baking sheet with parchment paper.
2.In a large bowl, combine the ground beef, grated carrots, chopped parsley, and egg. Mix thoroughly until all ingredients are well incorporated.
3.Press the mixture evenly onto the prepared baking sheet, forming a thin layer (about 1/4-inch thick). You can use another piece of parchment paper on top and a rolling pin to get an even thickness.
4.Score the mixture into desired strip or square shapes using a knife. This will make it easier to break apart after baking.
5.Bake for 2-3 hours, or until the jerky is firm, dry, and leathery. The edges should be crisp. Baking time will vary based on thickness.
6.Once baked, remove from the oven and let cool completely. Break along the scored lines.
Storage: Store in an airtight container in the refrigerator for up to 1-2 weeks, or freeze for up to 2 months.

Important Considerations

Drying is Key: For truly long-lasting treats, it’s crucial to remove as much moisture as possible. This often means longer baking or dehydrating times at lower temperatures.
Ingredient Safety: Always ensure all ingredients are safe for dogs. Avoid excessive salt, sugar, spices, and toxic ingredients like xylitol, onion, and garlic.
Supervision: Always supervise your dog when they are enjoying any chew treat, especially new ones, to prevent choking hazards.
Dental Health: While these treats can help with dental hygiene, they are not a substitute for regular brushing or professional dental cleanings.

Homemade Tuna Dog Treats

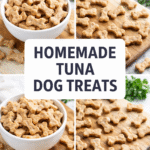
Tuna is a highly palatable and nutritious ingredient that many dogs adore, making it an excellent base for homemade treats. These Homemade Tuna Dog Treats are simple to prepare, packed with omega-3 fatty acids for a healthy coat and brain function, and serve as a fantastic high-value reward for training or just a special snack. This recipe focuses on minimal, wholesome ingredients to ensure a safe and delicious treat for your furry friend.

Ingredients

1 (5-ounce) can tuna in water, undrained (do NOT use tuna in oil or with added salt/flavorings)
1 large egg
1 cup whole wheat flour (or oat flour for a gluten-free option)
1/4 cup fresh parsley, finely chopped (optional, for fresh breath)

Instructions

1.Preheat Oven: Preheat your oven to 350°F (175°C). Line a baking sheet with parchment paper.
2.Prepare Tuna Mixture: In a medium bowl, combine the undrained can of tuna and the egg. Mash the tuna well with a fork, ensuring it’s thoroughly mixed with the egg.
3.Combine Ingredients: Add the whole wheat flour (or oat flour) and chopped parsley (if using) to the tuna mixture. Mix until a stiff dough forms. The dough should be firm enough to roll out but not overly sticky. If it’s too dry, add a tiny bit of water; if too wet, add a little more flour.
4.Roll and Cut: On a lightly floured surface, roll out the dough to about 1/4-inch thickness. Use a small cookie cutter (e.g., bone, circle, or square) to cut out treat shapes. For training treats, cut into very small pieces.
5.Bake: Place the cut-out treats on the prepared baking sheet.
6.Bake for 15-20 minutes, or until the treats are golden brown and firm. The baking time may vary depending on the size and thickness of your treats. For a crispier treat, you can bake a few minutes longer.
7.Cool and Store: Allow the treats to cool completely on a wire rack before storing. This is crucial to prevent them from becoming soggy and to ensure they are fully dried out.

Storage

Store homemade tuna dog treats in an airtight container in the refrigerator for up to 1 week. For longer storage, they can be frozen for up to 2-3 months. Thaw frozen treats in the refrigerator before serving.

Important Considerations

Tuna Type: Always use tuna packed in water with no added salt or flavorings. Tuna in oil can be too fatty, and certain additives can be harmful to dogs.
Moderation: While tuna is healthy, it should be given in moderation due to potential mercury content. These treats are best as occasional rewards rather than a daily staple.
Allergies: If your dog has known fish allergies, avoid this recipe. Introduce new treats slowly and monitor for any adverse reactions.
Avoid Harmful Ingredients: Ensure all ingredients are safe for dogs. Never use ingredients like onion, garlic, or xylitol.
Homemade Bacon Cheddar Dog Treats

Homemade Bacon Cheddar Dog Treats

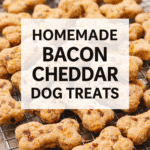
Spoil your furry friend with these irresistible Homemade Bacon Cheddar Dog Treats! This recipe combines the savory flavors of bacon and cheddar cheese into a crunchy biscuit that your dog will absolutely love. Made with wholesome ingredients, these treats are a much healthier alternative to many store-bought options, and you can feel good about giving them to your beloved pet.

Ingredients

1 cup cooked bacon, finely chopped (ensure it’s not excessively greasy)
1 cup shredded cheddar cheese
2 cups whole wheat flour (or a mix of whole wheat and oat flour)
1 large egg
1/2 cup water or low-sodium chicken/beef broth (plus more if needed)

Instructions

1.Preheat Oven: Preheat your oven to 350°F (175°C). Line a baking sheet with parchment paper.
2.Combine Dry Ingredients: In a large mixing bowl, combine the whole wheat flour, chopped bacon, and shredded cheddar cheese. Mix well to distribute the ingredients evenly.
3.Add Wet Ingredients: In a separate small bowl, whisk the egg and water (or broth) together. Pour the wet mixture into the dry ingredients.
4.Form Dough: Mix until a stiff dough forms. If the dough is too dry, add more water or broth, one tablespoon at a time, until it comes together. If it’s too sticky, add a little more flour.
5.Roll and Cut: On a lightly floured surface, roll out the dough to about 1/4-inch thickness. Use a dog bone-shaped cookie cutter or a knife to cut the dough into desired treat shapes.
6.Bake: Place the cut-out treats on the prepared baking sheet.
7.Bake for 20-25 minutes, or until the treats are golden brown and firm. For extra crunch, you can turn off the oven and leave the treats inside for another 30 minutes as the oven cools.
8.Cool and Store: Allow the treats to cool completely on a wire rack before storing. This is crucial to prevent them from becoming soggy.

Storage

Store homemade bacon cheddar dog treats in an airtight container at room temperature for up to 1 week. For longer storage, they can be kept in the refrigerator for up to 2 weeks or frozen for up to 2-3 months. Thaw frozen treats before serving.

Important Considerations

Bacon Quality: Use plain, cooked bacon. Avoid bacon with excessive salt, sugar, or artificial flavors. Pat cooked bacon dry to remove excess grease.
Cheese Moderation: While cheddar cheese is generally safe for dogs in small amounts, some dogs can be lactose intolerant. Introduce new treats slowly and observe your dog for any digestive upset.
Portion Control: These are rich treats, so offer them in moderation as part of a balanced diet.
Avoid Harmful Ingredients: Always double-check that all ingredients are safe for dogs. Never use ingredients like onion, garlic, or xylitol.
Peanut Butter Banana Twist Dog Treats

Peanut Butter Banana Twist Dog Treats

The Peanut Butter Banana Twist Dog Treats recipe is built on a foundation of dog-safe, nutritious ingredients. Peanut butter provides protein and healthy fats, while bananas offer potassium, vitamins, and natural sweetness. Whole wheat flour and rolled oats add fiber and sustained energy, and applesauce contributes moisture and additional nutrients without adding refined sugar.
The recipe yields approximately 24-30 treats, depending on the size of your cookie cutters. The baking time is quick—just 15-20 minutes at 350°F—making this an ideal recipe for busy pet parents. The treats store well in the refrigerator for up to two weeks or can be frozen for up to three months, allowing you to always have fresh treats on hand.

Ingredients

To create these delightful treats, you’ll need the following simple, dog-safe ingredients:
Ingredient
Amount
Notes
Ripe banana, mashed
1 medium
Use a banana that’s soft and sweet for best flavor
Natural peanut butter (xylitol-free)
1/2 cup
CRITICAL: Ensure no xylitol, which is toxic to dogs
Unsweetened applesauce
1/4 cup
Provides moisture and natural sweetness
Whole wheat flour
1 1/2 cups
Adds fiber and structure to the dough
Rolled oats
1/2 cup
Provides texture and additional nutrition
Water
1/4 cup (or as needed)
Adjust consistency as needed
Important Safety Note: Before making these treats, verify that your peanut butter contains no xylitol, an artificial sweetener that is highly toxic to dogs. Many brands now use xylitol as a sugar substitute, so always read the label carefully. Natural peanut butter brands are typically safer, but double-check the ingredients list.

Step-by-Step Instructions

Preparation Phase

Begin by preheating your oven to 350°F (175°C). While the oven heats, line a baking sheet with parchment paper to prevent the treats from sticking and to make cleanup easier. Having everything prepared before you start mixing ensures a smooth baking process.

Mixing the Wet Ingredients

In a large mixing bowl, mash the ripe banana thoroughly until you achieve a smooth consistency with no large chunks remaining. The banana should be soft and creamy, almost like a paste. Next, add the natural peanut butter and unsweetened applesauce to the mashed banana. Mix these ingredients together until they are well combined and form a uniform, smooth mixture. This wet base is the flavor foundation of your treats, so take time to ensure everything is thoroughly incorporated.

Combining Dry Ingredients

In a separate bowl, whisk together the whole wheat flour and rolled oats. This step ensures that the dry ingredients are evenly distributed and helps prevent lumps in the final dough. The combination of flour and oats creates a texture that holds together well while remaining soft enough for dogs to chew comfortably.

Creating the Dough

Gradually add the dry ingredient mixture to the wet ingredients, stirring as you go. Mix until a dough begins to form. If the dough appears too dry and crumbly, add water one tablespoon at a time until you achieve a consistency that holds together when squeezed but isn’t overly sticky. The dough should be workable but not wet—think of it as similar to sugar cookie dough.

Shaping the Treats

On a lightly floured surface, roll out the dough to approximately 1/4 inch thickness. This thickness ensures the treats bake evenly and develop a slightly crispy exterior while maintaining a chewy interior. Using cookie cutters, cut out your desired shapes. For the signature “twist” effect, you can cut the dough into strips and gently twist them into spiral shapes. This not only looks appealing but also makes the treats more interesting for your dog to chew.

Baking

Arrange the shaped treats on the prepared baking sheet, leaving about an inch of space between each treat to allow for even baking and air circulation. Place the baking sheet in the preheated 350°F oven and bake for 15-20 minutes, or until the treats are golden brown and firm to the touch. The exact baking time may vary depending on your oven and the size of your treats, so keep an eye on them during the final minutes of baking.

Cooling

Remove the baking sheet from the oven and allow the treats to cool completely on a wire rack before serving them to your dog. This cooling period is important because it allows the treats to firm up and become easier to handle. Serving treats while they’re still warm can cause them to crumble, and warm treats may be too soft for your dog to enjoy properly.
Storage and Shelf Life
Proper storage ensures your homemade treats remain fresh and safe for your dog to enjoy.
Room Temperature Storage: Place cooled treats in an airtight container and store at room temperature for up to one week. This is ideal if you plan to use the treats quickly and your home remains at a comfortable temperature.
Refrigerator Storage: For extended freshness, store treats in an airtight container in the refrigerator for up to two weeks. This method is particularly useful during warmer months or if you want to preserve treats longer than a week.
Freezer Storage: To maintain a supply of treats over several months, freeze them in an airtight container or freezer bag for up to three months. Simply thaw treats at room temperature for 30 minutes before serving, or serve them directly from the freezer as a refreshing, cool treat on warm days.

Nutritional Benefits

Each ingredient in this recipe contributes specific nutritional value to support your dog’s health and wellbeing.
Peanut Butter is an excellent source of protein, supporting muscle development and maintenance. It also contains healthy monounsaturated and polyunsaturated fats that support coat health and cognitive function. Additionally, peanut butter provides vitamin E, an important antioxidant.
Bananas are rich in potassium, which supports heart health and muscle function. They also contain vitamin B6, vitamin C, and manganese. The natural sugars in bananas provide quick energy, making these treats suitable as pre-activity snacks.
Applesauce contributes fiber, which supports digestive health. It also provides vitamin C and antioxidants. Unsweetened applesauce ensures you’re not adding unnecessary sugar to the treats.
Whole Wheat Flour provides complex carbohydrates and fiber, promoting sustained energy and digestive health. It also contains B vitamins and minerals like iron and magnesium.
Rolled Oats are an excellent source of soluble fiber, which supports digestive health. Oats also contain beta-glucans, compounds with potential immune-supporting properties. They provide a satisfying texture that dogs enjoy.

Serving Suggestions and Portion Guidelines

While these treats are nutritious and made with wholesome ingredients, they should still be given in moderation as part of a balanced diet. Treats should comprise no more than 10% of your dog’s daily caloric intake, with the remaining 90% coming from their regular dog food.
For small dogs (under 20 pounds), offer one to two treats per day. Medium dogs (20-50 pounds) can enjoy two to three treats daily, while large dogs (over 50 pounds) can have three to four treats per day. Adjust portions based on your individual dog’s size, activity level, and overall diet.
These treats work wonderfully as training rewards, post-exercise snacks, or simple expressions of affection. Some pet parents also enjoy using them as puzzle toy fillers or breaking them into smaller pieces for training sessions.

Variations and Customizations

Once you’ve mastered the basic recipe, consider these creative variations to keep your dog’s treat experience fresh and exciting.
Apple Cinnamon Twist: Replace the banana with one mashed apple and add 1/2 teaspoon of dog-safe cinnamon. Cinnamon adds warmth and flavor while potentially supporting blood sugar regulation.
Sweet Potato Peanut Butter: Substitute 1/2 cup of mashed sweet potato for the banana. Sweet potatoes are rich in beta-carotene and provide a slightly different flavor profile.
Carrot Peanut Butter: Add 1/2 cup of finely grated carrot to the wet ingredients. Carrots support eye health and provide a satisfying crunch when baked.
Pumpkin Peanut Butter: Replace applesauce with 1/4 cup of pure pumpkin puree. Pumpkin is excellent for digestive health and adds a seasonal twist.
Remember to introduce any new ingredients gradually and in small quantities to ensure your dog tolerates them well. If your dog has known allergies or sensitivities, consult with your veterinarian before introducing new ingredients.
Natural Dehydrated Dog Treats

Natural Dehydrated Dog Treats

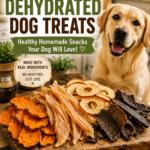
Dehydrated dog treats are a fantastic, healthy, and long-lasting option for your canine companion. By removing moisture, dehydration concentrates flavors and nutrients while inhibiting spoilage, making these treats a great alternative to store-bought options filled with preservatives. This guide provides recipes for natural, wholesome dehydrated treats that are easy to make at home using either a food dehydrator or an oven.

1. Sweet Potato Chews

A simple, single-ingredient treat packed with vitamins and fiber.
Ingredients:
1-2 large sweet potatoes
Instructions (Dehydrator):
1.Wash and peel the sweet potatoes. Slice them into 1/4-inch thick rounds or sticks. For faster drying, you can blanch them in boiling water for 5 minutes, then immediately plunge into ice water before dehydrating.
2.Arrange the slices in a single layer on dehydrator trays, ensuring no pieces are overlapping.
3.Dehydrate at 135°F (57°C) for 8-12 hours, or until completely dry and leathery. The time will vary based on thickness and dehydrator model.
Instructions (Oven):
1.Preheat your oven to its lowest setting, typically 170-200°F (77-93°C). If your oven runs hotter, prop the door open slightly with a wooden spoon.
2.Arrange the sweet potato slices on a baking sheet lined with parchment paper.
3.Bake for 3-6 hours, flipping occasionally, until they are dry and chewy. For crispier treats, bake longer.
Storage: Store in an airtight container at room temperature for up to 2-3 weeks, or in the refrigerator for longer.

2. Chicken Jerky Strips

High in protein and a favorite among dogs, this jerky is a lean and chewy reward.
Ingredients:
1 lb boneless, skinless chicken breast
Instructions (Dehydrator):
1.Partially freeze the chicken for 30-60 minutes to make it easier to slice thinly.
2.Slice the chicken against the grain into 1/8 to 1/4-inch thick strips.
3.Arrange the strips on dehydrator trays without overlapping.
4.Dehydrate at 160°F (71°C) for 4-8 hours, or until completely dry and brittle. Ensure no moisture remains to prevent spoilage.
Instructions (Oven):
1.Preheat your oven to 170°F (77°C). If your oven doesn’t go this low, use the lowest setting and prop the door open.
2.Arrange the chicken strips on a wire rack placed over a baking sheet to allow for air circulation.
3.Bake for 2-4 hours, or until the chicken is completely dry and firm. Check frequently to prevent burning.
Storage: Store in an airtight container in the refrigerator for up to 2 weeks, or freeze for longer.
3. Apple Chips
A sweet and crunchy treat, apples are a good source of vitamins A and C, and fiber.
Ingredients:
2-3 apples (any dog-safe variety, e.g., Fuji, Gala, Honeycrisp)
Instructions (Dehydrator):
1.Wash the apples thoroughly. Core them and slice into thin rounds (about 1/8-inch thick). You can leave the skin on.
2.Arrange the apple slices on dehydrator trays.
3.Dehydrate at 135°F (57°C) for 6-10 hours, or until crisp.
Instructions (Oven):
1.Preheat oven to 200°F (93°C).
2.Arrange apple slices on a baking sheet lined with parchment paper.
3.Bake for 2-3 hours, flipping halfway, until crisp. Turn off the oven and let them cool inside for extra crispiness.
Storage: Store in an airtight container at room temperature for up to 2-3 weeks.
4. Banana Chips
Naturally sweet and easy to digest, banana chips are a great energy booster.
Ingredients:
3-4 ripe bananas
Instructions (Dehydrator):
1.Peel the bananas and slice them into 1/4-inch thick rounds.
2.Arrange the banana slices on dehydrator trays.
3.Dehydrate at 135°F (57°C) for 6-10 hours, or until completely dry and crisp.
Instructions (Oven):
1.Preheat oven to 200°F (93°C).
2.Arrange banana slices on a baking sheet lined with parchment paper.
3.Bake for 2-4 hours, flipping halfway, until crisp. Turn off the oven and let them cool inside.
Storage: Store in an airtight container at room temperature for up to 2-3 weeks.

5. Liver Bites

Highly palatable and nutrient-dense, liver is a superfood for dogs.
Ingredients:
1 lb beef or chicken liver
Instructions (Dehydrator):
1.Partially freeze the liver to make it easier to slice.
2.Slice the liver into thin strips or small cubes (about 1/4-inch thick).
3.Arrange the pieces on dehydrator trays without overlapping.
4.Dehydrate at 160°F (71°C) for 6-10 hours, or until completely dry and brittle. Ensure no moisture remains.
Instructions (Oven):
1.Preheat your oven to 170°F (77°C). Use a wire rack over a baking sheet.
2.Arrange the liver pieces on the wire rack.
3.Bake for 3-5 hours, or until completely dry and firm. Check frequently.
Storage: Store in an airtight container in the refrigerator for up to 2 weeks, or freeze for longer.

Important Considerations

Food Safety: Always ensure meat products are dehydrated at a high enough temperature (160°F/71°C) to kill bacteria, and that all treats are completely dry to prevent mold growth.
Ingredient Quality: Use human-grade, fresh ingredients. Avoid any spices, salt, or seasonings that are not safe for dogs.
Portion Control: Dehydrated treats are concentrated, so feed them in moderation as part of a balanced diet.
Veterinary Consultation: If your dog has specific health concerns or allergies, consult your veterinarian before introducing new treats.
Homemade Freezer Dog Treats

Homemade Freezer Dog Treats

Frozen dog treats are a fantastic way to cool down your canine companion on a hot day, provide a refreshing snack, or even help soothe teething puppies. They are typically easy to make, require minimal ingredients, and can be customized to your dog’s preferences and dietary needs. These recipes focus on simple, dog-safe ingredients that are perfect for freezing.

1. Peanut Butter & Banana Pupsicles

A classic combination that most dogs adore, perfect for a creamy, frozen treat.
Ingredients:
1 ripe banana
1/2 cup natural peanut butter (xylitol-free)
1/4 cup plain yogurt (dairy-free option if needed)
Instructions:
1.In a blender or food processor, combine the banana, peanut butter, and yogurt. Blend until smooth.
2.Pour the mixture into silicone molds (bone shapes, paw prints, or ice cube trays work well).
3.Freeze for at least 2-4 hours, or until solid.
4.Store in an airtight container in the freezer for up to 2-3 weeks.

2. Frozen Pumpkin & Yogurt Bites

These treats are great for digestion and a cool, refreshing snack.
Ingredients:
1 cup plain pumpkin puree (not pie filling)
1/2 cup plain yogurt (dairy-free option if needed)
1/4 teaspoon ground cinnamon (optional, for flavor)
Instructions:
1.In a bowl, whisk together the pumpkin puree, yogurt, and cinnamon until well combined.
2.Spoon the mixture into silicone molds or ice cube trays.
3.Freeze for at least 2-4 hours, or until solid.
4.Store in an airtight container in the freezer for up to 2-3 weeks.

3. Fruity Watermelon Cubes

A hydrating and low-calorie treat, perfect for summer.
Ingredients:
2 cups seedless watermelon, chopped
Instructions:
1.Blend the chopped watermelon until smooth. Strain if you prefer a pulp-free treat.
2.Pour the watermelon juice into ice cube trays.
3.Freeze for at least 4 hours, or until solid.
4.Store in an airtight container in the freezer for up to 1 month.

4. Bone Broth & Veggie Freezies

Nutrient-rich and soothing, especially good for older dogs or those needing a digestive boost.
Ingredients:
1 cup unsalted, plain bone broth (ensure no onion or garlic)
1/4 cup finely chopped dog-safe vegetables (e.g., carrots, green beans, spinach)
Instructions:
1.Distribute the chopped vegetables evenly among the compartments of an ice cube tray.
2.Pour the bone broth over the vegetables, filling each compartment.
3.Freeze for at least 4 hours, or until solid.
4.Store in an airtight container in the freezer for up to 1 month.

5. Apple & Carrot Frosty Paws

Crunchy, sweet, and full of vitamins, these are a healthy delight.
Ingredients:
1 medium apple, cored and chopped (remove all seeds)
1 medium carrot, peeled and chopped
1/2 cup water
Instructions:
1.In a blender, combine the chopped apple, carrot, and water. Blend until smooth.
2.Pour the mixture into silicone molds or ice cube trays.
3.Freeze for at least 3-5 hours, or until solid.
4.Store in an airtight container in the freezer for up to 2-3 weeks.
Important Considerations
Dog-Safe Ingredients: Always ensure all ingredients are safe for canine consumption. Avoid grapes, raisins, chocolate, xylitol, onions, and garlic.
Portion Control: Even healthy treats should be given in moderation as part of a balanced diet.
Supervision: Always supervise your dog when they are enjoying frozen treats, especially if they tend to gulp down food.
Storage: Proper storage in the freezer is key to maintaining freshness and preventing spoilage.