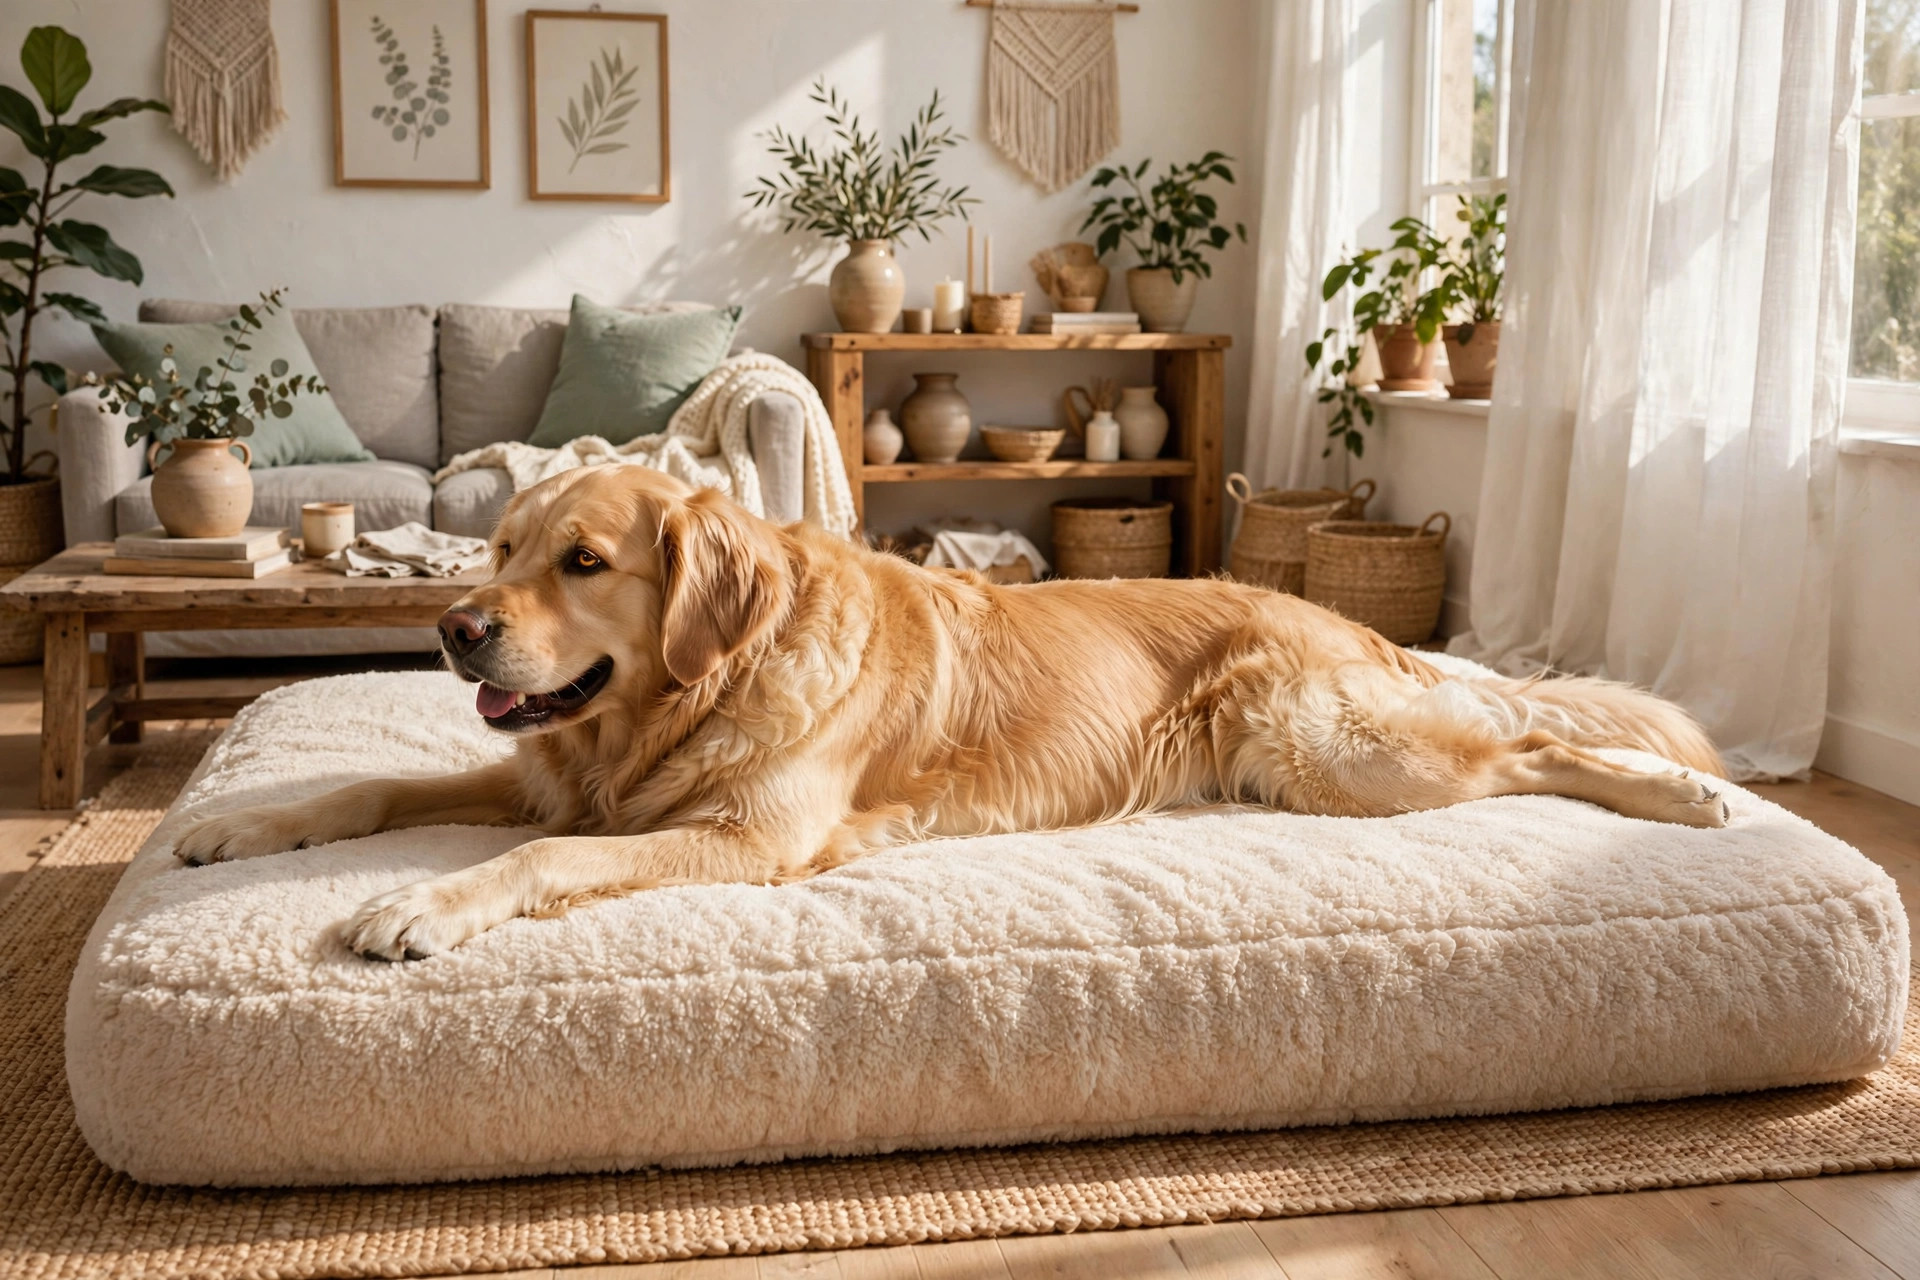
Golden retriever eating from a DIY wooden raised dog feeder with stainless steel bowls.

DIY Raised Dog Feeder: A Simple Weekend Wood Build

Bowls on the floor work — until the water bowl migrates across the
kitchen, kibble rolls under the fridge, and your tall dog folds
himself in half twice a day just to eat. A raised feeder fixes all
three problems at once: bowls sit at a comfortable height, the whole
station stays put, and it looks like furniture instead of a mess.
And you don’t need a workshop to build one — a couple of pine
2x4s, a piece of plywood, a drill and an afternoon will do it.

This guide walks you through the one measurement that matters,
the simple build, and the food-safe finish that keeps the wood
happy through years of spills.

What a raised feeder actually does — and doesn’t do

The real wins are comfort and tidiness. A bowl at chest height
means less neck and shoulder strain reaching down, which older dogs
and tall breeds genuinely appreciate. The heavy wooden stand stops
the classic “push the bowl across the room” move, and a raised lip
keeps the worst of the splashing inside the station instead of on
your floor.

What it doesn’t do: prevent bloat. This needs saying plainly,
because the myth persists. The best-known large study on the
subject (Glickman et al., Purdue) actually linked elevated feeding
to a higher risk of GDV (bloat) in large, deep-chested breeds —
the opposite of the folk claim. Build a raised feeder for comfort
and convenience, not as a health treatment. If your dog is an
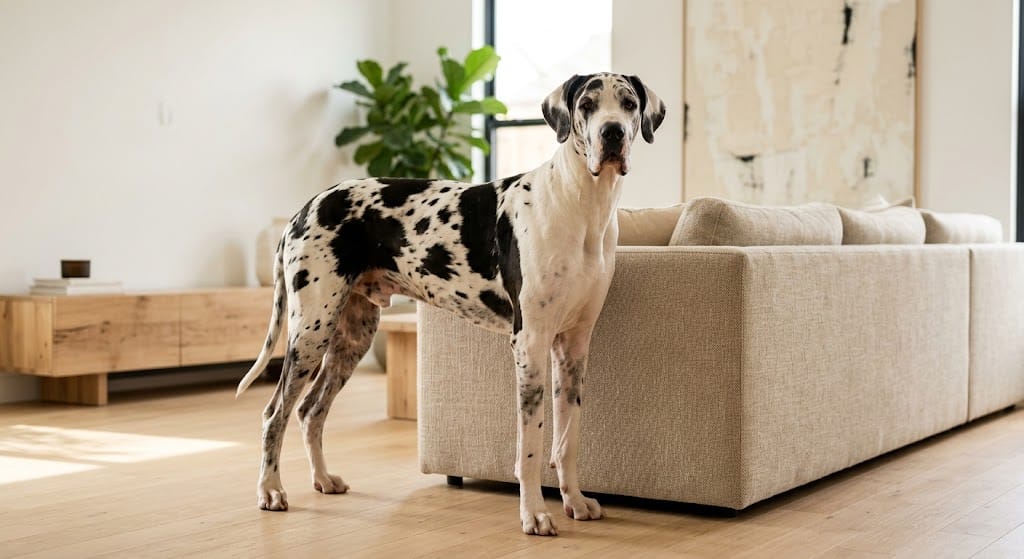
at-risk breed — Great Dane, German Shepherd, standard poodle,
Irish setter and friends — talk to your vet about feeding setup
before you change anything.

The bowl height formula — measure before you cut

The single most important number in this whole project is the
finished rim height. Too high and the dog stretches awkwardly
upward; too low and you lose the point of the exercise.

  1. Stand your dog square on a hard floor.
  2. Measure from the floor to the top of their shoulders (the
    withers — the bony ridge between the shoulder blades).

  3. Subtract about 15 cm (6 inches). The result is your target rim
    height — the dog should eat with their head lowered only
    slightly, not bent down to the floor.

Rough starting points: a 30 cm beagle lands around a 15 cm stand,
a 58 cm labrador around 43 cm, an 80 cm Great Dane around 65 cm.
These are guides, not rules — use your own dog’s measurement.
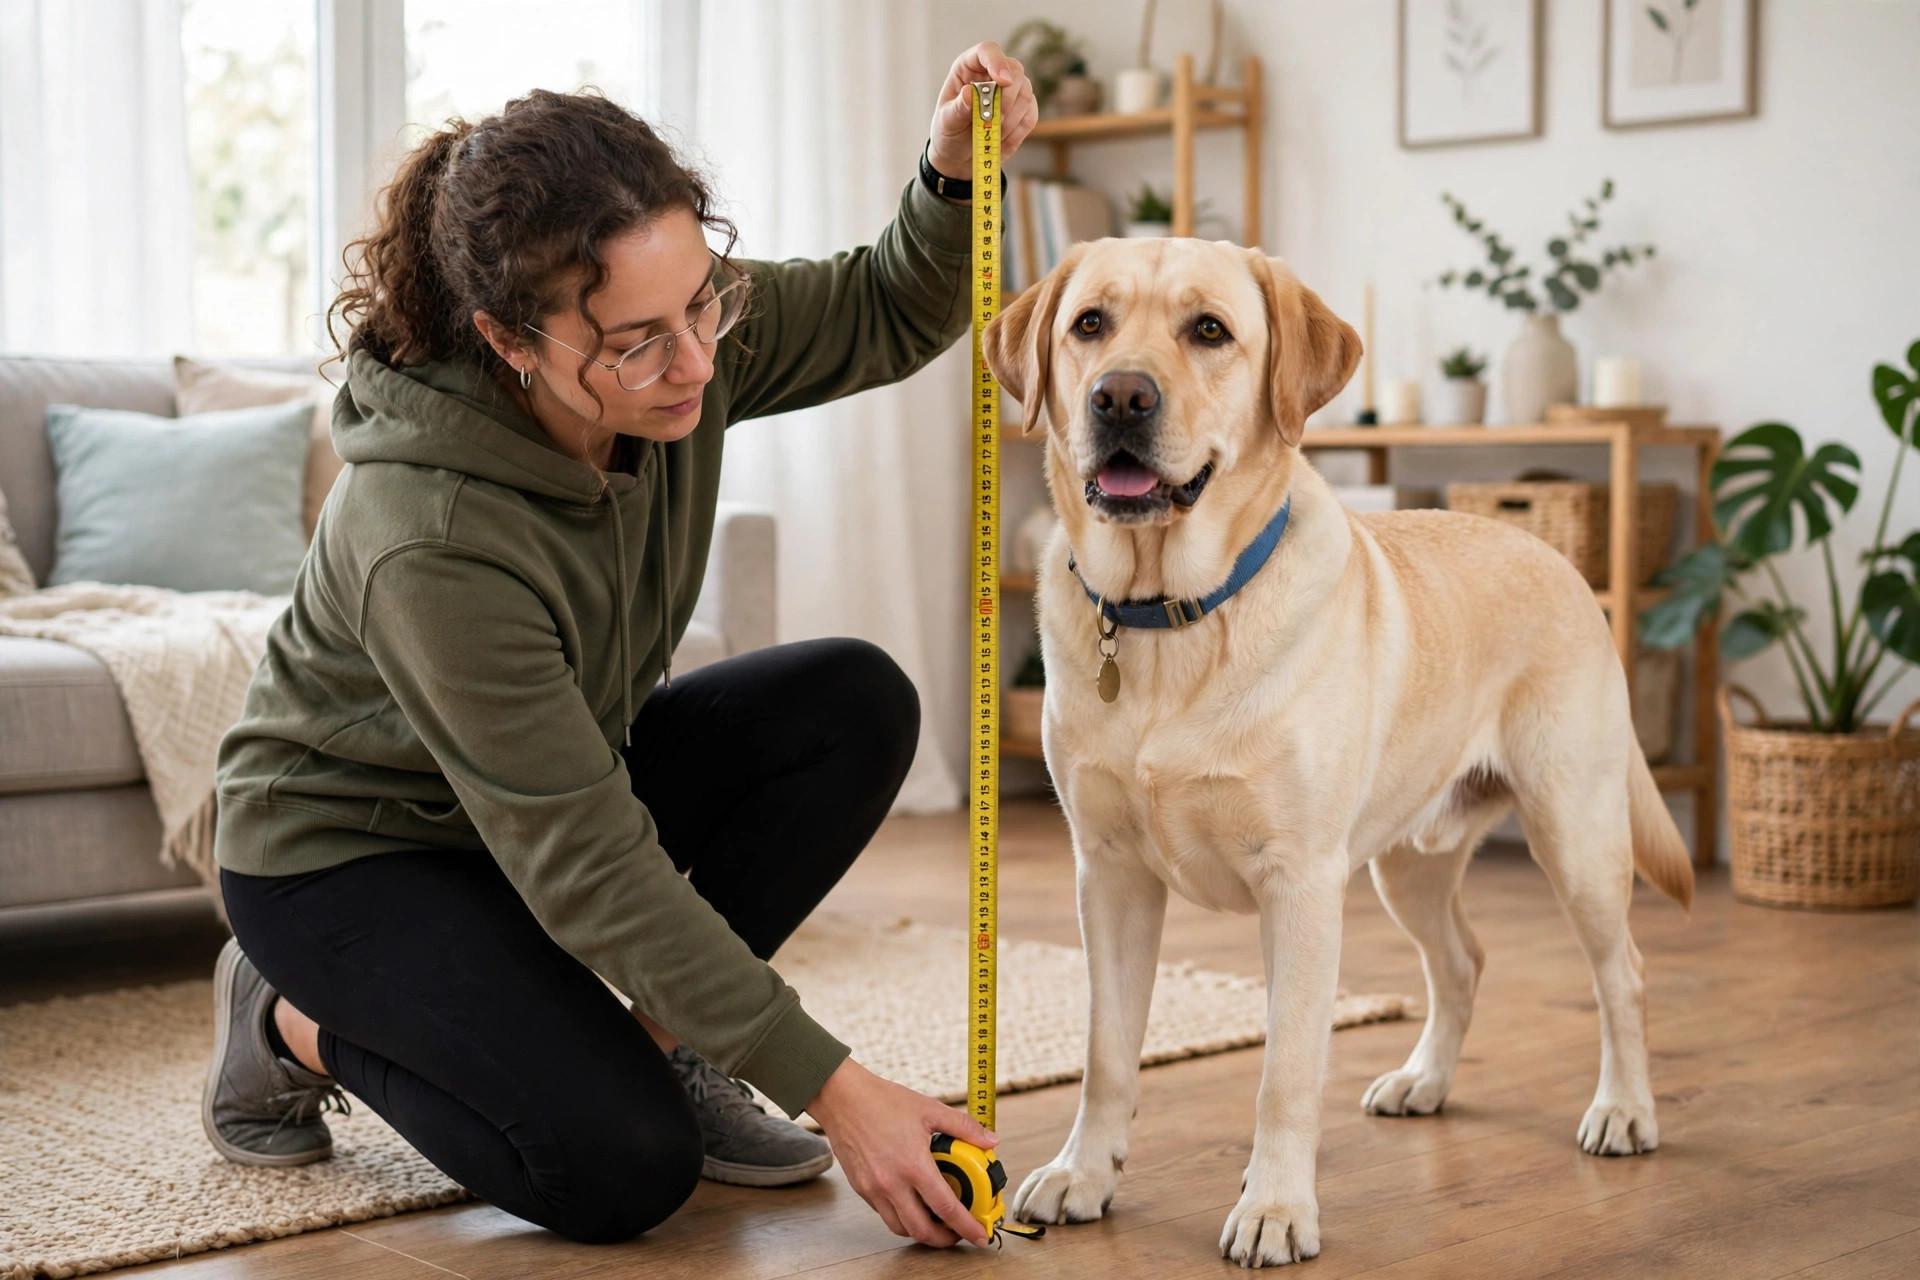
Owner measuring a Labrador's shoulder height with a tape measure to find the right raised feeder bowl height.

Then measure your bowls. The cut-out for each bowl should be about
1 cm wider than the bowl’s rim, so the lip rests on the top and the
bowl hangs down into it. Buy the bowls before you cut the top —
stainless steel, two matching sizes, and big enough that a meal
fills them two-thirds at most.

Growing puppy? Build for their current size, or leave the legs
over-long and trim down later — wood is forgiving. Alternatively,
stack two shorter leg sets that screw together so you can remove a
tier as the pup grows.

Materials and tools

Materials (for a two-bowl feeder):

  • 1 piece of 2 cm (¾ in) plywood or pine board for the top, about
    60 x 30 cm for large bowls (scale down for small breeds)

  • 4 pine 2×4 legs, cut to rim height minus the top’s thickness

  • Wood screws (6 cm), wood glue, 120- and 220-grit sandpaper
  • A food-safe finish: water-based polyurethane (3 thin coats) or
    food-grade mineral oil plus beeswax

  • 2 stainless steel bowls, clear silicone sealant (optional)

Tools: saw (hand saw or circular), drill, a hole saw or jigsaw,
tape measure, pencil, carpenter’s square, clamps, safety glasses,
dust mask.

One more note on materials: skip pressure-treated lumber and any
wood with a strong chemical smell. Plain pine or plywood plus a
cured food-safe finish is all you need — dogs will lick this thing.

The build: six steps to a finished feeder

Step 1 — Cut the top and legs. Cut the top panel to size, then
cut four legs to your measured height minus the top’s thickness.
Sand the cut ends so they sit flat.

Step 2 — Cut the bowl holes. Mark the bowl centres on the top,
evenly spaced with at least 5 cm of wood between the holes and the
edges. Drill a starter hole and cut with the hole saw or jigsaw.
Test-fit the bowls: the rim lip should rest flat on the top with
the bowl hanging through. If a hole is slightly tight, sand the
edge rather than forcing the bowl.

Cutting a bowl hole in a pine board with a hole saw drill for a DIY raised dog feeder.

Step 3 — Assemble the stand. Glue and screw the legs to the
underside corners of the top, checking with the square that they
sit at 90 degrees. Stand it up and check for wobble — sand the
long leg until it sits dead flat. A wobbly feeder gets head-butted
across the kitchen.

Step 4 — Sand everything a dog will touch. Go over the whole
stand with 120 grit, then 220, rounding every edge and corner.
No splinters, no sharp screw heads — countersink the screws and
fill with a dab of wood filler. A dog’s nose and tongue will
investigate every millimetre of this.

Step 5 — Seal it food-safe. Wipe the dust off and apply three
thin coats of water-based polyurethane, sanding lightly between
coats, or rub in food-grade mineral oil followed by melted
beeswax. Whatever you choose, let it cure fully before the first
meal — 72 hours for polyurethane, overnight for oil/wax. This is
the step that turns “weekend project” into “lasts for years”:
an unsealed top absorbs water, swells, and smells like old soup.
A thin bead of clear silicone around each bowl hole is optional
but excellent spill insurance.
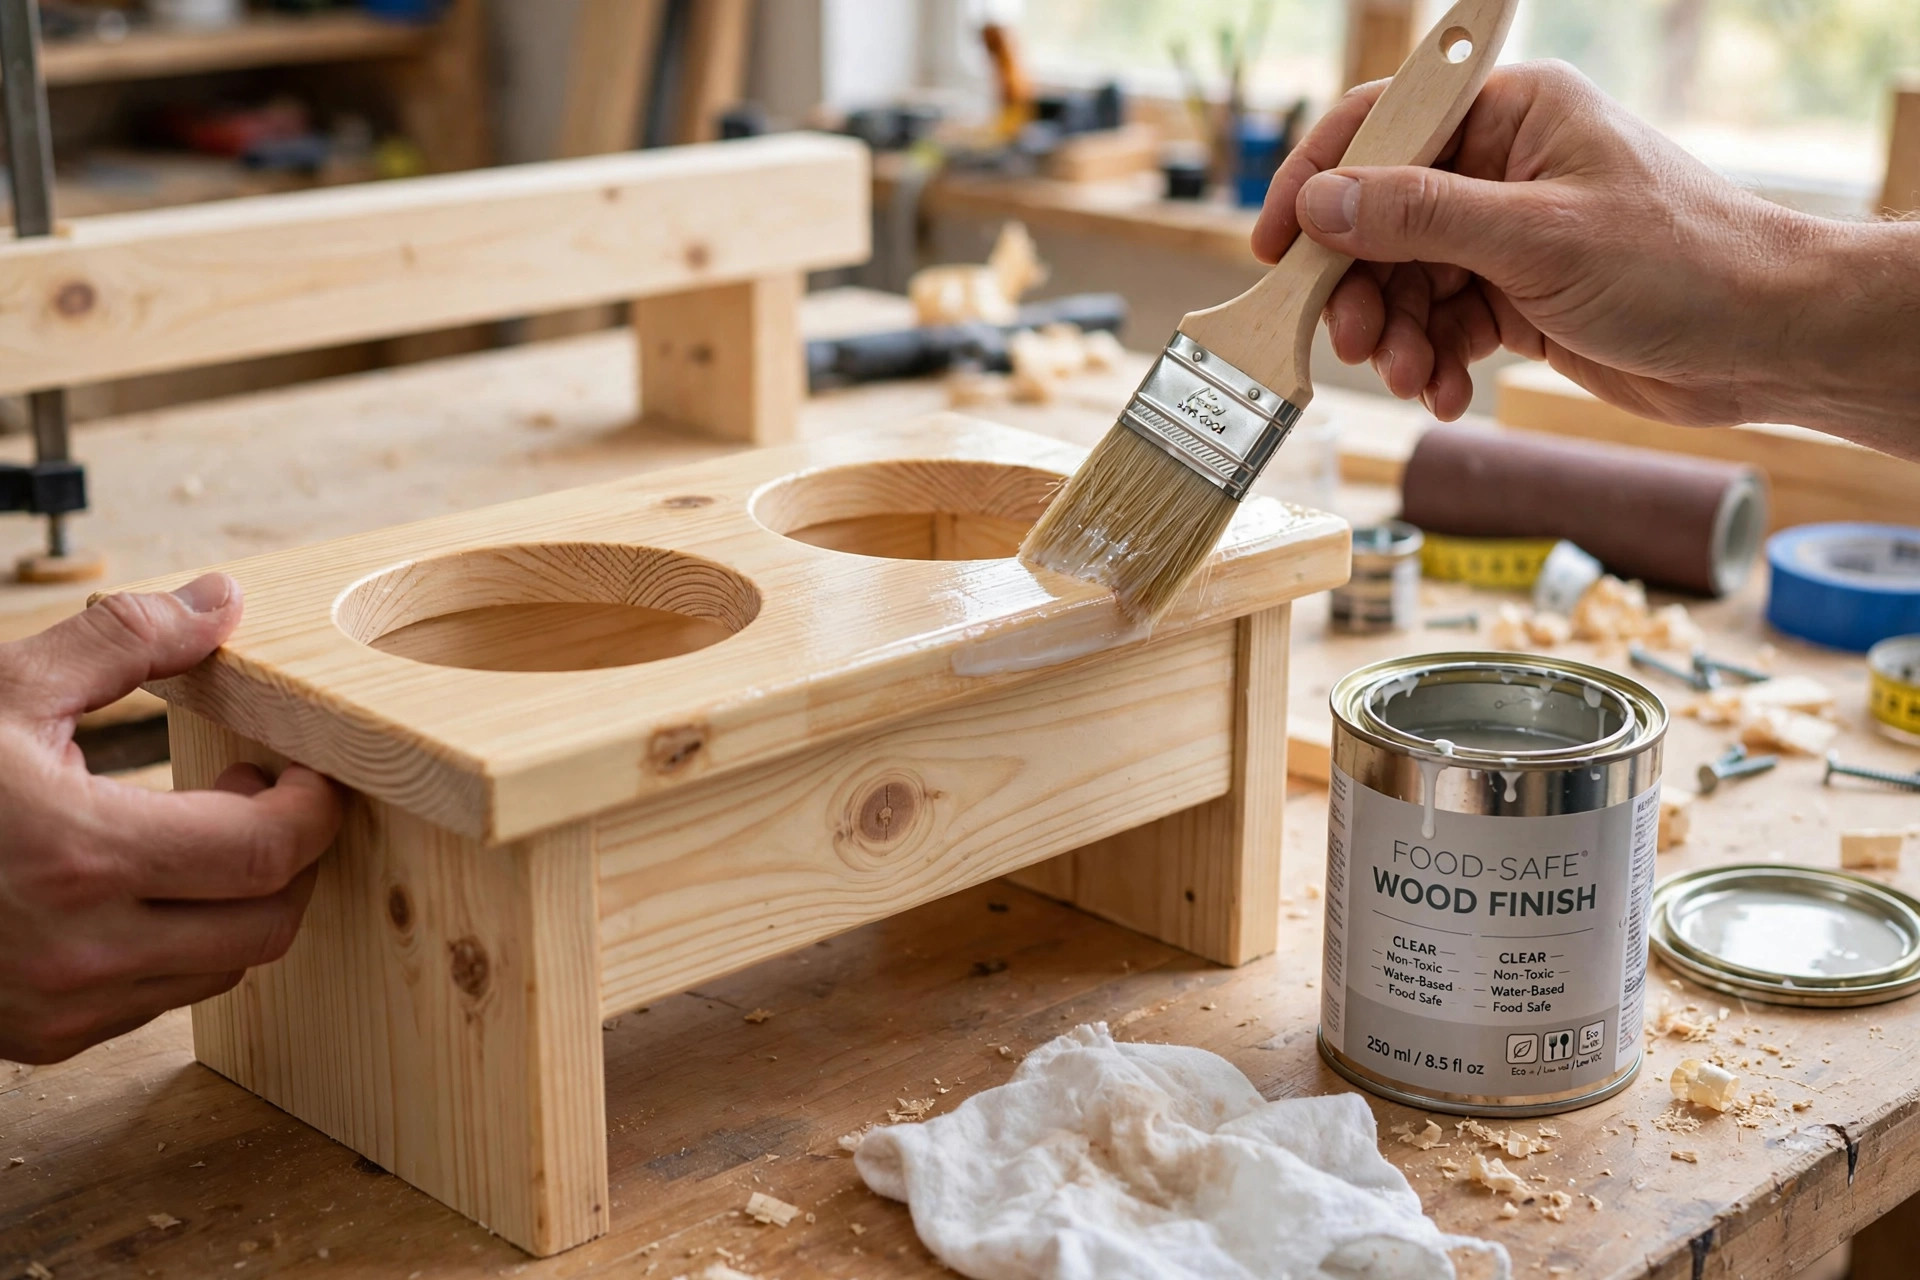
Brushing food-safe wood finish onto a DIY raised dog feeder stand.

Step 6 — Place it and let the dog adjust. Put the feeder on a
washable mat, drop the bowls in, and serve dinner. Most dogs take
to it immediately; cautious dogs get their first meal half at the
old height, half at the new one. Keep the old bowls out of sight
for a week so there’s no confusion.

Which dogs benefit most

  • Tall and large breeds: greyhounds, danes, setters — the
    neck-fold is real for them.

  • Seniors with stiff necks or arthritis: less reaching down,
    less discomfort at mealtimes.

  • Champion bowl-pushers and splashy drinkers: the stand’s
    weight plus a mat ends the migration.

  • Multi-dog households: one tidy station instead of four
    wandering bowls.
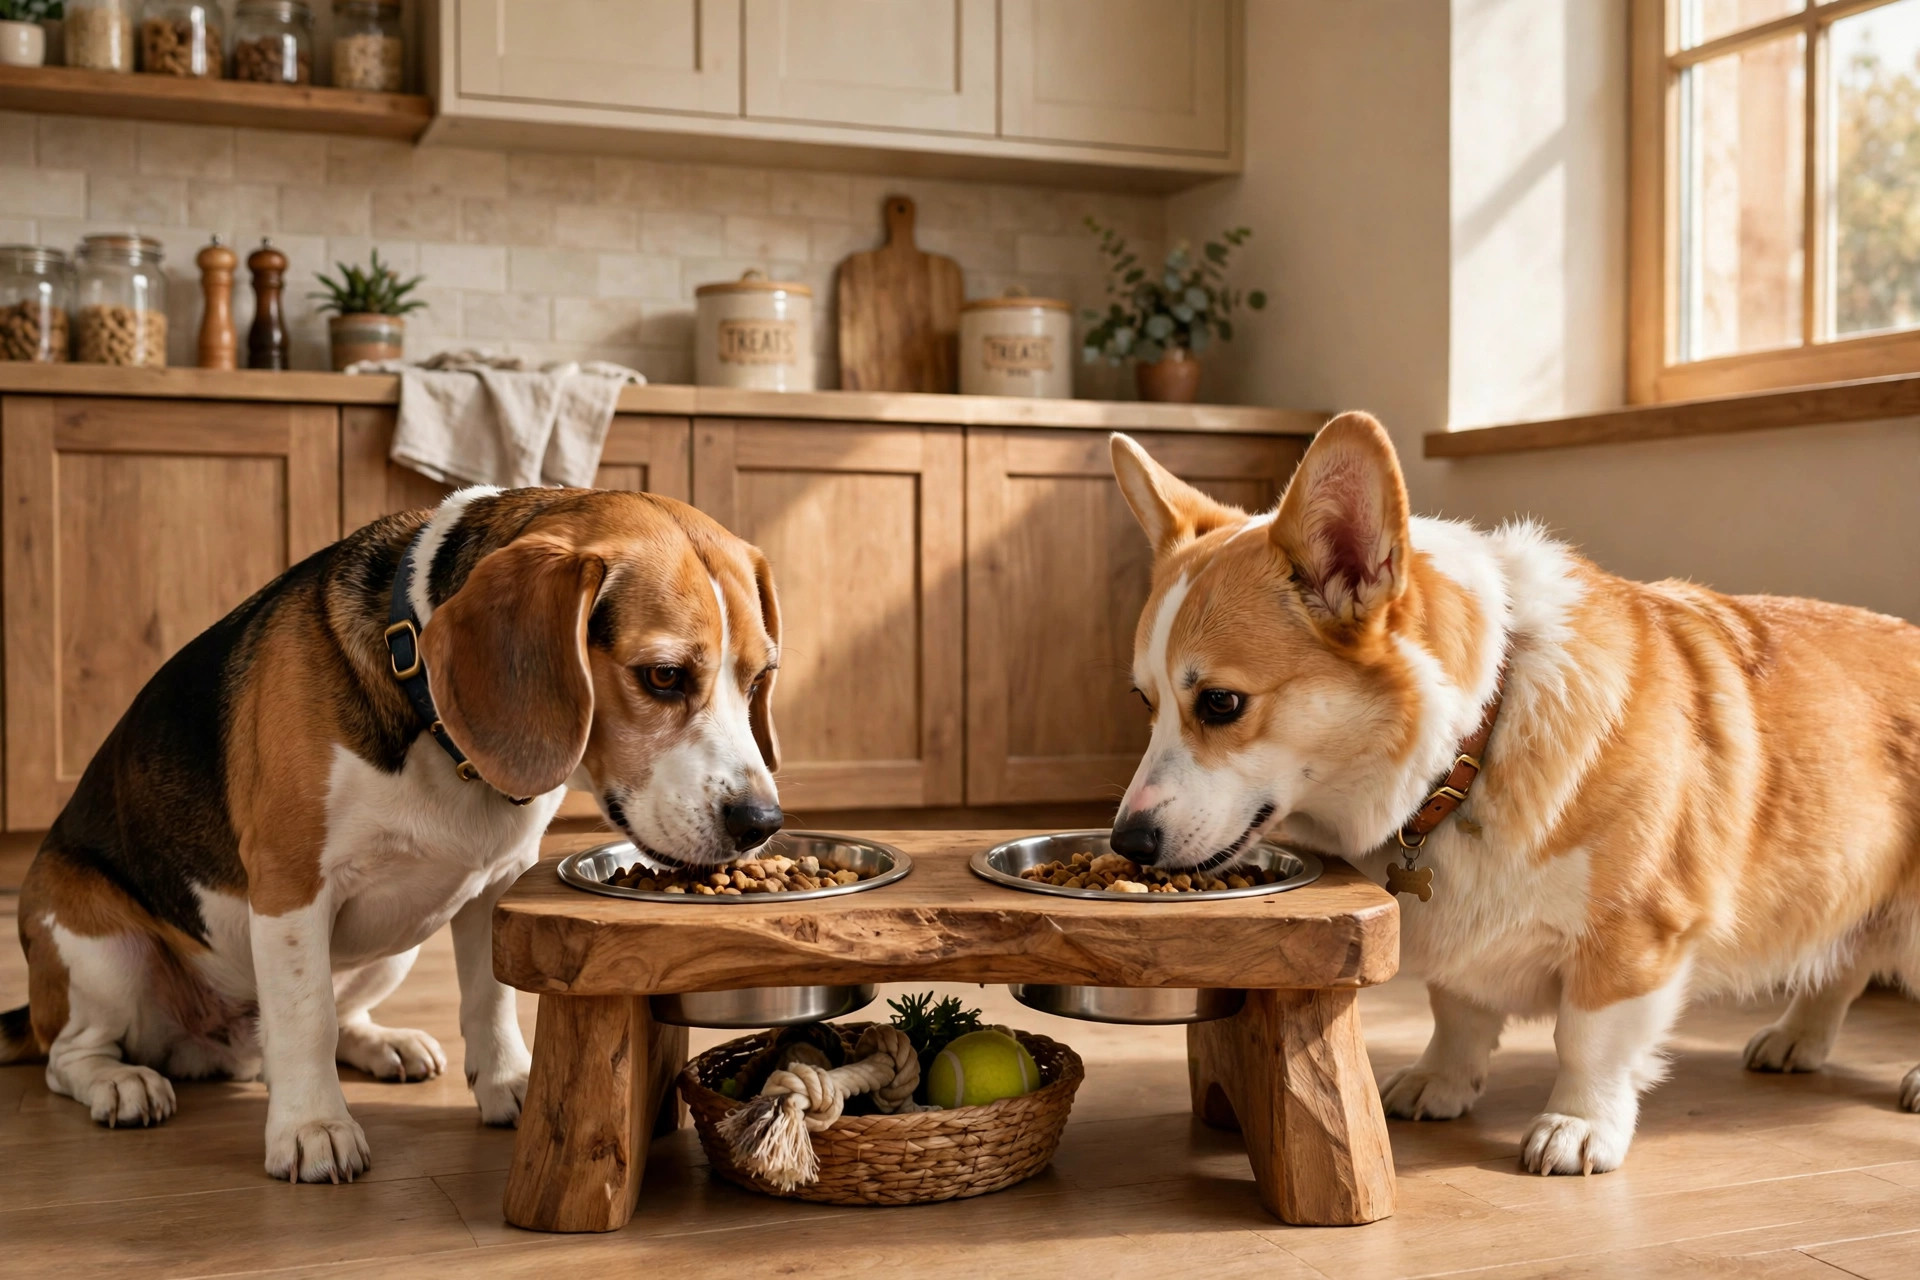
Beagle and corgi eating from a wooden raised dog feeder station in a kitchen.

Not ideal for: determined chewers (they’ll gnaw the legs —
a metal stand suits them better) and very fast-growing puppies
unless you build the adjustable version. And if your dog has a
medical condition affecting swallowing or digestion, check with
the vet first — the feeder is furniture, not therapy.

Living with it: care and food safety

The bowls get a hot soapy wash daily, same as any bowl — stainless
is the right call here because it doesn’t scratch the way plastic
does, and scratches harbour bacteria. Wipe the top down after
splashy meals; if the finish starts looking thirsty, rub in
another coat of mineral oil or beeswax. Check the leg screws every
few months and re-tighten — wood moves with the seasons. If you
used polyurethane, there’s nothing to redo for years unless the
surface gets deeply scratched.

Three easy variations

The double-diner is the build above. For a single-bowl
version
(one dog, small kitchen), shrink the top to a square
and use three or four shorter legs — same steps, half the wood.

The storage-cubby feeder replaces the open legs with a plywood
box: the top carries the bowls, the cubby below holds the kibble
bag. More cutting, but it clears a whole shelf of clutter.

And the no-power-tools version: buy pre-cut legs and a board
cut to size at the timber yard, assemble with a hand saw’s worth
of trimming and a screwdriver. The hole saw is the only
specialist bit — and most hardware stores will cut the bowl
holes for you if you mark them first.

If mealtimes are a race as well as a mess, drop a
slow feeder
bowl
into one of the holes — the raised station and the maze
bowl pair well. For the rest of the feeding routine, see our
guides to homemade dog food
and the weekend dog door build
for more petcore DIY.

The bottom line

A raised dog feeder is one of the highest-satisfaction weekend
builds you can do for your dog: simple materials, one honest
measurement, and a finish that survives real life. Measure the
dog, not the guess; cut the bowl holes after you own the bowls;
sand like your dog’s nose depends on it (it does); and seal
food-safe. Do that, and dinner time gets noticeably calmer —
for the dog’s neck and your kitchen floor alike.

FAQs

How tall should a raised dog feeder be?
Measure your standing dog from the floor to the top of their
shoulders, then subtract about 15 cm (6 inches). That rim height
lets the dog eat with their head only slightly lowered. Typical
results: ~15 cm for a beagle, ~43 cm for a labrador, ~65 cm for
a Great Dane.

Do raised feeders prevent bloat?
No — and the best available evidence points the other way for
large, deep-chested breeds. Treat a raised feeder as a comfort
and tidiness upgrade, and discuss feeding setup with your vet
if your breed is bloat-prone.

What finish is safe for a wooden dog feeder?
Water-based polyurethane (fully cured, 72 hours) or food-grade
mineral oil plus beeswax. Avoid oil-based stains, varnishes and
anything with a strong solvent smell — dogs will lick the stand.

Can I build one without power tools?
Yes. Get the timber yard to cut the top and legs to your
measurements, assemble with screws and a screwdriver, and have
them (or a friend) cut the bowl holes with a hole saw. A hand
saw handles any final trimming.

Stainless steel or ceramic bowls in a raised feeder?
Stainless steel wins: unbreakable, dishwasher-safe, and it won’t
scratch the way plastic does. Ceramic looks great but chips —
and a chipped glaze near a chewer is a bad combination.
Labrador sitting beside a washing machine with a dog bed cover ready to wash.

How to Wash a Dog Bed (Without Ruining It)

A dog bed picks up everything — dirt from muddy paws, drool, shed
hair, the faint funk of a dog who “just went swimming”. Left
unwashed, it stops being the cosy den your dog loves and starts
being a little ecosystem of its own. But most people either never
wash the bed (afraid of ruining it) or wash it wrong and end up
with a lumpy, flat, sad cushion. Here’s how to do it right.

The short version: wash the cover often, the insert rarely, dry
everything thoroughly, and match the method to the bed type. The
details below keep your dog’s bed fresh and your wallet intact.

How often should you wash a dog bed?

For most dogs, the cover should go through the wash every one to
two weeks — more often if your dog sheds heavily, swims a lot,
spends time outdoors, or has skin allergies. The foam or
polyfill insert needs a full wash only a few times a year unless
it smells or your dog has had an accident on it.

A good rhythm: strip and wash the cover with your regular pet
laundry (towels, blankets, throws) every Sunday. Vacuum the bed
itself midweek to pull out hair and dust. Deep-clean the insert
seasonally. If the bed starts smelling despite fresh covers, the
insert needs attention — that’s your cue.

Dogs with allergies or sensitive skin benefit from the weekly
schedule, since beds trap dust mites and pollen. And if your dog
has just come back from a beach trip, a muddy walk, or a bout of
illness, wash the whole bed right away rather than waiting.

Step 1: Check the label and prep the bed

Every wash starts with the care label. “Machine washable” usually
means the cover; the insert is often spot-clean only. Memory foam
inserts in particular should never go in the machine — they absorb
water like a sponge, can take days to dry, and the agitation can
crumble the foam.

Prepping the bed takes five minutes and saves the washer:

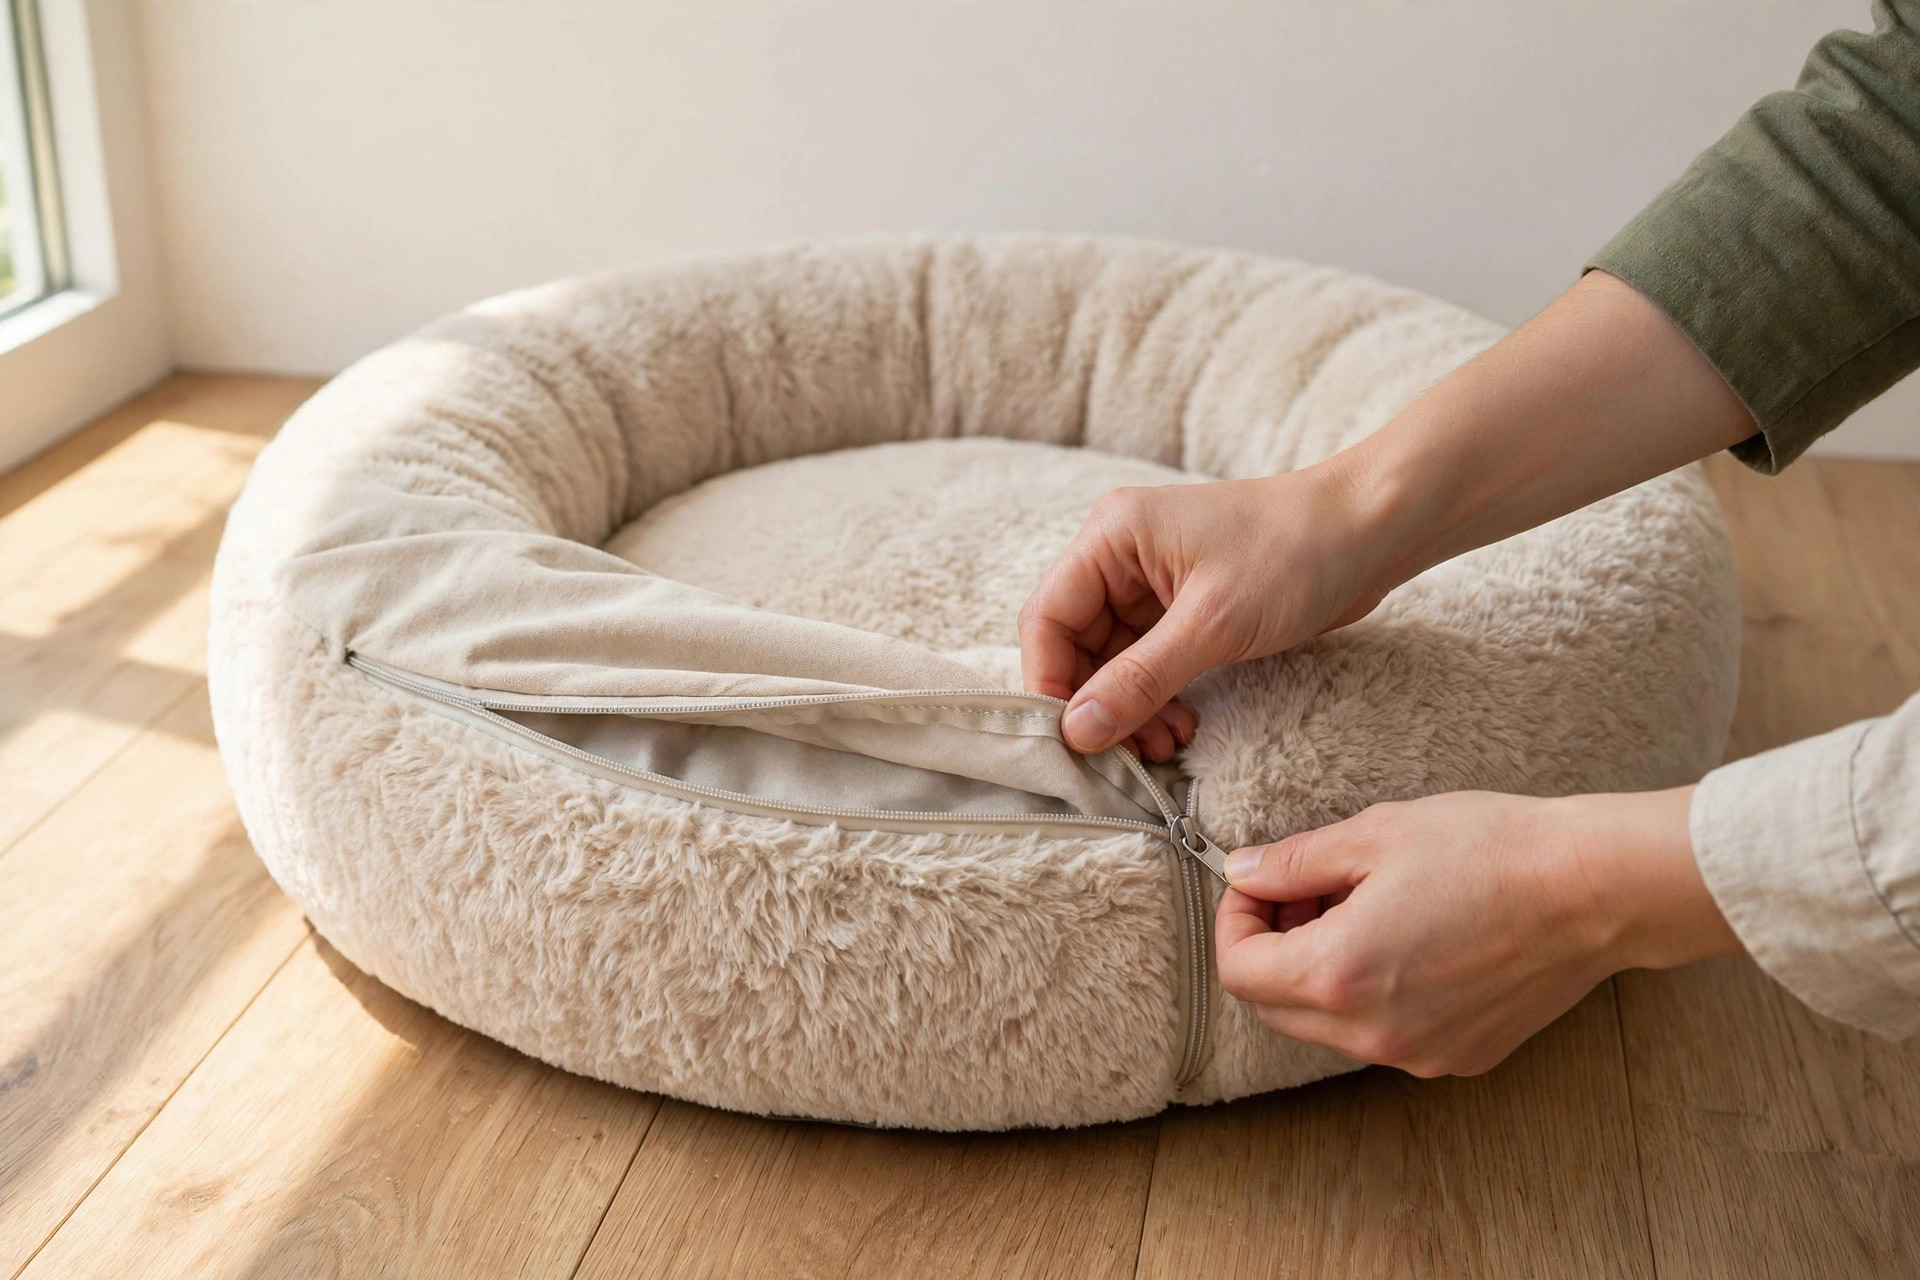
Remove the cover via the zip. Wash it separately from the insert.

Vacuum everything first. Run a vacuum (upholstery attachment)
over the cover and the insert to pull off hair and loose dirt.
Washing a hairy bed raw sends all that fur straight into your
machine’s filter.

Pre-treat stains. Dab urine, vomit, or mystery stains with an
enzymatic pet-stain cleaner before the wash. Regular detergent
masks these stains; enzymes break them down properly. Blot, don’t
rub — rubbing drives the stain deeper.

Check for damage. Small tears in a cover become big tears in
the spin cycle. Stitch up any rips or wash the bed in a large
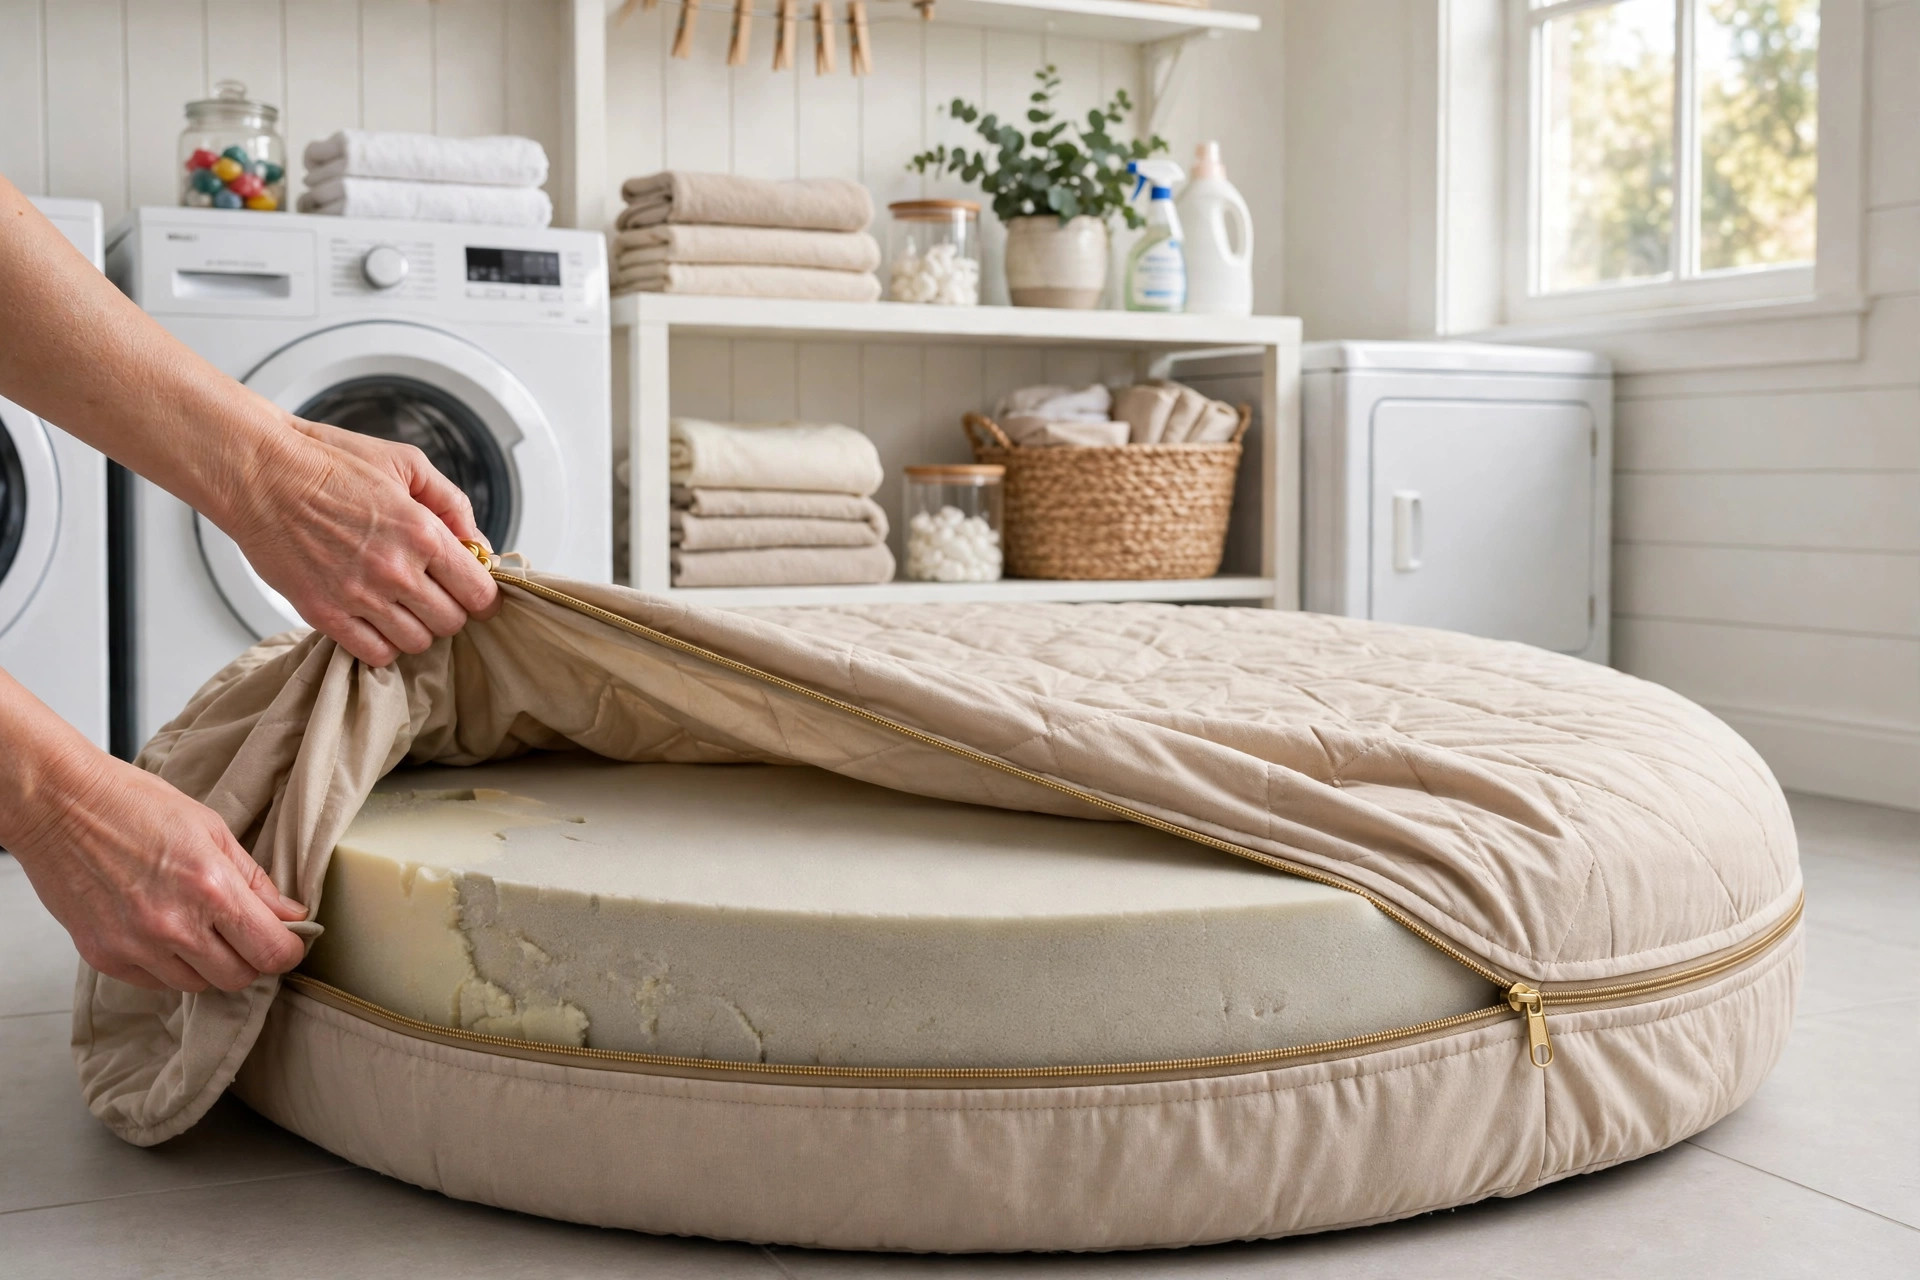
laundry bag to contain them.Hands unzipping a removable washable cover from a round dog bed.

Step 2: Washing the cover — machine settings that matter

The cover is the easy part and the one you should wash most. Use
these settings:

Cold or warm water (30°C / 85°F max). Hot water sets some
stains and can shrink cotton or boucle covers. Cold keeps fabrics
happy and is kinder to colours.

Gentle or delicate cycle. Dog bed covers take enough beating
already; the gentle cycle reduces pilling and wear.

A pet-safe, fragrance-free detergent. Heavy fragrances can
irritate a dog’s skin and nose — and some dogs will refuse to
sleep on a bed that smells like a perfume counter. Use a
fragrance-free detergent, and skip the fabric softener: it coats
fibres and reduces absorbency over time.

Load size matters. A big donut-bed cover fills a domestic
machine on its own. Overloading stops things from rinsing
properly, and trapped detergent makes dogs itchy. Wash a huge
cover on its own, or take it to a laundromat with a commercial
machine.

Baking soda boost for odour. Add half a cup of baking soda to
the drum along with the detergent for a genuinely fresher smell
— it deodorises without perfume. A splash of white vinegar in the
rinse compartment works too, as a natural softener that rinses
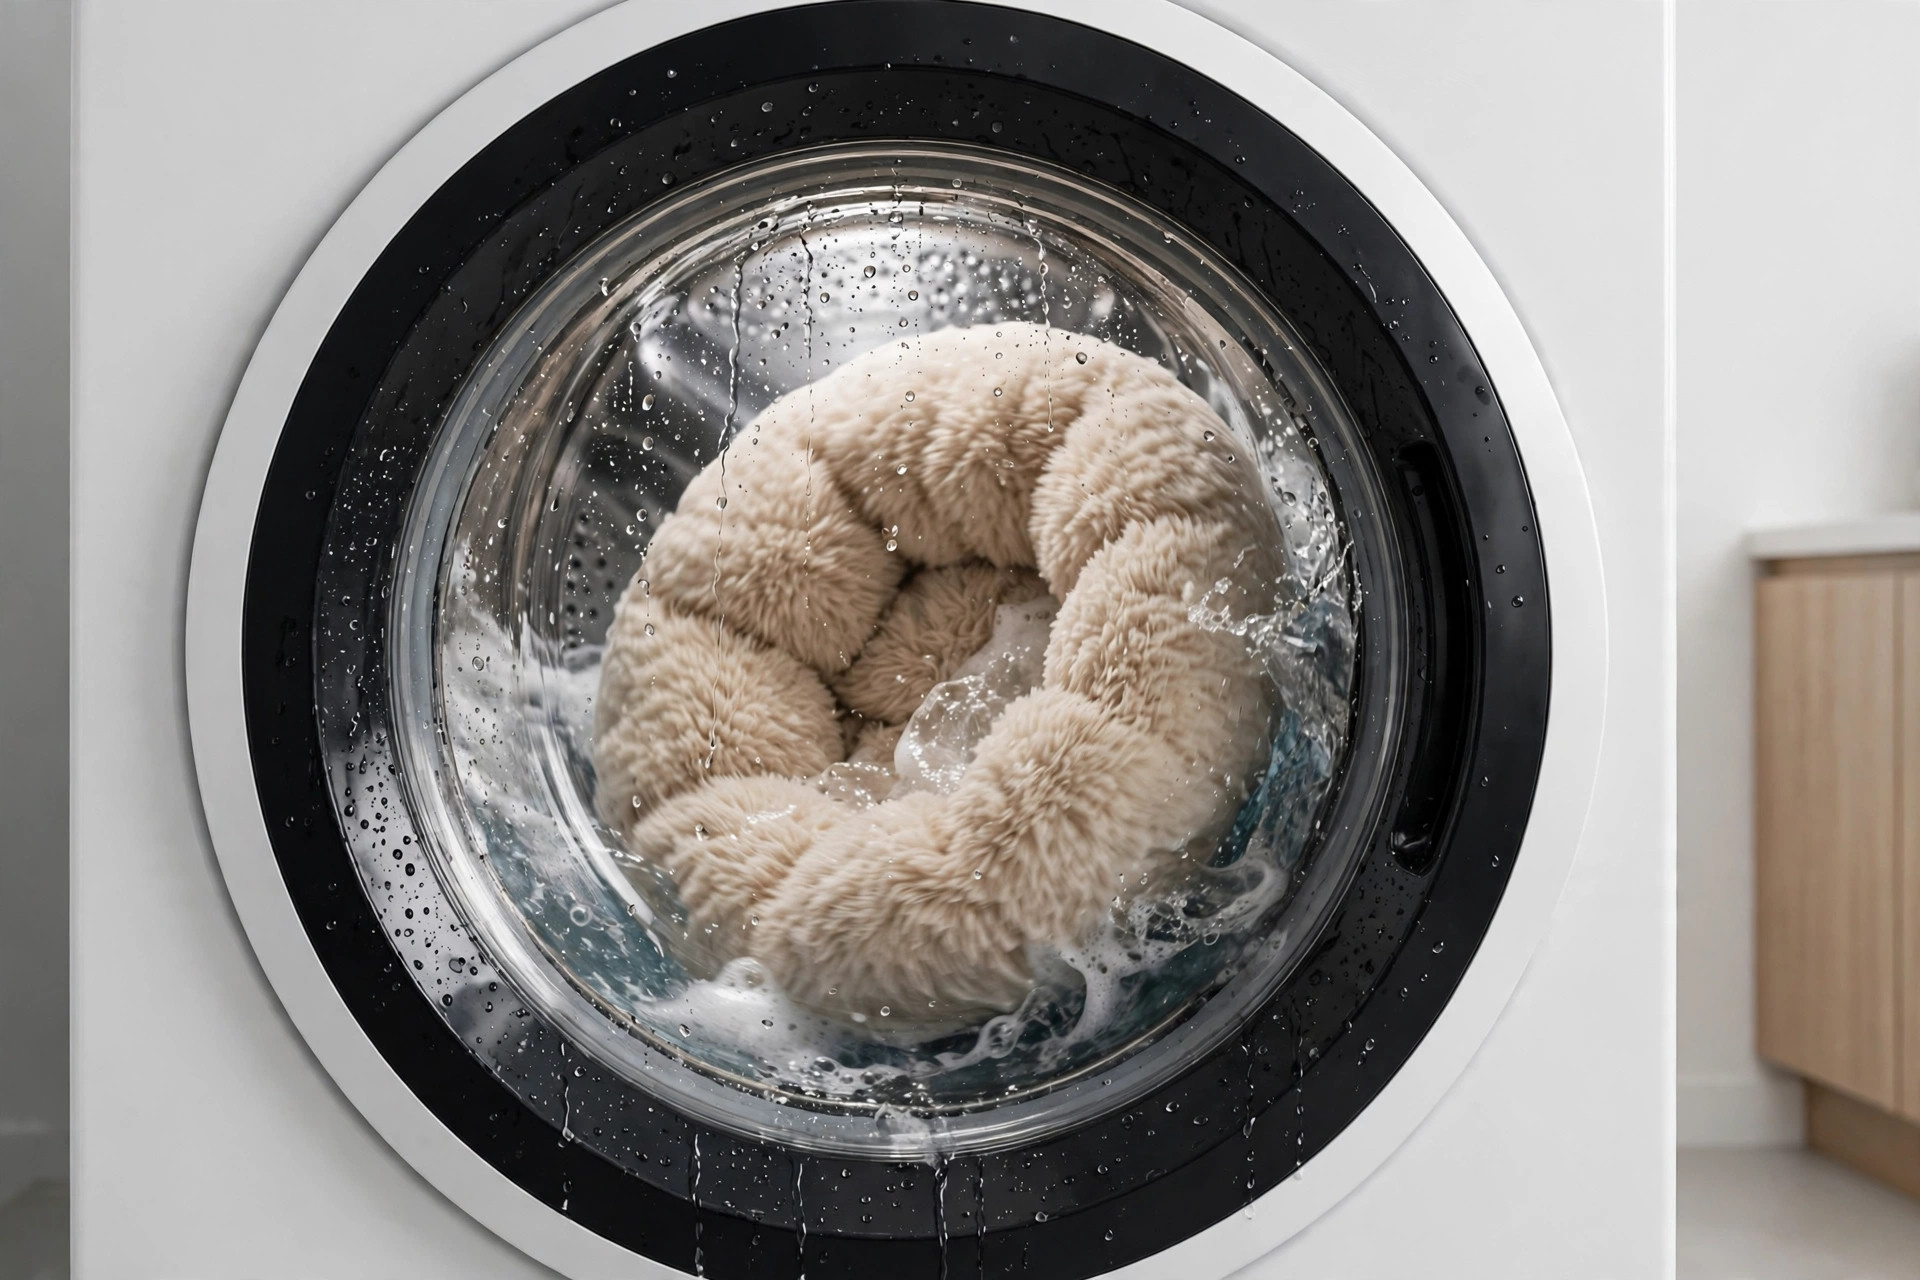
clean.Dog bed cover tumbling inside a front-loading washing machine.

Step 3: Washing the insert — by bed type

This is where beds get ruined, so match the method to the type.

Polyfill / fibre-fill beds: usually machine washable on a
gentle cycle with cold water. Add a couple of clean tennis balls
(or dryer balls) to the load — they bounce the fill apart and
stop it clumping. Use a large laundry bag if the insert has a
thin inner liner.

Memory foam beds: never machine wash. Spot-clean with a
damp cloth and a little mild detergent, or sprinkle baking soda
over the foam, leave it for an hour to absorb odour, then vacuum
it off. For a deeper clean, hand-wash in a bathtub with lukewarm
water and mild soap, press (don’t wring) the water out, and dry
flat — this can take 24–48 hours with good airflow.

Orthopaedic / egg-crate foam: same as memory foam — spot
clean or bathtub wash only. Wringing or machine agitation tears
the foam structure apart.

Cedar or buckwheat-fill beds: the fill itself doesn’t get
washed — empty it into a bin, wash the outer casing, and replace
the fill when it loses its scent or gets damp. Cedar fill can
usually just be aired in the sun.

Elevated / cot-style beds: wipe the fabric deck with a damp
cloth and mild soap, rinse with a hose, and let it air-dry. The
mesh dries fast and these are the lowest-maintenance beds going.

Whichever type you have, a waterproof liner between the cover
and the insert is the single best investment — it stops
accidents from reaching the insert at all, and it costs less
than one replacement bed.

Drying without the clumps

Drying is where most wash jobs go wrong. A cover that comes out
of the dryer half-damp will smell musty within days, and a foam
insert dried in direct heat can warp or crumble.

Covers: tumble dry on low heat or line-dry. If the cover is
thick (donut beds, bolster beds), add dryer balls to keep it
moving. Take it out promptly — leaving it bunched in the dryer
breeds that damp-fabric smell.

Polyfill inserts: tumble dry on low with dryer balls, and
check every 20 minutes. Pause the cycle, pull the insert out,
fluff it by hand, and redistribute the fill before it dries into
a lump. Patience here is the whole game.

Foam inserts: air-dry only, flat, in a ventilated room or
outdoors in shade. A fan pointed at the foam speeds things up
dramatically. Never tumble-dry foam and avoid direct hot
sunlight, which can break down the material over time.

The sniff test. Before reassembling, smell the insert. Any
dampness or mustiness means it isn’t done. A bed put away damp
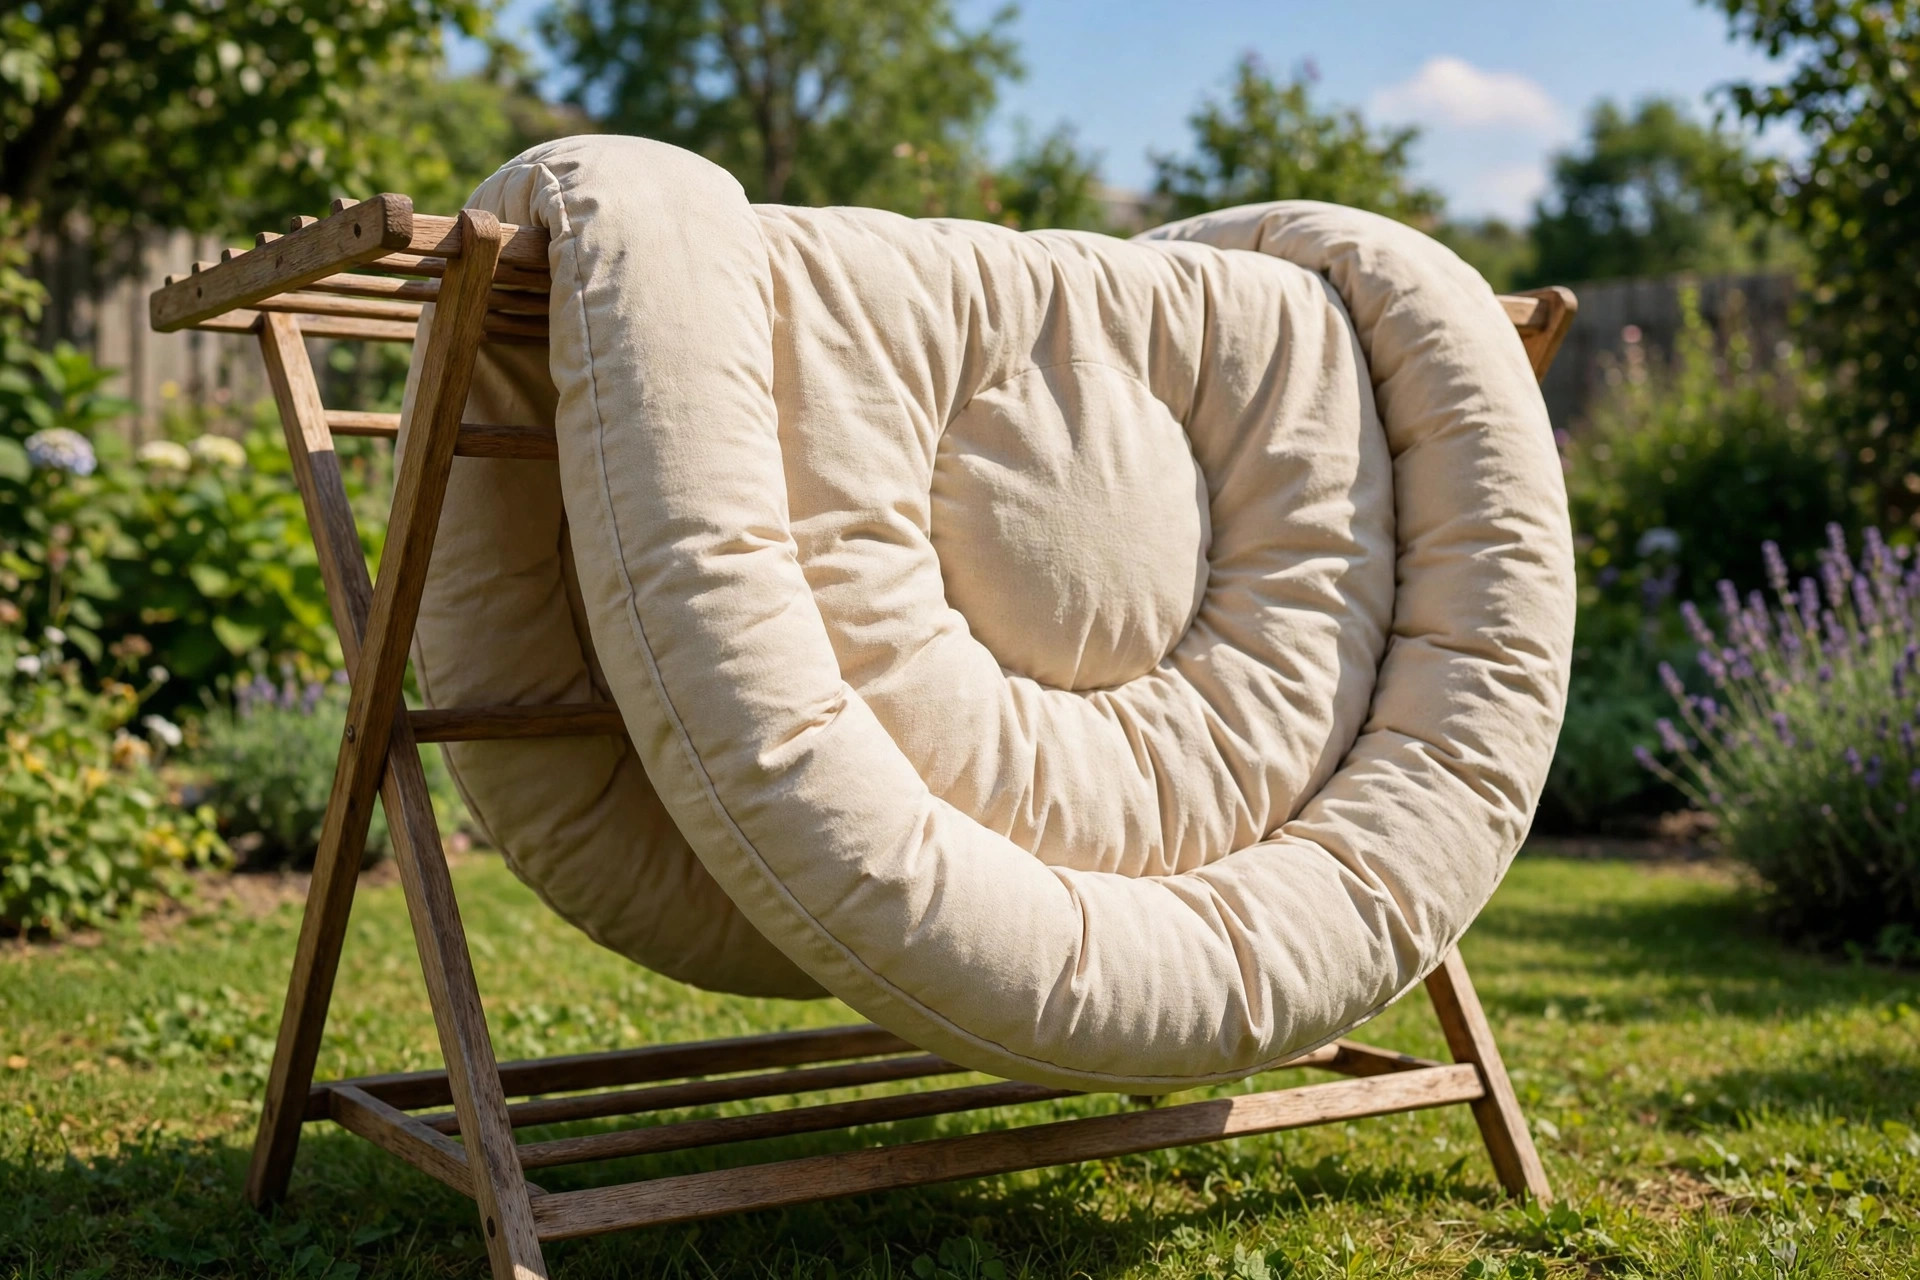
grows mildew — and your dog will notice before you do.Clean dog bed air-drying on a rack in sunny garden.

Deodorising between washes

Between full washes, these keep things fresh:

Baking soda refresh. Sprinkle baking soda over the bed,
leave for 20–30 minutes, then vacuum thoroughly. It lifts odours
without wetting anything.

Sunlight. UV is a free disinfectant. Put the bed in direct
sun for a few hours on wash day — it kills odour-causing
bacteria and dries out any residual dampness. (Don’t overdo it
with foam; shade-dry foam instead.)

Pet-safe fabric spray. A light spritz of an enzymatic pet
deodoriser between washes buys you a few extra days. Avoid
anything with essential oils like tea tree, which are toxic to
dogs.

Rotate two covers. If your dog’s bed has a removable cover,
buy a spare. One washes while the other is on duty, and the bed
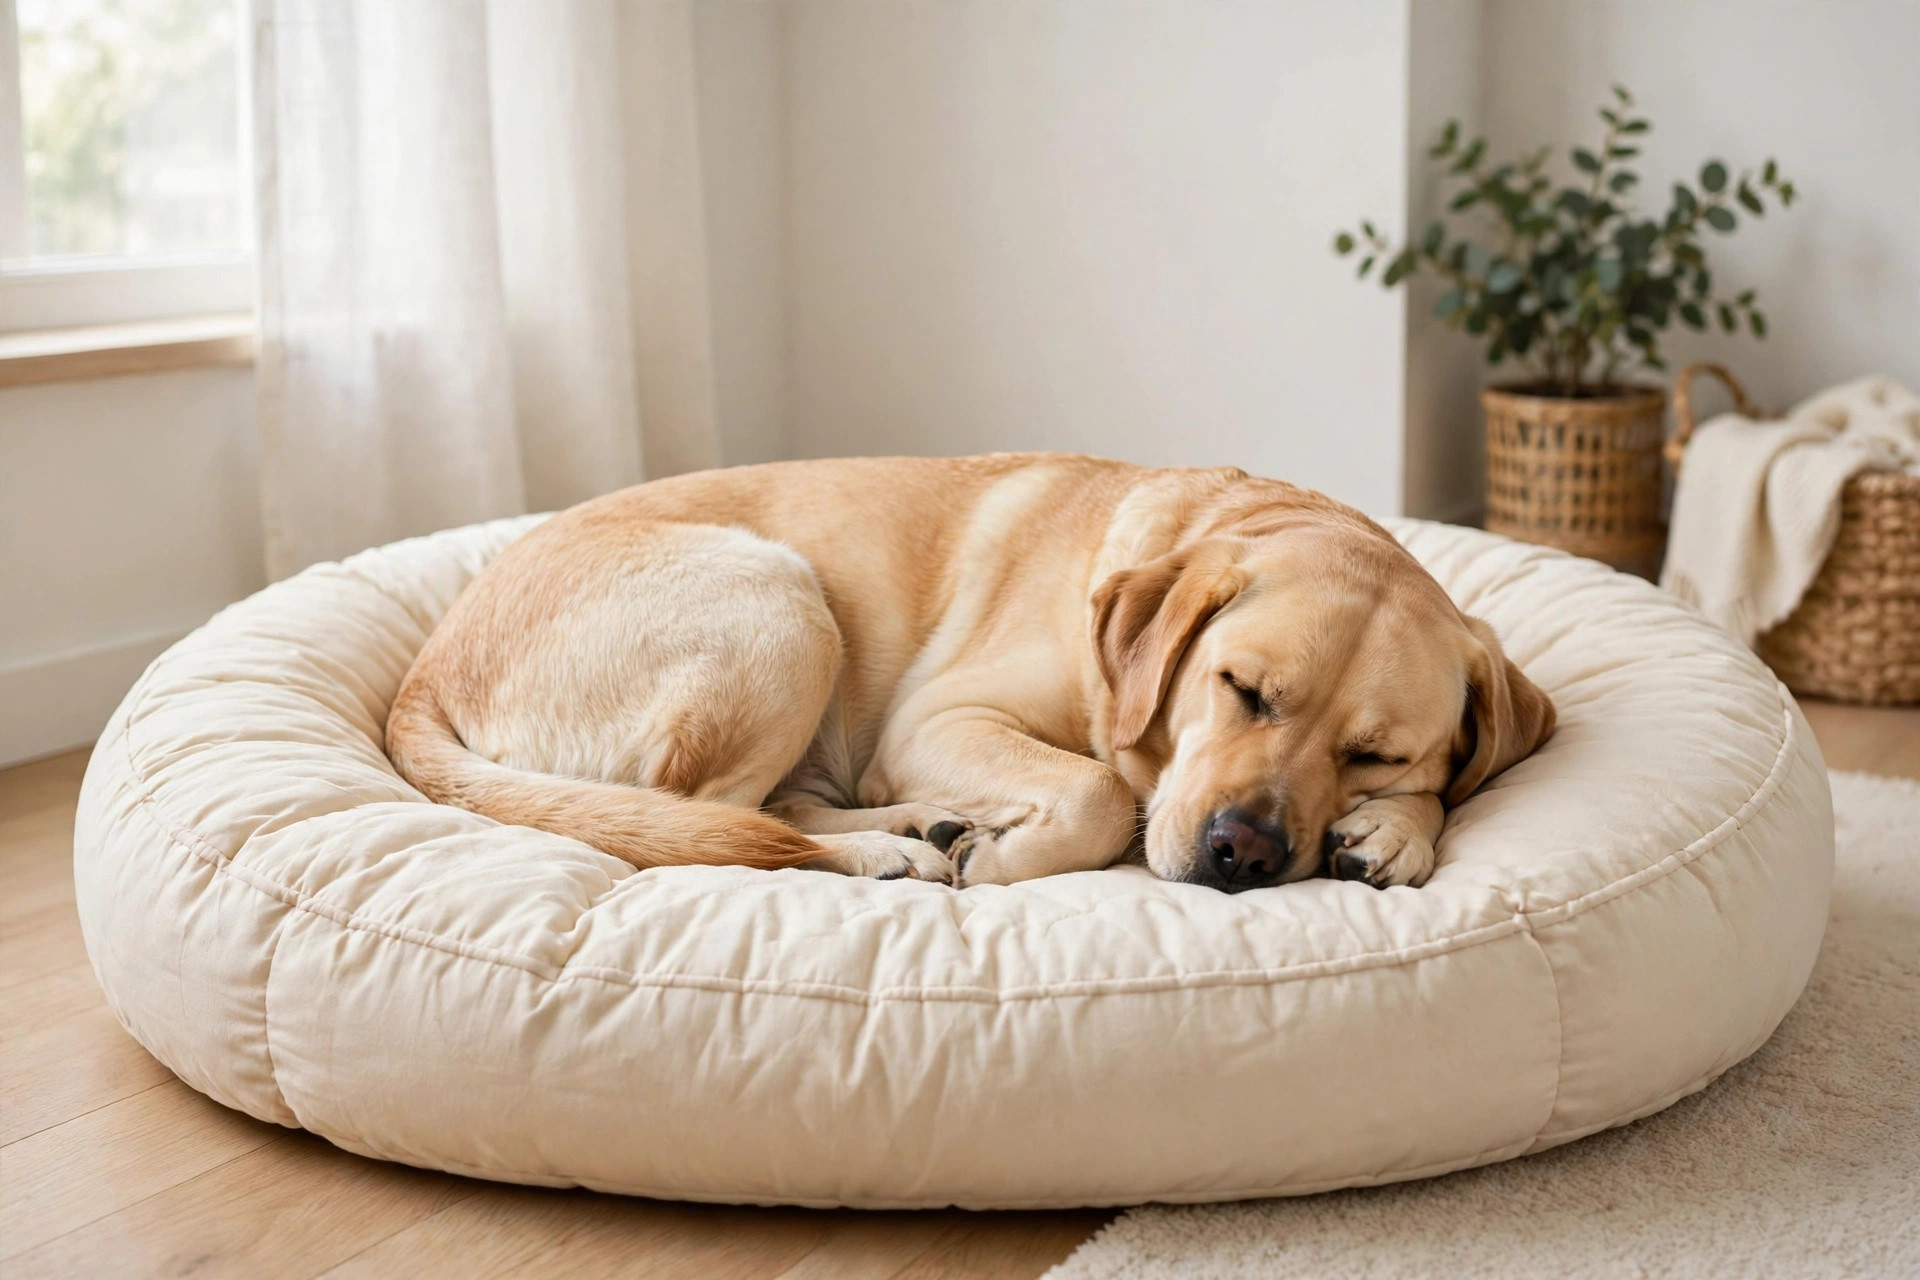
never has to sit around naked waiting.Labrador sleeping on a freshly washed clean dog bed.

When to replace the bed instead of washing it

No bed lasts forever. Replace it when the foam stays compressed
after fluffing (it no longer supports the dog’s weight), when
odour survives a full wash-and-dry cycle, when the cover’s zip
fails or the fabric wears through, or when your dog has outgrown
it and hangs off the edges. A good rule of thumb: with regular
washing, a quality bed lasts two to three years of daily use.

If your dog is a senior, watch for thinning cushion in their
favourite sleeping spot — that’s the bed telling you it’s done.
An unsupportive bed can make arthritic joints worse overnight.

Safety notes

Keep these in mind and the wash stays dog-safe:

  • No bleach, no harsh chemicals. Chlorine bleach residues
    irritate skin and paws. If you need disinfecting power (after
    illness or fleas), use a pet-safe enzymatic cleaner or a
    veterinary disinfectant, and rinse thoroughly.
  • Rinse twice if your dog is sensitive. An extra rinse cycle
    removes detergent residue that can cause itching.
  • Dry completely. A damp bed is a mildew bed. If in doubt,
    give it another hour.
  • Check for loose stuffing after washing. Fill can work its
    way out of seams in the wash; trim loose threads and check
    that no clumps of stuffing are accessible to chew.

The bottom line

Washing a dog bed isn’t complicated — it’s just specific.
Covers wash easily and often; inserts wash rarely and gently,
matched to their fill type; everything dries completely before
the dog gets it back. Two covers in rotation and a waterproof
liner underneath turn the whole job into a ten-minute weekly
habit, and your dog gets a fresh den every week.

FAQs

Can I put a whole dog bed in the washing machine?

Only if the entire bed is labelled machine washable — small
polyfill beds and some donut beds are. Foam, memory foam, and
cedar-fill beds should never go in whole; wash the cover and
treat the insert separately.

How do I get dog smell out of a bed that survives washing?

Pre-soak the cover in cold water with a cup of baking soda for
an hour before washing, add half a cup of baking soda to the
wash, and dry the bed in direct sun. If the smell is in the
insert itself, the baking-soda-sprinkle-and-vacuum method or a
replacement insert may be needed.

Can I use regular laundry detergent on a dog bed?

Yes, as long as it’s fragrance-free and dye-free. Scented
detergents and fabric softeners can irritate a dog’s skin and
put some dogs off using the bed entirely. An extra rinse cycle
is a good safety margin.

How do I wash a dog bed without a removable cover?

Vacuum thoroughly, spot-clean stains with an enzymatic cleaner,
then hand-wash the whole bed in a bathtub with lukewarm water
and mild soap if the fill allows it (polyfill yes, foam no —
spot-clean foam only). Squeeze, don’t wring, and dry flat with
a fan.

My dog’s bed is flat after washing — can I fix it?

Sometimes. Tumble the polyfill insert on low heat with dryer
balls, pausing to fluff by hand every 20 minutes, and the fill
often springs back. If the foam itself has compressed and stays
flat, the bed has reached the end of its life — time to replace.

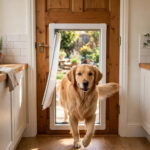
Golden retriever walking through a newly installed dog door in a wooden kitchen door.

How to Install a Dog Door (Without Ruining Yours)

A dog door is one of those small home upgrades that quietly changes
daily life — no more playing doorman at 6am, and the dog gets
freedom on their own terms. The reason most people put it off is
fear of ruining a perfectly good door. Done methodically, though,
fitting a dog door is a straightforward weekend job, and with the
right measurements there’s no visible mess at the end.

The secret is all in the planning: measure the dog (not the guess),
pick the right door type for your home, cut once, seal well, and
train properly. Here’s the full walkthrough.

Step 1: Measure your dog — the flap is everything

A dog door that is too small scares the dog; too big wastes energy
and invites weather in. Measure properly.

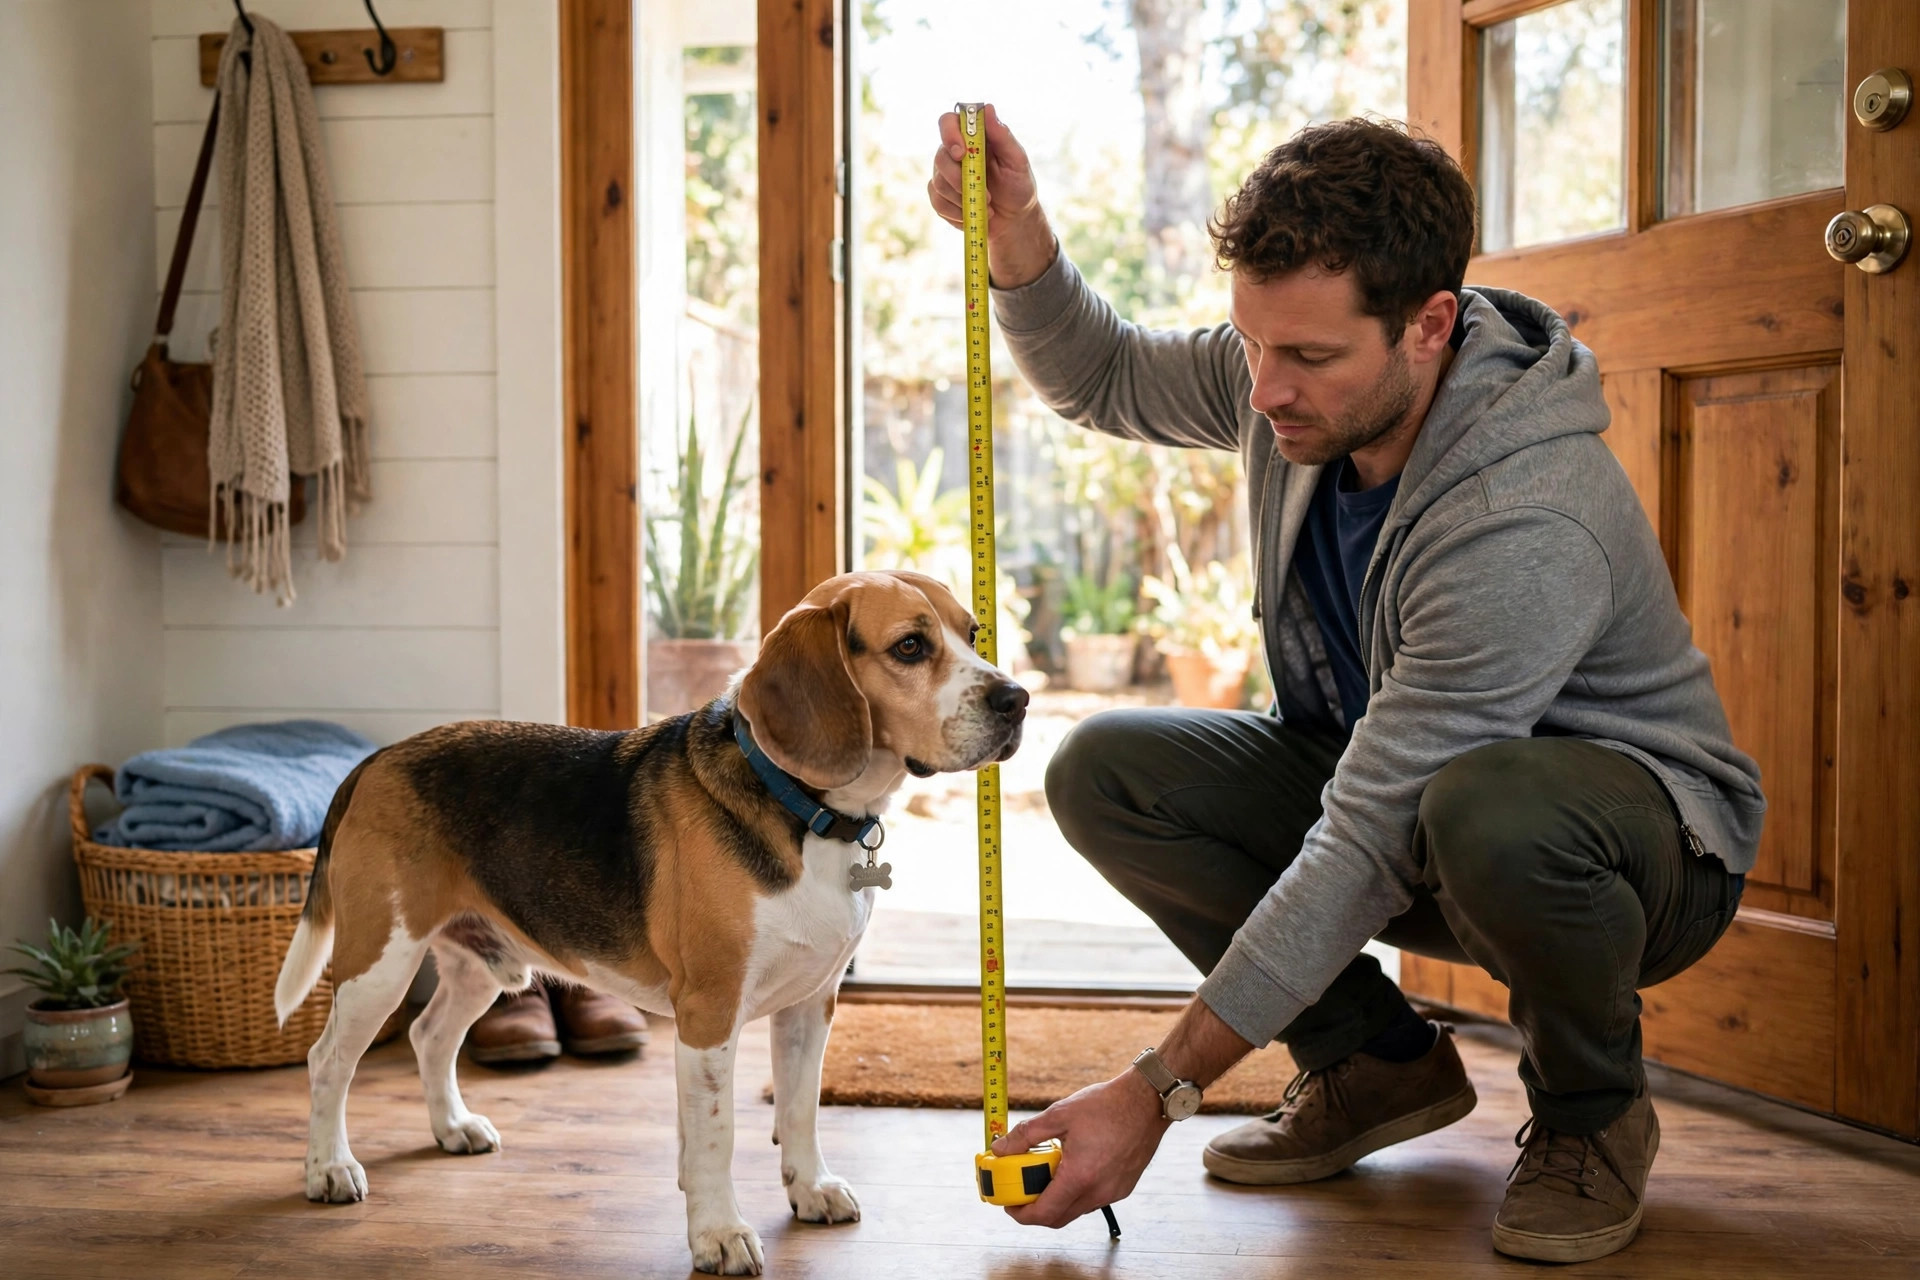
Height: with the dog standing square, measure from the floor to
the top of their shoulders (the withers). Add 5–8 cm — that’s your
flap’s clear opening height.

Width: measure the widest point of the dog’s body (usually the
shoulders or hips), then add 5 cm either side. A lean greyhound and a
barrel-chested bulldog of the same height need very different widths.

Step-over height: the flap should sit low enough that the dog
steps through comfortably — the bottom of the flap ideally clears the
floor by 5–8 cm for most dogs, lower (2–3 cm) for seniors, puppies
and short-legged breeds.

Buy the flap kit after you have numbers, not before. Most kits
cover a size range (small/medium/large/XL), and the right size is
the one your measurements land in the middle of, not at the edge of.

Owner measuring a beagle's shoulder height with a tape measure by a back door.

Step 2: Pick the right door type for your home

Door-mounted flaps (easiest). A two-piece frame kit that sandwiches
an existing wooden, PVC or composite door around a cut-out. Best for
most homes, fully removable (replace the panel later if you move),
and the lowest-risk cut you’ll ever make.

Wall-mounted tunnels (most versatile). Used when there’s no
suitable door — typically through a brick or timber-framed wall.
The tunnel kits telescope to your wall’s thickness. The cut is bigger
and you must check for wiring, plumbing and studs first (more on
that below), but it’s the cleanest look for a utility room.

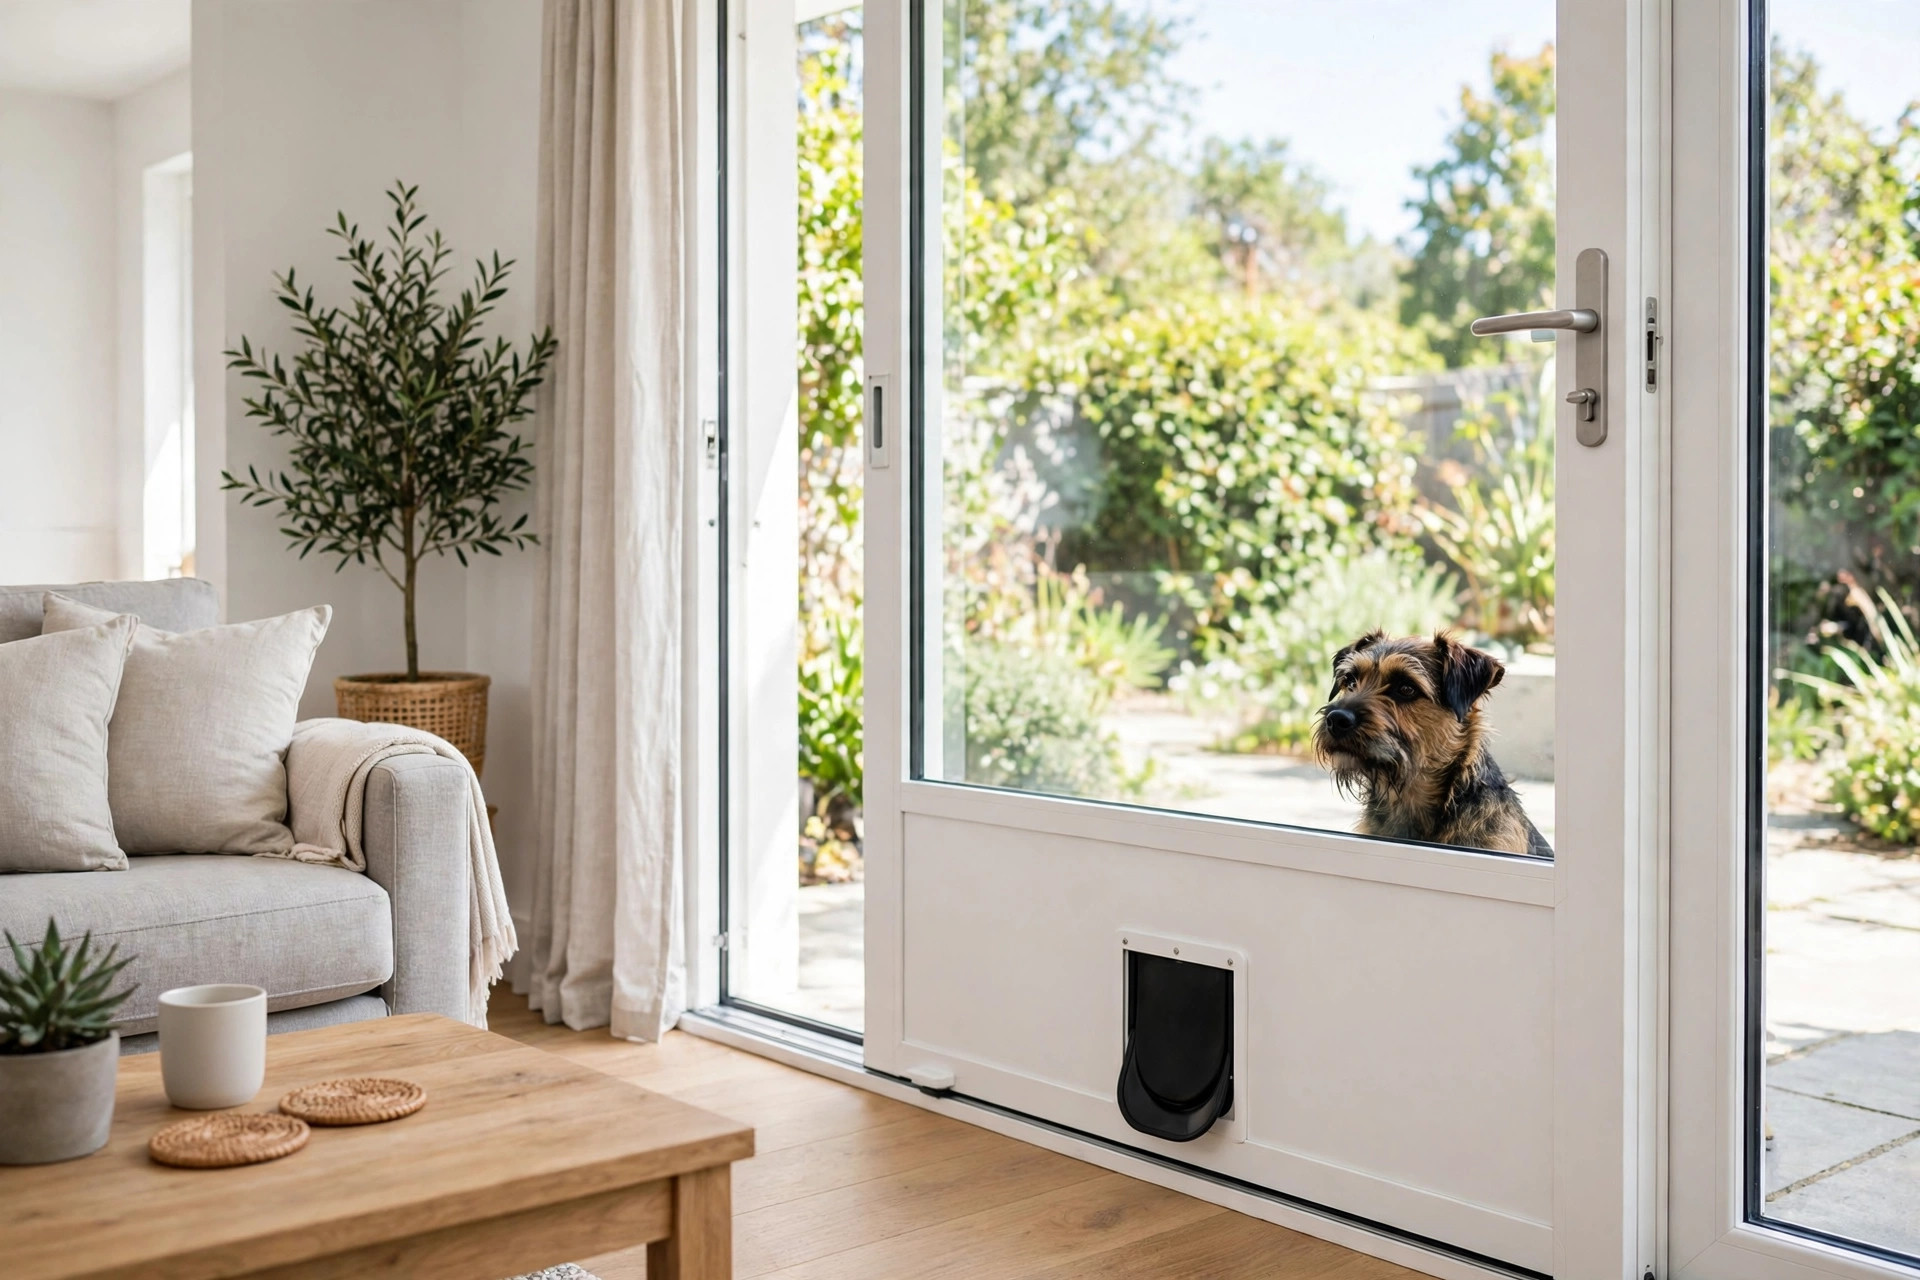
Sliding-door inserts (zero cutting). A panel with a built-in flap
that drops into your sliding patio door track. No permanent changes
at all — ideal for renters. Measure the track height carefully and
buy an adjustable-height panel.

Electronic/smart flaps. Read the dog’s microchip or a collar tag
and lock out neighbourhood visitors. Worth considering if stray cats
or foxes are a local problem — the mechanism is the same to install,
you’re just wiring a battery compartment instead of nothing.

Sliding patio door pet panel insert with a built-in dog flap in a modern living room.

Step 3: Gather the tools

For a standard door-mounted kit you’ll need: the flap kit itself,
a tape measure, pencil, spirit level, drill with a 10 mm bit, a
jigsaw with a fine wood blade, sandpaper (120 grit), masking tape,
silicone sealant, and safety glasses. For wall installs, add a
stud/wire detector, a masonry drill bit set if the wall is brick,
and a dust mask.

Work in daylight, and keep the dog in another room once the tools
come out — curious noses and jigsaws do not mix.

Step 4: Mark it out — measure twice, cut once

Most kits include a paper template. Position it on the door so the
flap’s bottom edge sits at your measured step-over height, and use
the spirit level to keep it square — a tilted flap never seals
properly and always looks amateur.

Trace the template, then stick masking tape along the cut lines.
The tape does two jobs: it stops the saw from chipping the door’s
finish, and it gives you a crisp line to follow.

Drill a 10 mm pilot hole inside each corner of the marked rectangle
(these are the jigsaw’s entry points), then cut slowly along the
lines. Let the blade do the work — forcing it makes the cut wander.
Sand the edges smooth so the frame sits flush.

Step 5: Fit the frame and weatherproof it

Dry-fit the frame halves together through the cut-out. They should
sit flat against both door faces with no rocking — if the door has
panels or mouldings in the way, most frames allow you to pack small
gaps with the supplied screws.

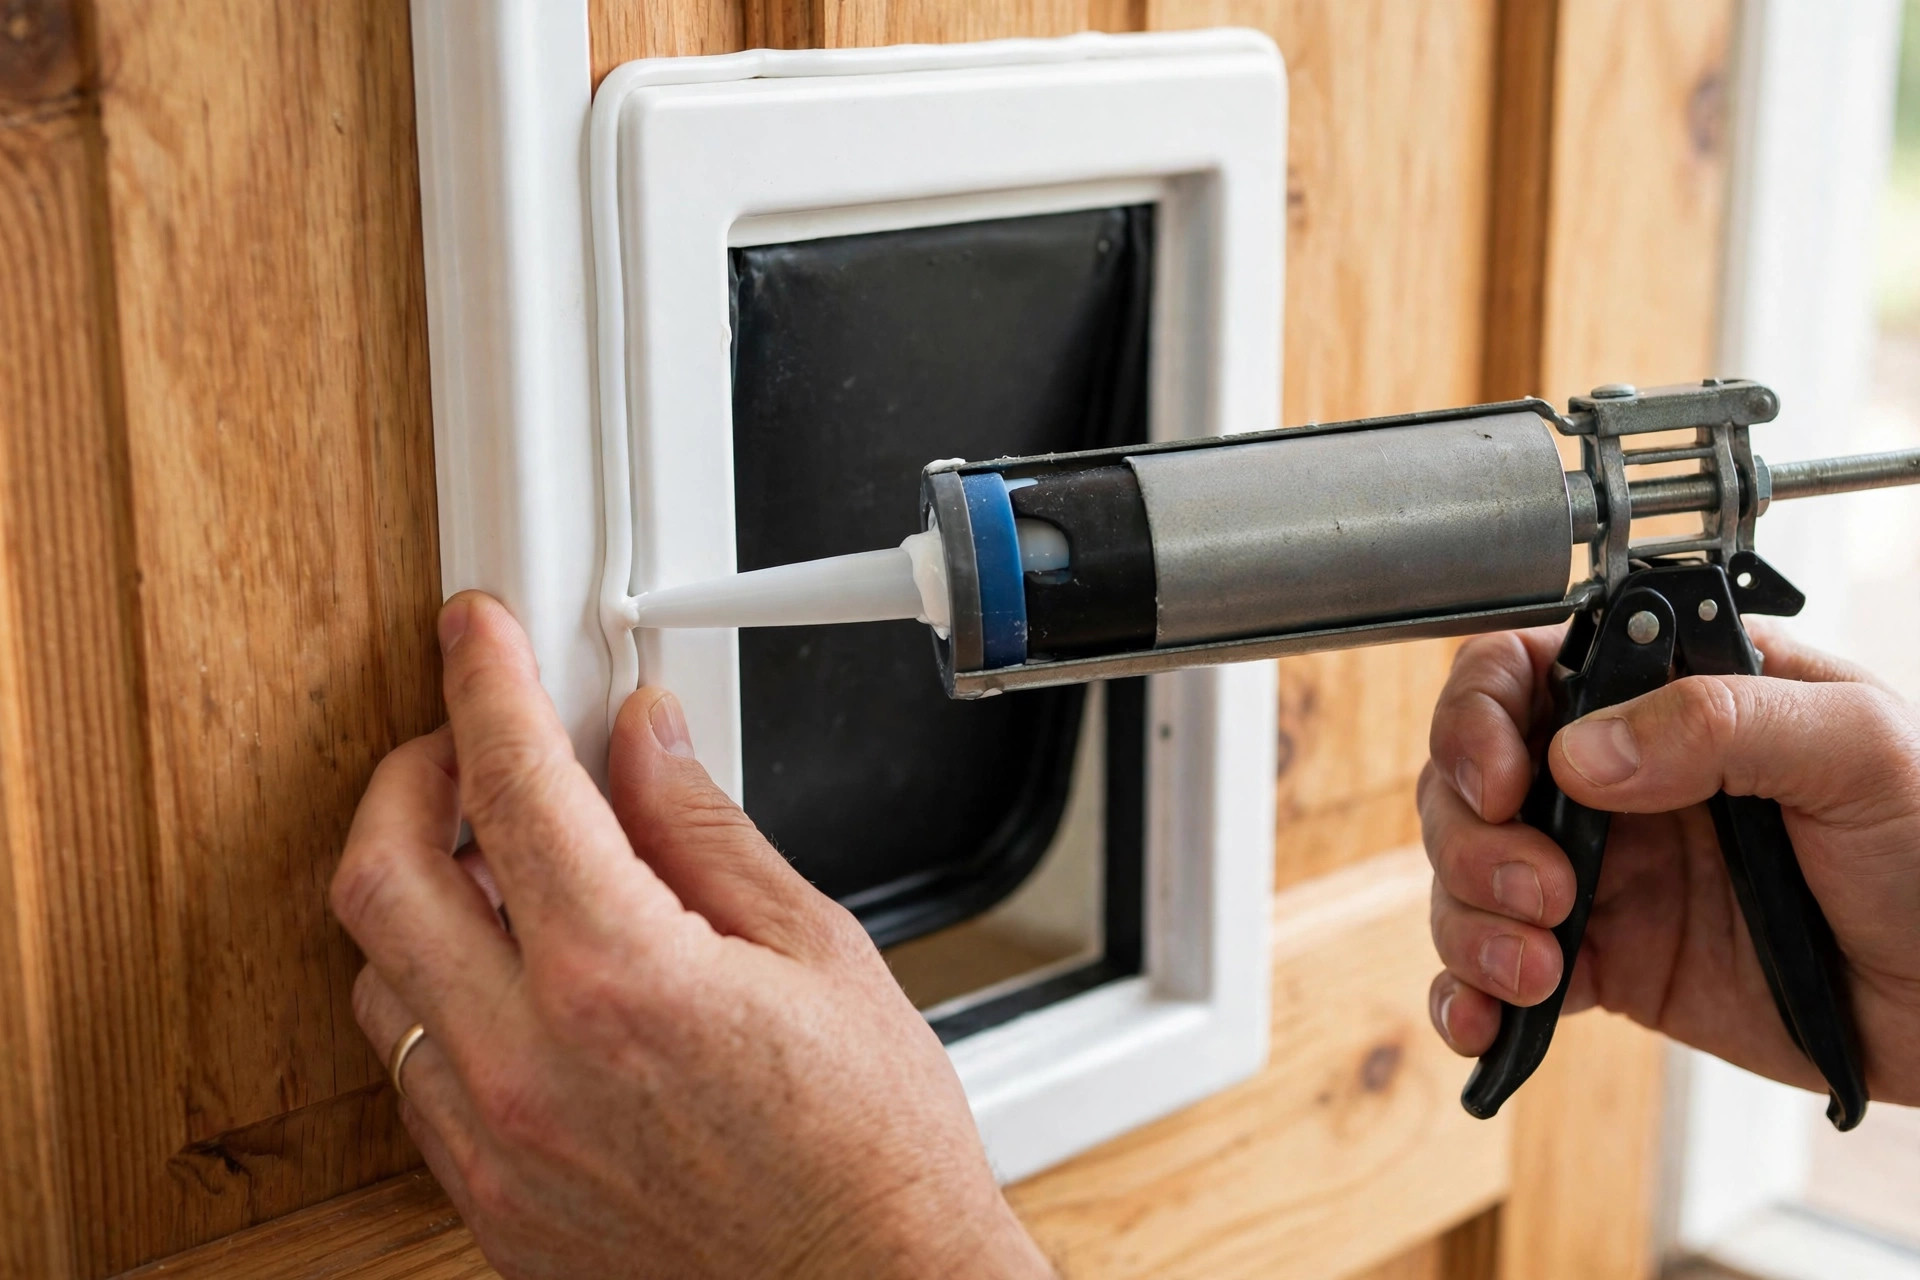
Run a thin bead of silicone sealant around the cut edge before the
final fit (or around the frame’s outer edge after fitting). This is
the step people skip and regret in the first rainstorm. Sealant also
stops the cut edge absorbing moisture, which is what makes door
material swell around cheap installs.

Tighten the frame screws evenly, alternating sides — over-tightening
one corner first warps the frame and the flap binds. Test the flap:
it should swing freely both ways and settle back to closed on its
own, magnetic or gravity-sealed.

Hands applying silicone sealant around a white dog door frame fitted in a wooden door.

Wall installs: the extra checks

Cutting a wall is the same principle with higher stakes. Before the
saw touches anything: scan the area with a wire/pipe detector and
check both faces of the wall for sockets, switches or pipe runs.
Avoid load-bearing timber studs if you can — cutting one means
adding a header, which turns a weekend job into a project.

Brick walls need a masonry bit and a cold chisel or angle grinder
to square the opening; wear a proper dust mask. Insulated walls
need the tunnel lined so cavity insulation doesn’t spill into the
mechanism. None of this is beyond a confident DIYer, but if any of
it makes you nervous, that’s exactly what a handyman is for — a
one-hour call-out is cheaper than a botched wall.

Security and energy: the two worries, answered

Security. A flap big enough for a large dog is big enough for a
determined intruder’s arm — that’s the honest trade-off. Mitigate
it: fit the door to a utility room or kitchen rather than the front
hall; use a kit with a rigid locking cover and slide it in at night;
and electronic flaps keep animal intruders out even when you can’t
be there to slide the cover. Never fit a dog flap in a door that
carries your home’s main lock.

Energy. A well-fitted double flap with a magnetic seal loses
surprisingly little heat — far less than the open-back-door routine
it replaces. The draughts people blame on dog doors almost always
come from poor sealing at install. Seal it like the instructions say
and check the flap’s bottom sweep each autumn.

Training: teach the dog to actually use it

Some dogs charge through on day one; cautious dogs need a week.
Either way, don’t force them.

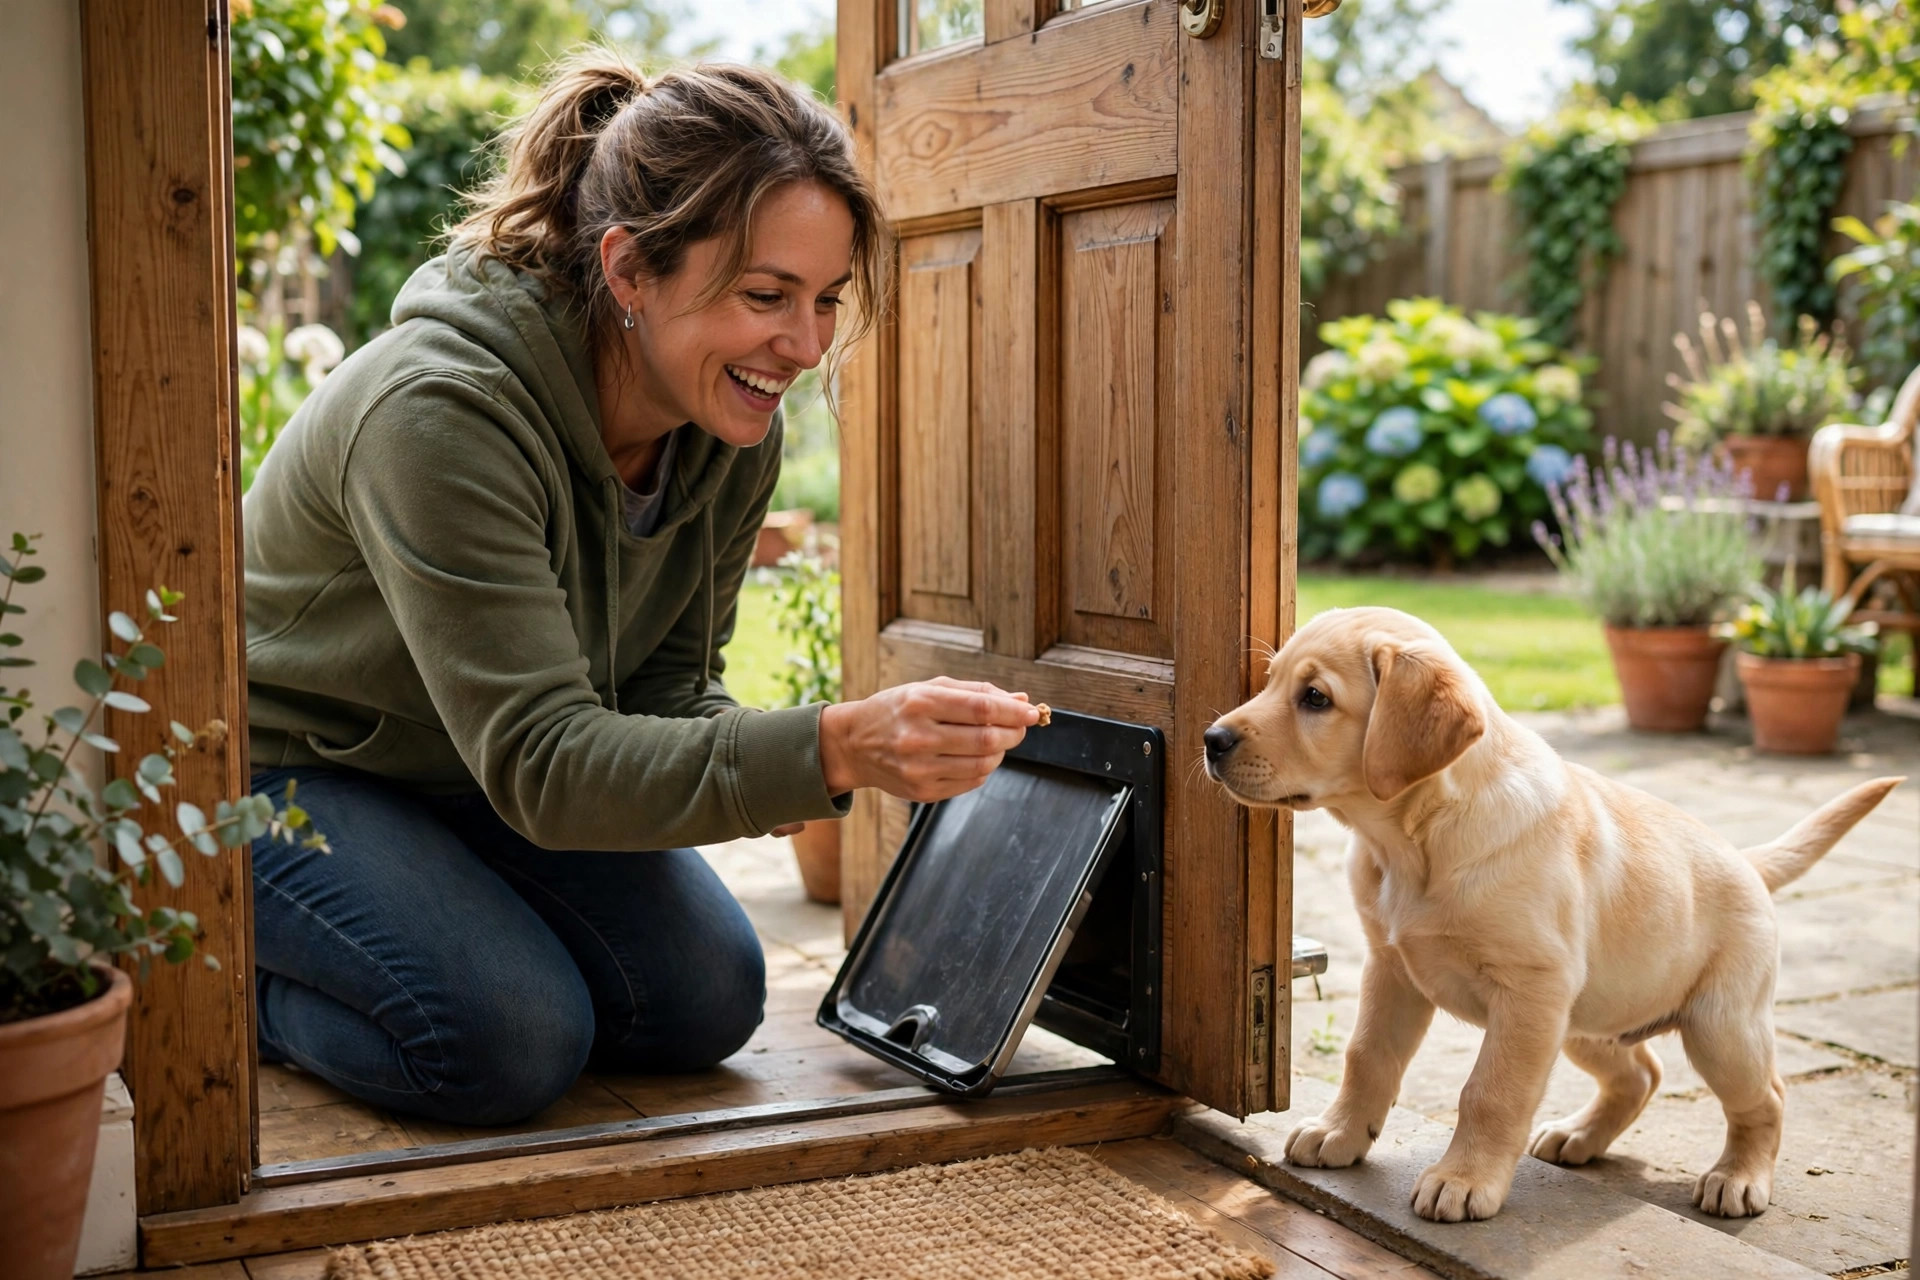
  1. Prop the flap fully open and let the dog walk through for treats
    for a day or two — the goal is “doorway equals good things”.

  2. Lower the flap so it rests lightly on their back as they pass.
    Reward every crossing.

  3. Let it swing closed. Most dogs push through within a session or
    two once the treat trail is established.

  4. Practise from both sides, and don’t lock the cover until the dog
    is fully confident — a scared dog that meets a locked flap
    learns to distrust it.

Keep training sessions to five minutes, end on a win, and never
push a nervous dog through by hand. Seniors and puppies may need
a ramp or a lower step-over — adapt the setup, not the dog.

Owner luring a labrador puppy through an open dog flap with a treat.

The bottom line

A dog door is a measure-twice job with a one-week payoff: morning
lie-ins, a dog with genuine independence, and a home that quietly
works better. Pick the flap for the dog’s real measurements, cut
cleanly, seal thoroughly, and train patiently. Do those four things
and nobody — including the door — will know it wasn’t always there.

FAQs

What size dog door do I need?
Measure your dog standing: floor to top of shoulders plus 5–8 cm
for flap height, widest body point plus 10 cm for width. Buy the kit
whose range puts your measurements in the middle, not at the edge.

Can you put a dog door in a rented home?
Use a sliding-door insert panel — it needs no cutting and removes
without a trace. Door-mounted kits are also reversible if you keep
the cut-out piece and fill it later, but get the landlord’s written
okay first.

Are dog doors safe from burglars?
Large flaps are a genuine weak point. Fit the door to a secondary
room (not the front entrance), use the rigid locking cover at night,
and consider an electronic flap that only opens for your dog.

How do I stop draughts around a dog door?
Choose a double-flap or magnetic-seal kit, fit the frame square so
the flap hangs true, and run silicone sealant around the cut edge at
install. Check the seal each autumn.

My dog is scared of the flap — what now?
Go back a step: prop it open, reward crossings, then lower it
gradually. Never force the dog through. Most dogs crack it within a
week of short, treat-led sessions.

Golden retriever sleeping on a cream boucle dog bed next to a rattan armchair in a stylish living room.

Stylish Dog Beds That Don’t Ruin Your Decor

Your dog’s bed is one of the biggest objects in the room — and for years,
most of them looked like it: a shapeless brown cushion that clashed with
everything. That era is over. The 2026 petcore trend has pushed dog beds
into actual furniture territory, with boucle fabrics, rattan frames,
mid-century lines, and covers designed to be washed weekly without going
grey.

The good news: a bed that looks good doesn’t have to be a compromise for
the dog. The same washable, durable, supportive features that make a bed
practical are the ones that keep it looking smart. Here’s how to pick a
dog bed that suits your dog’s sleep style and survives your living room —
and how to make it look like it belongs there.

The petcore idea: treat the dog’s spot like a room, not an afterthought

The interior-design term floating around this year is “petcore” — the
idea that your pet’s corner is a designed zone, not a tolerated one.
Dedicated pet zones get the same treatment as the rest of the room: a
cohesive palette, a piece that fits the furniture style, and materials
chosen for looks as well as durability.

This isn’t about being precious. A bed that looks right is a bed that
stays in the room — which means the dog actually uses it instead of
migrating to your sofa. Owners who upgrade from the “temporary cushion
in the corner” to a proper bed in a deliberate spot often find the dog
settles there far more reliably.

The starting move is simple: decide the dog’s sleeping spot, then choose
a bed for that spot the way you’d choose an ottoman — by size, material,
and colour, not just by the “dog bed” aisle.

Pick the style that matches your furniture

Dog beds now come in recognisable furniture styles. Match the bed to
the room you already have.

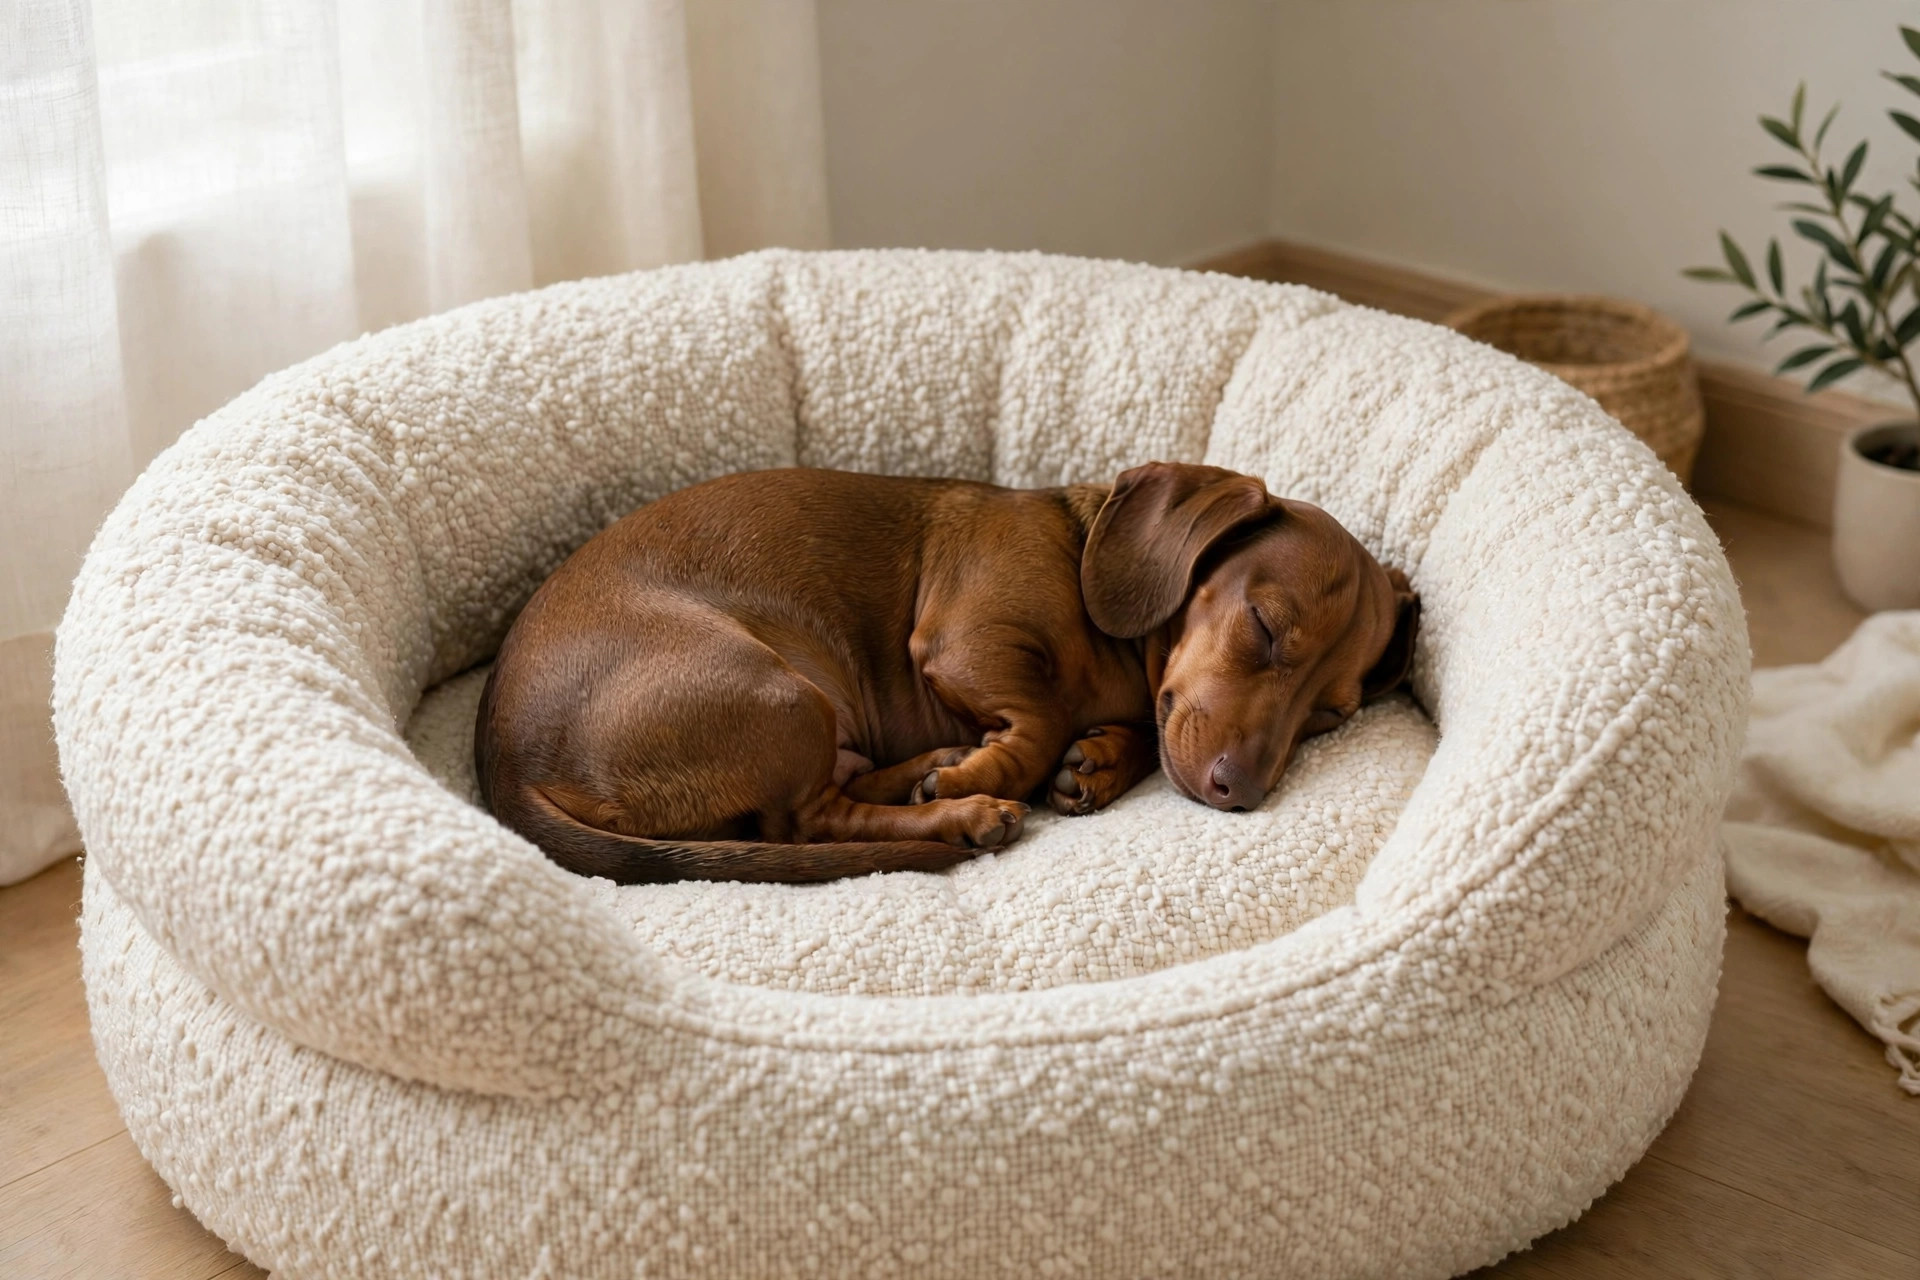
Boucle rounds for soft, modern rooms. Cream and oatmeal boucle is
the 2026 signature look — a nubby, textured weave that reads as a design
piece first, dog bed second. The round, nest-like shape suits curlers and
burrowers, and the raised rim doubles as a chin rest. The caveat: light
fabrics show dirt fast, so only buy boucle if the cover is machine
washable — and be honest about whether you’ll wash it weekly.

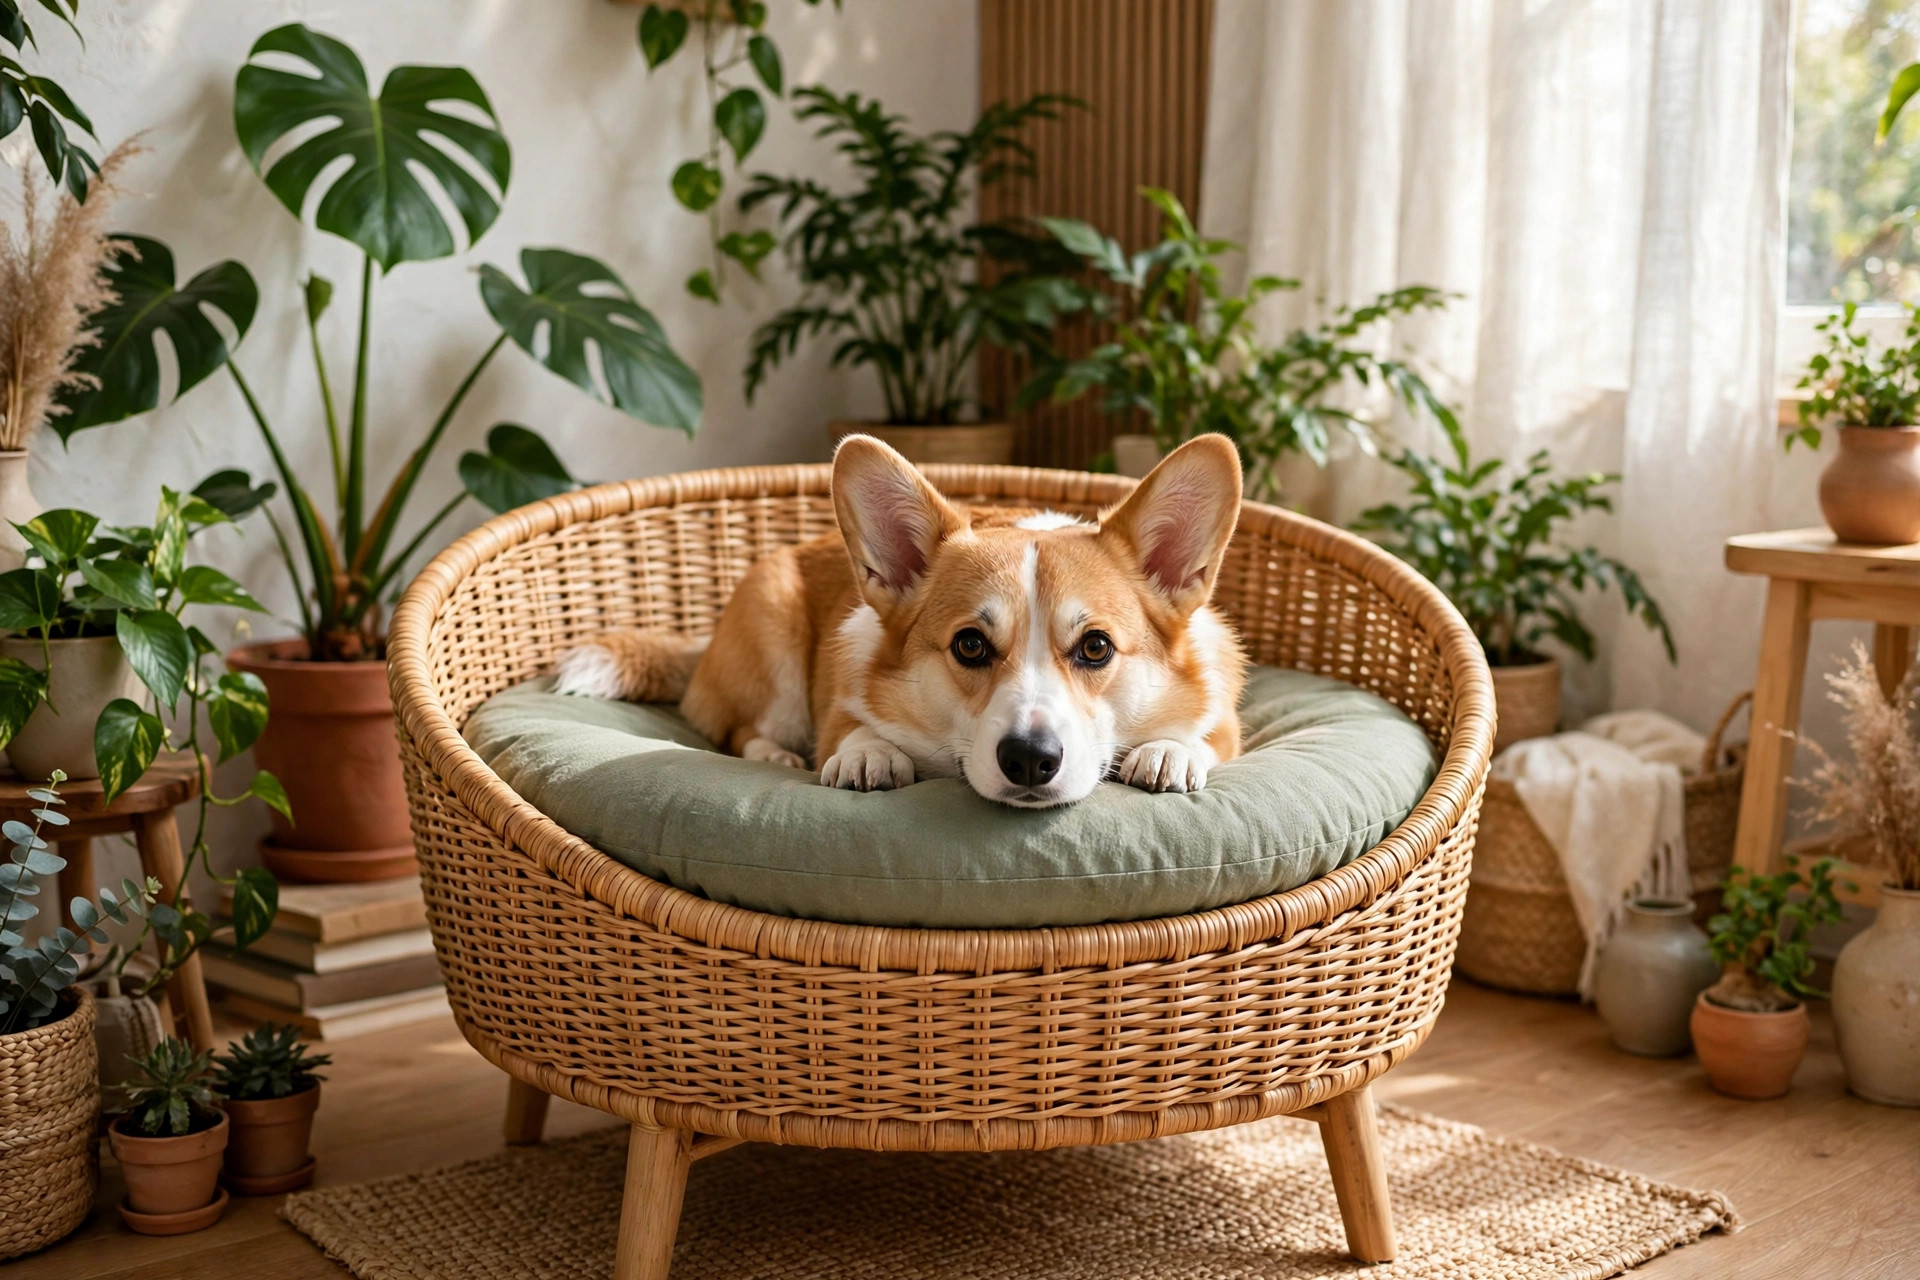
Rattan and cane for warm, natural interiors. Woven rattan dog beds —
raised baskets on legs, or round bolster frames — look like actual side
furniture. They’re airy (great for warm rooms), the raised position keeps
dogs off cold floors, and the weave hides pet hair better than dark flat
fabrics. Check the cushion inside is thick enough, because the frame is
doing the aesthetic work, not the padding.

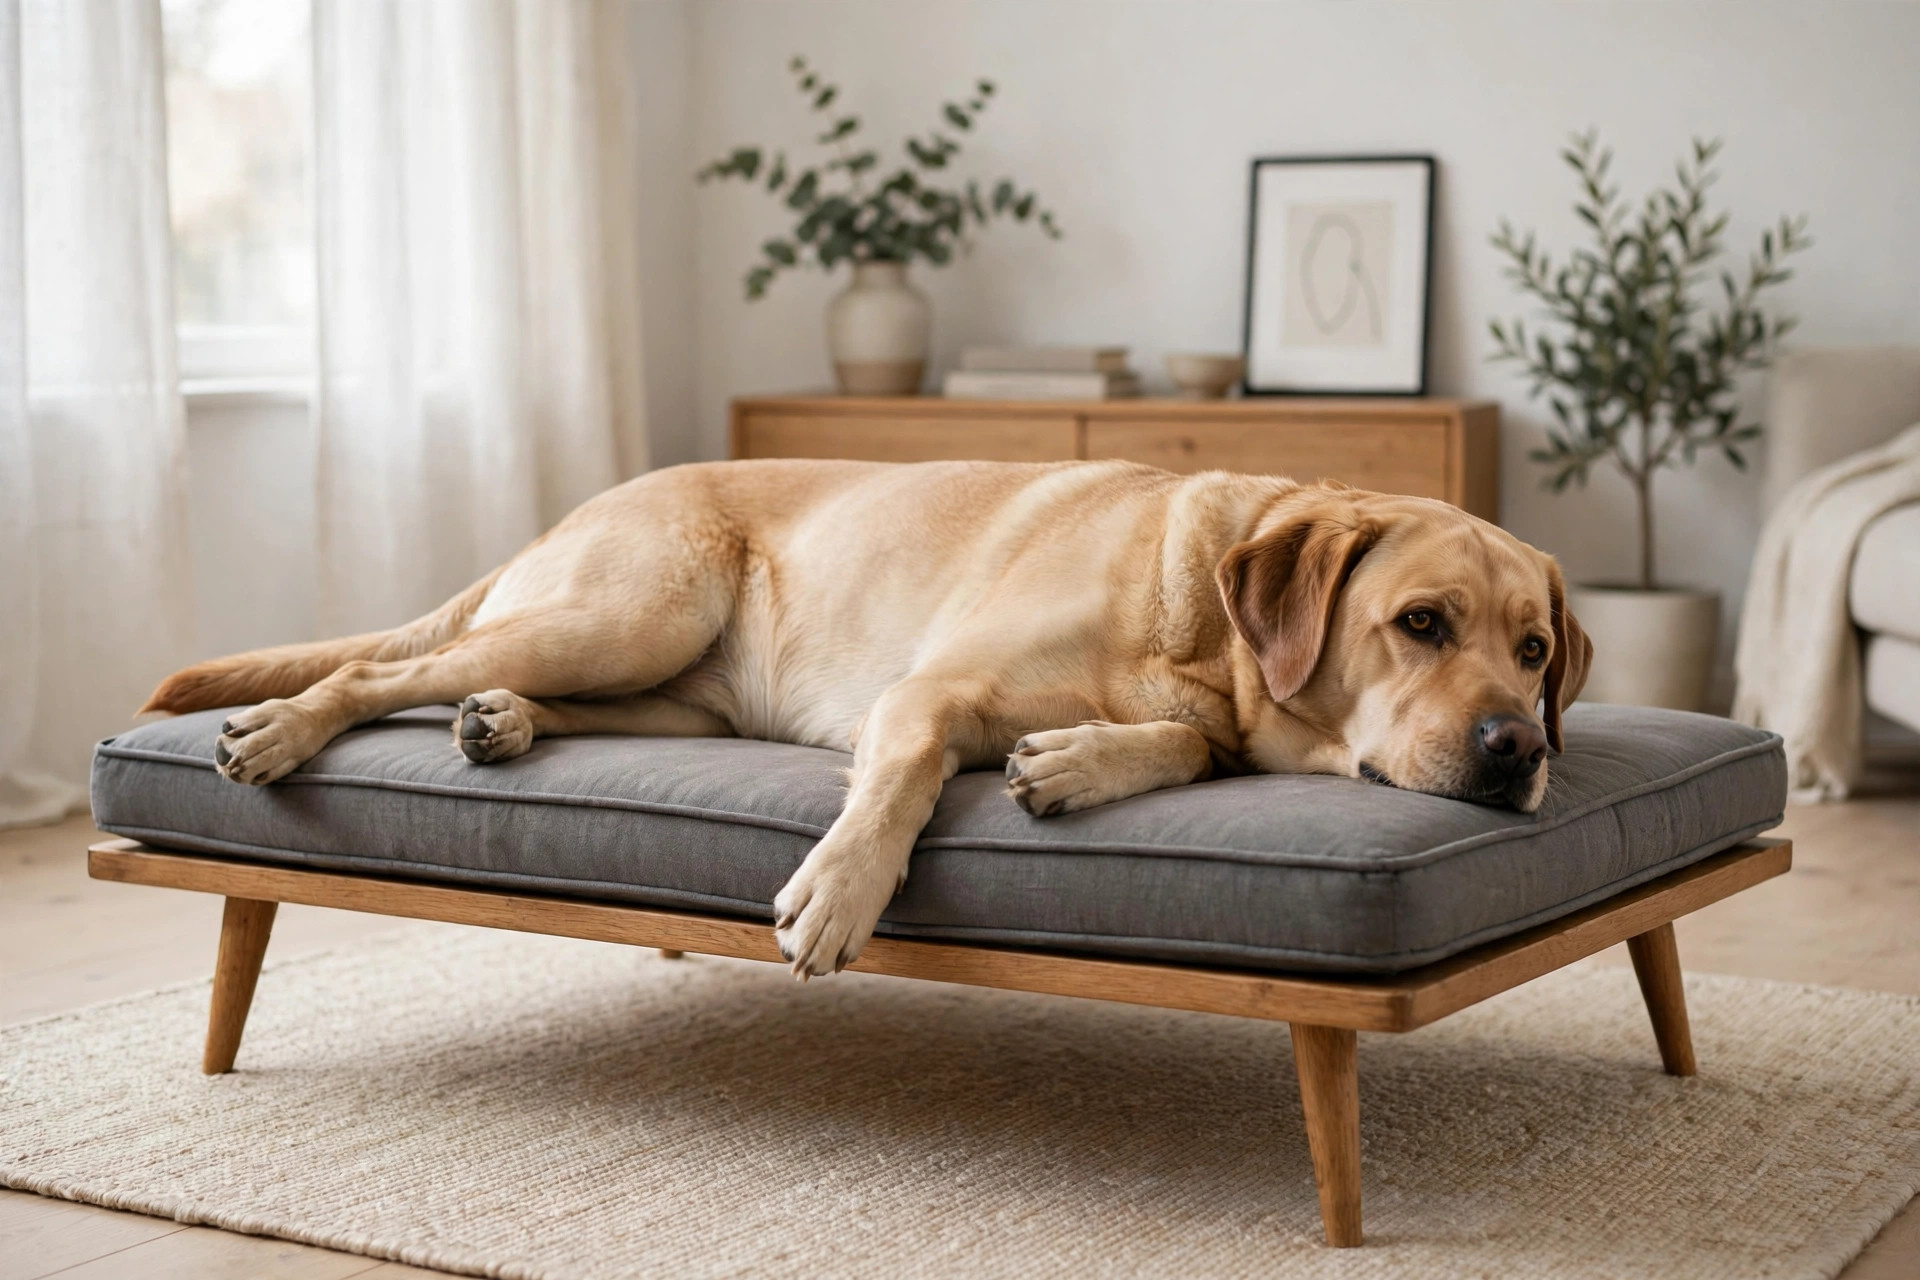
Mid-century lines for minimalists. Low-slung rectangular beds with
tapered wooden legs, piped edges, and solid-colour covers in muted tones
(greige, forest, terracotta) slot into Scandinavian and mid-century rooms
without a wobble. The slim profile stays out of the way, and a separate
cover in a neutral tone is easy to coordinate with a rug.

Faux-leather and performance fabrics for high-traffic homes. If the
dog is muddy, drooly, or shares the bed with kids, wipeable matters more
than weave. Modern vegan-leather and performance-fabric beds (crypton
style) look like a good ottoman and shrug off paw prints with a damp
cloth. They’re the least “dog bed looking” option of all — and the most
practical.

Corgi resting in a woven rattan dog bed with a sage cushion in a plant-filled living room.

What actually makes a bed “stylish” without failing the dog

Looks are the brief, but the dog still votes with their body. A beautiful
bed the dog won’t touch is just an expensive floor cushion. Check the
comfort fundamentals before you fall for the design.

Match the sleep style. Sprawlers need a flat mattress with no
restrictive rim; curlers want a bolstered nest with walls to lean on;
burrowers want a cave or hooded bed. The stylish-bed ranges cover all
three — but pick the shape for the dog first, the fabric second.

Support matters in pretty packages too. Senior dogs and large breeds
need real support — memory foam or a thick, high-density fill that
doesn’t flatten in a month. Some designer beds skimp on fill to hit a
slim profile. Press the centre: if your fingers reach the floor through
it, keep looking.

Washable covers are non-negotiable. Every beautiful bed becomes an
ugly one within a month of unwashed use. A removable, machine-washable
cover is what keeps the investment looking like the product photo.
Hidden zips keep the lines clean; spare covers in the same style are
worth buying if offered.

Water-resistant liners. The feature nobody photographs but everybody
appreciates: a waterproof liner under the cover protects the inner
mattress from drool, accidents, and the occasional muddy-paw disaster. It
doubles the bed’s life.

Size like furniture, not like a gift. Measure the dog stretched out,
then add room to spare. An undersized designer bed looks sad and goes
unused; a correctly sized one anchors the corner like a piece of furniture.

Dachshund curled asleep in a cream boucle dog bed.

Match the palette to the room

The fastest way to make a dog bed look designed-in: pull one colour from
the room.

  • Neutral rooms (white, greige, oak): cream, oatmeal, or camel beds
    disappear into the palette beautifully. Boucle and natural textures do
    the heavy lifting here.
  • Green and plant-heavy rooms: forest, sage, or moss covers echo the
    foliage; rattan frames sit naturally among plants.
  • Dark, moody rooms: charcoal, espresso, or deep navy beds hold their
    own and hide hair better than light colours — the practical choice if
    you won’t wash weekly.
  • Patterned or colourful rooms: pick one solid accent colour from the
    rug or cushions and let the bed repeat it. The bed becomes a deliberate
    accent instead of a clash.

One rule: avoid the bed that tries to match nothing and clashes with
everything. A single colour pulled from the room beats a “fun” print
almost every time.

Placement: give the dog a proper zone

Where the bed sits is half the styling. The dog-zone approach that works
best:

  • Anchor the corner. Beds pushed against a wall or into a corner look
    intentional; beds floating mid-room look temporary. A corner with a
    small side table or plant beside it reads as a “spot”.
  • Near the family, not exiled. Dogs settle where the people are. A
    beautiful bed in a lonely hallway loses to your sofa every time. Put the
    good-looking bed where the dog actually wants to be.
  • Add one prop. A small throw blanket draped over the bed’s edge, or
    a basket for toys beside it, turns “dog bed on the floor” into a
    styled corner. The throw is also washable and protects the cover.
  • Keep the feeding zone separate. Food bowls next to the bed invite
    crumbs into the fabric. A few metres of separation keeps the bed
    cleaner and the zone looking sharp.

Labrador sprawled on a mid-century style low dog bed in a minimalist living room.

Keeping a pretty bed pretty

Style is maintenance. The owners whose beds still look good in year two
all do the same boring things:

  1. Wash the cover on a schedule. Every 1-2 weeks for light fabrics,
    monthly at minimum for dark. Add a cup of white vinegar to the wash
    to kill odours without harsh scent.
  2. Vacuum the bed between washes. A quick weekly vacuum stops hair
    working into the weave — especially on boucle.
  3. Rotate and fluff. Turn the inner cushion and shake it out weekly
    so the fill doesn’t migrate into a permanent dog-shaped dent.
  4. Sun the cushion. An hour in sunlight now and then deodorises
    naturally and discourages dust mites.
  5. Spot-clean immediately. Muddy paw prints lift off easily when
    fresh; left for a day they set into the fabric.

Hands unzipping a washable cover from a round dog bed cushion.

FAQs

Are stylish dog beds as comfortable as regular ones?
They can be — comfort comes from fill and shape, not price or looks.
A well-made designer bed with dense memory foam beats a cheap lumpy
cushion easily. Always check the fill quality, not just the fabric.

Is boucle practical for a dog bed?
Only with a washable cover. Boucle’s textured weave traps hair, but it
releases it in the wash, and it hides wear better than flat fabrics.
If you won’t wash weekly, choose a darker or wipeable fabric instead.

How do I stop the dog bed smelling?
Wash the cover regularly, use a waterproof liner under it, vacuum the
inner cushion, and sun it occasionally. Most persistent smells live in
the inner mattress, not the cover — so protect the inside.

Should the dog bed match my decor exactly?
It doesn’t need to match — it needs to coordinate. One colour pulled
from the room (rug, cushions, wall art) is enough to make the bed look
deliberate rather than accidental.

What size dog bed looks best in a living room?
The right size for the dog always beats the most photogenic size.
Measure your dog stretched out and size up slightly. An undersized bed
looks cramped; a correctly sized one reads as furniture.

Are raised rattan dog beds good for older dogs?
The frame is fine, but check the cushion thickness — some rattan beds
have thin pads over hard weave. Seniors need real padding, so add a
memory-foam insert if the included cushion is thin.

The bottom line

A dog bed that looks like furniture is no longer a luxury niche — it’s
where the market has gone, and the practical features (washable covers,
supportive fills, waterproof liners) are the same ones that keep it
looking good. Pick the shape for the dog, the fabric for your washing
habits, and one colour from the room, and the bed stops being the thing
you apologise for and starts being part of the room.

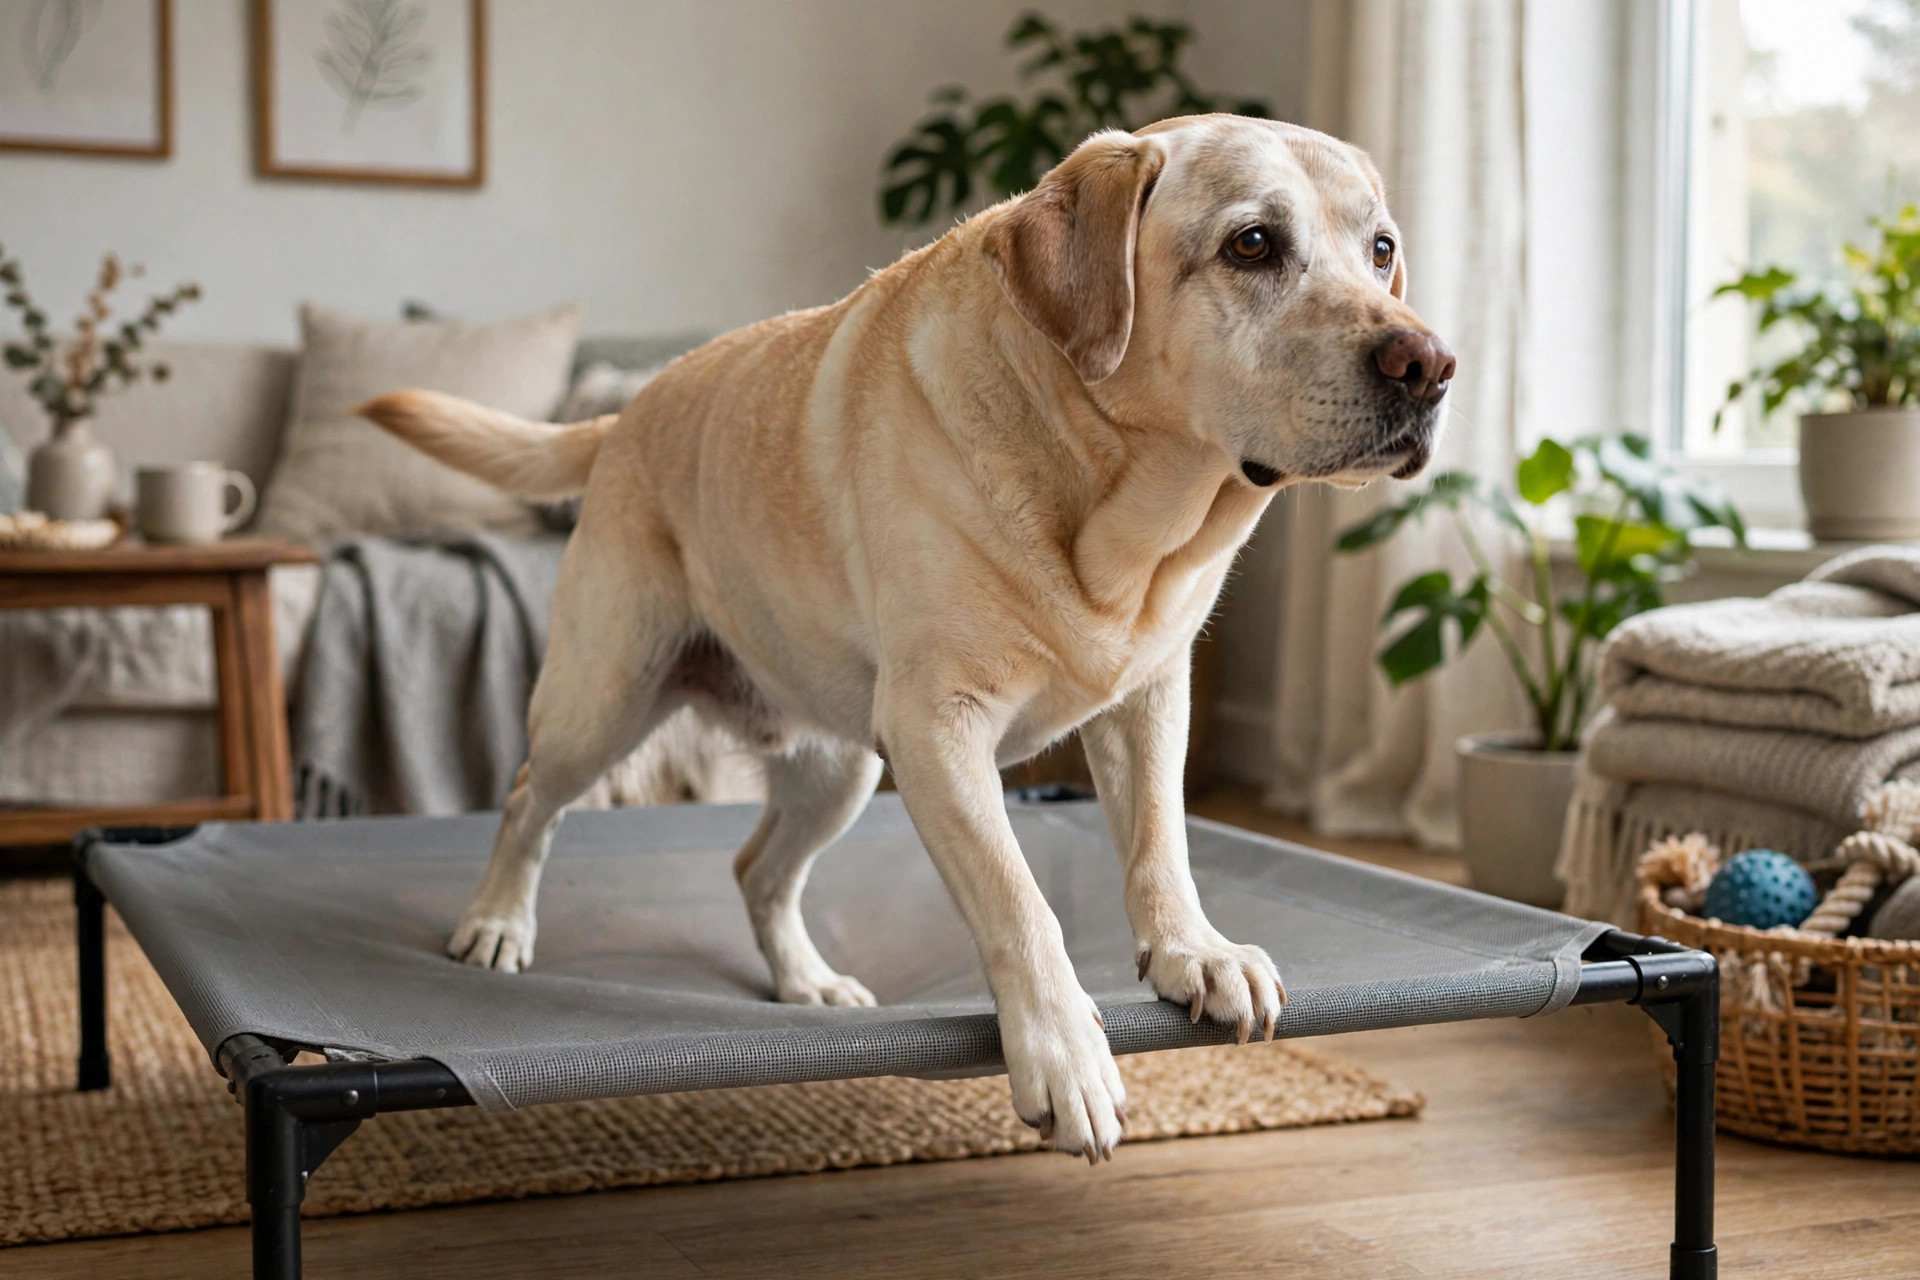
Golden retriever lying relaxed on a grey raised mesh dog bed in a bright sunlit living room.

Elevated Dog Beds: Are They Better for Your Dog? (Cooling, Joints & How to Choose)

Most dog beds sit flat on the floor — a cushion or mattress your dog
settles into. An elevated dog bed does the opposite: it lifts your dog a
few inches off the ground on a taut, breathable fabric stretched over a
frame, like a camping cot built for canines.

Walk through any dog-training facility, kennel, or summer dog park and
you’ll see them everywhere. But are elevated dog beds actually better than
the plush cushion your dog already has? For some dogs, the answer is a
clear yes. For others, a raised bed is the wrong tool entirely. Here’s the
honest breakdown: what the design does, which dogs benefit most, the real
downsides, and how to choose one that lasts.

How elevated dog beds work

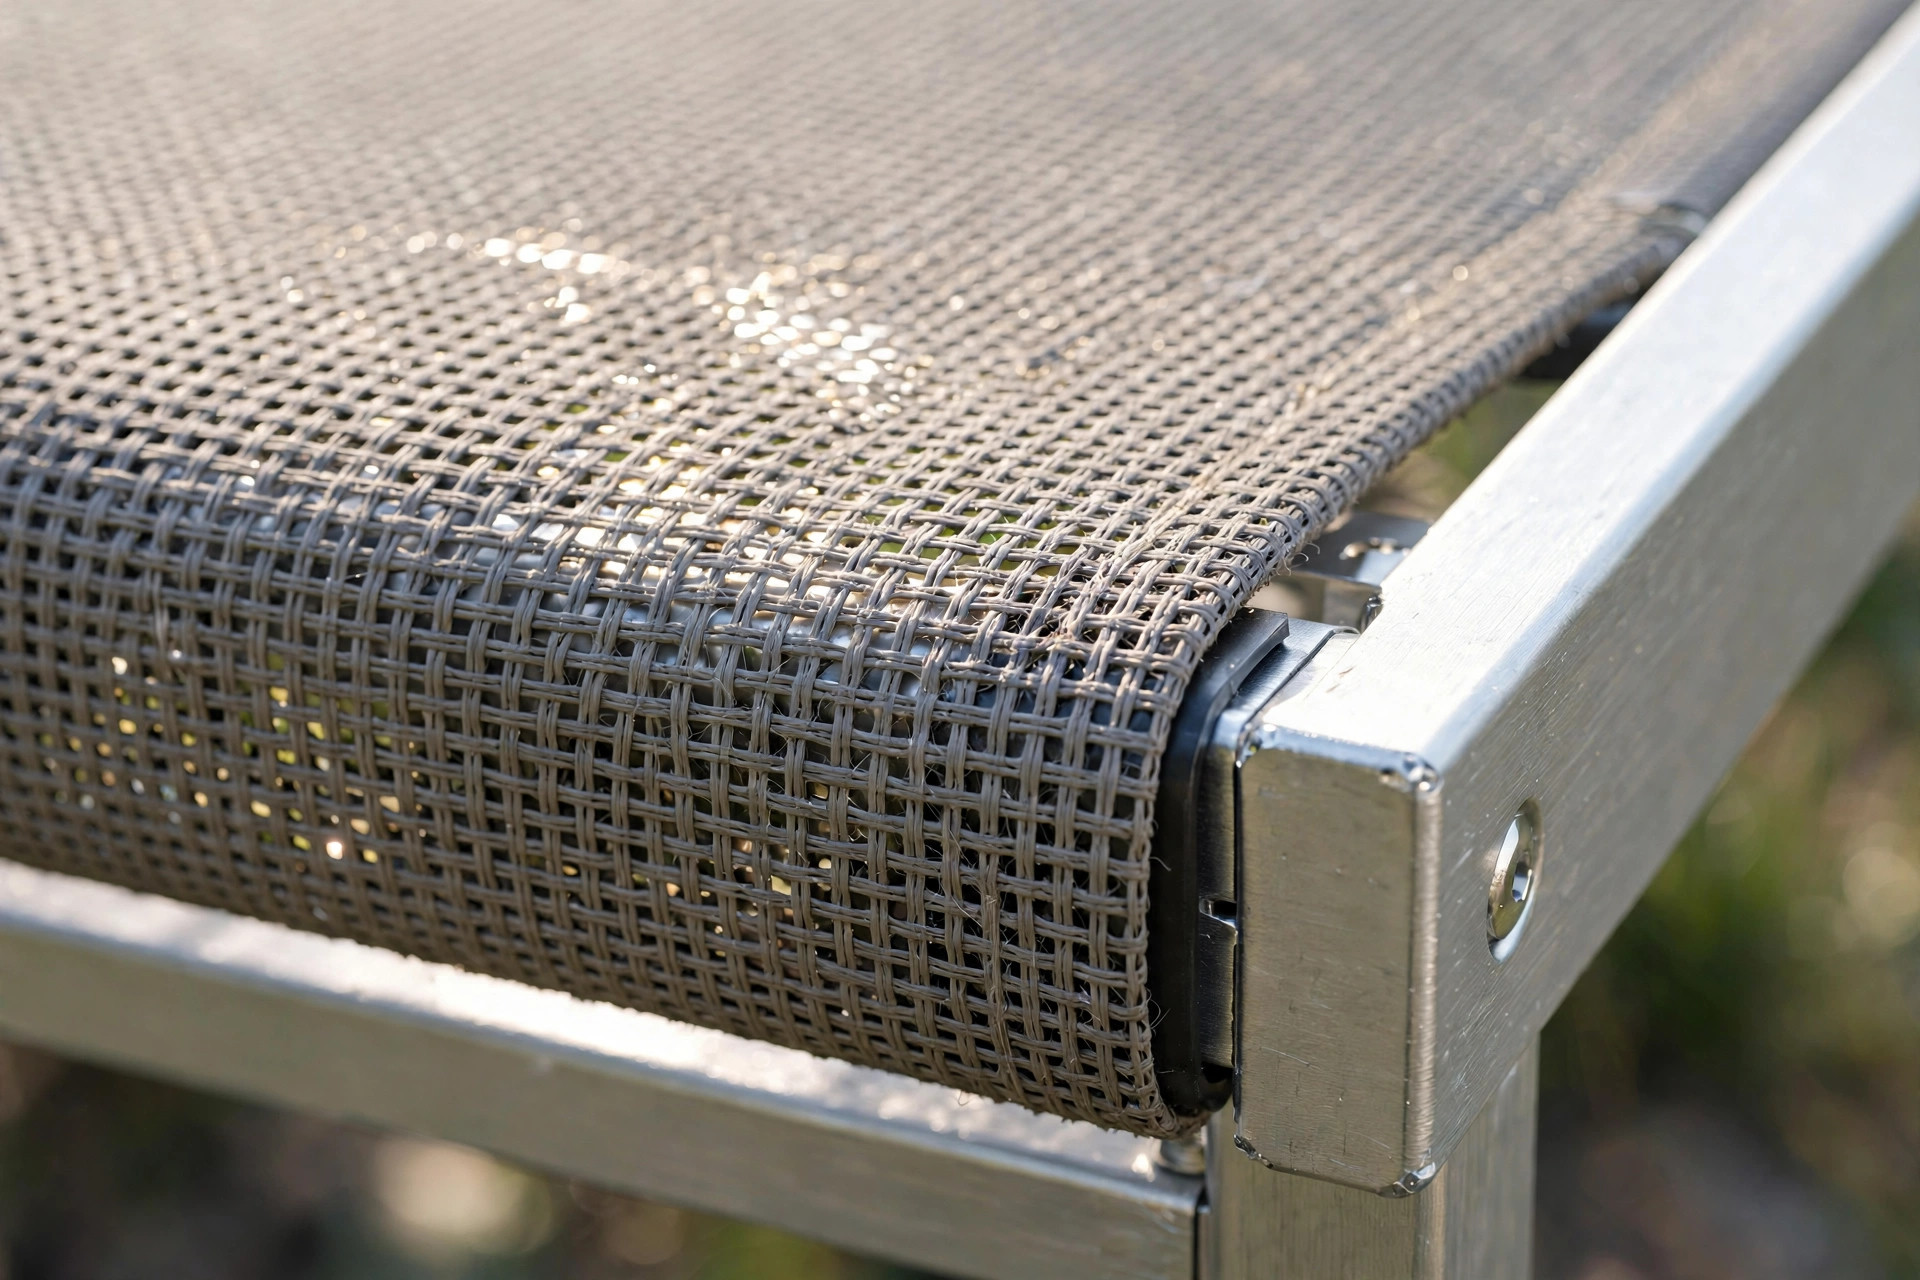
The design is simple. A rectangular frame — usually aluminium, steel, or
heavy-duty PVC — holds a woven fabric (often a PVC-coated mesh like
Textilene) pulled drum-tight. Your dog lies on a suspended surface,
roughly 15 to 20 cm above the floor.

That air gap is the whole point. Air circulates above and below the dog,
so heat doesn’t build up under the body the way it does on a floor
mattress. The taut fabric also distributes weight evenly, without the
sagging centre that lets bony joints press into hard floorboards through a
thin cushion.

Vets and trainers like raised beds for three practical reasons: they’re
easy to hose down, they keep dogs off cold or damp floors, and the firm,
even surface makes standing back up easier for dogs with stiff joints.

Close-up of breathable woven mesh fabric stretched taut over the corner of an aluminium elevated dog bed frame.

The cooling advantage

Overheating is a bigger problem for dogs than most owners realise — dogs
cool themselves mainly by panting, and a thick insulating bed traps body
heat against their belly and chest. Elevated beds are the cooling
counter-move.

On a raised mesh bed, air moves freely underneath. The mesh itself doesn’t
insulate — it breathes. Dogs that flop on cool tile floors in summer, or
dig at the hot side of their cushion to reach the cooler floor beneath,
are telling you exactly what they want: airflow.

This matters most for:

  • Thick-coated breeds — Huskies, Malamutes, Newfoundlands, Samoyeds,
    and other double-coated dogs run warm even in air-conditioned rooms.

  • Brachycephalic breeds — Bulldogs, Pugs, and Shih Tzus pant less
    efficiently, so passive cooling helps them regulate.

  • Summer and warm climates — if your home runs hot in summer, a
    raised bed can be the difference between a restless dog and a settled
    one.

They won’t replace water, shade, or air conditioning — a raised bed helps
a dog shed heat, it doesn’t actively cool them. But as a passive comfort
measure, the effect is real and noticeable on warm days.

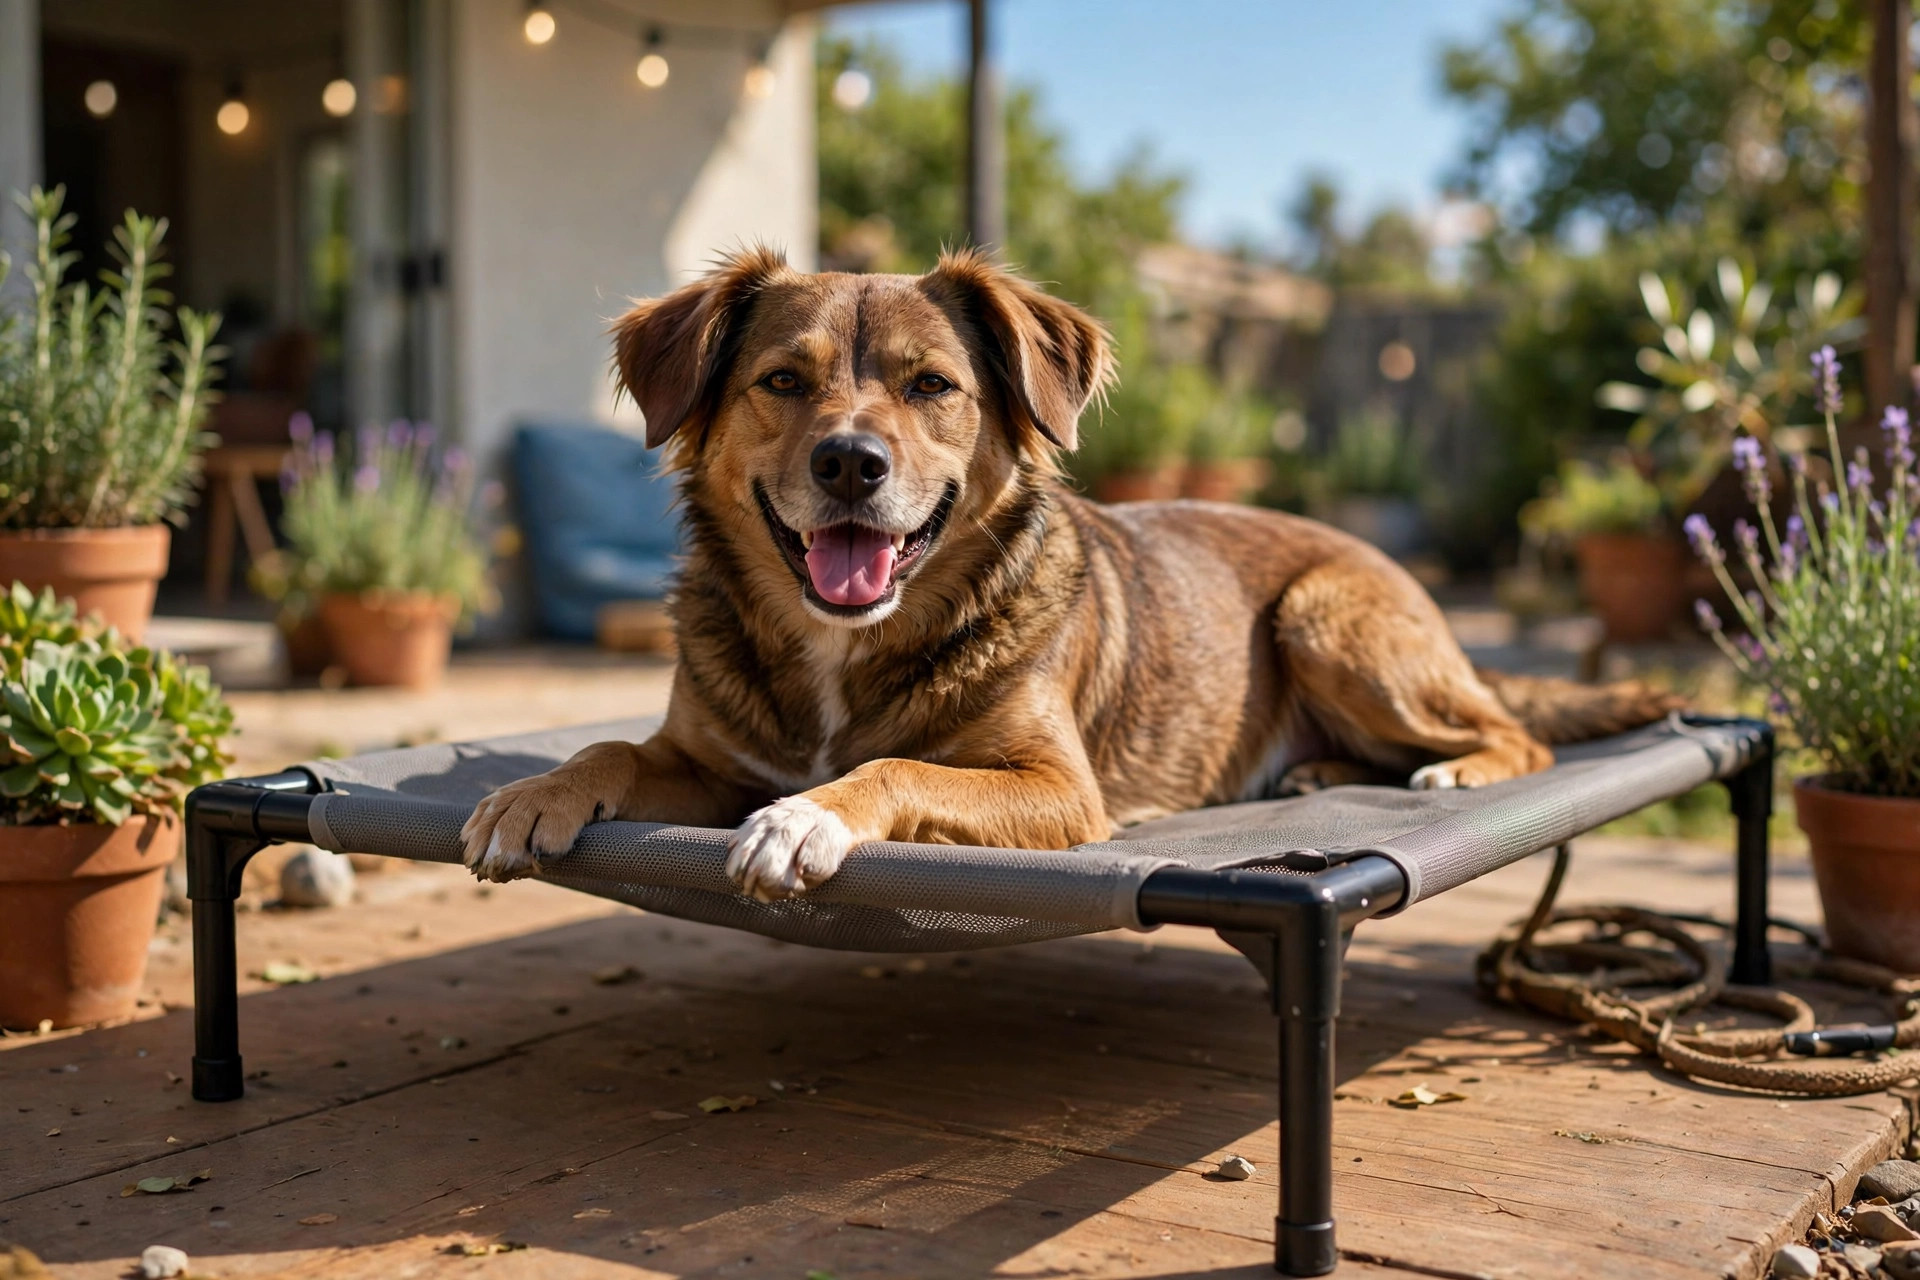
Happy brown dog lying on a raised cot-style elevated dog bed on a sunny patio.

Easier on joints and bones

Here’s the benefit that surprises people. A plush bed feels soft to your
hand, but once a 30 kg dog compresses it, bony elbows, hips, and hocks can
end up pressing through thin padding onto the hard floor — especially on
older, flattened cushions.

The taut surface of an elevated bed spreads pressure evenly and never
bottoms out. There’s no centre sag, no cold spot where the filling has
migrated to the edges. For senior dogs with arthritis, or large breeds
prone to elbow hygromas and hip stiffness, that even, firm support often
feels better than a squishy mattress.

Getting up is easier too. Pushing up from a flat floor cushion asks stiff
joints to lift the full body weight from a dead stop. A raised surface
starts the dog a few inches higher and lets the legs stay slightly bent —
a small difference that adds up for arthritic dogs who get up a dozen
times a day.

Senior yellow labrador pushing up to stand from a grey elevated mesh dog bed at home.

Built for chewers and messy paws

Chew-proofing is the third big selling point. Many elevated beds have no
stuffing to shred — just fabric and frame. A determined chewer can still
gnaw the fabric edge, but there’s no tempting fluffy interior, no squeaker,
no zip to work open. For power chewers who have destroyed three cushion
beds this year, a raised bed often survives where plush ones don’t.

They’re also the easiest bed to clean. Muddy paws? Hose it down outside or
wipe it with a damp cloth. The fabric doesn’t absorb odours the way
polyfill does, and most covers remove for a proper wash. For muddy-season
dogs, garden dogs, or dogs with incontinence issues, a washable raised bed
plus a thin washable pad on top is a practical combination.
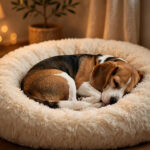
And because the dog sits above the floor, raised beds stay cleaner in the
first place — dust, draughts, and cold dampness from the ground don’t reach
the sleeping surface.

The honest downsides

Elevated beds aren’t for every dog. Know the limits before you buy.

Not a nest. Dogs that love to burrow, curl into a ball, and feel
walls around them — the anxiety-prone “curlers” — often find a flat raised
platform too exposed. A calming donut bed suits those dogs better.

The fabric feel is unfamiliar. Some dogs step onto the taut mesh,
feel it give slightly underfoot, and refuse to lie down. Most adapt within
a few days (treats on the bed help enormously), but a small minority of
dogs never take to it — especially seniors with poor footing confidence.

Less insulation in cold weather. The same airflow that cools in
summer can feel draughty in winter. In cold homes, add a blanket or pad on
top, or use the raised bed as the summer option and a cushioned bed for
winter.

Weight limits matter. Cheap raised beds sag or crack under large
dogs. Always check the manufacturer’s weight rating and buy above your
dog’s weight — a bed rated to 45 kg for a 40 kg dog will last far longer
than one rated to exactly 40 kg.

Assembly and size. They’re bulkier than a cushion and need assembling.
Measure your space — and your dog stretched out — before ordering.

How to choose the right one

1. Frame material

Powder-coated steel and aluminium frames are the sturdiest and best for
large dogs; heavy-duty PVC frames are lighter and fine for small to medium
dogs. Avoid thin uncoated metal that rusts after the first hose-down.

2. Fabric

Look for PVC-coated woven mesh (often sold as Textilene or similar). It
should feel taut and springy, not floppy. A tighter weave resists claws
better; a looser weave breathes more. Replacement covers from reputable
brands are a good sign — it means the frame is expected to outlast the
fabric.

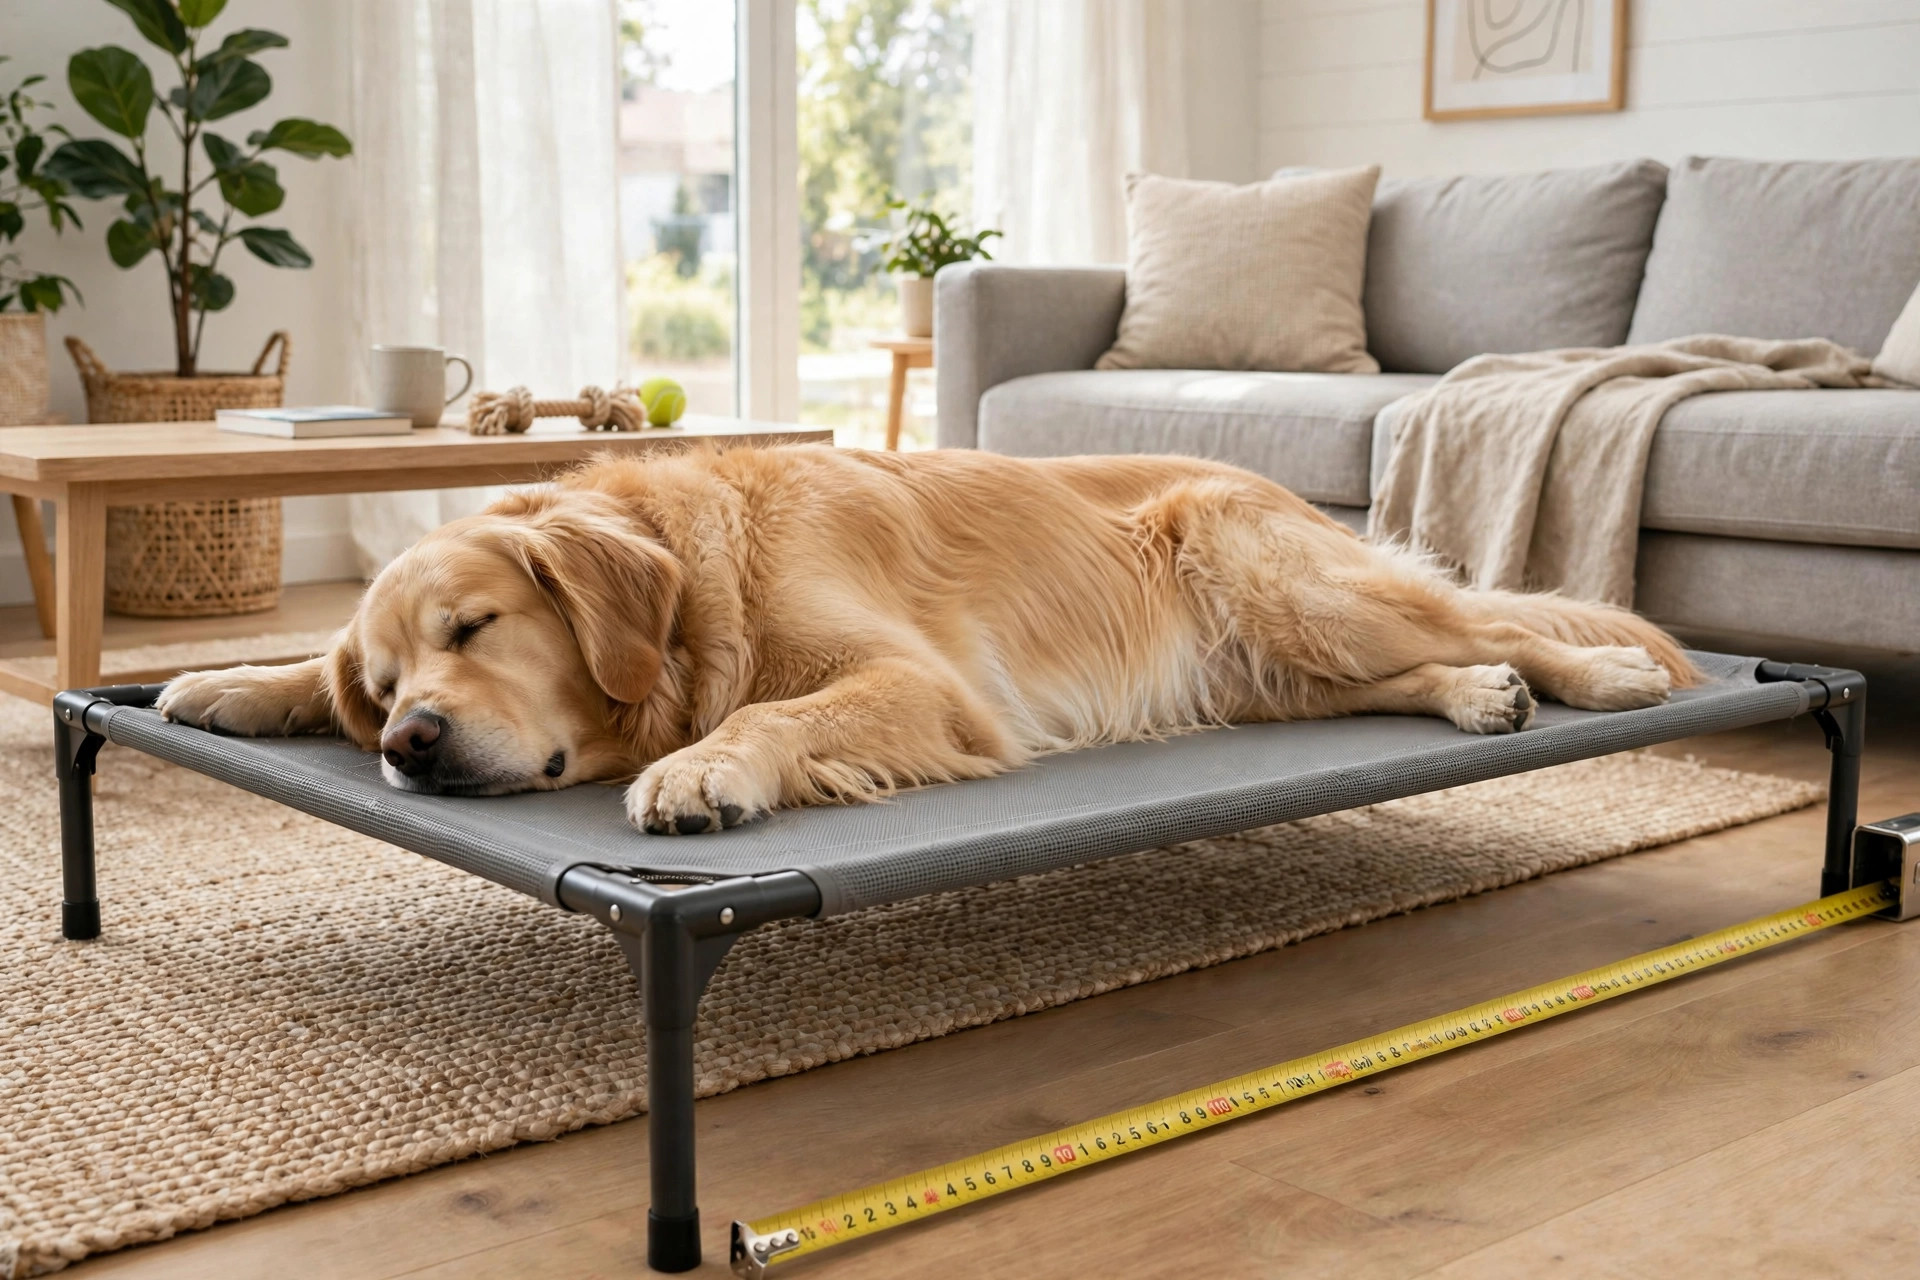
3. Size

Your dog should be able to lie fully stretched on the bed with room to
spare. When in doubt, size up — a bed that’s slightly too big is fine; one
that’s slightly too small goes unused. Check the weight rating, not just
the dimensions.

4. Feet and stability

Skid-resistant feet matter on tile and wood floors. A bed that slides when
the dog jumps on is a bed the dog stops trusting. Some models add
rubberised feet or a slightly wider stance for stability.

5. Portability

If you travel, camp, or move the bed between rooms, look for a folding or
quick-assembly design. Many elevated beds disassemble in minutes, which is
another reason trainers love them.

Large dog stretched out asleep on a spacious elevated dog bed with a measuring tape beside the frame.

Getting your dog to actually use it

Placement is half the battle. Put the raised bed where your dog already
likes to rest — near the family, not banished to a cold corner. Make the
first introductions positive: treats on the bed, praise for stepping on,
a favourite chew the first few times.

If your dog hesitates at the springy feel, lay a thin blanket or their old
favourite cushion on top for the first week, then gradually remove it.
Dogs that already like sleeping on the sofa (a raised, springy surface)
usually convert fastest.

FAQs

Are elevated dog beds good for puppies?
Yes, with supervision — they’re easy to clean during house-training, and
the firm surface is good for growing joints. Just make sure the height is
low enough that a small puppy can climb on safely.

Do elevated dog beds help with arthritis?
Many owners and vets say yes. The even, firm support and easier stand-up
help stiff dogs, though a raised bed is a complement to vet treatment, not
a replacement. For severe arthritis, some dogs do better with a thick
orthopedic mattress — watch which one your dog chooses.

Can dogs sleep on elevated beds in winter?
They can, but add insulation — a blanket or pad on top, and keep the bed
away from draughts. The airflow that cools in summer works against you in
a cold room.

How do you clean an elevated dog bed?
Most need only a hose-down or a wipe with mild soap and water. Removable
covers can usually go in the washing machine. Let the fabric dry fully
before the dog uses it again.

How long do elevated dog beds last?
A good steel-frame bed lasts years; the fabric is the wear item and many
brands sell replacement covers. Cheap models with thin fabric and weak
joints may last months with a large dog — the frame is where the money
goes.

The bottom line

Elevated dog beds are better than floor cushions for one specific job:
keeping a dog cool, supported, and off the ground on a surface that’s easy
to clean. Hot sleepers, seniors with stiff joints, chewers, and muddy-paw
dogs all tend to thrive on them. Nervous burrowers and cold-sensitive dogs
usually prefer something plusher.

If your dog flops on the kitchen tiles every summer evening, or stands up
stiffly from a flattened old cushion, a raised bed is one of the simplest
upgrades you can make to their daily comfort.

Border collie playing a DIY muffin tin puzzle toy with tennis balls hiding treats.

DIY Dog Puzzle Toys: 7 Brain Games from Household Stuff

A tired dog is a good dog — but here’s what most owners miss: fifteen
minutes of brain work can tire a dog out more thoroughly than an hour of
fetch. Puzzle games force your dog to think, sniff, plan and problem
solve, and that mental effort burns energy the way no amount of running
in circles quite does. Trainers use puzzle feeding on rainy days, with
under-stimulated teenagers, with reactive dogs that need a calming
focus, and with seniors whose legs have retired but whose brains are
still very much in the game.

Border collie playing a DIY muffin tin puzzle toy with tennis balls hiding treats.

The pet industry will happily sell you a £30 plastic puzzle. But the
games dogs love most are the ones you build from your own junk drawer:
a muffin tin, an old towel, a plastic bottle, a cardboard box. They cost
nothing, they take five minutes to set up, and you can retire them the
moment your dog cracks the code — then make a new one.

This guide gives you seven DIY dog puzzle toys from household stuff,
each rated by difficulty so you can start your dog at the right level
and work up.

A note on difficulty levels

Every game below has a rating: Easy, Medium or Tricky. Start
with Easy. A dog that succeeds stays engaged; a dog that fails twice
walks away from puzzle games entirely. Build the wins first, then raise
the stakes.

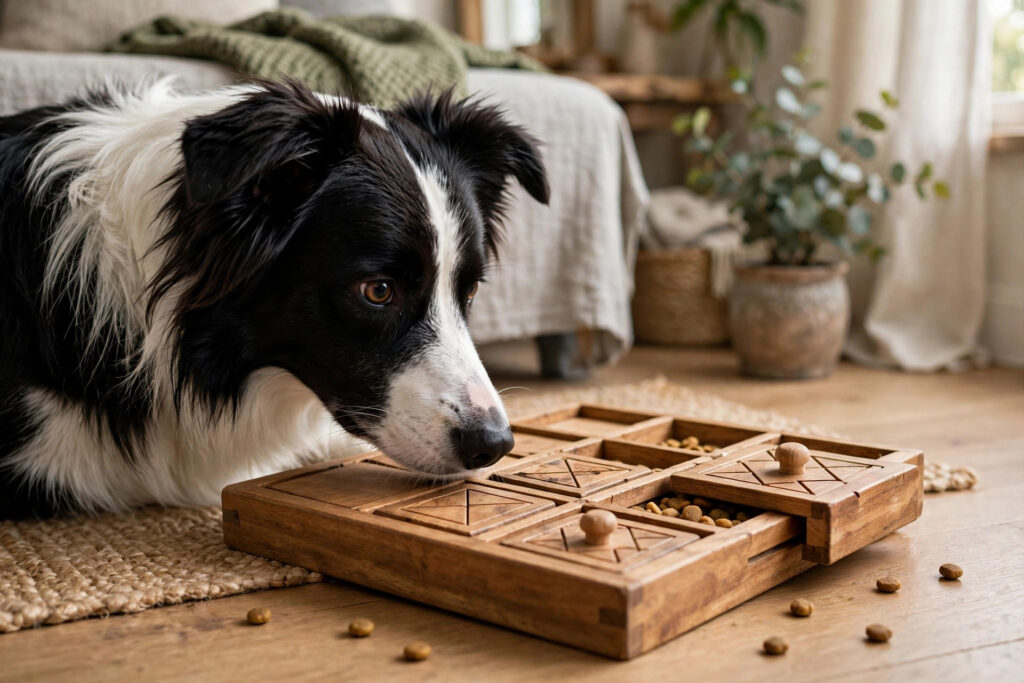
1. The muffin tin treat hunt — Easy

You need: a muffin tin, 6–12 small treats, 6 tennis balls.

Drop a treat into some (or all) of the muffin cups, then set a tennis
ball on top of each cup. Your dog has to nudge or lift the balls to get
the treats. Most dogs get it in under a minute — which makes it the
perfect first puzzle game, not a boring one. Let the first two rounds be
easy wins, then add more balls and cover every cup.

Best for: puppies, seniors, and dogs that have never played a
puzzle game before.

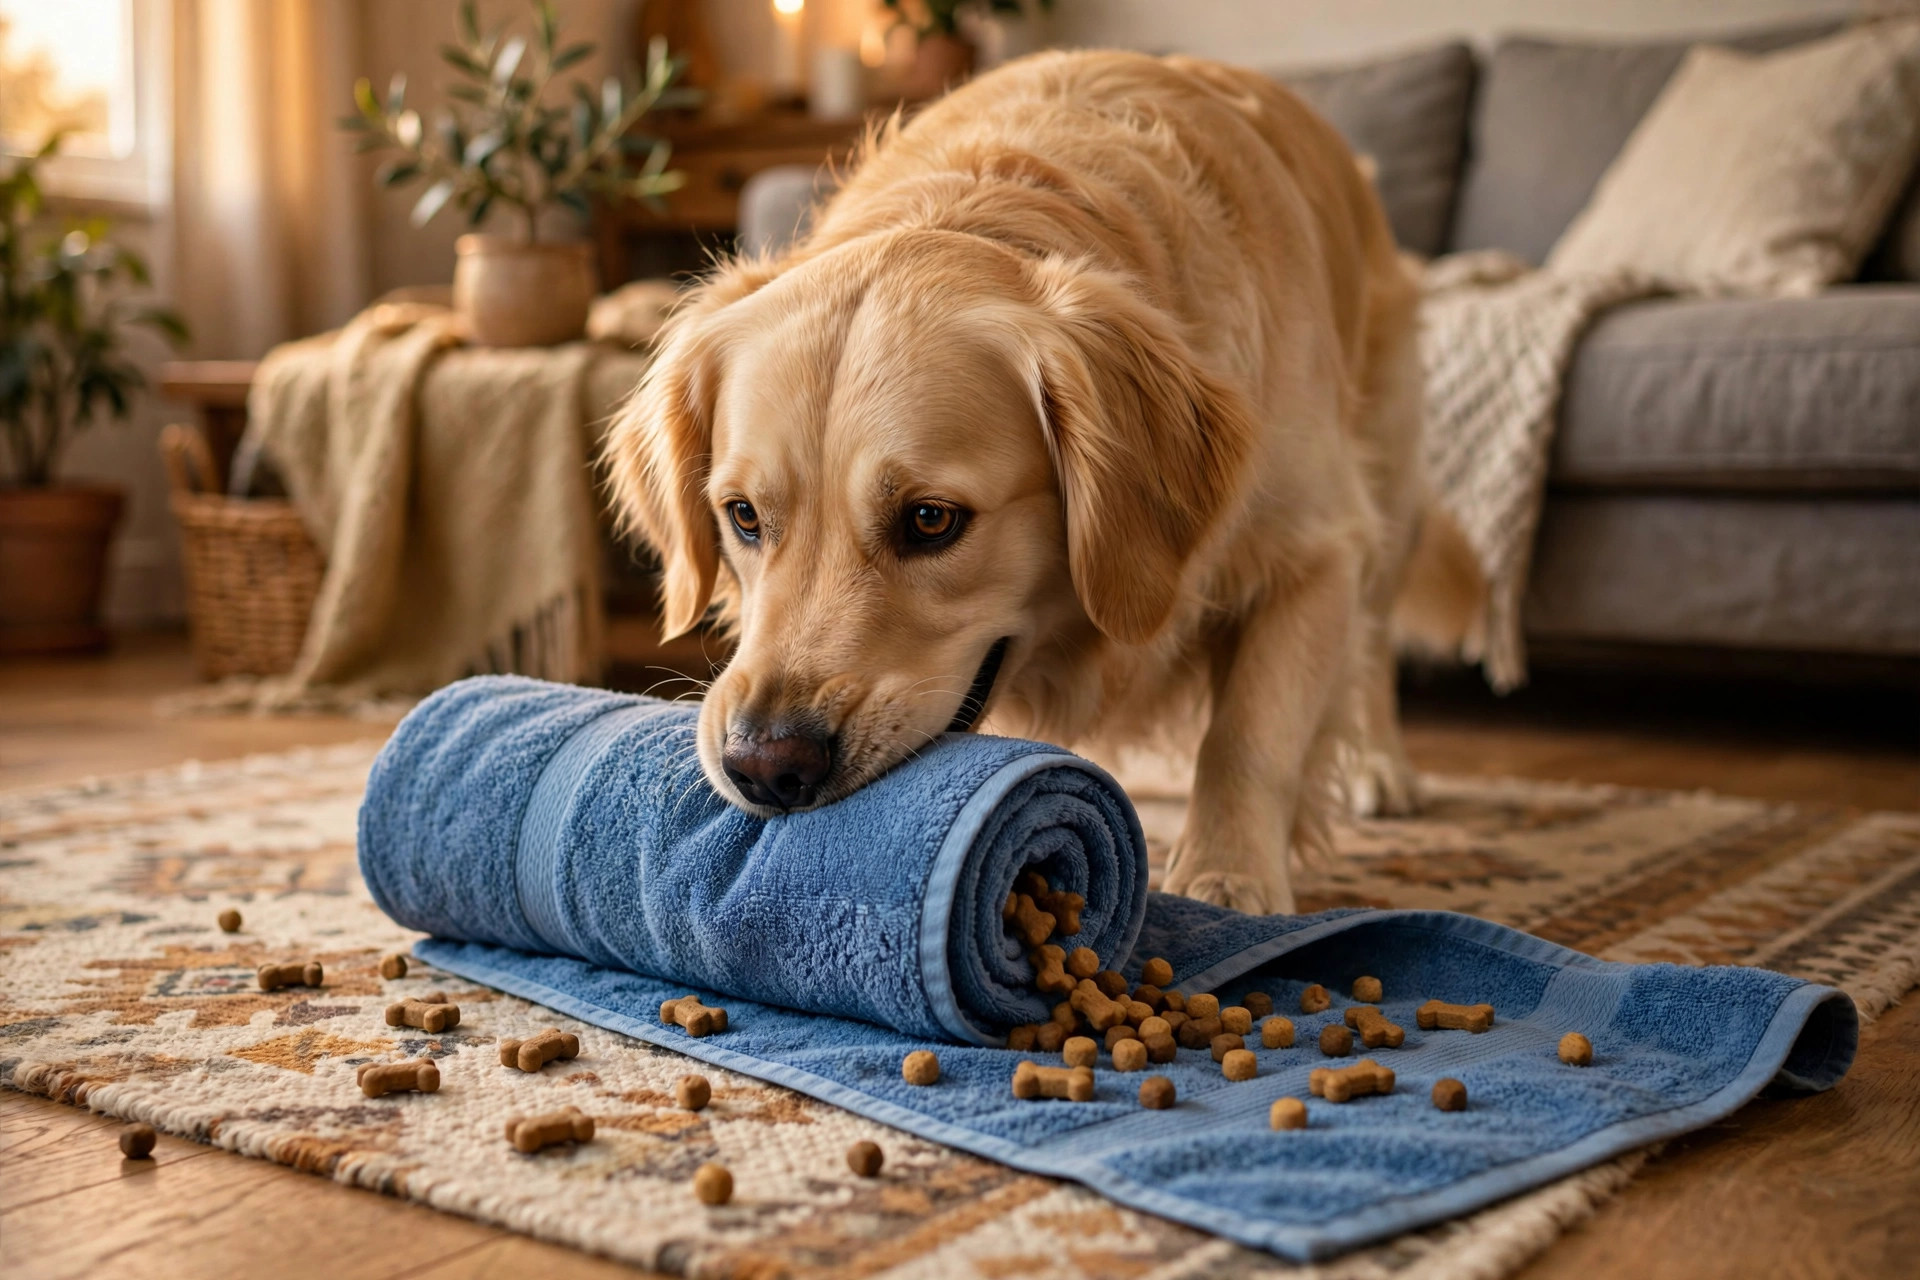
2. The towel roll-up — Easy

You need: an old bath towel, a handful of kibble or treats.

Lay the towel flat, scatter treats across it, and roll it up into a
tight log. Your dog unrolls it nose-first to find the rewards. For a
harder version, fold the towel in half before rolling, or tie a loose
knot in the middle of the rolled log. Towels are ideal because there’s
nothing to chew through and nothing small to swallow — just fabric and
food.

Best for: fast eaters — this turns a 40-second meal into a 10-minute
foraging session.

Golden retriever unrolling a rolled-up towel with dog treats spilling out.

3. The cup shell game — Easy to Medium

You need: 3 identical plastic cups or small bowls, one smelly treat.

This is the classic street game, dog edition. Put a treat under one cup
while your dog watches, shuffle the cups slowly, then let them choose.
Real talk: most dogs will just knock all three over rather than
“deduce” anything, and that’s fine — the nose work is the point. Raise
the difficulty by adding cups, or by hiding the treat under a cup after
a brief “look away” so your dog has to search rather than track.

Best for: nose-driven breeds and rainy-day indoor play.

Beagle knocking over plastic cups to find a hidden dog treat.

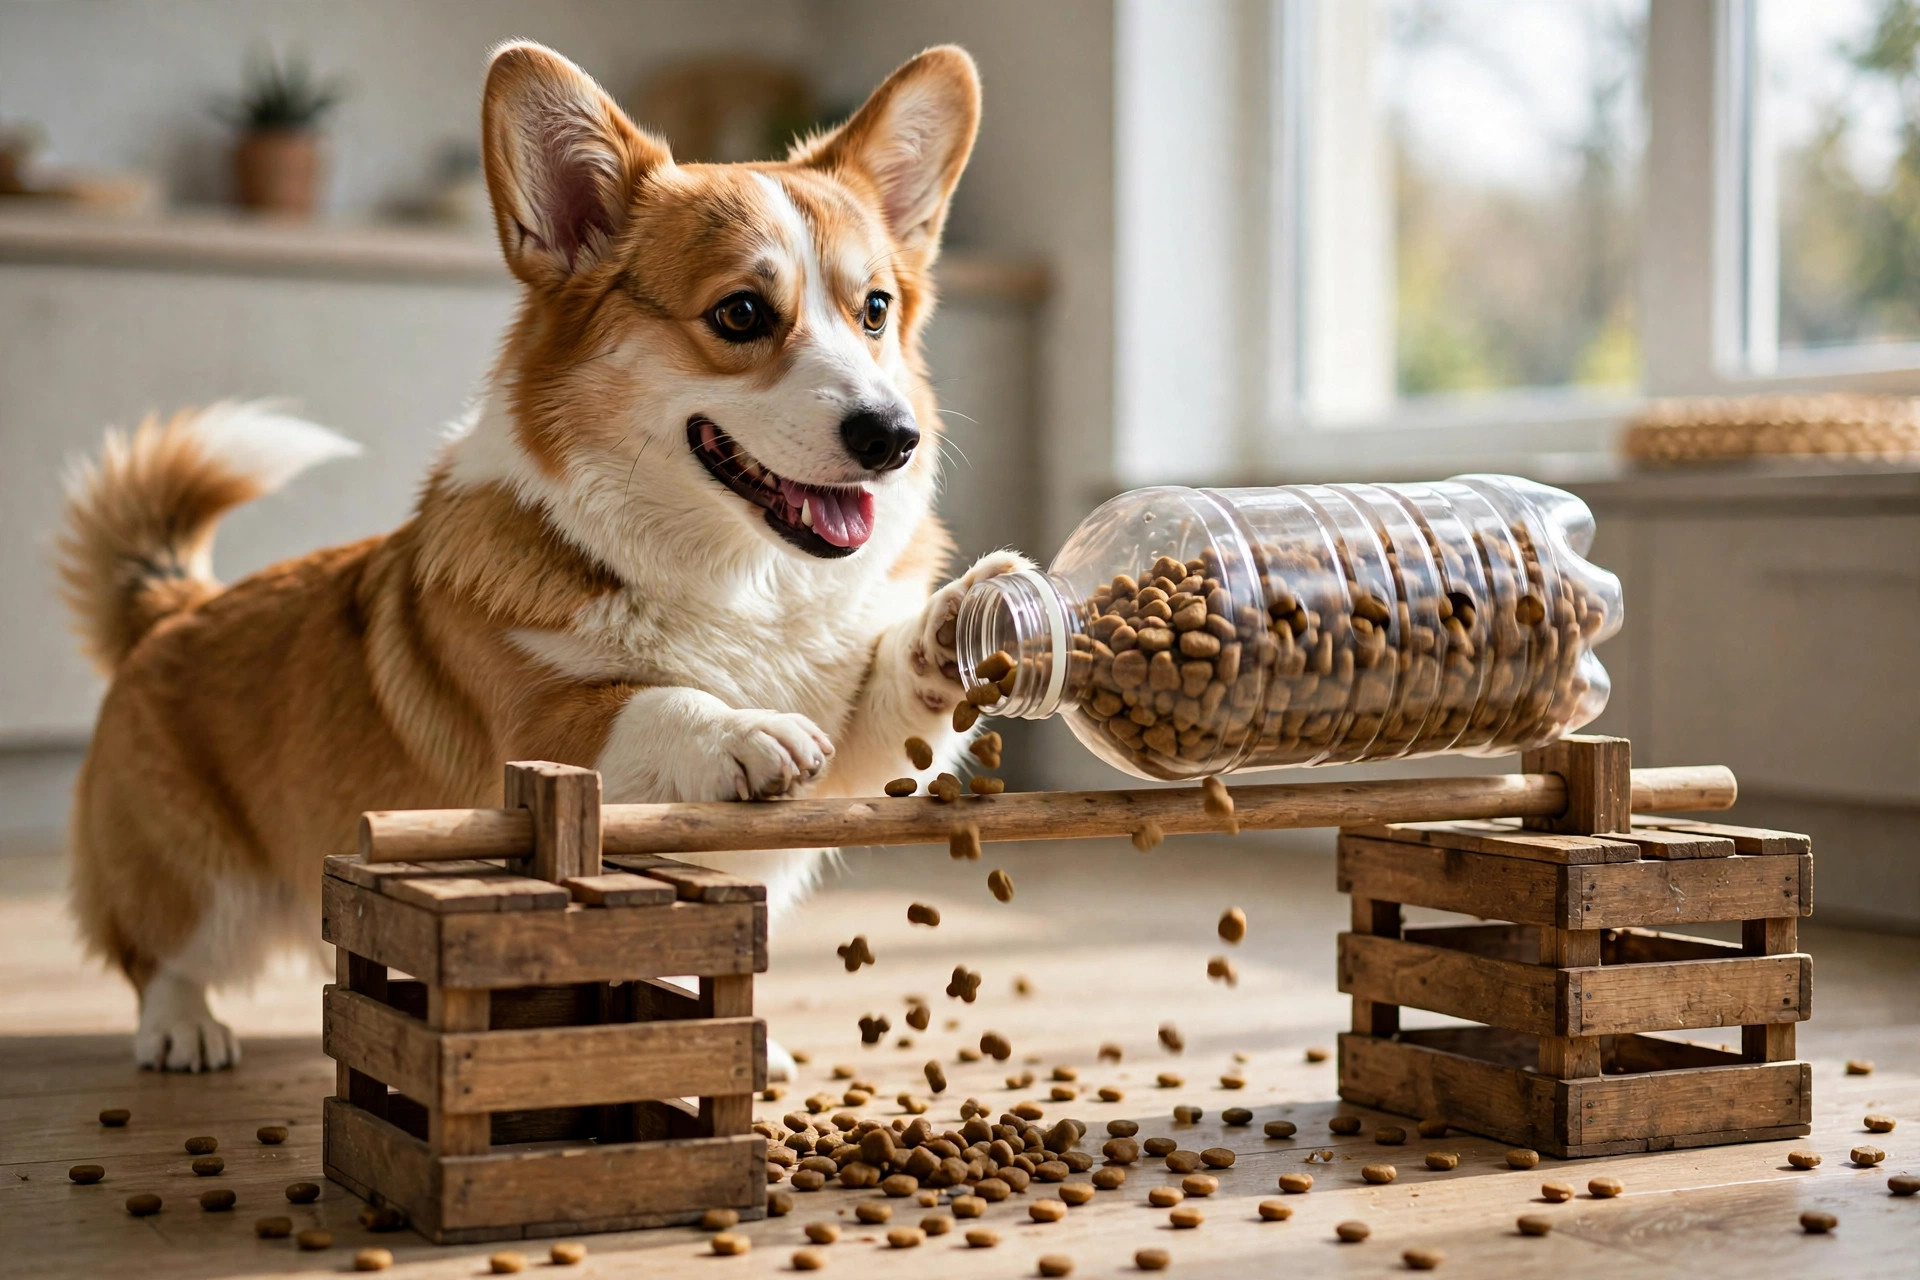
4. The bottle spinner — Medium

You need: an empty plastic bottle (500 ml is ideal), a wooden dowel
or broom handle, two sturdy boxes or chairs to rest the dowel across,
and some kibble.

Cut a couple of small treat-sized holes in the bottle — just big enough
for kibble to fall through. Remove the cap and the label. Thread the
dowel through the bottle’s middle (poke a hole on each side with a
screwdriver), rest the dowel across the two supports, fill the bottle
with kibble, and let your dog spin it with their nose or paw to shake
treats out. It rattles, it moves, it dispenses — dogs go wild for it.

Best for: food-motivated dogs and teenagers with energy to burn.
Supervise closely: retire the bottle the moment it cracks.

Corgi spinning a DIY plastic bottle puzzle toy that dispenses kibble.

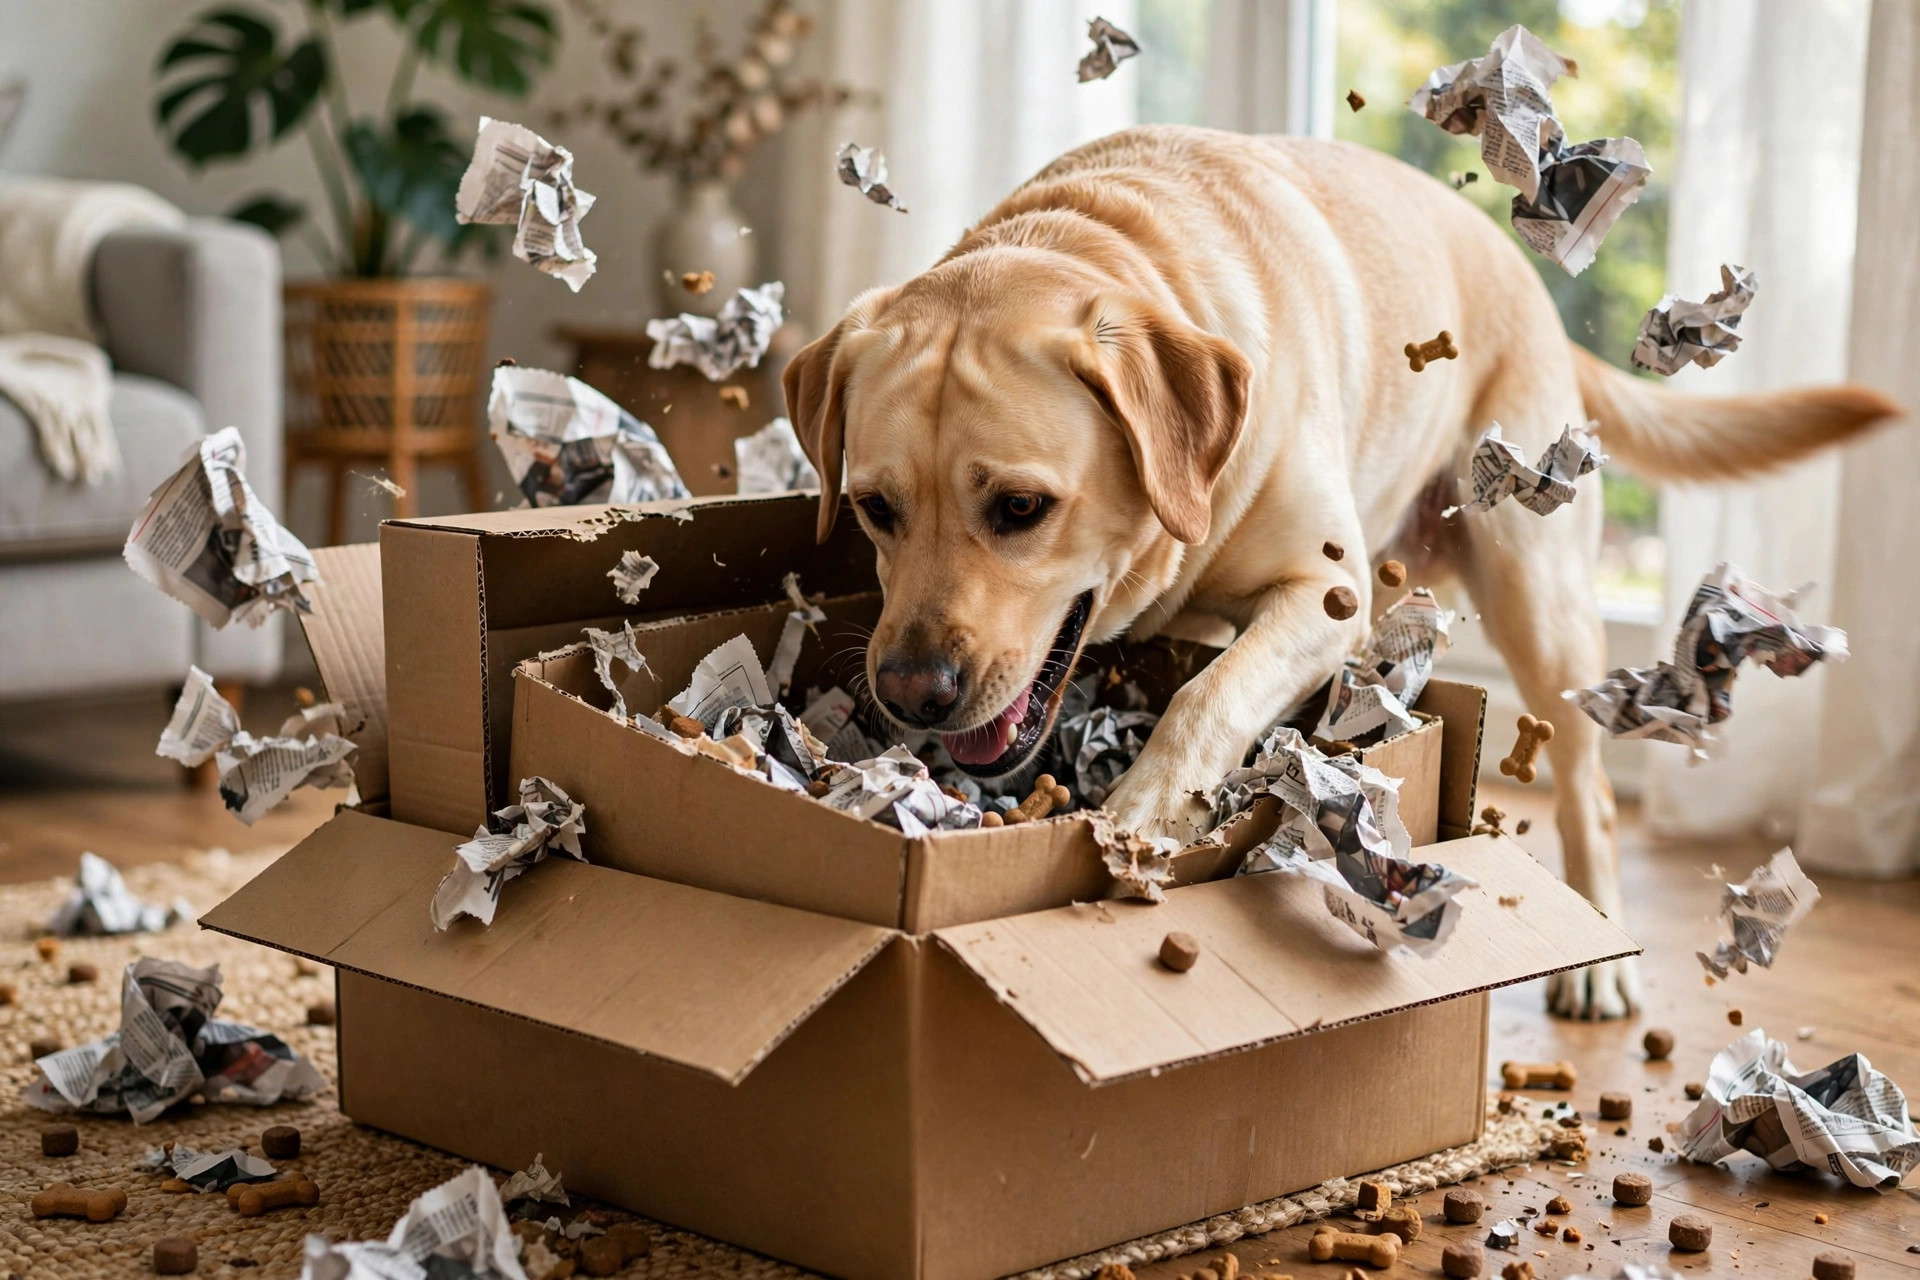
5. The cardboard box nest — Medium

You need: 3–4 cardboard boxes of decreasing size, treats, and some
scrunched newspaper.

Put treats in the smallest box, close its flaps loosely, nest it inside
the next box with more treats tucked in the newspaper around it, and
repeat. Your dog shreds, digs and unpacks their way to the centre like
a furry little archaeologist. Shredding is a natural, satisfying
behaviour — this gives it a legal outlet, and it costs you nothing but
yesterday’s delivery boxes.

Best for: dogs that love to rip things up. Expect confetti; embrace
the confetti.

Labrador digging through a cardboard box nest puzzle filled with newspaper and hidden treats.

6. The frozen ice-tray feast — Medium to Tricky

You need: a silicone ice cube tray or muffin mould, kibble or small
treats, and water or low-sodium broth.

Drop a treat into each compartment, fill with water or broth, and freeze
overnight. Pop the cubes out into your dog’s bowl (or a lick mat) and
let them lick, crunch and melt their way through breakfast. On hot days
this doubles as cooling enrichment; on cold days it stretches a meal
into a 20-minute project. Broth cubes smell incredible to dogs, so this
one is a guaranteed hit.

Best for: hot weather, teething puppies, and dogs that need
calming, repetitive licking.

7. The egg carton cracker — Tricky

You need: an empty cardboard egg carton and treats.

Put a treat in each cup of the carton, close the lid, and hand it over.
Simple to us — surprisingly hard for a first-timer, because the dog has
to figure out how to pry the lid open without opposable thumbs. Most
dogs learn to pin it with a paw and nose the lid up within a few tries.
Once they’ve cracked it, make it harder: put the carton inside a paper
bag, or stack a second carton on top.

Best for: confident dogs that have already beaten games 1–6. This
is your graduation puzzle.

Safety rules for homemade puzzle toys

Homemade doesn’t mean unregulated — you’re the safety inspector.

  • Supervise every session. No DIY puzzle toy is a leave-alone toy.
    Watch, enjoy the show, and intervene the moment pieces start coming
    apart.

  • Remove small parts. Bottle caps, pull tabs, rubber bands and
    twist ties must go before your dog ever sees the toy.

  • Retire damaged toys immediately. A cracked bottle develops sharp
    edges; a shredded box is fine, a half-eaten box is not — take it
    away before cardboard becomes a meal.

  • Size treats sensibly. Puzzle games dispense a lot of small
    rewards. Use your dog’s regular kibble for at least half the games,
    and cut training treats small, so the games don’t blow the daily
    calorie budget.

  • Know your chewer. Power chewers should not get the bottle
    spinner unsupervised (or at all, if they eat plastic). Gentler dogs
    can play with lighter materials safely.

  • Wash what you reuse. Towels, silicone trays and bottles that get
    regular use should be washed like any other food dish.

How often should dogs play puzzle games?

Once a day is the sweet spot for most dogs — a 10–15 minute session
replaces a chunk of physical exercise and keeps the brain in shape.
Rotate the games so your dog doesn’t memorise them: a puzzle your dog
has fully solved stops being enrichment and becomes a vending machine.
Retire a game for two weeks, then bring it back — it’ll feel new again.

FAQs

Are puzzle toys good for puppies?
Yes — they’re excellent for puppies. Start with Easy games (muffin tin,
towel roll-up) and short sessions. Puzzle play builds frustration
tolerance and teaches a young dog to think before acting, which pays
off in training for years.

My dog gives up when a puzzle is hard. What do I do?
Drop back to a level where they win, and make the first rep of every
session easy — let them see the treat go in. Confidence first, challenge
second. Some dogs also do better with smellier rewards; upgrade the
treats before you upgrade the puzzle.

Can puzzle games replace walks?
They complement walks, not replace them. Physical exercise builds
fitness and provides real-world socialisation; puzzle games burn mental
energy and build calm focus. A dog that gets both is a dog that settles
beautifully in the evening.

What treats work best in puzzle toys?
Small, dry and not too crumbly: regular kibble is ideal. For high-value
motivation, use tiny pieces of freeze-dried meat or cheese. Avoid
sticky treats in fabric games (towels, snuffle mats) — they gum up the
fibres and are a pain to wash out.

My dog destroys puzzle toys instead of solving them. Help?
Destruction is also enrichment — but expensive if it’s a shop-bought
toy. That’s the beauty of DIY: let them shred the box nest (game 5),
because the boxes are free. For the thinking games, redirect: if they
start eating the egg carton instead of opening it, take it away calmly,
reset it easier, and reward the first nose-touch. Shredding has its
place — just give it its own game.

Small beagle curled tightly in a round plush faux-fur calming donut bed in a warm living room corner.

Calming Dog Beds for Anxious Dogs: Do They Work? (Design, Evidence & How to Pick One)

Some dogs bounce off the furniture and sleep anywhere. Others pace at
strange noises, tremble during storms, and won’t settle unless they’re
wedged against you. If you have one of the second kind, you’ve probably
seen the ads: round, fluffy, donut-shaped beds that promise to melt away
anxiety with raised rims and faux-fur centres.

Do calming dog beds actually work — or are they just a very soft place to
nap? The honest answer is somewhere in the middle. Here’s what the design
is really doing, what behaviour science says about it, and how to pick one
that earns its floor space.

What makes a “calming” bed calming?

A calming bed isn’t a medical device — it’s a bed shaped around what anxious
dogs already do when they’re looking for comfort. Three design choices do
most of the work:

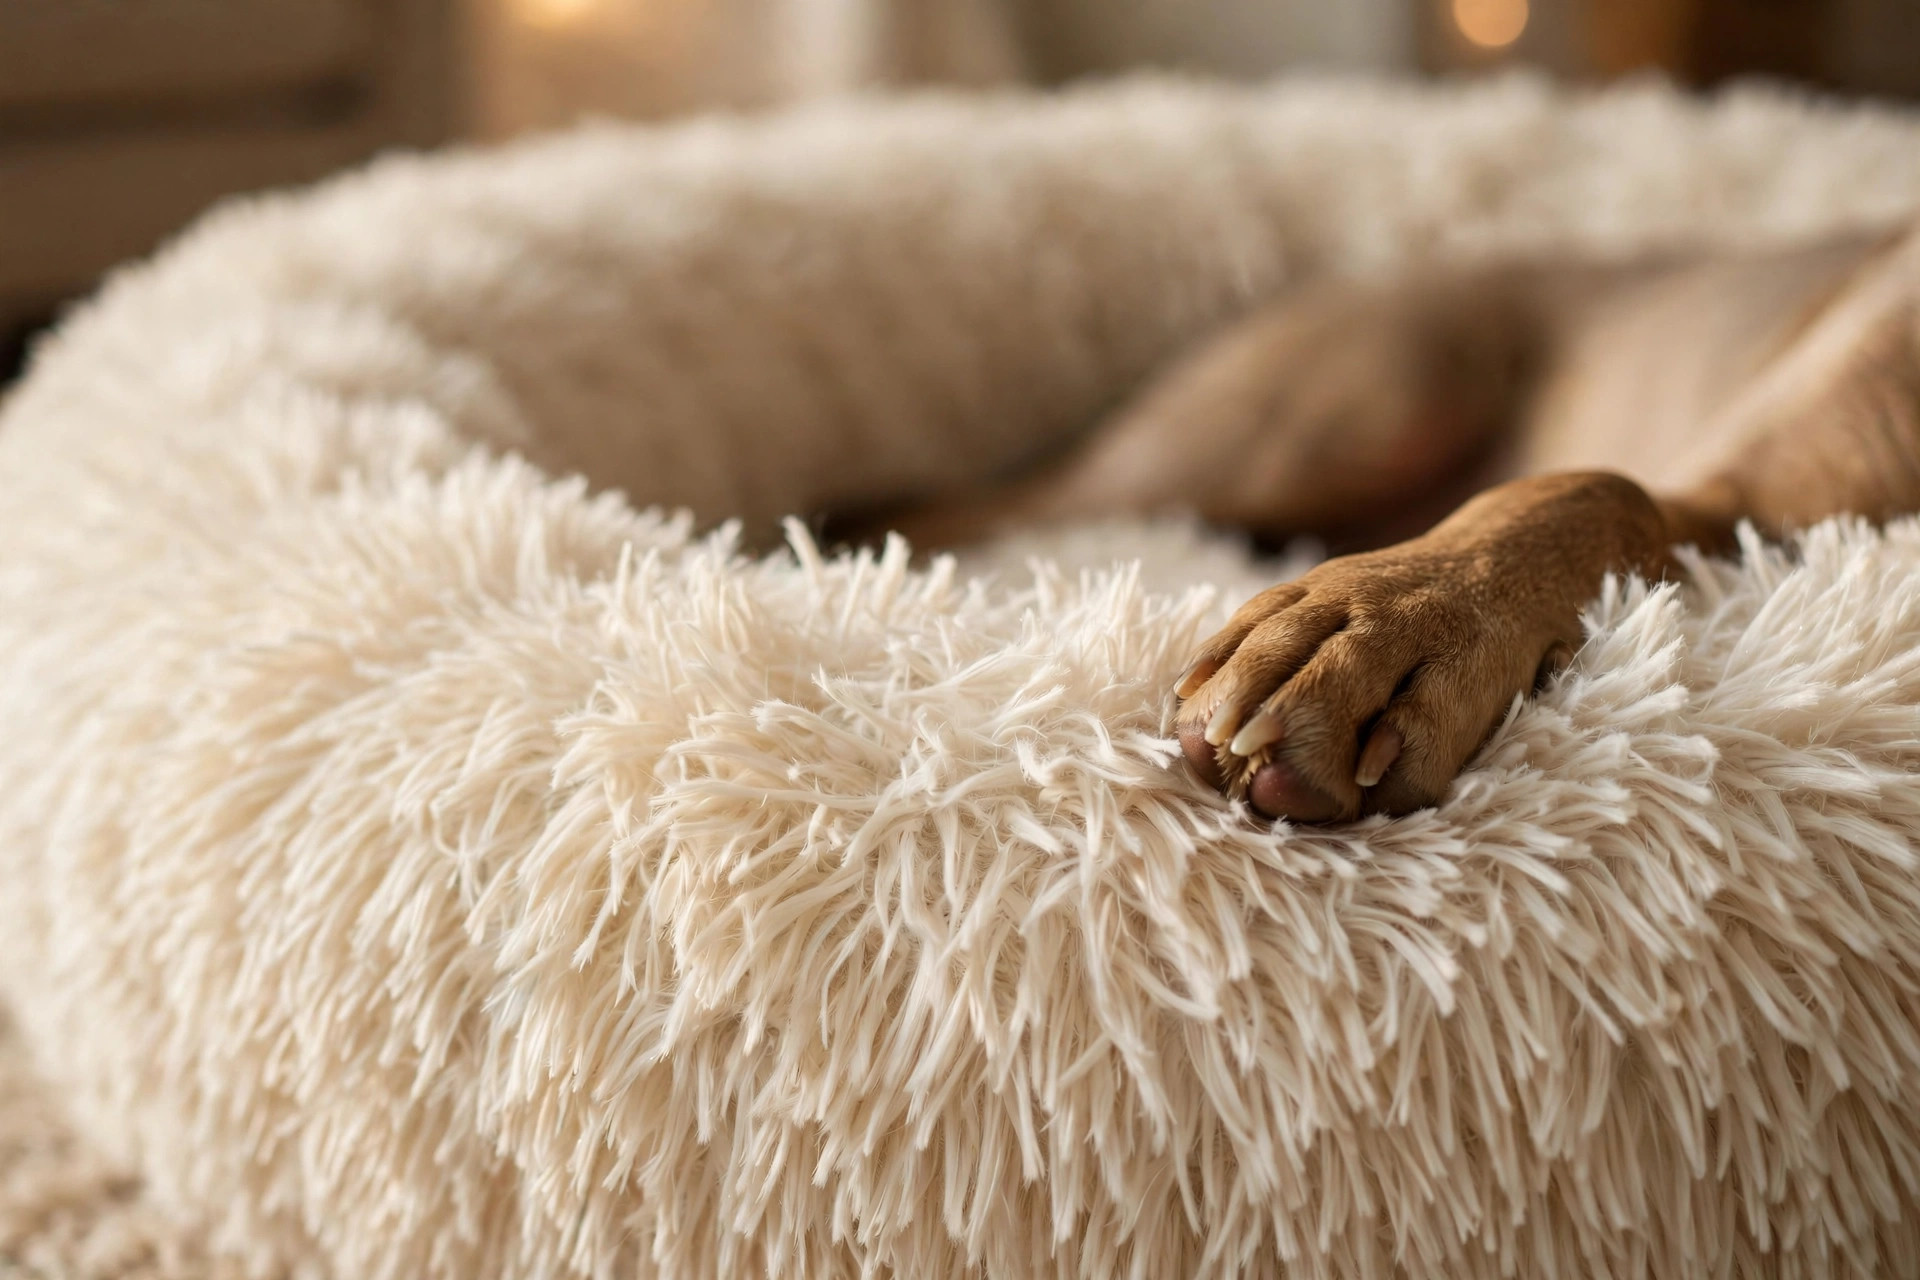
1. The raised rim (the den effect)

The defining feature is the high, bolstered edge — usually 15 to 25 cm of
plush wall circling most of the bed. Dogs that curl up naturally press their
back against something solid: a sofa arm, your legs, a crate wall. A raised
rim gives them that contact on demand. Behaviourists call this denning
behaviour — dogs are descendants of den animals, and enclosed-feeling
resting spots read as “safe territory” to a nervous brain. For a storm-shy
dog, the rim is a barrier between them and the worrying world.

Close-up of the high raised plush rim of a cream faux-fur calming donut dog bed with a dog's paw resting on it.

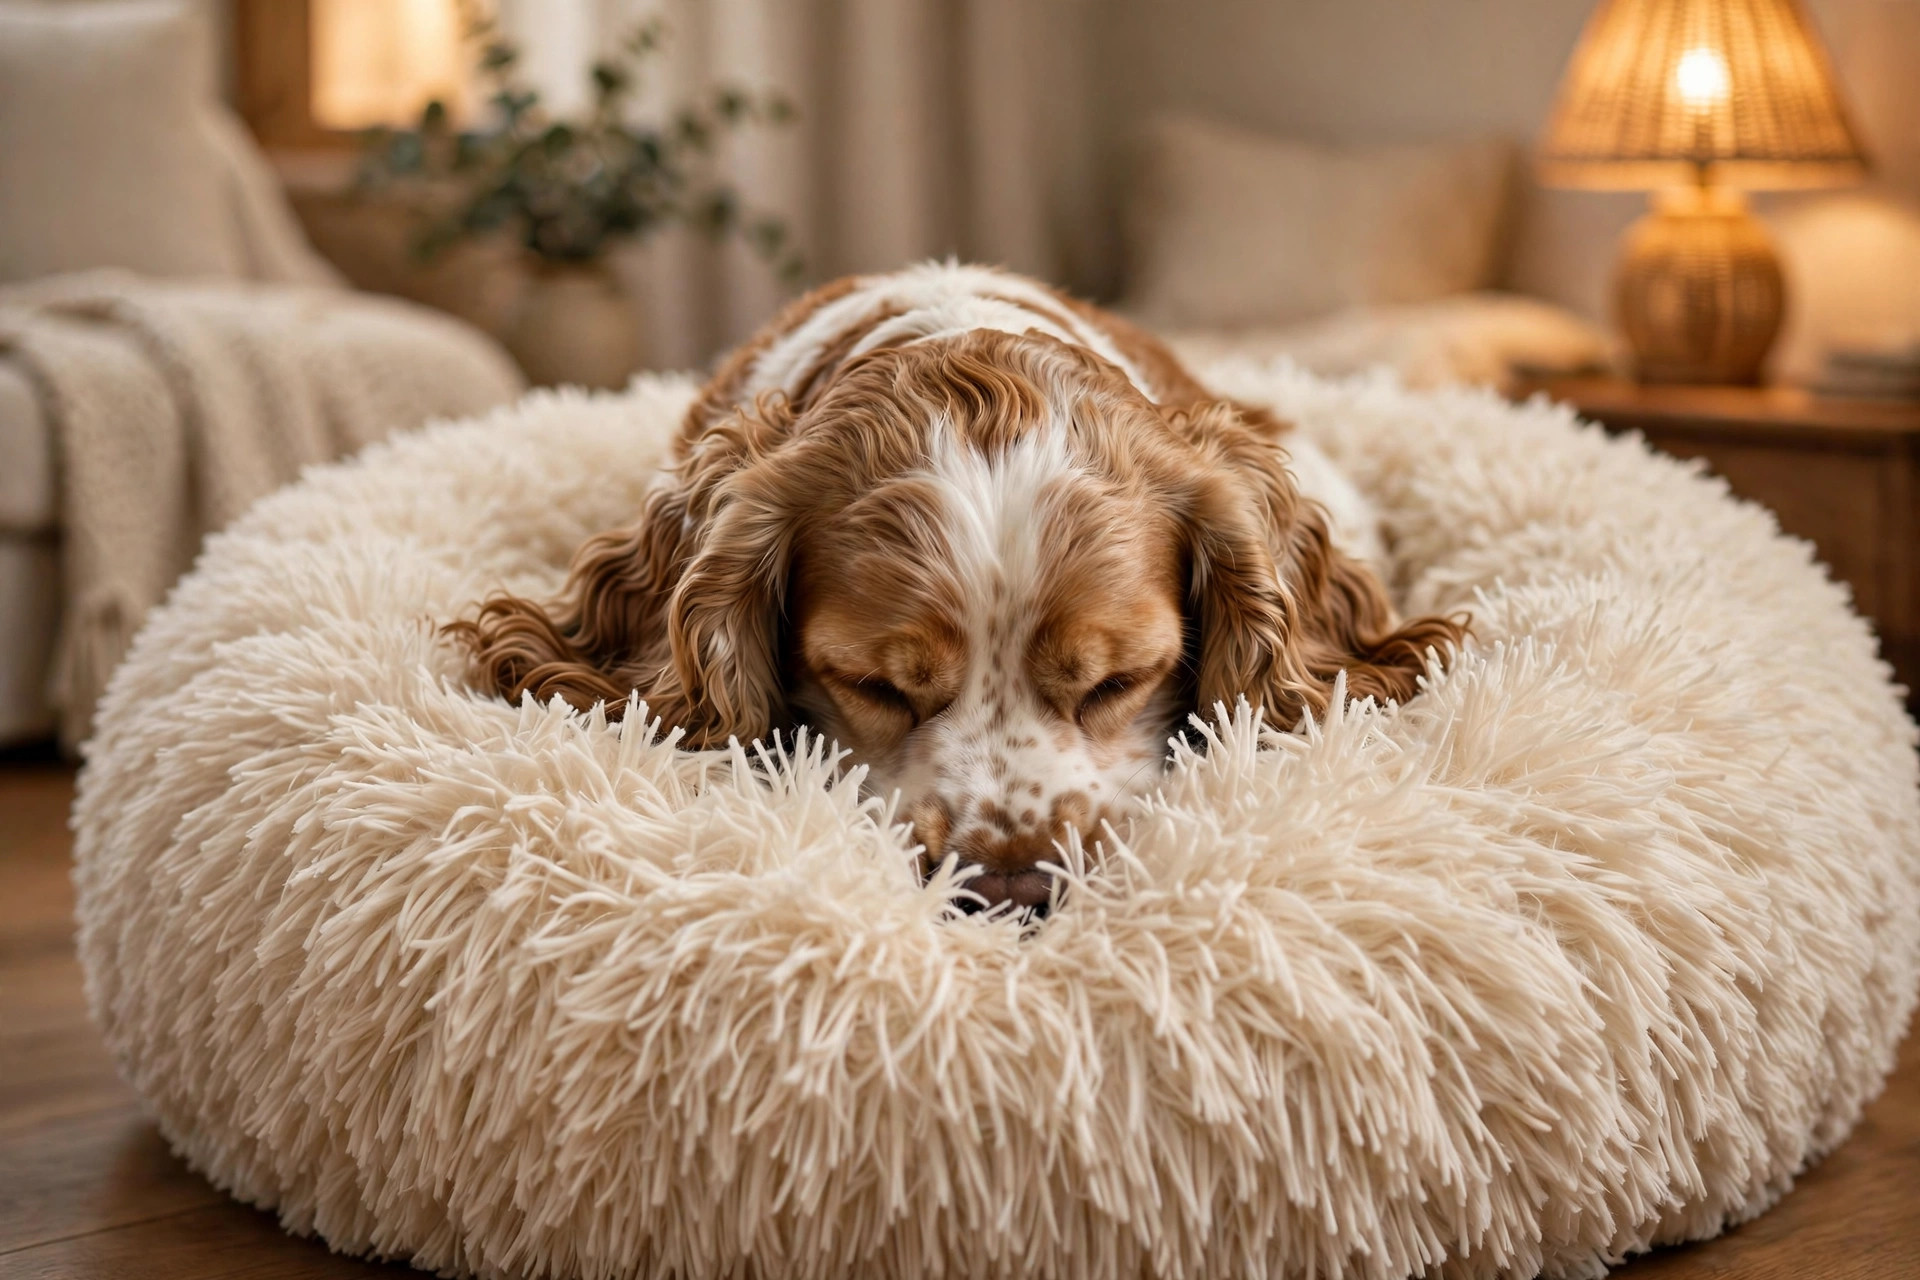
2. The faux-fur sensory centre

Most calming beds use a long-pile shag or faux-fur cushion in the middle.
This mimics the texture of another dog’s coat — a puppy sleeping against
littermates gets the same sensory input. It’s the same principle behind
heartbeat plush toys for new puppies: warmth + familiar texture lowers
arousal. Dogs that knead, nose-bury, or paw at soft blankets tend to be the
biggest fans.

Cocker spaniel nuzzling its nose into the long-pile faux-fur centre of a calming donut dog bed.

3. The snug size

Calming beds are deliberately sized closer to the dog’s curled-up body than
general beds are. That gentle all-round pressure resembles a swaddle or a
thunder shirt — and it’s not a coincidence that the same anxious dogs who
love thunder shirts also love donut beds. The hug works both ways: the rim
behind the back and the rim under the chin.

Do they actually work? What the evidence says

Let’s be straight: there are no large clinical trials on donut beds for
canine anxiety. The pet-bed studies that exist are small, often run by the
manufacturers, and mostly measure sleep duration rather than anxiety
scores. So the evidence is soft — but the mechanism is plausible and
consistent with well-studied behaviour principles:

  • Denning preference is real. Shelter and kennel studies consistently
    show dogs choose smaller, enclosed resting spaces when stressed. A raised
    rim is the home version of that.

  • Sustained gentle pressure helps some dogs. The anxiety-wrap literature
    (thunder shirts, calming coats) shows modest but real reductions in
    heart-rate and stress behaviours for many dogs — and a snug bed applies
    the same principle while they sleep.

  • Routine sleep itself calms. A dog that naps longer and deeper is simply
    less reactive. If a bed gets your dog to settle 20% sooner, that compounds
    across every day.

What calming beds do not do: cure separation anxiety, fix noise phobia
on their own, or replace desensitization and vet guidance for genuinely
clinical anxiety. Think of them as one ingredient — an important one —
not the whole recipe. Owners of mildly anxious dogs (the pacers, the
storm-watchers, the velcro sleepers) report the biggest wins. Dogs with
severe, diagnosed anxiety disorders need the bed plus a behaviour plan,
and sometimes medication — that’s a vet conversation.
Calming beds vs orthopedic beds: different jobs

These get confused because both are marketed to “senior” and “anxious”
dogs, but they solve different problems:

  • Calming beds (donut, cuddler, nesting) → designed for anxious,
    nest-loving, curl-up sleepers. The priority is the raised rim and the
    snuggle factor. They offer some cushioning, but joint support is a
    side benefit.

  • Orthopedic beds (flat memory-foam rectangles) → designed for joint
    support, arthritis, and heavy dogs. The priority is even weight
    distribution. They offer comfort, but an anxious curler gets no
    “hug” from a flat slab.

An anxious senior is the overlap case: a dog that both curls for comfort
and has stiff hips. For those dogs, the best pick is often a calming bed
with a genuinely supportive (not hollow) base, or a flat orthopedic bed
with a low bolster edge. Buy for the bigger problem first — a dog in pain
won’t calm down no matter how fluffy the rim.

How to pick the right calming bed

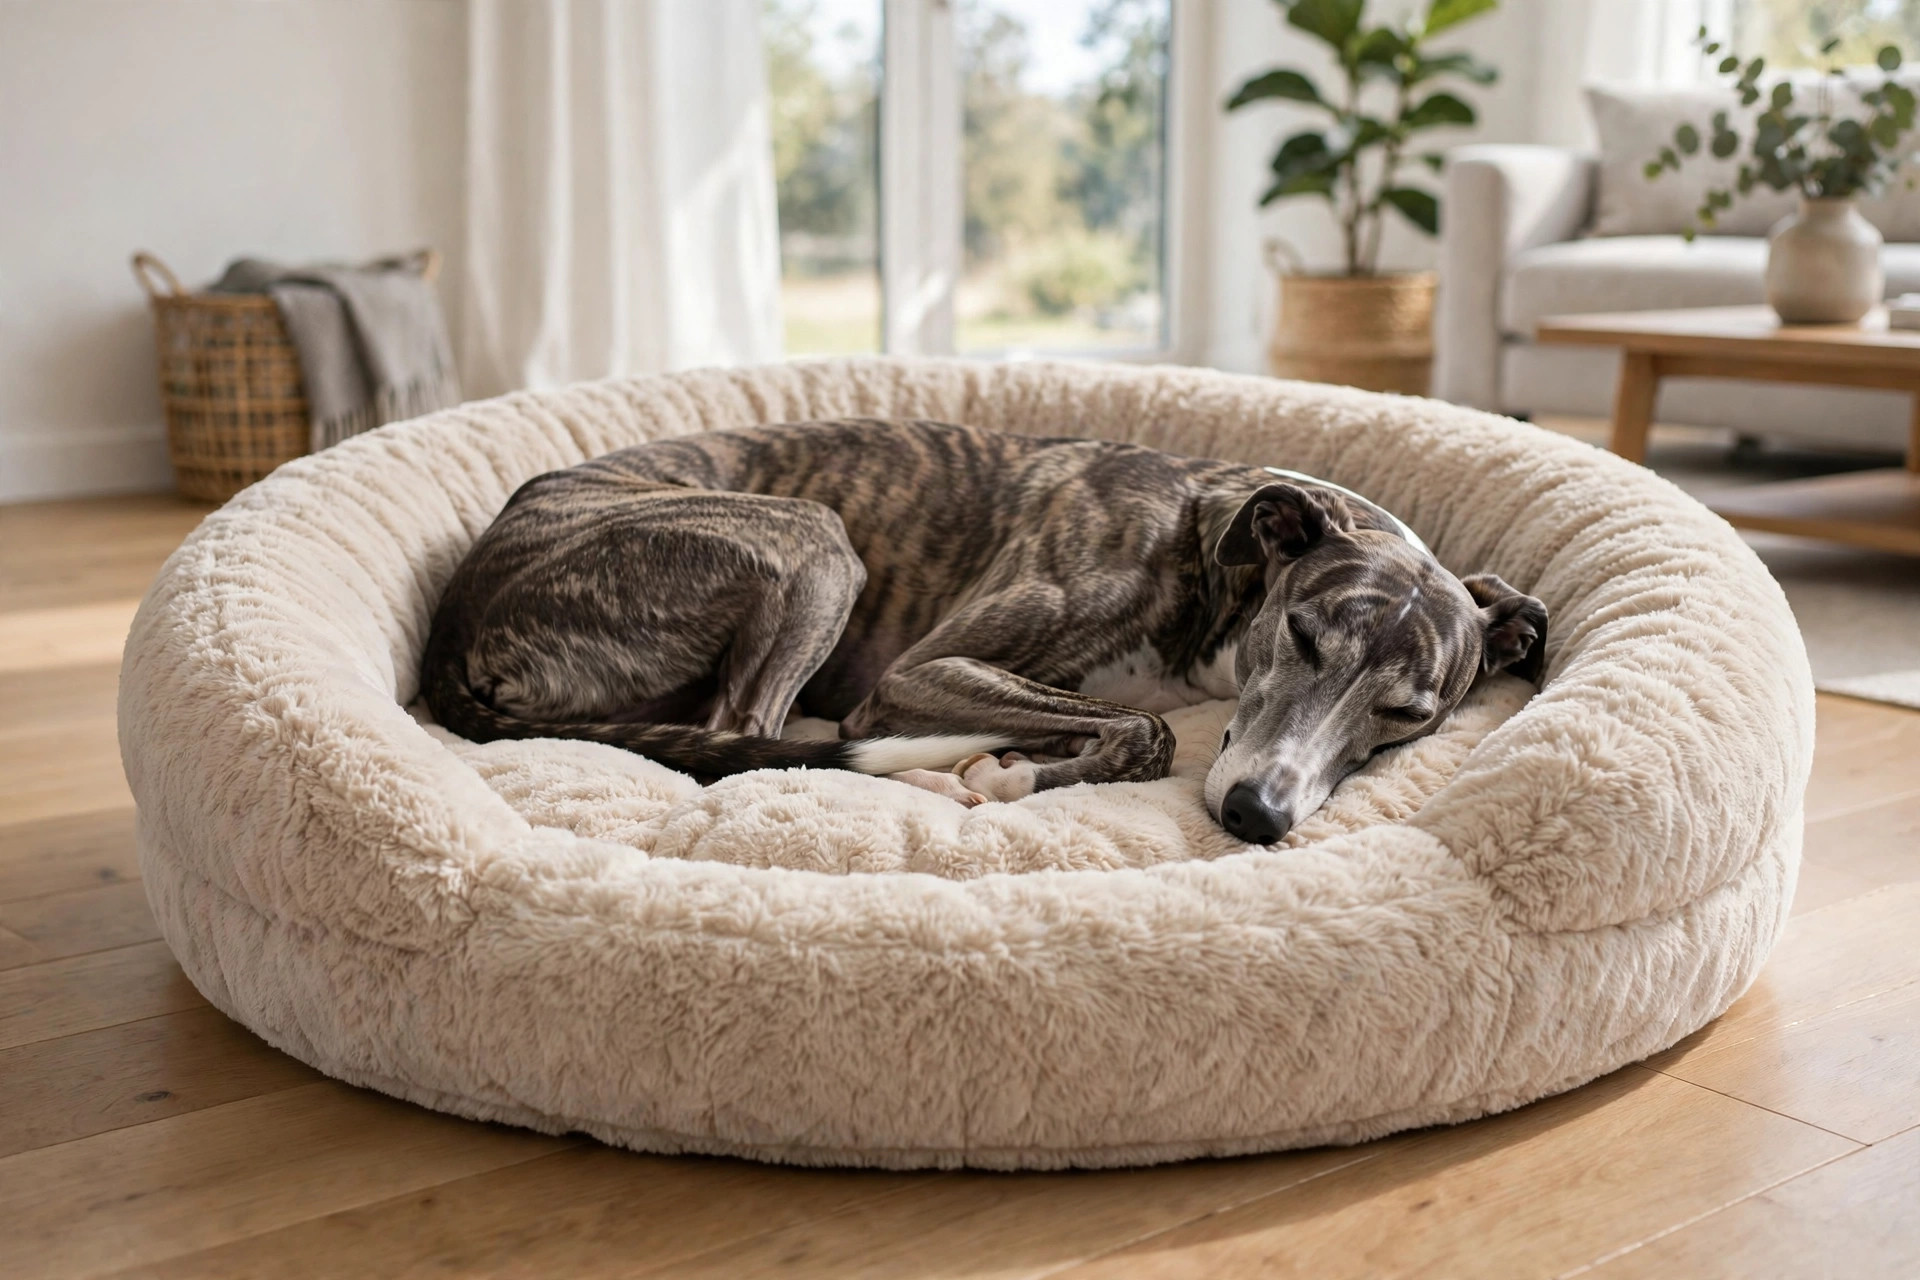
Size: snug, not cramped

Measure your dog curled up, then choose a bed whose internal sleeping area
matches that — not the outer diameter. Too big and you lose the hug; too
small and your dog drapes over the rim and gives up. Most brands run
small: when in doubt, size up one from the chart.

Large greyhound curled up in a big appropriately-sized calming donut dog bed in a bright living room.

Rim height and firmness

The rim should stand up on its own, not flop flat when your dog leans on
it. Squashed-flat rims are the tell-tale sign of a cheap bed — and the
number one complaint in reviews. Look for rims filled with dense, recycled
microfibre or shredded foam rather than thin polyfill.

The centre matters too

Cheap donut beds are all rim and no mattress: a thin disc in the middle
that bottoms out onto the floor. Press the centre in the shop — if you feel
floor through it, keep looking. A decent foam or thick-filled base protects
hips and elbows and makes the bed one a dog returns to.

Cover and washing

Calming beds are fur magnets — long-pile shag traps hair, dander and drool.
A machine-washable bed (whole bed or zip-off cover) is not optional, it’s
the whole maintenance plan. Wash at 30–40°C with unscented detergent; tumble
low or air-dry to keep the faux fur from matting. A spare cover means the
bed is never out of service during laundry day.

For chewers and power diggers

The plush, stuffable construction of donut beds is catnip for determined
chewers. If your dog eats bedding, a calming bed is a supervised-use bed
only — stuffing ingestion is a vet emergency. Nest-diggers are usually fine,
but watch the first week: if your dog is harvesting the fill, this style
isn’t for them.

Getting your dog to actually use it

  1. Put it where they already nap. Dogs choose location first, bed
    second. The new bed goes in the corner they’ve already claimed —
    you’re upgrading their spot, not relocating them.

  2. Add your scent. A worn t-shirt tucked under the cover bridges the
    first few days. Your smell is the fastest trust signal you have.

  3. Reward the settling. Toss a treat on the bed whenever they step in,
    and quietly reward them for lying down. Two to three days of this and
    most dogs self-assign.

  4. Don’t force it. Pushing a nervous dog into the bed teaches them the
    bed is where scary handling happens. Patience beats placement.

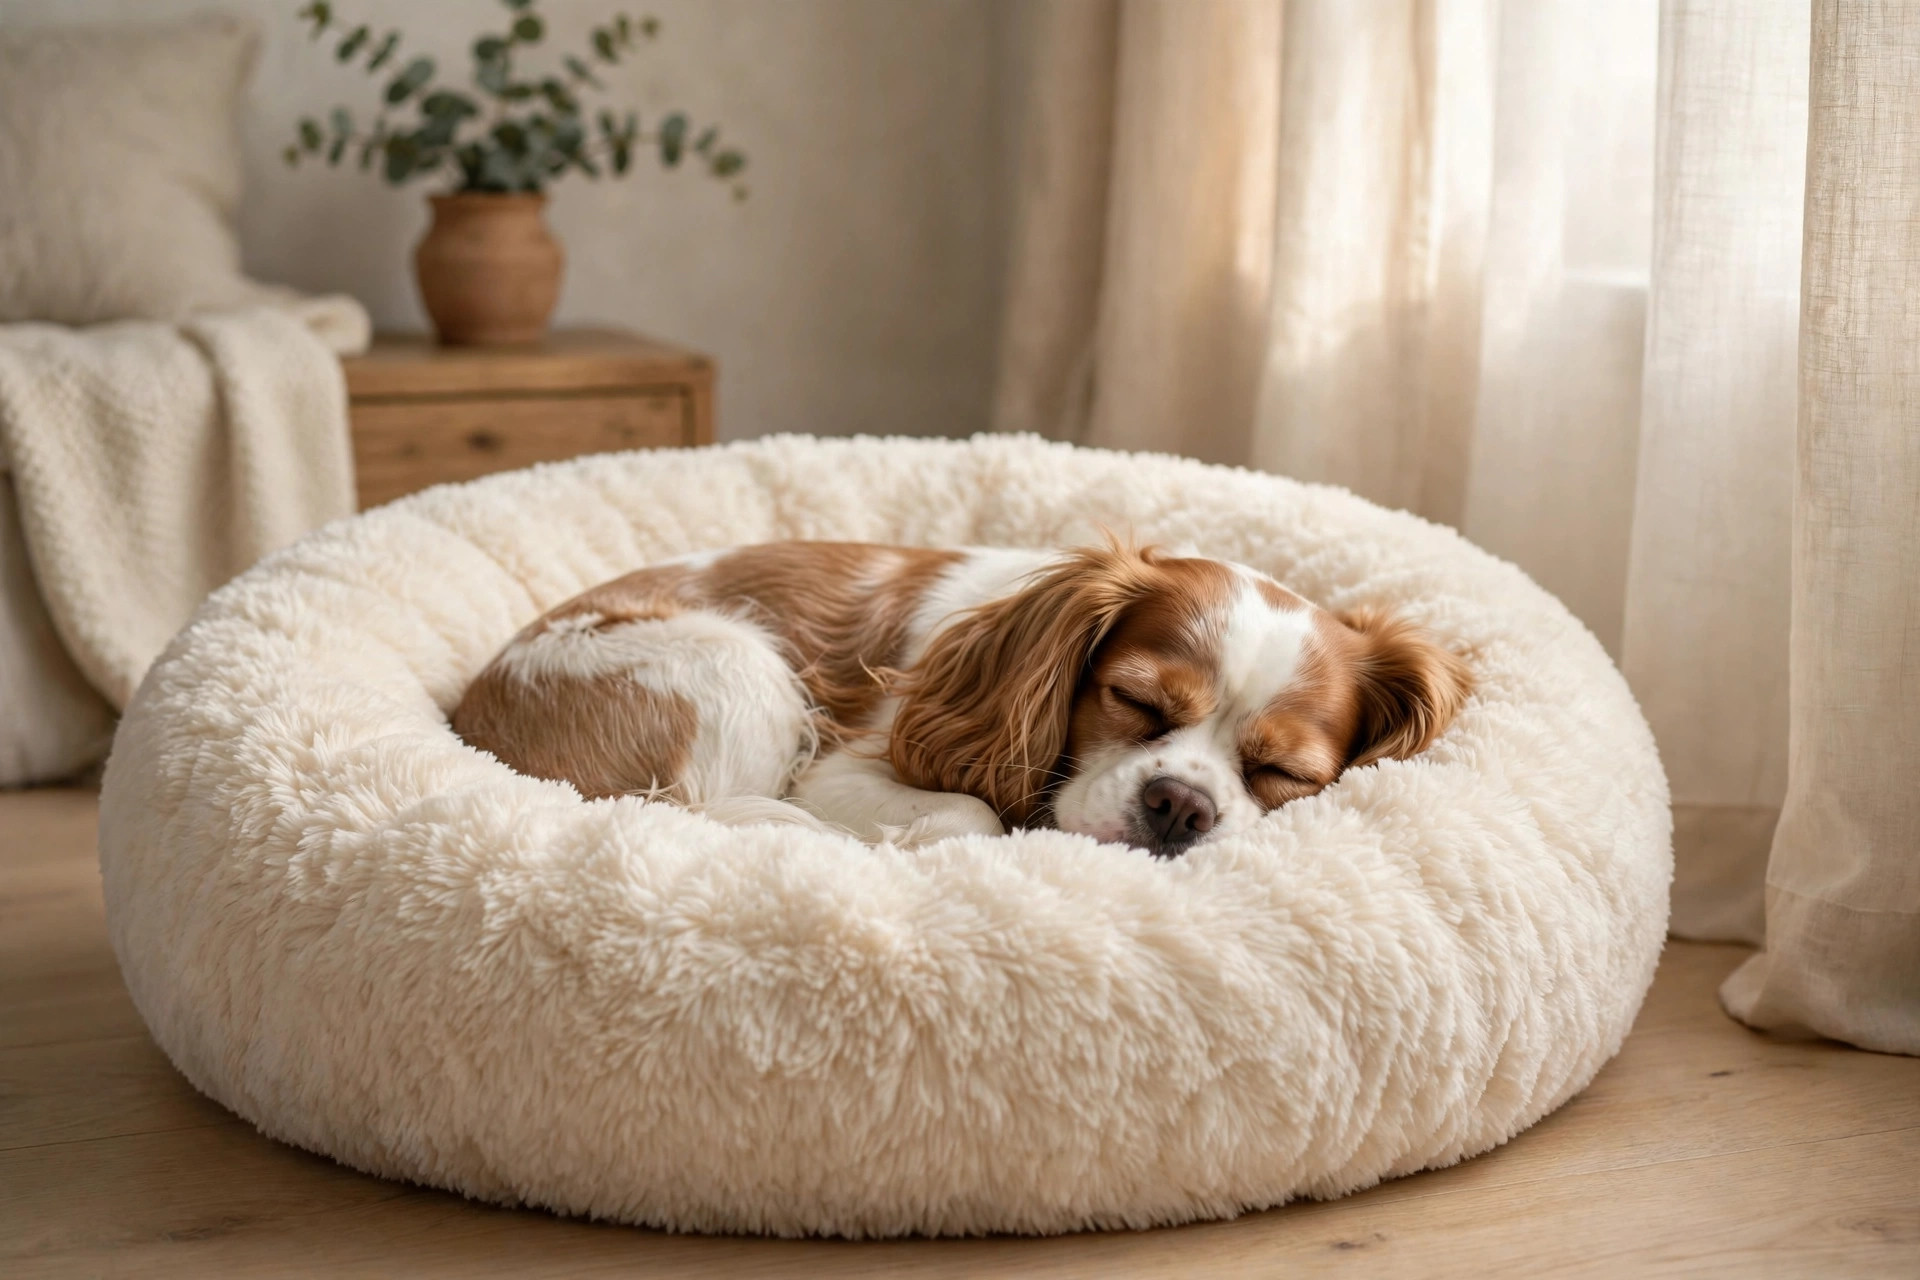
Cavalier King Charles spaniel sleeping peacefully in a cream faux-fur calming donut bed in a softly lit bedroom.

Safety notes

  • Chewing and ingestion: remove the bed when unsupervised if your dog
    pulls stuffing out of anything. Intestinal blockages from swallowed fill
    are genuinely dangerous — no calming effect is worth that risk.

  • Overheating: long faux-fur beds run warm. Heavy-coated breeds and
    flat-faced (brachycephalic) dogs can overheat in summer or heated rooms;
    offer a cooler flat bed alongside and let the dog choose.

  • Small puppies: very young puppies can struggle to climb in and out of
    high rims — choose a lower rim or a cuddler style until they’re bigger.

  • Not a treatment: a calming bed supports anxious dogs; it does not
    treat clinical anxiety. If your dog panics, injures itself, or can’t
    function, see your vet about a proper behaviour plan.

Washing and care tips

  • Shake and vacuum weekly. Long-pile shag hides an astonishing amount
    of hair. A weekly shake-outdoors plus a vacuum pass stops it baking in.

  • Wash monthly (or sooner). Whole-bed wash at 30–40°C, unscented
    detergent, no fabric softener — softener coats the fibres and kills the
    plush texture dogs love.

  • Dry fully before use. A damp bed smells and mildews fast. Air-dry or
    tumble low, and fluff the faux fur with a soft brush once dry to restore
    the shag.

  • Two covers beat one. If your bed has a zip-off cover, a spare means
    laundry day never leaves your dog bedless — anxious dogs notice routine
    disruption.
FAQs

How long until my dog calms down in the new bed?
Most dogs investigate within hours and nap in it within a day or two. For
nervous dogs, give it a week of treats and your-scent bedding before
judging — routine matters more than the product.

Are calming beds good for separation anxiety?
They help with settling but they’re not a fix. A dog with real separation
anxiety needs training and often vet input; the bed can be one calm
anchor in a wider plan, not the plan itself.

Can big dogs use donut beds?
Yes, but most “calming” lines top out around medium sizes. Large anxious
dogs need genuinely large donut or cuddler beds — or a low-bolster
orthopedic bed that gives rim contact with proper support. Sizing charts
lie upward; read reviews from owners of your breed.

My dog burrows under the blankets instead. Will a donut bed convert them?
Often yes — hooded cave beds are the burrower’s upgrade. A standard donut
suits curlers; a burrower wants something to get under, so look for the
attached-flap or hood styles.

How often should I replace a calming bed?
When the rim stops standing up or the centre bottoms out — typically 1–2
years of daily use. A flattened donut is just a round rug.

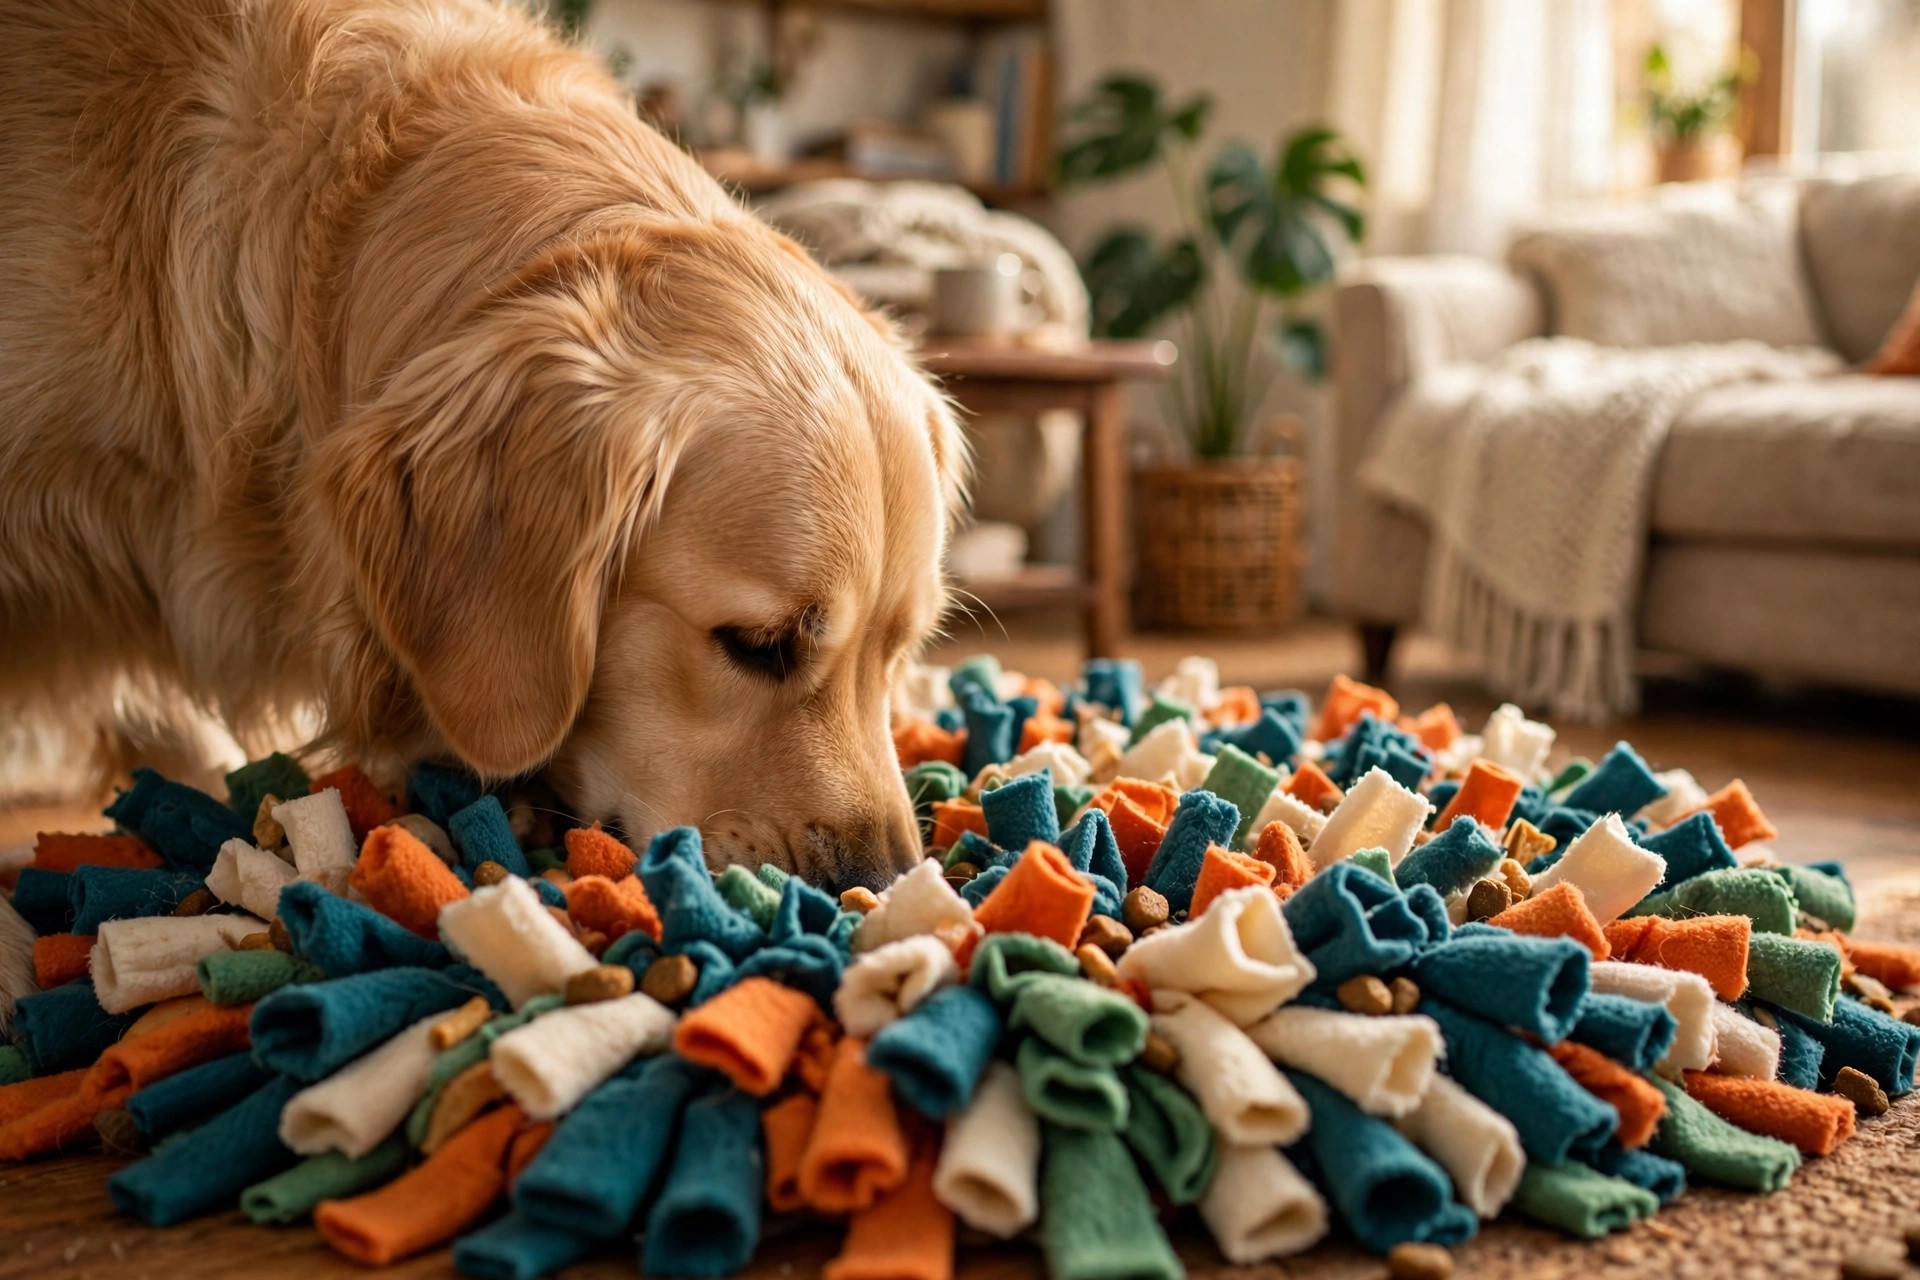
Golden retriever foraging for treats in a handmade fleece snuffle mat.

DIY Snuffle Mat for Dogs: No-Sew Enrichment in Under an Hour

Dogs were built to sniff. A dog’s nose has up to 300 million scent
receptors (we manage about six million), and foraging — nose to the
ground, brain working out where the next bite is hiding — is one of the
most satisfying things your dog can do. The problem is that a bowl of
kibble takes forty seconds to inhale, and then the enrichment is over.

A snuffle mat fixes that in about the cheapest way possible. It’s a
thick, shaggy mat made from hundreds of fabric strips knotted through a
rubber base — you scatter treats or kibble into it, and your dog has to
snuffle, nudge and paw through the fibres to find every last piece. Ten
minutes of foraging can tire a dog out as effectively as a long walk,
which is why trainers reach for snuffle mats on rainy days, for fast
eaters, and for anxious dogs that need a calming focus.

Store-bought snuffle mats exist, but they’re pricey for what they are —
and the DIY version is better, because you control the fabric quality,
the density, and the size. This guide shows you how to make one in under
an hour with no sewing at all.

Golden retriever foraging for treats in a handmade fleece snuffle mat.

What you’ll need

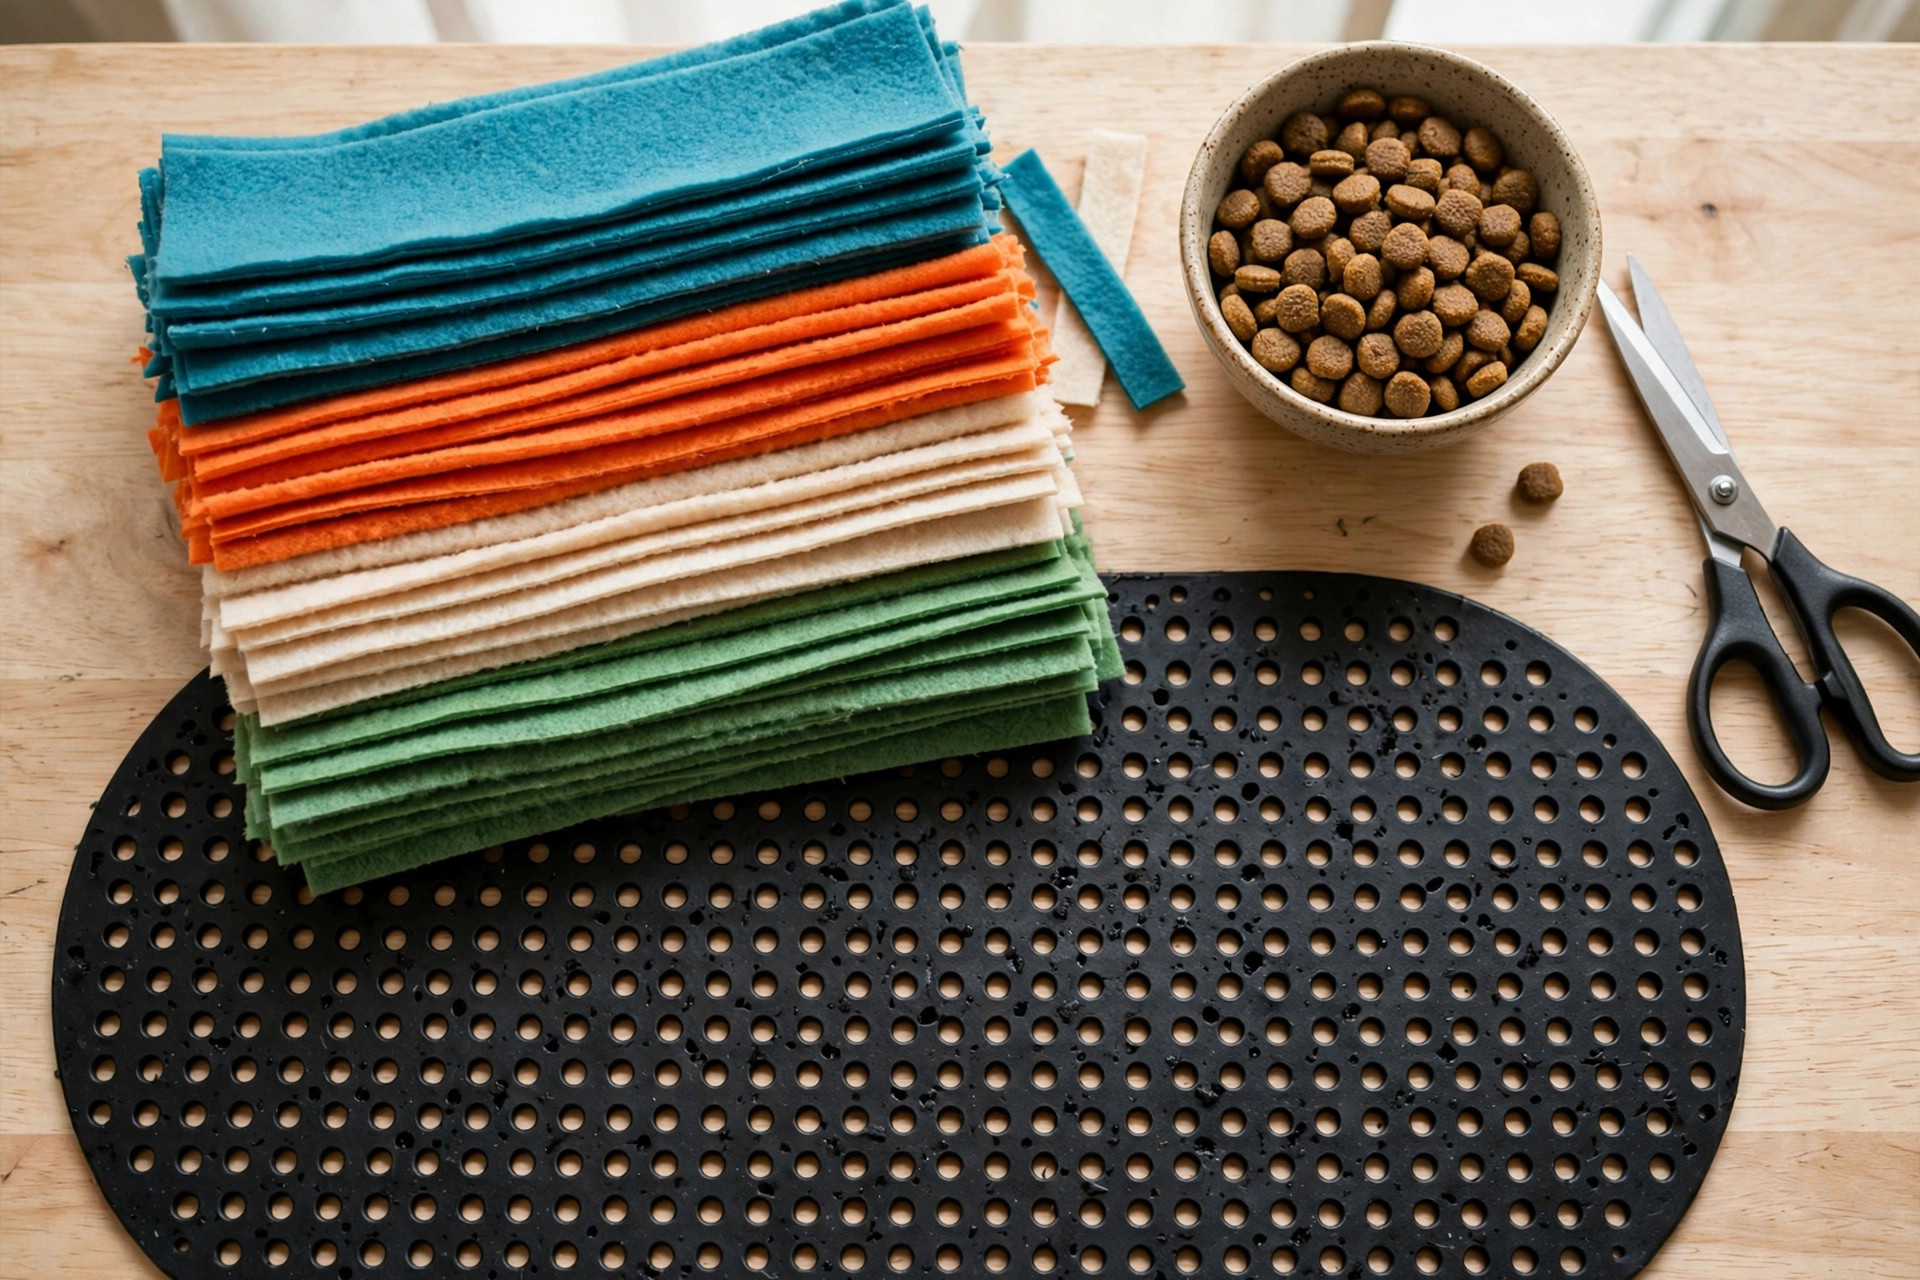
  • A rubber sink mat or anti-fatigue mat (the perforated kind with holes, roughly 40 x 60 cm). This is the base everything knots into. Rubber door mats with drainage holes work too — avoid anything with a crumbly or foam core.
  • Fleece fabric, 1 to 1.5 metres. Fleece doesn’t fray, which is why it’s the only fabric I’d use — cut edges stay clean and there’s no loose thread for your dog to swallow. Old fleece blankets are perfect; otherwise buy a cheap fleece throw.
  • Scissors and a ruler or tape measure.
  • A large bowl of kibble or small training treats for the test run.

That’s the entire shopping list. Total cost: a few pounds or dollars if you’re buying the mat and a cheap fleece throw; nearly free if you’re raiding the airing cupboard.

Fleece fabric strips, a perforated rubber sink mat, scissors and a bowl of kibble for making a DIY snuffle mat.

Step 1 — Cut the fleece into strips

Lay your fleece flat and cut it into strips about 2.5 cm wide and 15–20 cm long. Don’t fuss over precision — slight variation actually makes foraging harder and more fun. You’ll need a lot of strips: roughly 200–300 for a standard sink mat, depending on how dense you want it. Put a podcast on; this is the only tedious part.

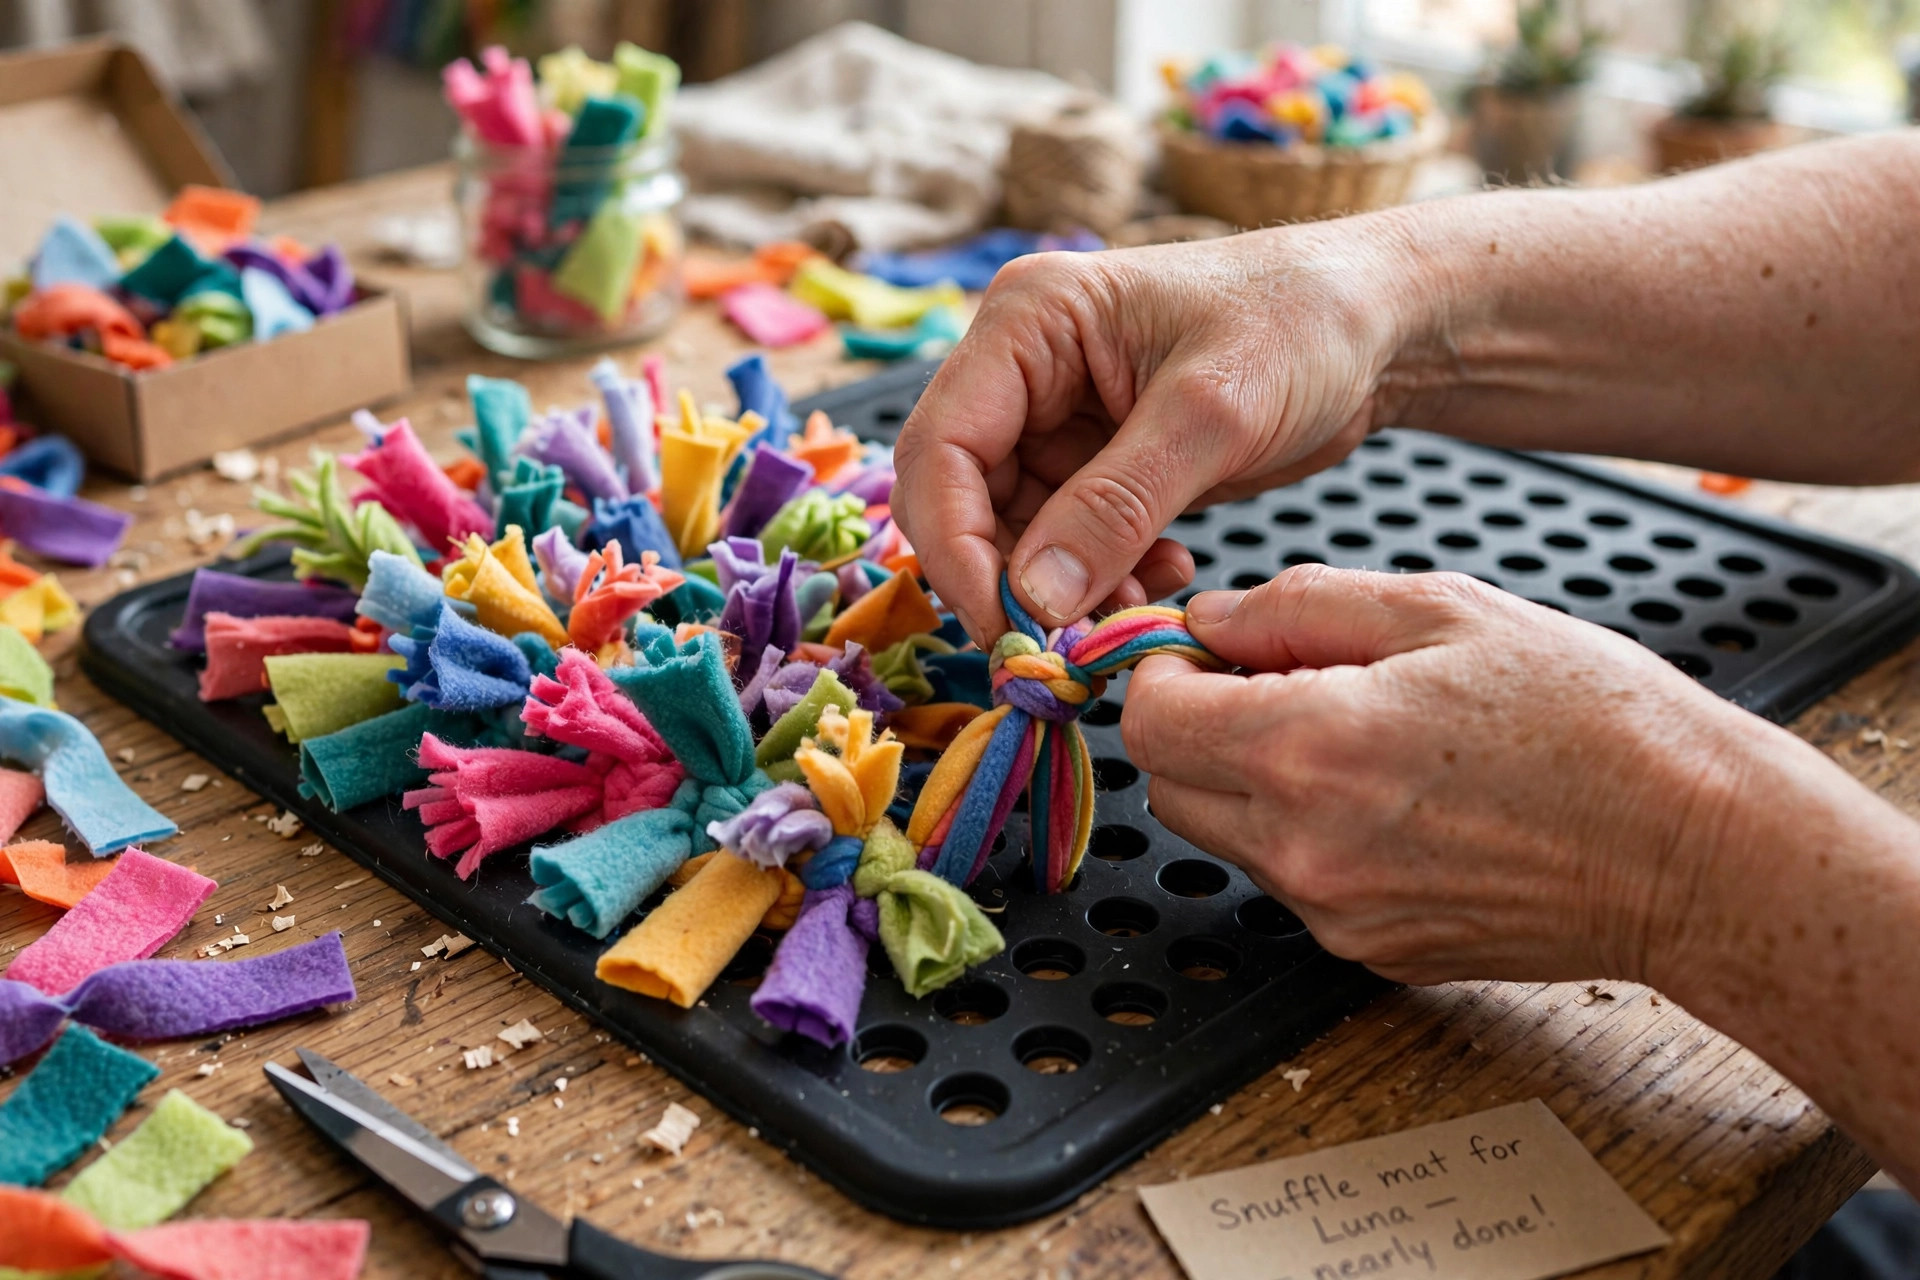
Step 2 — Knot the strips through the mat

Take one strip, push both ends up through one hole of the rubber mat from underneath, and tie it in a single knot on top. Work hole by hole, row by row, until the whole mat is covered. There is genuinely no technique to learn — if the knot holds, it’s right.

How dense should it be? For beginners and nervous dogs, keep it loose (about one strip per hole, loosely knotted) so the first wins come fast. For confident foragers and fast eaters, double up — two strips per hole, pushed through from different angles. A denser mat turns a two-minute meal into a fifteen-minute job.

Hands knotting fleece strips through the holes of a rubber sink mat to make a snuffle mat.

Step 3 — Trim, fluff and test

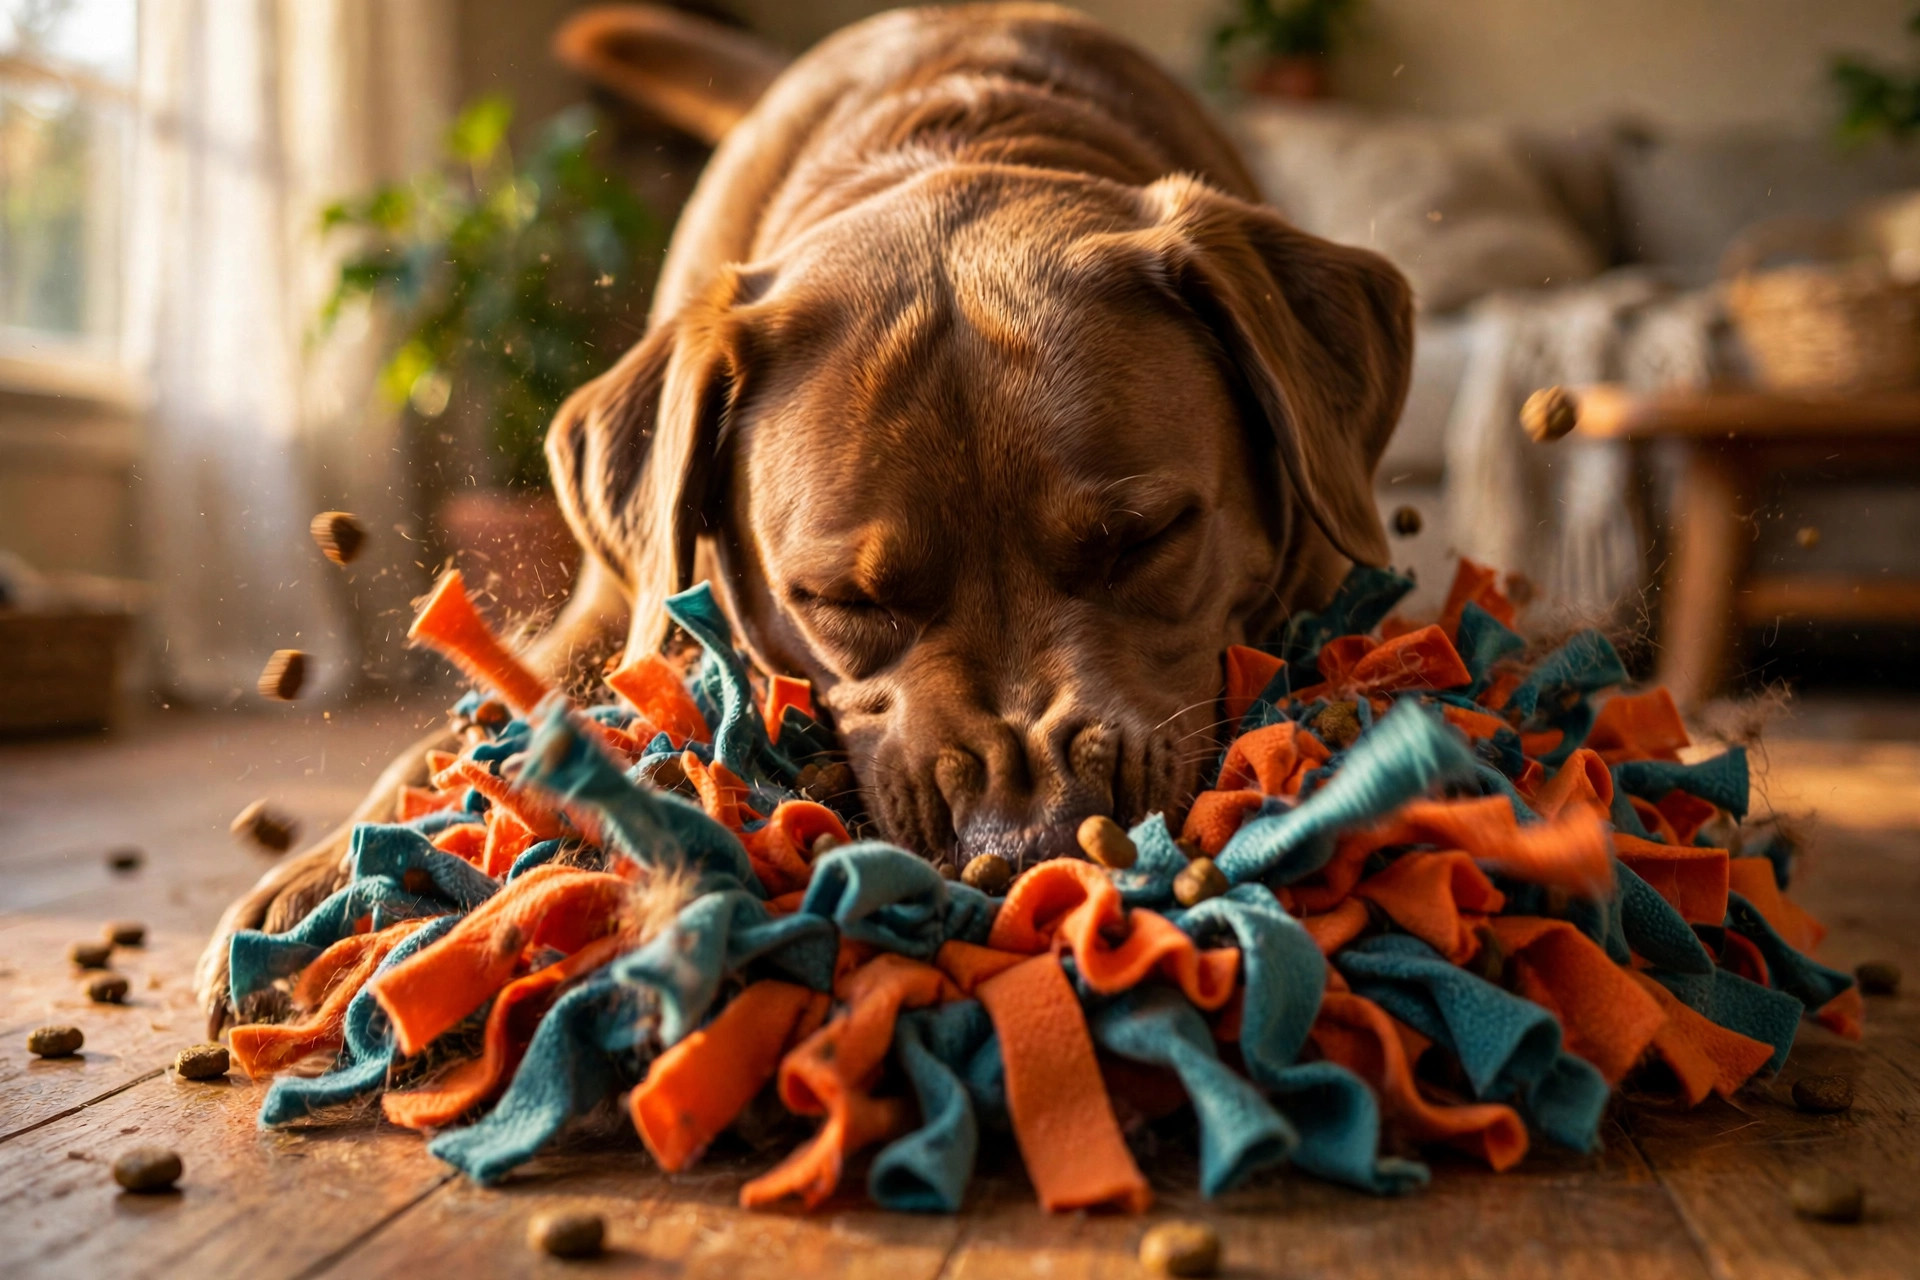
Give the whole mat a shake, trim any strips that are much longer than the rest, and fluff everything up. Now the fun part: scatter a handful of kibble deep into the fleece, hide a few high-value treats right at the bottom, and let your dog at it. Watch how they work — nose first, then paws, then the whole-body wiggle when they find the jackpot piece.

How to use it (three ways)

For meals. Replace the bowl with the snuffle mat for one meal a day and you’ve slowed a 40-second inhale into 10–15 minutes of calm work. Start with a sparse sprinkle so your dog learns the game is worth playing, then hide the kibble deeper as they get the idea.

For rainy-day enrichment. Ten to fifteen minutes of snuffling is a seriously effective energy burner. Use it before the thing you need calmness for — visitors arriving, the evening wind-down, a vet visit later in the day.

For anxious and reactive dogs. Foraging is self-soothing: the repetitive sniffing lowers heart rate in the same way licking does. A snuffle mat session during fireworks season, thunderstorms, or while you’re on a work call gives a worried dog a job instead of a panic.

Brown labrador foraging for kibble in a handmade fleece snuffle mat.

Difficulty levels (keep it interesting)

Once your dog hoovers the basic mat in minutes, upgrade the challenge:

  • Roll it up. Tuck treats inside the mat, roll it like a burrito, and let your dog unroll it.
  • Layer it. Fold the mat in half with treats trapped between the layers.
  • Hide the jackpot. Bury one amazing treat (a bit of cheese, a freeze-dried liver piece) at the very bottom and let them work for the big reveal.

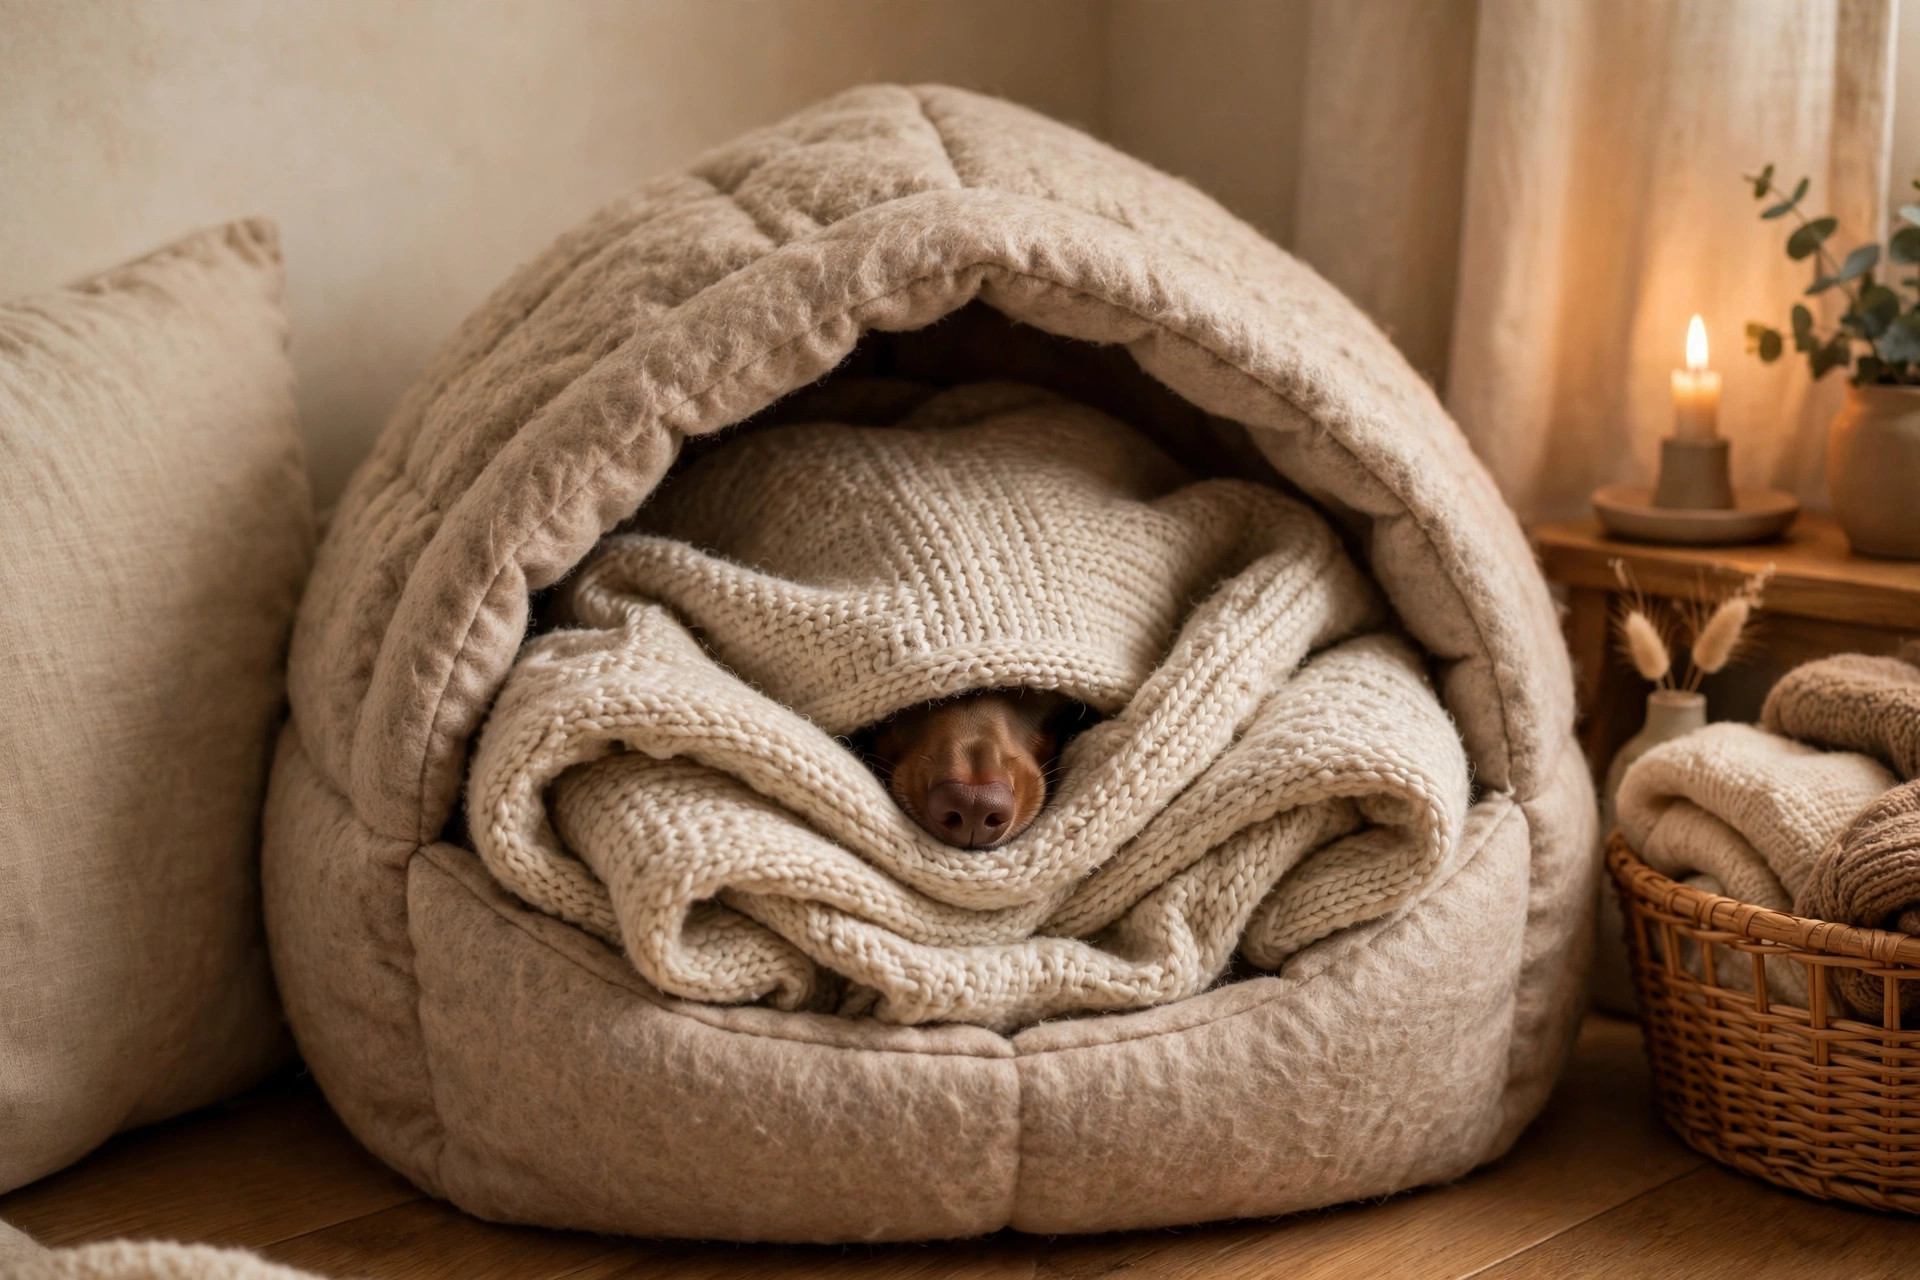
Cleaning your snuffle mat

Snuffle mats get grimy — slobber, crumbs, the works. Shake it out after every use, and machine-wash it every week or two on a cool cycle inside a laundry bag or pillowcase (this stops the strips tangling). Air-dry rather than tumble-dry, and give it a good shake once dry to fluff the fleece back up. Check the knots every few washes and re-tie any that have loosened.

Washing a handmade fleece snuffle mat in a front-loading washing machine.

Safety notes

  • Supervise, always. Snuffle mats are for interactive foraging, not unsupervised chewing. If your dog starts ripping strips off, the session is over.
  • Fleece only. Avoid cotton, towels, or anything that frays into threads — swallowed threads can cause gut trouble.
  • Size it to your dog. A mat that a big dog can pick up and shake will end its life quickly; use a heavier rubber base for large breeds.
  • Watch for resource guarding. Some dogs guard high-value finds — if yours stiffens over the mat, scatter lower-value kibble only, or skip the mat and talk to a trainer.

FAQs

How long does it take to make a snuffle mat?

About 45 minutes to an hour, most of it cutting fleece strips. The knotting itself is simple and oddly relaxing — it’s a one-episode-of-TV project.

Is a snuffle mat good for puppies?

Yes — puppies are natural foragers and snuffle mats are brilliant for crate training wind-downs and teething-distraction. Use a loose-knotted mat so a young puppy wins quickly, and supervise closely since puppies chew everything.
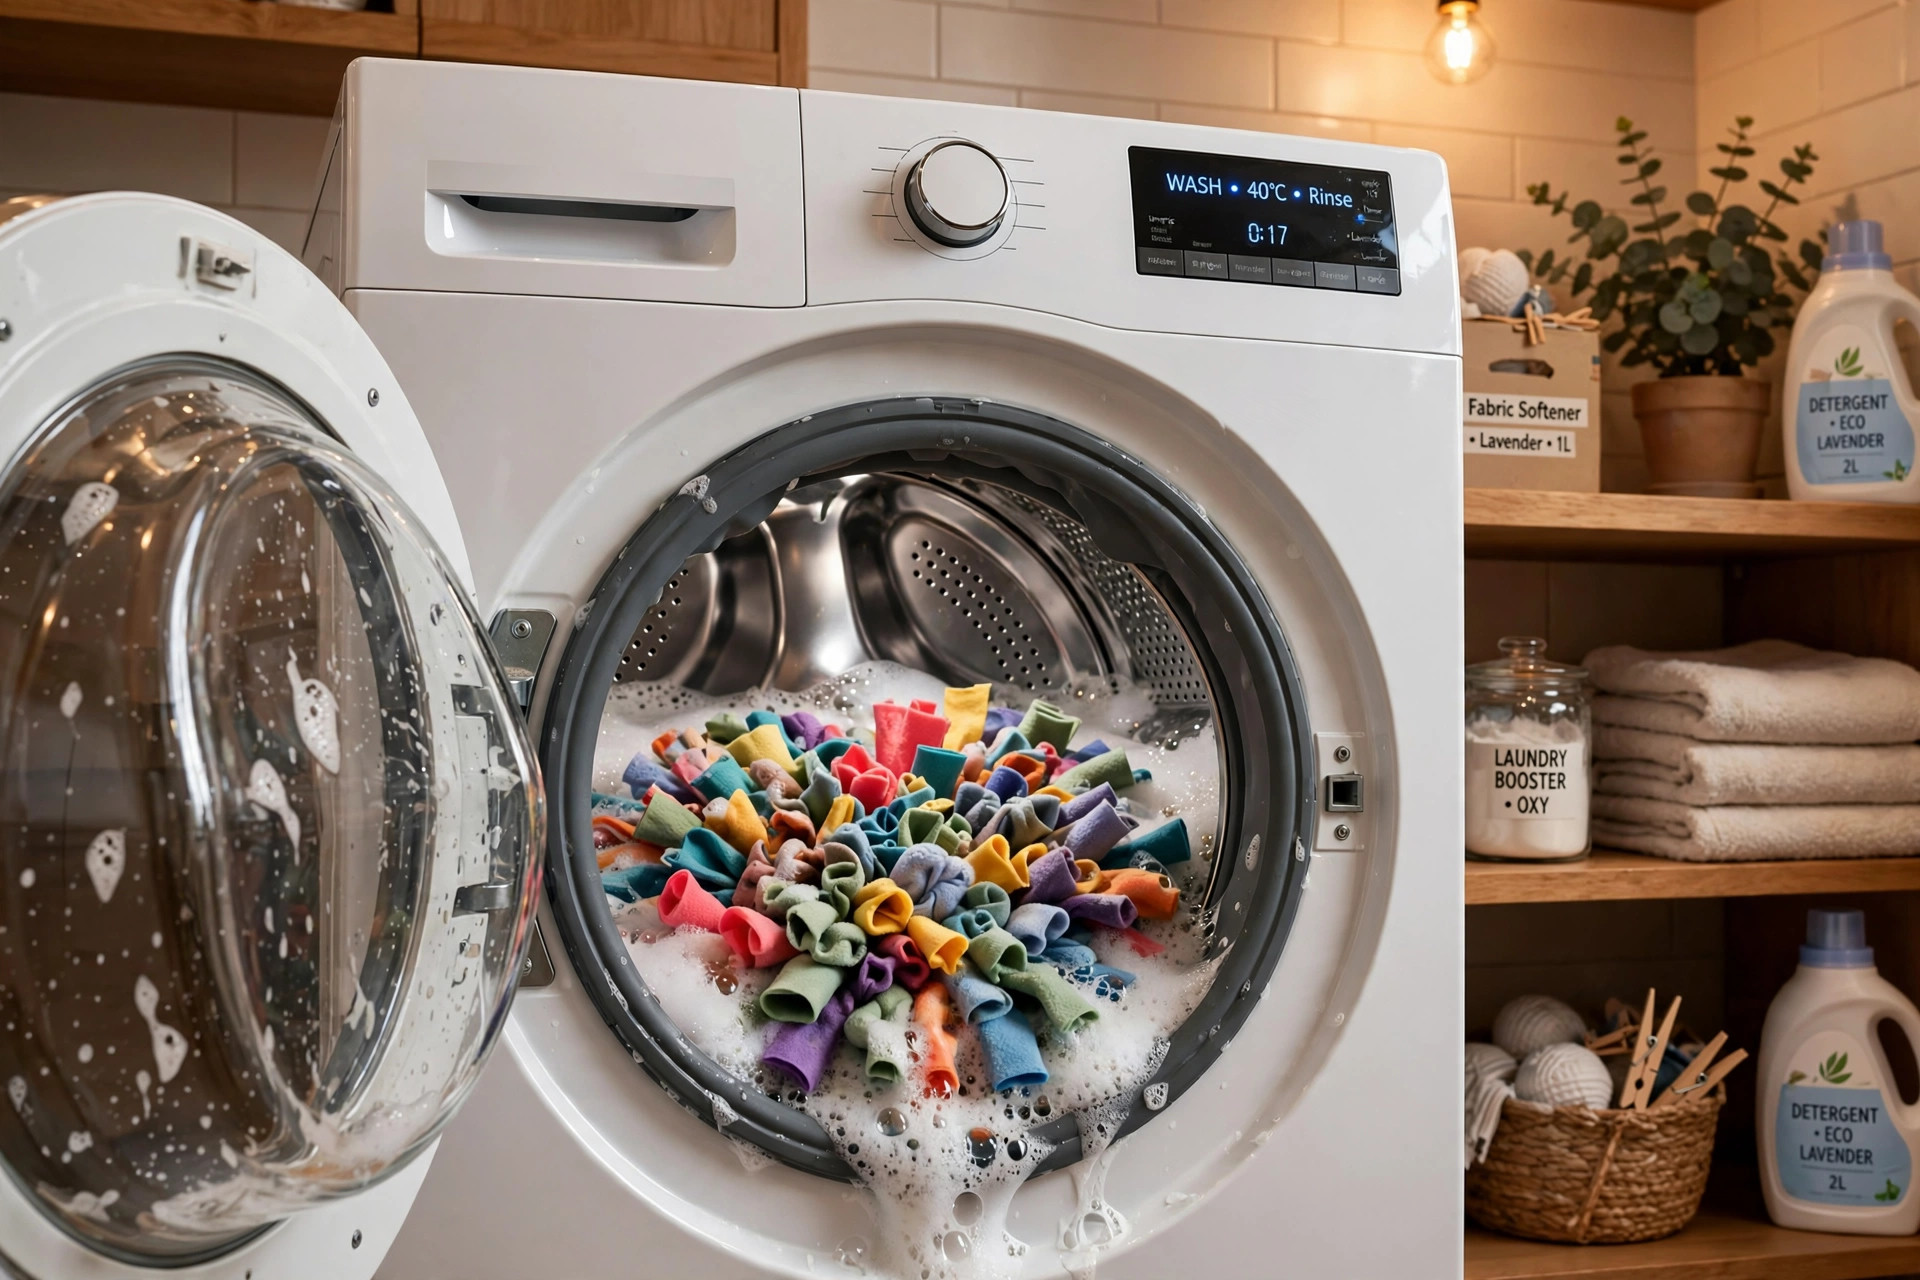
Can I use a snuffle mat for every meal?

You can, but one enriched meal a day is the sweet spot. Keep some feeding routine variety — a snuffle mat for breakfast and a slow-feeder bowl or scatter-feeding in the garden for dinner keeps the novelty alive.

Will my dog destroy it?

A determined chewer can pull fleece strips loose, which is why supervision is non-negotiable. If your dog is a strip-ripper, try a denser knot pattern (harder to grab single strips), use it for short supervised sessions only, and remove the mat between sessions.

Golden retriever sitting in front of a handmade wooden dog house with a slanted roof in a sunny backyard.

DIY Dog House Ideas: 9 Builds for Every Budget

A store-bought dog house can cost anywhere from a little to a lot — and half of them are too small, too flimsy, or made of plastic that turns your backyard into a sauna. Building your own changes the maths completely: with a weekend, some reclaimed timber and basic tools, you can give your dog a sturdy, well-sized shelter that fits your yard and your budget.

Below are 9 DIY dog house ideas, ordered from “an afternoon and almost no money” to “a proper weekend carpentry project”. Every build includes the sizing rule, the weatherproofing basics, and the safety notes that keep a nice project from becoming a vet visit.

The golden rule of sizing: the house should be tall enough for your dog to stand and turn around, and long enough for them to stretch out — but no bigger. An oversized house feels cold and empty in winter, because your dog’s body heat can’t warm the space.

Budget builds (under a day, minimal tools)

1. The pallet dog house

The classic. Pallets are free or nearly free, and two or three of them give you walls, a floor frame and most of a roof. Break them down (a reciprocating saw or just a hammer and pry bar), sand the slats smooth, and screw them into a simple box shape with a pitched roof. Raise it 10 cm off the ground on short legs or bricks so air flows underneath and the floor stays dry.

Safety note: check pallets for the HT (heat-treated) stamp — avoid MB (methyl bromide) treated wood. Sand every surface your dog’s mouth can reach, and sink or pull any protruding nails.

Rustic dog house built from reclaimed wooden pallet slats with a small terrier peeking out.2. The crate-and-plywood shell

Got a big plastic or wire crate your dog outgrew? Build a simple plywood box around it — walls, floor and a sloped lid — and you’ve turned a boring crate into a proper little house. This is the fastest build on this list: four panels, a roof, and some hinges on the lid so you can lift it for cleaning. The crate inside gives your dog the familiar den feel, and the shell keeps rain and sun off.

3. The insulated barrel house

A food-grade plastic barrel (ask bakeries and food wholesalers — they often give them away) laid on its side makes a surprisingly cosy den. Cut a doorway in one end with a jigsaw, sand the edge smooth, and line the inside with a layer of closed-cell foam board glued under a plywood inner skin. Barrels shed rain naturally and the curved walls stay warm — this is the cheapest build that genuinely works for cooler weather.
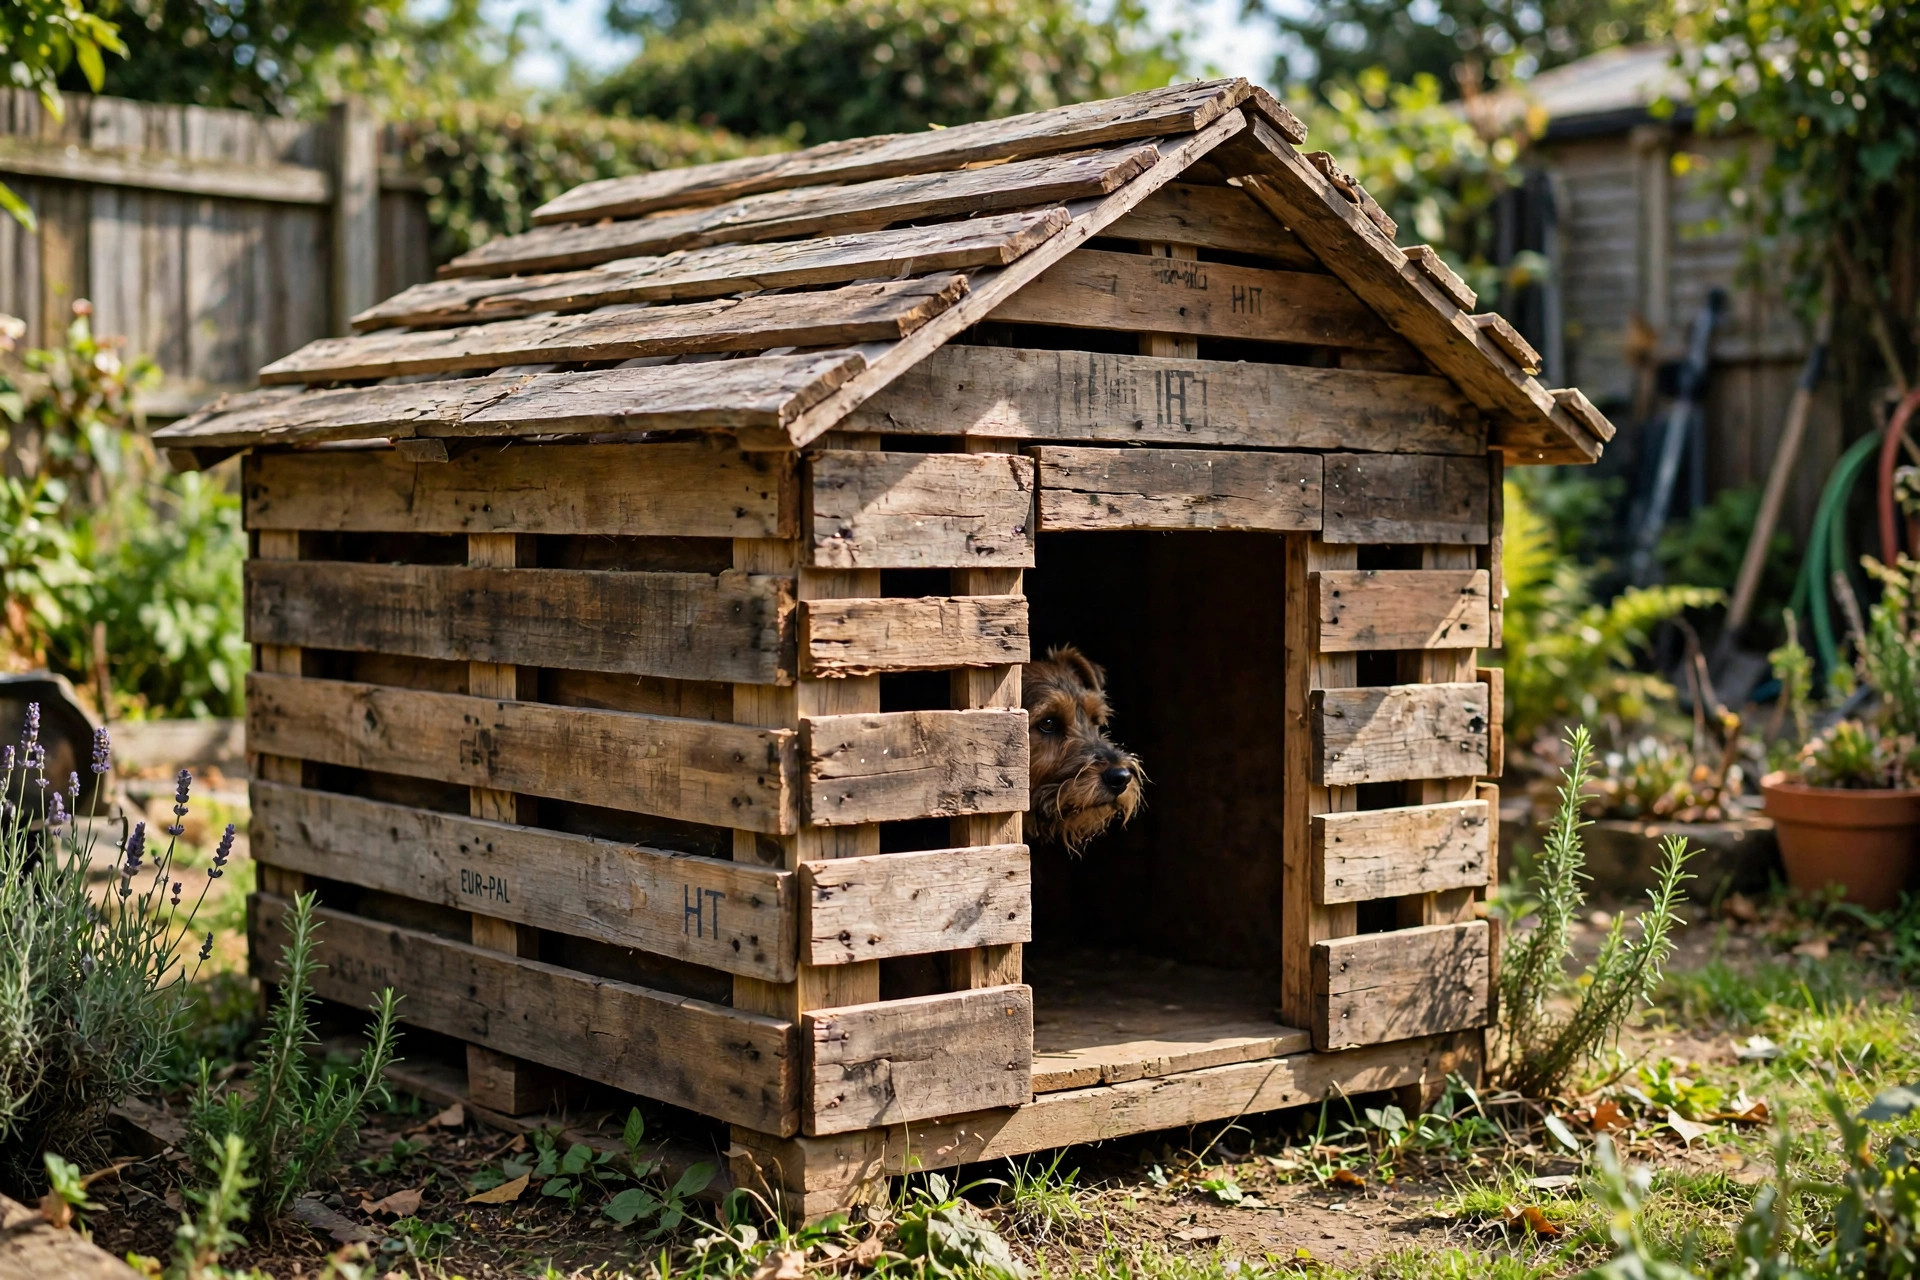
Weekend carpentry builds

4. The classic pitched-roof kennel

The build most people picture: 2×2 framing, tongue-and-groove or plywood walls, a pitched roof with real shingles or roofing felt. Add a front porch overhang of 20–30 cm — it keeps rain out of the doorway and gives your dog a dry spot to sit and supervise the garden. Ventilation matters: leave a small vent gap under the roof ridge so hot air escapes in summer.

Paint the outside with exterior paint or wood stain, and line the floor with a removable panel you can hose off. Dogs are gloriously muddy; plan for it.

5. The insulated winter dog house

If your dog spends real time outside in cold weather, insulation is not optional — it’s the whole point of the build. Sandwich rigid foam board between the outer wall and an inner plywood skin on all sides, floor and roof. Cut the doorway smaller than usual (about 10 cm taller than your dog’s shoulders) and hang a heavy fabric or vinyl flap over it to block wind. A raised floor plus insulation keeps the interior noticeably warmer than the air outside.

Never heat a dog house with electric heaters, heat lamps or heated mats left running unattended — fires and burns are a real risk. A well-built insulated house plus deep, dry bedding is warm enough.

Insulated wooden winter dog house with a fabric flap door and raised floor in a snowy yard, husky beside it.6. The dog house with a run

Combine a medium-sized house with an attached fenced run and your dog gets shelter plus safe outdoor space in one project. Build the house first, then frame a run of kennel panels or welded-wire mesh off the front, with a small doorway cut between them. Give the run a shaded half and a sunny half, and bury the mesh 20–30 cm underground or lay an L-shaped footer so diggers don’t tunnel out.

7. The raised deck dog house

Damp ground is the enemy of every dog house. Build the house on a sturdy deck platform 30–40 cm off the ground and you solve drainage, damp and even most pests in one move. The deck doubles as a lounging spot your dog will probably prefer to the house itself. Use pressure-treated timber for the deck structure (not for any surface your dog chews) and make sure the steps or ramp aren’t slippery when wet.

Wooden dog house on a raised deck platform with a beagle lounging beside it in a backyard.Indoor builds

8. The furniture-grade indoor dog nook

Not every “dog house” goes outside. Turn a side table, the space under the stairs, or a low cabinet into a built-in dog nook: add a cushion, a curtain or low door for den-feel, and ventilation at the back. Dogs that sleep in your bedroom will often abandon their expensive bed for a quiet dark corner — this just makes that corner deliberate. Keep the entrance wide enough that a nervous dog never feels trapped.

Cozy indoor dog nook built under a staircase with a sleeping cocker spaniel on a cushion.9. The corner-frame nook with a roof
Two walls, a roof panel and a front rail — the simplest indoor structure that still reads as a “house” to your dog. Frame it from timber battens, drape it with washable fabric or bolt on plywood panels, and you have a den that fits any room corner. Because it’s light, you can move it with the seasons: next to the radiator in winter, by the garden door in summer. Add a machine-washable cushion and it’s done.

Weatherproofing basics (every outdoor build)

  • Elevate the floor 10–40 cm off the ground — damp rises, dogs get cold, and rot follows. This single step matters more than any paint.
  • Slope the roof at least 10 degrees and overhang every wall by 15–30 cm. Water should never run down a wall.
  • Face the doorway away from prevailing wind and rain. A flap or small porch helps in exposed spots.
  • Seal and paint all exterior wood with exterior-grade products, and re-seal every year or two. Interior surfaces: seal with a water-based, non-toxic finish only.
  • Ventilate. A house that’s airtight in summer becomes an oven. A ridge vent or two small louvered vents near the roof line is enough.

Safety checklist before your dog moves in

  1. No exposed fasteners. Every screw head should be countersunk or capped; pull or hammer flat every staple and nail.
  2. No treated wood where your dog can chew — no pressure-treated, creosote or MB-stamped timber on interior or chewable surfaces.
  3. No toxic finishes inside the house. Water-based, pet-safe products only, and let everything cure fully before the dog moves in.
  4. The doorway test. Your dog should walk in and turn around without scraping. Too big is worse than slightly snug in cold climates.
  5. Check it seasonally. Tighten screws, re-seal wood, replace bedding, and look for wasp nests in spring — they love roof overhangs.

FAQs

What size should a DIY dog house be?

Big enough for your dog to stand up, turn around and lie stretched out — and not much bigger. Measure your dog: the interior height should be about 25% taller than their shoulder height, and the length roughly equal to their nose-to-tail-base measurement. A house that’s too large loses body heat fast in winter.

Can a dog house be too warm?

Yes. A plastic house in full summer sun can be dangerously hot inside. Always place outdoor houses in partial shade, give them ventilation near the roof, and check the interior temperature on hot afternoons. If it’s uncomfortable for your hand, it’s too hot for your dog.

How do I keep a dog house dry inside?

Elevate it, slope the roof, overhang the walls, face the door away from rain, and use bedding that drains and dries — straw works better than blankets in wet weather, and it should be replaced when damp.

Is plywood safe for a dog house?

Exterior-grade plywood is fine for walls and roofs once sealed. Avoid OSB and chipboard for outdoor builds — they swell and crumble when wet. For any surface a determined chewer can reach, use solid timber instead.

Golden retriever tugging a colourful braided t-shirt rope dog toy in a living room.

DIY Dog Toys from Old Clothes: 7 Easy Makes

Before you bag up those worn-out t-shirts, frayed jeans and single socks, pause. To a dog, your old clothes are a treasure chest of toys — soft, chewy, full of interesting textures, and carrying your scent, which most dogs find deeply comforting. DIY dog toys from old clothes cost nothing, take minutes to make, and keep perfectly good fabric out of landfill.

Most of these need no sewing at all. If you can cut a straight line and tie a knot, you can make all seven. Grab the rag bag and let’s go.

Prep: turning clothes into toy material

Wash everything first, even if it looks clean. Then strip anything a dog shouldn’t chew or swallow: buttons, zips, drawstring toggles, plastic eyelets, wire underwires and decorative beads. Cut away seams that are already fraying badly — loose threads are the main thing dogs unravel and swallow. Old cotton t-shirts, fleece jumpers, flannel pyjamas and denim are the best fabrics. Avoid fabrics treated with heavy waterproofing or strong chemical finishes, and skip anything shed-loads of micro-fibres on first touch.

A pair of sharp fabric scissors makes everything ten times easier. Cutting against the grain of a t-shirt (across the body, below the armpits) gives you long, stretchy strips that are ideal for braiding.

1. The classic braided t-shirt tug rope

The king of DIY dog toys, and it takes about ten minutes. Lay an old t-shirt flat and cut three strips, each about 4 cm wide and 60–80 cm long — longer for big dogs. Knot the three strips together at one end, then braid them tightly all the way down, keeping even tension. When you reach the end, tie a big chunky knot and trim the tails to about 8 cm.

T-shirt fabric stretches slightly, so the tug has a satisfying give that dogs love. Make a second one and you’ll never run out of fetch-and-tug games. Two or three colours braided together look great and photograph beautifully for social media.

Golden retriever tugging a colourful braided t-shirt rope dog toy in a living room.

2. The no-sew fleece knot ball

Old fleece jackets and blankets make gloriously squishy toys. Cut a fleece garment into strips about 3 cm wide and 40 cm long — you’ll need around 12 of them. Gather them in a bundle, tie one tight knot dead centre, then fan the strips out in all directions. Trim the ends so the ball is roughly round, about 10 cm across.

This toy is soft enough for gentle chewers and puppies, bouncy enough to chase, and light enough to throw indoors without risking your windows. The knot core gives it just enough weight to roll interestingly.

3. The sock-and-bottle crinkle toy

That single sock from the laundry void finally has a purpose. Take a clean empty plastic water bottle (squeeze it empty, keep the cap ON tightly — or better, tape the cap on), and slide it inside a thick sports sock or an old woolly sock. Tie a firm knot in the sock above the bottle to lock it in place. The crinkle sound drives most dogs wild.

This one works best as a supervised-play toy rather than a leave-it-in-the-crate toy: the appeal is the noise, and enthusiastic chewers can eventually compress the bottle. Replace the bottle when it stops springing back.

Beagle nosing a homemade sock crinkle dog toy on a wooden floor.

4. The double-handle denim tug

Denim is the heavyweight fabric of DIY dog toys — it stands up to serious tugging. Cut two strips from an old pair of jeans, each about 5 cm wide and 70 cm long. Knot them together in the middle with a big overhand knot, then braid the two pairs of ends loosely for about 20 cm on each side. Tie a knot at each end so your hands have something to grip, and trim.

The double handles mean two people (or one person and a very determined dog) can play tug properly without hands sliding onto teeth. Denim softens with washing and lasts far longer than t-shirt fabric — this is the toy to make for power chewers.

Sturdy dog chewing a braided denim tug toy in a backyard.

5. The treat-dispenser rag ball

Cut three t-shirt strips about 4 cm wide and 45 cm long. Lay them in a star shape on the table, drop 4–5 small treats into the centre, then gather all the ends up and tie one tight knot above the treats, letting the strip tails flop down. The dog has to nose and paw the ball to work treats out through the fabric folds.

It’s a brilliant rainy-day brain game — five minutes of sniffing and problem-solving tires a dog out more than a twenty-minute amble. Start with smelly treats so they understand the game, and use small, soft treats that can poke through the folds.

Knotted rag ball of t-shirt strips with dog treats tucked among the folds.

6. The fringe fetch rope

Take one t-shirt strip (4 cm × 90 cm) as your core. Cut 8–10 shorter strips (4 cm × 25 cm) and tie each one around the core with a lark’s head knot: fold the short strip in half, loop it under the core, and pull the two ends through the loop. Space them evenly along the core, then knot the two core ends together into a loop handle.

You get a fringed, floppy rope that flies well, is easy to spot in long grass, and has dozens of biteable edges. Dogs that like “worrying” a toy — grabbing and shaking it — go mad for fringe.

7. The fleece snuffle cloth

Dogs experience the world through their noses, and snuffle toys turn that into a game. Cut a fleece garment into 20–25 strips, each about 3 cm wide and 15 cm long. Tie every strip with a single knot onto a cheap rubber sink mat (or knot them all together into one thick braid if you don’t have a mat). Scatter kibble or treats among the strips.

Your dog will spend ten happy minutes snuffling, pushing strips aside and hunting out every last morsel. It’s genuinely calming for anxious dogs — sniffing lowers a dog’s heart rate. Wash the strips every few weeks to keep it fresh.

Border collie sniffing a handmade fleece snuffle ball on a rug.

Safety notes — read before you play

  • Supervise, always. DIY toys are for interactive play, not for leaving a dog alone with. If a dog starts eating fabric rather than chewing it, the game is over — swallowed threads and fabric scraps can cause intestinal blockages that need surgery.

  • Inspect before every play session. Re-tie loosening knots, trim fraying edges, and retire any toy that’s falling apart. A two-minute check beats a vet bill.

  • Know your chewer. Gentle mouthers can enjoy fleece and t-shirt toys for months. Power chewers that shred fabric in minutes should stick to denim toys (idea 4) and only under close supervision.

  • No small detachable parts. This is why we remove buttons, zips and toggles before we start. A knot is fine; a bead is a choking hazard.

  • Watch for string ingestion. Long threads are worse than fabric chunks — linear foreign bodies are one of the nastiest things a vet sees. If your dog is a thread-puller, knot toys tighter and retire them sooner.

  • Wash the toys. They get slobbery. Most survive a normal machine wash at 30–40°C; air-dry the bottle toy rather than machine-drying it.

Washing and upkeep

Toss t-shirt, fleece and denim toys in the washing machine at 30–40°C with your normal detergent — skip fabric softener, which coats the fibres and can irritate skin. Air-dry; tumble drying shrinks cotton strips and can warp braided toys out of shape. The bottle crinkle toy should be hand-washed and air-dried so the bottle keeps its shape. A quick inspection after each wash is a good moment to retire anything on its last legs.

FAQs

Are DIY dog toys from old clothes safe? Yes for supervised play, provided you prepare the fabric properly: washed, stripped of buttons/zips/toggles, with fraying seams removed. Supervise every session and retire toys that fall apart. If your dog eats fabric instead of chewing it, stick to commercial toys rated for their chew style.

What fabrics are best for homemade dog toys? Cotton t-shirts (stretchy, soft), fleece (squishy, no fraying), flannel (gentle) and denim (toughest, best for strong chewers). Avoid fabrics with heavy chemical treatments and anything that sheds loose fibres at a touch.

How do I stop my dog destroying a DIY toy in minutes? You can’t fully — that’s what toys are for. But denim braided tightly (idea 4) survives longest, and rotating two or three toys keeps novelty high so no single toy gets the full demolition treatment. Retire shredded toys promptly.

Can puppies play with these? Absolutely — the fleece knot ball (idea 2) and snuffle cloth (idea 7) are ideal for puppies: soft on baby teeth, light, and the snuffling builds confidence. Supervise closely, as puppies chew indiscriminately.

My dog only wants the toy with my smell on it. Normal? Completely normal. Your scent is comfort to a dog. Tuck a worn (unwashed) t-shirt strip into a new toy for anxious dogs or new puppies settling in — it works like a security blanket.

Golden retriever sprawled on a large plush rectangular dog bed in a bright living room

10 Dog Bed Ideas for Every Kind of Sleeper (Sprawlers, Burrowers & Seniors)

Golden retriever sprawled on a large plush rectangular dog bed in a bright living room

Watch your dog sleep for five minutes and you’ll learn more than any product
review could tell you. Some dogs sprawl like they’ve paid rent; others
bulldoze every cushion into a nest and burrow underneath. Seniors press
against something solid, puppies gnaw whatever’s chewable. One bed does not
fit all — and a dog that sleeps better is, unscientifically but observably, a
better-behaved dog.

Here are 10 dog bed ideas matched to sleeper type, with the materials and
shapes that suit each one, plus sizing, washing and safety notes at the end.

For the sprawlers

1. The oversized rectangle mat

Sprawlers need surface area, not walls. A thick rectangular pillow mat —
about 10 cm of fill — gives them room to fling all four legs without sliding
off onto hard floor. Best pick for large breeds, hot sleepers, and multi-dog
piles. Look for a non-slip base so it stays put on wooden floors.

2. The low-profile floor cushion

Flat, wide and slightly overstuffed, these suit dogs that sprawl but still
want something to push against — the cushion edge becomes a headrest. A
removable, washable cover is non-negotiable here, since big flat surfaces
collect the most hair.

For the burrowers and nesters

3. The hooded cave bed

Part bed, part blanket fort: a rounded bed with a low hood or attached
blanket flap. Burrowers shove their noses under the flap and settle —
fantastic for anxious dogs, dachshunds, terriers and any dog that used to
sleep under your duvet. The hood also muffles household noise, which many
light sleepers love.

4. The blanket-topped donut bed

A classic donut with an extra-soft blanket layer folded into the centre.
Nest-diggers can paw, circle and knead the blanket exactly as they would
your sofa cushions, while the raised rim gives them something to curl
against. Choose one with a washable liner — digging dogs are dusty dogs.

Dachshund burrowed under a knitted blanket inside a hooded cave-style dog bed

For the seniors

5. The orthopedic memory-foam bed

The single biggest upgrade you can make for an older dog. Real memory foam
(at least 7–8 cm of it, not “egg-crate” convoluted foam) distributes weight
away from stiff hips and elbows. Seniors that grumble when standing up often
change noticeably within a week of getting proper support. Flat rectangular
shapes beat bolsters here — arthritic dogs step in more easily and sprawl
without climbing.

6. The low bolster bed

For seniors that still love leaning: a bed with one low, wide bolster side
instead of four tall walls. They can press a hip against the cushion and
drop their head onto it, without needing to clamber over a rim. Make sure the
bolster is firm — soft squishy rims collapse under a leaning dog and
frustrate them.

Senior golden retriever resting on a grey orthopedic memory-foam dog bed

For the chewers and puppies

7. The chew-proof cot

Raised camp-style cots (a taut fabric panel on a metal or PVC frame) remove
almost everything chewable: no stuffing, no seams at tooth height, no corners
to worry. They also keep hot puppies cool and stay dry after accidents, since
there’s nothing to absorb them. If your puppy destroys beds for sport, this
is the one — many come with chew-resistant guarantees.

8. The tough rope-twist donut

For the moderate chewer that’s past the puppy-shredding stage: tightly
braided rope or canvas-look fabrics resist claws and teeth far better than
plush. It’s still soft enough for nesting behaviour, but the dense weave
won’t surrender its stuffing at the first nibble. Supervise at first — no
bed is truly indestructible.

Puppy lying on a chew-proof elevated camp-style dog cot

For special sleepers

9. The cooling gel bed

Dogs that pant at night or seek out the kitchen tiles are heat-shedders.
Cooling beds use pressure-activated gel pads (no electricity, no water to
fill) that draw heat away for an hour or two at a time. Pair one with a
regular bed: the dog chooses. They’re also brilliant for summer heatwaves and
for thick-coated breeds.

10. The travel-and-crate pad

A thin, foldable pad that goes inside the crate, the car boot or the holiday
rent — same smell, same feel, wherever you are. Routine-sensitive dogs
settle dramatically faster in new places on their own pad. Washable,
lightweight, and cheap enough to keep a spare.

Husky lying on a blue pressure-activated cooling gel dog bed by a sunny window

The sizing rule (measure, don’t guess)

  • Length: dog stretched nose-to-tail, plus 15–20 cm. If in doubt, size up —
    undersized beds are the number-one reason dogs abandon them.

  • Weight: check the bed’s fill rating against your dog’s weight; cheap
    beds flatten within weeks under heavy dogs.

  • Curlers vs sprawlers: measure the dog in its favourite sleeping pose,
    not standing. A donut bed is measured by internal diameter, a rectangle by
    flat length.

Washing and care tips

  1. Removable, machine-washable cover first. Whatever the style, if the
    cover doesn’t zip off, it becomes a smell within a month. Wash at 30–40°C
    with a gentle, unscented detergent.

  2. Foam cores air, don’t wash. Spot-clean memory foam and air-dry it
    fully — trapped damp breeds mildew. Waterproof liners between foam and
    cover are cheap insurance against accidents.

  3. Vacuum between washes. A weekly lint-roll or vacuum stops hair and
    dander baking into the fabric.

  4. Rotate two covers. One on the bed, one in the wash — a bed is never
    “unavailable”, and your dog isn’t forced onto a bare foam core.

Safety notes

  • Chewing risk: no bed is safe to chew unsupervised. If your dog eats
    stuffing or fabric, remove the bed when you leave the room — intestinal
    blockages are genuinely dangerous. The chew-proof cot (idea 7) is the
    safest unattended option.

  • Cedar-filled beds: smell lovely, but cedar oils can irritate some dogs’
    skin and respiratory tracts. If your dog scratches after switching beds,
    the fill is suspect number one.

  • Heated beds: only use vet-designed low-wattage heated beds, never
    human heat pads — dogs can’t move off quickly enough if they overheat, and
    they chew through cords.

  • Bolsters vs puppies: very small puppies can get wedged between a tall
    bolster and a wall; keep flat-sided beds against walls with a small gap,
    or choose low rims until they’re bigger.

FAQs

How often should I replace a dog bed?
When the fill stops springing back — roughly 1–2 years for polyfill, 3–5
for quality memory foam. A flattened bed is decoration, not support.

My dog ignores the expensive bed and sleeps on the sofa. Why?
Usually scent, temperature or location. Put the bed where the dog already
naps (they’ve told you the spot), add a worn t-shirt of yours, and reward
them with treats for settling on it for a few days.

Are elevated cots good for old dogs?
Yes for cool rest and easy cleaning, but very arthritic dogs can struggle
to climb onto taller frames — choose a low one, or stick with orthopedic
foam.

Can dogs share one big bed?
If they choose to pile up, yes — but keep a second bed available. Dogs that
love cuddling at bedtime still want their own space at 3 a.m.

What’s the cheapest bed that isn’t rubbish?
A washable floor cushion (idea 2) with a dense polyfill pad — under most
bed budgets, easy to launder, and honest about what it is.

Golden retriever beside wrapped Christmas gifts with a chew toy.

25 Thoughtful Christmas Gifts for Dogs (2026 Guide)

Some dogs could not care less about the wrapping paper. But every dog
owner knows the truth: the best part of Christmas morning is watching
your dog discover that a present is actually for them. Nose in the box,
tail going like a windmill, new toy squeaking within seconds.

The trouble is the choice. Pet store shelves are crammed with festive
plushes, edible “chocolate”, crinkly stocking fillers and gadgets with
glowing reviews — and not all of them are safe, well-made or worth your
money. So we did the homework: 25 thoughtful Christmas gifts for dogs
in 2026, organised by budget, with the safety notes that actually matter
buried in plain sight.

A quick word before the list: the best gift is always attention. A new
toy is wonderful, but twenty minutes of play with you beats any squeaker.

Stocking fillers — under £10 / $12

Small budgets, big tail wags. These are the gifts that fill the toe of
the stocking and get destroyed by Boxing Day.

  1. Natural rubber chew toy. The classic. Look for one-piece,
    non-toxic rubber that can be stuffed with treats — it lasts longer
    than plush and cleans up in seconds.

  2. Squeaky festive plush. Dogs love the crinkle-squeak combo. Buy
    ones with reinforced stitching, and supervise heavy chewers — if
    your dog de-stuffs toys, plush is a supervised-play gift, not a
    leave-them-alone one.

  3. Lick mat. Smear with plain yoghurt, mashed banana or peanut
    butter, freeze it, and you have a 20-minute calming activity. Our
    lick mat recipes
    give you ten to start with.

  4. Natural treats pouch. Skip the mystery “dog chocolate” drops
    (more on that below) and choose single-ingredient treats — freeze-
    dried liver, sweet potato chews or dried fish skins. Our
    natural treats round-up
    covers the best options.

  5. Snuffle mat. Shredded fleece hides kibble and turns dinner into
    a foraging game. Brilliant mental enrichment for rainy winter days.

  6. Tennis ball multipack — the good ones. Cheap balls shed fuzz
    that some dogs swallow; buy proper dog-safe balls without abrasive
    felt glue.

  7. Carrot stick chew bundle. Dehydrated carrot chews are cheap,
    crunchy and safe — a genuinely healthy stocking filler.

Beagle puppy sniffing a Christmas stocking filled with dog toys.

Thoughtful picks – £10–£30 / $12–$35

The sweet spot: gifts that last past January and earn their shelf space.

  1. Puzzle feeder. A sliding-puzzle or spinning treat dispenser slows
    fast eaters and exercises the brain. Start with an easy level so your
    dog learns the game before the difficulty ramps up.

  2. Durable tug rope. Hand-knotted cotton rope with no loose fraying
    — watch for unravelled strands, which can be swallowed. Replace when
    it starts to fray.

  3. Calming enrichment bundle. A lick mat plus a long-lasting chew
    (yak cheese chew or bully stick) makes a ready-made relaxation kit
    for firework season and visitors. Supervise chews, always.

  4. Personalised collar or ID tag. A new engraved tag is practical
    and festive — and winter walks with early darkness are exactly when
    good ID matters. Reflective collars earn bonus points.

  5. Doggy advent calendar. Buy one made specifically for dogs with
    a clear ingredient list — never share your chocolate calendar, and
    check human versions for xylitol before even considering them.

  6. Cozy fleece blanket. Their own blanket for the sofa stops the
    great cushion war and gives them a “place” cue for training.

  7. Paw balm. Winter salt and ice are brutal on pads. A tin of
    natural paw balm is the gift that says “I pay attention.” Our
    winter paw care guide
    explains the full routine.

  8. Slow-feeder bowl. Turns a 30-second inhale into a 5-minute meal,
    reducing gulping and bloat risk. Pick the maze depth for your dog’s
    nose shape — flat-faced breeds need shallow patterns.

  9. Flirt pole. A giant cat-wand for dogs: incredible exercise in a
    small garden, and brilliant for high-energy breeds on dark winter
    evenings. Use on grass, keep sessions short.

Border collie solving a wooden puzzle feeder toy.

Proper splurges — £30+ / $35+

For the dog who has everything, or the owner who has decided this is
the year.

  1. Orthopaedic dog bed. Memory-foam beds genuinely help older dogs
    and big breeds. Buy the right size — nose-to-tail plus a few inches
    — with a washable cover. You will thank yourself in February.

  2. Dog boots (set of 4). Salt-burned pads are a winter reality in
    many places. Proper boots with velcro straps stay on; cheap ones do
    not. Introduce them indoors first, with treats, or Christmas morning
    will be comedy rather than comfort.

  3. Automatic ball launcher. For fetch-obsessed dogs and owners
    with tired arms. Use in the garden with supervision — and check the
    ball size suits your dog’s jaw.

  4. GPS tracker. Clips to the collar and shows your dog’s location
    on your phone. A thoughtful gift for escape artists and rural
    walkers; remember most need a subscription.

  5. Heated dog bed or self-warming mat. Reflective self-warming
    mats need no electricity and are safer than plug-in pads — a lovely
    gift for senior dogs who feel the cold.

  6. Subscription treat box. A monthly box of treats and toys keeps
    the Christmas spirit going all year. Check the treats are
    single-ingredient or clearly labelled, and match the box size to
    your dog.

Cocker spaniel sitting beside a decorated Christmas tree with presents.

Gifts for the dog lover (for the human, really)

  1. Custom pet portrait. From a favourite photo — the gift that
    makes owners cry in a good way. Order early; artists book up by
    late November.

  2. “Dog mum/dad” Christmas jumper. Festive, ridiculous,
    mandatory.

  3. Donation to a rescue in their dog’s name. Many rescues run
    Christmas appeals. For the person whose dog truly has everything,
    this is the most thoughtful gift on the list.

What NOT to buy — the safety notes

Christmas is peak season for well-meaning but risky gifts. A few hard
rules:

  • No “dog chocolate” mystery products. Some are carob-based and
    fine; others are low-quality with vague labels. If you would not eat
    the ingredient list yourself, do not give it to your dog.

  • No rawhide. It is cheap, festive-looking and everywhere — and it
    swells in the stomach, can contain processing chemicals, and causes
    choking and blockages. Choose yak chews, bully sticks or collagen
    sticks instead.

  • No small squeakers for power chewers. If your dog can de-stuff a
    toy in minutes, squeakers are a swallowing hazard. Buy “no-stuffing”
    or rubber toys instead, and supervise.

  • No cooked bones. Christmas dinner leftovers are not gifts —
    cooked bones splinter. Raw meaty bones are a separate discussion for
    another article; cooked bones are a flat no.

  • No essential-oil or heavily fragranced products. Dogs’ noses are
    up to 100,000 times more sensitive than ours. That pine-scented toy
    is misery in a stocking.

  • Check every treat label for xylitol (also listed as birch
    sugar) — it is extremely toxic to dogs, and it hides in “sugar-free”
    festive treats. Our
    Christmas dinner guide
    has the full safe/unsafe food lists.

Safety note: supervise all new toys and chews the first few
times. The most expensive gift in the world is the emergency vet
visit — and most of those are preventable with five minutes of
watching how your dog plays.

Wrapping it up (literally)

Dogs do not care about the paper, but the ritual is half the fun. Let
them sniff the parcel, help them “unwrap” (tear an edge to start),
and keep the ribbon and tape out of reach — ribbon is a linear foreign
body waiting to happen if swallowed.

The best Christmas gift for your dog is not on this list, because it
is not a product: it is you, present, playing, walking the long way
home. The toy is just the excuse.

Merry Christmas — from our pack to yours.

Labrador joyfully unwrapping a Christmas gift box with rope toys.

FAQs

When should I buy Christmas gifts for my dog?
Order personalised items (portraits, engraved tags) by late November.
Everything else, aim to buy by mid-December — popular toys sell out
and delivery slots fill up fast in the final week.

Are advent calendars for dogs safe?
Dog-specific ones with clear ingredient lists are fine. Never share a
human chocolate calendar — chocolate is toxic to dogs — and check any
“sugar-free” treats for xylitol (birch sugar), which is extremely
toxic.

What is the best Christmas gift for a puppy?
For puppies, prioritise safe chewing: a natural rubber chew toy, a
small lick mat and a snuffle mat. Avoid small squeakers and anything
with stuffing they can pull out and swallow.

What should I avoid buying as a dog Christmas gift?
Avoid rawhide, cooked bones, mystery-ingredient “dog chocolate”,
small-squeaker plushes for power chewers, and heavily scented
products. Always check treat labels for xylitol.

How much should I spend on my dog at Christmas?
There is no right number. A £5 lick mat used daily beats a £50 gadget
ignored by New Year. Spend on what your dog will actually use — and
remember the best gift is your time.

DIY Dog Run Ideas

5 DIY Dog Run Ideas That Save Your Yard (And Your Sanity)

You know that moment when your golden just launched herself through your freshly mulched flower bed for the third time this week, and now she’s standing there looking proud, covered in dirt, tail wagging like she just won a medal? Yeah. That was me last Tuesday.

My dog Winnie has exactly two speeds: dead asleep and full-throttle zoomies. And my backyard used to look like a construction site because of it. Bare patches, dug-up flower beds, one very confused rosebush that never quite recovered.

The fix wasn’t more training. It wasn’t less exercise. It was a proper DIY dog run — a dedicated zone where she could go absolutely feral without murdering the landscaping. Below are five of the best DIY dog run setups I’ve found, sized for everything from a tiny side yard to a full backyard, with the exact materials and dimensions you need to build each one.

#1: The Classic Side-Yard Chain-Link Run

The Classic Side-Yard Chain-Link Run

The workhorse. If you’ve got a strip of unused space between your house and the fence, this is your cheapest, sturdiest, most dog-proof option. Nothing fancy. Nothing pretty. Just a fully enclosed zone where your dog can be outside without you white-knuckling every squirrel sighting.

Materials: Galvanized chain-link fence panels (6 ft tall for large breeds, 5 ft for medium), metal fence posts, post-hole concrete mix, a walk-through gate with latch, and either pea-free decomposed granite or synthetic pet turf for the ground surface. Rough cost: $400–$800 depending on size.

Sizing: Aim for a run at least 4 ft wide by 20 ft long for a medium dog, or 6 ft by 30 ft for a large breed. Anything shorter and your dog paces instead of runs.

What to do: Dig post holes 24 inches deep, set the corner and gate posts in concrete, and let them cure for 48 hours before attaching the chain-link mesh. Grade the ground with a one-inch slope every four feet so water drains out instead of pooling. Skip pea gravel — it gets stuck in paw pads and flings everywhere. Decomposed granite or pet turf is the way.

Pro Tip: Add a shade sail or plant a fast-growing tree at the far end. Even the toughest chain-link run turns into a solar oven in July if there’s no shade.

#2: The Enclosed Turf Run With Net Fencing (For Smaller Yards)

The Enclosed Turf Run With Net Fencing

Chain-link isn’t always the right vibe. If you rent, have HOA rules, or just want something less industrial-looking, a net-fenced turf run is your friend. Lightweight, removable, and way better looking than metal panels.

Materials: PVC or aluminum pipe framing (adjustable connectors make this way easier), heavy-duty garden netting with small openings (1-inch mesh or less so paws don’t get stuck), UV-stabilized zip ties, ground stakes, and interlocking artificial turf tiles for the floor.

Sizing: A 10×10 ft footprint works for small breeds. Scale up to 12×20 ft for medium dogs. The whole thing can be assembled in a single afternoon with two people and a rubber mallet.

What to do: Frame the perimeter first with PVC pipe (2-inch diameter for stability), then drape and secure the netting with zip ties every 6 inches along the frame. Anchor the base to the ground with U-shaped landscape stakes so nothing lifts in wind. Lay the turf tiles inside — no glue needed, they interlock.

Pro Tip: If your dog is a chewer, run a PVC-coated cable along the bottom edge of the netting. It stops the classic “chew through the bottom and escape” move that ruins a lot of budget net runs.

#3: The Rooftop or Balcony Dog Run (For Apartment Dwellers)

The Rooftop or Balcony Dog Run

Living in an apartment doesn’t mean your dog is stuck with 15-minute leash breaks. A rooftop or balcony dog run gives them a real outdoor zone that’s actually theirs, without ever leaving the building.

Materials: Interlocking artificial turf tiles (perforated drainage backing is essential), an outdoor pen or modular fence panels (usually 30–36 inches tall), landscape fabric underlayment, and a small watering can or spray bottle for daily rinse-down.

Sizing: Even a 6×6 ft footprint works for small breeds. If you have a full rooftop, 10×15 ft turns into a proper mini-park.

What to do: Lay landscape fabric first to protect the underlying deck surface, then click together the turf tiles like puzzle pieces on top. Set up the pen around the perimeter for containment — especially critical on balconies or unfenced rooftops. Rinse the turf with water and a splash of enzymatic cleaner once a week to keep odor down.

Pro Tip: Get turf tiles with drainage holes on the underside, not solid backing. Otherwise urine pools underneath and your rooftop becomes a chemistry experiment by August.

#4: The Elevated Deck-Style Wooden Run

The Elevated Deck-Style Wooden Run

For anyone who wants their dog run to look like an intentional part of the yard — not a cage bolted onto the side of the house — an elevated wooden run doubles as landscaping. Bonus: elevation solves half the drainage problems built-in.

Materials: Pressure-treated 4×4 posts for the frame, cedar or composite decking for the platform surface, 2×2 vertical rails for the sides (spaced no more than 3 inches apart for medium dogs, 2 inches for small), a hinged gate, and outdoor wood stain in a dark walnut or espresso finish.

Sizing: An elevated run doesn’t need to be huge — an 8×12 ft platform raised 8–10 inches off the ground gives your dog a proper “deck” feel while staying manageable to build.

What to do: Build the base frame first with 4×4 posts and 2×6 joists spaced 16 inches apart. Screw the decking down with a small 1/8-inch gap between planks for drainage. Frame the vertical rails around the perimeter, and add a hinged gate on the side closest to the house. Seal everything with a waterproof outdoor stain — that’s what makes the difference between a five-year run and a fifteen-year run.

Pro Tip: Add a shallow ramp at one corner for older dogs, puppies, or short-legged breeds. A 30-degree ramp made from the same decking is a five-minute add-on that saves a lot of joints.

#5: The Long Zoomie Alley With Rinse Station

The Long Zoomie Alley With Rinse Station

Some dogs don’t need a room. They need a runway. If your dog is a sprinter — huskies, greyhounds, working Labs, high-drive shepherds — the classic square run isn’t long enough. This one goes long and narrow, ending in a paw-wash station so muddy zoomies don’t become muddy floors.

Materials: Cedar fence posts (6 ft tall), white vinyl-coated wire mesh fencing (blends better with landscaping than chain-link), compacted decomposed granite or short-cut warm-season turf like Bermuda for the floor, and a garden hose bib mounted to the closing gate post.

Sizing: Go long — 50 to 80 feet of straight running length is the goal. Width can be as tight as 6–8 feet. The longer, the better; sprinting dogs need real distance to actually stretch out.

What to do: Set posts every 8 feet along both sides, sunk 24 inches into the ground with concrete footings. Stretch the vinyl-coated wire mesh between posts and secure with heavy-duty fence staples. Grade the run with a slight slope (1 inch per 4 feet) so water drains toward one end. At the exit end, mount a hose bib to a cedar post and build a shallow gravel trough underneath for a quick paw rinse before your dog re-enters the house.

Pro Tip: Plant Bermuda or zoysia grass instead of Kentucky bluegrass. High-traffic warm-season grasses hold up to sprint claws way better and recover faster from bare patches.

The One Mistake That Ruins Every DIY Dog Run

Most people build the run and then notice they have a drainage problem. My neighbor spent $700 on a beautiful cedar run last summer. After the first rain, it turned into a mud swamp — her golden was tracking brown paw prints across white carpet for months.

Here’s the fix nobody puts in the tutorials: grade the ground before you build. Aim for a one-inch slope for every four feet of run length. That’s just enough angle for water to flow out instead of pooling in. Use a carpenter’s level and a bag of packed gravel to shape the base before a single post goes in.

The other big one: skip pea gravel. It wedges into paw pads, gets flung across the yard, and dogs end up limping. Decomposed granite compacts firmer, stays cooler in the sun, and doesn’t get tracked into the house.

And one more thing — build for your dog’s actual size, not their current size. A Great Dane puppy needs the same run a full-grown Dane will use in a year. Don’t undersize the build and regret it in six months.

Your Yard Deserves This

Pick one idea. Not all five. Just the one that fits your yard, your budget, and your dog’s energy level, and knock it out this weekend. The relief of watching your dog burn 40 minutes of zoomie energy in a space that isn’t your flower bed is worth every hour of build time.

While you’re at it, check out our 5 dog spaces in the house for indoor companion ideas — pair a solid outdoor run with a cozy indoor nook and your dog basically has a two-home setup, which honestly is more real estate than most humans I know.

Which one is going in your yard first?

Yeast Infection in Dogs

5 Signs Your Dog Has a Yeast Infection (And Exactly What to Do)

It’s 2 AM. Your dog is scratching so hard the whole bed is shaking. You reach over half-asleep, catch a whiff of something that smells like stale bread and corn chips, and suddenly you’re very, very awake.

Welcome to a yeast infection.

Roughly 15% of dogs develop a yeast infection every single year, and the average vet visit for one runs about $300 — more if it’s been left to fester into a secondary bacterial infection. The itchy truth is that every dog carries Malassezia pachydermatis, a naturally occurring yeast, on their skin and ears already. It only becomes a problem when the balance tips — allergies, antibiotics, moisture, stress — and suddenly your dog is a walking bakery.

Below are the five warning signs every dog owner should know, where they show up on the body, and exactly what to do about each one. Catch it in the first 72 hours and you’re looking at a week of treatment. Miss it, and you’re looking at six to eight.

#1: Ear Scratching, Head Shaking, and That Stale-Bread Smell

Ear Scratching, Head Shaking, and That Stale-Bread Smell

The ears are ground zero for yeast infections — the warm, dark, moisture-trapping canal is basically a yeast spa. If your dog is shaking her head 20+ times a day, tilting her head to one side, or scratching at her ears until they’re raw, this is the number-one suspect.

What to look for: Thick, dark brown or coffee-ground-like discharge inside the ear flap. A musty, fermented, “old bread” smell when you lift the ear. Red or inflamed skin along the canal.

Who’s at highest risk: Floppy-eared breeds — Cocker Spaniels, Basset Hounds, Labs, Goldens, Beagles. That gorgeous ear flap seals in moisture and heat every time they swim or bathe.

What to do: Clean the ears with a vet-recommended ear cleaner solution (avoid Q-tips — they push debris deeper; use cotton pads). If the discharge is heavy or the ear is very red, book a vet visit within 48 hours. Most confirmed ear yeast infections are treated with medicated ear drops (often combined with an antibiotic) applied twice daily for 10–14 days.

Pro Tip: After every bath and swim, gently dry the ear canal with a cotton pad within 30 minutes. This one habit prevents the majority of recurring ear infections.

#2: Constant Paw Licking and “Frito Feet”

If your dog is licking her paws for 15 minutes or more — especially between the toes — and her feet smell exactly like the bottom of a corn chip bag, yeast has set up shop.

What to look for: Brown or reddish staining in the fur between the toes. A strong, savory smell when you press the fur near the pads. Redness on the underside of the paw. Obsessive nighttime licking.

What’s driving it: Environmental allergies are the biggest trigger — grass, pollen, mold. Every walk exposes the thin paw skin, tiny inflammation opens the door, and yeast colonizes within 3–5 days. The licking adds more moisture and feeds the cycle.

What to do: A twice-daily paw soak in a diluted mixture of one part 3% hydrogen peroxide to two parts water for 3–5 minutes. Pat completely dry between the toes afterward — “bone dry” is the goal. Most dogs stop licking within 48 hours. For chronic cases, your vet may recommend an oral antifungal like ketoconazole or fluconazole.

Pro Tip: Keep a portable paw washer or a small basin by the front door. A 30-second post-walk rinse removes 90% of the allergens driving the infection in the first place.

#3: Greasy, Smelly Skin Folds That Wipe Away Brown

Wrinkly breeds like Bulldogs, Shar-Peis, Pugs, and Mastiffs live with dozens of little moisture pockets on their face, neck, and tail. When those folds don’t get cleaned and dried daily, yeast moves in fast.

What to look for: Slick, greasy patches inside the folds. Brown or darkened skin. A musty, sour odor when you spread the fold open. In more severe cases, raw red skin and hair loss along the crease.

What to do: Clean each fold daily with an unscented dog-safe wipe, then dry completely — a soft cloth or even a hairdryer on cool setting works. For active infections, your vet will typically prescribe a chlorhexidine or ketoconazole shampoo used twice a week for 4–6 weeks, with the lather left on for 10 full minutes before rinsing.

Pro Tip: Set a timer on your phone. “Fold check” every night at the same time (right after dinner works well) turns it into a two-minute habit instead of a Saturday-morning-crisis situation.

#4: Scooting, Groin Redness, or Under-the-Tail Irritation

The groin, armpits, and area under the tail are the forgotten yeast zones. They’re warm, they’re sweaty, they rub against each other constantly, and they’re easy to miss during a normal petting session.

What to look for: Scooting across the carpet (yes, sometimes it’s the anal glands — sometimes it’s yeast). Sitting with legs spread wider than usual to air the groin out. Sticky, moist patches under the armpits. A yeasty odor near the tail base. Redness or discoloration in the perivulvar area in female dogs, especially spayed or overweight ones.

What to do: Book a vet exam within 48 hours if the perivulvar area is involved — symptoms overlap with urinary tract infections, vaginitis, and life-threatening pyometra. Do not self-diagnose these. For groin and armpit yeast confirmed by your vet, topical antifungal wipes plus a low-carb diet make a noticeable difference within 7–10 days.

Pro Tip: Overweight dogs and dogs with underactive thyroids are at highest risk in this zone. If your dog is battling recurrent groin yeast, ask your vet for a full thyroid panel — the root cause may be hormonal.

#5: Recurring Infections Every Few Months (The Root-Cause Problem)

Here’s the honest truth: if your dog gets a yeast infection, clears it with medication, and gets another one three months later, the infection isn’t the problem. It’s a symptom.

The five real root causes:

Food allergies (40% of chronic cases). High-carb kibble with chicken, beef, wheat, corn, or soy is the top offender. Try an 8–12 week elimination diet using a novel protein — duck, venison, rabbit.

Antibiotic overuse. Antibiotics wipe out gut bacteria along with the bad, leaving yeast unchecked. Always run a probiotic alongside antibiotic courses and for a month afterward.

Environmental allergies. Pollen, grasses, and molds inflame the skin barrier every spring and summer. If infections spike July–August every year, this is your culprit.

Underlying health conditions. Hypothyroidism, Cushing’s disease, and diabetes all suppress the immune system. Bloodwork rules these in or out.

Moisture and heat. Yeast thrives above 80°F and 60% humidity. Poor drying after baths and swims is the single most preventable trigger.

What to do: Pick one root cause to address per month rather than trying everything at once. A vet-guided elimination diet, a good probiotic (or plain unsweetened yogurt at 2 tablespoons per 20 lbs of body weight), and a habit of thorough drying after every wet activity handle about 80% of recurring cases.

Pro Tip: Coconut oil is your friend — lauric acid in it fights yeast both topically and internally. Add 1 tsp per 10 lbs of body weight to food daily, and rub a small amount into dry paws or fold areas after cleaning. Most dogs show noticeable improvement within 2–3 weeks.

When to Skip the Home Remedies and Go Straight to the Vet

Some red flags aren’t worth waiting on. Call your vet the same day if you see any of these:

Bleeding from scratched-open sores. Fever above 102.5°F. Lethargy or loss of appetite alongside the itching. Head tilt or balance problems (may indicate the infection has moved into the inner ear). Blood-filled swelling on the ear flap (a hematoma from violent head shaking — needs surgical drainage). No improvement after two weeks of at-home treatment.

Yeast infections are easily treatable when caught early. They become expensive, painful, and sometimes permanent (chronic ear infections can cause hearing loss) when they’re ignored. Don’t wait for the smell to knock you out of a chair.

Your Next Step

Pick one change today. Not five. One.

Maybe it’s swapping the chicken kibble for a novel-protein diet. Maybe it’s adding a paw rinse by the door. Maybe it’s a nightly fold check for your wrinkly Bulldog. Small, consistent habits crush recurring yeast infections faster than any six-week medication course, because they attack the moisture-and-inflammation cycle at the source.

And while you’re fixing the itch, check out our best service dog breeds guide for insight into the breeds most affected by allergies and coat-related infections — the same knowledge helps you tailor care to your own dog’s risk profile.

This article is informational and should not replace veterinary advice. Always consult your vet before starting new treatments, supplements, or dietary changes, especially for dogs with existing health conditions.

Best Big Dog Breeds

5 Best Big Dog Breeds That Are Gentle Giants and Family Favorites

Everyone wants a dog. But some of us? We want a lot of dog.

You know the type. The one that leans against your leg and nearly knocks you over. The one whose water bowl is basically a small bathtub. The one that scares the delivery driver into leaving packages at the end of the driveway even though he’s just standing there wagging his enormous tail.

My aunt had a Newfoundland named Bruno who tipped the scales at 165 pounds and thought he was a lap dog. Every visit ended with all 165 pounds of him draped across whoever sat on the couch first. Total gentle giant. Total love.

If you’re dreaming of a big dog but worried about temperament, drool, or fitting one into your family life, this list is for you. These are the five best big dog breeds known for their calm, affectionate, family-first personalities — plus the honest realities of what it’s actually like to live with them.

#1: Great Dane — The Apollo of Dogs

Standing up to 32 inches at the shoulder and easily eyeballing you from across the dinner table, the Great Dane is arguably the most iconic big dog on the planet. And despite the towering height, they’re some of the most laid-back dogs you’ll ever meet.

Height: 28–32 inches | Weight: 110–175 lbs | Lifespan: 7–10 years

Great Danes were originally bred as boar hunters, but modern Danes are more “professional couch occupant.” They’re gentle, playful, deeply people-oriented, and typically fantastic with children when raised alongside them. They don’t bark much, don’t need marathon exercise, and often behave more like a giant, low-energy roommate than a dog.

Best for: Families with space (a small apartment is not it), patient owners who can afford giant-breed food and vet bills, and anyone who wants a dog that looks intimidating but greets guests with a wagging tail.

Watch for: Bloat is the biggest health concern in Danes and other deep-chested giants — feed multiple small meals daily, use a slow-feeder bowl, and avoid vigorous exercise around mealtimes. Also, that heartbreakingly short lifespan is real. Loving a Great Dane is a shorter but incredibly rich commitment.

Pro Tip: Start training early and firmly. A 30-pound Great Dane puppy who jumps up is cute. A 130-pound adult who jumps up is a broken hip.

#2: Bernese Mountain Dog — The Swiss Cuddle Machine

Bernese Mountain Dog

If a dog could be described as “a warm blanket that follows you around,” it’s the Bernese Mountain Dog. That tri-color coat, those soulful eyes, that goofy grin — Berners are basically walking Instagram content, and they know it.

Height: 23–27 inches | Weight: 70–115 lbs | Lifespan: 7–10 years

Bred in the Swiss Alps as farm and cart dogs, Berners are hardworking, calm-natured, and deeply loyal. They form intense bonds with their families and tend to shadow their favorite person around the house all day. They’re patient with children, tolerant of other pets, and generally friendly with strangers once introduced.

Best for: Cool climates (that thick double coat is a real handicap in heat), families who want a cuddly dog with just enough working-dog structure to enjoy hikes and outdoor time, and anyone who doesn’t mind constant, gentle shadowing.

Watch for: Berners are notoriously prone to cancer and joint issues. Buy only from health-tested lines that screen for hips, elbows, heart, and von Willebrand disease. Their lifespan is heartbreakingly short — make every year count.

Pro Tip: Get on a good grooming rhythm from puppyhood — twice-weekly brushing and monthly baths. Berners shed like it’s their full-time job, and staying on top of it saves your house.

#3: Newfoundland — The Water Rescue Bear

Newfoundland

Nicknamed “Nana dogs” after the famous nanny in Peter Pan, Newfoundlands are giant, sweet-natured water rescue dogs who genuinely think of themselves as protectors of small humans. If a dog was designed by committee to be the perfect family teddy bear, it would look exactly like a Newfoundland.

Height: 26–28 inches | Weight: 100–150 lbs | Lifespan: 9–10 years

Newfies were bred to jump off Canadian fishing boats and retrieve people from freezing water. Their webbed feet, waterproof double coat, and incredible strength make them born swimmers — and their patience with kids is basically legendary. They’re slow-moving, deeply affectionate, and almost impossible to provoke.

Best for: Families with young children, homes near water, and owners who don’t mind a whole lot of drool and a whole lot of shedding. Also excellent for people who’ve always wanted a large, warm rug that follows them around.

Watch for: The drool situation is real. Keep “slobber towels” in every room. Newfoundlands also overheat easily — they’re built for cold water, not August afternoons. Provide plenty of shade, water, and air conditioning.

Pro Tip: If you live near a lake, ocean, or river, let your Newfie swim regularly. It’s incredible exercise for their joints, and they will love you forever for it.

#4: Saint Bernard — The Alpine Rescue Icon

Saint Bernard

Barrel of brandy optional. The Saint Bernard is the classic gentle giant — originally bred by Swiss monks at the Great St. Bernard Pass to find travelers lost in the snow. That legendary calm, patience, and rescue instinct still runs strong in the modern Saint Bernard.

Height: 26–30 inches | Weight: 120–180 lbs | Lifespan: 8–10 years

Saint Bernards are gentle, protective, and deeply devoted to their families. They’re not high-energy — a couple of good walks a day and some backyard puttering is plenty — but they need to be part of family life. Left alone too much, they get sad, and a sad Saint is a giant sad experience for everyone.

Best for: Families with kids of all ages, cooler climates, and homes with enough square footage to accommodate 150 pounds of dog spread across the living room floor.

Watch for: Massive drool. Massive shedding. And massive food and vet bills. Also, brachycephalic-adjacent breathing issues in some lines — look for a breeder producing dogs with proper muzzle length and open airways.

Pro Tip: Get pet insurance the day you bring a Saint home. Giant-breed emergency vet visits can hit five figures fast, and insurance turns catastrophic bills into manageable ones.

#5: Irish Wolfhound — The Tallest of Them All

Irish Wolfhound

Standing eye-to-eye with an average adult, the Irish Wolfhound is the tallest dog breed in the world. Originally bred to hunt wolves and elk, today they’re one of the most laid-back, quiet, dignified dogs you can invite into a family home.

Height: 30–35 inches | Weight: 105–180 lbs | Lifespan: 6–8 years

Wolfhounds are sighthounds — they’re built for short bursts of speed followed by long hours of luxurious lounging. They’re calm indoors, gentle with children, and remarkably quiet for their size. Think of them as a horse-sized greyhound with the temperament of a poet.

Best for: Owners who want an impressive, gentle companion; homes with fenced yards (that sighthound prey drive is real); and people willing to accept a heartbreakingly short average lifespan in exchange for one of the most magnificent dogs on Earth.

Watch for: The shortest lifespan on this list. Wolfhounds are also prone to bloat, heart disease (particularly dilated cardiomyopathy), and bone cancer. Only buy from breeders doing full cardiac and orthopedic screening.

Pro Tip: Puppies grow fast — too fast. Feed a large-breed puppy formula and avoid over-exercising them until their growth plates close around 18–24 months. Slow, correct growth = fewer joint problems later.

The One Mistake People Make With Big Dogs

Everyone falls in love with the size. Almost nobody plans for the space, cost, and time commitment that comes with it.

A big dog needs a big car (that Prius isn’t going to cut it). A big dog eats big food — budget $80–$150 a month, minimum. A big dog needs big vet care — anesthesia, X-rays, and medications all scale with body weight. And a big dog leaves a big footprint on your daily life, from the dog bed that eats a whole corner of the living room to the crate that’s the size of a small piece of furniture (see our dog crate furniture guide for how to make that work in a real home).

The fix: plan the logistics before you fall in love with the puppy. Measure the vehicle. Price the food. Get quotes on pet insurance. Look at your yard, your flooring, and your daily schedule with brutal honesty. Big dogs are worth every dollar and every square foot — but only if you’re prepared for both.

The Bottom Line

Big dogs aren’t for everyone. They’re expensive, they don’t live as long as smaller breeds, and they take up real physical and emotional space in your home. But if you have the room, the resources, and the heart for it? There is nothing on Earth like coming home to 150 pounds of dog who has been waiting all day just to lean on your leg.

Pick the breed whose temperament, coat, and climate needs match your life — not just the one that photographs best. And when you find your gentle giant, give them the space, care, and love that a dog their size absolutely deserves.

Looking to give your big dog their own corner? Check out our 5 dog spaces in the house guide for ideas that scale up beautifully.

Which one is calling your name?