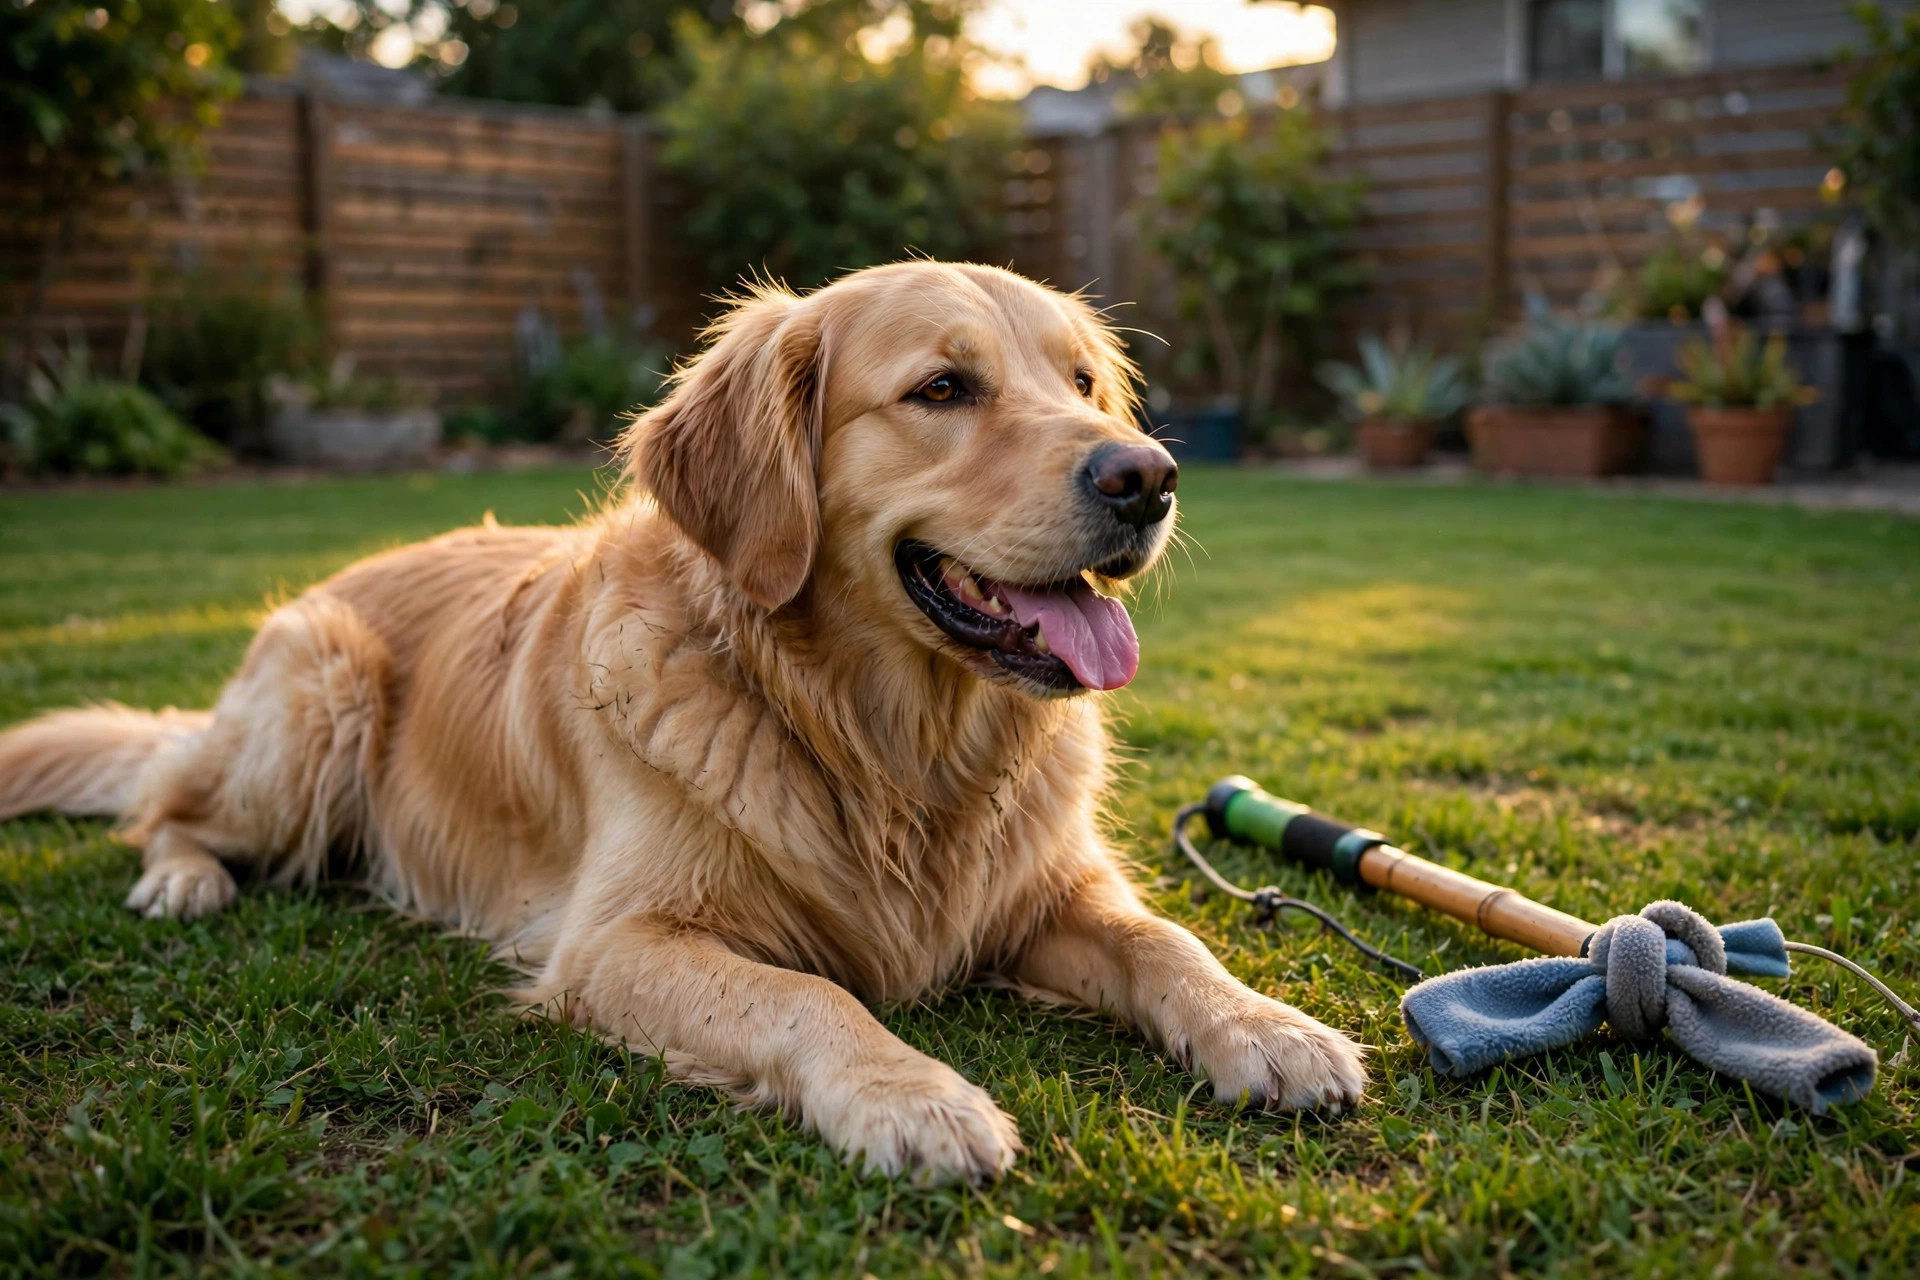
Golden retriever playing tug with a handmade braided fleece tug toy in the garden.

DIY Dog Tug Toy: 5 Easy Braided Toys Your Dog Will Love

A tug toy is the simplest thing a dog owns — and the one they reach for most. It is a game, a workout, a teething aid and a bonding session all in one piece of braided fabric. The good news is you do not need to buy one. A homemade tug toy costs next to nothing, takes about fifteen minutes to make, and you can size it exactly to your dog — which shop-bought toys rarely get right.

This guide covers five easy DIY tug toys — a classic fleece braid, a t-shirt tug, a rope-and-ball tug, a denim knot for strong chewers, and a soft loop tug for puppies — plus the materials that are safe, the knots that hold, and the tug-play rules that keep the game fun instead of frantic.

Before you start — the 4 rules
1. No small parts. No buttons, zips, beads, bells or sewn-on eyes — anything that can be chewed off and swallowed does not belong on a tug toy.
2. Supervise every game. Tug toys are for playing together, not for leaving with a dog alone. A determined chewer can shred fabric and swallow threads.
3. Size it to the dog. A toy that is too small is a choking risk; a toy that is too big is no fun to grip. The braid should be wider than your dog’s mouth and the handles long enough for your hands.
4. Check it every time. If the braid is fraying, the knot is loosening or a strip is coming free, retire the toy and make a fresh one. They are cheap — replace, do not repair.
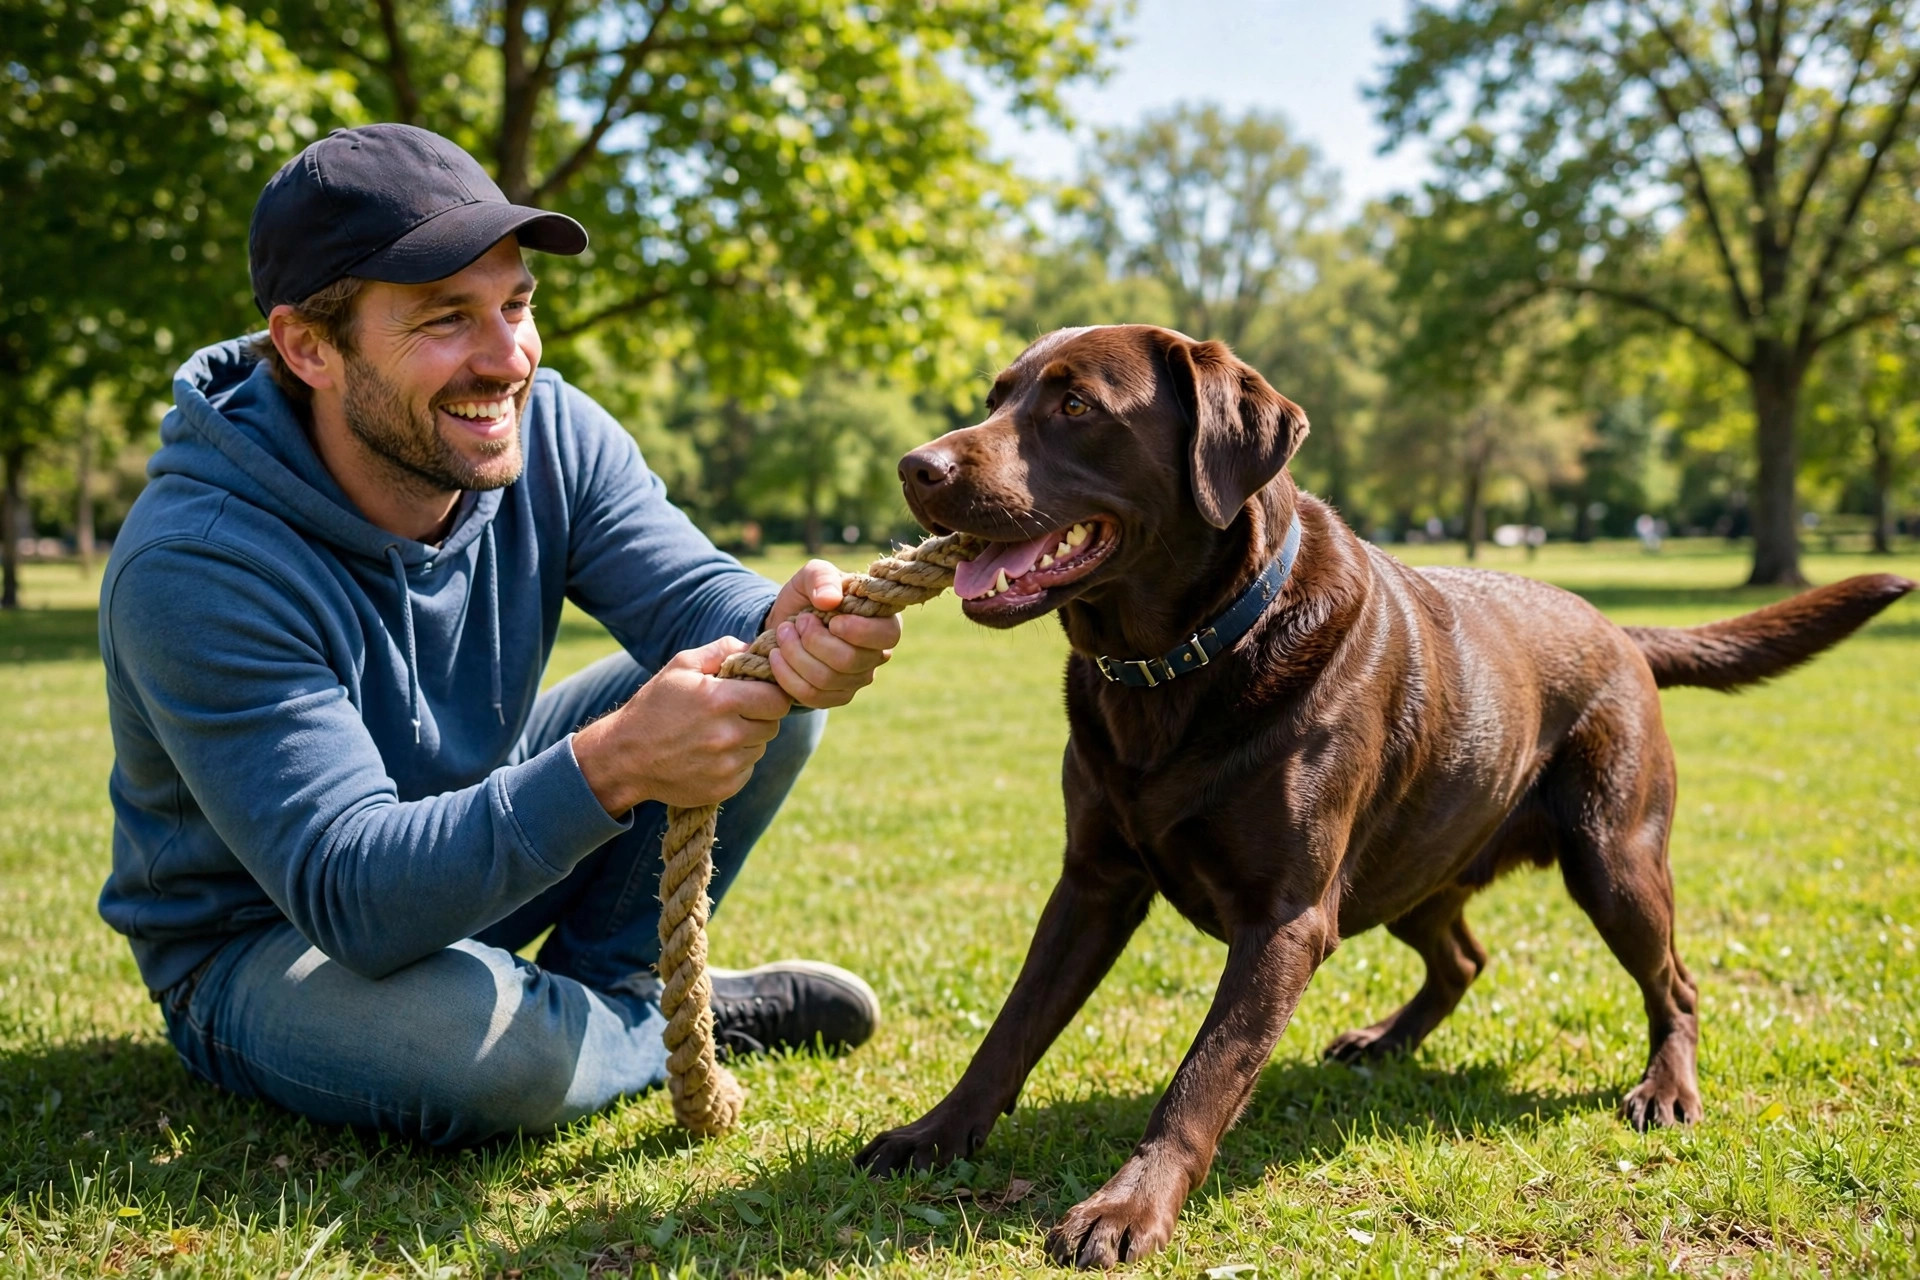
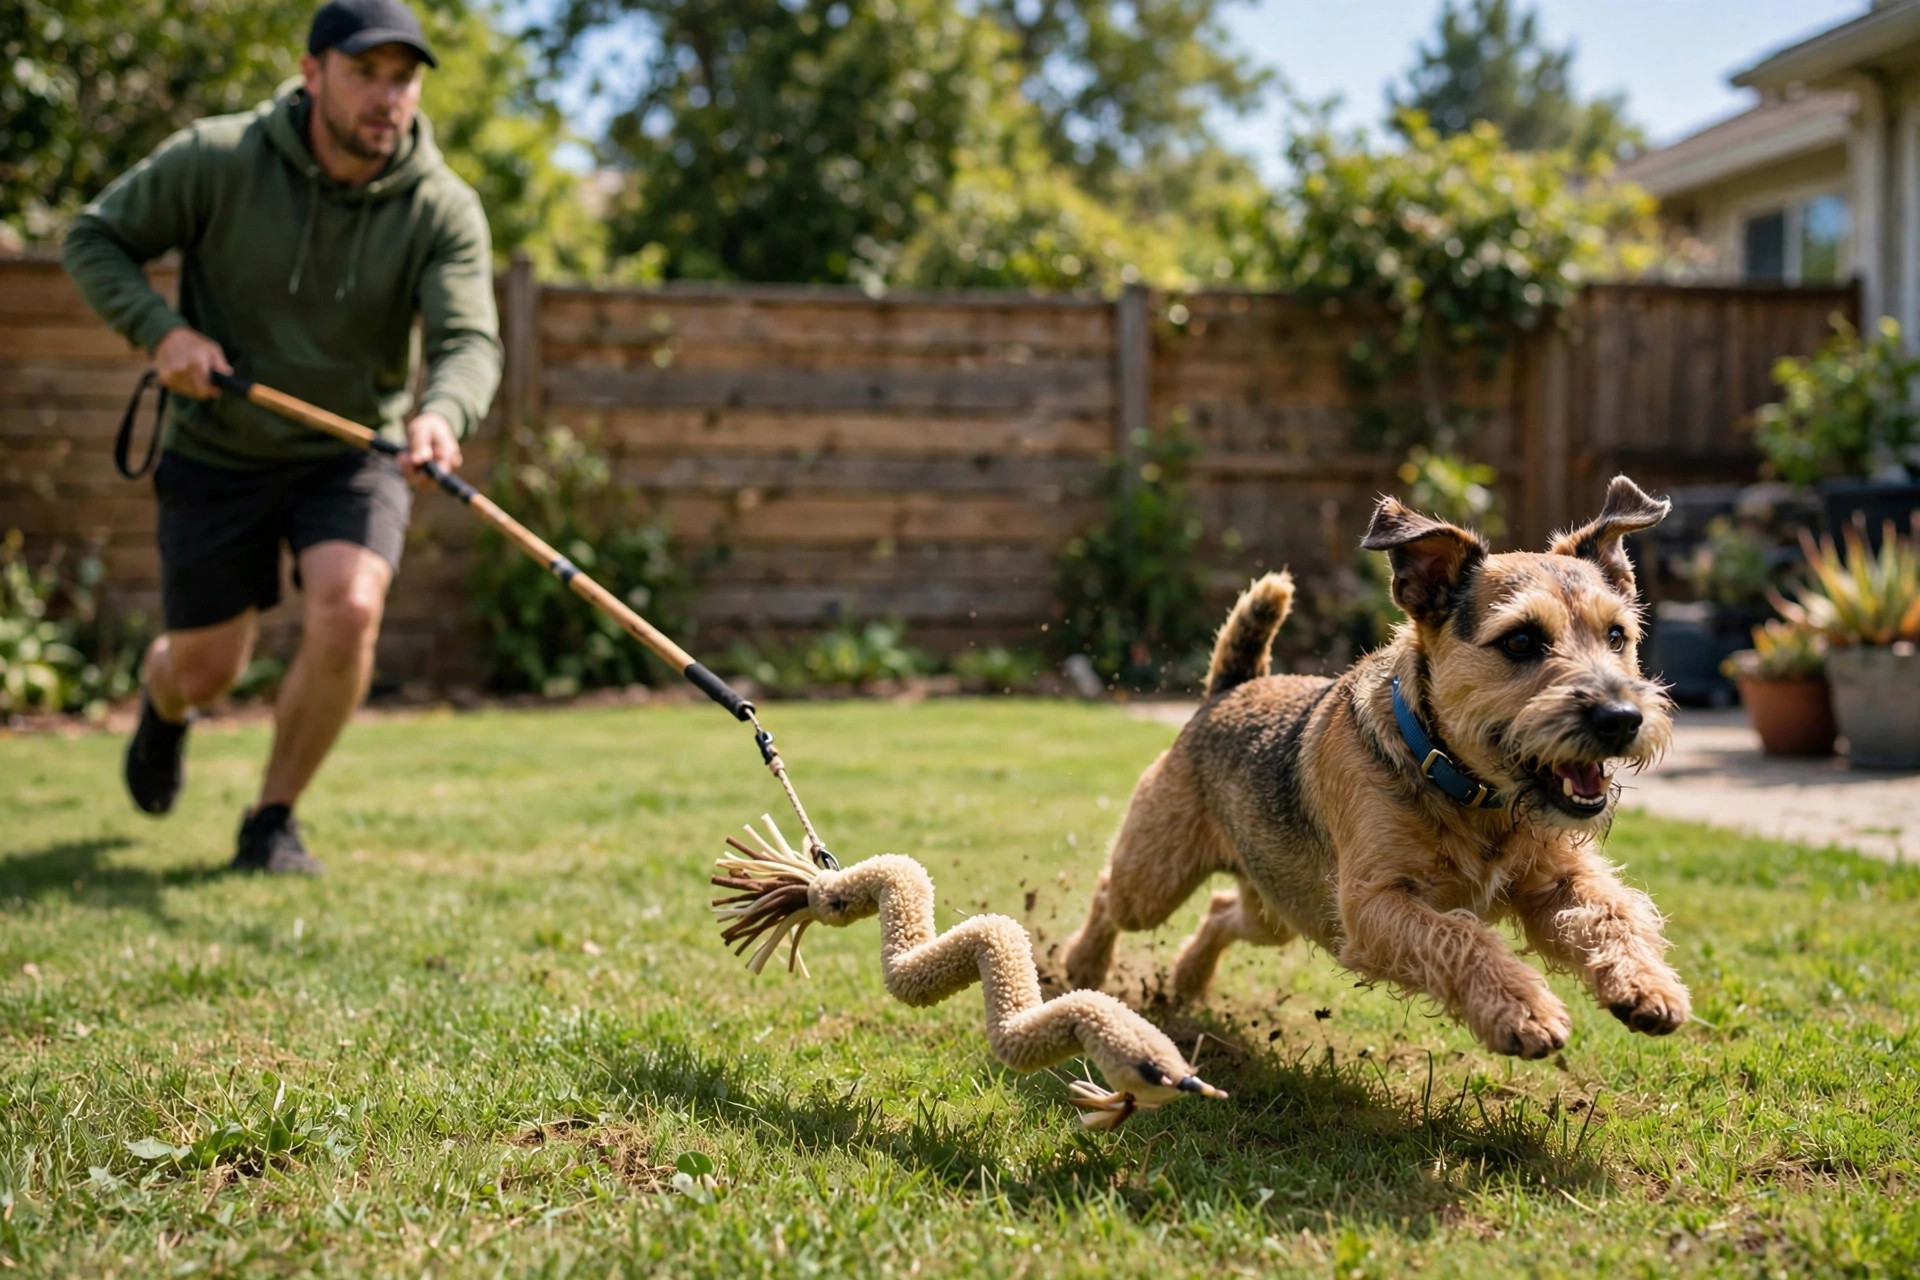
Dog playing tug toy owner.

Why dogs love tug — and why homemade wins

Tug is one of the few games that uses the whole dog at once. The pulling works the neck, shoulders and core; the gripping cleans the teeth; the back-and-forth teaches impulse control when you add a “drop it” cue. It is also the game that builds your bond fastest, because it only works when you play it together — a tug toy on the floor is just a rope, but in your hands it becomes a game.

Homemade tug toys beat shop-bought ones on three counts. First, cost: an old fleece blanket or a worn t-shirt becomes a toy instead of landfill. Second, fit: you choose the length, thickness and handle size for your dog, from a teething puppy to a 40 kg puller. Third, replacement: when a homemade tug wears out, you make another in fifteen minutes instead of ordering one and waiting. Pair tug sessions with a brain game like our DIY dog puzzle toys and you have a full enrichment routine — body and mind both tired out.

What you need

You probably own everything already. The basics for all five builds:

  • Fleece fabric or an old fleece blanket — the best tug material: soft on gums, strong when braided, and it does not fray into long threads.
  • Old cotton t-shirts — a good second choice; cut into strips and braid tightly. Avoid thin, worn fabric that tears easily.
  • Cotton rope or a retired dog lead — for the rope-and-ball build; natural cotton is safer than nylon if fibres are swallowed.
  • An old tennis ball or rubber ball — for the rope-and-ball tug; check it is too big for your dog to swallow whole.
  • Scissors and a ruler — straight, even strips braid far better than ragged ones.
  • A door handle or a heavy book — something to anchor one end while you braid (or a willing helper holding it).

Avoid: stretchy elastic, fabric with sequins or prints that flake, and any rope with a wire core. If in doubt, leave it out.
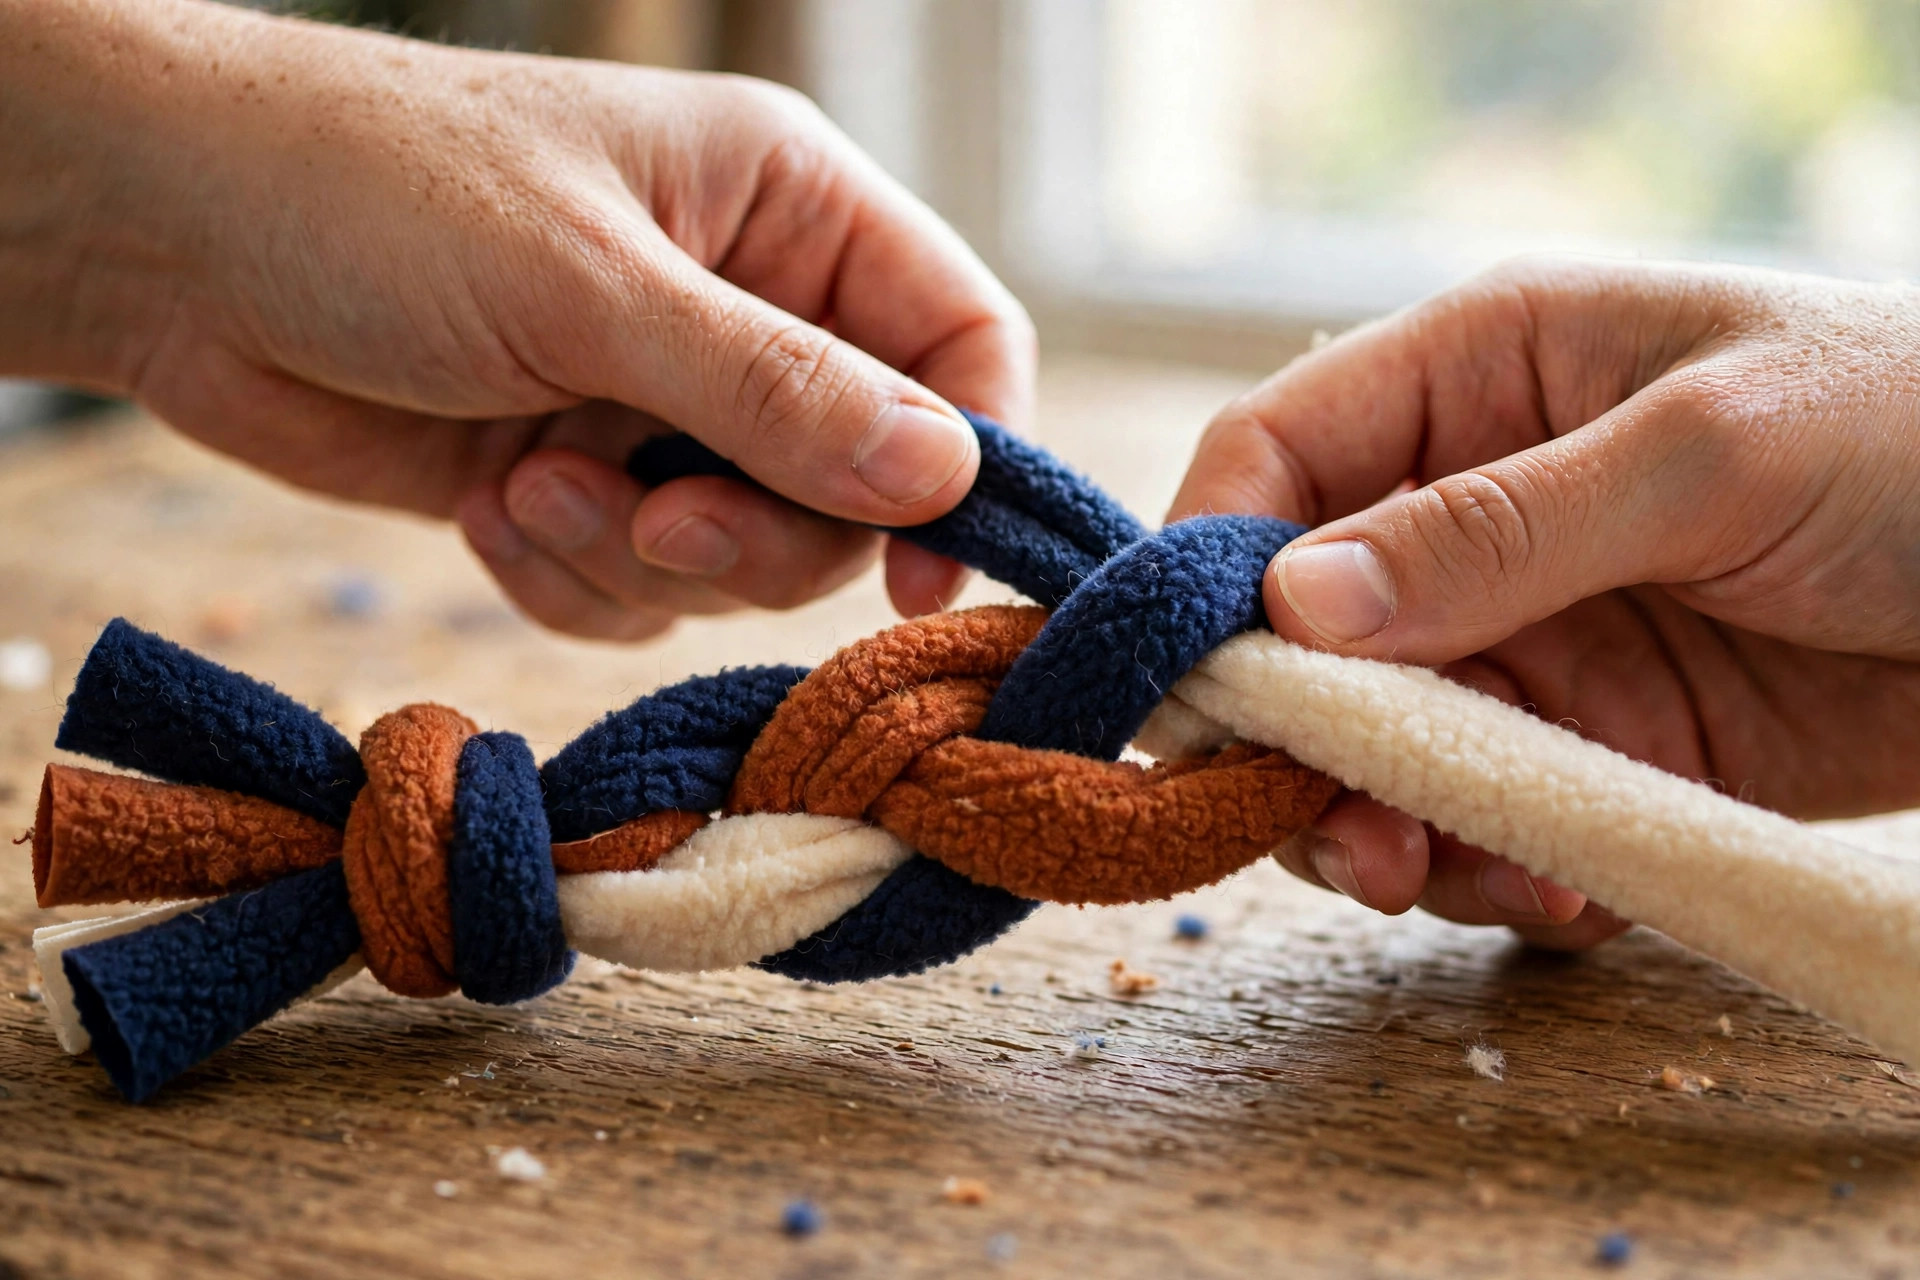
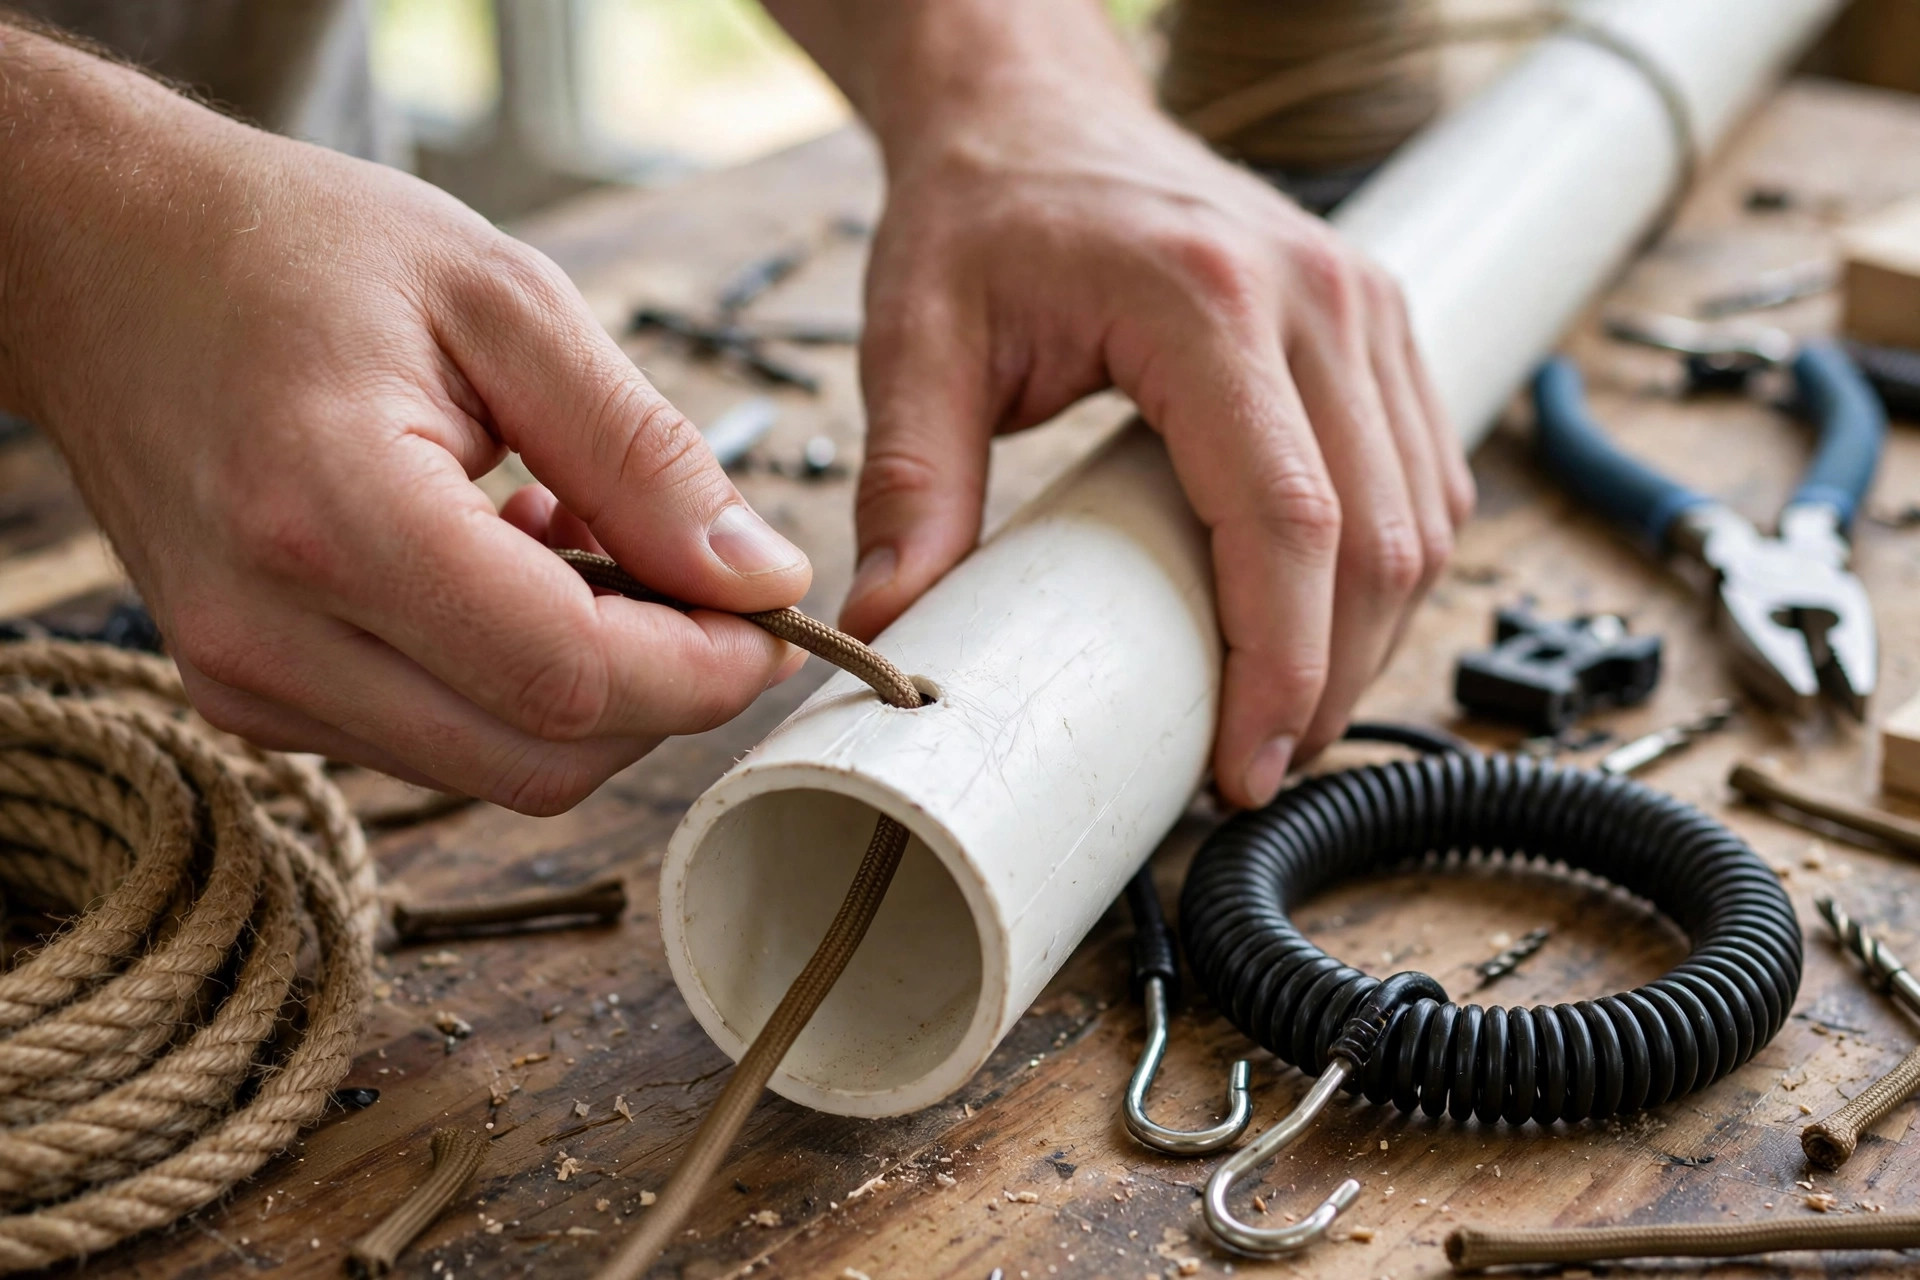
Braiding fleece tug toy.

1. The classic fleece braid

The one every dog owner should know. Cut three strips of fleece, each about 5 cm wide and 90 cm long (longer for big dogs, shorter for small ones). Knot the three strips together at one end, anchor the knot under a heavy book or a door handle, and braid tightly all the way down. Knot the other end firmly, then trim the tails to about 5 cm so they do not unravel.

For a stronger toy, use six strips and braid two sets of three, then knot the two braids together at each end — a double braid that survives serious pullers. Fleece is forgiving: if the braid loosens, it is still safe, and you can re-braid it in a minute.

2. The old t-shirt tug

The fastest build here, and the best use for the t-shirts you were about to throw away. Cut a t-shirt into three long strips across the body (about 6 cm wide), knot one end, braid, and knot the other. Cotton t-shirts make a slightly stiffer tug than fleece, which some dogs prefer — it gives them something to really grip.

Mix colours for a toy that is easy to spot in the garden, and use the sleeves for a smaller puppy-sized version. One warning: cotton frays faster than fleece, so check a t-shirt tug more often and replace it at the first sign of thinning.

3. The rope-and-ball tug

For dogs who love a ball as much as a tug. Take a length of cotton rope (about 1 metre), thread it through a tennis ball — cut a small slit on two sides of the ball and push the rope through — then knot the rope tightly on each side of the ball so it cannot slide. Braid a handle on one end, or knot a second length of rope around the first for a two-handed grip.

This build is brilliant for fetch-and-tug games: throw the ball, let the dog bring it back, then grab the handle for a round of tug. The ball also stops the dog from sliding its mouth down to your hand, which is useful with enthusiastic pullers.

4. The denim knot for strong chewers

Denim is the toughest fabric in this guide, which makes it the right choice for dogs who destroy a fleece braid in a week. Cut an old pair of jeans into strips about 5 cm wide and 70 cm long — the leg seams make natural, extra-strong strips. Knot three strips together, braid tightly, and finish with a double knot at each end.

Denim tugs are heavy and stiff when new, so they suit medium and large dogs better than puppies. Soften a new denim tug by washing it once before the first game. And be honest about limits: even denim is not indestructible — a determined chewer will get through it eventually, so supervise and retire it when it thins.

5. The soft loop tug for puppies

Puppies need a gentler toy — their teeth are sharp, their jaws are still growing, and a hard tug can hurt. Cut two strips of fleece, about 4 cm wide and 60 cm long, and tie them into a loop with a single knot in the middle, leaving two short tails. The loop gives the puppy something to hold without pulling hard, and gives you a handle to guide the game.

Keep puppy tug sessions short — two or three minutes — and always let the puppy win sometimes. Winning builds confidence, and a confident puppy grows into a dog that plays tug with manners instead of desperation.
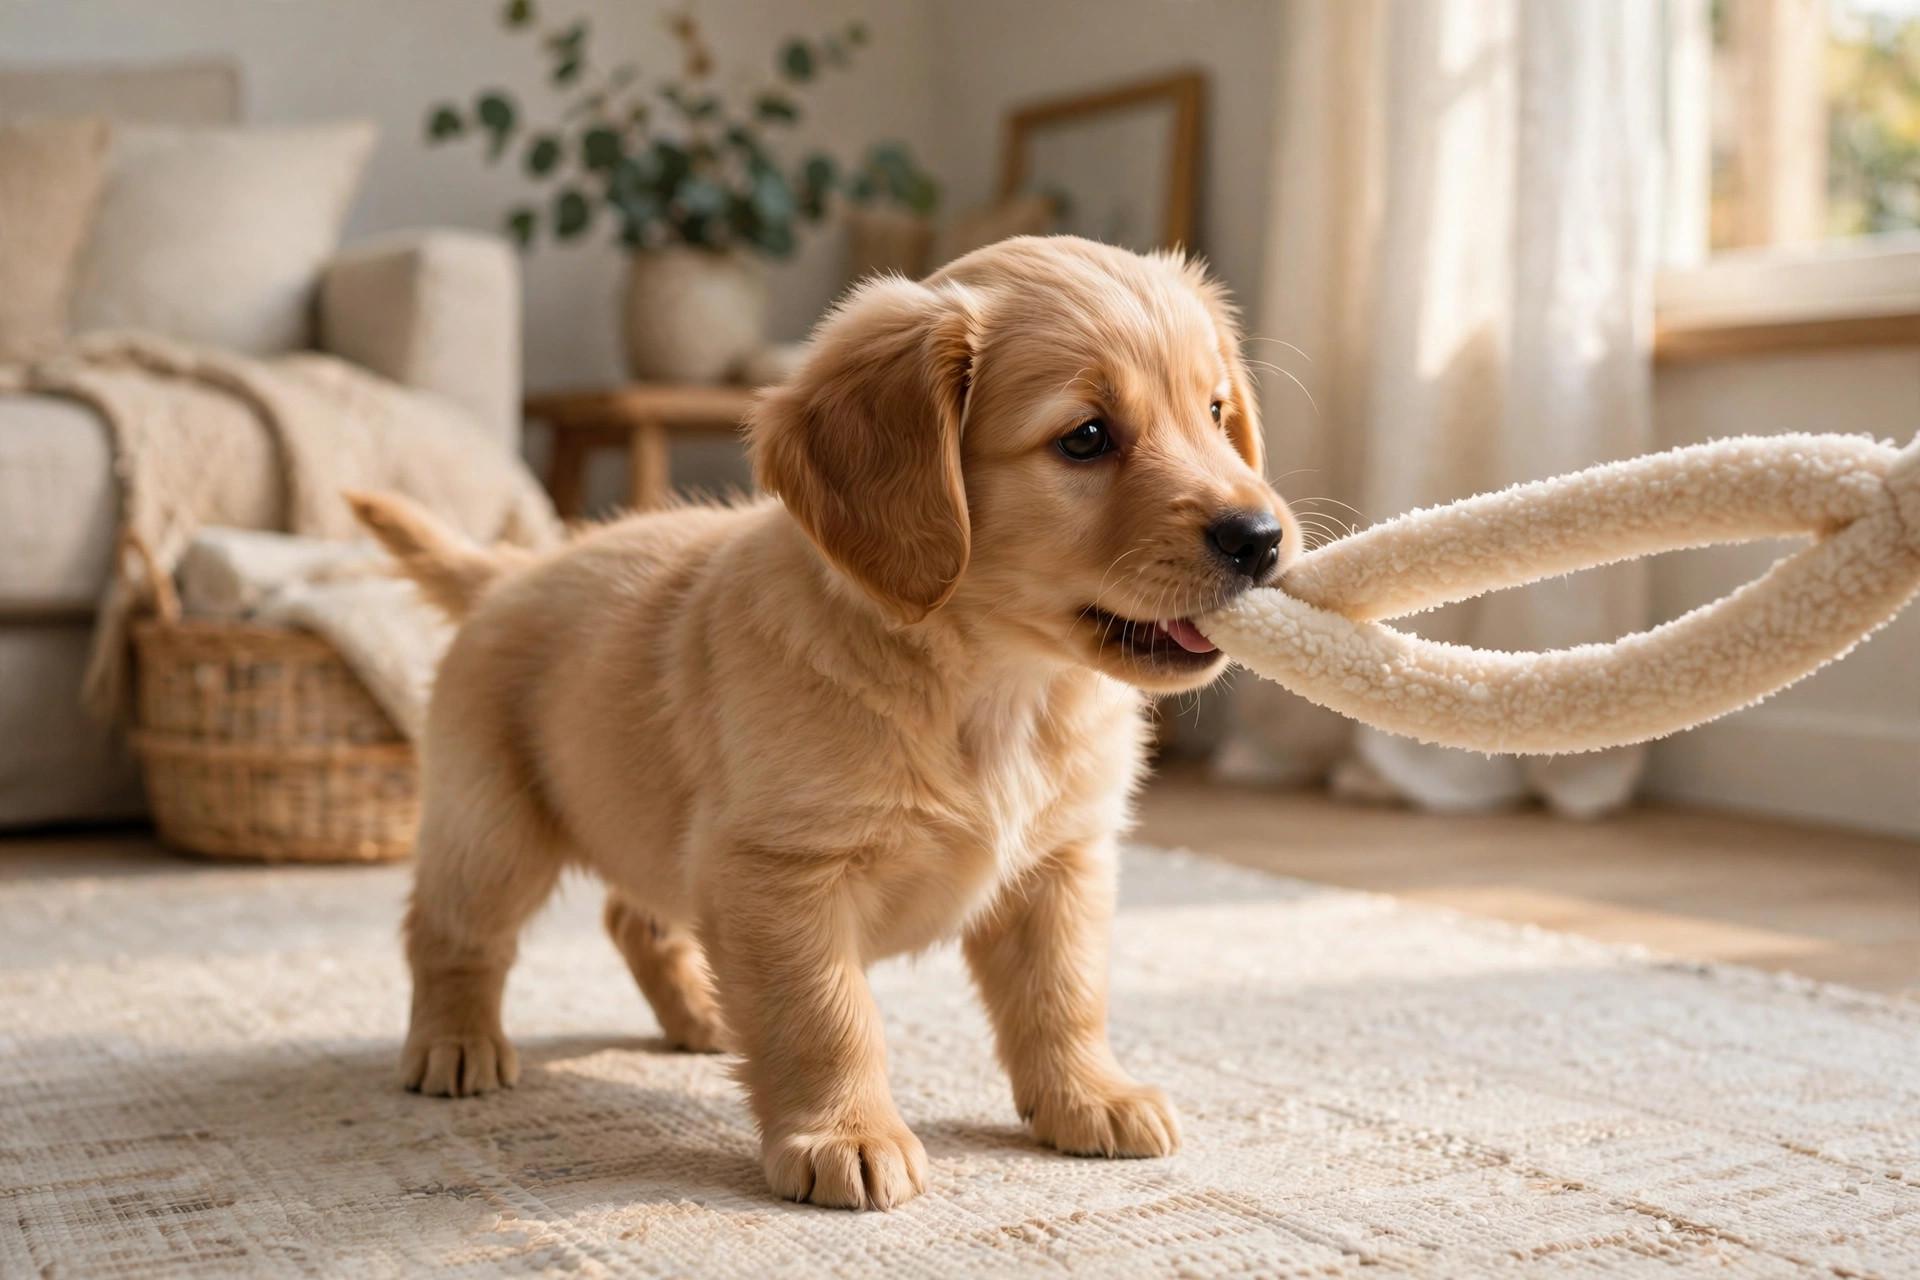
Puppy tug toy play.

How to play tug safely

The game is as important as the toy. Play by these rules and tug stays a joy:

  • You start it, you stop it. The toy lives in a drawer, not on the floor. Bring it out for a game, put it away when the game ends — that keeps it exciting and keeps the dog from chewing it unsupervised.
  • Teach “drop it” first. Trade the tug for a treat, say “drop it” as the dog lets go, and reward. A dog that drops on cue is a dog you can always stop safely.
  • Keep it low and level. Pull side to side, not up and down. Yanking upward puts strain on the neck and jaw, especially in puppies and older dogs.
  • No teeth on skin. If teeth touch your hand, the game pauses for ten seconds. The dog learns fast that gentle mouths keep the game going.
  • Let them win sometimes. A dog that never wins stops trying; a dog that always wins gets pushy. Aim for roughly half and half.
  • Stop while it is still fun. Five minutes of good tug beats fifteen minutes that ends in over-excitement. End the game with a calm “drop it”, a treat, and the toy going back in the drawer.
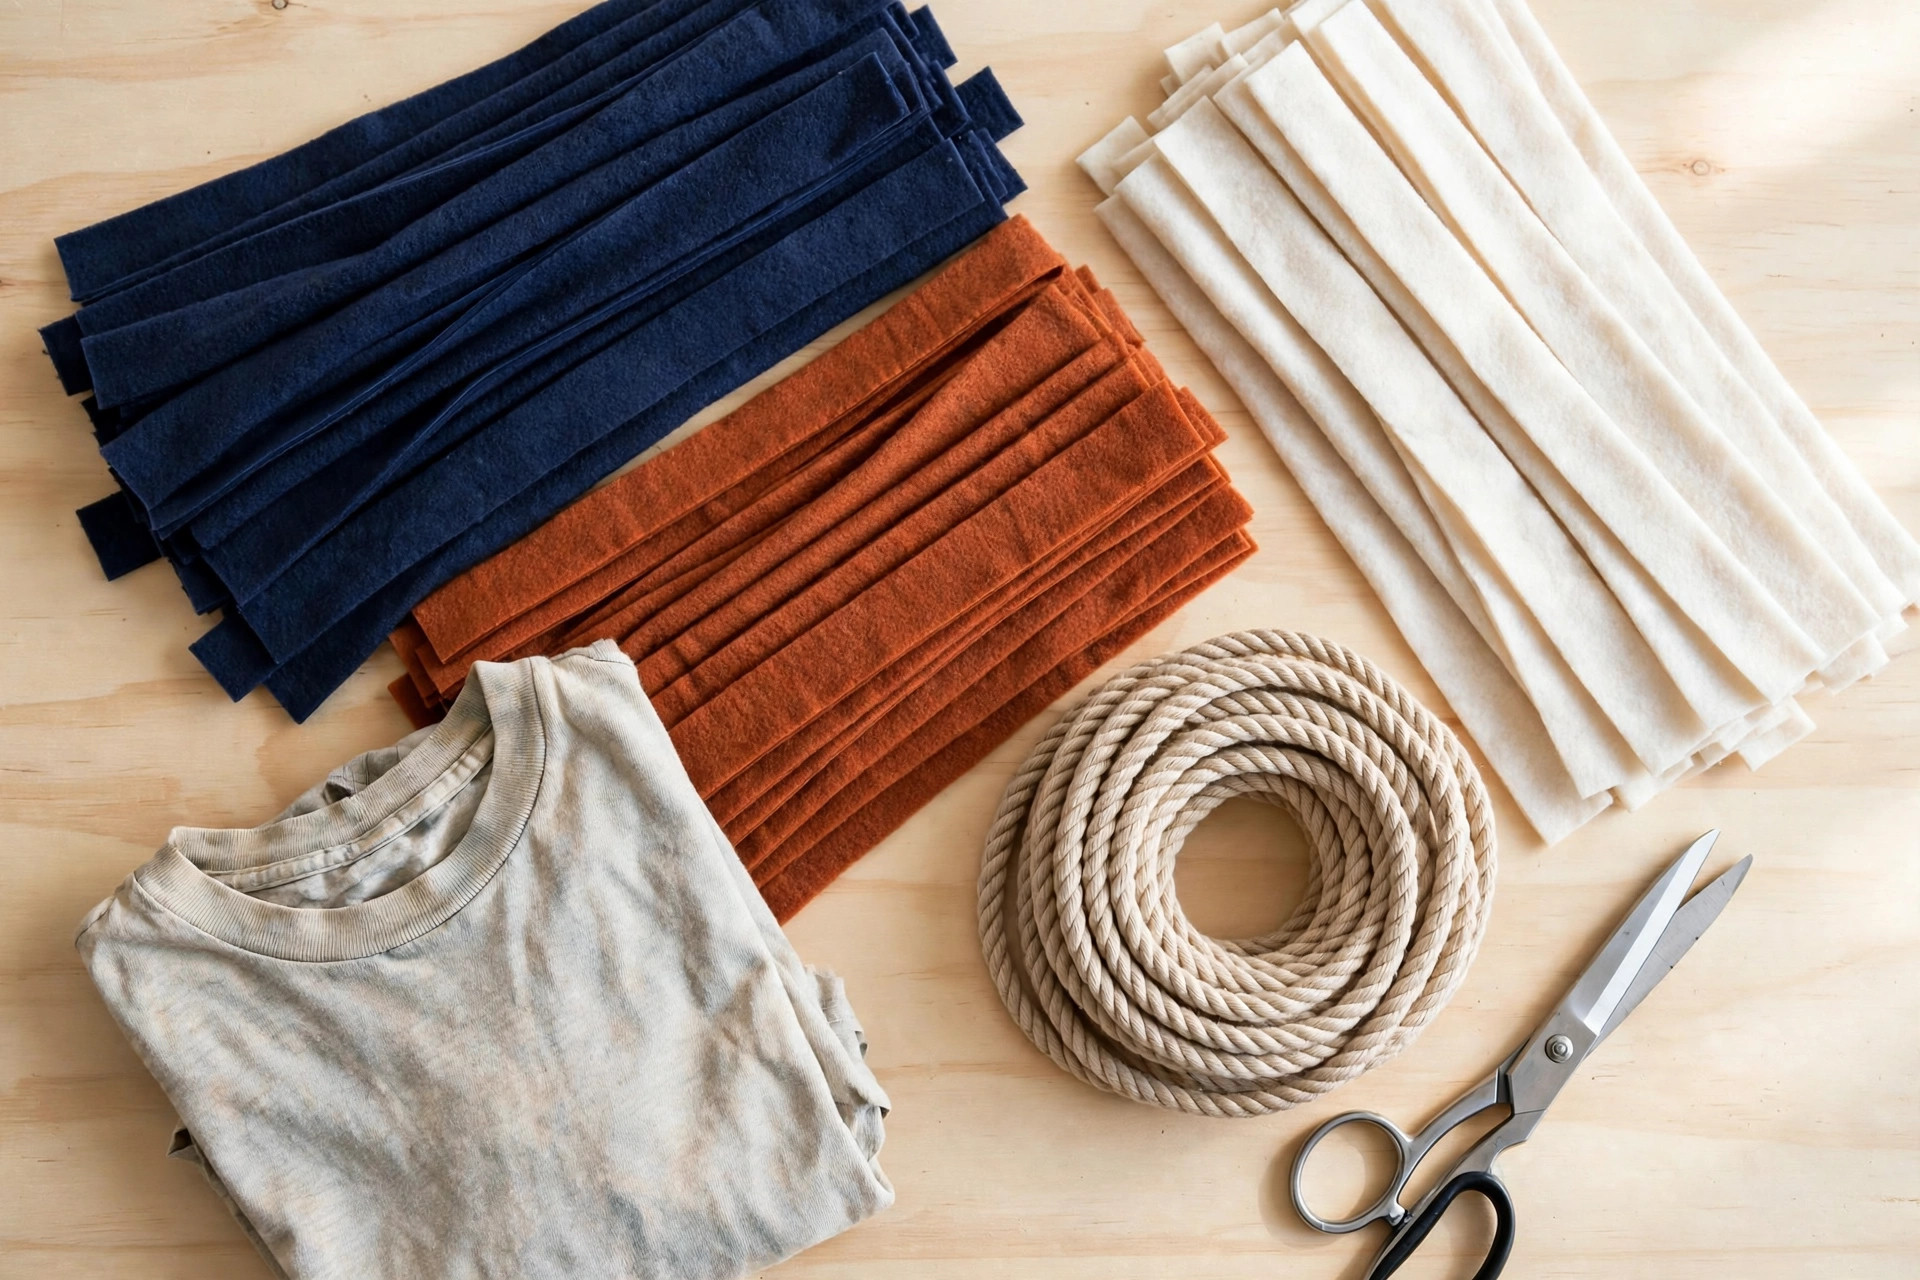
Diy tug toy materials flatlay.

When to retire a tug toy

Check the toy before every game, and retire it when any of these show up: a strip has torn through, the end knot is loosening, the braid has thinned to half its width, or loose threads longer than a few centimetres are hanging free. Loose threads are the real danger — a dog can swallow them, and they can tangle in the gut.

Retiring is not wasteful. Cut the old toy up and use the strips as stuffing for a DIY snuffle mat, or compost the cotton and fleece if your local scheme accepts it. Then make a fresh one — fifteen minutes, and your dog has a brand-new favourite.

FAQs

Is tug-of-war bad for dogs?
No — played properly, tug is a healthy game that builds muscle, confidence and your bond. The problems come from bad habits: yanking upward, letting the dog grab your hands, or playing until the dog is over-excited. Follow the rules above and tug is one of the safest games there is.

Can puppies play tug?
Yes, with a soft toy and short, gentle sessions. Use the soft loop tug in this guide, keep the pulling light, let the puppy win often, and stop after two or three minutes. Avoid hard tugging while adult teeth are coming in.

What is the safest material for a tug toy?
Fleece is the safest all-rounder — soft on gums, strong braided, and it does not fray into long threads. Cotton t-shirts are a close second. Denim is toughest but stiffer, so save it for adult dogs. Avoid nylon rope and anything with small parts.

How long should a tug toy last?
A fleece braid lasts weeks to months depending on the dog; a t-shirt tug a little less; a denim tug the longest. Supervised play and a quick check before each game matter far more than the material — retire at the first sign of wear.

My dog growls during tug — is that a problem?
Usually not. Most dogs growl during tug the way people laugh during a game — it is play noise, not aggression. Watch the body language: a loose, wiggly body with a wagging tail means fun. A stiff body, hard stare or freezing means stop the game calmly and try again another day.

The bottom line

A DIY dog tug toy is fifteen minutes of cutting and braiding for weeks of games. Start with the classic fleece braid — it suits almost every dog — then try the t-shirt tug for speed, the rope-and-ball for fetch fans, the denim knot for power chewers, and the soft loop for puppies. Keep the safety rules in mind, teach “drop it”, and put the toy away between games. Your dog gets a toy made exactly for them, and you get the best game there is, for free.

Pin this for later 📌 — and if you want more homemade play ideas, our guide to DIY dog toys from old clothes turns the rest of the wardrobe into toys too.
Golden retriever splashing happily in a DIY dog pool in a sunny backyard.

DIY Dog Pool: 7 Easy Ways to Keep Your Dog Cool

Some dogs were born for water. Others treat a puddle like a personal insult. Either way, on a hot day a dog pool is one of the simplest things you can build for your dog — a shallow splash to cool off in, a game to play, and a reason to spend the afternoon in the garden instead of panting indoors.

The good news is that a DIY dog pool does not need a contractor, a pond liner, or a big budget. A hard plastic kiddie pool, a stock tank, or even a splash pad from the garden centre can be a proper dog pool in under an hour — often for less than the cost of a bag of kibble. The trick is matching the pool to your dog’s size and confidence, keeping the water clean, and never treating a pool as a babysitter.

This guide covers 7 easy DIY dog pool ideas, the right water depth for your dog, how to keep the water fresh without chemicals, and the safety rules that matter most.

Before you start — the 3 rules
1. Never leave a dog alone in water. Even a shallow pool. Dogs slip, panic, or tire faster than they look, and a dog that cannot climb out of a steep-sided pool is in trouble within minutes. Somebody stays outside with the dog, every time.
2. Shallow first, always. A dog should be able to stand in the pool with its head well above the water. Start ankle-deep and let a nervous dog walk in on its own — never lift a reluctant dog into deep water.
3. Fresh water, no chemicals. Pool chlorine, algaecides and garden chemicals are not made for dogs that drink what they swim in. Keep the water clean by changing it often, not by dosing it.

How deep should a dog pool be?

Depth is the single most important decision. Too deep and a small or nervous dog will not use it — or worse, will panic. Too shallow and it is a puddle, not a pool.

Dog size Water depth Notes
Small (under 10 kg) 10–15 cm (4–6 in) Belly-deep at most; a kiddie pool with a low wall they can step over
Medium (10–25 kg) 15–25 cm (6–10 in) Chest-deep is plenty for cooling off and splashing
Large (25–45 kg) 20–30 cm (8–12 in) Enough to lie down in and soak the belly and paws
Giant / confident swimmers 30–45 cm (12–18 in) Only for dogs that already swim happily and can climb out easily

If your dog has never been in water, start at the shallow end of the range no matter its size. A dog that loves its first paddle will happily go deeper next time; a dog that gets a fright the first time may never go near the pool again. And remember: the pool also needs a way out — a low wall, a ramp, or a step — because a dog that cannot climb out will panic.

1. Hard plastic kiddie pool (the classic)

This is the build most people should start with: a rigid plastic kiddie pool from a garden centre or toy shop, set on flat ground in the shade. It is the cheapest proper dog pool you can buy, it takes five minutes to set up, and if your dog does not like it, you have lost almost nothing.

Pick a hard plastic pool, not an inflatable one — a dog’s claws will puncture an inflatable ring in seconds, and a collapsing wall is a bad first experience. Look for a pool with a low, gently sloping wall (10–15 cm high) so small dogs can step in and out on their own, and a flat bottom so it does not tip. Put it on level ground, ideally on grass or a non-slip mat rather than bare concrete, which gets slippery when wet.

Cost: about $10–$30. Time: five minutes. Fill it ankle-deep to start, toss in a floating toy, and let your dog investigate at its own pace.

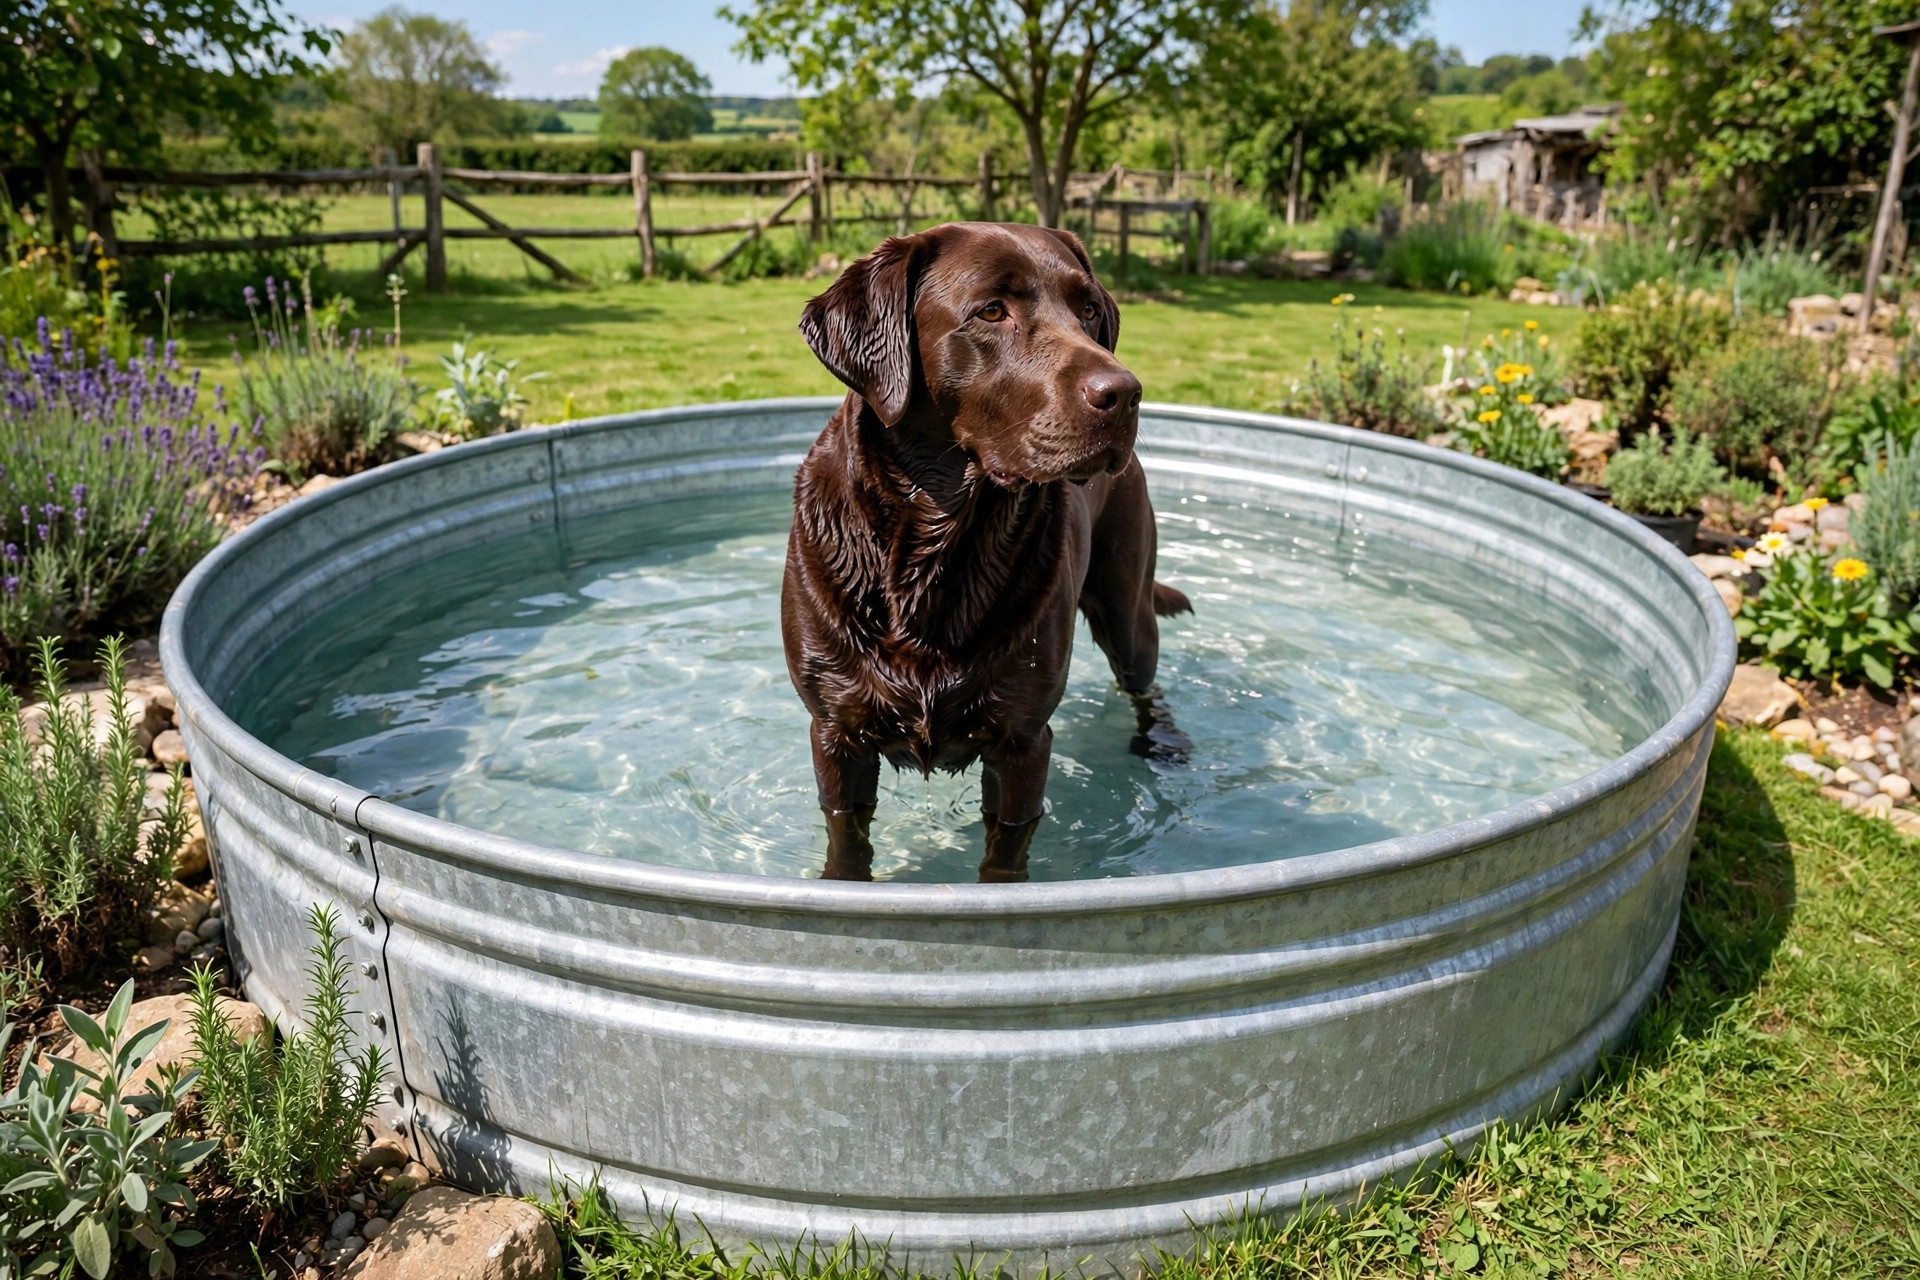
Labrador stock tank dog pool.

2. Stock tank pool (big dogs, serious splashing)

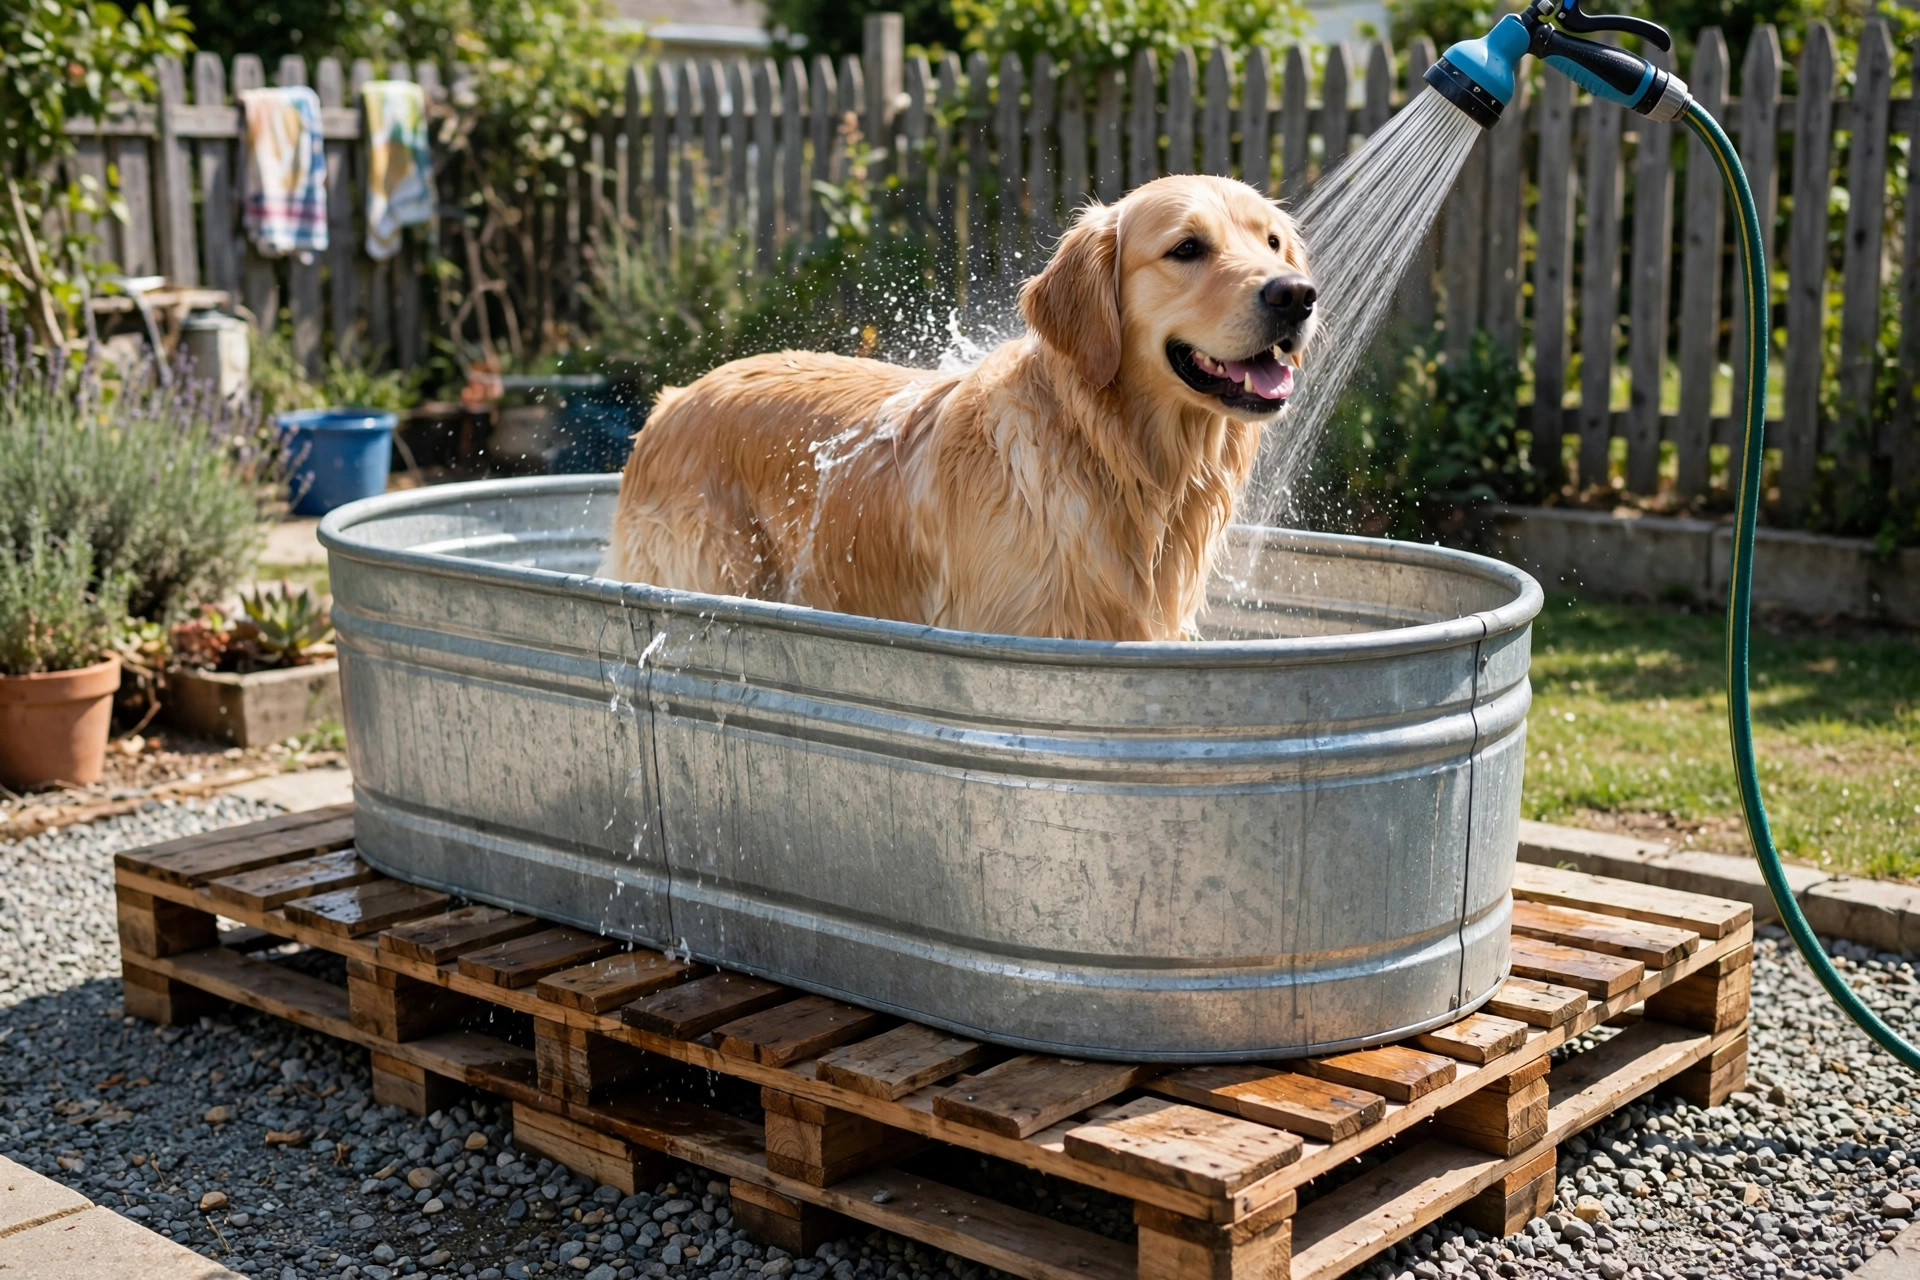
For large dogs that flatten a kiddie pool in a week, a galvanised or plastic stock tank — the kind farmers use for livestock water — is the upgrade. They come in sizes from 100 to 400 litres, they are rigid enough for a 40 kg dog to climb in and out of, and they last for years.

Choose a tank with a low profile (around 60 cm tall) and a wide base so it cannot tip. The taller ones need a step or a ramp, or a dog that is happy to be lifted in — and a wet 40 kg dog is not something you want to lift. A plastic stock tank is lighter and stays cooler in the sun than a metal one, which can get hot to the touch. Put a non-slip mat on the bottom — wet plastic is slippery — and place the tank where the water can drain away when you empty it.

Cost: about $60–$150 depending on size. Time: half an hour to position and fill. It will not win a design award, but it is the toughest dog pool in this guide — and it doubles as a bath for a muddy dog.

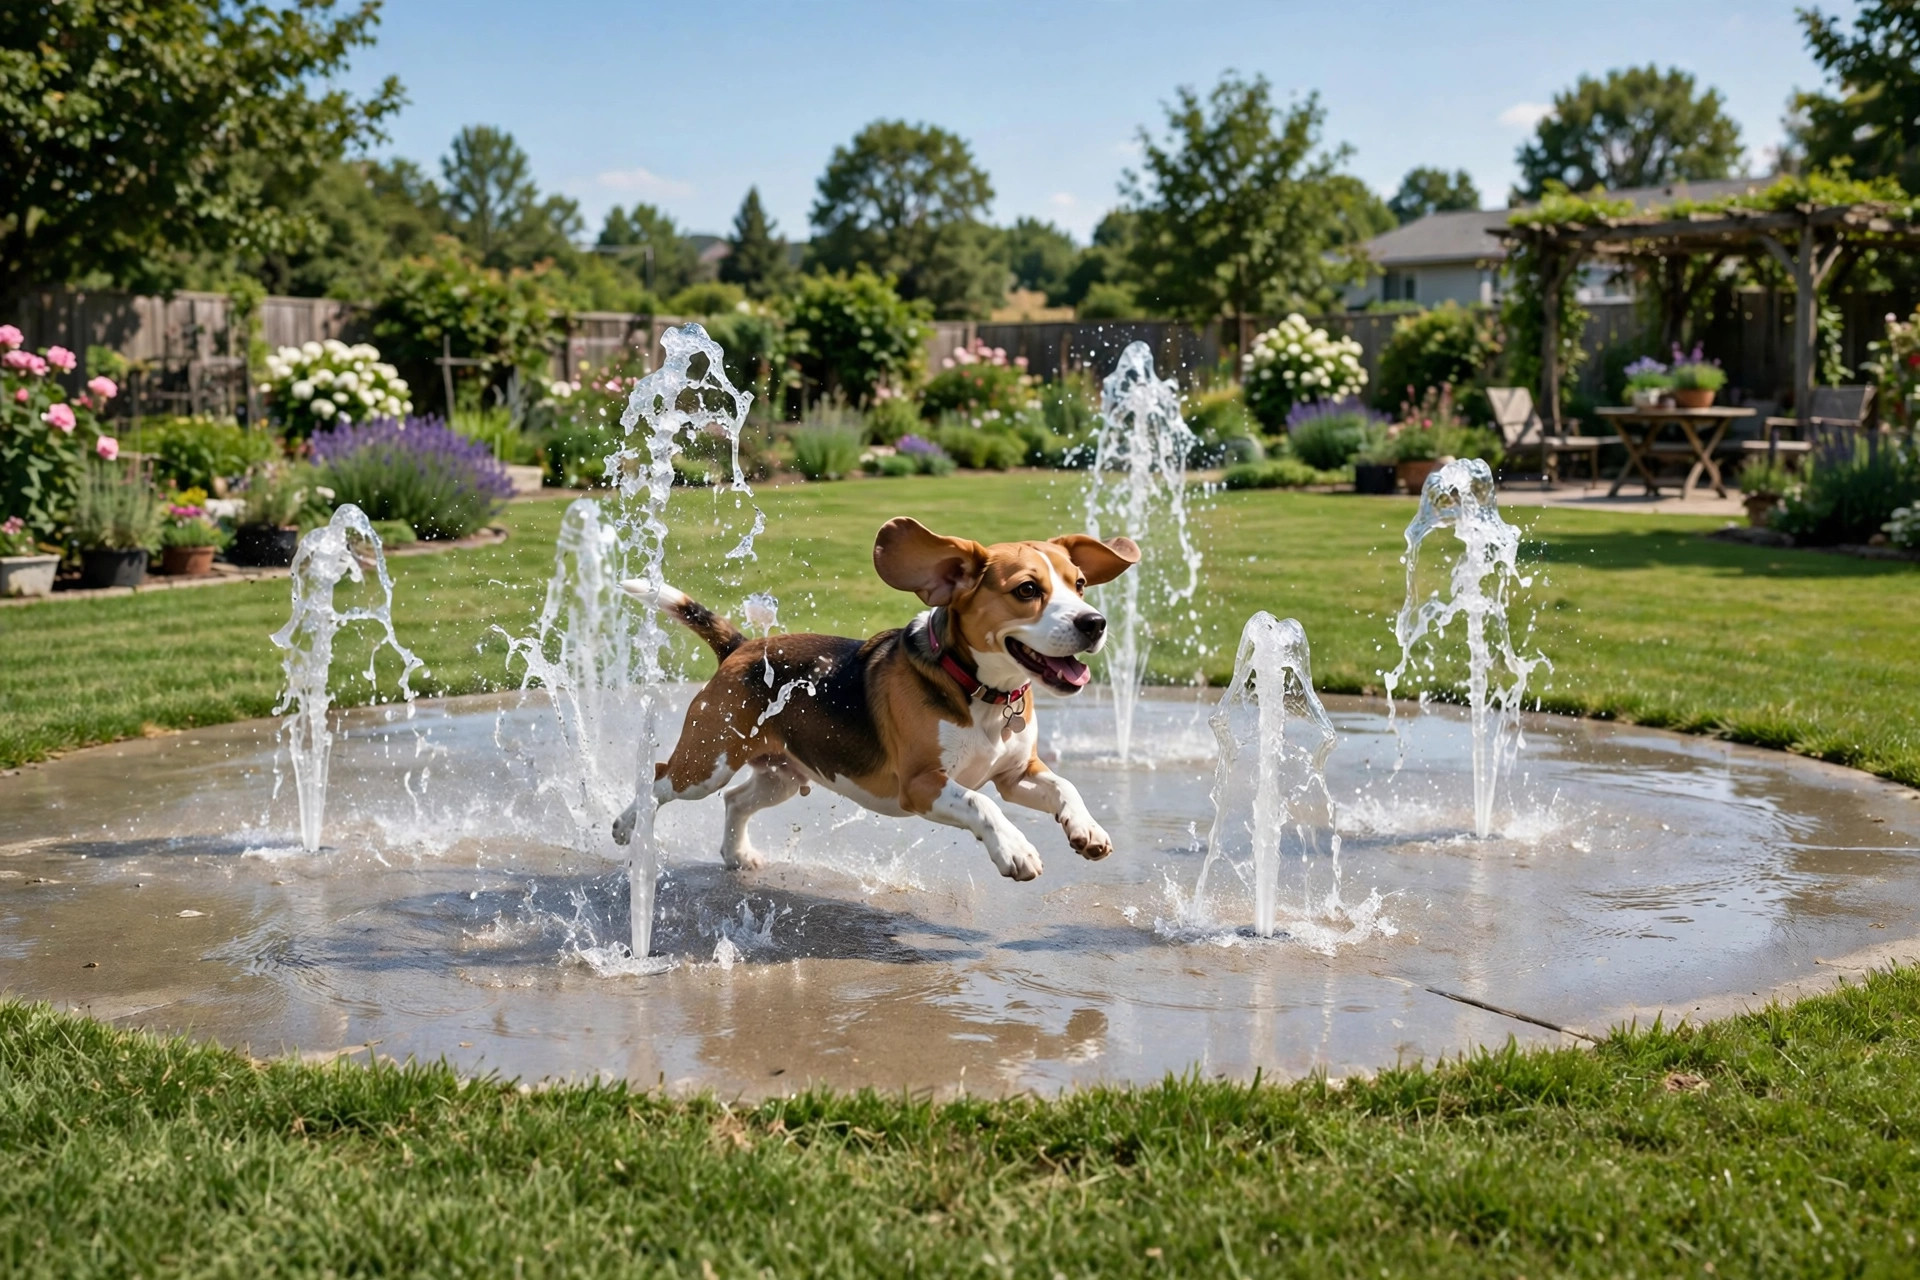
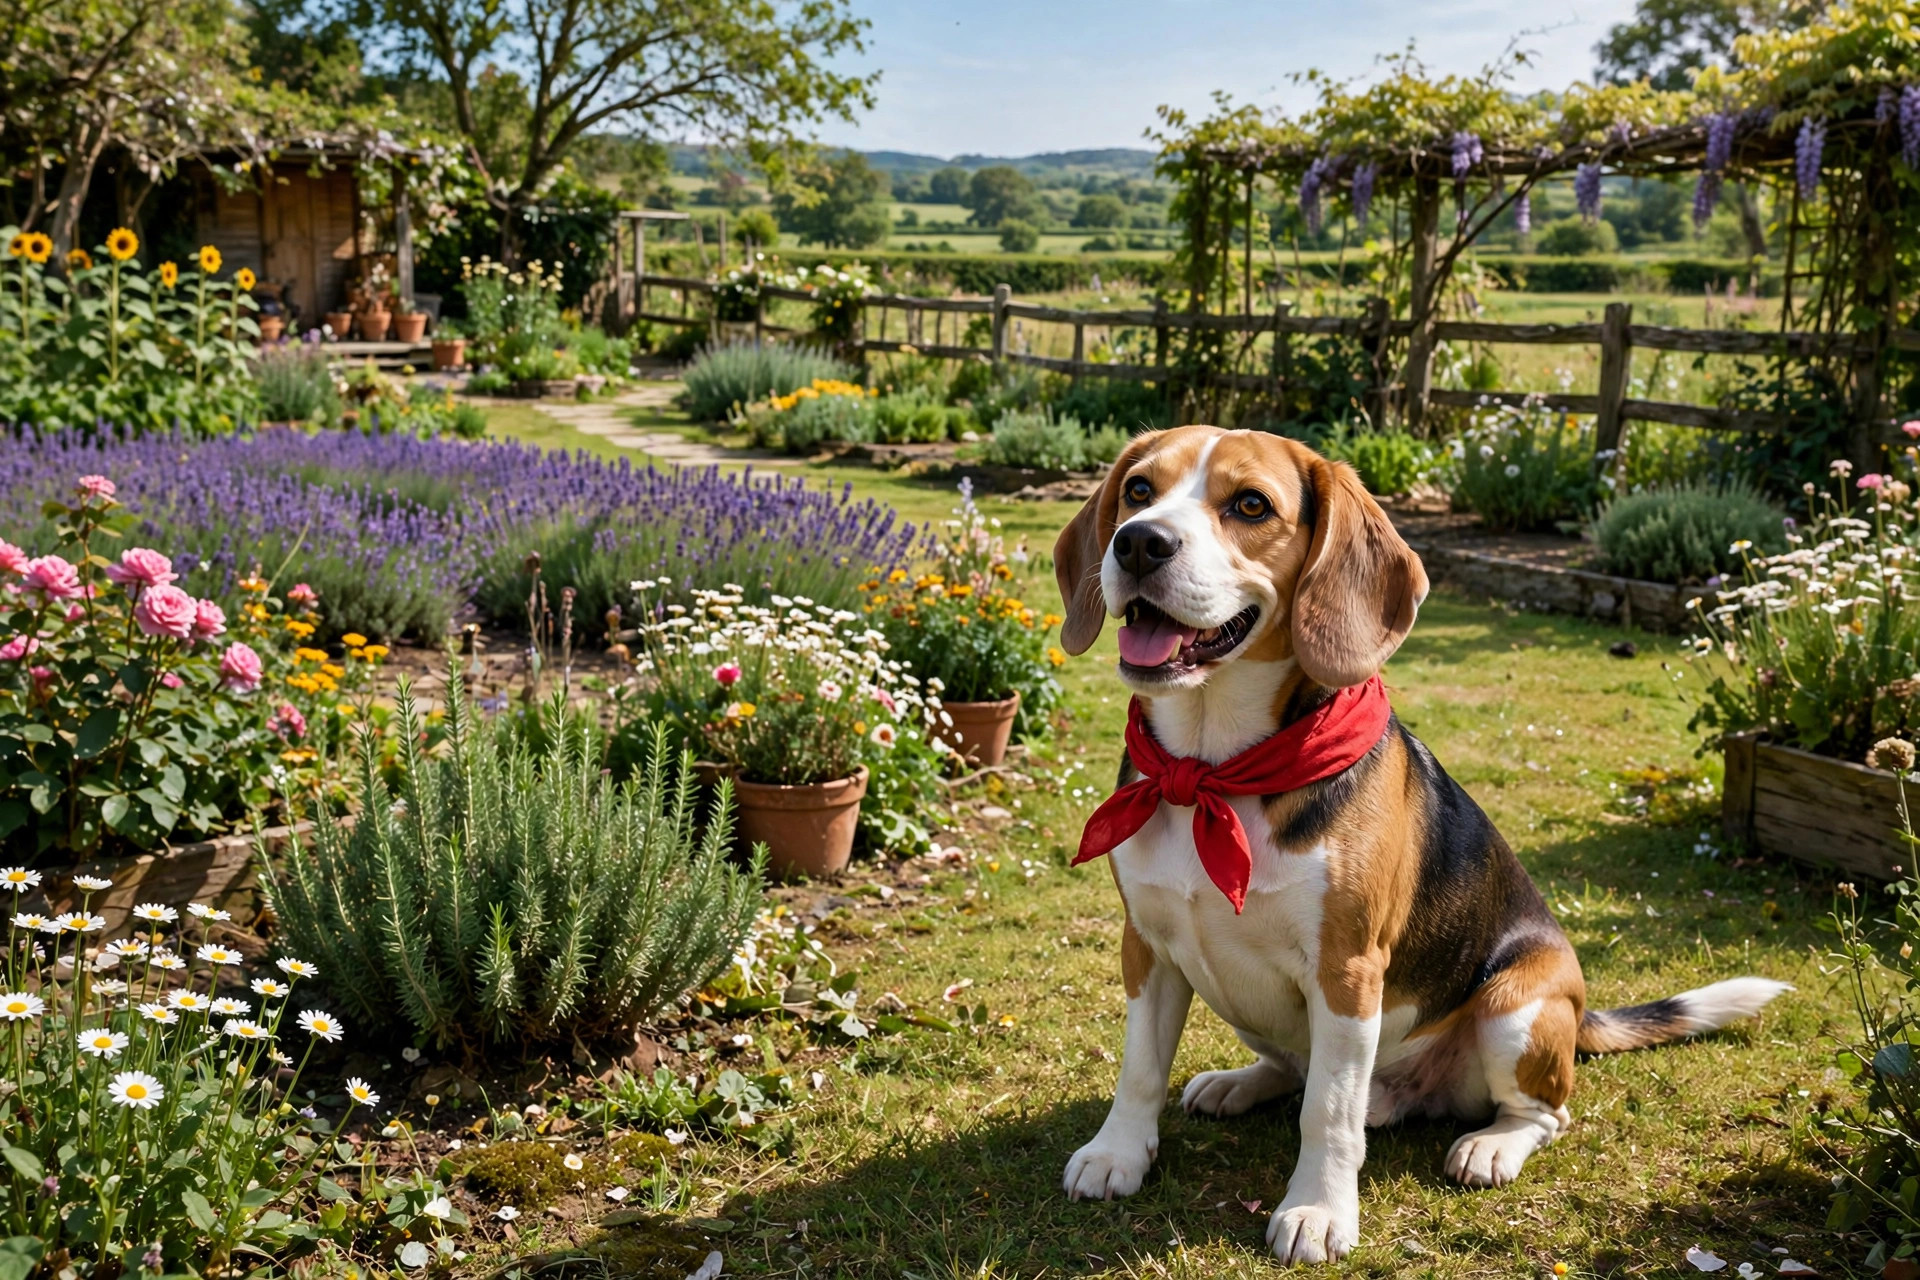
Beagle splash pad dog pool.

3. Splash pad / sprinkler mat (dogs that will not sit still)

Some dogs will not lie in a pool but will chase a sprinkler for an hour. A splash pad — a flat mat with little water jets around the edge — is the answer for those dogs. It connects to a garden hose, sprays a gentle ring of water, and has no sides at all, so there is nothing to climb into and nothing to be nervous about.

It suits puppies, small dogs, and dogs that are wary of standing water, because the dog controls how wet it gets — it can run through the spray or stand at the edge and watch. Keep the water pressure low: a fierce jet can sting a small dog’s eyes and ears, and a dog that gets blasted in the face once may never come back. A gentle, low spray is the whole point.

Cost: about $15–$40. Time: ten minutes to connect the hose. Best on a warm day on grass, where the water drains away instead of pooling.

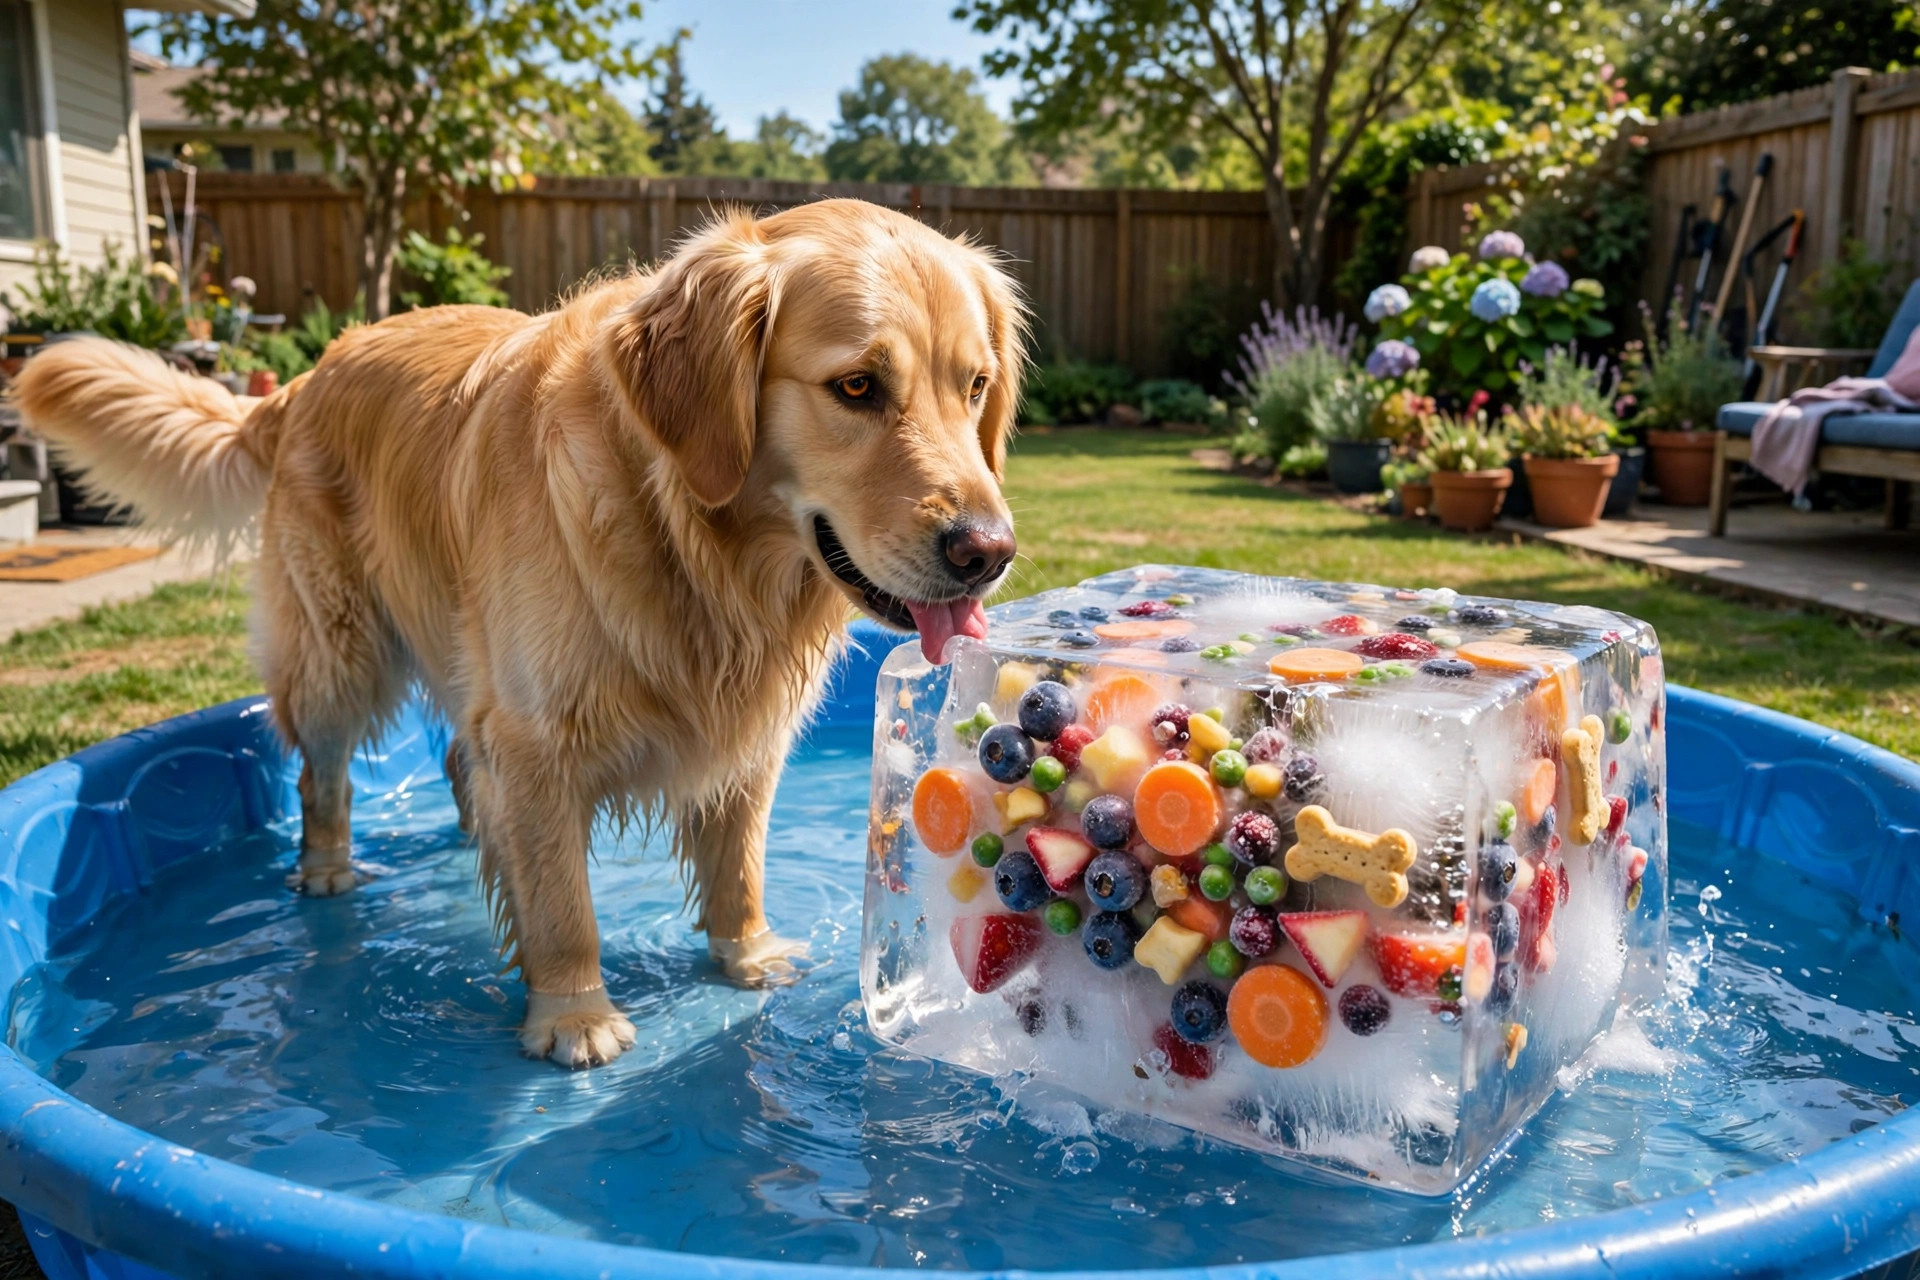
Frozen treat ice block dog pool.

4. Frozen treat pool games (cooling + enrichment in one)

On the hottest days, the pool is not just for splashing — it is a game. Freeze treats into a block of ice, drop the block into a shallow pool, and let your dog work at it. It cools them down from the outside and the inside at the same time, and it keeps a bored dog busy for half an hour.

Make a treat block by filling a container with water, dropping in a few dog-safe treats — blueberries, carrot pieces, apple slices, a smear of peanut butter (xylitol-free, always) — and freezing it overnight. Float the block in the pool, or put it in an empty pool with a little water around it. As it melts, the treats appear one by one. It is the simplest enrichment game there is, and it costs almost nothing.

Cost: about $0–$5 (treats you already have). Time: overnight in the freezer, five minutes to set up. Supervise as always — and skip this one if your dog is a gulper that tries to swallow large ice chunks whole.

5. Shade + pool station (the setup that actually gets used)

A pool in full sun is a hot bath by midday. The pool that gets used every day is the one in the shade, with a towel and a drink nearby. A shade station is the cheapest upgrade you can make to any pool on this list.

A pop-up canopy, a large garden umbrella, or a shade sail over the pool keeps the water cool and gives your dog somewhere to lie in the shade afterwards. Put a non-slip mat or an old towel beside the pool as a drying spot, and keep a bowl of fresh drinking water next to it — a dog that has been splashing for half an hour will be thirsty, and you do not want it drinking pool water. If your garden has no natural shade, a $30 pop-up canopy is money well spent.

Cost: about $0–$40 (an umbrella you already own, or a cheap canopy). Time: ten minutes. This is the difference between a pool your dog uses once and a pool your dog lives in all summer.

6. Portable foldable pool (small spaces, travel, renters)

A foldable dog pool — the kind that pops open like a laundry basket and folds flat for storage — is the best option if you are short on space, you rent, or you want a pool to take to the park or on holiday. They are made of tough PVC with a rigid rim, they hold their shape when full, and they pack away into a cupboard when the weather turns.

They suit small and medium dogs best; a big dog can still use one, but check the weight limit and the wall height before you buy — a 45 kg dog leaning on a foldable wall will fold it. The big advantage is storage: a rigid kiddie pool takes up garden space all year, a foldable one does not. Rinse it, dry it, fold it, and it is gone until the next hot day.

Cost: about $20–$50. Time: two minutes to pop open and fill. A good choice for balconies and small patios, too — just make sure the surface underneath can take the weight of the water and that the drain-off goes somewhere sensible.

7. Digging pit + pool combo (for dogs that dig)

Some dogs do not want a pool — they want a hole. If your dog digs every flower bed in the garden, give the digging a legal outlet: a shallow digging pit next to the pool. A low wooden frame filled with damp sand or soil, with the pool beside it, turns a destructive habit into a game.

Wet the sand down and bury a few treats in it, and most diggers will choose the pit over the petunias within a week. The pool beside it lets them cool off between digging sessions, and the two together keep a high-energy dog busy for an afternoon. Keep the pit shallow (15–20 cm of sand is plenty) and in the shade, and cover it with a board or tarp when it is not in use so cats do not adopt it.

Cost: about $20–$60 (frame timber, sand, a few treats). Time: an afternoon. It will not stop every digger, but for a dog that digs for fun rather than escape, it works surprisingly well.

Keeping the water clean (without chemicals)

A dog pool goes green fast in the sun. The fix is simple and chemical-free: change the water often. A small kiddie pool should be emptied and refilled every day or two in hot weather; a stock tank every two or three days. Tip the pool over onto the lawn — the water is good for the grass — scrub the bottom with a brush, and refill.

A few habits help: keep the pool in the shade, which slows algae; skim leaves out with a small net; and put the pool where the dog does not track mud straight into it. Never add chlorine, bleach, or algaecide — dogs drink pool water, lick their paws, and groom themselves afterwards, so anything in the water ends up inside the dog. If the water smells or looks cloudy, empty it. Fresh water is cheaper than a vet visit.

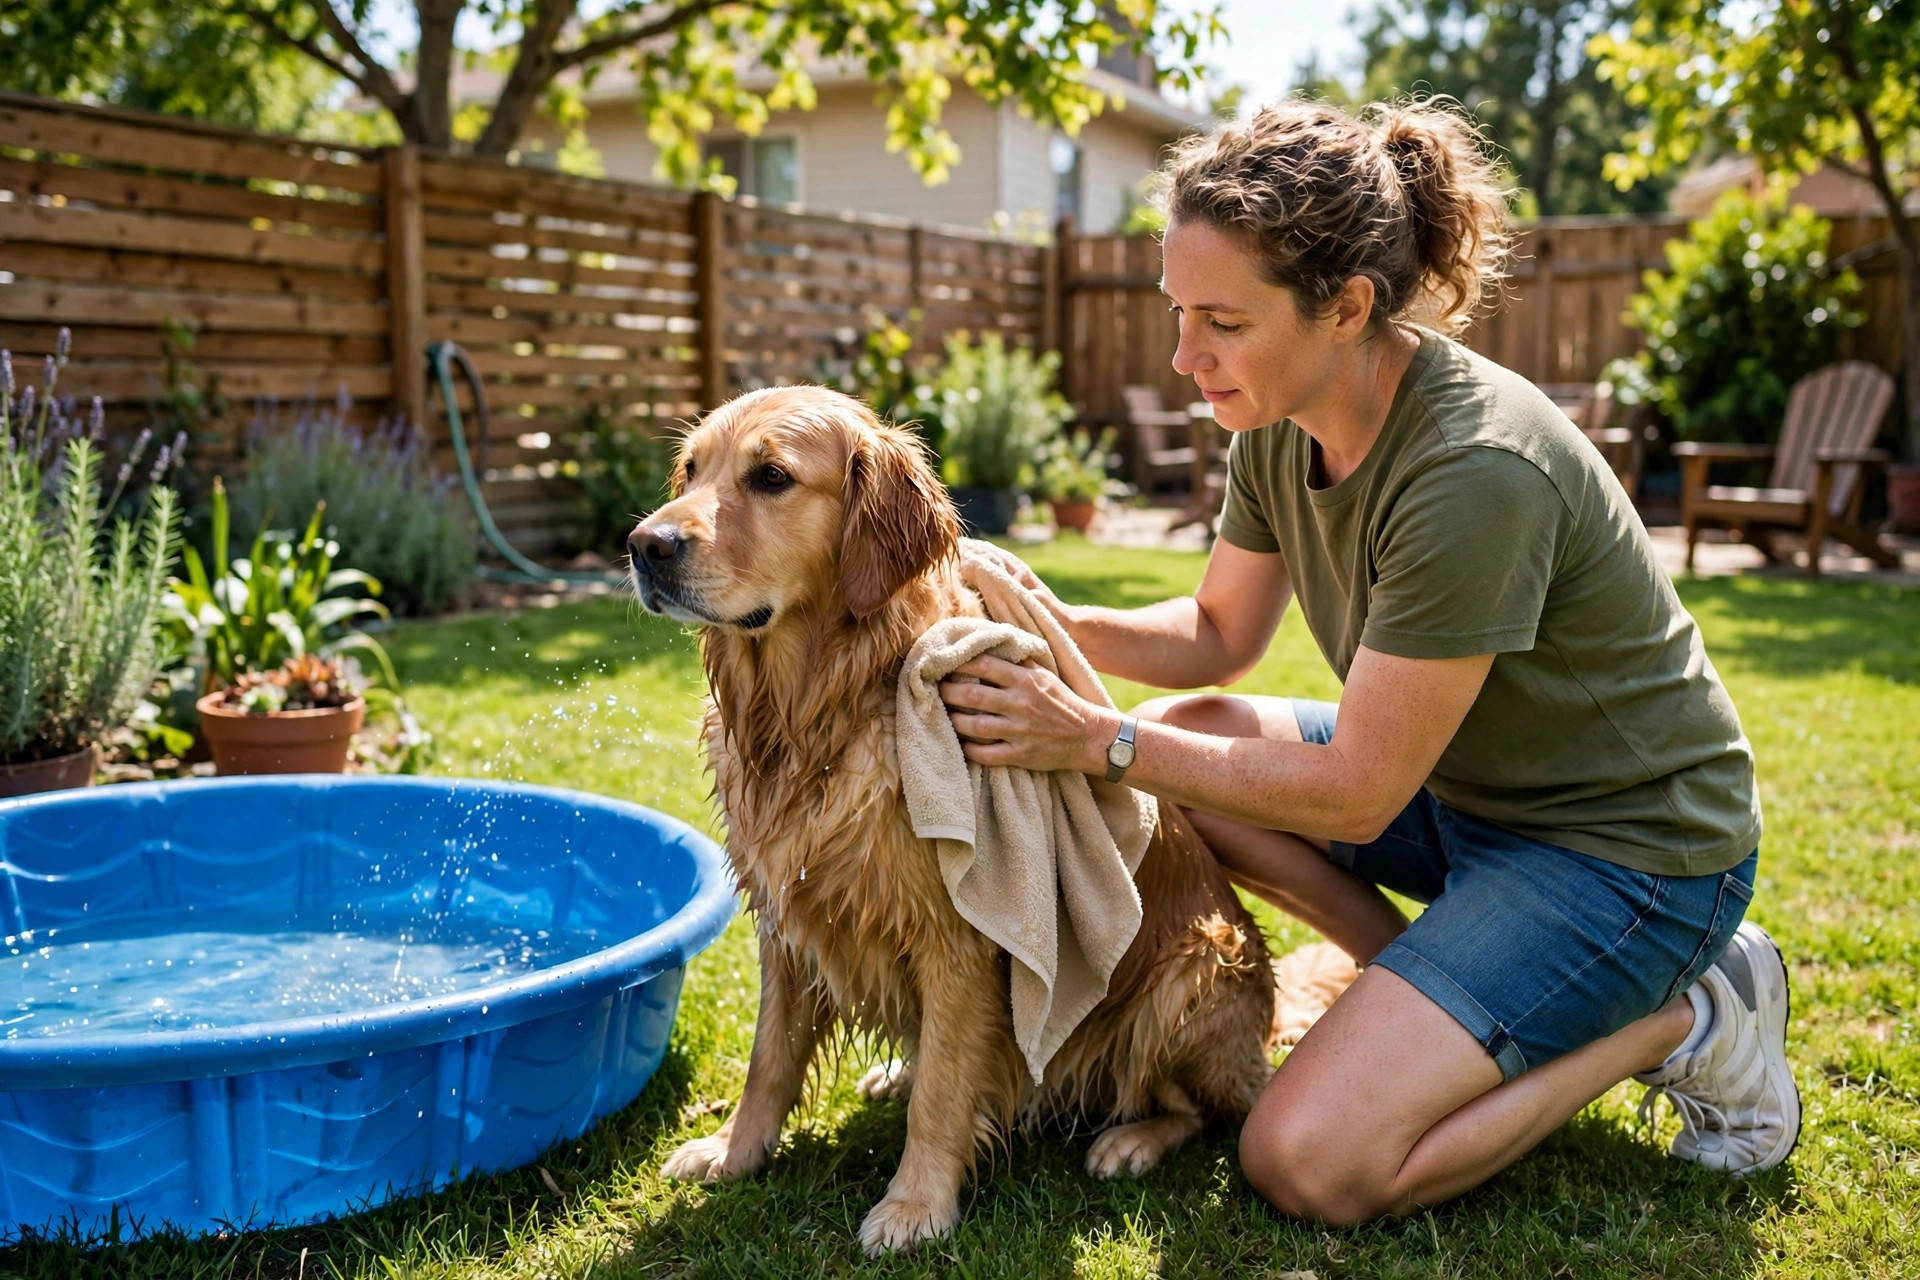
Towel drying dog after pool.

Drying off after the pool

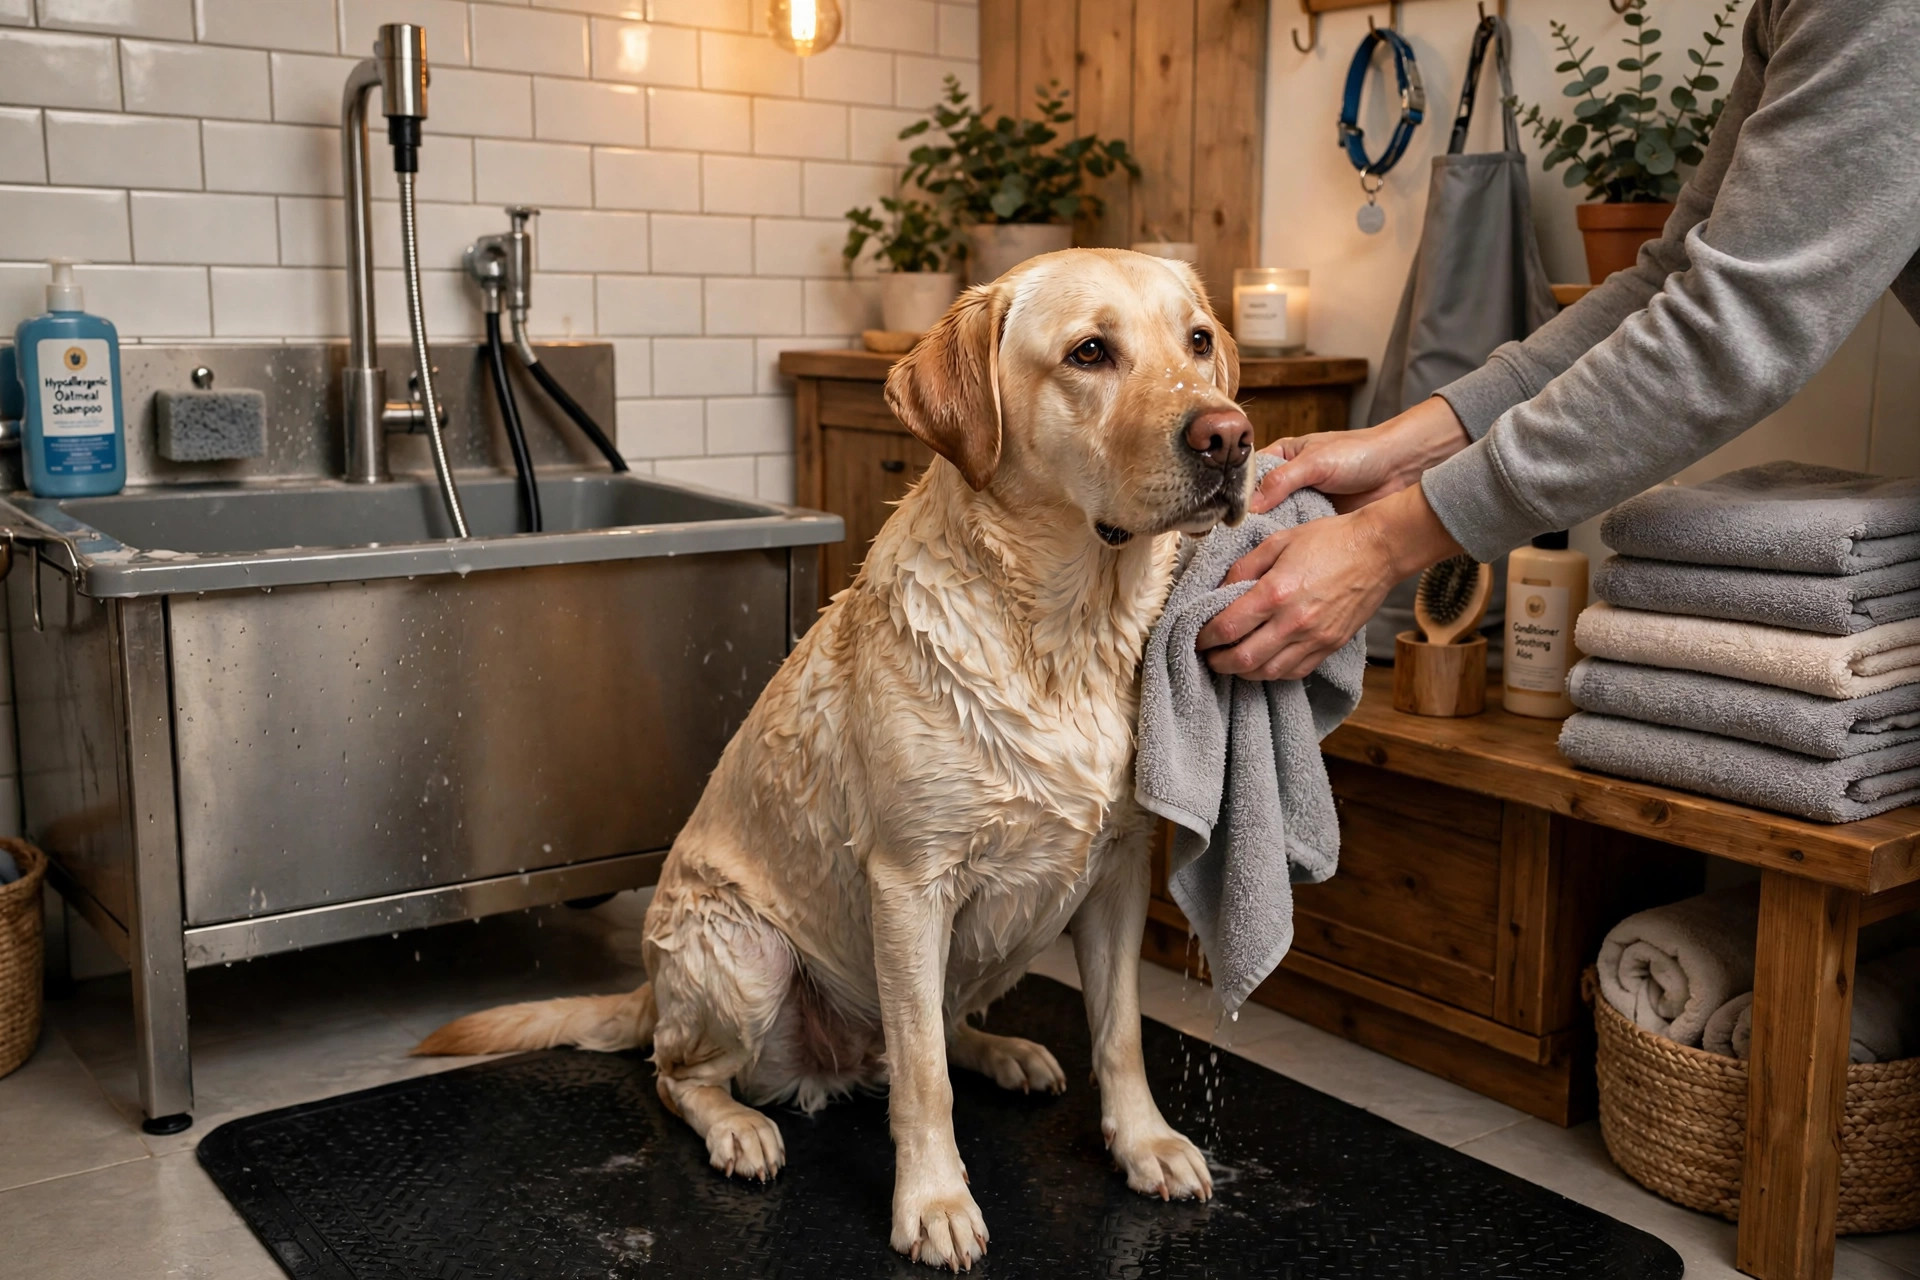
A wet dog in the house is a wet sofa, a wet floor, and a dog that smells like a pond by evening. Keep a towel by the pool and dry the belly, paws and ears before the dog comes inside — ears especially, because damp ears are where ear infections start. A quick towel-dry takes two minutes and saves a lot of mopping.

If your dog will tolerate it, a gentle rinse with fresh water after a pool session washes off the worst of the mud and algae. And on a cool evening, bring the dog in promptly: a wet dog loses heat fast once the sun goes down, and a small or older dog can get chilled even on a warm day.

When NOT to use a dog pool

A pool is not right for every dog, every day. Skip it — or keep the water very shallow — for brachycephalic breeds (bulldogs, pugs, French bulldogs), which struggle to keep their heads above water and overheat fast; for puppies under 12 weeks, which chill quickly; for dogs with ear infections or skin wounds, which water can make worse; and for any dog that is frightened of water. A frightened dog forced into a pool learns to fear water, not to love it.

Watch for the signs of overheating even in the pool: heavy panting that does not ease, drooling, wobbling, or a dog that suddenly goes quiet and still. If you see them, get the dog out of the sun, offer cool (not ice-cold) water to drink, wet the belly and paws with a damp towel, and call your vet if the panting does not settle within a few minutes. A pool helps a dog cool down — it is not a cure for heatstroke.

FAQs

What is the best DIY dog pool for a large dog?
A plastic stock tank. It is rigid, it holds its shape under a heavy dog, it lasts for years, and it is deep enough for a large dog to lie down in. Add a non-slip mat on the bottom and a step or ramp if the wall is high.

How deep should the water be in a dog pool?
Belly-deep at most for most dogs — 10–15 cm for a small dog, 15–25 cm for a medium dog, 20–30 cm for a large dog. A dog should always be able to stand with its head well above the water.

Can dogs swim in a kiddie pool?
Most dogs do not really swim in a kiddie pool — they stand, splash and lie down in it, which is exactly what cools them off. A kiddie pool is for cooling and playing, not for swimming practice.

How often should I change the water in a dog pool?
Every day or two in hot weather for a small pool, every two or three days for a stock tank. If the water smells, looks cloudy, or has leaves and mud in it, empty it and refill — never add chlorine or algaecide.

Do dogs need a pool in summer?
Not every dog does — some dogs hate water and are perfectly happy in the shade with a bowl of cold water. But for a dog that loves splashing, a shallow pool is one of the cheapest ways to keep them cool, and it is a lot of fun to watch.

Is it safe to leave my dog alone in a pool?
No. Never leave a dog unsupervised in water, even a shallow pool. Dogs slip, panic or tire faster than they look, and a dog that cannot climb out is in trouble quickly. Somebody stays outside with the dog, every time.

The bottom line

A DIY dog pool is one of the simplest things you can build for your dog: a kiddie pool for most dogs, a stock tank for big ones, a splash pad for the ones that will not sit still, and a frozen treat block when the heat is really on. Keep the water shallow, keep it fresh, put the pool in the shade, and never leave your dog alone in it. Get those right and the cheapest pool on this list will keep your dog cool and happy all summer.

Pin this for later 📌 — and once the pool is in, make the rest of the garden dog-friendly too: our DIY dog house ideas and dog run ideas turn a fenced yard into a proper dog space, our dog backyard ideas cover the whole garden, and our DIY dog wash station is the perfect spot to rinse off after a swim.

Golden retriever behind a cheap DIY wire-mesh dog fence in a sunny backyard.

DIY Dog Fence Outdoor Cheap: 7 Budget Builds That Actually Keep Dogs In

A proper garden fence can cost thousands — and for a lot of dog owners, that is the whole problem. The dog needs a safe yard to run in, the budget says otherwise, and the “cheap” options online are either flimsy garden edging or a project that needs a contractor.

Here is the good news: a DIY dog fence does not have to be expensive to work. A welded-wire fence on steel T-posts, a pallet fence built from free wood, or a no-dig panel run can keep a dog safely in the yard for a fraction of a contractor’s quote — often under $100 for a small run, and a few hundred for a full backyard. The trick is picking the right build for your dog’s size and habits, and getting the gate and the ground line right, because that is where cheap fences fail.

This guide covers 7 cheap DIY dog fence builds for outdoors, with honest costs, the right height for your dog, and the mistakes that send dogs straight over, under or through.

Before you start — the 3 rules
1. Check the rules first. Many neighbourhoods, HOAs and councils limit fence height, materials and placement — some ban wire mesh at the front of the house, others need a permit over a certain height. A five-minute check beats rebuilding the whole fence.
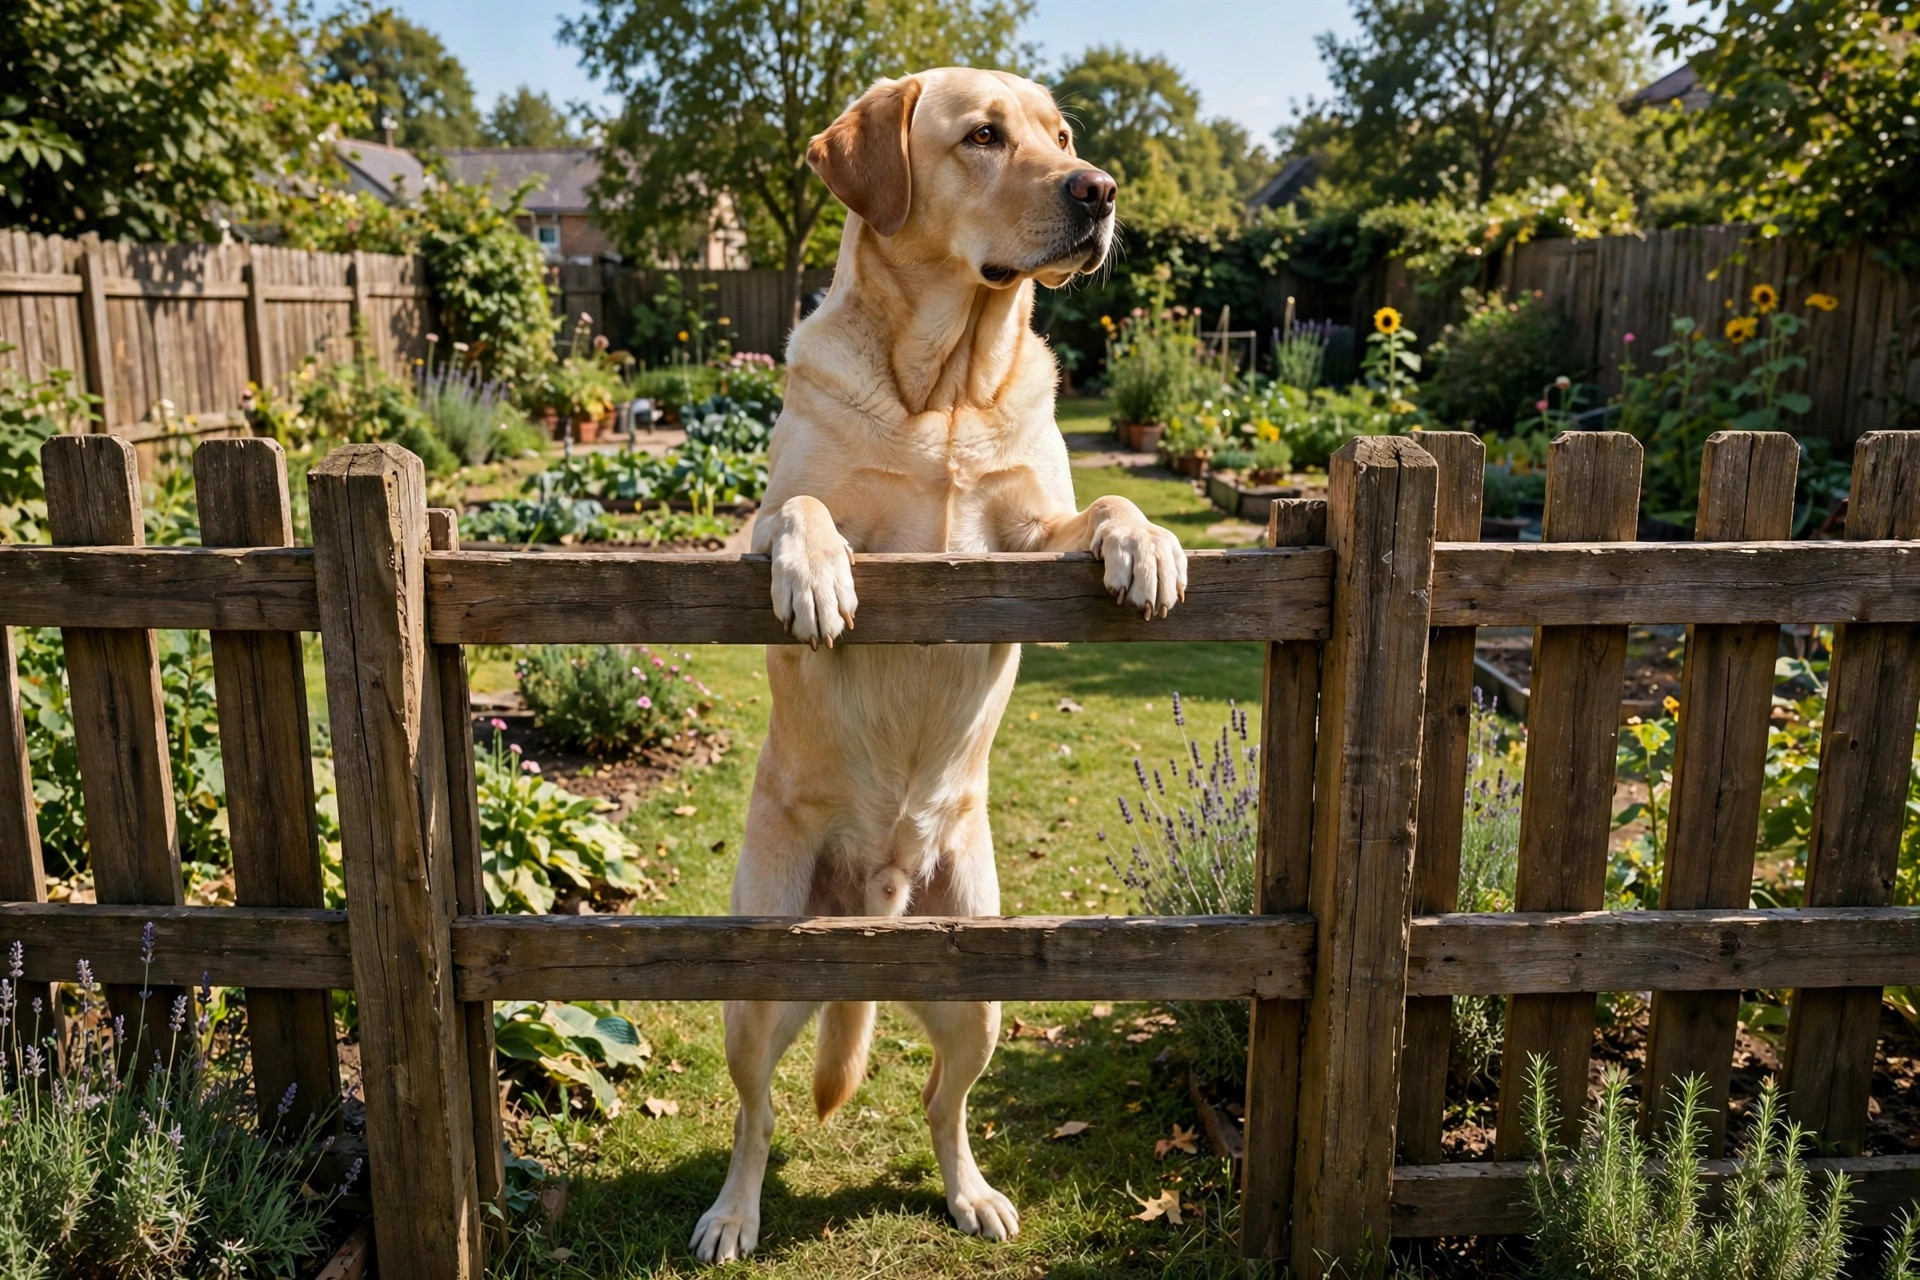
2. Measure your dog, not the catalogue. Fence height is decided by your dog’s jump, not by what looks tidy. Measure your dog standing on its hind legs with its paws up — the fence must be comfortably taller than that, with margin.
3. Plan the gate before you buy anything. Gates are where cheap fences fail: they sag, the latch slips, and the dog learns the gap in a day. Decide where the gate goes and how it closes before you order a single post.

Installing t post wire mesh dog fence.

How much does a cheap DIY dog fence cost?

It depends on the length you need and the material you choose, but a rough guide for a 30-metre (100-foot) run:

Build Approx. cost per 30 m Best for
T-posts + welded wire mesh $80–$150 Most dogs, best value
Pallet fence $0–$60 Small–medium dogs, free wood
Chicken wire garden fence $40–$80 Small dogs, garden zones
No-dig fence panels $150–$300 Renters, small yards
Bamboo / reed screening $60–$120 Privacy over an old fence
PVC pipe fence $120–$250 Small dogs, clean look
Rope + post boundary $30–$60 Calm dogs, visual boundary only

Measure your boundary before you shop: walk it with a tape or a long rope, add 10% extra for mistakes and corners, and count your posts — one every 2–2.5 metres for wire fences, closer together on soft ground.

Dog fence gate latch closeup.

How tall should a dog fence be?

Height is the single most important decision. Too low and your dog is over it; too high and you have paid for fence you did not need.

Dog size Minimum height Notes
Small (under 10 kg) 90 cm (3 ft) Watch for squeezing through gaps, not jumping
Medium (10–25 kg) 120 cm (4 ft) Most spaniels, beagles and border collies
Large (25–45 kg) 150 cm (5 ft) Labradors, boxers, German Shepherds
Giant / athletic jumpers 180 cm (6 ft) Huskies, Malinois, any dog that clears 5 ft

If your dog has ever cleared a fence, go one step taller than the table says. And remember: a dog that cannot jump over will try to dig under, so height alone is never the whole answer — the ground line matters just as much, and we cover that below.

Measuring fence height tall dog.

1. T-posts + welded wire mesh (the cheapest real fence)

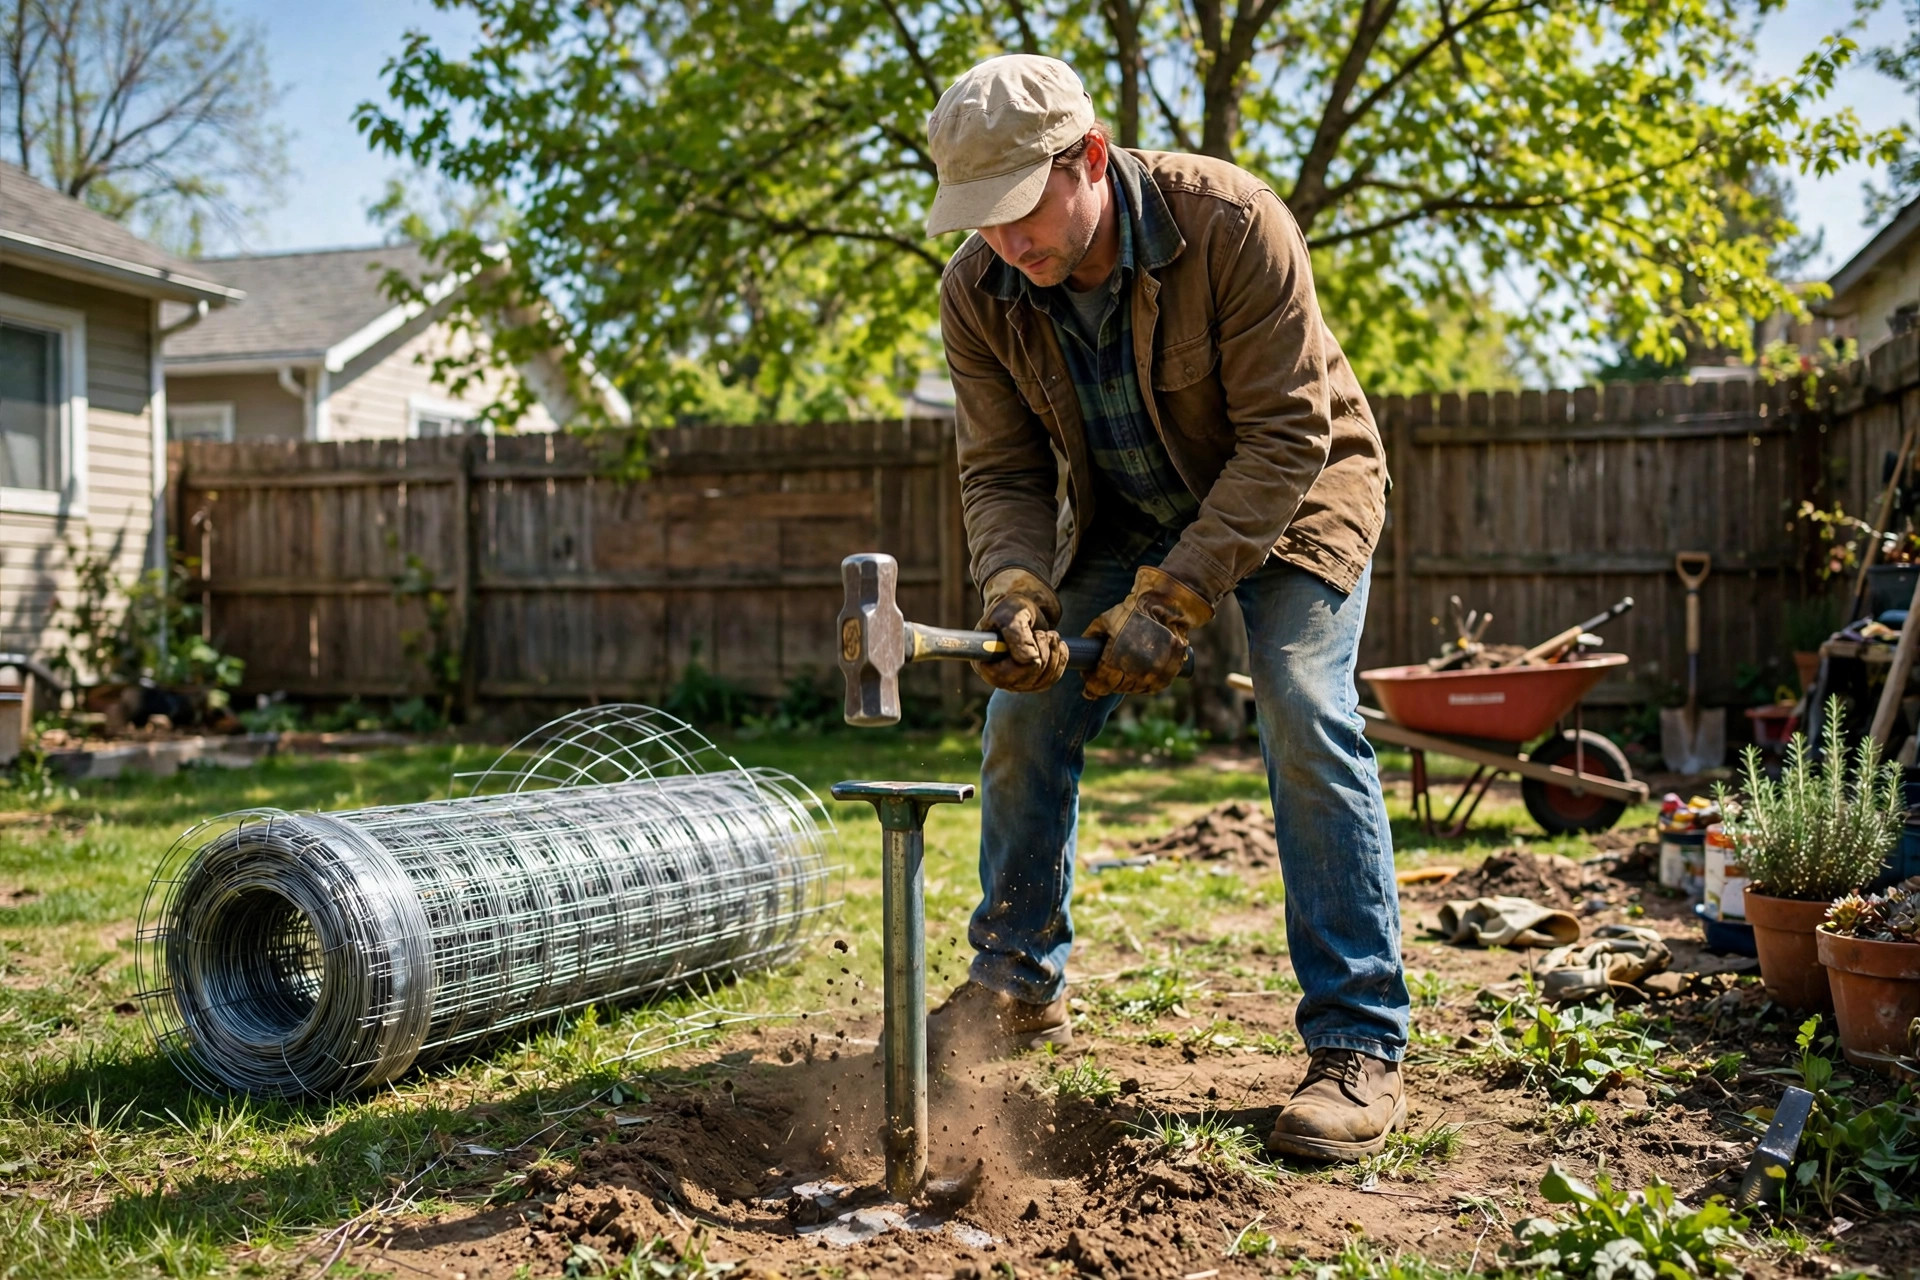
This is the build most people should start with: steel T-posts driven into the ground every 2–2.5 metres, with a roll of welded wire mesh unrolled along them and fixed with wire clips or zip ties. It is the cheapest proper fence you can build, it goes up in a day, and it holds up for years.

Buy 1.2 m or 1.5 m T-posts to match your dog’s height, and welded wire with 5 cm × 5 cm (2 in × 2 in) openings — smaller openings for puppies and small dogs so they cannot push their heads through. Drive each post 30–40 cm into the ground with a post driver or a heavy hammer, keeping them straight and evenly spaced. Unroll the mesh along the line, pull it tight, and clip it to every post at the top, middle and bottom. Leave no slack: a loose mesh sags, and a sagging mesh is a climbing ladder.

Cost: about $80–$150 for a 30-metre run. Time: half a day for two people. It will not win a design award, but it is the best value fence in this guide — and it is easy to extend later if you fence more of the yard.

Pallet wood dog fence backyard.

2. Pallet fence (free wood, real fence)

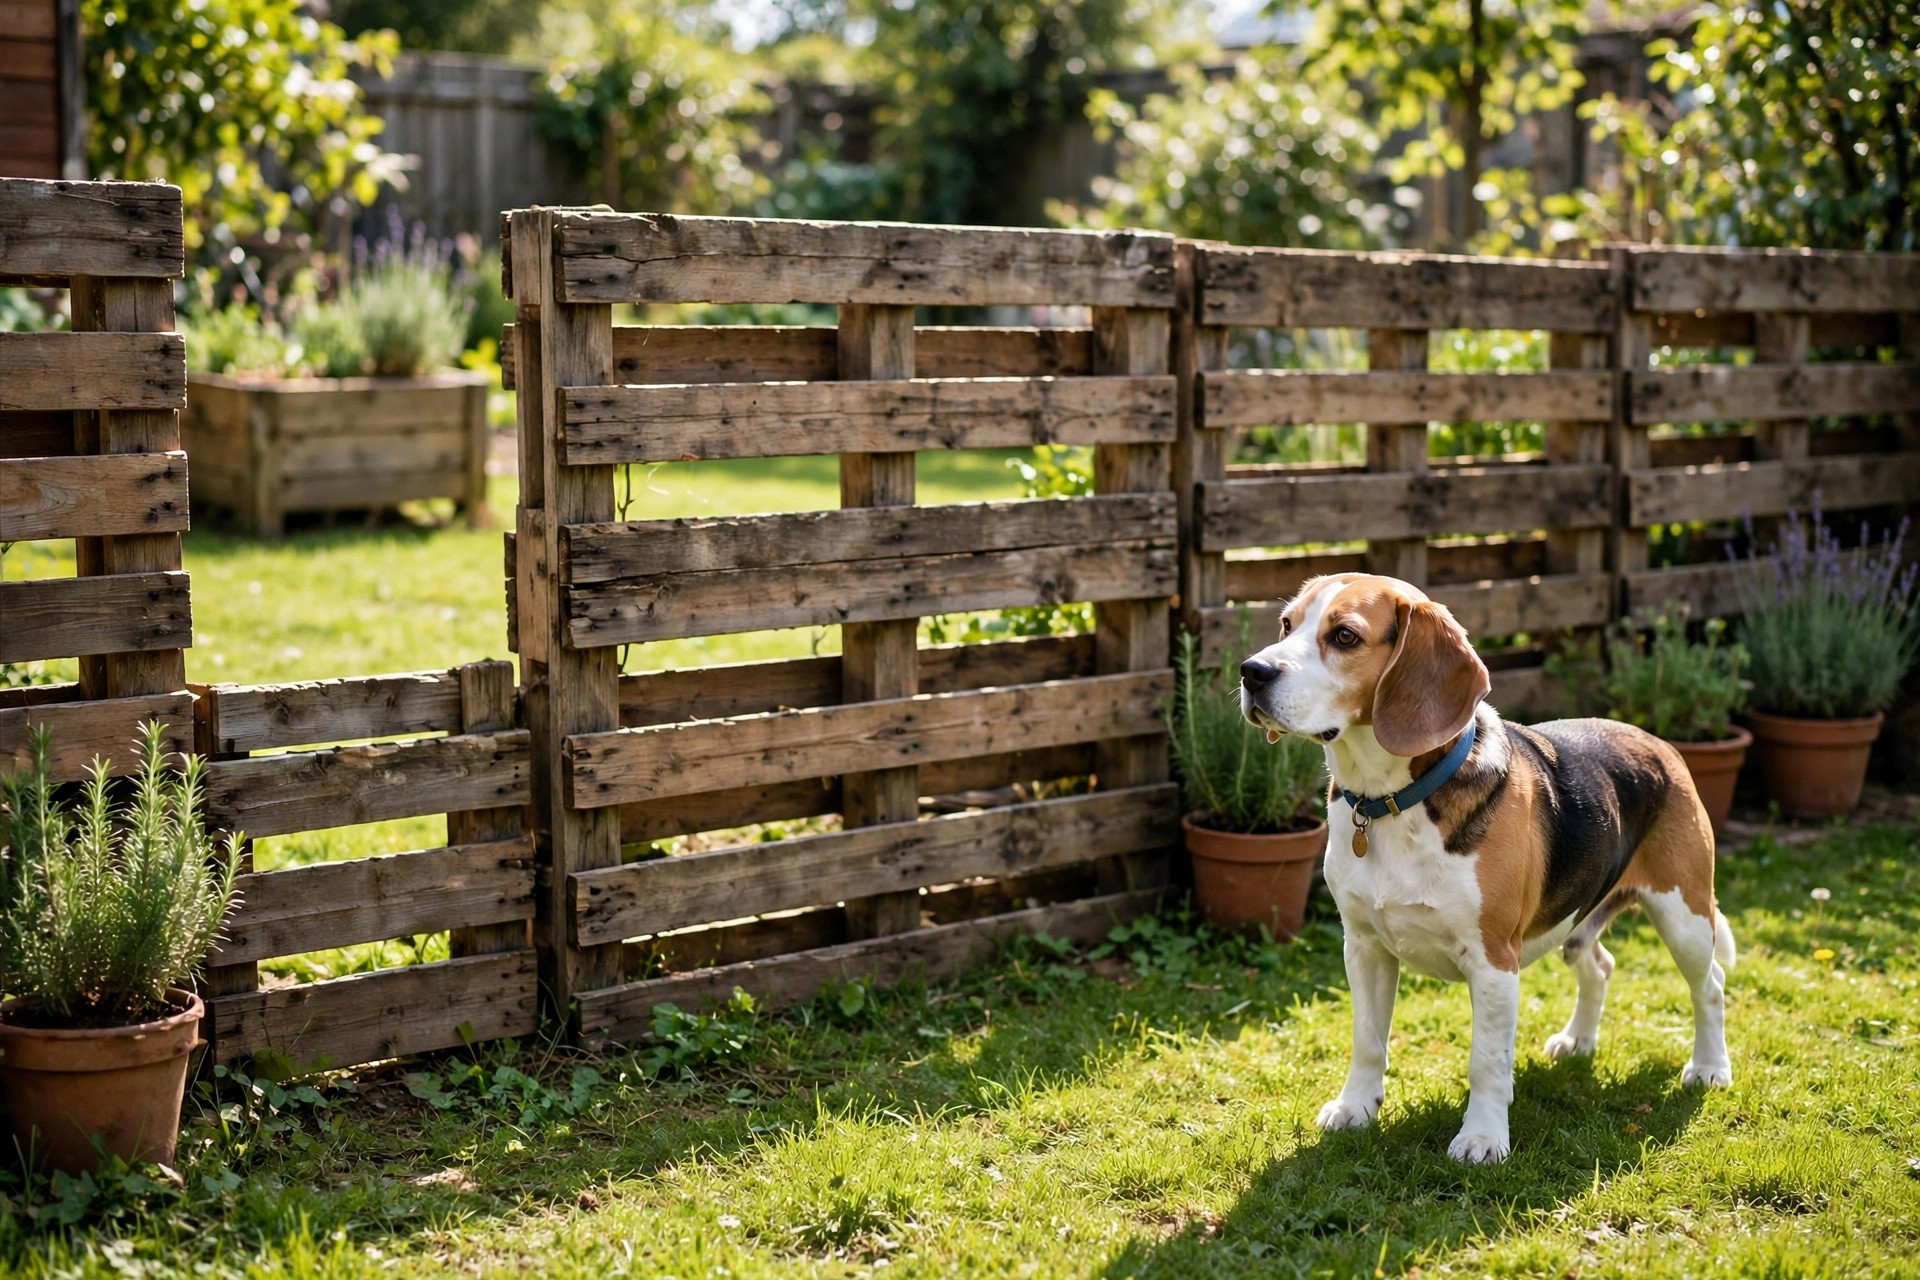
If you can get free pallets — check local listings, warehouses and building sites, and always ask first — a pallet fence costs almost nothing but your time. Stand the pallets upright in a line, screw them together, and brace them with posts every second pallet.

Choose pallets in decent condition: no broken slats, no spills or chemical stains, and look for the “HT” (heat-treated) stamp rather than “MB” (chemically treated) — you do not want your dog chewing treated wood. Two pallets stacked gives roughly 1.8 m of height; one pallet gives about 1.2 m, enough for small and medium dogs. Sink a wooden post at each joint and screw the pallets to it, top and bottom, so the run cannot lean or blow over. A coat of exterior wood stain makes it last twice as long and look far better.

Cost: $0–$60 (screws, posts and stain). Time: a weekend. Watch for gaps between slats that a small dog can squeeze through, and add a horizontal board across the back if your dog is a chewer.

3. Chicken wire garden fence (small dogs & garden zones)

Chicken wire — hexagonal wire mesh — is the lightest and cheapest mesh you can buy, and it is ideal for fencing off a vegetable patch or a small side yard for a small dog. It is not a full-boundary fence for a large or determined dog: a big dog can push through it, and a chewer can tear it.

Use it where it suits: a 90 cm roll on short wooden stakes around a flower bed, or a small run for a puppy or a toy breed. Fix it to the stakes with a staple gun, keep the bottom edge tight to the ground, and fold the sharp cut ends inward so your dog cannot catch a paw. For anything bigger than a beagle, use welded wire instead — the price difference is small and the strength difference is huge.

Cost: about $40–$80 for a 30-metre run. Time: a couple of hours.

4. No-dig fence panels (best for renters)

No-dig panels are pre-made metal or plastic fence sections that push into the ground with pointed feet — no post holes, no concrete, no digging. They are the best cheap option if you rent, because you can pull them up and take them with you when you move.

Most panels are 60–90 cm tall, so they suit small and calm medium dogs, not jumpers or climbers. Link the panels together with the clips supplied, check they sit level, and add a rubber mallet tap on each foot so they do not wobble. They work best on flat, firm ground; on a slope, step the panels down rather than forcing them level. For a taller run, stack two rows — it costs more, but it is still cheaper than a contractor-built fence.

Cost: about $150–$300 for a 30-metre run. Time: an afternoon, and you can do it alone.

5. Bamboo / reed screening on existing posts

If you already have a chain-link fence, an old post-and-rail fence, or a neighbour’s fence you are allowed to use, bamboo or reed screening turns it into a solid, private dog fence for very little money. Unroll the screening along the existing fence and tie it on with wire or zip ties every 30 cm.

It adds privacy, blocks the sightlines that set some dogs barking, and closes the gaps a small dog could slip through. It is not a fence on its own — it needs a structure behind it — and it will need replacing every couple of years as it weathers. But for a tired old fence that needs a second life, it is the cheapest upgrade there is.

Cost: about $60–$120 for a 30-metre run. Time: a few hours.

6. PVC pipe fence (lightweight, clean look)

A PVC pipe fence — white plastic pipes as rails between posts, with mesh or vertical pickets — looks tidy, never rusts, and is light enough for one person to build. It suits small and medium dogs in a front yard where a wire fence would look out of place.

Use thick-walled PVC (schedule 40) for the posts and rails, and set the posts in the ground or in small concrete footings — PVC on its own is too flexible to hold a fence line without proper posts. Space the pickets or mesh tightly enough that a small dog cannot push through, and keep the bottom rail close to the ground so there is no gap to crawl under.

Cost: about $120–$250 for a 30-metre run. Time: a day. It will not hold a large dog that throws itself at a fence, so be honest about your dog before choosing this one.

7. Rope + post boundary (visual boundary for calm dogs only)

A rope fence — wooden posts with two or three strands of thick rope between them — is the cheapest “fence” of all, and it looks lovely around a cottage garden. But let us be honest: it is a boundary marker, not a fence. It will not stop a dog that wants out.

It works for calm, older dogs that already respect boundaries, and for marking a garden zone you would rather the dog avoided. It does not work for puppies, escape artists, or any dog with a squirrel habit. If you use it, keep the ropes taut and the posts close together (1.5 m apart), and never rely on it as your only containment.

Cost: about $30–$60 for a 30-metre run. Time: a few hours.

The gate — the part everyone gets wrong

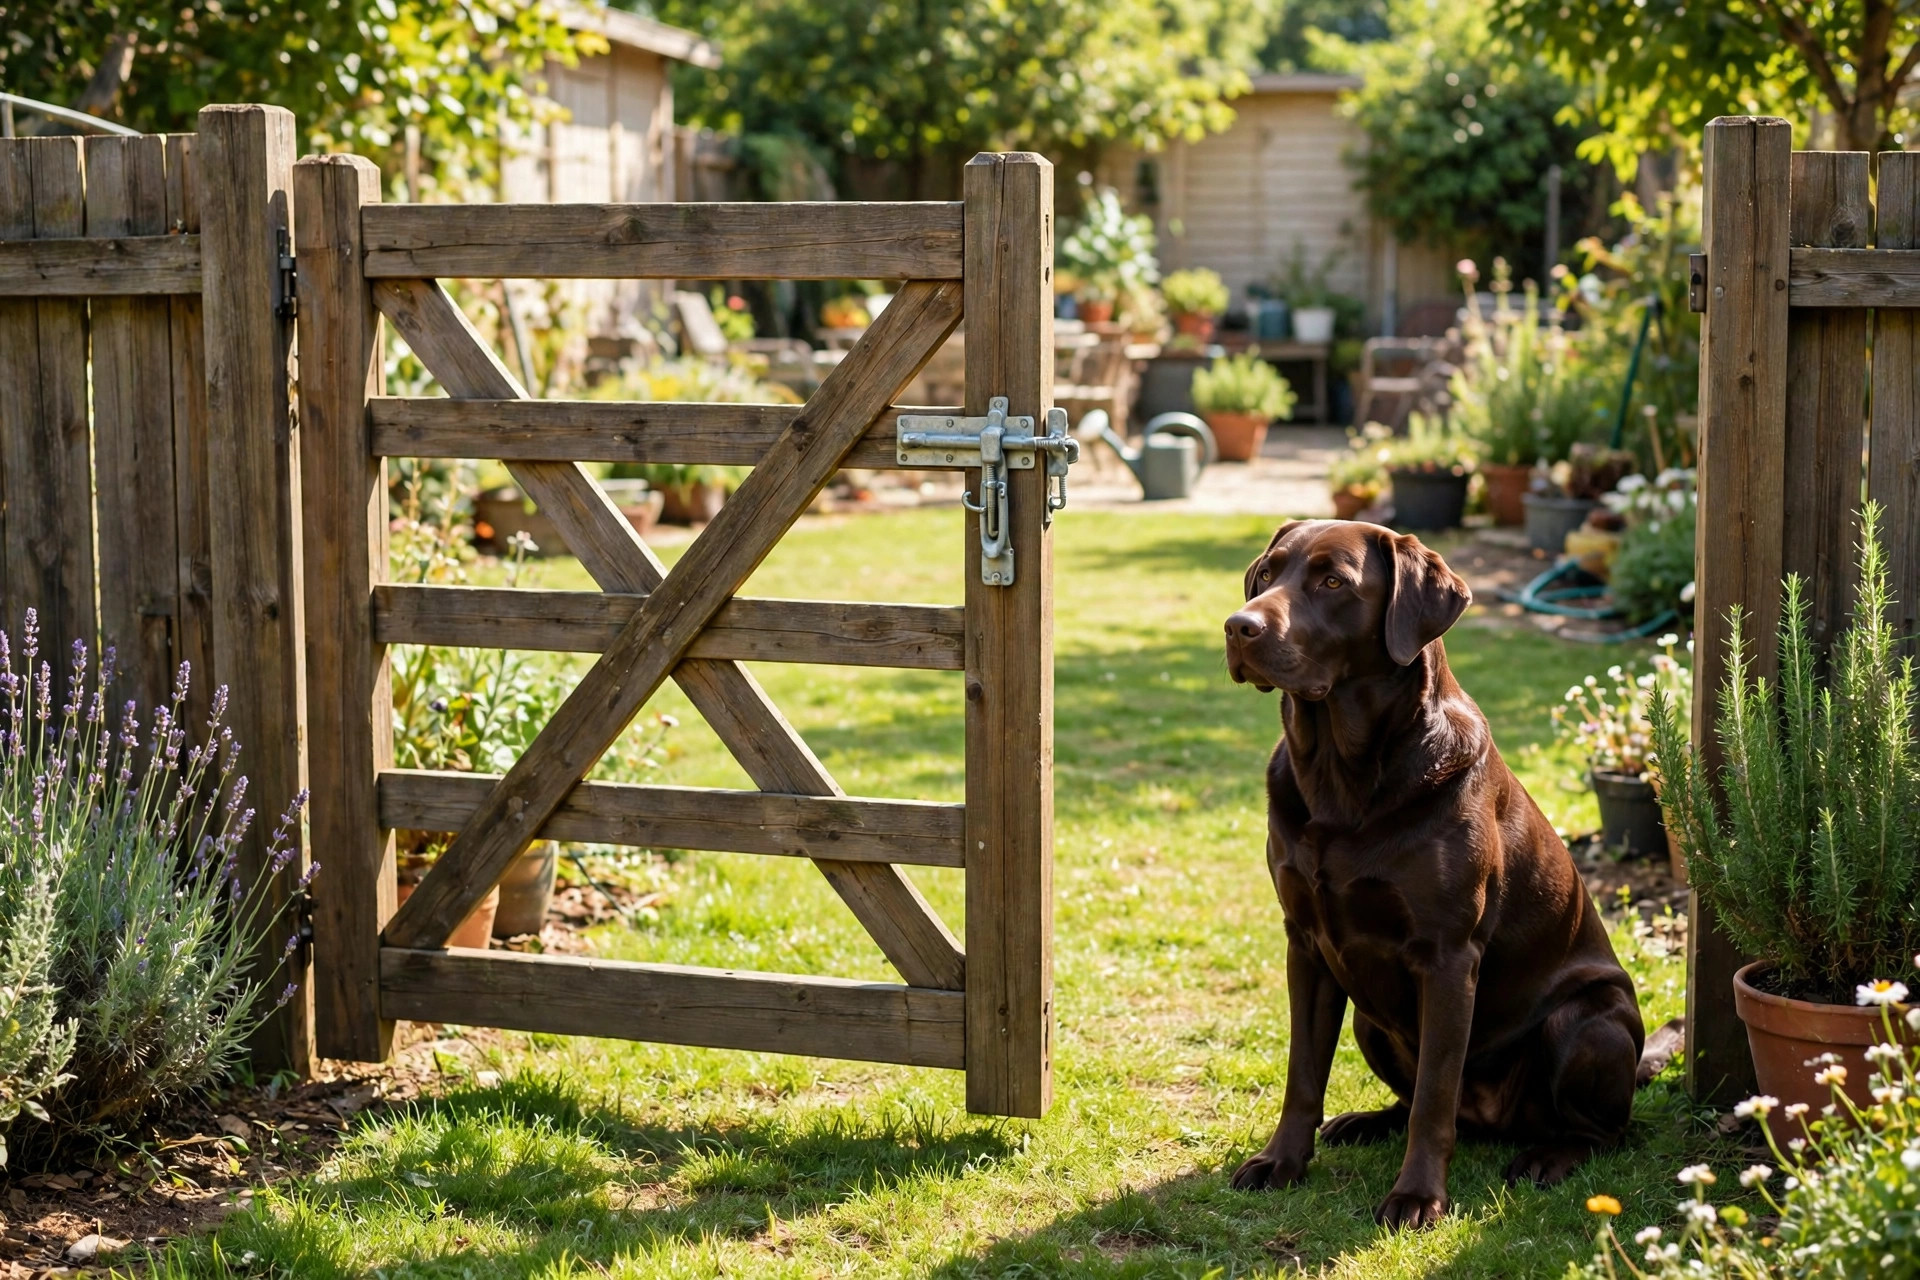
Every cheap fence fails at the gate first. Build the gate from the same material as the fence, hang it on proper hinges (not a loop of wire), and fit a latch that closes by itself — a gravity latch or a spring latch — because a gate that needs remembering to close is a gate that gets left open.

Make the gate swing inward, into the yard, so a dog pushing against it only pushes it shut. Leave a gap of no more than 2–3 cm under the gate, or add a board along the bottom: a surprising number of escapes happen under the gate, not over the fence. And test it properly — push it, pull it, lean on it, and get a child to try the latch. If a child can open it, so can a clever dog.

Stop diggers and jumpers

A fence is only as good as its ground line. Dogs dig where the fence meets the soil, usually at corners and near the gate. The fix is cheap: an L-footer. Lay a 30–40 cm strip of welded wire flat on the ground along the inside of the fence, bent up against the fence itself in an L shape, and peg it down. A digging dog hits wire within a few centimetres and gives up. Bury it under a thin layer of soil or gravel so it is not a trip hazard.

For jumpers, add height the cheap way: a 30 cm extension of wire above the top rail, angled slightly inward, makes a surprising difference — most dogs will not jump a fence they cannot see the top of clearly. Never use barbed wire or anything sharp on top: it injures dogs, and in many places it is not legal on a garden fence. If your dog is a serious climber, a coyote roller (a spinning tube on the top rail) is a humane option that stops the paws finding purchase.

What NOT to use

A few cheap options are cheap for a reason, and should be avoided:

  • Barbed wire: injures dogs and people, and is restricted or banned for garden fences in many areas. Never use it.
  • Electric shock fences as the only containment: they do not stop other dogs or people coming in, they fail in a power cut, and many owners and vets consider them inhumane. A physical fence is better.
  • Chicken wire for big dogs: too weak — a large dog can push straight through it.
  • Treated timber your dog can chew: avoid “MB” stamped pallets and freshly treated wood; let treated posts weather before the dog has access, or cover the chewable parts.
  • A fence with gaps at the bottom: if you can fit your fist under it, a small dog can get under it. Close every gap before the dog finds it.

Maintenance checklist (10 minutes, twice a year)

A cheap fence stays a good fence if you check it. Twice a year — spring and autumn — walk the whole line and check: posts still upright and firm; mesh still tight with no sagging; no rust or broken wires; gate hinges oiled and latch closing by itself; ground line still buried with no new digging; no gaps under the gate. Fix small problems when they are small: a loose clip today is a hole in the fence tomorrow.

FAQs

What is the cheapest dog fence I can build myself?
T-posts with welded wire mesh — about $80–$150 for a 30-metre run, and it goes up in half a day. If you can get free pallets, a pallet fence costs almost nothing but screws and posts.

How tall should a DIY dog fence be?
At least 120 cm (4 ft) for a medium dog, 150 cm (5 ft) for a large dog, and 180 cm (6 ft) for giant breeds or known jumpers. Measure your dog standing on its hind legs — the fence must be comfortably taller than that.

Can I build a dog fence without digging?
Yes — no-dig fence panels push straight into the ground, and a T-post fence only needs the posts driven in, not holes dug. Both are renter-friendly, and the panels can be taken with you when you move.

How do I stop my dog digging under the fence?
Lay an L-footer: a 30–40 cm strip of welded wire flat on the ground along the inside of the fence, bent up against it, and pegged down. A digging dog hits wire within a few centimetres and gives up.

Do I need a permit to build a dog fence?
It depends on where you live. Many areas limit fence height (often 1.8–2 m) and ban certain materials at the front of the house. Check your local rules and any HOA before you buy materials.

Will a cheap fence keep a husky in?
Only if it is tall enough (180 cm minimum), has an L-footer against digging, and a gate that latches by itself. Huskies are famous escape artists — if your dog is a climber or a jumper, spend the extra on height and a coyote roller rather than on looks.

The bottom line

A cheap DIY dog fence is not a compromise — it is a sensible build, as long as you match it to your dog. T-posts and welded wire will contain most dogs for the least money; pallets will do it for free if you have the time; no-dig panels will do it if you rent. Spend your effort on the three things that actually decide whether a fence works: the right height, a tight ground line, and a gate that closes itself. Get those right and the cheapest fence on this list will keep your dog safe for years.

Pin this for later 📌 — and once the yard is fenced, give your dog somewhere to enjoy it: our DIY dog house ideas and dog run ideas turn a fenced yard into a proper dog space, and our dog backyard ideas cover the whole garden.

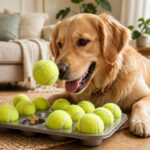
Golden retriever solving a muffin-tin enrichment game with treats.

DIY Dog Enrichment: 10 Easy Ideas to Keep Your Dog Happy & Busy

A bored dog is a busy dog — just not in the way you want. Chewed shoes, shredded cushions, barking at the window, digging up the garden: most of it is not naughtiness, it is a dog with a brain that has nothing to do. Dogs were bred to work, sniff, hunt and solve problems. A walk and a bowl of kibble do not use up that wiring. Enrichment does.

DIY dog enrichment is simply giving your dog something interesting to do with things you already own. No expensive puzzle feeders, no special equipment — a muffin tin, an old towel, a plastic bottle and a handful of treats will keep most dogs happily occupied for ten minutes. And ten minutes of sniffing and thinking tires a dog out more than a half-hour walk.

This guide covers 10 easy DIY dog enrichment ideas, from five-minute games to frozen treats that last half an hour. Every one is cheap, quick to set up, and tested on real dogs. Pick two or three, rotate them through the week, and watch the chewing and the barking fade.

Before you start — the 3 rules
1. Supervise, especially the first time. Enrichment should be fun, not a choking hazard. Watch your dog with any new game until you know how they play with it — some dogs shred cardboard, some try to eat the bottle.
2. Match the difficulty to the dog. Start easy so your dog wins. A game that is too hard frustrates them; a game that is too easy bores them. Make it slightly harder each time they master it.
3. Use their food, not extra food. Enrichment treats should come out of your dog’s daily food allowance, not on top of it. Use kibble, small training treats, or a few bits of carrot and apple — not handfuls of high-calorie biscuits.

What is dog enrichment, and why does it matter?

Enrichment is anything that lets a dog use its natural behaviours — sniffing, foraging, chewing, problem-solving, playing. In the wild, a dog’s ancestors spent most of the day searching for food. A pet dog gets dinner in a bowl in thirty seconds, and then has nothing to do until the next walk. That gap is where boredom lives.

The signs are easy to spot: destructive chewing, excessive barking, pacing, digging, attention-seeking, and that restless look dogs get at 7pm when the house is quiet. Vets and behaviourists agree that mental stimulation is as important as exercise — a dog that has sniffed, searched and solved something is a calmer, happier dog. Studies on working dogs show that just ten minutes of nose work can be as tiring as a much longer walk, because sniffing uses a huge part of a dog’s brain.

The good news is that enrichment does not need to cost anything. The ideas below use a muffin tin, towels, cardboard, plastic bottles and old socks — things that would otherwise go in the bin or the recycling.

1. The muffin-tin treat game (2 minutes to set up)

The classic, and the easiest place to start. Put a few treats in the cups of a muffin tin, then cover each cup with a tennis ball (or a rolled-up sock if you do not have tennis balls). Your dog has to work out how to lift the balls to get the treats.

Start with only two or three cups covered and the rest open, so your dog learns the game. Once they have the idea, cover them all. For a harder version, use a mini muffin tin with smaller cups, or hide the treats under the balls and let your dog nudge them off with their nose.

This is the game we use as our featured photo — a golden retriever working a muffin tin is the picture of a happy, busy dog. If you want more brain games like this one, our guide to DIY dog puzzle toys has seven more, all made from household stuff.

Dog solving towel roll treat game.

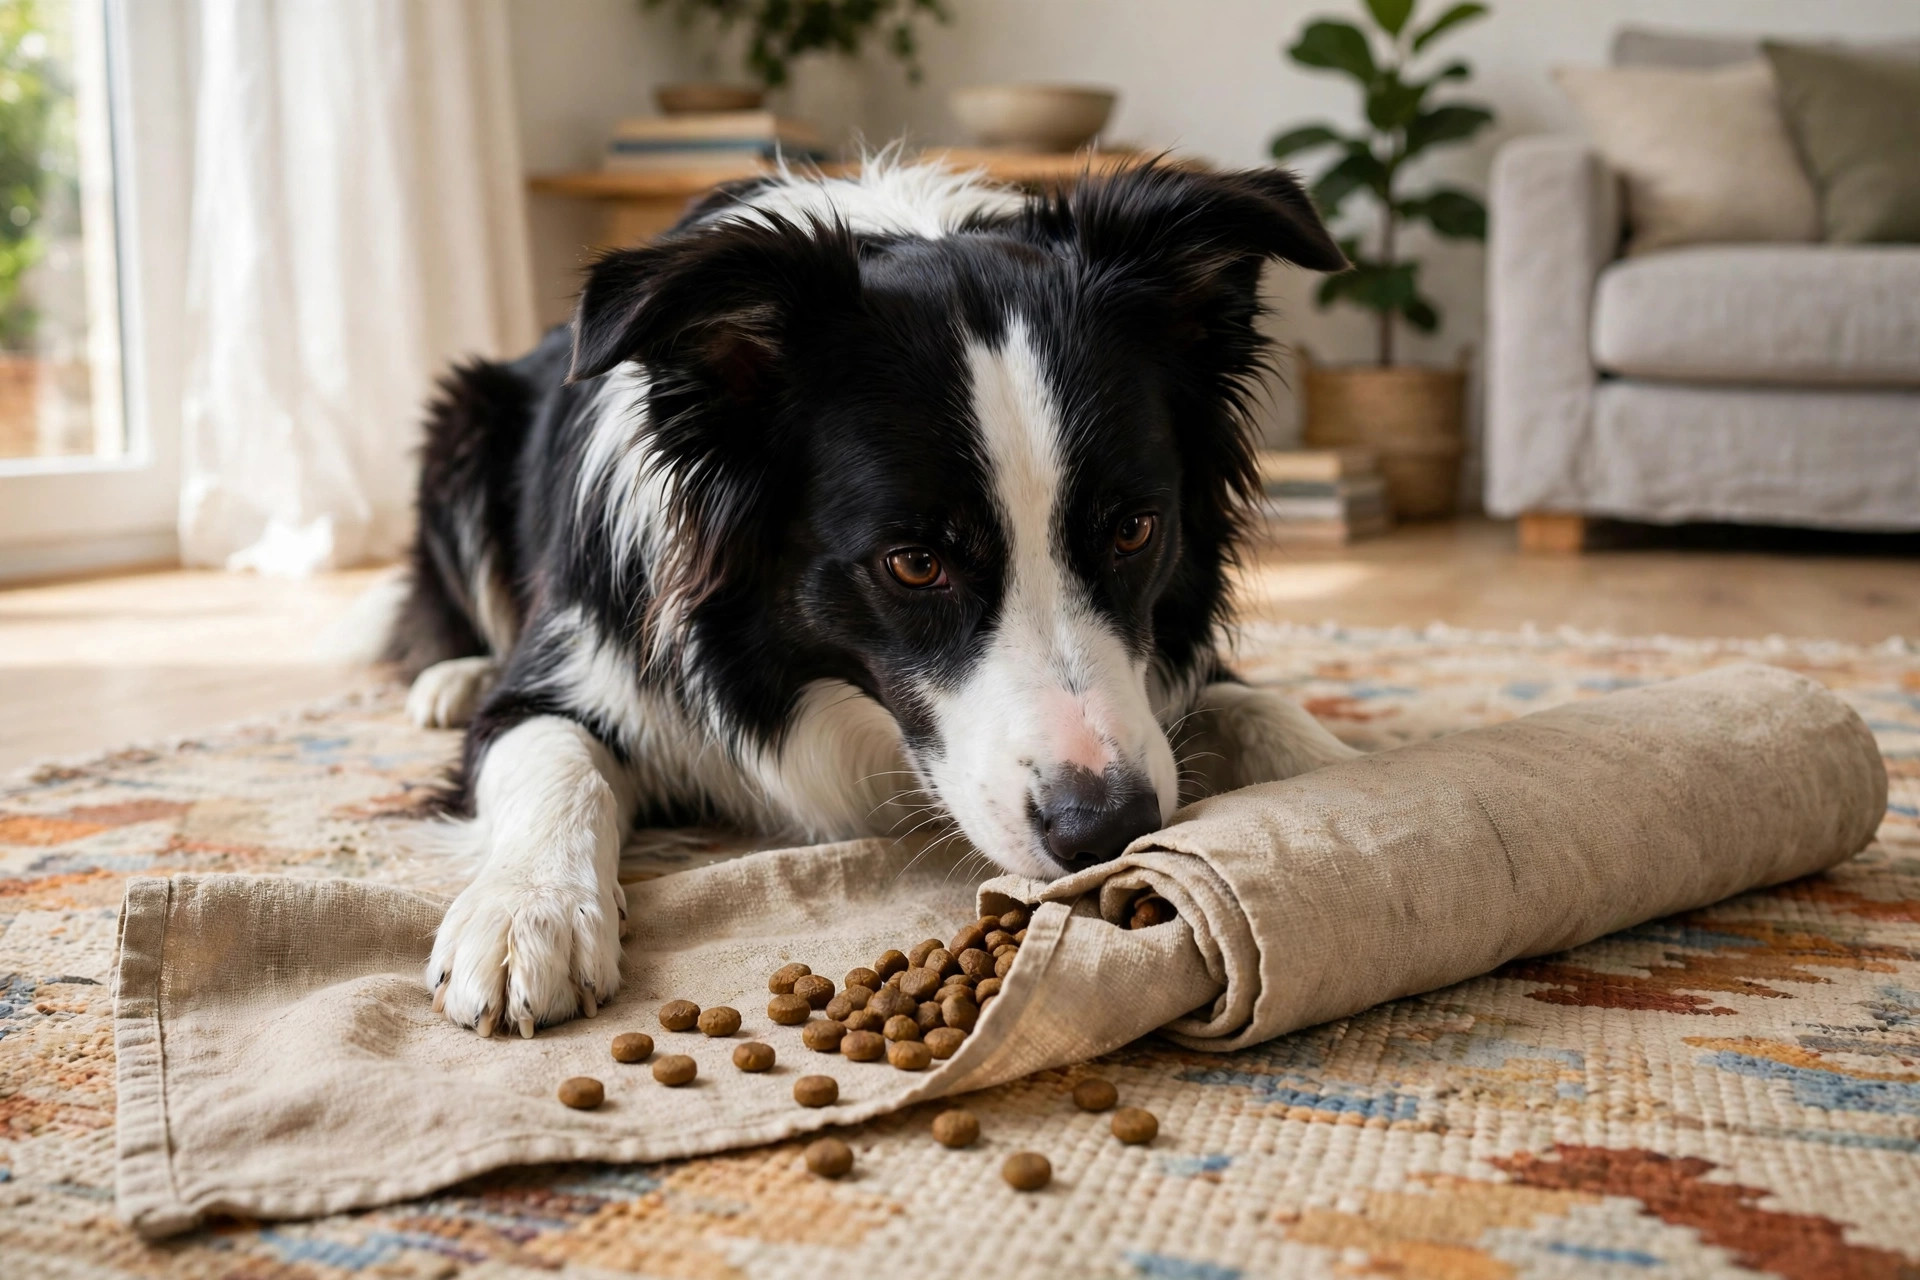
2. The towel roll-up (1 minute to set up)

Lay an old towel flat, scatter a handful of kibble across it, then roll it up tightly. Your dog has to unroll the towel with their nose and paws to find the food. It sounds too simple to work, and it works brilliantly — most dogs spend five to ten minutes on a single roll-up.

Make it harder by folding the towel in half before rolling, tying a loose knot in the middle, or hiding the towel under a cushion. For puppies and seniors, keep the roll loose so they succeed quickly; for clever dogs, roll it tighter and add a second towel.

Dog playing bottle spinner treat game.

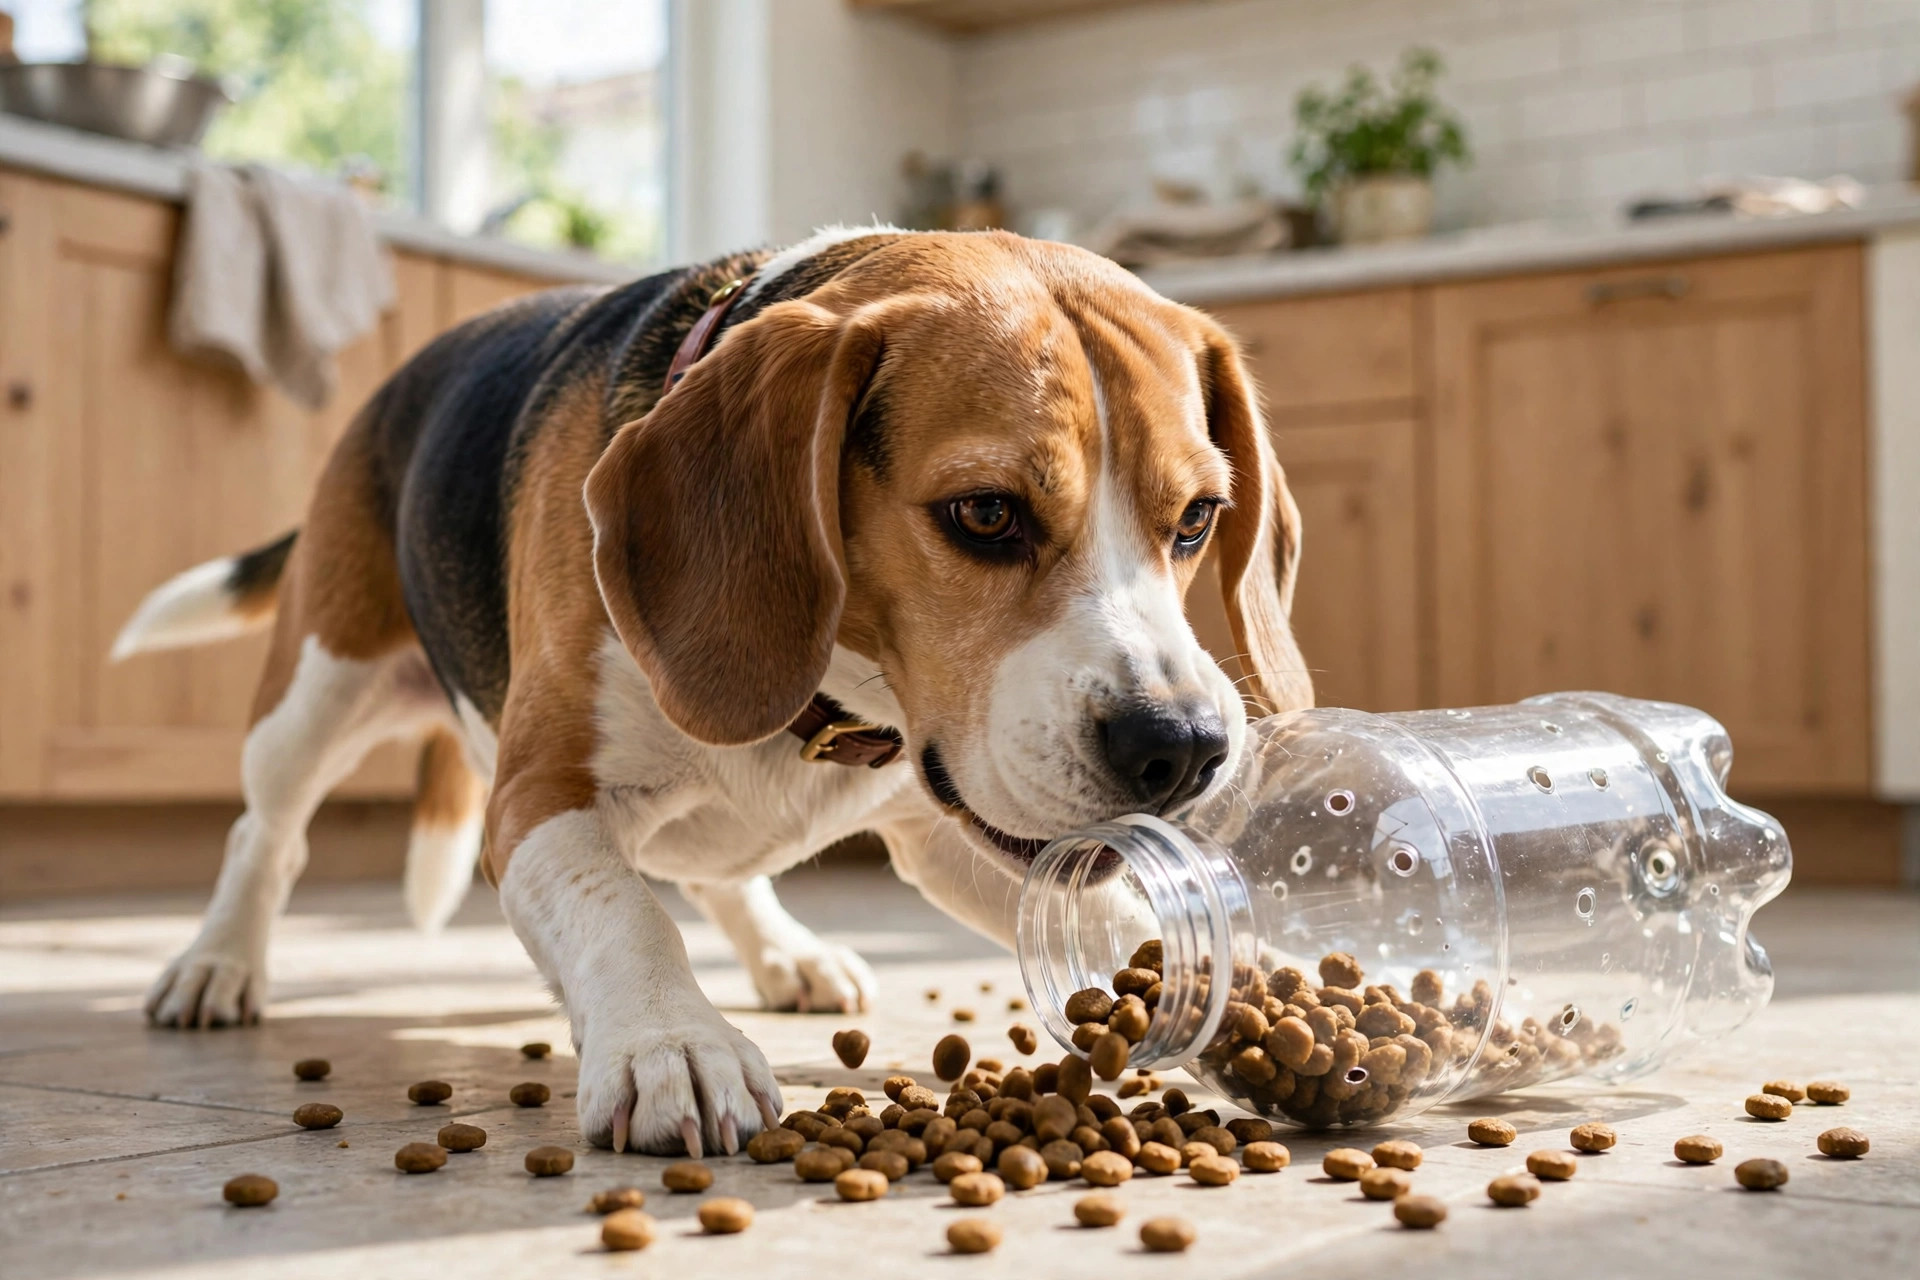
3. The bottle spinner (5 minutes to make)

Take a clean plastic bottle, cut two or three small holes in the sides (big enough for kibble to fall out, small enough that it does not pour out), fill it with kibble, and screw the lid on tight. Your dog rolls the bottle around the floor and kibble drops out as it spins.

Start with big holes and only a few pieces of kibble, so your dog gets rewarded fast. As they learn, use smaller holes or a bottle with a narrower neck. Always remove the cap and the plastic ring first — those are the parts a dog will chew off and swallow — and throw the bottle away as soon as it starts to crack or split.

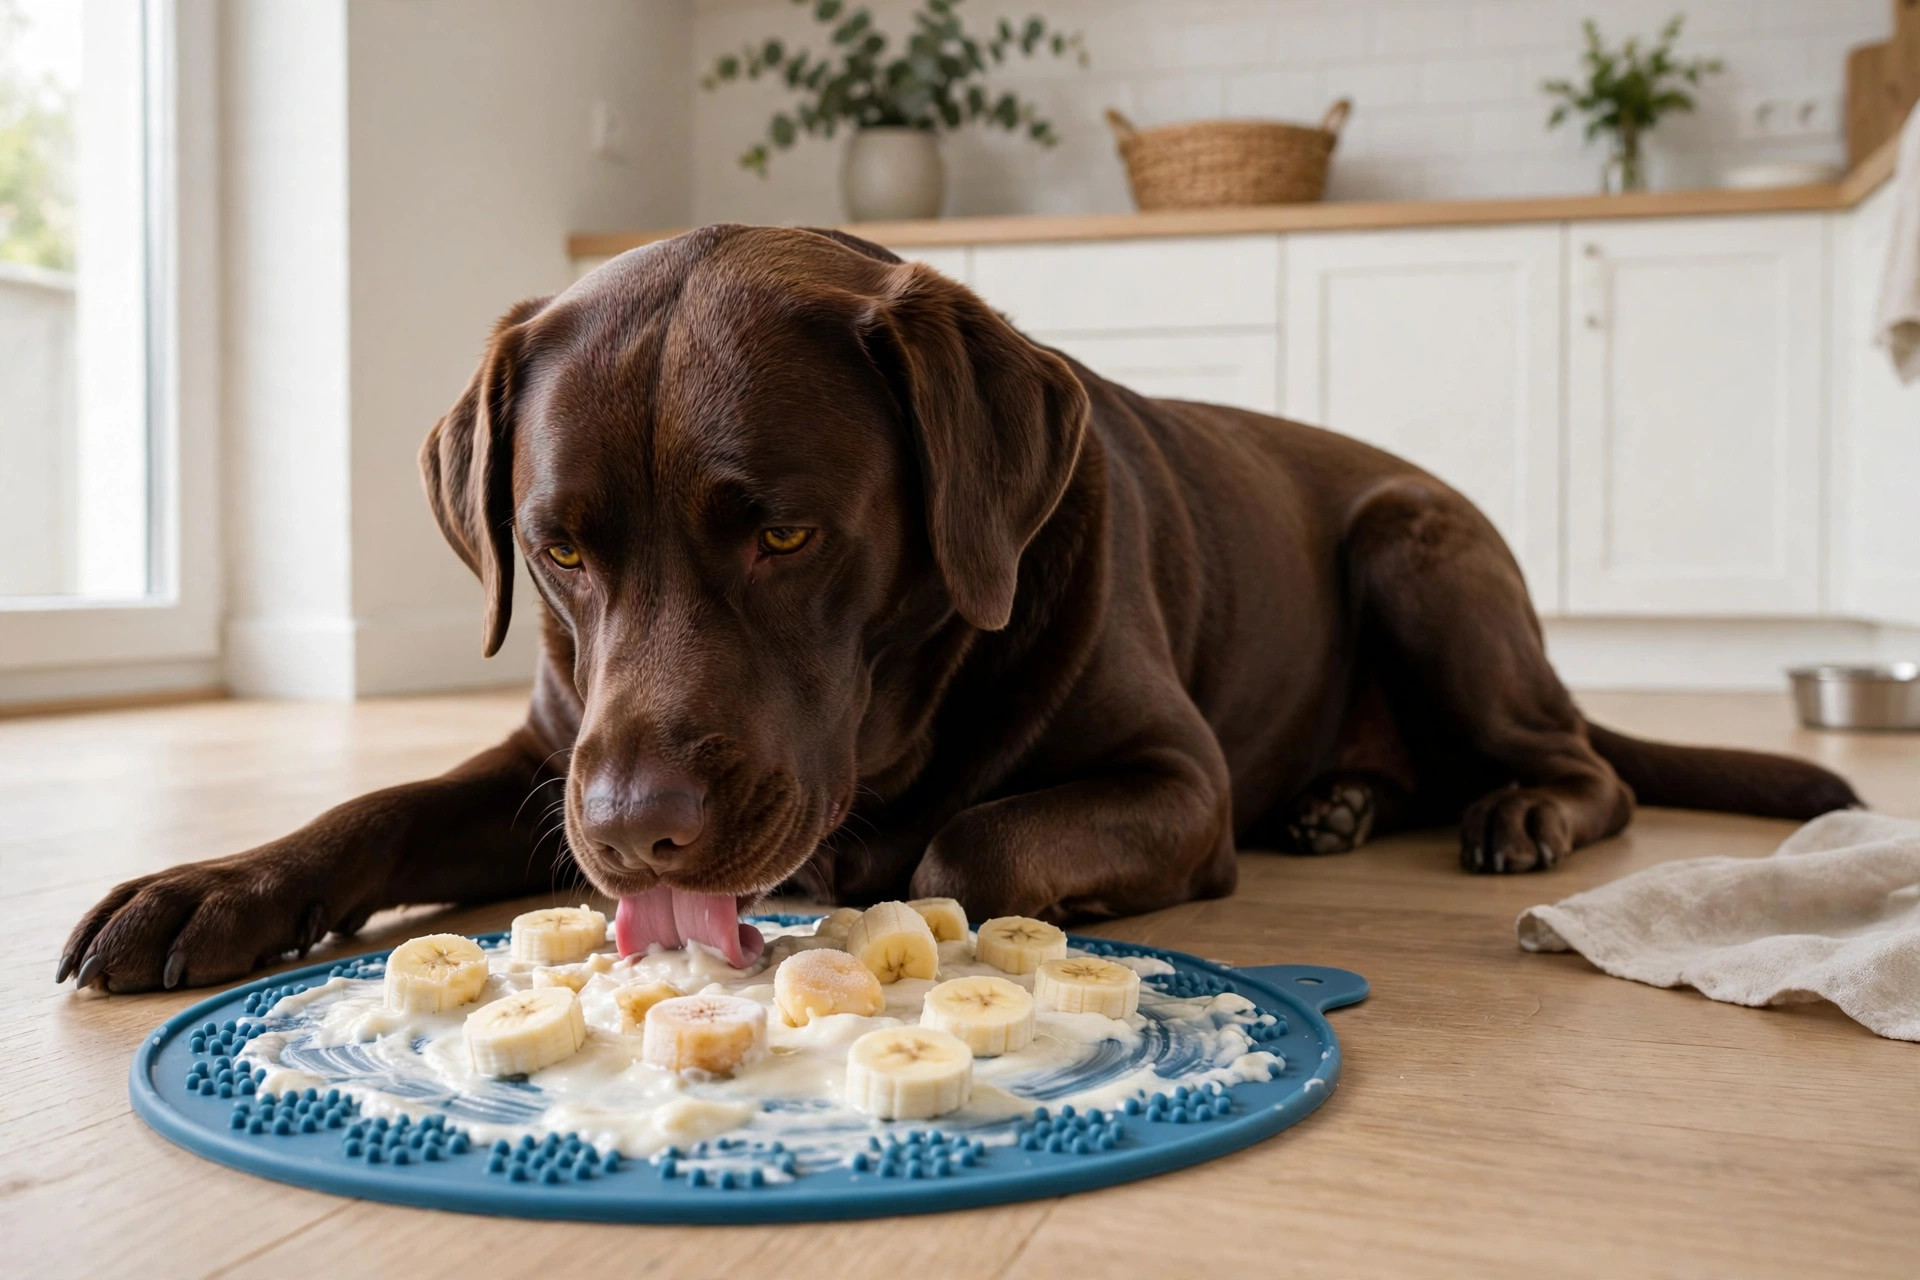
Dog enjoying frozen lick mat.

4. The frozen lick mat (10 minutes, lasts 20–30)

Spread a thin layer of dog-safe food on a lick mat — mashed banana, plain yoghurt, peanut butter (xylitol-free), or pumpkin purée — then freeze it for two to three hours. The frozen layer makes your dog work slowly, licking instead of gulping, and the repetitive licking is genuinely calming: it releases endorphins and settles anxious dogs.

This is the best enrichment for dogs that need to settle — after a walk, during fireworks season, or while you eat dinner in peace. Our lick mat recipes have ten freezable combinations, including a chamomile-and-banana one that works well for nervous dogs. If you do not own a lick mat, a silicone baking tray or a clean ice-cube tray works just as well.

5. The cup shell game (1 minute to set up)

The oldest trick in the book, and dogs love it. Put a treat under one of three cups (or small bowls) while your dog watches, shuffle them slowly, and let your dog nose the right one. Start with one cup and a visible treat, then build up to three cups and a proper shuffle.

This game is pure nose work — your dog is using scent, not sight, to find the food. It is also the easiest game to play with children, who love being the dealer. Keep the sessions short (five minutes) and always let your dog win most of the time: the point is the search, not the test.

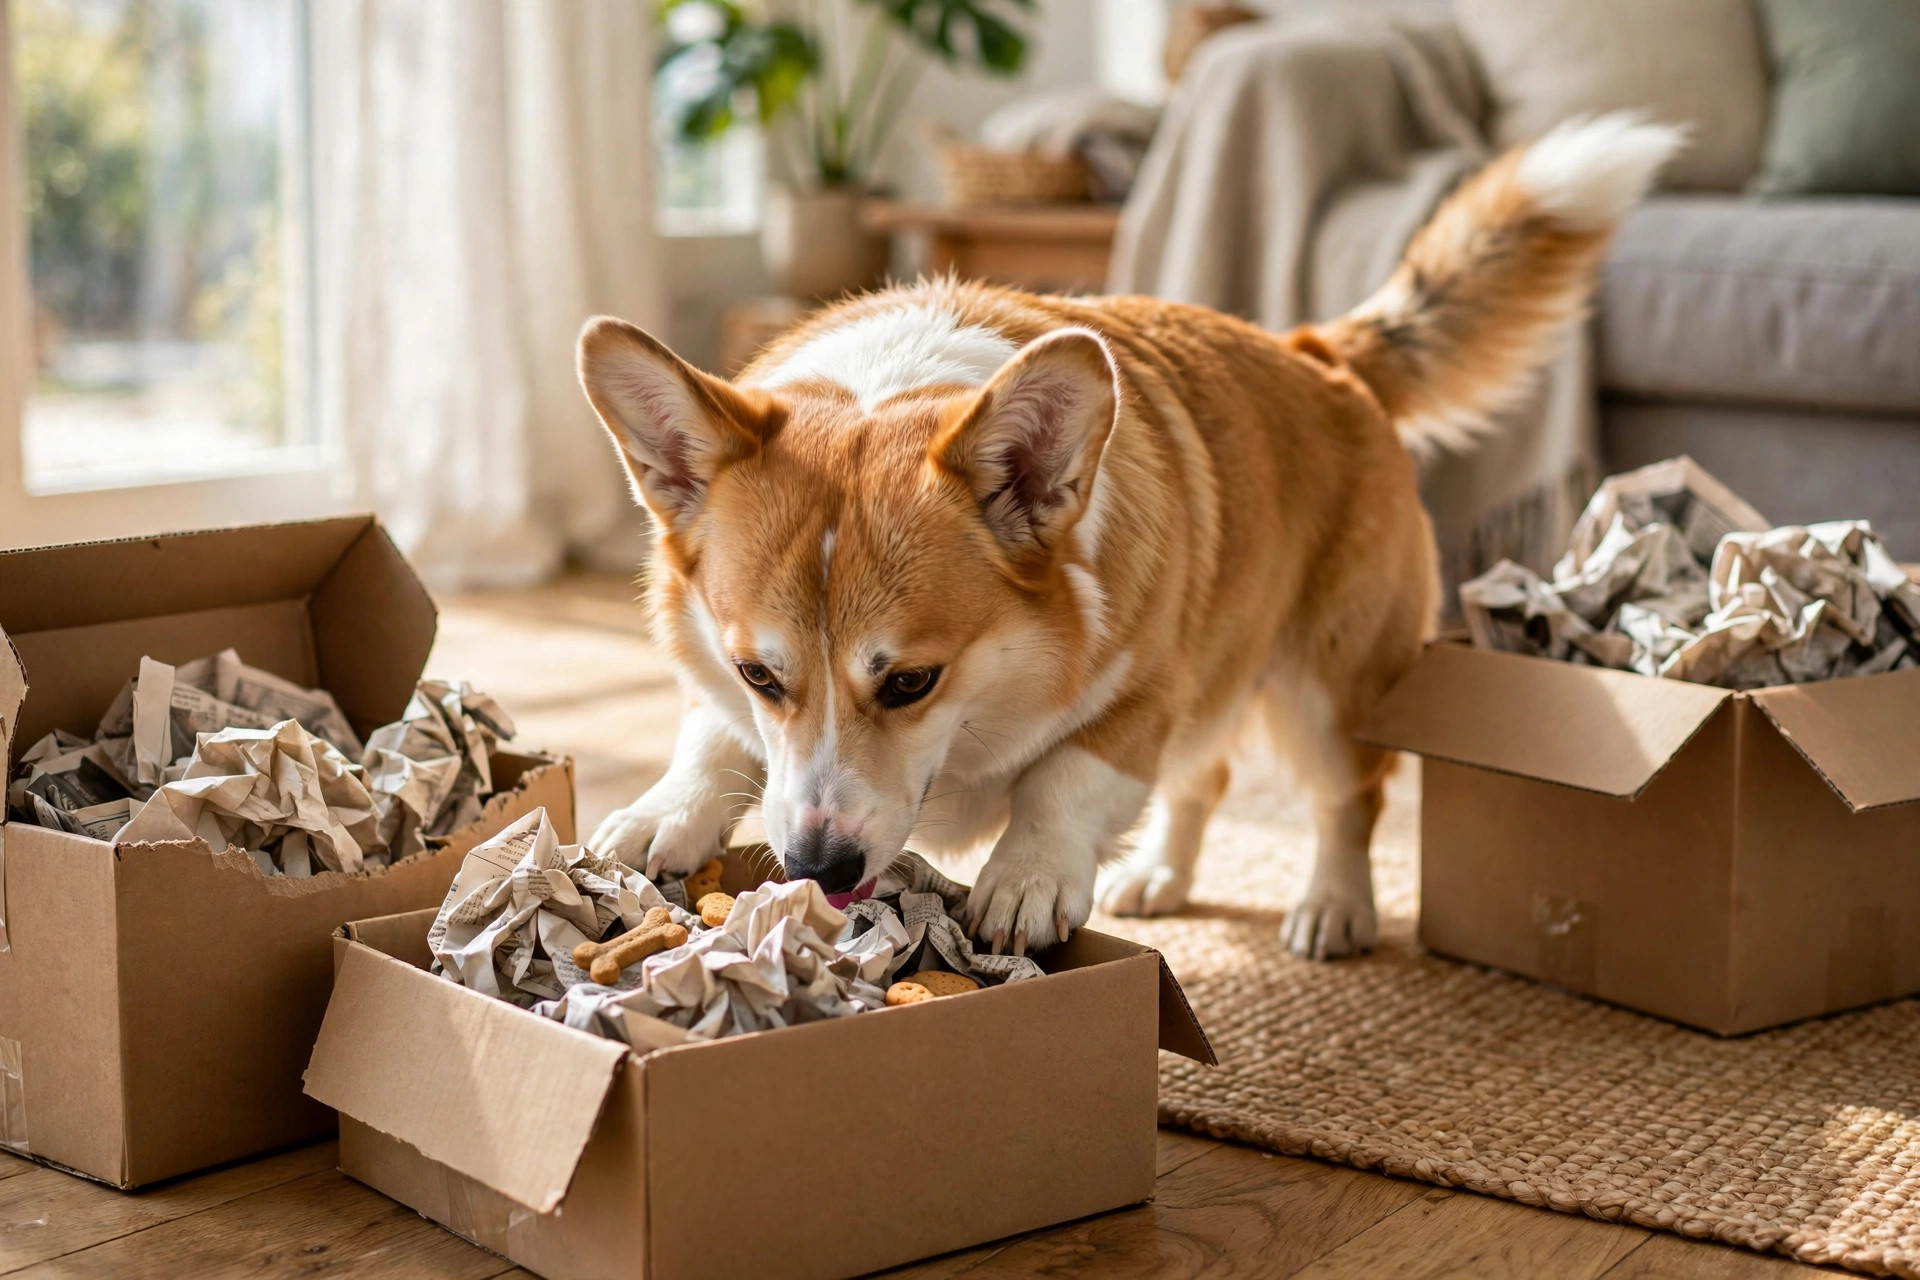
Dog sniffing cardboard box foraging.

6. Cardboard box foraging (2 minutes to set up)

Save your delivery boxes. Put a few treats in the bottom of a box, scrunch up some newspaper or old fabric on top, and let your dog dig through it. For a harder version, put a small box inside a bigger box, or tape the flaps half-closed so your dog has to push them open.

Cardboard is free, recyclable, and dogs love shredding it — which is the point. Set this one up on a hard floor or outside, because there will be cardboard everywhere afterwards. Remove any tape, staples or labels first, and take the box away if your dog starts eating the cardboard instead of searching through it.

7. The snuffle ball (10 minutes to make)

A snuffle ball is a ball of fleece strips tied into a rubber ball or a whiffle ball, with treats hidden in the folds. If you do not have fleece, cut up an old t-shirt or a pair of socks. Stuff the strips into the holes of the ball, tuck treats between them, and let your dog nose the food out.

It is the portable version of a snuffle mat — easier to carry, harder for the dog to flip over, and good for small spaces. Our full snuffle mat guide shows the no-sew fleece method step by step, and the same technique makes a ball in about ten minutes.

8. Scent games — “find it” (no equipment at all)

Hide treats around a room while your dog waits in another room, then let them in with a cheerful “find it!”. Start with the treats in plain sight, then hide them behind chair legs, under cushions and on low shelves. Dogs that have never played this will find the first few in seconds; within a week, most dogs will search a room methodically, nose down, tail wagging.

Scent work is the most tiring enrichment there is — a ten-minute “find it” session leaves most dogs ready for a nap. It is also the best enrichment for rainy days, bad weather and dogs on restricted exercise after surgery, because it needs almost no movement at all.

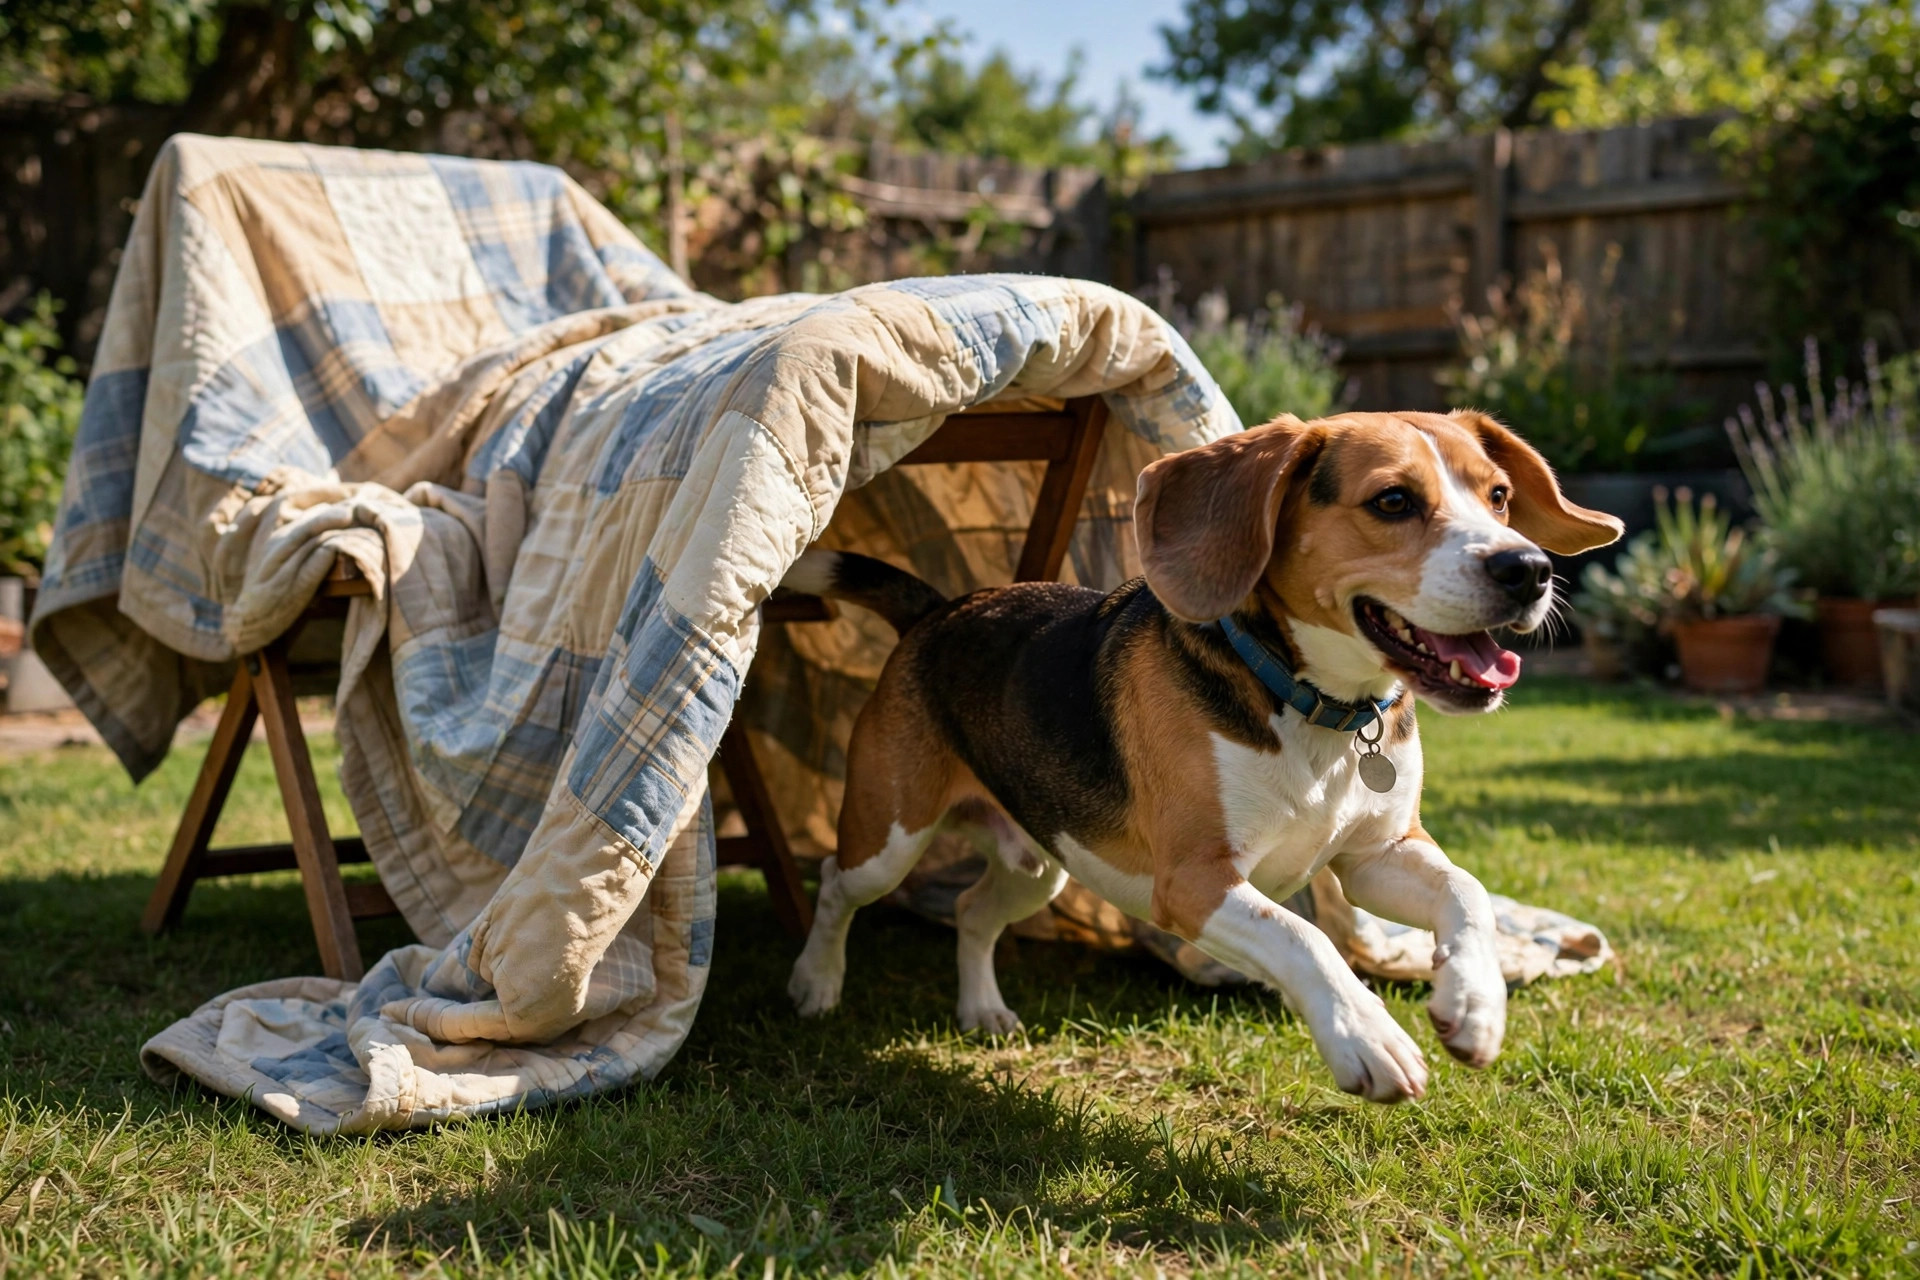
9. The blanket tunnel (3 minutes to set up)

Drape a blanket over two chairs to make a tunnel, scatter treats through it, and let your dog walk through. For nervous dogs, keep the tunnel short and the sides open at first; for confident dogs, add a second blanket to make it darker, or put a treat at the far end so they have to go all the way through.

This is also a good confidence-builder for puppies and rescue dogs that are wary of new spaces. Pair it with a treat at each end and never push a dog through — let them choose to go in, and praise them when they do.

10. The frozen treasure block (5 minutes, lasts 30+)

Fill a bowl or a plastic container with water, drop in treats, carrot slices, blueberries and a few pieces of kibble, then freeze it overnight. Tip the frozen block out onto a tray or outside on the grass, and let your dog lick and chew their way to the treasure inside.

This is the longest-lasting enrichment on the list and the best one for hot days — it cools your dog down while it keeps them busy. Use a shallow container for small dogs and puppies so they can reach the treats, and always supervise: a very determined chewer can break off chunks of ice, so take the block away once it gets small enough to swallow whole.

Feeding enrichment — use dinner as the game

The easiest enrichment upgrade costs nothing and takes no extra time: stop feeding from a bowl. Scatter your dog’s kibble across the garden, hide it in a snuffle mat, put it in a bottle spinner, or freeze it into a lick mat. The same food, eaten slowly through searching and solving, turns a thirty-second meal into ten minutes of work.

Dogs that eat too fast benefit most — slow feeders and foraging cut down gulping, reduce the risk of bloat, and make a meal feel like an event. If your dog is a fast eater, start with the towel roll-up or the muffin tin, which slow them down without frustrating them.

Enrichment by age — puppies, adults and seniors

Puppies (8 weeks – 6 months): Keep it easy and short. A loose towel roll-up, a cup game with one cup, a snuffle mat with treats on top. Puppies tire fast and frustrate faster — two or three minutes is plenty, and always end while they are still having fun. Never leave a puppy alone with cardboard, bottles or fabric they can chew and swallow.

Adult dogs: This is the age for the full range. Rotate the harder versions — tight towel knots, small-hole bottle spinners, multi-box foraging — and combine games: a scent game followed by a frozen lick mat is a perfect evening routine.

Seniors: Enrichment matters even more for older dogs, because their world shrinks as their mobility drops. Keep games low-impact and nose-led: scent games, lick mats, snuffle mats and easy muffin-tin games. Avoid anything that needs jumping, climbing or rough play, and keep sessions short — five minutes of sniffing beats twenty minutes of frustration.

The 10-minute daily routine

You do not need an hour. Ten minutes a day, split across the day, is enough to change a dog’s behaviour:

Morning: scatter breakfast across the garden or in a snuffle mat instead of a bowl (2 minutes of your time, 10 minutes of theirs).

Midday: one quick game — the muffin tin, the towel roll-up or the cup game (5 minutes).

Evening: a frozen lick mat or a scent game while you eat dinner (2 minutes to set up, 20 minutes of calm for them).

Rotate the games so your dog does not get bored: the same game every day stops being enrichment and becomes routine. Keep a simple weekly rotation — Monday muffin tin, Tuesday towel roll-up, Wednesday scent game, Thursday bottle spinner, Friday frozen lick mat — and swap in the box foraging or the blanket tunnel at the weekend.

Safety notes — read this before you start

Most enrichment is very safe, but a few rules keep it that way. Always supervise new games until you know how your dog plays. Remove anything your dog can chew off and swallow: bottle caps, plastic rings, tape, staples, buttons, small parts. Throw away cracked bottles, torn fabric and chewed cardboard straight away.

Use dog-safe foods only. No chocolate, grapes, raisins, onions, garlic, xylitol (found in some peanut butters — check the label), cooked bones, or anything with artificial sweetener. If you are not sure a food is safe, leave it out.

Size everything to your dog. A muffin tin that works for a labrador is a choking hazard for a chihuahua; a bottle spinner that challenges a border collie will frustrate a pug. When in doubt, go bigger and easier, and watch your dog’s first attempt closely.

And never use enrichment as a substitute for exercise, training or company. A bored dog that also never walks, never plays and never sees anyone is not an enrichment problem — it is a lifestyle problem. Enrichment works best alongside walks, play and time with you.

FAQs

How much enrichment does a dog need every day?
About 10–20 minutes of mental stimulation a day is enough for most dogs, split into two or three short sessions. High-energy breeds (border collies, malinois, spaniels) may need more, and will tell you — if the chewing and barking continue, add another session rather than a longer walk.

Is enrichment a substitute for walks?
No. Enrichment and exercise do different jobs: walks give physical exercise, social contact and new smells; enrichment gives problem-solving and calm focus. A dog needs both. On days when a long walk is not possible (bad weather, illness, injury), enrichment can fill the gap — but it should not replace walks permanently.

My dog solves every puzzle in seconds. What now?
Make it harder, not bigger. Tighter towel rolls, smaller bottle holes, treats hidden inside boxes inside boxes, scent games with the treats higher up or further apart. And combine games: a scent game that ends at a frozen lick mat keeps even clever dogs busy for half an hour.

Can enrichment help with separation anxiety?
It helps, but it is not a cure. A frozen lick mat or a stuffed Kong given as you leave can settle a dog and create a positive association with your departure. For real separation anxiety — destruction, howling, toileting when left alone — enrichment is one part of a proper behaviour plan, and a vet or behaviourist should be involved.

What is the cheapest enrichment to start with?
The towel roll-up. One old towel, a handful of kibble, one minute to set up, and most dogs love it. The muffin-tin game is a close second if you already own a muffin tin and some tennis balls. Both cost nothing and work on the first try.

The bottom line

DIY dog enrichment is not about buying puzzle feeders or building elaborate setups. It is about giving your dog’s brain a job, using things you already own. A muffin tin, an old towel, a plastic bottle and a frozen lick mat will keep most dogs happier, calmer and quieter than any new toy you could buy. Start with one game today — the towel roll-up takes a minute — and build a simple rotation from there. Your dog will tell you which ones they love, and your shoes will thank you.

Pin this for later 📌 — and if your dog also needs new toys to play with, our guide to DIY dog toys from old clothes turns the rest of the wardrobe into tug toys and sock balls.

Golden retriever wearing a handmade knitted sweater — an easy DIY dog clothes project.

DIY Dog Clothes: 7 Easy Outfits to Make at Home

A shop-bought dog jumper can cost more than your own. A handmade one costs almost nothing, fits your dog properly, and — if we are honest — looks better too. DIY dog clothes are one of the easiest wins in the dog world: most projects need an old jumper, a pair of scissors and twenty minutes, and your dog ends up warmer, drier and considerably more photogenic.
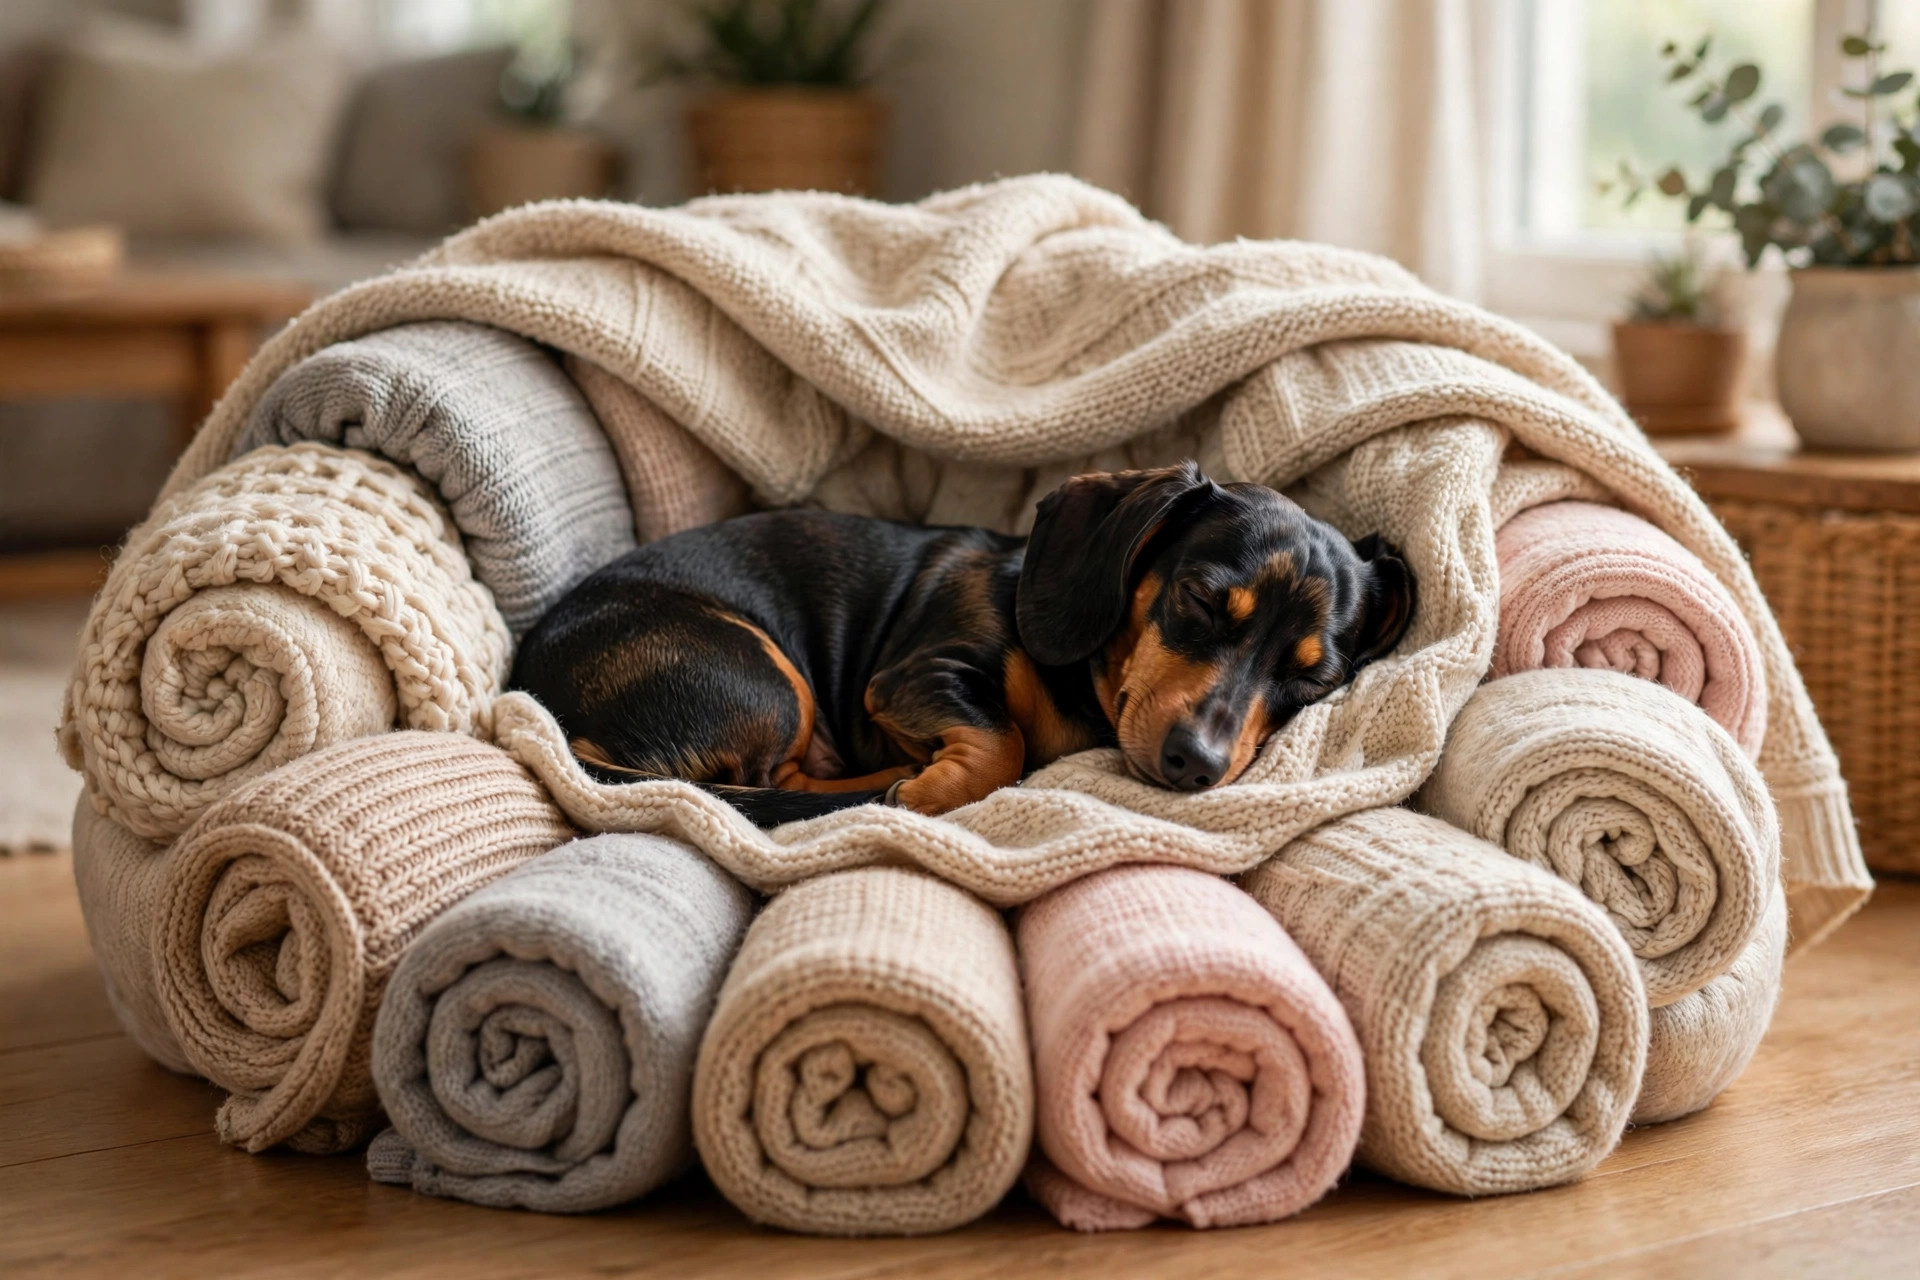
This guide covers 7 easy DIY dog clothes projects, from a no-sew bandana that takes five minutes to a proper fleece jacket. Every project uses materials you probably already own, and every one includes the safety notes that matter — because a cute outfit that your dog hates, chews apart or gets tangled in is not worth making.

Before you start — the 3 rules
1. Fit first, fashion second. Clothes should sit flat, never pull, and let your dog walk, sit, lie down and go to the toilet normally. If your dog freezes, paws at it or tries to wriggle out, take it off and adjust the fit.
2. Nothing small, dangly or chewable. No buttons, beads, sequins, drawstrings or loose ribbons — dogs chew them off and swallow them. Use flat seams, velcro or simple ties that sit out of reach.
3. Supervise the first wear. Never leave a dog unsupervised in a new outfit, especially a puppy or a chewer. Clothes are for outings and cold days, not for all-day wear indoors.

Do dogs actually need clothes?

Some do, some do not — and it depends on the dog, not the owner. Short-coated breeds (greyhounds, whippets, boxers, dachshunds), small dogs, puppies, seniors and dogs with very little body fat genuinely feel the cold, especially in rain or wind. Thick-coated breeds like huskies, malamutes and most spaniels usually do not need a jumper at all, and can overheat in one.

The honest test is your dog’s behaviour: shivering, tucking the tail, lifting paws off cold ground, or refusing to go outside in bad weather are all signs a layer would help. A warm dog walks further and enjoys it more. If your dog is comfortable without clothes, do not force the issue — a bandana or a lightweight raincoat for wet days is plenty.

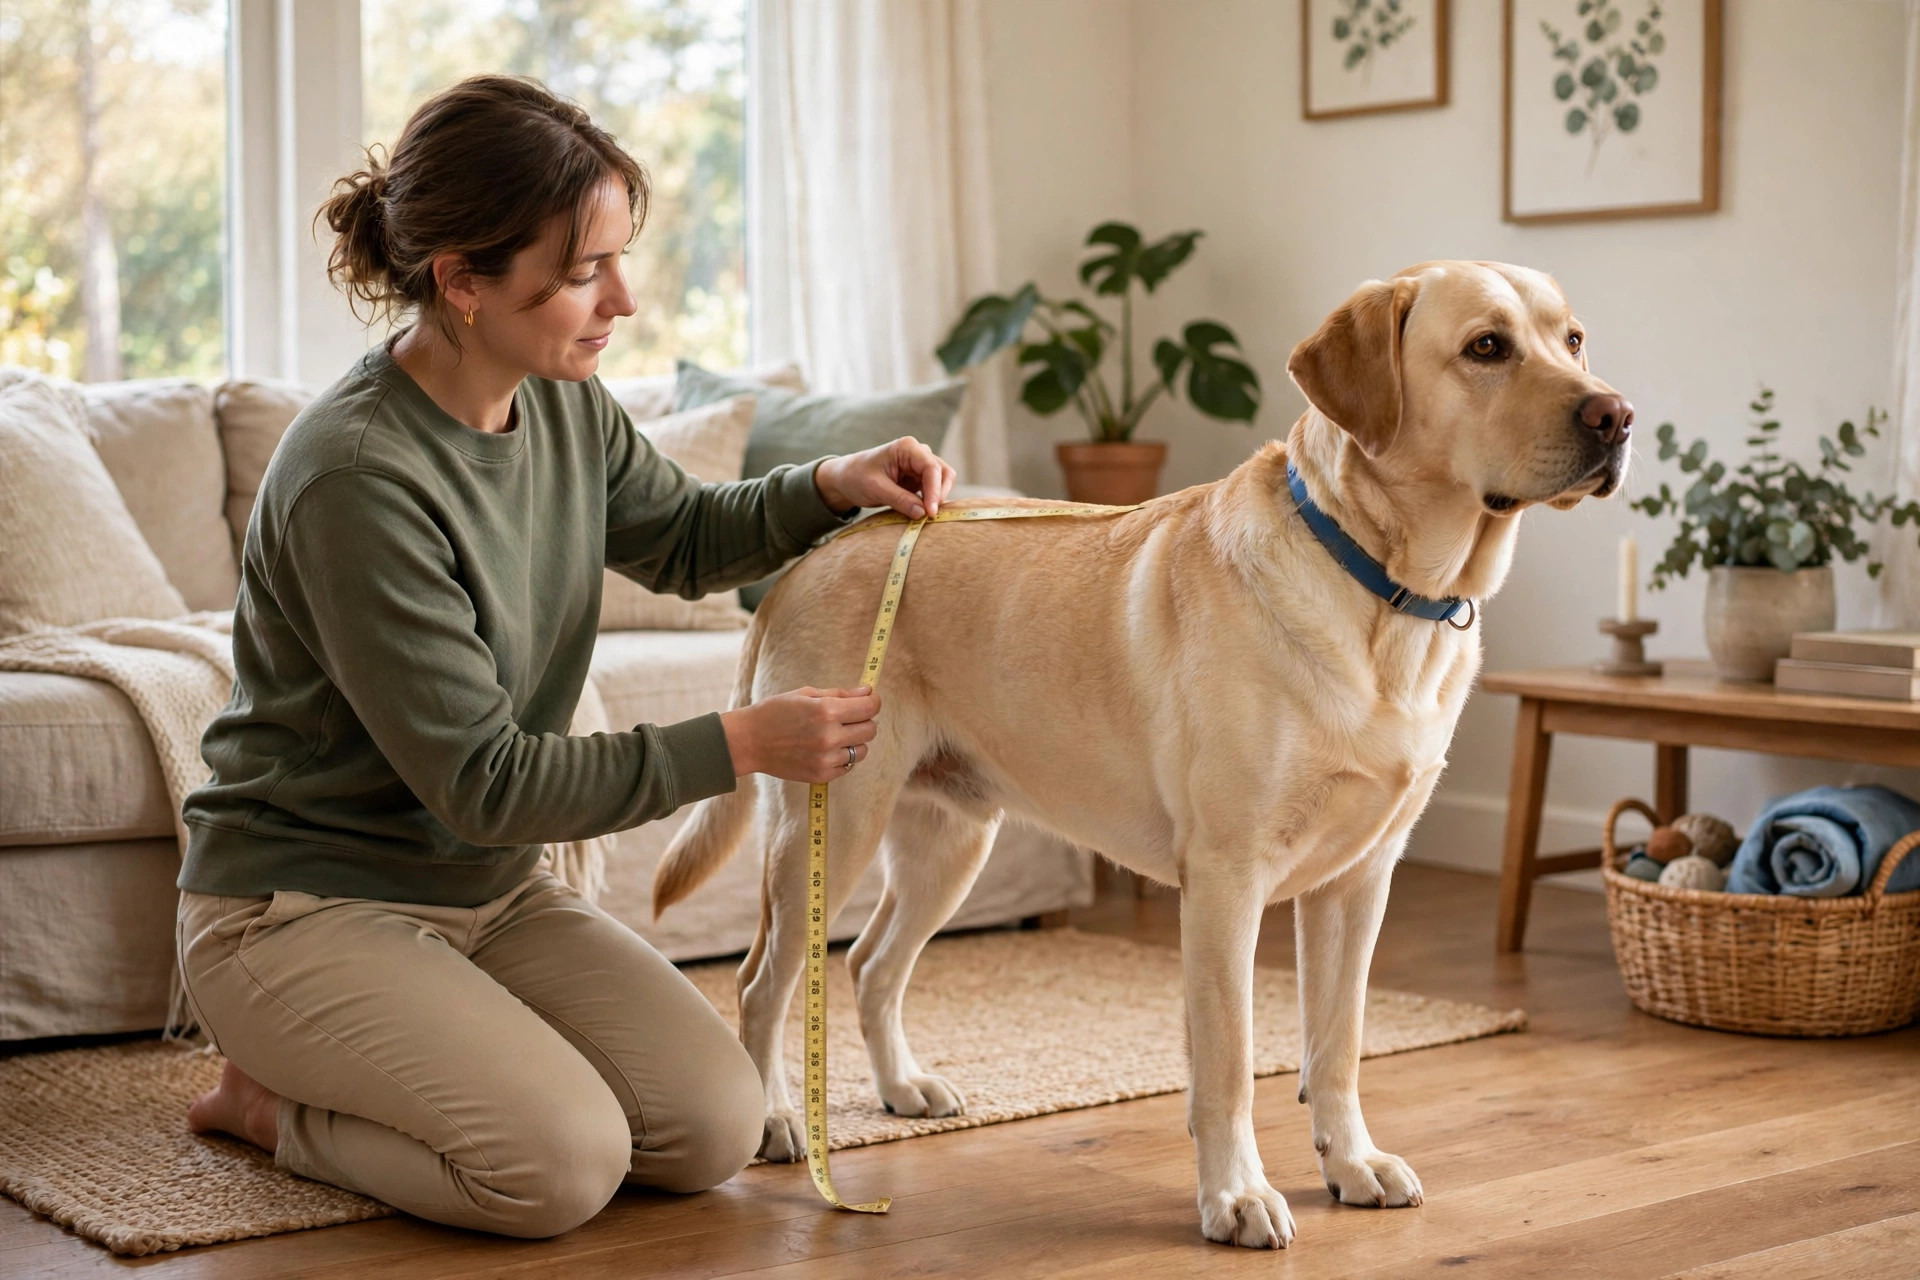
Measuring dog for clothes.

Measure first — the 30-second sizing guide

Every project below works from three measurements, so take them before you cut anything. Use a soft tape measure and measure over the dog standing square:

Back length: from the base of the neck (where the collar sits) to the base of the tail. This is the number most patterns ask for, and the one that matters most.

Chest: around the widest part of the ribcage, just behind the front legs. Add 2–3 cm of ease so the garment does not pull when your dog moves.

Neck: around the base of the neck, loose enough to fit two fingers underneath.

Write the numbers down and keep them with your sewing kit. Dogs grow, puppies especially — re-measure every few months, and always test a new garment indoors for ten minutes before the first walk.

Dog wearing cotton bandana.

1. No-sew bandana (5 minutes)

The perfect first project. Take a square of cotton fabric — an old shirt, a fat quarter from a craft shop, a tea towel you like — and cut it to size: for a medium dog, a 55 cm square works well; small dogs need about 40 cm, large dogs about 70 cm.

Fold it diagonally into a triangle, roll the long edge down two or three times until the band sits comfortably across your dog’s chest, then tie it loosely behind the neck with the point facing down the chest. That is it. No sewing, no velcro, no fuss.

Choose a light cotton that breathes, and avoid anything with a print that uses flaking paint or glitter. Bandanas are also the easiest way to dress a dog up for a photo or a party without asking them to wear a whole outfit — and if your dog hates clothes, a bandana is often the one thing they will tolerate happily.

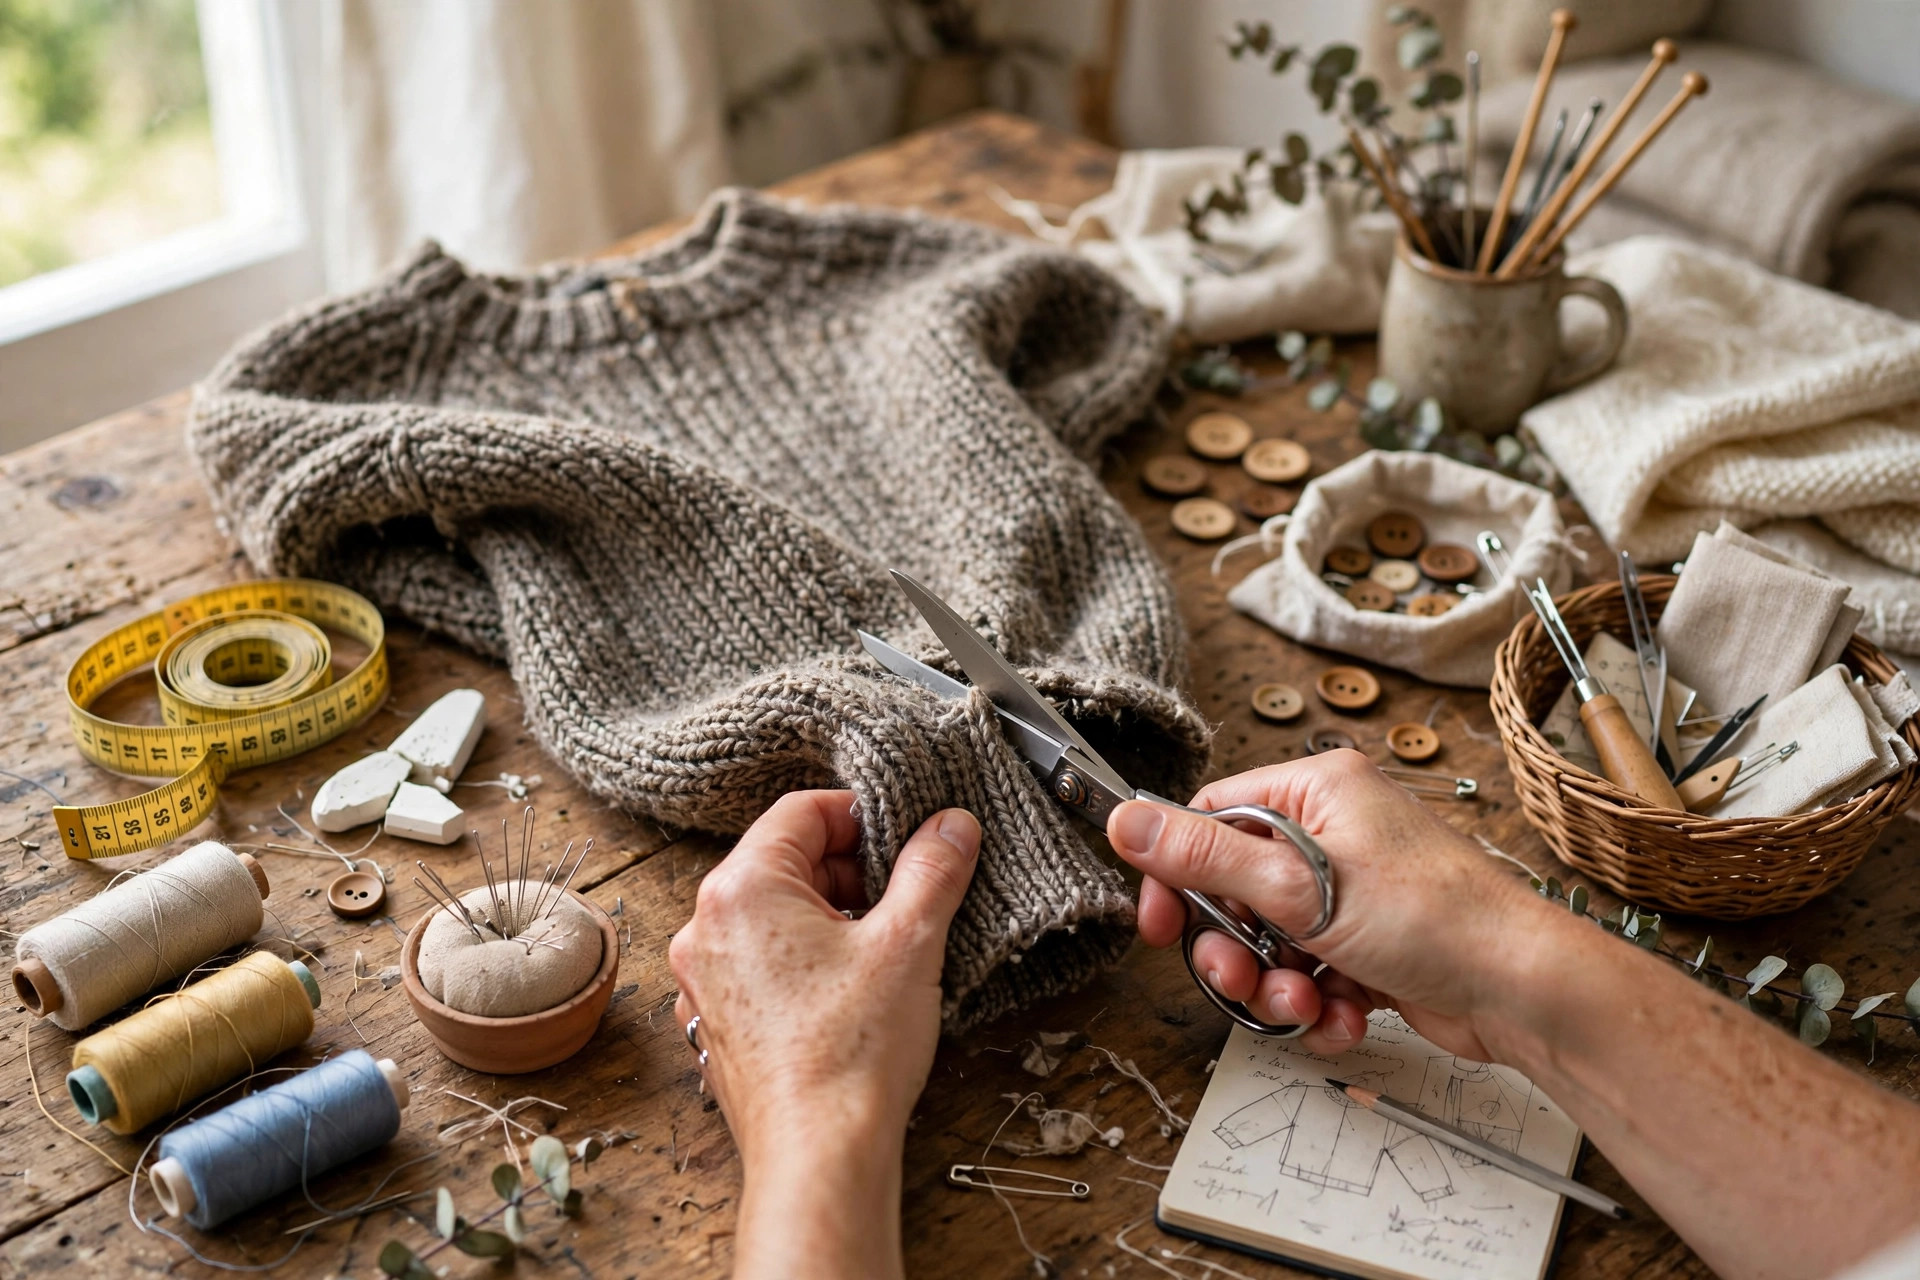
Cutting old jumper dog sweater.

2. Old jumper sweater (20 minutes)

The classic, and the one that saves a perfectly good jumper from the charity bag. Lay an old wool or fleece jumper flat and cut off one sleeve — that sleeve is your dog’s sweater. The cuff becomes the neck opening, so choose the sleeve whose cuff fits loosely around your dog’s neck.

Cut the sleeve to your dog’s back length, then cut two small leg holes on the underside, about a third of the way from the cuff end. Try it on, mark where the holes should sit with chalk, and cut them slightly smaller than you think — stretchy knit gives, and a hole that is too big will not stay put.

Fold the raw edge under and stitch it down, or use a zigzag stitch to stop fraying. If the jumper is thick, leave the hem raw and let it curl naturally — it will not unravel much on knit fabric. This is the warmest project in the list and the best use for the jumpers you were about to throw away.

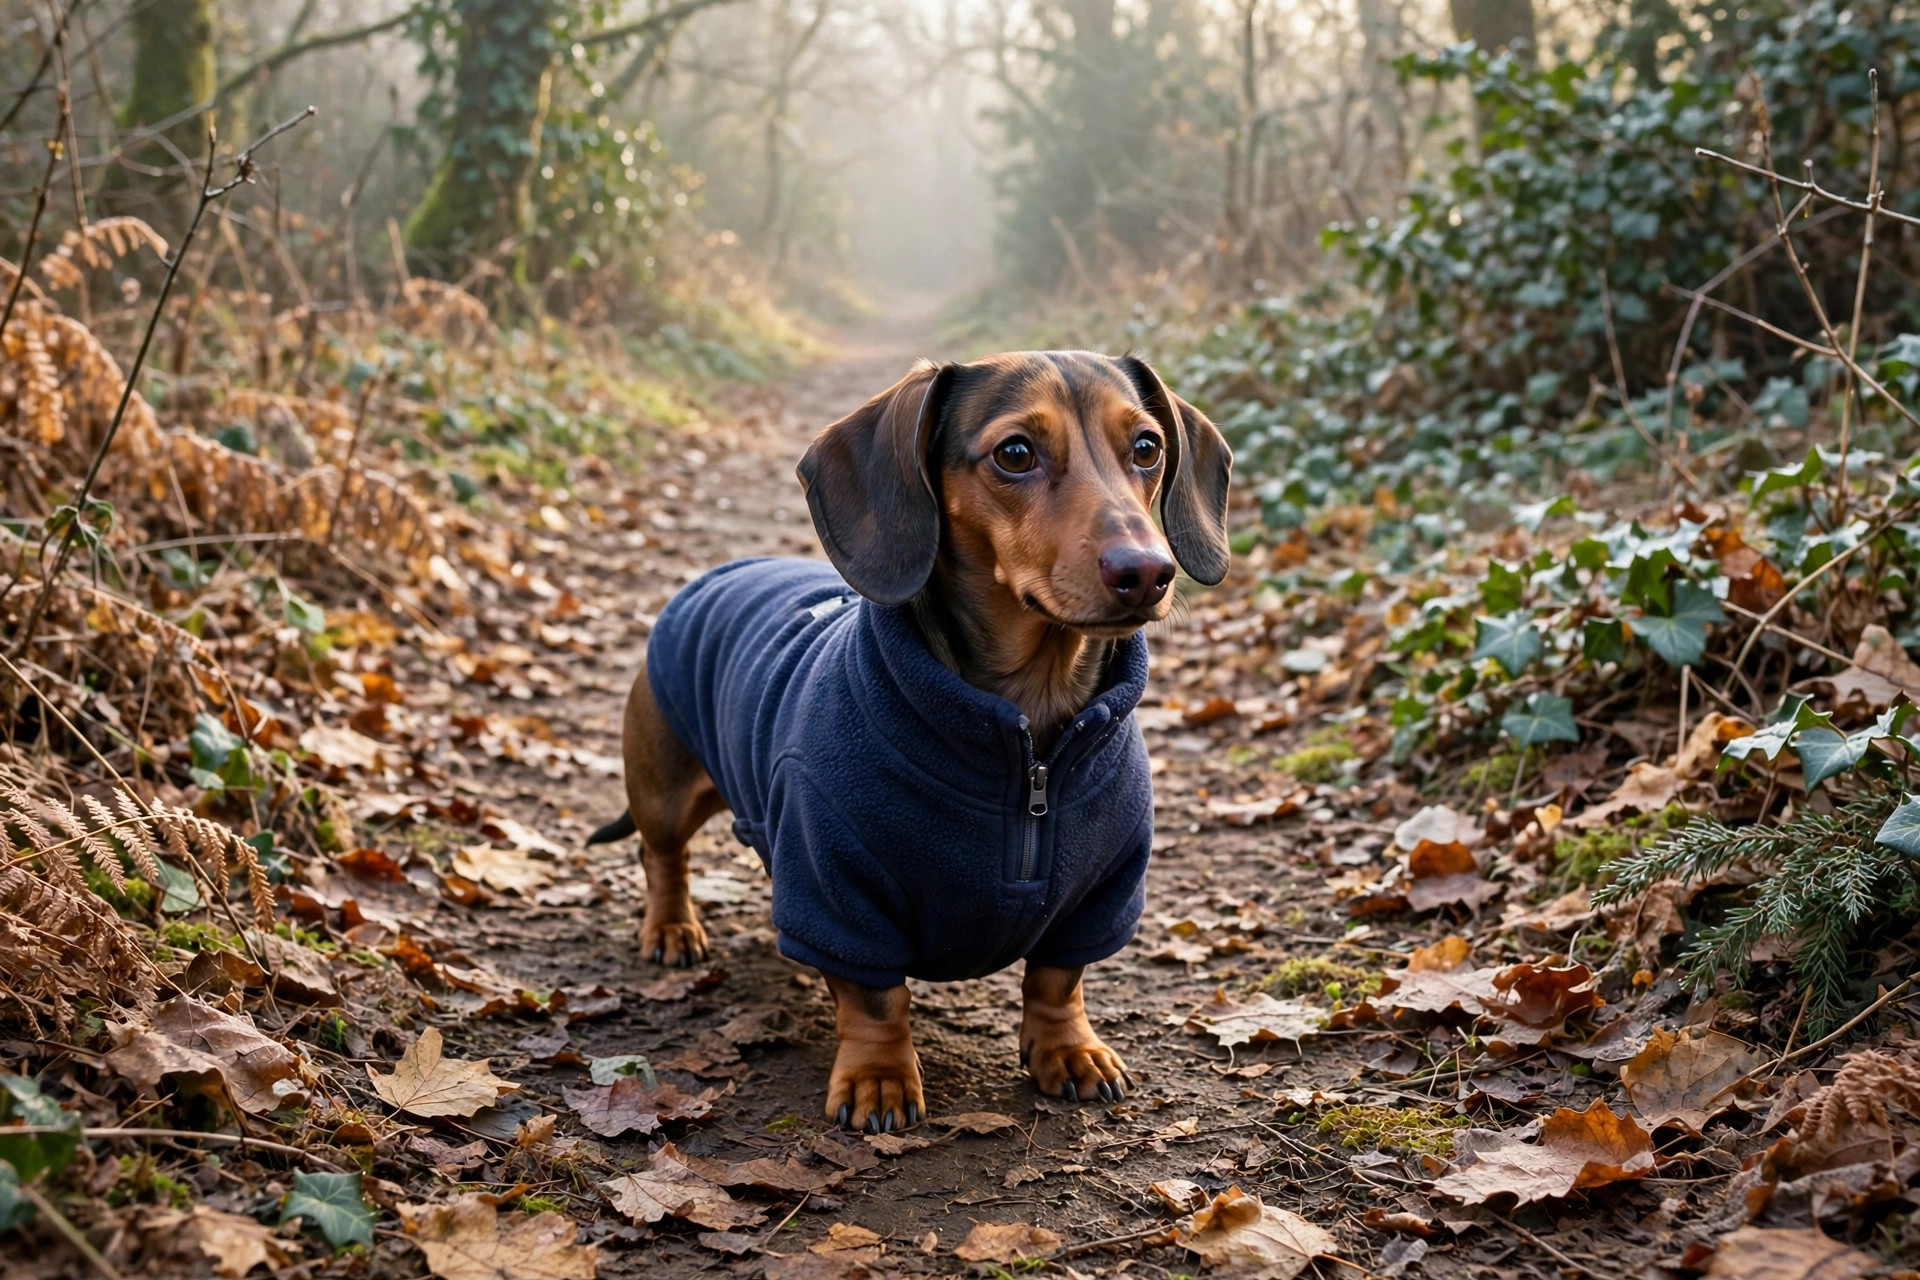
Small dog fleece jacket winter walk.

3. Fleece jacket with velcro (30 minutes)

For dogs that need real warmth on winter walks, a fleece jacket beats a sweater: it covers the chest and belly, dries fast, and does not hold water the way wool does. You need a piece of polar fleece (an old blanket works perfectly), velcro strips, and a tape measure.

Cut a rectangle of fleece: length = back length plus 5 cm, width = chest measurement plus 10 cm. Round the corners. Cut a shallow curve at the front for the neck, and two slits where the belly strap will pass through. Sew or glue velcro strips on the belly strap and the chest, so the jacket fastens underneath and your dog steps into it rather than having it pulled over its head.

Fleece does not fray, so you can leave the edges raw and the jacket will still look tidy. Add a strip of reflective tape along the back if your dog walks in the dark — it costs pennies and makes a real difference to visibility.

4. Raincoat from a shower curtain (30 minutes)

Wet dogs, wet houses, wet car seats — a raincoat solves all three. A cheap shower curtain, a poncho or a waterproof tablecloth is the perfect material: light, waterproof and easy to cut.

Cut the same rectangle as the fleece jacket, but add a hood if your dog will tolerate one — a simple rectangle of material, sewn or taped at the back of the neck opening, that sits over the ears in heavy rain. Most dogs prefer no hood, so make it optional: attach it with velcro so you can remove it.

Keep the coat short — it should end at the base of the tail, never further, so your dog can go to the toilet without soaking it. And make sure the belly is covered but the leg holes are generous: a raincoat that rubs the insides of the legs will be chewed off within minutes. For more on keeping paws and coats comfortable in bad weather, see our guide to winter paw care.

5. Cosy sleep shirt (15 minutes)

Some dogs — especially short-coated and older dogs — sleep cold, and a light sleep shirt keeps them comfortable through the night without overheating them. This is the simplest sewn project here: take an old t-shirt, cut it to your dog’s back length, and cut the sleeves off at the shoulder seam.

The t-shirt’s existing neckline becomes the dog’s neckline, so choose a shirt with a wide, stretchy neck. Hem the raw edges with a straight stitch, or leave them — jersey fabric curls rather than frays. The shirt should be loose: if you can slide two fingers under it everywhere, the fit is right.

Use it only for sleeping in a cool room, and take it off in the morning. A dog that sleeps in clothes every night can develop irritated skin where the fabric rubs, so keep the shirt clean and give the skin a break during the day.

6. Paw covers and booties (20 minutes)

Paw covers are the least glamorous item here and the most useful in winter, when salt and ice burn paws. Cut four small rectangles of fleece or old sock material, fold each into a tube that fits loosely over the paw, and stitch or glue a strip of elastic around the top — loose enough to slide two fingers underneath.

The trick is the fit: too tight and the circulation suffers, too loose and they fall off in the first minute. Test indoors first, and expect your dog to walk like a comedy act for the first five minutes — that is normal, and almost every dog gets used to them within a day. For the full cold-weather paw routine, including salt-burn first aid, see our winter paw care guide.

If your dog refuses booties entirely, a smear of paw balm before walks and a rinse afterwards does most of the same job with no dressing up required.

7. Dress-up bandana set (10 minutes)

Once the basic bandana works, make a set: one for every season, one for birthdays, one that matches your own scarf. Cut the same triangle in different fabrics and add a velcro tab instead of a tie, so you can swap them in seconds.

This is also the best project to make with children: let them pick the fabric, cut the triangle (with safety scissors), and decorate it with fabric pens. Just keep the decorating flat — iron-on patches are fine, anything raised or glued is a chewing hazard.

A bandana set is the only item on this list that is purely for fun, and that is the point. Dogs do not care about fashion, but they do care about attention — and a dog in a bright bandana gets a lot of it.

Washing and care

Handmade dog clothes get dirty fast, so wash them like dog bedding: warm water, a mild detergent with no fragrance, and air-dry flat. Wool jumpers should be hand-washed or they will shrink to a size that fits a hamster. Fleece and cotton can go in the machine on a gentle cycle.

Check the seams every few washes — a loose thread is a chewing invitation. And store the clothes somewhere your dog cannot reach them: a surprising number of dogs will drag their favourite jumper out of the drawer and sleep on it, which is flattering but not hygienic.

Safety notes — read this before your dog wears anything

Clothes should never restrict movement, breathing or toileting. Watch for rubbing behind the front legs and under the collar — the two places garments chafe first. If you see redness or hair loss there, the garment does not fit.

Never dress a dog in clothes with a hood pulled tight, a drawstring, or anything around the neck that could catch on a fence or a branch. Never leave a dog in clothes in a crate, in the car, or unsupervised — a caught garment can panic a dog badly. And if your dog is clearly stressed by clothes — freezing, lip-licking, trying to bite the garment off — respect that. Some dogs simply do not like it, and a raincoat for the worst weather is all they will ever need.

FAQs

What fabric is best for DIY dog clothes?
Cotton and fleece are the easiest to work with and the most comfortable for dogs. Cotton breathes and washes well; fleece is warm, light and does not fray. Avoid anything stiff, scratchy or heavily treated, and avoid wool for dogs with sensitive skin unless it is a soft merino.

Can I make dog clothes without sewing?
Yes — the no-sew bandana and a simple tied fleece wrap need no sewing at all, and fabric glue or iron-on hemming tape works for most straight hems. A basic running stitch is worth learning though: it takes ten minutes to learn and makes every other project neater and longer-lasting.

How do I stop my dog chewing their clothes?
Fit is usually the cause: a garment that pulls, rubs or hangs loose invites chewing. Make sure it fits well, remove it when you are not supervising, and give your dog something else to chew. Bitter-apple spray on the hem works for some dogs, but fit and supervision matter more.

Are DIY dog clothes safe for puppies?
Yes, with two rules: puppies grow fast, so measure often and do not make anything they will outgrow in a week; and never leave a puppy unsupervised in clothes, because puppies chew everything and can swallow fabric or fasteners. A simple bandana or a loose sleep shirt is the safest starting point.

My dog hates wearing clothes. What should I do?
Do not force it. Try a bandana first — most dogs accept it. Introduce new garments slowly, with treats, for a few minutes at a time indoors. If your dog still hates it after a week of gentle tries, accept it: some dogs never take to clothes, and a quick towel-dry after wet walks does the job instead.

The bottom line

DIY dog clothes are cheap, quick and genuinely useful — especially for short-coated dogs, puppies and seniors in cold or wet weather. Start with the no-sew bandana, graduate to the old-jumper sweater, and only make what your dog actually needs. Measure twice, cut once, skip the buttons and beads, and always let your dog tell you whether the outfit stays or goes. And if you have old clothes left over after the sewing, turn the rest into toys — our guide to DIY dog toys from old clothes shows you how.

Pin this for later 📌 — and if your dog also needs a warmer place to sleep, our guide to dog bed ideas is a good next read.

Large golden retriever stretched out on an XXL orthopaedic dog bed in a living room.

Big Dog Bed Ideas: 10 Beds That Actually Hold Up for Large Dogs

A bed that fits a beagle will not survive a 40 kg Labrador. Big dogs need more than a bigger rectangle of foam — they need a bed rated for their weight, long enough for a full stretch, and tough enough to take a hundred pounds of dog flopping down on it twice a day. Buy a bed built for a small dog in a large size and you get the same thin fill, the same weak seams and the same flattened pancake within a month — just bigger.

This guide covers the ten big dog bed ideas that actually hold up: what size your dog really needs, which fills support heavy joints, which covers survive muddy paws and weekly washing, and the mistakes that send most large-dog beds to the bin early. If you are starting from scratch, our dog bed ideas roundup covers every sleeper type; this guide is the big-dog deep dive.

Before you buy — the 4 rules
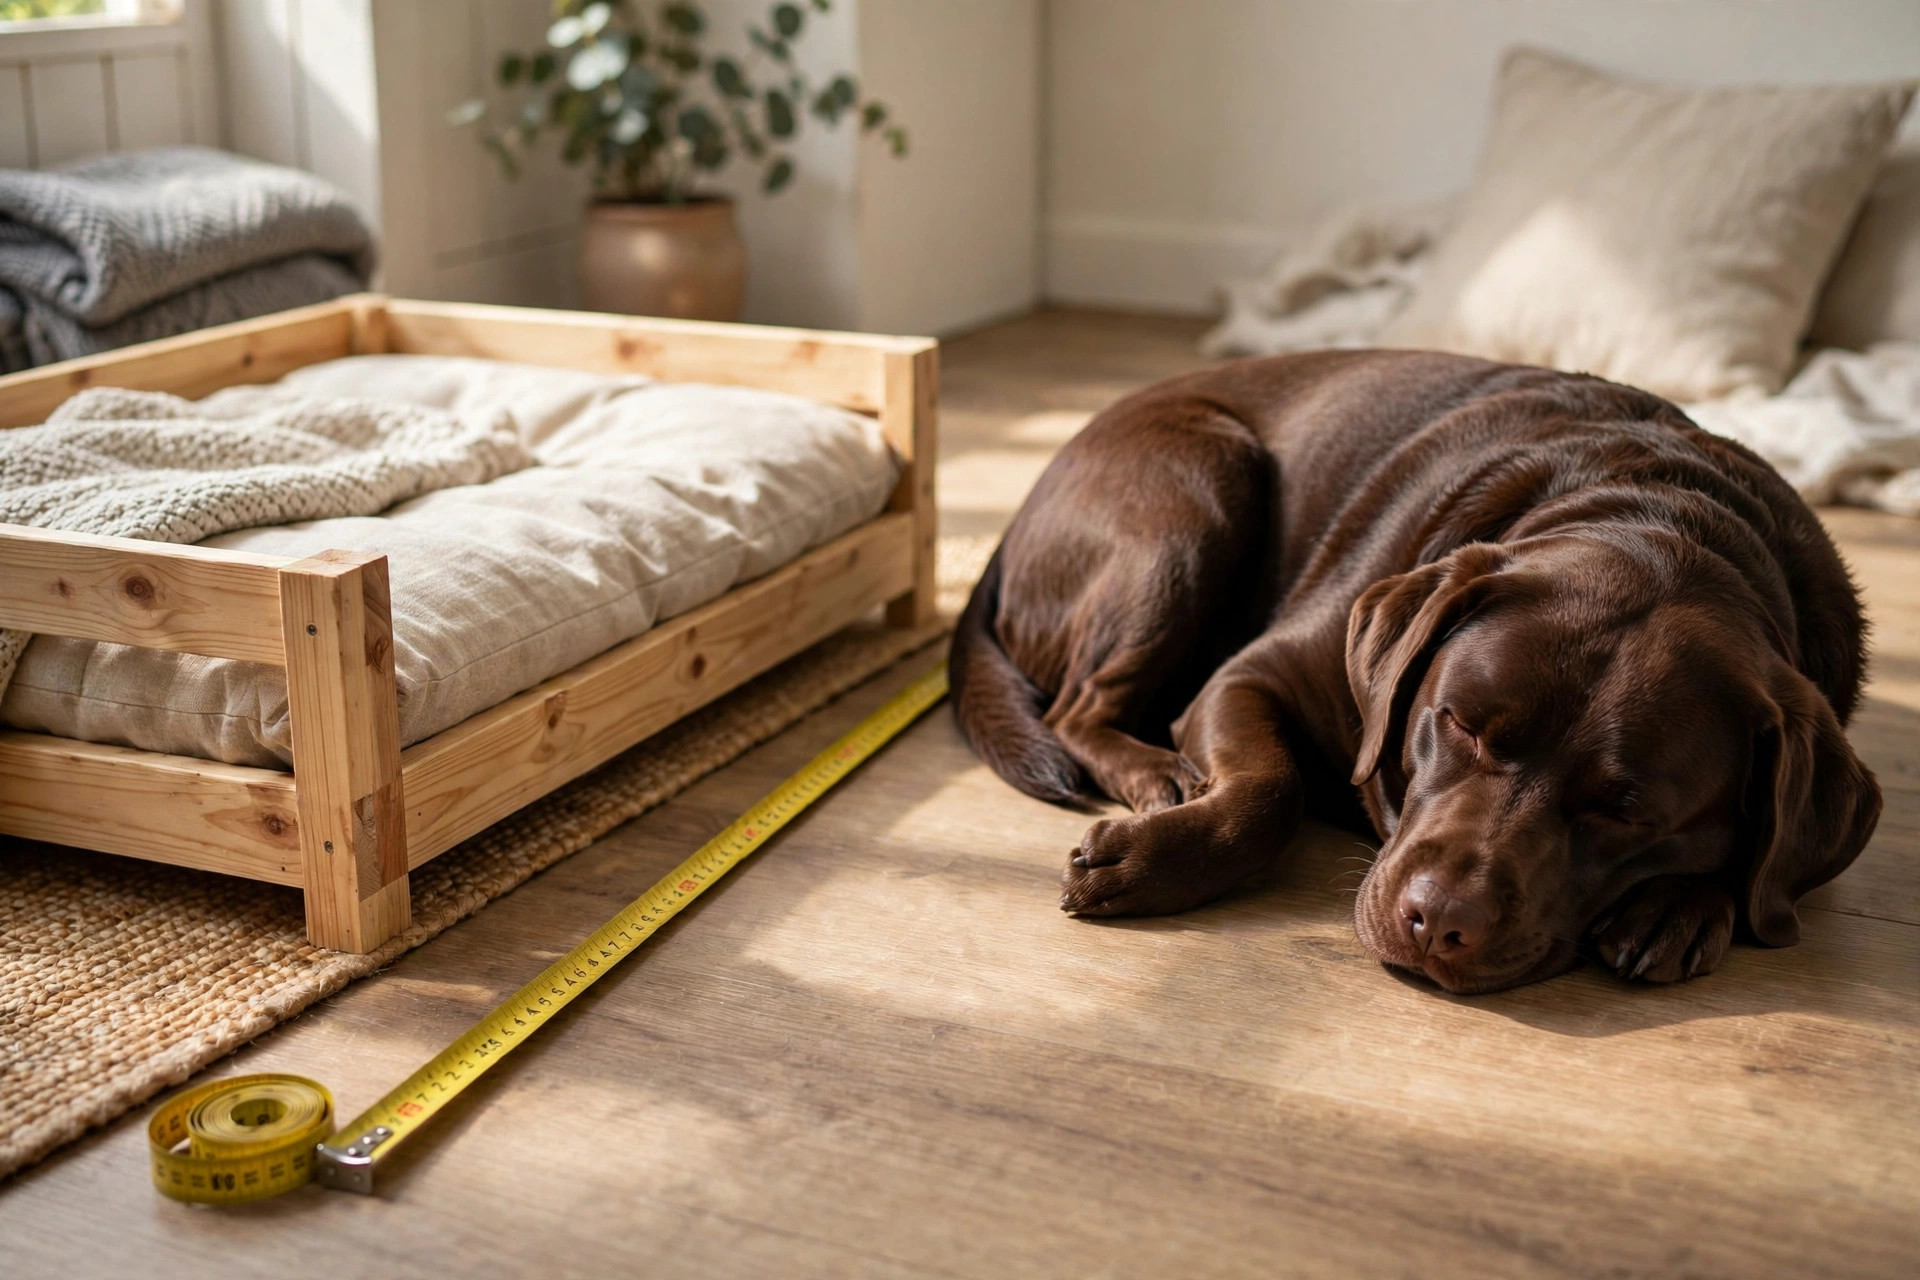
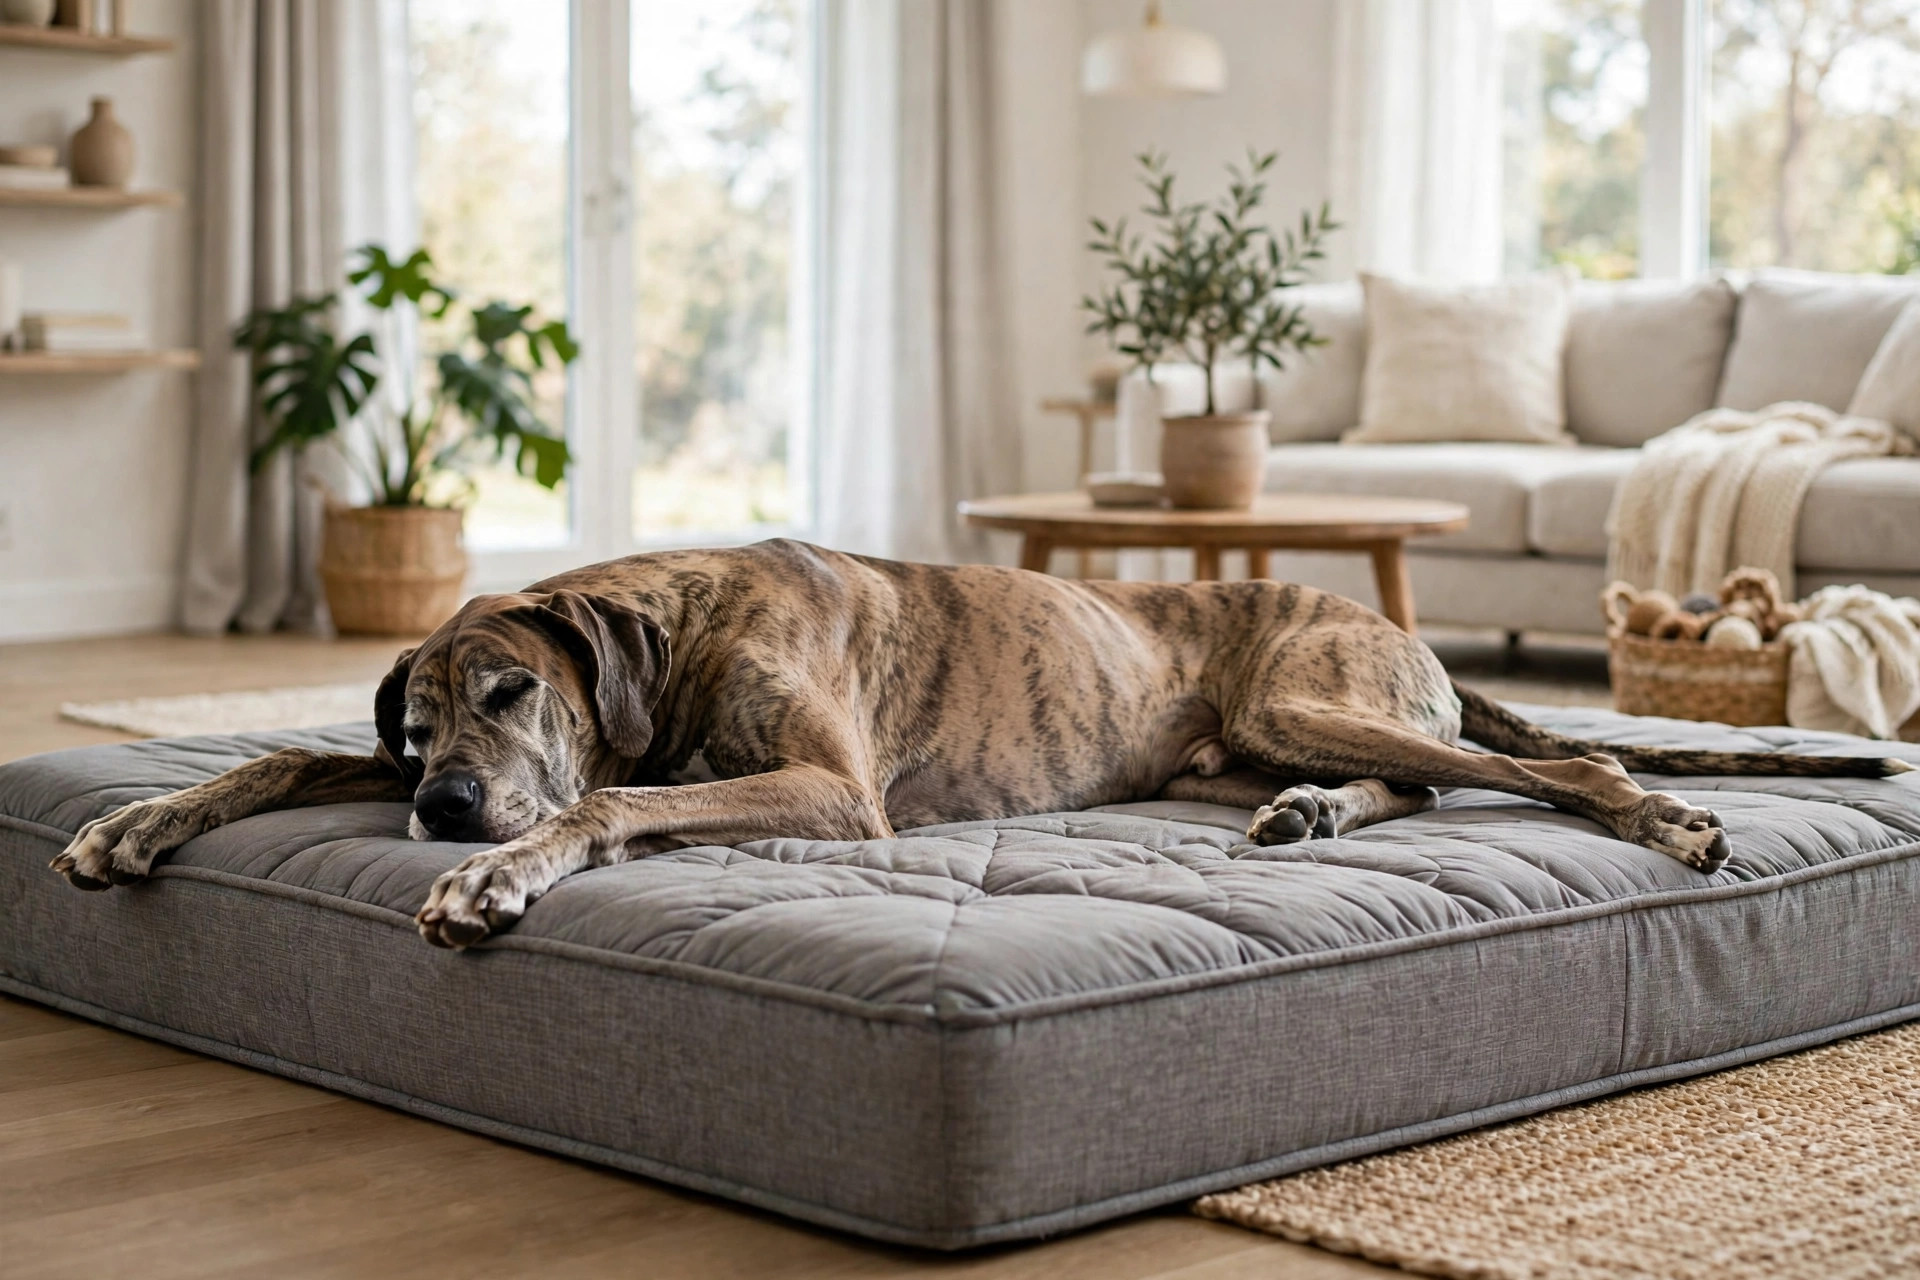
1. Measure the dog, not the room. Measure your dog stretched out nose to tail, then add 15–20 cm. A bed that is “about right” is too small.
2. Check the weight rating, not just the size label. “XL” means nothing without a weight limit — look for a stated rating of at least your dog’s weight plus 10 kg.
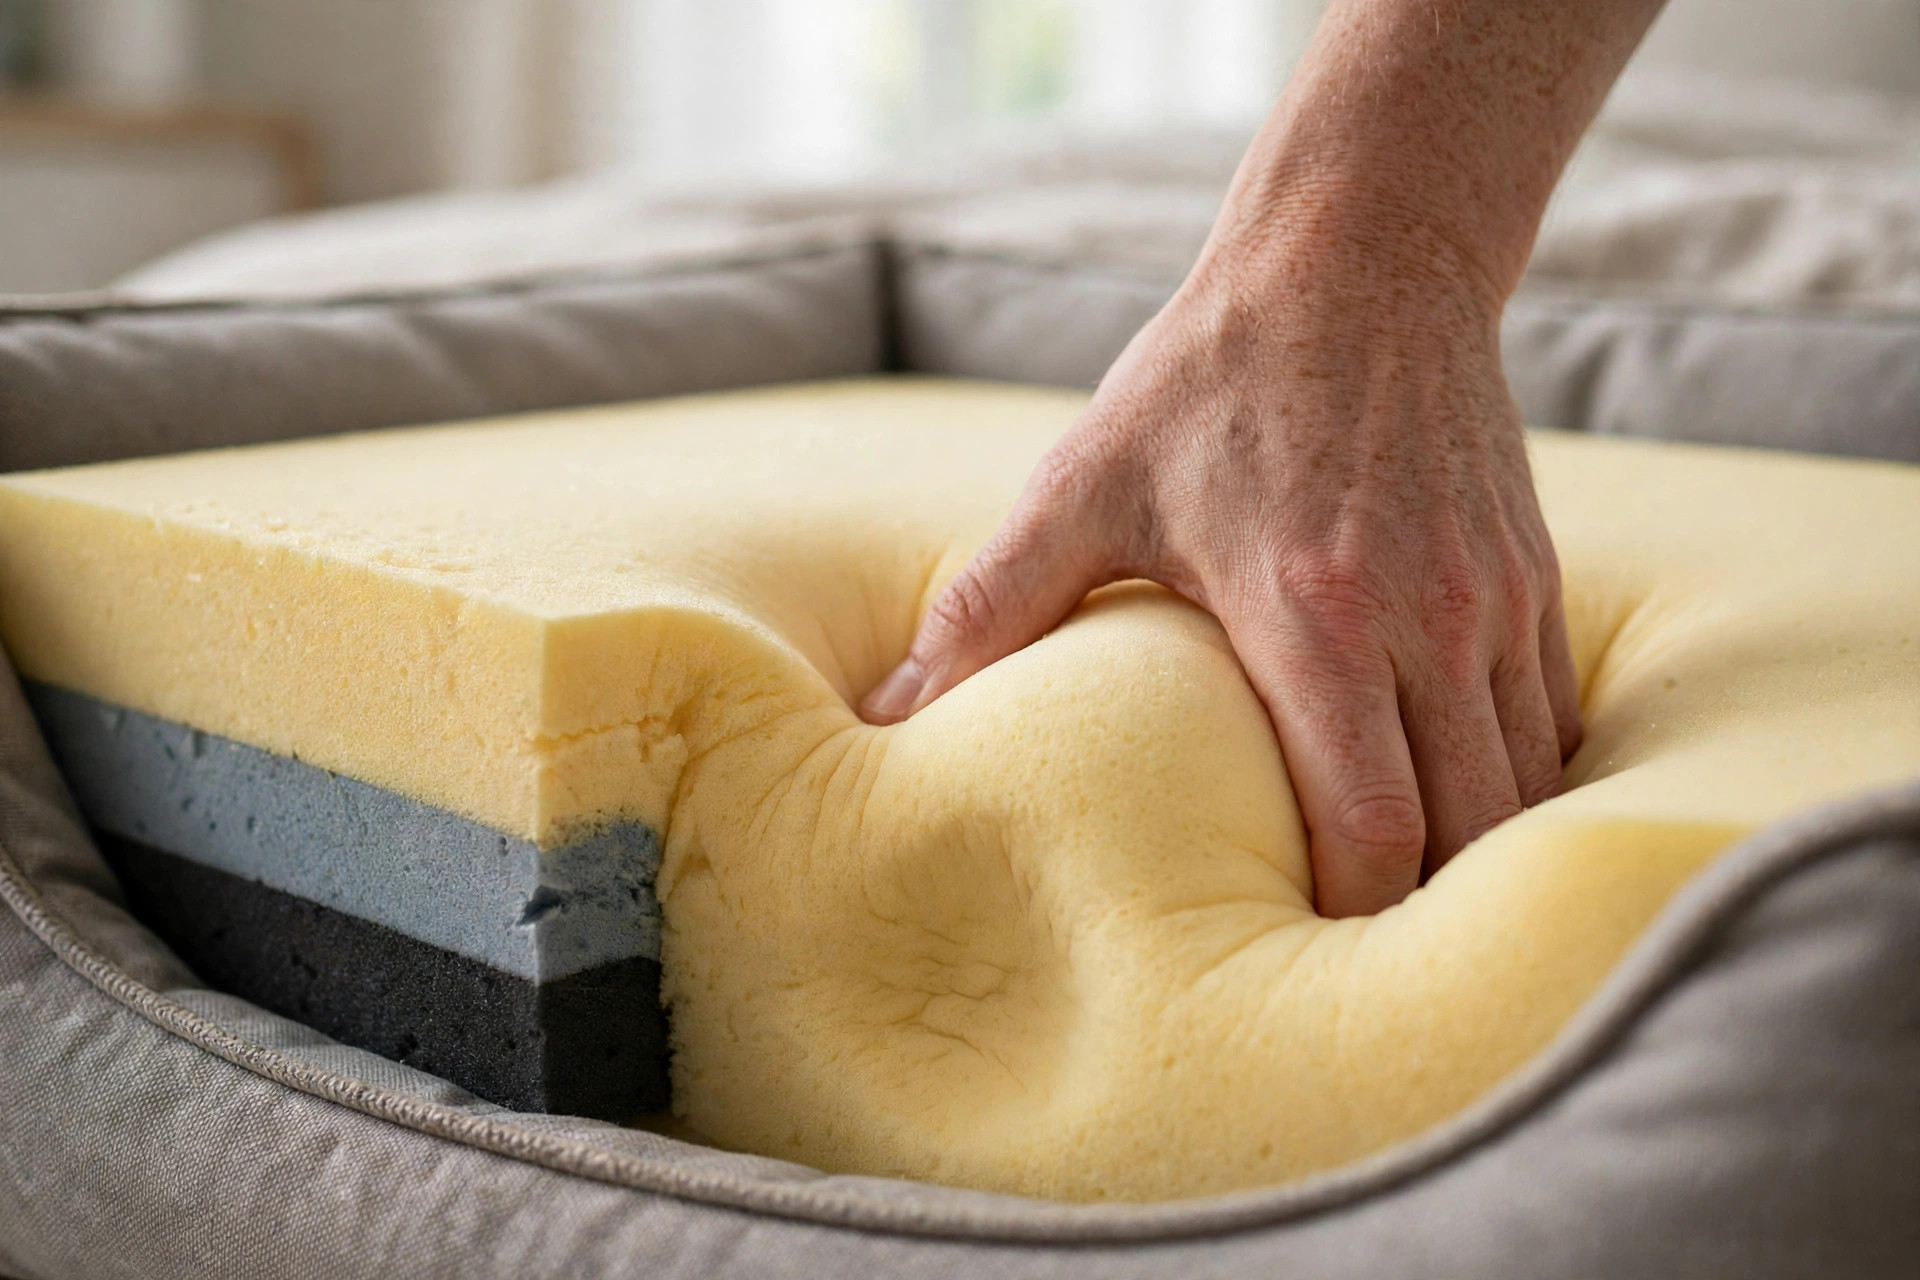
3. Fill matters more than looks. For dogs over 25 kg, memory foam or high-density foam is the floor; polyester fill flattens fast under heavy dogs.
4. Washability is not optional. A big dog means a big mess. If the cover does not come off and go in the machine, the bed will smell within a month.

What counts as a “big dog” bed?

A big dog bed starts where standard beds stop: roughly 90 cm long and up, with a stated weight capacity. The table below is a starting point — always measure your own dog, because a long-legged 30 kg greyhound needs a longer bed than a stocky 30 kg bulldog.

Dog’s weight Bed length to look for Best fill
20–30 kg (medium-large) 90–110 cm High-density foam or thick polyester
30–45 kg (large) 110–130 cm Memory foam, 10 cm+ thick
45 kg+ (giant) 130 cm+ (XXL) Orthopaedic memory foam, 12 cm+ thick

If you want the exact numbers for your dog, our dog bed size calculator works it out from your dog’s measurements. The short version: a dog should be able to lie fully stretched out without paws or head hanging off the edge, and curl up without spilling over the sides.

1. XXL orthopaedic memory foam

The default best choice for most big dogs, and the one to buy if you only buy one. A slab of memory foam 10–12 cm thick spreads a heavy dog’s weight instead of letting hips and elbows sink through to the floor. It is the same logic as our orthopedic dog beds guide: for seniors and arthritic dogs it is not a luxury, it is joint care. Look for a CertiPUR or similar foam certification, a non-slip base so the bed does not skate across hard floors, and a cover you can remove.

Large dog bolster bed.

2. Bolster beds for leaners

Big dogs love to lean. A bolster bed — a flat sleeping surface with raised edges on three or four sides — gives a heavy head somewhere to rest and gives sprawlers a backrest. For giant breeds, check the bolster height: a 15 cm bolster is a pillow, a 25 cm bolster is a wall. The best big bolster beds use the same dense foam in the bolsters as in the base, so the edges do not collapse under a leaning head. Avoid bolsters stuffed with loose fill if your dog is a leaner — they go flat in weeks.

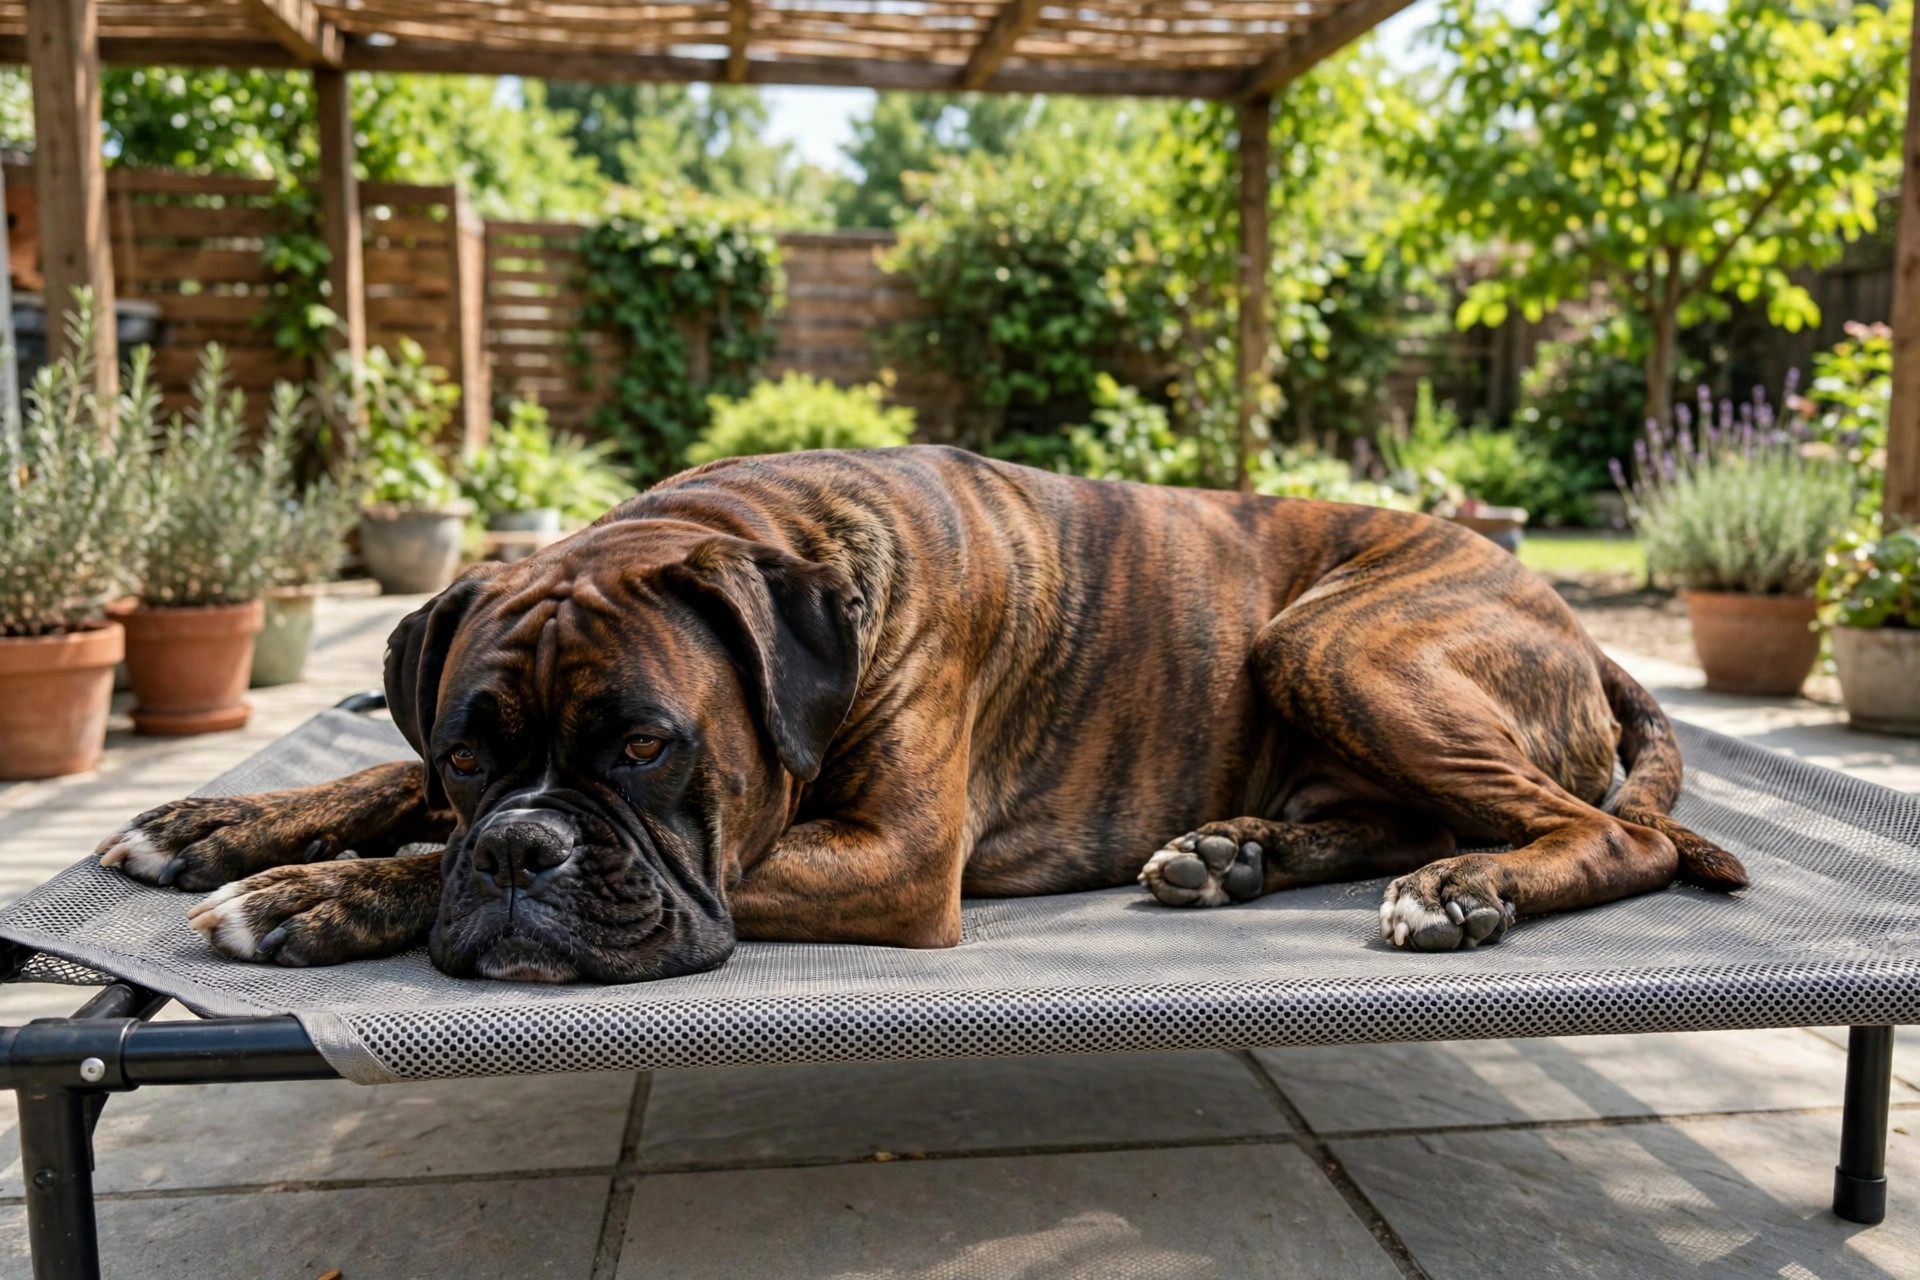
Big dog elevated cooling bed.

3. Elevated cooling beds

A raised mesh bed lets air flow underneath, which is why they are the go-to for thick-coated big dogs and hot sleepers. The frame matters more than the fabric: look for a steel or heavy-duty aluminium frame rated well above your dog’s weight, and a taut, chew-resistant mesh. Cheap elevated beds sag in the middle under a 40 kg dog and become a hammock, which is bad for joints. Our elevated dog beds guide covers cooling, frames and chew-proofing in detail.

4. Chew-proof ballistic beds

Some big dogs chew. A bed with a ballistic nylon or Cordura-style cover, hidden zips and reinforced seams survives dogs that shred ordinary beds in an afternoon. The honest version: no bed is truly chew-proof, but a heavy-duty cover with no loose flaps or exposed zips buys months instead of days. Pair it with a chew-proof crate mat if the bed lives in a crate — and check our best dog beds for crates for sizing inside a crate.

5. XXL donut and calming beds

Calming donut beds work by letting a dog curl into a den-like nest — and they do make them in XXL. For an anxious big dog, a 110–120 cm donut with a deep, soft rim can be the bed they actually use instead of your sofa. The catch is the fill: a donut full of loose polyester flattens under a heavy dog, so look for one with a foam base under the plush top. Our calming dog beds guide explains the anxiety mechanism and what the evidence actually says.

6. Waterproof beds for droolers and accidents

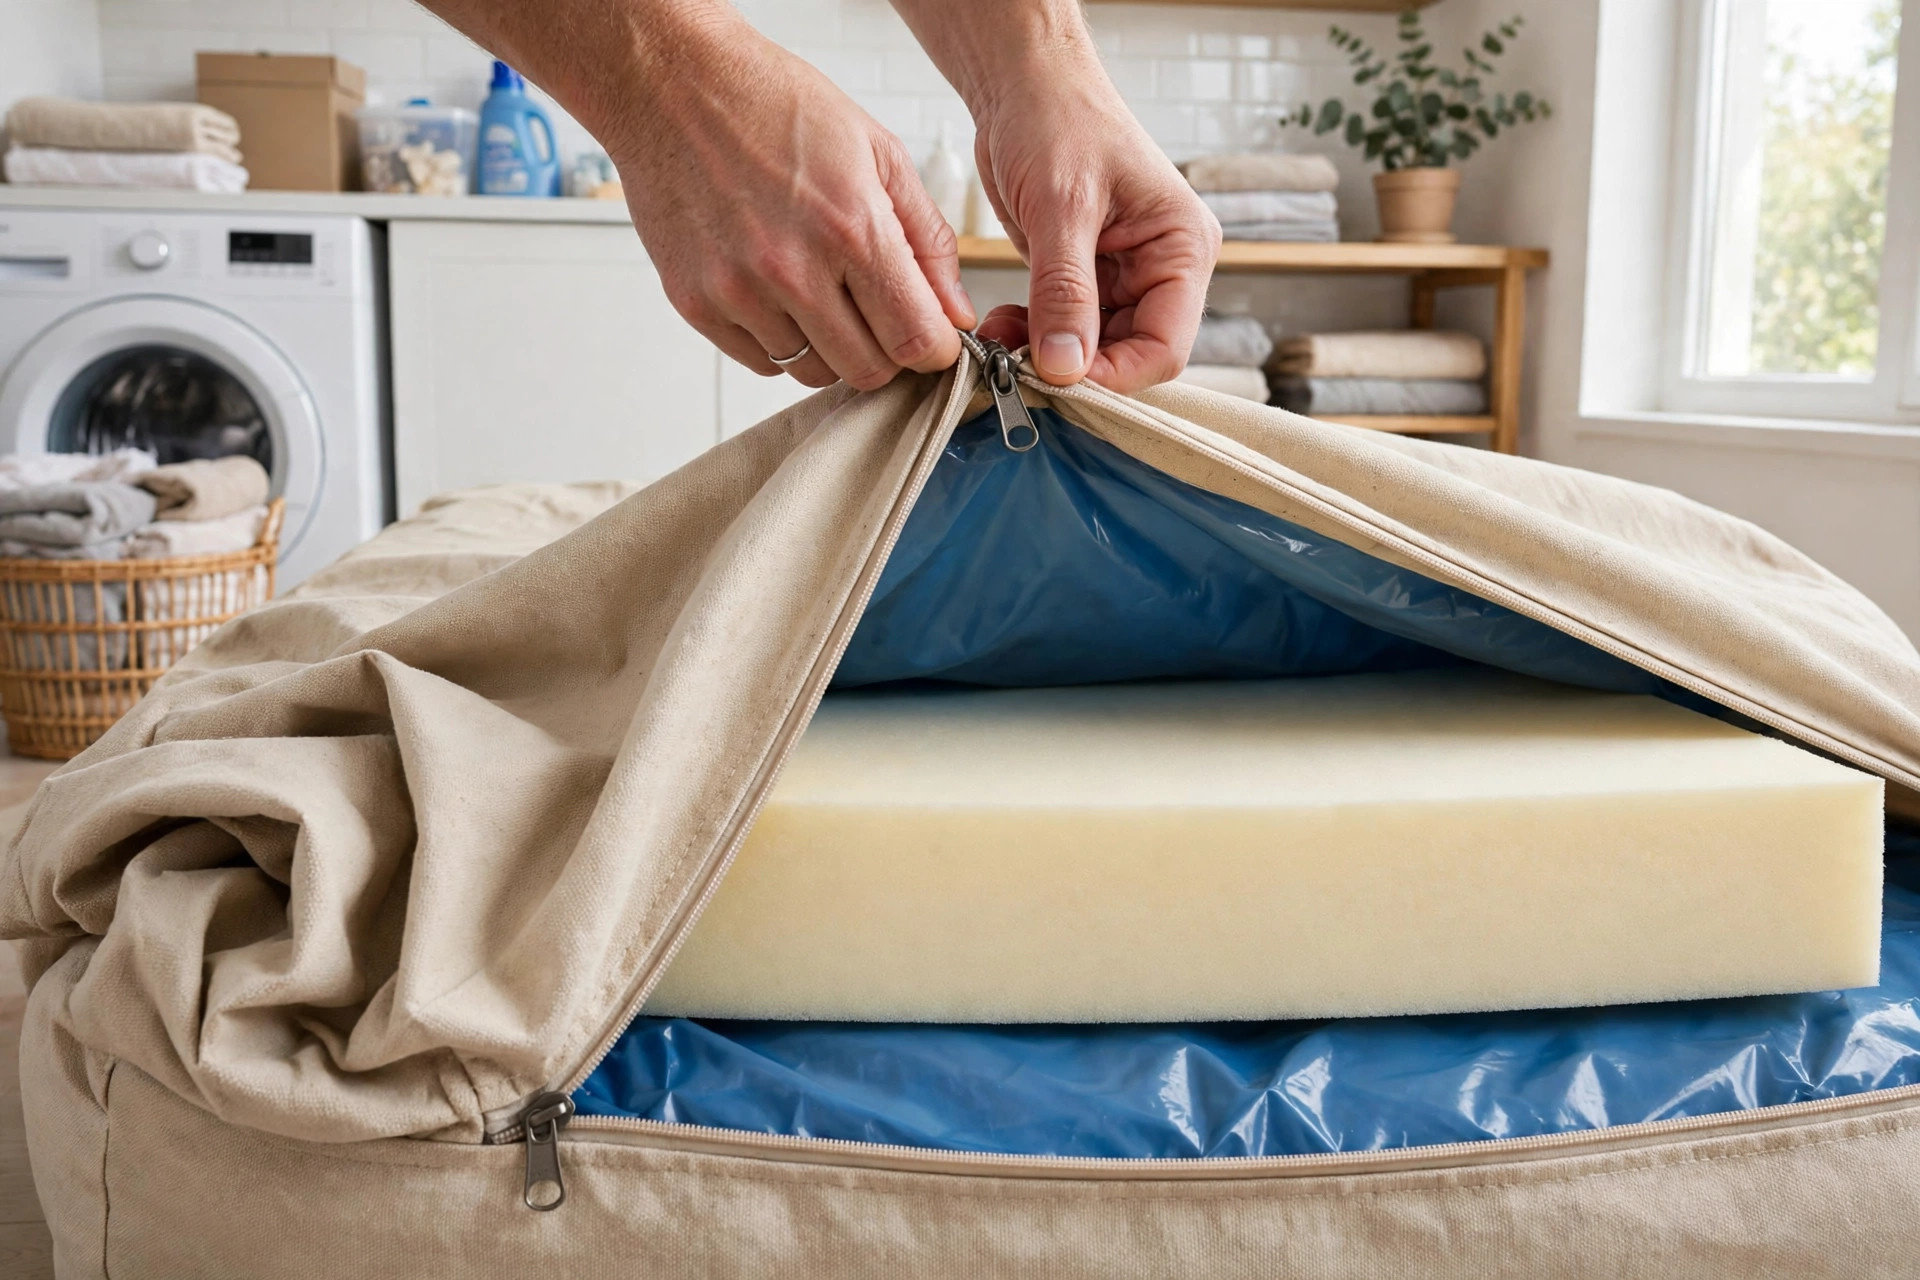
Big dogs drool, puppies have accidents, and older dogs leak. A waterproof liner — either built in or as a separate zip-on cover — protects the foam, which is the part you cannot wash. Without it, one accident soaks into the fill and the bed is finished. Check that the waterproof layer is on the inside of the cover, not a crinkly plastic sheet on top: the dog should sleep on fabric, with the waterproofing underneath it.

7. Rugged outdoor and patio beds

If your big dog sleeps on the porch or in the garden room, an indoor bed will rot. Outdoor big-dog beds use weather-resistant fabric, a raised or mesh base so rain drains through, and fill that does not hold water. A raised mesh bed doubles as the outdoor option and the cooling option, which is why it appears twice in this list. Bring it inside in heavy rain anyway — “weather-resistant” is not “waterproof”.

8. Crate-fit XL beds

A bed that fits the crate is not the same as a bed that fits the dog. Measure the crate pan first, then find the thickest foam that fits inside it — a bed that curls up at the edges wastes the space the dog needs. Flat, rectangular foam beds with a low profile work best in crates; deep bolsters eat floor space. If the crate bed needs washing weekly, a two-cover system (one on the bed, one in the wash) is worth the extra cost.

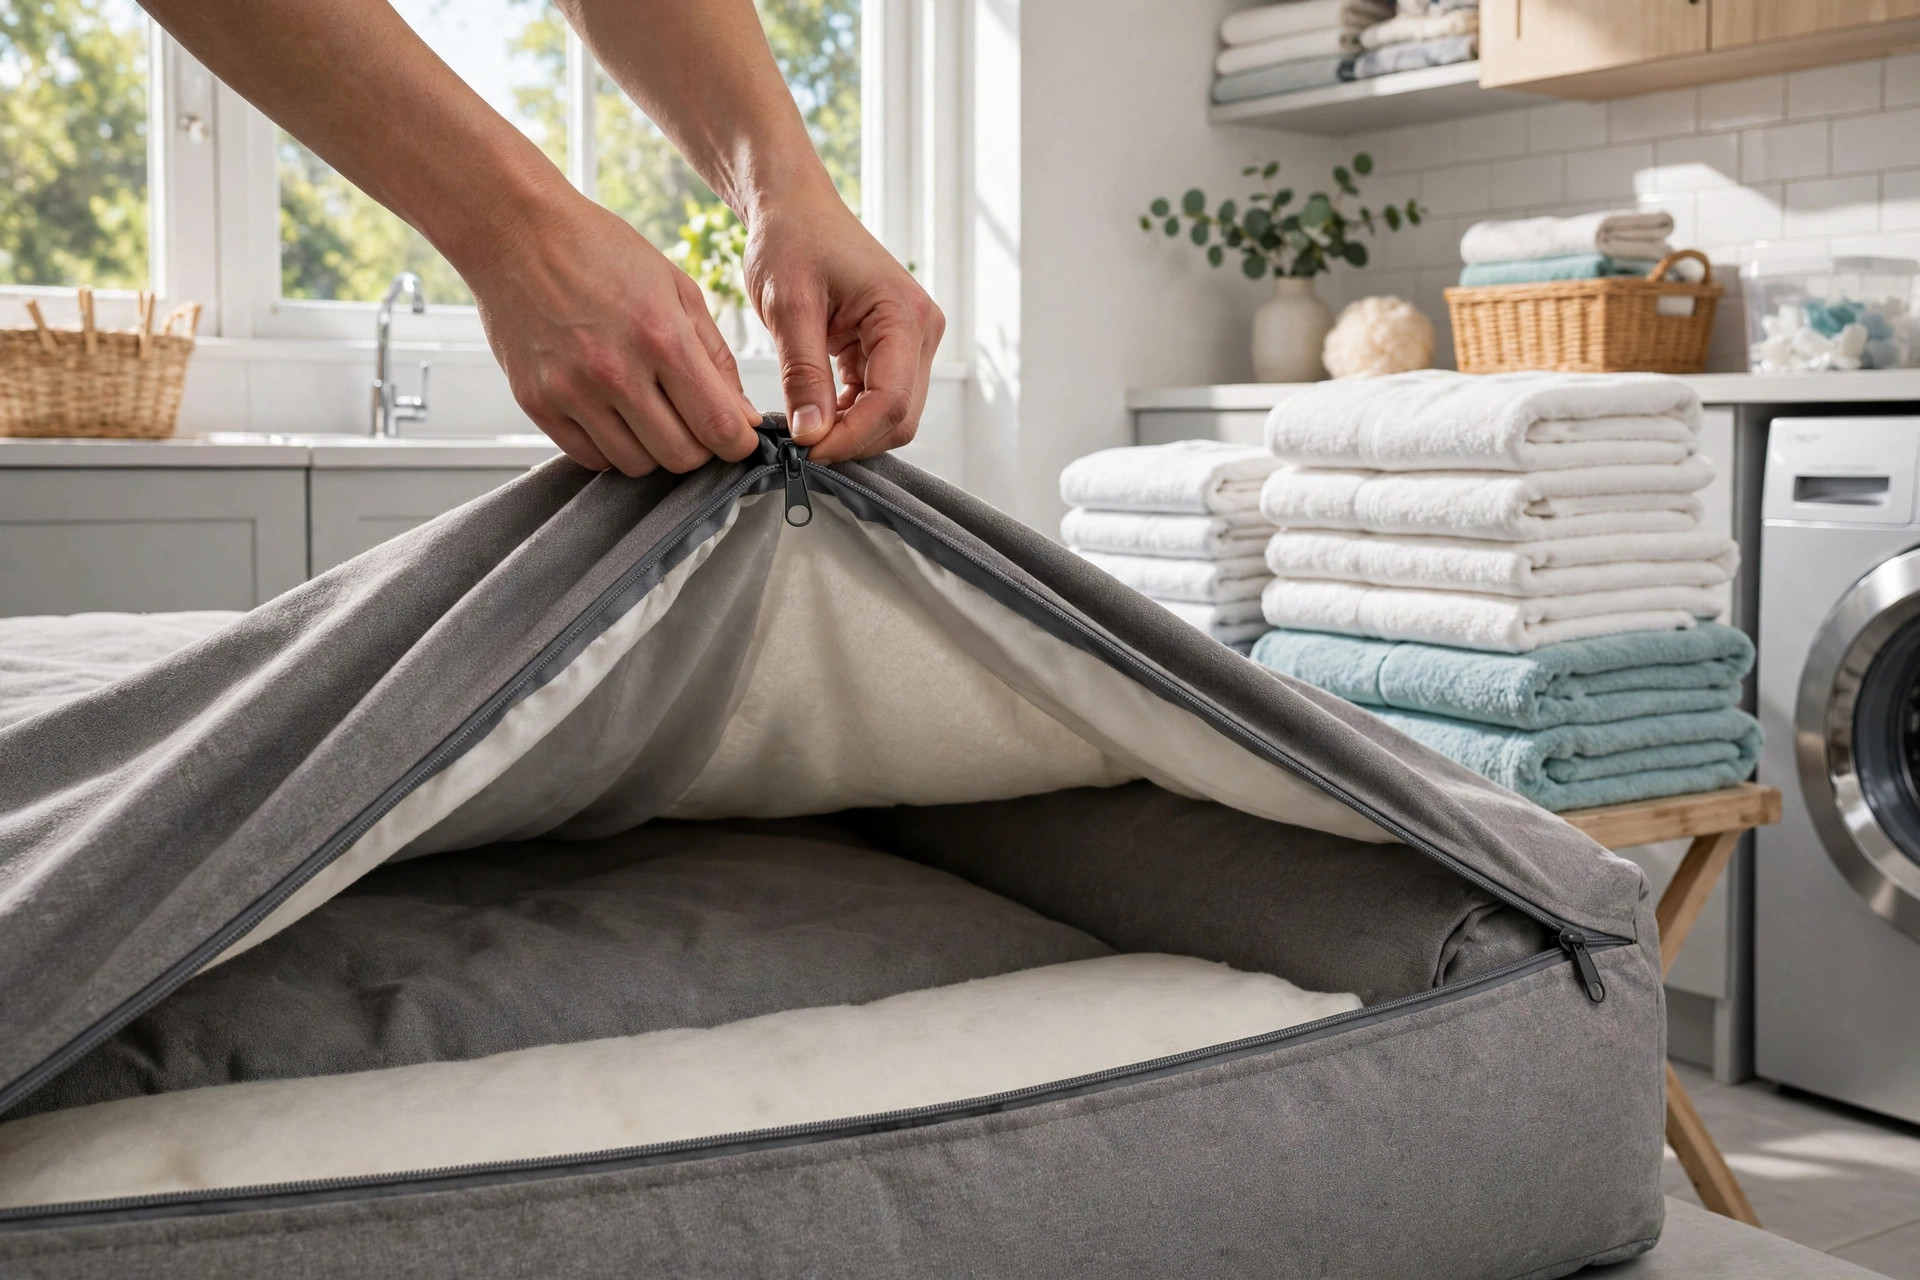
Washing big dog bed cover.

9. Washable-cover beds

The single most practical feature on any big dog bed. A cover that unzips fully, goes in the machine on a normal cycle, and dries without shrinking will double the bed’s useful life. Look for a zip that runs at least three-quarters of the way around — a small zip makes the cover a wrestling match with a 130 cm bed. Wash on a gentle cycle with unscented detergent, and air-dry the cover when you can: tumble drying shrinks covers faster than anything else. Our how to wash a dog bed guide covers machine vs hand washing by bed type.

10. DIY no-sew bolster from old blankets

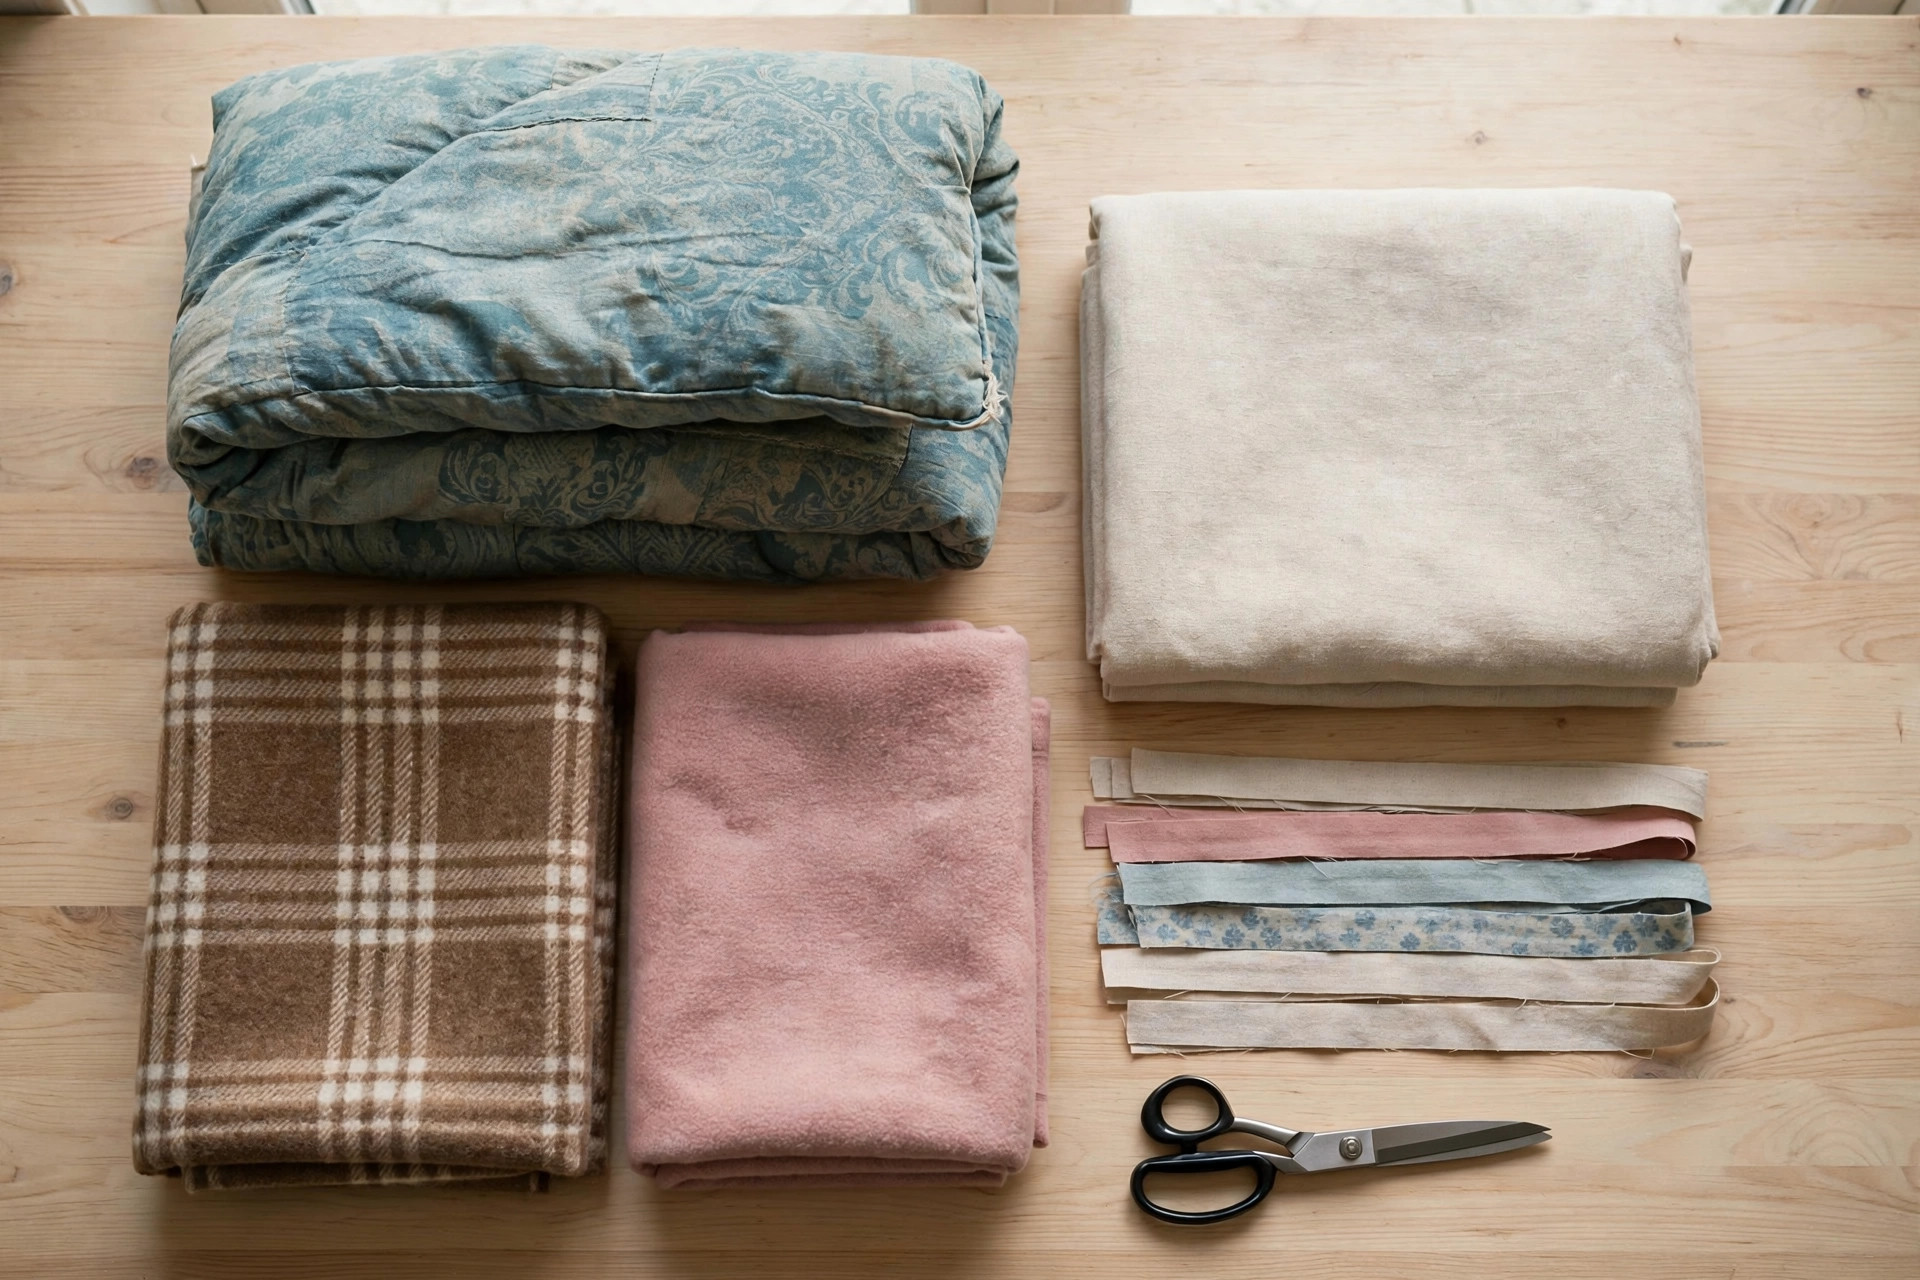
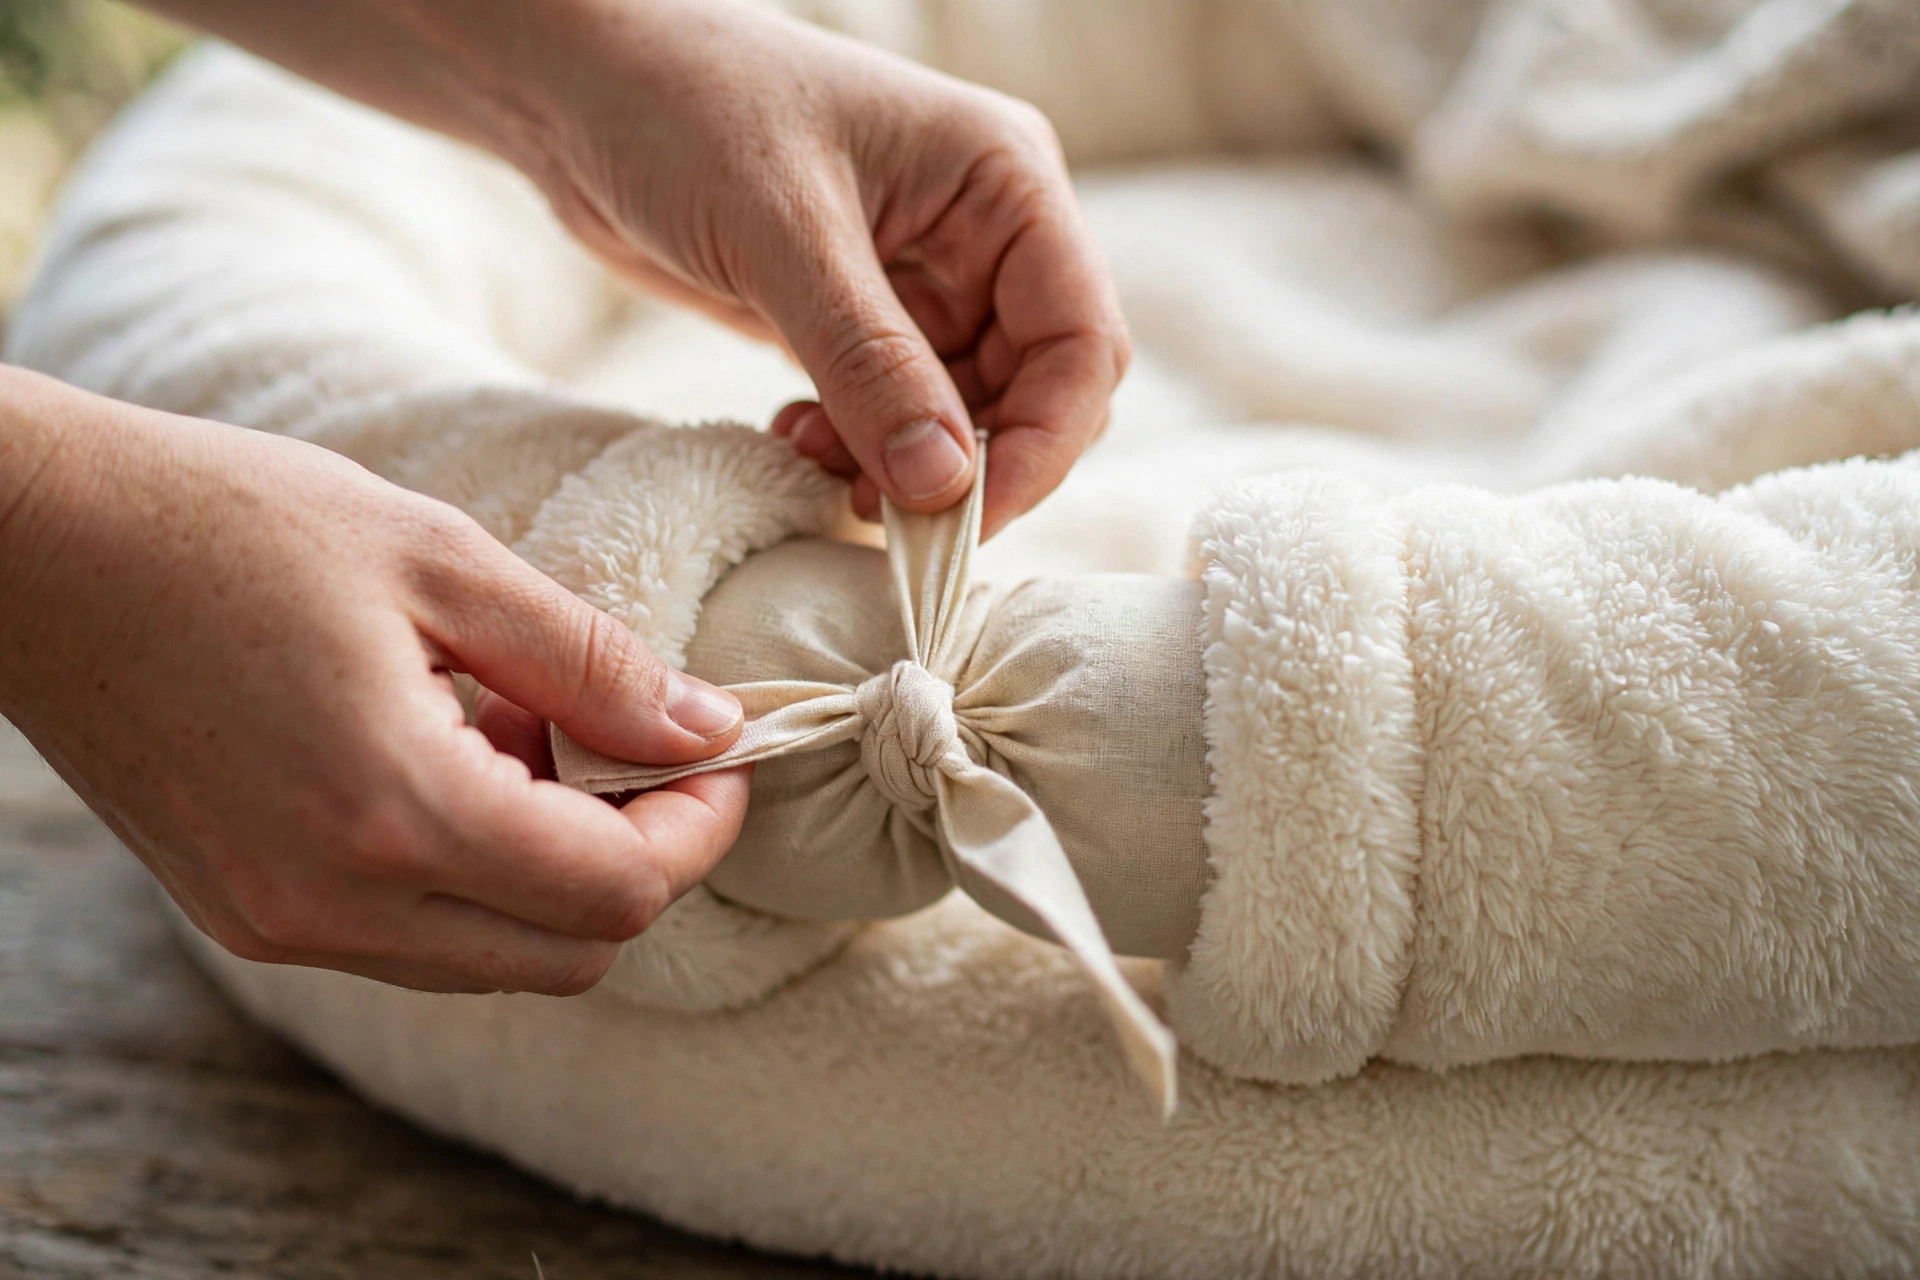
If shop prices for XXL beds sting, the cheapest big-dog bed is one you make: an old duvet folded into a thick rectangle, wrapped in a washable cover, with a rolled blanket bolster along two sides. It costs almost nothing, it is fully washable in parts, and you can adjust the thickness by adding a layer. Our no-sew DIY dog bed guide walks through the knot method step by step. It will not outlast a proper orthopaedic bed, but it is the best stopgap — and a good way to test what size and shape your dog actually prefers before spending real money.

Measuring big dog for bed size.

How to measure your dog for a bed

Do it while the dog is asleep — that is when they are longest. Measure from the tip of the nose to the base of the tail with the dog fully stretched out, then add 15–20 cm. Then measure across the widest point (usually the chest or hips) and add 10 cm. The larger of the two numbers sets the bed length; the smaller sets the width. For a dog that sleeps curled up, measure the curled diameter instead and add 10 cm. And weigh the dog before you shop: the weight rating matters as much as the dimensions, and most owners underestimate their dog’s weight by 5 kg or more.

Mistakes that ruin a big dog bed

Buying by the label, not the measurements. “Large” on one brand is “medium” on another. Measure first, then match the measurements to the product’s listed dimensions.

Thin fill under a heavy dog. Anything under 8 cm of foam will bottom out under a 30 kg dog. If you can press the fill to the floor with one hand, the dog will do it with one hip.

A cover you cannot remove. A bed you cannot wash is a bed with a expiry date measured in weeks for a big, muddy dog.

Ignoring the weight rating. A bed rated to 25 kg will sag, split seams and flatten under a 40 kg dog within a month. The rating is the manufacturer’s own admission of what the bed can hold — believe it.

Putting a good bed in a bad spot. A draughty doorway or a cold tiled corner undoes the point of a good bed. Put it where the dog already sleeps, not where it looks tidy — a bed the dog will not use is decoration.

FAQs

What size bed does a big dog need?
Measure your dog stretched out nose to tail and add 15–20 cm — that is the minimum bed length. For most large breeds that means 110–130 cm; for giant breeds, 130 cm and up. The dog should be able to stretch fully without hanging off the edge.

Is memory foam worth it for big dogs?
Yes, for most dogs over 25 kg. Memory foam spreads weight and supports joints in a way polyester fill cannot, and it keeps its shape for years instead of months. For seniors and arthritic dogs it is the single most useful upgrade — see our orthopaedic beds guide for the density numbers to look for.

How do I stop my big dog destroying their bed?
Use a ballistic-nylon cover with hidden zips, remove loose flaps and tags, and give the dog an approved chew instead. No bed is indestructible, but a heavy-duty cover plus a chew toy buys months. If the dog chews from anxiety or boredom, fix that first — the bed is the symptom.

Can big dogs use donut beds?
Yes, in XXL sizes (110–120 cm) with a foam base under the plush top. A donut full of loose fill will flatten under a heavy dog, so check the base before you buy — and expect to pay more for a big one that holds its shape.

How often should I wash a big dog bed?
Wash the cover every 1–2 weeks, and the whole bed (or the foam, if it allows it) monthly. Big dogs bring in more mud, hair and smell than small ones, and a regular wash keeps the bed from becoming the smelly corner of the room.

The bottom line

The best big dog bed is the one that fits your dog’s body, holds your dog’s weight, and survives your washing machine. Measure the dog stretched out, buy foam thick enough for their weight, and insist on a removable, washable cover. Get those three things right and the bed lasts years; get any one wrong and it lasts weeks. Start with an XXL orthopaedic bed if you are unsure — it is the safest default for a big dog — and use the other nine ideas here to match the bed to the way your dog actually sleeps.

Pin this for later 📌 — and if you are still deciding on size, our dog bed size calculator works out the exact dimensions from your dog’s measurements.

German Shepherd standing guard at a home entrance — one of the best guard dog breeds for families.

Best Guard Dog Breeds: 10 Loyal Protectors for Your Home & Family

A good guard dog is not the loudest dog on the street, and it is certainly not the most aggressive. The best guard dogs are calm, confident, deeply loyal to their family — and trained. They notice what is out of place, they warn you first, and they only act when they have to. That combination is rare, and it is why the breeds below have been trusted with this job for generations.

This guide covers the 10 best guard dog breeds for a home and family, what each one is genuinely like to live with, and the honest trade-offs: exercise needs, training demands, shedding, and the legal and insurance notes nobody mentions until it is too late. A guard dog is a 10–13 year commitment, not a security purchase — pick the breed that fits your life, not just the one that looks toughest.

Before you choose — the 4 rules
1. Training is not optional. A guard breed without training and socialisation is a liability, not protection. Budget for a professional trainer, especially in the first year.
2. Socialise early and often. A confident guard dog can tell a guest from an intruder. That judgement comes from meeting lots of people and dogs as a puppy.
3. Check your insurance and local rules. Some insurers and landlords restrict certain breeds. Check before you fall in love with one.
4. A guard dog is a family dog first. These breeds bond hard and hate being left alone all day in a yard. If the dog lives outside the family, pick a different breed.

What makes a great guard dog?

Three traits matter more than size. Loyalty — the dog must be bonded to its people, because a guard dog protects what it loves. Confidence — a nervous dog barks at everything and trusts nothing; a confident dog stays calm until something is genuinely wrong. Trainability — you need a dog that takes direction well, so you can switch its guarding instinct on and off. Size and a deep bark help, but they are the garnish, not the meal.

There is also a real difference between a guard dog and a watchdog. A watchdog alerts you — it barks, it watches, it may be small. A guard dog is trained (or bred) to stand its ground and physically deter a threat. Every breed below can guard, but some are better suited to families who mainly want an alert, and some are serious working protection dogs that need an experienced owner.

1. German Shepherd

The classic for a reason. German Shepherds are intelligent, brave and deeply bonded to their family — and they are one of the most trainable breeds on earth, which is why police and military units use them worldwide. At home they are watchful without being frantic, and they learn the household routine fast, including who belongs and who does not.

They need real work: at least 90 minutes of exercise and training a day, plus a job to do (obedience, scent games, agility). A bored German Shepherd invents its own job, usually involving your furniture. They shed heavily twice a year. Best for: active owners who want a true all-rounder — family dog, watchdog and protector in one.

Rottweiler calm and watchful in a garden

2. Rottweiler

Calm, powerful and famously devoted to its people, the Rottweiler is a natural guardian that rarely needs to be taught to watch the house — it does it on its own. With its family it is affectionate and even goofy; with strangers it is reserved and watchful, which is exactly the balance you want.

This is a strong, heavy breed that needs a confident owner and consistent training from puppyhood. Early socialisation is essential: a well-socialised Rottweiler is steady and trustworthy; an under-socialised one can be suspicious of every visitor. Expect 60–90 minutes of daily exercise, plus strength work like structured walks and pulling games. Best for: experienced owners with a secure garden.

Doberman Pinscher standing alert and watchful

3. Doberman Pinscher

Sleek, fast and startlingly smart, the Doberman was literally bred to be a personal protection dog. Dobermans bond intensely to one person or family, read body language brilliantly, and are famously obedient when trained — they want to work with you, not against you.

They are high-energy and need 90+ minutes of daily exercise plus mental work, or they get destructive. They are short-coated (easy grooming) but feel the cold, so they are indoor dogs. Dobermans can be wary of strangers and same-sex dogs, so early socialisation matters. Best for: active owners who want a loyal shadow that doubles as a deterrent.

4. Bullmastiff

If you want a quiet guardian, look here. The Bullmastiff is a huge, calm dog that was bred to catch poachers silently — it knocks an intruder down and holds them, rather than barking or biting. At home it is gentle, patient with children and famously lazy, happy with a couple of shorter walks a day.

The trade-offs are size (45–60 kg of dog on your sofa) and drool, plus a short life for the size — typically 8–10 years. Training must start early because a 60 kg adolescent that has not learned manners is a real handful. Best for: families who want a calm, low-barking protector and have the space for a giant.

Belgian Malinois training with its owner outdoors

5. Belgian Malinois

The Malinois is the athlete of this list — lighter and faster than a German Shepherd, with a work drive that borders on obsession. It is the breed of choice for many military and police units today, and in the right hands it is an extraordinary protection dog.

Be honest with yourself before choosing one: this is not a first-dog breed. A Malinois needs 2+ hours of hard exercise and training daily, a job, and an owner who enjoys training as a hobby. Without that, it will herd your children, chew your house and stress itself out. Best for: experienced, very active owners — ideally people who already train dogs for sport.

6. Cane Corso

The Cane Corso is an Italian mastiff: powerful, confident and deeply territorial in the best sense — it regards your home as its own and guards it accordingly. With its family it is affectionate and steady; with strangers it is aloof until told otherwise.

This breed needs a firm, experienced owner and thorough socialisation, because its protective instinct is strong and its size (40–50 kg) means mistakes matter. Exercise needs are moderate — about an hour a day — but training is a daily habit for life, not a puppy-class phase. Best for: confident owners who want a serious guardian and understand the responsibility.

Great Pyrenees with family and children

7. Great Pyrenees

The gentle giant of the list. The Great Pyrenees was bred to guard livestock alone in the mountains, so it thinks independently, stays calm under pressure, and is wonderful with children and other animals. It barks at night — a lot — because that is when it thinks its job matters most.

It is a big, heavy-coated dog that sheds constantly and needs regular grooming. It is also stubborn: it was bred to work without instructions, so recall and obedience take patience. Best for: rural or large-garden homes, families who want a calm protector and can live with the barking and the hair.

8. Akita

Loyal to a fault, the Akita bonds fiercely to its family and is naturally suspicious of strangers — a combination that makes it an excellent guard dog with almost no training needed for the instinct itself. Akitas are dignified, quiet and clean, and they carry themselves with a calm confidence that deters most trouble on its own.

They are strong-willed and often dog-selective, so early socialisation and a confident owner are essential. They shed heavily and need regular brushing. Best for: experienced owners in a calm household who want a loyal, low-barking guardian.

9. Boxer

The friendliest guard dog on this list. Boxers are playful, patient with children and famously goofy — and they are also muscular, alert and deeply protective of their family. Their bark is deep, their stance is brave, and most intruders will not wait around to find out whether the goofiness is real.

Boxers need plenty of exercise (90 minutes a day) and mental stimulation, and they stay puppy-like for years, which is either charming or exhausting depending on your day. They are short-lived for their size (10–12 years) and prone to certain health issues, so choose a breeder carefully. Best for: active families who want protection with a sense of humour.

10. Giant Schnauzer

The dark horse. The Giant Schnauzer is a powerful, intelligent working breed with a natural suspicion of strangers and a strong territorial instinct. It is also one of the most trainable dogs here — it excels at obedience and protection sports, and it bonds hard to its family.

It needs 90+ minutes of exercise and training daily, plus regular coat care (clipping or stripping). Without enough work it becomes bored and destructive. Best for: active owners who want a trainable, imposing guardian that is less common than the usual choices.

Guard dog or watchdog — which do you actually need?

Most families need a watchdog, not a protection-trained guard dog. A breed like a Boxer or a German Shepherd, well socialised and obedience-trained, gives you the alert, the bark and the presence — and that alone deters almost all opportunistic trouble. Full protection training is a specialist job: it costs serious money, takes months, and creates legal responsibility for everything the dog does. Talk to a qualified trainer before going down that road, and never train a dog to be aggressive at home without professional guidance.

Training and socialisation — the part that makes it work

Whatever breed you choose, the first year decides everything. Enrol in puppy classes, then obedience, then keep training for life. Introduce your puppy to at least 100 different people, places and sounds in the first four months — visitors at the door, delivery drivers, children, other dogs, traffic. Teach a rock-solid recall and a “place” command (go to your bed and stay there) so you can control the dog when guests arrive. And exercise the body and the brain every day: a tired guard dog is a calm guard dog.

Legal and insurance notes

Check three things before you commit: (1) your home insurance — some policies exclude or surcharge certain breeds, and a bite claim can be expensive; (2) your landlord or housing rules, if you rent; (3) local dangerous-dog rules, which vary by country and region. Keep your dog securely fenced, never let it roam, and remember that you are legally responsible for what it does. Good fencing and a “beware of the dog” sign are cheap insurance.

How to choose the right one for you

Start with your life, not the breed. How much time can you train every day? How big is your home and garden? Do you have small children, other pets, or frequent visitors? Have you owned a strong breed before? A Bullmastiff or Boxer suits a calmer household; a Malinois or Doberman needs an owner who trains for fun. Visit breeders, meet the parent dogs, and ask about health testing — hips, elbows and eyes at minimum for the large breeds. A good breeder will interview you as hard as you interview them.

FAQs

Are guard dogs safe around children?
Yes — when the breed is chosen well, socialised early and trained. Breeds like the German Shepherd, Boxer, Bullmastiff and Great Pyrenees are famously patient with children. But no dog, however gentle, should be left unsupervised with small children, and children must be taught to respect the dog’s space and food.

Do guard dogs need to be aggressive?
No. The best guard dogs are calm and confident, not aggressive. Aggression is usually fear or poor training. A well-bred, well-trained guard dog warns first and only acts when a real threat appears.

Can a first-time owner have a guard dog breed?
Some, yes: a Boxer, Bullmastiff or well-bred German Shepherd can work for a committed first-timer who invests in training. A Belgian Malinois, Cane Corso or Akita is a poor first choice — those breeds need an experienced hand.

How much exercise does a guard dog need?
Most need 60–120 minutes a day, split between walks, play and training. High-drive breeds like the Malinois and Doberman need more, and mental work (scent games, obedience, puzzle feeders) counts as much as physical exercise.

Male or female — which guards better?
Both guard well. Males tend to be larger and more territorial; females are often a little more focused on the family and can be easier to train. Temperament, breeding and training matter far more than sex.

The bottom line

The best guard dog breed is the one that fits your home, your experience and your daily life. A German Shepherd is the safest all-round choice for most families; a Bullmastiff or Boxer is the gentlest path to real protection; a Malinois or Cane Corso is the serious working choice for experienced owners. Whichever you pick, invest in training and socialisation from day one — that is what turns a strong breed into a trustworthy guardian, and a trustworthy guardian into a family member.

Pin this for later 📌 — and if you are weighing up size as well, our guide to the best big dog breeds is a good next read.

Golden retriever sleeping on a homemade no-sew DIY dog bed made from an old folded blanket

No-Sew DIY Dog Bed from Old Blankets

A good dog bed costs $60–$150 and lasts a few years at best. An old duvet, two blankets and a pillowcase you already own cost nothing — and with zero sewing, they make a dog bed your dog may actually prefer. Dogs love beds that smell like home, and nothing smells more like home than your old blankets.

This is the no-sew method: no machine, no needle, no skill required. You wrap, fold, tuck and tie. In about 20 minutes you get a proper bolster-style bed — the raised-rim shape that burrowers and anxious dogs love — that you can take apart and wash in pieces. Here’s how to build it, size it to your dog, and keep it clean.

Why this actually works as a bed

Store-bought beds are usually a flat cushion in a cover. The no-sew method naturally creates a bolster: you fold blankets into a thick roll around the edges and lay a soft centre pad inside. That raised rim is the shape anxious dogs lean against — the same den-like feel that makes calming donut beds popular, at a fraction of the cost.

It also solves the biggest complaint about DIY beds: washing. A sewn bed is one bulky lump that barely fits the machine. This one comes apart into flat blankets you wash separately, so it stays fresh far longer. If you want the full routine for keeping any bed clean, our guide on how to wash a dog bed covers machine vs hand washing by bed type.

What you need (probably already in the house)

  • The fill: an old duvet, comforter or 2–3 thick blankets. Duvets are ideal — they’re already the right thickness and fold flat.
  • The cover: a large pillowcase, a folded flat sheet, or one more blanket to wrap everything in. Fleece throws work brilliantly — soft and they don’t fray.
  • Ties: 6–8 strips of fabric (cut from an old t-shirt or pillowcase), each about 30 cm long, or thick ribbon. These are your “no-sew stitches”.
  • Scissors — the only tool.

That’s it. No sewing kit, no staples, no glue. If your blankets are thin, use more layers; if they’re thick, fewer. The rule is simple: when you press your hand into the folded stack, it should spring back rather than bottom out on the floor.

Flat lay of folded duvet, blankets, pillowcase, scissors and fabric strips for a no-sew dog bed project.

Step 1: Size it to your dog

A bed that’s too small gets ignored; a bed that’s too big loses the cosy nest feeling. Measure your dog curled up asleep — nose to tail-base, then add 15–20 cm. That’s your bed’s inner sleeping area. Then add another 20–25 cm all round for the bolster roll.

Quick sizing guide:

  • Small dogs (under 10 kg — dachshunds, terriers): inner area ~55 × 55 cm, finished bed ~100 × 100 cm.
  • Medium dogs (10–25 kg — beagles, border collies): inner area ~70 × 70 cm, finished bed ~115 × 115 cm.
  • Large dogs (25–40 kg — labradors, goldens): inner area ~90 × 90 cm, finished bed ~135 × 135 cm.

Err on the generous side. A dog that can fully stretch out uses the bed more — and a slightly oversized blanket bed still folds down smaller than a store-bought one.

Measuring tape beside a sleeping labrador to size a DIY dog bed correctly.

Step 2: Build the bolster base (the main method)

This is the core build — a thick folded blanket ring wrapped in a cover, tied at intervals so it can’t unfold.

  1. Fold the fill. Lay your duvet or blankets flat and fold them into a long strip about 30–40 cm wide and as long as the stack is thick enough to feel plush (4–6 layers). Thicker is better — this becomes the rim your dog leans on.
  2. Shape the ring. Curve the strip into a circle or rounded square on the floor, overlapping the ends by 20 cm. Sit the overlap under the ring so it stays put. This ring is the bolster.
  3. Wrap it. Lay your cover blanket or large pillowcase flat, place the ring on top, and fold the cover up and over the ring all the way round, tucking the edges underneath. It should look like a giant donut wrapped in fabric.
  4. Tie it. Every 25–30 cm, loop a fabric strip around the wrapped ring and tie a firm square knot on the underside. These knots are your stitching — they stop the wrap from sliding off. Tuck all knot ends underneath, out of reach.
  5. Fill the centre. Fold your remaining blanket into a flat pad that fits snugly inside the ring. Tuck its edges under the bolster. This is the part you’ll pull out and wash most often, so don’t tie it in — just tuck.

Test it: press the middle — your hand shouldn’t touch the floor. Shake the ring — nothing should shift. Done. Total time: about 20 minutes.

Hands tying a fabric strip knot around a blanket bolster ring for a no-sew dog bed.

Step 3: Two variations for different sleepers

The roll-up nest (for burrowers). Skip the ring. Roll 2–3 blankets into tight logs, arrange them in a circle like a nest, and drape one blanket over the top, tucking the edges under the rolls. Burrowers — dachshunds, terriers, chihuahuas — will nose under the top blanket and sleep inside the nest. Re-fluff the rolls weekly.

The flat pad stack (for sprawlers). Some dogs, especially big ones, ignore bolsters and sprawl. For them, fold 3–4 blankets into a thick rectangle, wrap in a flat sheet, and tie the corners underneath with fabric strips. No ring, just a deep, washable pad. Our roundup of the best dog bed ideas covers which sleeper types suit which shapes if you’re unsure what yours is.

Dachshund nestled in a nest of rolled blankets, a no-sew dog bed variation for burrowers.

Safety notes — read before your dog uses it

  • Supervise chewers. The ties are the weak point: a determined chewer can gnaw a fabric knot loose and swallow the strip. If your dog destroys soft toys, either skip the ties (use the tuck-only method and re-tuck weekly) or supervise until you’re sure they leave it alone. Swallowed fabric strips can cause intestinal blockages — this is a real vet-emergency risk, not a theoretical one.
  • No small bits. Don’t use buttons, zippers, rubber bands or safety pins anywhere on the bed. Everything should be fabric, and every knot tucked underneath.
  • Wash the fill, not just the cover. Old blankets harbour dust mites and dander. Wash every blanket you’re using on hot before the first build, and wash the centre pad every 1–2 weeks after. Dogs with allergies do noticeably better on freshly washed bedding.
  • Check for lumps. Folded blankets can bunch into hard ridges. Run your hand over the finished bed — if you feel a ridge, refold. Senior or arthritic dogs feel pressure points the most; if your dog has joint issues, a proper orthopedic bed may serve them better than any DIY build.
  • Retire worn blankets. When the fill goes flat and thin, it stops cushioning. Refresh the fill every 6–12 months — the beauty of this method is that “replacing the bed” means grabbing a different old blanket.

Washing and upkeep (the part that makes it better than store-bought)

Untie the strips, shake out the cover, and everything goes in the machine as flat laundry:

  • Centre pad: wash every 1–2 weeks on warm with a pet-safe detergent. This is the piece that absorbs the most drool, dander and outdoor dirt.
  • Bolster wrap and ring blankets: wash monthly, or whenever they smell.
  • Ties: toss them in with any load; replace any that stretch out.
  • Drying: tumble dry low or line dry. High heat shrinks cotton blankets and can make them bunch.

Between washes, vacuum the bed weekly and sprinkle baking soda on the centre pad, leave 15 minutes, then vacuum — it deodorises without a full wash.

When to buy instead of DIY

This build is brilliant for average dogs, but be honest about the edge cases:

  • Heavy chewers will dismantle it. A chew-proof crate bed or a raised cot-style bed survives what blankets won’t.
  • Incontinent or senior dogs need waterproof layers — look for beds with waterproof liners you can wipe down.
  • Dogs with arthritis need even, firm support. A DIY blanket bed is soft and uneven by nature; an orthopedic memory-foam bed is the kinder choice for sore joints.

For everyone else, the no-sew bed is a genuine upgrade over a flat old blanket on the floor — and it costs nothing.

The bottom line

Fold a duvet into a ring, wrap it, tie it, tuck a pad in the middle. Twenty minutes, zero sewing, and your dog gets a bolster bed that smells like home and washes in pieces. When it wears out, you don’t buy a new bed — you grab a different old blanket and build it again.

FAQs

How do you make a dog bed without sewing? Fold blankets into a thick ring, wrap the ring in a cover blanket, and tie fabric strips around it at intervals to hold everything together. Tuck a folded blanket pad into the centre. No needle, no machine — the ties act as your stitching.

What can I use to stuff a homemade dog bed? Old duvets, comforters and thick blankets are ideal — they fold flat, wash well and are free. Avoid loose fill like shredded foam for chewers (choking risk) and avoid anything with small parts like buttons or zips.

How often should I wash a DIY dog bed? Wash the centre sleeping pad every 1–2 weeks and the outer blankets monthly. The advantage of a no-sew build is that it comes apart into flat pieces, so washing is easier than with a sewn bed.

Is a blanket bed warm enough for winter? Folded blankets trap plenty of warmth for indoor use. For cold houses, add an extra folded blanket layer in the centre pad, and keep the bed away from draughts. It’s not a substitute for heating in genuinely cold rooms.

My dog keeps unfolding it. What do I do? Add more ties (every 20 cm instead of 30), tie them tighter, and tuck all knot ends well underneath. Persistent dismantlers are usually chewers or nesters — for chewers, supervise or switch to a chew-proof bed; for nesters, try the roll-up nest variation, which is meant to be rearranged.

Golden retriever resting on a fitted crate dog bed inside a wire crate.

Best Dog Beds for Crates: Sizing & Picks That Fit

A dog crate is a den, not a cell — and a bed is what makes it feel like one. But crate shopping is where most bed mistakes happen: a plush rectangle that folds up at the edges, a bolster bed that eats half the standing room, or a “crate-sized” pad that slides around like a rug. The best dog bed for a crate is not the thickest or the cutest — it is the one that fits the pan, survives the dog, and washes easily when it does not.

Crates come in standard sizes (24, 30, 36, 42 and 48 inches), but no two manufacturers cut their pans exactly the same way. This guide walks you through measuring, choosing the right style for your dog, and the picks worth your money — whether you have a teething puppy, a power chewer, or a senior who wants a soft landing.

For the full bed-type overview, see our 10 dog bed ideas for every kind of sleeper roundup; for anxiety-prone dogs, the calming dog beds deep dive; and for joint issues, the orthopedic dog beds guide.

Measure the crate pan first — not the crate’s label

The single most common crate-bed mistake is trusting the crate’s advertised size. A “36-inch crate” refers to its length, and the interior floor pan is usually an inch or two smaller in every direction. Measure the pan itself: length × width, inside the walls, at the floor. Write both numbers down and buy to them.

As a rule of thumb, the bed should cover the pan fully but sit flat — no bunching at the corners, no raised edges where the pan meets the walls. A bed that is 2 cm short on each side is fine (it will not shift if the fit is otherwise snug); a bed 5 cm too long will fold and make an uneven surface your dog will not settle on.

If you use a divider panel for a growing puppy, measure the active section only, and plan to size up as the panel moves. Puppies outgrow crate beds fast — buy to the current section, not the crate’s future full size.

Hands measuring the inside of a dog crate pan with a tape measure.

Flat pads vs bolster beds in a crate

Flat pads and bolster (raised-rim) beds behave very differently inside a crate, and the right choice depends on the dog more than the look:

Flat crate pads are the default for a reason. They sit flush on the pan, lose no floor space, and work in every crate size. They are also the easiest to wash — most have a single removable cover. For puppies and chewers, flat pads are nearly always the right call: fewer edges to grab and destroy.

Bolster beds have a raised rim that dogs love to rest their chin on, and the raised edge can make the crate feel den-like, which helps anxious dogs settle. The trade-off is space: in a standard crate, a bolster bed can eat 10–15 cm of floor on each side, leaving a tall dog cramped. Bolsters suit medium and large crates with smaller dogs inside — a beagle in a 36-inch crate, not a labrador in the same crate.

Orthopedic crate pads deserve a mention for senior dogs: low-profile memory-foam pads (5–7 cm) fit crates well and protect stiff joints without the bulk of a full orthopedic bed. If your senior still uses a crate at night, this is the category to shop.

Chocolate labrador lying on a flat washable crate pad inside a wire dog crate.

What the bed should be made of

Three material questions matter more than brand names:

  1. Chew resistance. If your dog chews bedding, shop for ballistic nylon or Cordura covers, reinforced stitching, and no loose tags or zippers. Flat pads beat bolster beds here — fewer grab points. And supervise: no bed is truly chew-proof, and ingested filling is a vet visit.
  2. Washability. Crate beds collect accidents, muddy paws and drool. Look for a fully removable, machine-washable cover and a water-resistant liner between cover and fill. Foam cores should survive a spin cycle or at least a hose-down. Our how-to-wash-a-dog-bed guide covers keeping any bed fresh.
  3. Fill type. Polyfill flattens fast in a crate. Egg-crate or memory foam holds its shape and supports joints. Avoid loose bead fills in crate beds — if a chewer opens a seam, tiny beads scatter everywhere.

Picks by dog type

For puppies: a flat, washable crate pad with a waterproof liner. Skip expensive beds until teething ends — most puppies destroy at least one bed. Buy cheap now, upgrade at a year old.

For power chewers: a ballistic-nylon flat pad or an elevated cot-style bed sized to the crate pan (the raised mesh frame keeps the surface taut and chew-resistant). No bolster, no plush.

For seniors: a low-profile orthopedic crate pad (5–7 cm memory foam) with a water-resistant liner for the occasional accident. Easy entry matters — flat pads are lower than bolsters.

For anxious dogs: a snug-fitting bolster bed in a crate one size up, so the rim fits without cramping. The chin rest really does help — pair it with a covered crate for the full den effect. More on the mechanism in our calming dog beds guide.

For hot sleepers: a mesh elevated cot that fits the crate footprint, or a cooling-gel flat pad. Crates trap heat, so avoid thick faux-fur beds in warm rooms.

Jack Russell terrier sitting on a chew-proof flat crate bed inside a crate.

What NOT to put in a crate

  • Beds thicker than ~10 cm in a standard-height crate — they eat headroom your dog needs to sit and stand.
  • Loose blankets, towels or quilts as the main bedding for unsupervised dogs — they bunch, and determined chewers shred and swallow fabric.
  • Beds with small parts: buttoned covers, decorative bows, dangling tags.
  • Electric heated pads in a crate with a chewer — cord risk. Use self-warming (mylar-lined) pads instead.
  • Anything with cedar or aromatic fill in an enclosed crate — the scent concentrates.

Safety notes

Crate beds are for supervised settling, not for a dog left to destroy things out of boredom. If your dog shreds every bed, that is information: they may need more exercise before crate time, a tougher chew toy in the crate, or a vet check for anxiety. Remove and replace any bed with exposed filling immediately. Puppies under 12 weeks do fine on the bare pan with a single flat washable pad — comfort matters less than safety at that age.

FAQs

How do I know what size bed fits my dog’s crate? Measure the inside of the crate pan (length × width) and buy a bed that matches or is within 2 cm on each side. Never size by the crate’s advertised length alone — the pan is always smaller.

Can puppies have a bed in their crate? Yes, but keep it simple: one flat, washable, cheap pad. Expect destruction during teething. Skip bolsters and plush until the chewing phase passes.

Flat pad or bolster bed for a crate? Flat for puppies, chewers and small crates. Bolster for calm adult dogs in a crate one size up, where the rim adds comfort without cramping. Low-profile orthopedic pads suit seniors either way.

How often should I wash a crate bed? The cover every 1–2 weeks; the liner monthly. Wash immediately after accidents — enzyme cleaner on the foam, then air-dry fully before it goes back in the crate.

Loading a dog bed cover into a washing machine.


My dog bunches the bed into a corner. What now? The bed is probably too small for the pan, or the dog is too hot. Size up so it sits flat edge to edge, or switch to a breathable flat pad and check the room temperature.

Are elevated cot beds good in crates? For chewers and hot sleepers, yes — if the cot frame matches the pan dimensions exactly. A frame that presses against the crate walls can rattle and stress anxious dogs.

What is the best crate bed for a dog that chews? A ballistic-nylon flat pad with no bolster and reinforced stitching. Nothing is indestructible, so supervise and remove the bed if chewing starts — crate time should not be chew time on the bed itself.

The bottom line

Measure the pan, not the label. Flat and washable for puppies and chewers, bolster for calm adults with room to spare, low-profile orthopedic for seniors. The best dog bed for a crate is the one your dog actually settles on — and you will know within a week, because a well-fitted crate bed barely moves and smells like nothing.

Border collie chasing a homemade flirt pole lure in a backyard — DIY flirt pole for dogs.

DIY Flirt Pole for Dogs: Build a Chase Toy in 30 Minutes

A flirt pole is basically a giant cat toy for dogs: a long pole with a rope and a lure on the end that you drag, whip and zigzag around while your dog chases it. And for high-drive dogs — terriers, collies, shepherds, any dog that lives to chase — it is the single fastest way to burn off energy without leaving your backyard.

Ten minutes of flirt-pole play tires out many dogs the way an hour of fetch never quite does. Fetch is a straight line; a flirt pole is unpredictable. Your dog has to turn, brake, think and sprint in bursts — that’s mental and physical exercise in one. It’s also brilliant for dogs that need “a job”: the chase satisfies the prey drive in a controlled, constructive way.

A shop-bought flirt pole costs $20–$40 and breaks sooner than you’d like. The DIY version costs about $10, takes 30 minutes, and you can replace any part in minutes. If your dog already loves the enrichment builds in our DIY dog toys and DIY dog puzzle toys guides, this is the next one to make — it’s the chase-drive toy that fills the gap the indoor games leave.

What you need

You can buy everything in one trip to a hardware store:

  • PVC pipe, 1.2–1.5 m — 2 cm (¾ inch) diameter is the sweet spot: stiff enough to whip around, light enough to play for ten minutes. Cap one end with a PVC cap (or tape it shut) so it doesn’t whistle or crack.
  • Bungee cord or strong elastic, ~1 m — the bungee is the shock absorber. It protects your dog’s neck and spine from sudden jerks and makes the lure move more erratically (more fun for the dog).
  • Rope, ~1 m — paracord or climbing cord works. This extends your reach; combined with the bungee, the total trailing line should be roughly your dog’s body length.
  • A lure — an old sock stuffed with fabric, a braided fleece strip, a store-bought squeaky toy you don’t mind destroying. Avoid lures with small parts that detach easily.
  • Cable ties or strong cord to join the rope to the pole and the lure to the bungee.

Flatlay of DIY flirt pole materials: PVC pipe, bungee cord, paracord, cable ties, sock and fleece lure.

Measure the right length

The pole + line should let you keep the lure 1–2 m away from your feet at all times — you never want your dog crashing into your legs at full speed. For small dogs (terriers, corgis), a 1 m pole with a 1 m line is plenty. For big dogs (labs, shepherds), go up to 1.5 m of pole with 1.5 m of trailing line. When in doubt, make the pole a touch shorter: a shorter pole is easier to control, and control is everything in this game.

Build it in 3 steps

Step 1 — Rig the pole. Drill a small hole through the PVC near one end (or just wrap the cord tightly around it and secure with tape). Thread your paracord through, knot it solidly, and tape over the knot so it can’t slip. This is the main handle end — everything else hangs from this.

Step 2 — Add the bungee. Tie one end of the bungee cord to the free end of the paracord with a secure knot (a double fisherman’s knot is ideal), and cable-tie it as backup. The bungee is the most important part of the build: it’s what keeps sudden direction changes from wrenching your dog’s neck when they grab the lure at speed.

Step 3 — Attach the lure. Tie or cable-tie the lure to the free end of the bungee. Give it a hard tug test — if it survives you yanking it, it’ll survive your dog. Your flirt pole is done. Total build time: about half an hour, most of it spent deciding which lure your dog will destroy first.

Hands threading paracord through a PVC pipe while building a DIY flirt pole.

How to play

This is not fetch — you don’t throw the lure and wait. You’re the “prey driver”:

  • Drag, don’t dangle. Keep the lure on the ground, zigzagging it like a fleeing animal. A lure on the ground is what triggers the chase instinct; a lure dangling in the air triggers jumping, which you want to limit (see safety below).
  • Let them catch it — sometimes. A dog that never catches the lure gets frustrated and quits. Let them grab it every 30–60 seconds, then trade it for a treat to get it back. The catch-and-release rhythm keeps the game fun.
  • Keep sessions short. Five to ten minutes, once or twice a day, is perfect. End while your dog still wants more — that builds drive for the next session.
  • Swap directions. Alternate clockwise and anticlockwise turns so your dog works both sides of their body evenly.

Terrier dog chasing a fleece lure dragged on grass with a flirt pole.

Safe play rules (read these first)

  • Warm up first. A five-minute loose-lead walk before play and a gentle cool-down after. Cold muscles plus explosive sprinting is how soft-tissue injuries happen.
  • No hard jumping for puppies. Puppies under 12 months (longer for giant breeds — check with your vet) shouldn’t leap and twist for a lure. Keep the lure on the ground for them, always.
  • Soft ground only. Grass or packed dirt, never concrete or hard-packed gravel.
  • Watch the neck. The bungee cord is there for a reason. If your dog hits the end of the line hard and yelps, the bungee is too stiff or the game is too wild — calm it down.
  • Skip it for some dogs. Dogs with hip dysplasia, elbow problems, recent surgery, or serious arthritis should sit this one out (the DIY dog ramp guide is the better build for them). When in doubt, ask your vet.

Training with a flirt pole

The flirt pole doubles as an impulse-control trainer — one of the hardest things to teach a chase-driven dog. Work these cues into play:

  • “Wait” before the game starts: lure on the ground, dog in a sit, release with your chase cue.
  • “Drop it” when they catch the lure: trade for a high-value treat. Practice this every session — a reliable drop-it on the flirt pole transfers to the park, the beach and the squirrel on the fence.
  • “Enough” to end the game: lure stops moving, you ask for a sit, treat, done. Dogs that learn an off-switch for the flirt pole are easier to call off everything else.

When to retire the toy

A flirt pole takes a beating, and that’s the point — but retire it when: the bungee has lost its stretch (it becomes a hard line, which defeats its purpose), the lure is chewed to pieces with stuffing or string hanging out (ingestion risk), or the PVC is cracked or splintered. The beauty of the DIY build: replacing any of those takes five minutes and a couple of dollars.

The bottom line

A DIY flirt pole is the cheapest, fastest build on this site: one hardware-store trip, thirty minutes, and you’ve got the toy that finally matches your high-drive dog’s energy. Keep the lure on the ground, keep sessions short, and always end while they’re still begging for more. Your dog will sleep like a rock — and you’ll have the quietest evening of the week.

Tired golden retriever resting on grass next to a flirt pole after play.

FAQs

Is a flirt pole safe for my dog?
Yes for healthy adult dogs, provided you keep the lure on the ground, play on soft surfaces, warm up first, and keep sessions to 5–10 minutes. Puppies and dogs with joint problems need the modified version — or should skip it and check with a vet first.

What age can puppies start?
Puppies can play a gentle ground-lure version from about 4–6 months — no jumping, no tight turns, short sessions. Save the full-speed version for after 12 months (longer for giant breeds, once growth plates close).

How long should a flirt pole session be?
Five to ten minutes is the sweet spot — one to two sessions a day. It’s intense exercise: a tired-but-still-eager dog at the end is exactly right.

What can I use as the lure?
A stuffed sock, braided fleece strips, a worn-out plush toy, or a dedicated flirt-pole lure from a pet store. Avoid anything with buttons, beads or parts that detach when chewed.

My dog is obsessed and won’t stop. What do I do?
That’s normal for high-drive dogs — it means the toy works. Teach “enough” as a hard end-of-game cue (lure stops, sit, treat, done), and keep the schedule predictable: two short sessions a day, not on-demand all day.

Beagle sleeping in a dog bed tucked into a cosy small apartment corner.

Small Apartment Dog Setup: 10 Space-Smart Ideas

A small apartment is not a bad home for a dog. The dog doesn’t measure square footage — it measures routine, attention and a few well-chosen zones. What a small space actually demands is intention: every corner has to earn its keep, and the dog’s gear has to disappear into the decor instead of colonising it.

This guide gives you ten space-smart ideas that work in studios and one-beds: the fold-away crate nook, vertical gear storage, a dead-corner feed station, balcony potty solutions, noise-proofing for barkers, indoor exercise that doesn’t need a garden, the drying kit at the door, furniture that hides dog stuff, tight-quarters dog-proofing, and the routine design that replaces the yard. None of them needs a renovation — most need a weekend afternoon at most.

1. The fold-away crate nook

Dog crate tucked under a console table as a fold-away crate nook in a small apartment.

The crate is the biggest single item in a small dog home, so where it lives decides the whole layout. The space-smart answer is a nook, not a centrepiece: tuck the crate under a console table, into a wardrobe alcove, or beside the sofa where it reads as an end table.

A collapsible crate earns its place twice: it folds flat to a few centimetres when guests come or when you’re deep-cleaning, and it travels with you. For permanent setups, a wooden crate-style side table works as actual furniture — lamp on top, dog sleeping inside. Either way, drape a breathable cover over the top and sides so the crate becomes a den: dark, quiet, and visually tidy.

Safety note: a crate is a den, not storage. Never stack things on top of a wire crate, never use it as punishment, and make sure the dog can stand up, turn around and lie flat out. If the dog can’t stretch fully, the crate is too small for the apartment trick to work.

2. Go vertical with gear storage

Pegboard wall with dog leash, harness and treat basket by an apartment front door.

Leashes, harnesses, poop bags, brushes and treats take over horizontal surfaces fast. Move them to the wall: a pegboard or a row of hooks by the front door holds the whole walk kit in about 40 cm of wall.

The grab-and-go rule makes it work: everything needed for a walk lives at the door, in one place, visible. A small basket on the hooks holds poop bags and treats; the harness hangs ready. No more hunting through drawers while the dog spins in circles.

3. The dead-corner feed station

Feeding doesn’t need a kitchen footprint. Pick a dead corner — beside the fridge, under the breakfast bar, the end of a hallway — and claim about 60 cm of it with a raised feeder on a waterproof tray mat. The tray catches the splashes that would otherwise ruin flooring or a rug, and it defines the zone so bowls don’t migrate.

In a small apartment, store the kibble in a slim airtight container that slides into the gap beside the counter — decanting keeps it fresh and kills the crinkly bag on the worktop.

4. Balcony potty solutions that actually work

Small dog on a grass potty pad tray on an apartment balcony with mesh safety panels.

If your building allows it, a balcony potty spot is the single biggest quality-of-life upgrade for apartment dogs — midnight needs, rainy nights, puppies between vaccinations. The setup that works: a large tray with a real or hydroponic grass pad on top, on a waterproof mat with a slight lip.

The maintenance rules matter more than the purchase:

  • Pick up solids immediately. Odour in a small apartment is a neighbour-relations issue, not just a smell issue.
  • Rinse the tray weekly and replace grass pads on the manufacturer’s schedule — a sour pad is the reason most people abandon the system.
  • Drainage: keep the tray off the balcony floor on small risers so water doesn’t pool and stain.

Safety note: balcony railings must be dog-proof. Small dogs can squeeze through rail gaps and large dogs can jump lower ones — add mesh or acrylic panels to at least chest height before the dog ever goes out unsupervised. And never leave a dog on a high balcony in direct sun without water and shade.

5. Noise-proofing for barkers

In an apartment, your dog’s bark is everyone’s business. You can’t soundproof a rental, but you can take the edge off with soft furnishings — which doubles as the petcore look:

  • Rugs with thick underlay in the hallway and the dog’s main room deaden footstep and claw-click noise.
  • Heavy curtains on the street-facing windows cut both incoming street noise (a bark trigger) and outgoing sound.
  • A white-noise machine or low radio near the front door masks hallway sounds that set off alert barking.
  • Draught-excluder strips around the front door reduce the sound leaking into the corridor — and the corridor sounds leaking in.

The training side matters more than any curtain: reward quiet check-ins, and desensitise the dog to door sounds with treats rather than shouting over the barking.

6. Indoor exercise that doesn’t need a garden

Border collie mid-leap chasing a flirt pole toy during indoor exercise in an apartment.

No yard means the apartment has to host the dog’s workout. The good news: small-space games tire dogs out fast because they’re mentally intense.

  • The hallway fetch. A soft toy down a hallway is a full sprint in 8 metres. Three sessions of ten throws and most dogs are done.
  • Flirt pole play. A flirt pole in a living room (furniture pushed back, or in a corridor) is five minutes of explosive chase — the highest-intensity workout per square metre you can buy.
  • Snuffle and puzzle work. Scatter feeding, a DIY snuffle mat or muffin-tin puzzle games burn mental energy that rivals a walk — perfect for rainy days and for winding a dog down before you leave for work.
  • Stair-free strength work. “Up” onto a sturdy ottoman and “off” again, repeated, is a legitimate workout for small and medium dogs. Keep it low-impact for seniors and puppies.

Aim for two focused play sessions a day on top of walks — a tired dog is a quiet neighbour.

7. The drying and cleaning kit at the door

Small apartments punish muddy paws disproportionately: one muddy dog, one hallway rug, one disaster. Keep a basket right inside the door with a stack of old towels, a paw-washing cup, and a spray bottle of paw-safe rinse. The routine takes ninety seconds and saves the rug.

If you want the full version, a compact DIY dog wash station in a laundry corner or on the balcony handles the whole muddy-dog problem at the entry point — but even the basket version changes the game.

8. Furniture that hides dog stuff

In a small home, the dog’s things should look like your things. The pieces that do double duty:

  • A storage ottoman that opens: the dog’s toys, chews and spare lead live inside, and the dog sleeps on top of it.
  • A side-table crate: looks like furniture, works as a den (see idea 1).
  • A lidded basket by the sofa for blankets and the spare harness — tidies in ten seconds when guests arrive.
  • Under-sofa storage boxes for the treat stash, grooming kit and poop-bag refills.

One rule: everything dog-related should be put away in under two minutes. If tidying the dog’s stuff is a project, it won’t happen, and the apartment stays a obstacle course.

9. Tight-quarters dog-proofing

Small spaces concentrate hazards. Run this checklist once, then forget about it:

  • Cords: in a studio the dog is always near outlets. Run cables through covers or behind furniture — chewing a live cable is one of the most common apartment emergencies.
  • Plants: check every houseplant against a toxic-plants list. In a small apartment the dog can reach all of them.
  • Small objects: coins, hair ties, earbuds, medication — in a big house they scatter; in a studio they land on the dog’s level. A weekly floor sweep at dog-eye height catches them.
  • Bins: a pedal bin with a locking lid, or bins inside a cupboard. Kitchen smells in a small flat are irresistible, and bin contents are a vet visit waiting to happen.
  • Cleaning products: locked away, not under the sink. Dogs in small spaces encounter the under-sink cupboard constantly.

10. Design the routine, not just the rooms

The apartment dog’s real “yard” is the walk schedule. In a small space, routine replaces square footage:

  • Three walks minimum, with at least one long sniffy walk a day. Sniffing is mental exercise — a 40-minute sniff walk tires a dog more than a 20-minute march.
  • Feed on a schedule rather than free-feeding. Routine feeding means routine digestion, which means predictable balcony-pad or walk timing.
  • Alone-time training in small doses. Practice short departures with a stuffed Kong so the dog learns that alone time is normal — separation anxiety is the number-one reason small-space dogs become problem barkers.
  • A wind-down ritual. Same order every evening: last walk, dinner, chew, lights low. Dogs in small apartments live close to your energy; a calm evening routine keeps the whole flat calm.

What not to do in a small space

A few common mistakes that make small apartments harder than they need to be: buying the biggest bed that fits instead of the right-sized one (an oversized bed in a studio becomes an obstacle); skipping the balcony-pad maintenance until the neighbours complain; assuming a small dog needs less exercise (many small breeds are the sportiest dogs alive); and choosing a puppy or a high-drive breed without a plan for the energy. The space isn’t the constraint — the plan is.

The bottom line

A small apartment dog setup is ten small decisions, not one big renovation: a crate nook instead of a crate in the middle of the room, gear on the wall instead of the floor, a balcony pad with a maintenance routine, soft furnishings that hush the barking, and indoor games that replace the garden. Do those, keep the routine tight, and the dog won’t just cope with apartment life — it’ll thrive in it.

FAQs

What is the best dog for a small apartment?
The best apartment dog is more about energy and noise than size. Calm, lower-energy breeds and mixes — retired greyhounds are the classic example — often do better than small but hyper breeds. Whatever the breed, the setup and routine matter more than the floor plan.

Can a large dog live happily in a small apartment?
Yes, if the exercise and routine are right. Many large breeds are couch potatoes indoors and only need their outdoor exercise covered. The setup adjustments are mostly about a right-sized bed, a sturdy crate nook, and enough walking.

How do I stop my dog barking in an apartment?
Combine the environment and the training: soften the space (rugs, curtains, white noise, door seals), reward quiet behaviour, and desensitise the dog to hallway and door sounds with treats. Never punish barking after the fact — the dog can’t connect it.

Is a balcony potty pad enough, or does my dog still need walks?
The pad is a supplement, not a replacement. Dogs still need walks for exercise, sniffing, socialisation and mental stimulation. The pad covers emergencies and bad-weather nights.

How often should I wash my dog’s bedding in an apartment?
More often than in a house — smells concentrate in small spaces. Wash removable covers every 1–2 weeks and the bed itself monthly, and keep a spare cover in rotation.

Golden retriever in a DIY mudroom dog wash station with a handheld shower sprayer

DIY Dog Wash Station: Mudroom & Outdoor Shower Ideas

Every muddy walk ends the same way: a negotiation at the back door. Wet paws on the tiles, muddy prints up the hallway, and a dog that somehow gets dirtier during the towelling-off process than during the walk itself.

A dog wash station ends the negotiation. One dedicated spot where the muddy dog goes straight from the door, gets rinsed and dried, and re-enters the house as a clean dog. It’s one of those 2026 “Barkitecture” hallmarks — built-in dog wash stations are now a standard feature of mudroom and laundry renovations — but you don’t need a renovation budget. You need a corner, a plan, and a weekend.

This guide covers three builds at three budgets: the proper mudroom wash corner (raised platform, handheld sprayer, tiled splash zone), the budget outdoor shower from a utility sink and a hose, and the no-plumbing micro option for renters. Plus the drying zone that finishes the job — because a wet dog released into the house undoes everything.

Why a wash station beats the bathtub

Think about what actually happens when you wash a dog in the family bath: hauling a muddy dog through the house first (the thing you’re trying to avoid), a tub that takes ten minutes to clean afterwards, and a wet dog doing zoomies on the sofa while you mop. A wash station flips the order — the dog is contained at the entry point, cleaned, and only then released.

The mud-control payoff is real:

  • Contained mess. Mud stays in one washable zone instead of migrating through the house.
  • Faster rinses. A handheld sprayer at the door turns a 20-minute ordeal into a 3-minute rinse — which means you actually do it, every walk.
  • Less grooming cost. Regular rinses mean fewer full baths and less grit ground into the coat.
  • Works in bad weather. The outdoor option aside, the indoor station is usable in pouring rain, which is exactly when you need it most.

Option 1: The mudroom / laundry corner wash station

This is the full build — the one that looks like the renovation photos. You need a corner roughly 90 × 90 cm near a door, ideally in a laundry room, garage nook or mudroom with an existing water supply and drain nearby.

Raised wooden dog wash platform with non-slip rubber mat and handheld shower head in a laundry room corner

The three components:

1. The raised platform. A dog shower works best raised 20–30 cm off the floor. You stop bending double, the dog stops climbing out so easily, and the drain sits underneath. Build it from a plywood base on treated-wood framing, or — the simplest version — set a large fibreglass laundry tub or stock tank into a frame. The platform surface should be a non-slip rubber mat (horse-stall mat offcuts are perfect: cheap, indestructible, paw-grippy).

For small dogs, a raised laundry sink basin itself can BE the station. For medium and large dogs, a stock tank or a tiled raised platform is the answer.

2. The handheld sprayer. This is the heart of the station. Tee off the nearest cold supply — and hot too, if you can — with a washing-machine Y-splitter or a proper plumber-installed branch, and run a flexible hose to a handheld shower head with a long (2 m+) hose. The sprayer hangs on a hook or a shower rail at dog height when in use.

Safety note: always test water temperature on your own wrist first, the same as for a baby. Lukewarm only — what feels warm to your hand can scald a dog’s thinner-skinned belly. If you tee off hot water, fit a simple thermostatic mixing valve or just be disciplined about testing.

3. The tiled splash zone. Dogs shake. Water goes everywhere — mostly sideways at about dog-shoulder height. Protect the walls 60–90 cm around the station: stick-on vinyl tiles, waterproof wall panels, or a coat of exterior-grade paint over backer board. A cheap shower curtain on a tension rod also works brilliantly as a splash guard and doubles as the “stay in here” boundary during rinses.

Drainage: the ideal is a floor drain or tying into an existing waste pipe — a job for a plumber if you’re not confident. The practical DIY fallback: the station drains into a bucket or a low tray underneath, which you empty after each use. It adds 30 seconds and saves a plumbing bill.

Typical cost: $80–$200 depending on how much you plumb properly versus improvise.

Option 2: The budget outdoor shower

No spare corner indoors? The outdoor version costs almost nothing and is arguably better in summer — the dog never comes inside wet at all.

The classic setup: a utility sink or large tub (a galvanised stock tank is the budget hero) placed near an outside tap, fed by a garden hose with a spray-nozzle attachment. For warm rinses, a solar shower bag hung in the sun gives you a few litres of warm water for free — enough for paws and bellies.

Golden retriever rinsed in a galvanised stock tank outdoor dog shower on a pallet platform

The three outdoor rules:

  1. Drainage matters outside too. Don’t rinse the dog in a spot that turns into a mud pit — gravel, decking or a paved corner with a fall away from the house. A raised pallet platform under the tub keeps paws out of the puddle.
  2. Water temperature swings. Hoses left in the sun run scalding for the first seconds — always run it clear before pointing it at the dog. In cold weather, only rinse if you can dry the dog properly afterwards; a wet dog in wind chills fast.
  3. Dry before entry. The outdoor shower still needs a drying step (see the drying zone below) — a dog that air-dries on the patio then runs inside damp is only half the job.

Typical cost: $30–$60 for the tub, hose nozzle and a pallet platform.

Option 3: The renter’s micro station (no plumbing)

If you can’t touch the plumbing, build the station around containment rather than water supply:

  • A boot tray (the big ribbed mats for muddy boots) or a shallow plastic storage-box lid at the door becomes the wash pad.
  • A 2-litre pump sprayer — the garden kind — filled with lukewarm water is your “shower”. It gives a directed rinse with zero plumbing.
  • A stack of old towels and a paw-washing cup (the silicone-bristle kind) handle the detail work.

It won’t replace a real rinse for a fully mud-caked dog, but for everyday paw-and-belly mud it’s the difference between prints up the hallway and a clean entry. The whole kit lives in a basket by the door and costs under $25.

The drying zone: don’t skip this part

Washing is half the job; drying is the other half, and it’s the part most DIY guides forget. A wet dog in a wash station is contained. A wet dog released into the house is a mop with legs.

Labrador being towel-dried in a home dog drying zone with microfibre towels

Set up the drying zone right next to the wash station:

  • A non-slip mat on the floor — wet dogs slide on tiles, panic, and bolt.
  • Dedicated dog towels — microfibre beats cotton: it pulls water out of the coat instead of pushing it around. Keep 3–4 in rotation.
  • A towel-dry routine: squeeze (don’t rub) the coat, paws one by one, ears, then belly. Rubbing mats the coat; squeezing removes water.
  • Warm air option: a pet dryer or even a hairdryer on its coolest, lowest setting, kept moving — never hot, never pointed at one spot. Many dogs learn to love the warm air if you introduce it with treats.

Safety note: never use a human hairdryer on hot near a dog’s skin — burns happen faster than you’d think, especially on bellies and inner thighs. And never leave a wet dog unsupervised in a cold garage or outdoors in winter; towel-dry thoroughly and bring them into the warm house.

Waterproofing and drainage basics (the unglamorous bit)

Water finds every gap. Wherever your station lives, run through this checklist:

  • Seal the floor-wall joint — silicone caulk along the base of the splash zone walls.
  • Slight fall to the drain — even a bucket-catch setup works better if the platform tilts a degree or two toward the drain side.
  • Ventilation — a damp, unventilated laundry corner grows mildew. Crack a window or run the extractor after wash sessions.
  • Store the sprayer dry — disconnect and drain the handheld hose after use; hoses left full of water in an unheated garage split in frost.

Training the dog to love the station

Handheld shower sprayer gently rinsing a beagle's muddy paws in a dog wash station

Most dogs tolerate a wash station faster than a bathtub, because it’s at their level and the session is short. Still, don’t start with a full rinse:

  1. Treats in the station. Feed dinner or high-value treats in the dry station for a week. The station becomes a good place.
  2. Water on paws only. First wet session: rinse just the paws, treat heavily, done. Five minutes max.
  3. Full rinse, calm voice. Build up to the full body rinse over a few sessions. Keep the sprayer moving and the water pressure gentle — a jet on the face is the fastest way to lose their trust.
  4. The dry is the reward. Most dogs love the towelling. End every session with the full dry-down ritual and a treat, and the station becomes something they walk into willingly.

The bottom line

A DIY dog wash station is one of the highest-payoff weekend builds for a dog owner: a mudroom corner with a raised platform and handheld sprayer, a $50 outdoor shower, or even a $25 renter’s kit by the door. Pick the version that fits your space, waterproof the splash zone properly, and don’t forget the drying zone next to it. The muddy-paw negotiation at the back door ends the day you build it.

FAQs

How much does a DIY dog wash station cost?
$25 for the renter’s micro kit, $30–$60 for the outdoor shower, $80–$200 for a proper indoor mudroom station with a raised platform and handheld sprayer. Plumbing work is the variable — a plumber-installed hot/cold branch costs more than a Y-splitter off the washing machine supply.

Can I build a dog wash station as a renter?
Yes — that’s what Option 3 is for. A boot tray, a pump sprayer of lukewarm water and paw-washing cup need zero plumbing and zero holes in walls. Everything packs into a basket.

Do I need hot water for a dog wash station?
Not necessarily. Lukewarm water is ideal, but many dogs are rinsed with cool water in summer without issue. What matters is never using hot — always test on your wrist first.

What’s the best flooring for a dog wash station?
A non-slip rubber mat (horse-stall mat offcuts are the budget pick) over a sealed, slightly sloped base. Avoid bare tile or smooth plastic — wet paws plus slippery surface equals a panicking dog.

My dog hates water. Will a wash station help?
Often, yes — because it’s at their level, the sessions are short, and you train it with treats in stages. Start with treats in the dry station and build up slowly; most dogs come around within a couple of weeks.

Golden retriever walking up a homemade wooden DIY dog ramp with a carpet non-slip surface.

DIY Dog Ramp for Bed, Couch & Car (No Fancy Tools)

Every jump onto the bed, every leap out of the car boot, lands on your dog’s joints. For a young, healthy dog it’s nothing. For a senior with stiff hips, a dachshund with a long back, or any dog recovering from a leg injury, those daily jumps add up — and they’re one of the most common ways older dogs hurt themselves at home.

A ramp fixes it quietly. No more lifting a 30-kilo labrador into the car. No more wincing when your old dog hesitates at the edge of the bed. And you don’t need to buy one: a DIY dog ramp is one of the simplest weekend builds there is — one sheet of plywood, a carpet offcut, two hinges, and basic tools you probably already own.

This guide covers the build that works for beds, couches and cars alike: a folding plywood ramp with a proper non-slip surface, sized to your dog, for under $30 in materials.

Why a ramp, and which dogs need one most

Ramps aren’t just for old dogs, though seniors are the biggest winners. Think about it from the joint’s point of view: jumping down from a car boot or a tall bed multiplies the force on elbows, shoulders and spine several times over. Dogs that benefit most include:

  • Seniors and arthritic dogs — if your dog hesitates before jumping, or needs a running start, a ramp removes the daily impact. It pairs perfectly with the joint support in our guide to the best orthopedic dog beds.
  • Long-backed breeds — dachshunds, corgis and basset hounds are prone to back injuries (IVDD), and vets routinely recommend ramps over stairs or jumps for them.
  • Small dogs — a chihuahua jumping off a sofa is proportionally like you jumping off a kitchen counter. Repeatedly.
  • Dogs recovering from surgery — vets almost always prescribe “no jumping” after cruciate or hip surgery, and a ramp is how you actually enforce that.
  • Big, heavy dogs — lifting a 40-kilo dog into an SUV gets old fast, for your back as much as their joints.

If your dog already struggles with household obstacles, a ramp plus a dog door can turn the whole house into easy-access territory.

Step 1: Measure the right height and angle

This is the step most people skip, and it’s the one that decides whether your dog actually uses the ramp. Too steep and they’ll refuse it; too long and it won’t fit anywhere.

Measure the height first. Measure from the floor to the surface your dog needs to reach — the top of the mattress, the couch cushion, or the car boot lip. Typical numbers: bed 55–65 cm, couch 40–50 cm, SUV boot 70–80 cm.

Then pick the angle. The sweet spot for most dogs is 18–25 degrees. Under 18° the ramp gets very long; over 25° most dogs — especially seniors — start balking.

Here’s the simple rule of thumb: for every 30 cm of height, plan 75–90 cm of ramp length. A 60 cm bed height needs a ramp roughly 1.5–1.8 m long. A 75 cm SUV boot needs 1.9–2.2 m. Longer is always kinder than shorter — if you have the space, go long.

Width: 30–40 cm for small dogs, 45–60 cm for medium and large dogs. A nervous dog feels much safer on a wider ramp, and the extra plywood costs almost nothing.

Person measuring a labrador's shoulder height with a tape measure next to a bed for DIY dog ramp sizing.

Step 2: Gather the materials

For a standard folding ramp (~1.8 m long, 50 cm wide):

  • One sheet of 12 mm plywood (exterior grade if it’ll live outdoors or in a damp car boot), cut to your length × width. Most hardware stores will cut it for you.
  • A carpet runner or rubber-backed doormat offcut to cover the walking surface — this is the non-slip layer, don’t skip it.
  • Two sturdy hinges (for the folding version) or four short legs (for the fixed version).
  • Wood screws, wood glue, sandpaper (120 grit).
  • Optional: two side rails (thin battens, 5 cm tall) along the edges — brilliant confidence-boosters for wobbly seniors.
  • Optional: a handle or rope loop for carrying.

Total cost: typically $20–$30 if you buy the plywood new; free if you’ve got offcuts in the garage.

Step 3: The build (folding version)

The folding design is the most useful: it halves in length for storage behind a door or in the car, and unfolds into a full ramp in seconds.

  1. Cut and sand. Cut the plywood to your measured length and width (or have the store do it). Sand every edge and face smooth — splinters and paws don’t mix.
  2. Split it in two. Cut the board across the middle into two equal halves. These are your two ramp sections.
  3. Hinge the halves. Lay them face-down, butt the cut edges together, and screw the two hinges across the join. Test the fold — it should fold flat like a book.
  4. Add the grip surface. Cut the carpet to cover each half’s top face, leaving the hinge area clear. Glue it down, then staple or screw the edges for good measure. The carpet should run the full length with no gaps — a bare plywood patch in the middle is exactly where a paw will slip.
  5. Add side rails (recommended). Screw a 5 cm batten along each long edge of the top face. They stop paws sliding off sideways and give nervous dogs a visual “lane” to follow.
  6. Stabilise the ends. The top end needs to grip, not slide: glue a strip of rubber shelf liner or stick-on rubber feet under the top edge where it meets the bed or car. For the folding version, small folding legs near the middle hinge stop it sagging under heavy dogs.

Let the glue cure overnight before the first use.

Hands stapling carpet onto plywood to build a non-slip DIY dog ramp surface.

Folding vs fixed: which should you build?

Folding wins if the ramp needs to travel (car boot ramps, visiting family) or storage space is tight. Slightly more work, slightly less rigid — fine for dogs under 40 kg with the middle legs in place.

Fixed (one solid board, no hinge, maybe with short legs) wins for a permanent bedside or couch ramp. It’s stiffer, simpler, and you can make it extra wide. If the ramp will live in one spot forever, build it fixed and skip the hinges.

Metal hinge joining the two folding sections of a carpeted DIY dog ramp.

The non-slip surface matters more than the wood

A beautiful ramp with a slippery surface is a decoration, not a tool. Dogs refuse ramps for one reason above all: their paws slipped once, and they don’t trust it anymore. Your options, best first:

  • Low-pile carpet or carpet tiles — the gold standard. Grippy in both directions, soft on paws, cheap as offcuts.
  • Rubber-backed doormat material — excellent grip, easy to hose clean after muddy paws.
  • Non-slip stair treads (the adhesive strips) — good for narrow ramps, but check the edges don’t peel.
  • Paint + sand texture — works, but rough on paw pads over time. Carpet is kinder.

Whatever you use, cover the entire walking surface edge to edge, and replace it when it wears smooth.

Training your dog to use the ramp

Most dogs don’t march up a new ramp on day one — and pushing them up it is the fastest way to make them hate it. Do this instead:

  1. Flat first. Lay the ramp flat on the floor and let your dog walk across it for treats. Click and treat every crossing. Most dogs are fine with this in a day.
  2. Low angle. Prop one end on a low step or a couple of books — barely an incline — and lure them up with a treat trail. Keep sessions to five minutes.
  3. Full height. Raise it to the real position. Walk beside your dog the first few times, treat at the top, treat at the bottom.
  4. Make it routine. Use the ramp for every car trip and bedtime for a week. Dogs learn by repetition, not by lecture.

Safety note: never force or drag a dog up a ramp. One scary experience can undo a week of training. If your dog freezes, go back a step. Arthritic dogs may need a few days just to trust the surface — that’s normal. And always supervise: ramps are for controlled climbing, not for launching off the top.

Senior dachshund walking up a carpeted DIY dog ramp onto a couch.

Weight, weather and upkeep

  • Weight rating: 12 mm plywood on edge supports most dogs fine, but if your dog is over 40 kg, use 18 mm plywood or add a centre support batten underneath.
  • Outdoor/car use: exterior-grade plywood plus a waterproof sealant on the underside; bring the carpet surface inside in heavy rain.
  • Cleaning: vacuum the carpet monthly, hose it down if it gets muddy, and check the hinge screws twice a year — they loosen with vibration in a car boot.
  • When not to DIY: if your dog is post-surgery, check the ramp plan with your vet first — some recoveries need a specific angle or a sling plus ramp combo.

The bottom line

A DIY dog ramp is an afternoon’s work, about $25 in materials, and it quietly removes dozens of joint-jarring jumps from your dog’s week. Measure twice, build it long and wide, carpet the whole surface, and train it in small steps. Your dog’s hips will thank you — probably by using the ramp to demand more car rides.

FAQs

What angle should a dog ramp be?
18–25 degrees works for most dogs. As a rule of thumb, allow 75–90 cm of ramp length for every 30 cm of height. Seniors and long-backed breeds do best at the gentler end.

Are ramps better than stairs for dogs?
For arthritic dogs, seniors and long-backed breeds, yes — ramps keep the spine level and avoid the repeated impact of step-downs. Stairs are fine for healthy, agile dogs in tight spaces.

How wide should a DIY dog ramp be?
30–40 cm for small dogs, 45–60 cm for medium and large dogs. Wider is always better for nervous or wobbly dogs.

Can I use a dog ramp for my car?
Absolutely — that’s one of the most common uses. Build the folding version so it stores in the boot, and make sure the top end has rubber grip so it doesn’t slide on the bumper.

My dog is scared of the ramp. What do I do?
Go back to the flat-on-the-floor stage and rebuild with treats. Never force them. Most dogs come around within a week of short, treat-heavy sessions.

Golden retriever mid-leap over a homemade PVC jump in a backyard DIY dog agility course

DIY Dog Agility Course: 7 Backyard Builds from Household Stuff

A backyard agility course used to mean spending hundreds on competition-grade equipment — or driving to a club twice a week. It doesn’t anymore. With some PVC pipe, garden stakes, a blanket and a hula hoop, you can build a proper DIY dog agility course in an afternoon, for less than the cost of one club session.

Agility is one of the best things you can do with a busy dog. It burns off physical energy, but the real magic is the mental workout: your dog has to listen, think, and trust your direction at speed. Ten minutes on a course tires out many dogs the way an hour-long walk never quite does. And if your dog already loves the enrichment games in our DIY dog toys and DIY snuffle mat guides, agility is the natural next level — it takes that brain work outside.

You don’t need a big garden, either. A course of just three or four obstacles in a small yard is plenty for a beginner dog. Here are seven household builds, in the order most trainers would introduce them.

Before you build: the ground rules

  • Soft ground only. Grass, packed dirt or rubber mulch is ideal. Skip concrete and hard-packed gravel — a bad landing on a hard surface is how injuries happen.
  • No high jumps for puppies. Dogs under 12–18 months (check with your vet for your breed) shouldn’t jump full height — their growth plates are still open. Keep bars at paw height or on the ground while they’re young.
  • Short sessions. Ten to fifteen minutes, once a day, is perfect. End while your dog is still having fun, not when they’re exhausted.
  • Always warm up. A five-minute loose-lead walk and a few minutes of play before the course, and a gentle cool-down walk after.

1. The PVC Jump

The signature agility obstacle, and the easiest to build. You’ll need two PVC pipes (about 1.5 m each) for the uprights, two T-joints, four short feet pieces, and one longer pipe or a wooden dowel for the bar. Stand the uprights in the T-joints, attach the feet, and rest the jump bar across two shorter stubs at your chosen height.

The clever bit: use cups or clamps so the bar falls freely if your dog clips it. A bar that knocks down safely is a safety feature, not a flaw. Start with the bar on the ground (just a pole between the uprights), then raise it to wrist height, then — for adult dogs — to roughly their shoulder height. Never higher than their shoulder.

Border collie weaving between bamboo garden stakes in a backyard DIY agility course

2. Weave Poles from Garden Stakes

Push six to twelve bamboo garden stakes or tomato stakes into soft ground in a straight line, spaced about 60 cm apart. That’s it — you have weave poles. Dogs learn to snake through them left-right-left, and it’s one of the most satisfying obstacles to watch a dog master.

Teach it with a lure: walk your dog through the first two poles in a straight line with a treat at their nose, rewarding at each gap. Add one pole at a time. Most dogs pick this up in a week of short daily sessions.

Beagle running out of a homemade blanket tunnel in a backyard agility course

3. The Blanket Tunnel

Drape a blanket or duvet cover over two chairs or sawhorses, leaving both ends open. For a longer tunnel, drape it over a row of three chairs. Weight the edges with shoes or books so it doesn’t slide.

Tunnels are brilliant confidence-builders because dogs can’t see through them — the first time your dog pops out the far end expecting you and gets a jackpot treat, you’ve got a tunnel fan for life. Start with the tunnel short and straight, then make it longer and curved as your dog gains confidence.

Labrador sitting on a homemade pallet pause table for dog agility

4. The Pause Table from a Pallet

A pause table is a low platform where the dog jumps up and holds a sit or down for five seconds. A wooden pallet on four short blocks (about 25–30 cm high) does the job. Lay an old yoga mat, carpet offcut or rubber doormat on top for grip.

The pause table is where your dog learns the most valuable agility skill: listening at speed. Running full tilt and then stopping on the table on cue is hard for excitable dogs — and incredibly useful everywhere else in life, too.
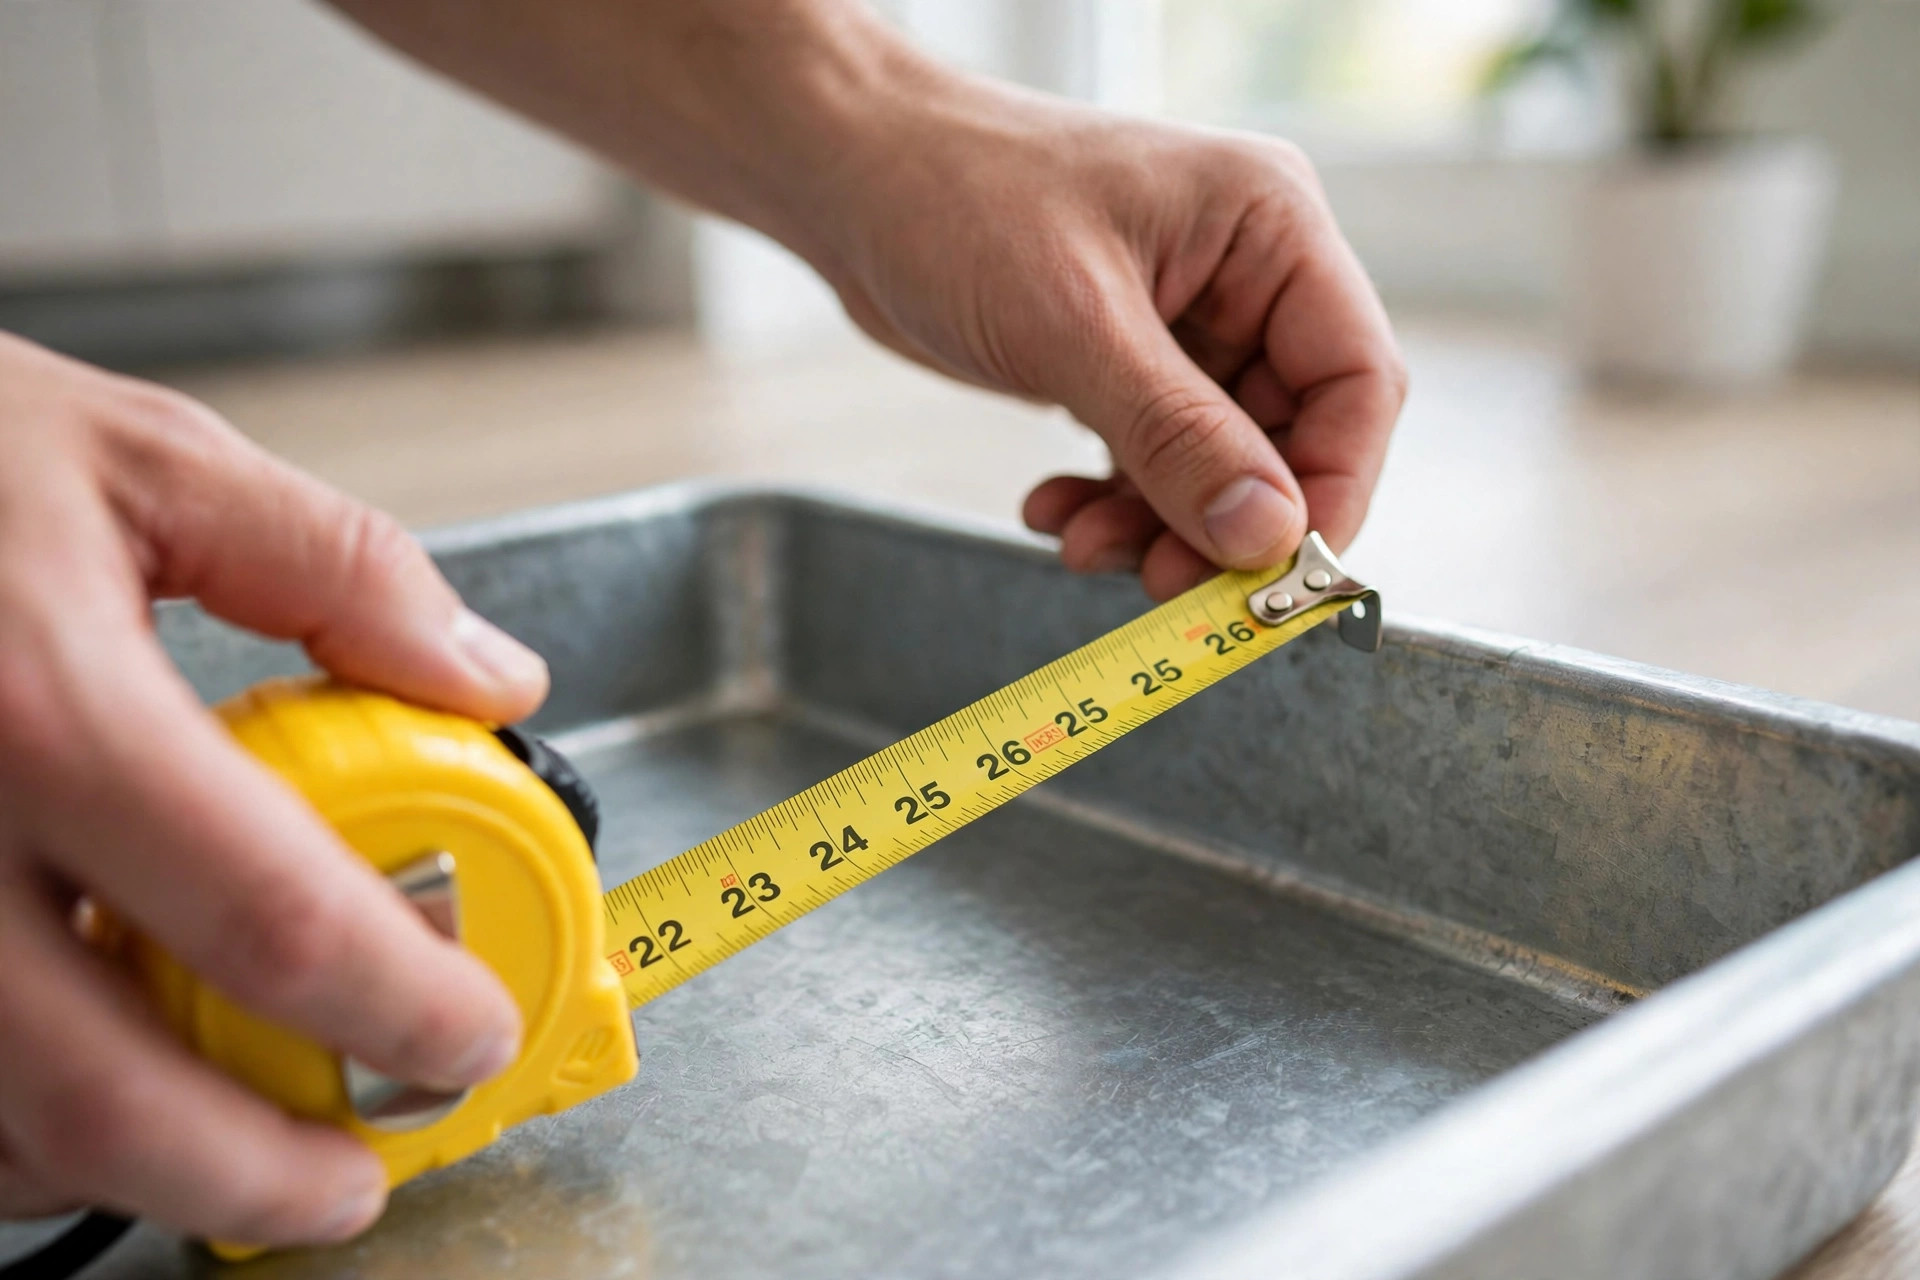
Corgi jumping through a hula hoop hung from a tree in a backyard agility course

5. The Hula-Hoop Tire Jump
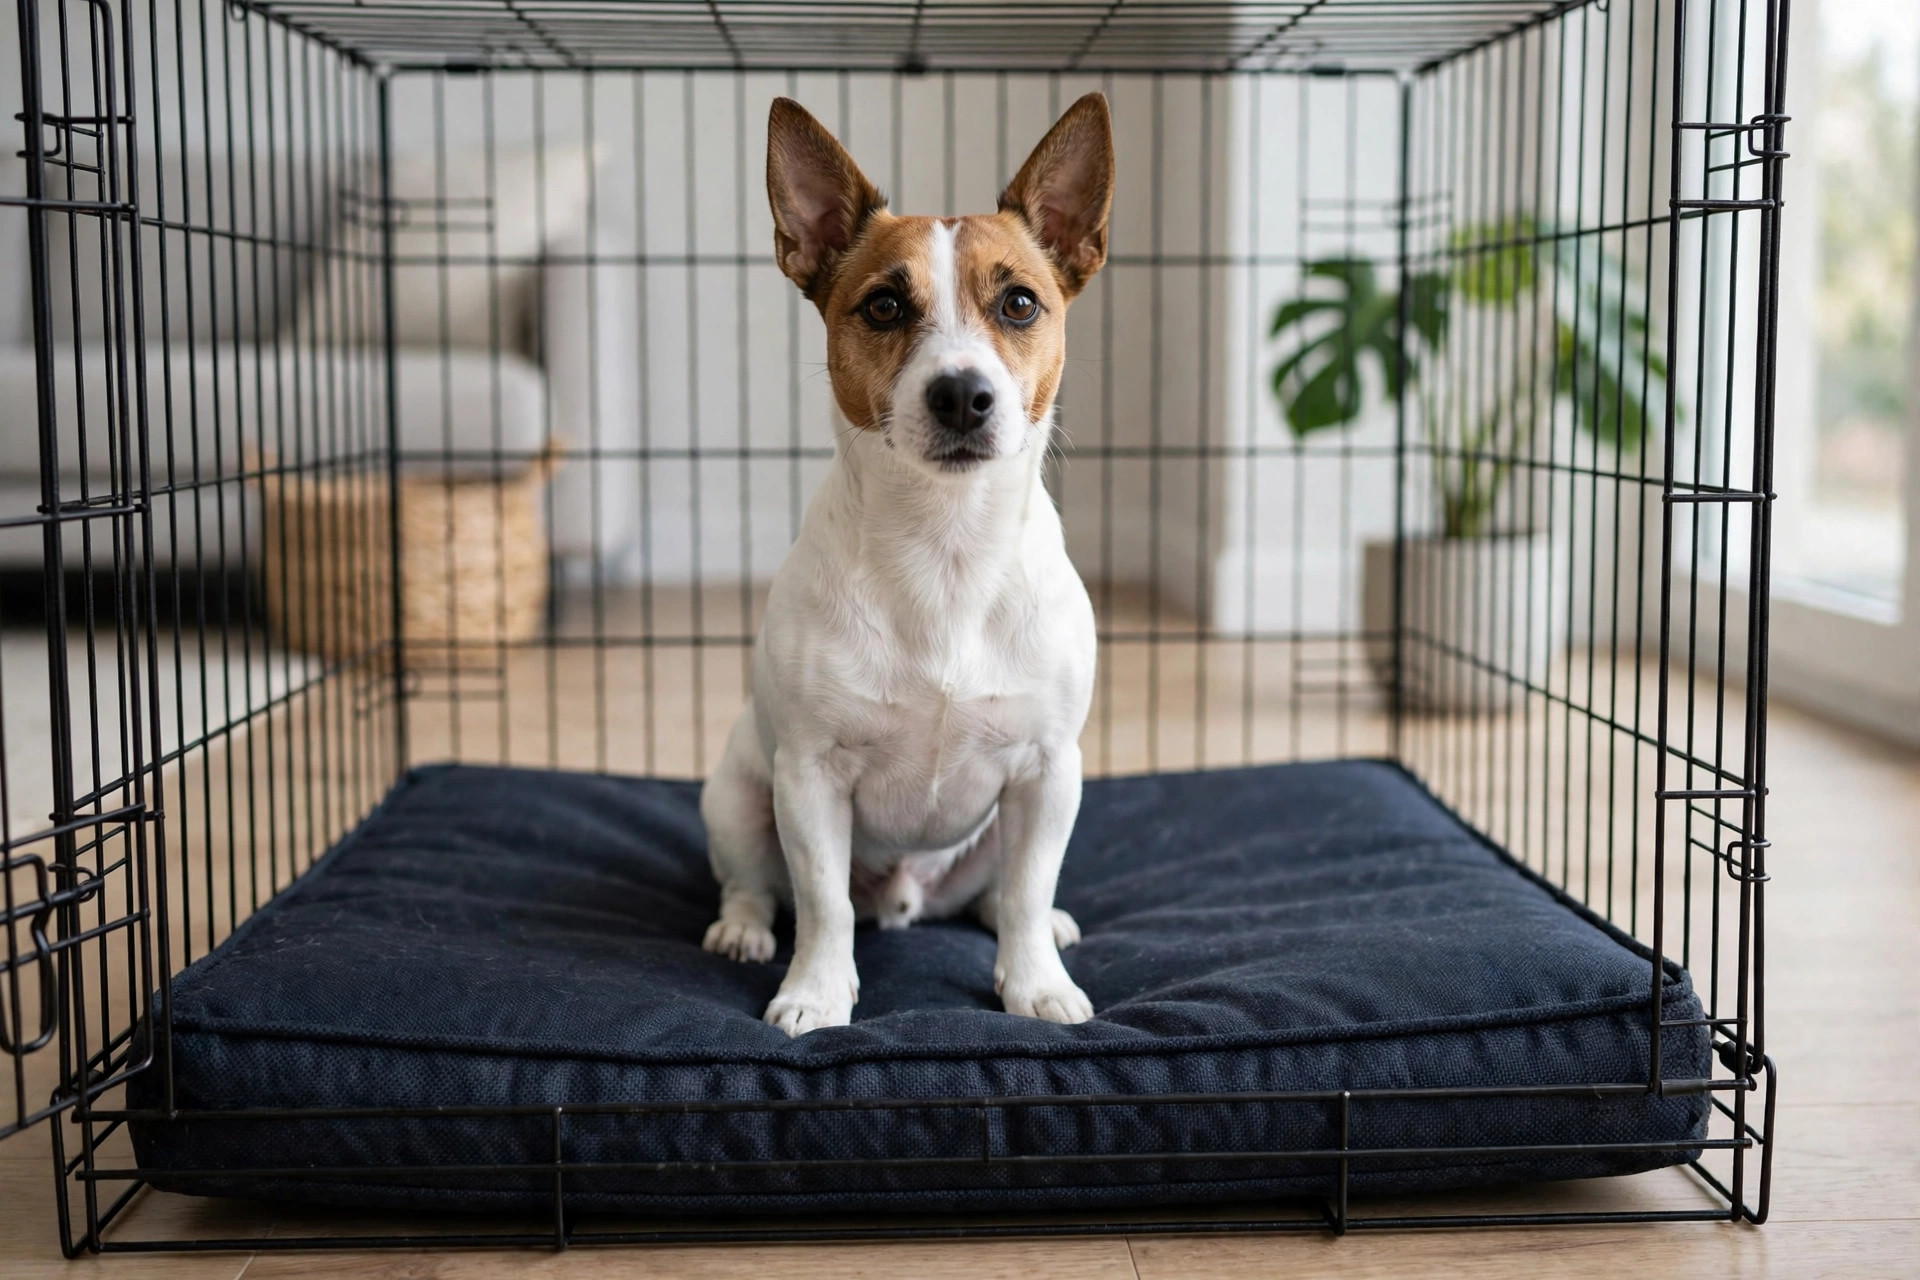
Hang a hula hoop from a tree branch with rope, or mount it between two PVC uprights like the jump in build 1. Start it touching the ground so your dog simply walks through it, then raise it slowly — to chest height for adult dogs, no higher.

This is the crowd-pleaser: dogs seem to find jumping through a hoop inherently fun. It’s also a great starter obstacle for cautious dogs, because there’s nothing to knock over and the target is obvious.

6. The Cardboard-Box Contact Zone

Competition courses have a “contact zone” — a painted area on the seesaw and ramp that the dog must touch, teaching controlled movement. You can train the idea with a flat cardboard box or a low wooden board. Teach your dog to walk across it and stop with two paws on, two paws off, then treat.

This build costs nothing and pays off in every other obstacle: a dog that understands “slow down and touch” is a dog that stays in control on the course.

7. The Slalom of Pool Noodles

Push pool noodles (or rolled towels) upright into soft ground, or stand them in buckets of sand. Dogs weave through them just like weave poles, but the soft noodles forgive every bump — perfect for puppies, seniors, or dogs that are still learning where their feet are.

Safety note — puppies and seniors: skip the full-height jumps and hard weaving for puppies under 12 months entirely — stick to ground poles, the tunnel, the pause table and the noodle slalom. For seniors, keep bars at elbow height, sessions to ten minutes, and check with your vet first if your dog has arthritis or hip issues. One bad landing matters more than one great run.

The beginner training order

Don’t just let your dog loose on all seven at once. Most trainers introduce obstacles in this order:

  1. Tunnel and pause table — confidence and listening, zero risk.
  2. Ground-level jumps (bar on the ground) and hula hoop at ground level — straight lines at walking pace.
  3. Weave poles and noodle slalom — add the weaving pattern.
  4. Raised jumps and contact work — only for adult dogs, raised gradually.

Work on one obstacle until your dog offers it happily and reliably, then add the next. A course of three mastered obstacles beats seven half-learned ones every time.

How much does it cost?

A full seven-obstacle course from household stuff typically runs under $30–$50: a few PVC pipes and fittings (the only thing most people buy), garden stakes you probably own, a blanket, a hula hoop, a pallet. Compare that to $150+ for a single commercial jump, and DIY wins by a mile. The most expensive part of agility was always the dog’s enthusiasm — and that’s free.

The bottom line

A DIY dog agility course turns an ordinary backyard into the best fifteen minutes of your dog’s day. Start with the tunnel and pause table, keep sessions short, keep the ground soft, and let your dog’s confidence set the pace. You’ll be amazed how quickly a dog that once dragged you to the park starts dragging you toward the course instead.

FAQs

Is agility safe for my dog?
For healthy adult dogs on soft ground with appropriate jump heights, yes. Puppies and seniors need the modified version above, and dogs with joint problems should get a vet’s clearance first.

What age can a dog start agility?
Puppies can start foundation work (tunnels, targets, flatwork) as young as 8–10 weeks with a trainer’s guidance. Full-height jumping and tight weaving should wait until growth plates close — 12–18 months depending on breed and size.

Do I need to compete to do agility?
Not at all. Most backyard agility dogs never enter a competition. The course is enrichment, exercise and bonding — competition is optional.

How big a yard do I need?
A 10 × 10 m patch of grass fits three or four obstacles comfortably, which is plenty for a beginner course. Small yards work fine if you keep the course compact.

My dog is scared of the tunnel. What now?
Shorten it, bunch the fabric up so they can see through, and toss treats through the middle. Never push a scared dog through — let curiosity do the work over a few days.

Senior golden retriever resting on an orthopedic memory-foam dog bed for arthritis relief.

Best Orthopedic Dog Beds for Arthritis & Senior Dogs

Watch a senior dog get up in the morning and you’ll understand what an orthopedic dog bed is for. The stiff pause before the first step. The careful way they lower themselves down, joint by joint, at night. Around half of all dogs over the age of seven show some degree of arthritis — and a bed that supports their joints instead of fighting them is one of the simplest, kindest upgrades you can make.

But “orthopedic” is one of the most abused words in pet marketing. Thin egg-crate foam pads, polyester-filled “support” cushions and flat mats all wear the label without earning it. A genuinely orthopedic bed is a piece of furniture with a job: distribute the dog’s weight evenly, keep pressure off sore hips, elbows and shoulders, and make getting up and lying down as easy as possible.

Here is how to tell the real thing from the marketing — and how to pick the right one for your dog.

What makes a bed genuinely orthopedic

The heart of an orthopedic bed is a thick slab of high-density memory foam. Not a layer of memory foam over cheap poly-fill. Not shredded-foam stuffing. A solid slab — usually at least 10 cm (4 inches) thick for large breeds — that compresses under your dog’s weight and cradles the joints instead of letting them sink through to the floor.

Do the hand test before you buy (or when the bed arrives): press your knee hard into the middle. On a real orthopedic bed you feel firm, slow resistance and you can’t feel the floor through it. On a fake, your knee goes straight through to the other side. If your knee can bottom it out, so can your arthritic dog’s elbow.

Under the memory foam, the best beds add a denser support-foam base — the same layered construction as a human mattress. This keeps the bed from flattening over time and gives the surface a stable platform to rebound from.

The memory foam density guide — the one spec that matters

Foam density is measured in pounds per cubic foot, and it is the single most honest number on the label. Here is what the numbers mean for your dog:

  • 2–3 lb density: soft comfort foam. Fine as a topper, not orthopedic on its own. Most “orthopedic” impostors live here.
  • 4 lb density: the sweet spot for most dogs. Genuinely supportive, sleeps a little warmer than lower-density foam.
  • 5 lb density: maximum support for very large or giant breeds, and for dogs with severe arthritis. Very firm at first — it softens slightly with body heat.

A word on thickness too: a 10 cm (4 inch) slab of 4 lb foam beats a 18 cm (7 inch) slab of 2 lb foam every time. Thickness without density is just height. Look for both numbers on the label, and be suspicious of any “orthopedic” bed that lists neither.

Hand pressing into dense memory foam inside an orthopedic dog bed.

Bolster vs flat: which suits an arthritic dog?

Flat orthopedic beds win for most senior dogs with joint problems. Nothing to climb over, no raised edges pressing into sore ribs when the dog sprawls — and many arthritic dogs sprawl flat out because curling up hurts. If your dog sleeps stretched on their side, go flat.

Bolster beds (raised edges on two or more sides) suit dogs who like to rest their chin or brace their back against something. The bolster has to be genuinely low and soft for a senior, though — a tall, firm bolster becomes a wall they have to heave themselves over, which defeats the purpose. For dogs who love the den feeling but have stiff joints, a low bolster on just the back edge is the best compromise. (If anxiety rather than arthritis is your dog’s main issue, our guide to calming dog beds covers the raised-rim designs built for that.)

Low-entry designs: the feature seniors actually feel

The most underrated orthopedic feature is how the dog gets on and off. Arthritis makes every small step up a negotiation. Look for:

  • A low profile overall — the sleeping surface should sit no more than a few inches off the floor, so there is no “step” to climb.
  • Dipped or ramped front edges on at least one side, letting a stiff dog walk on rather than haul themselves up.
  • No surrounding frame or lip the dog has to clear. Wooden-frame beds look great but add a barrier; for a genuinely creaky dog, a simple low slab beats a stylish frame.

If your dog struggles with the couch or the car too, a ramp can change their daily life — the same senior-mobility logic that applies to beds applies everywhere.

Senior dachshund stepping easily onto a low-profile orthopedic dog bed.

Sizing for large and giant breeds

Orthopedic support scales with the dog, and this is where most buyers under-buy. A bed is too small if any part of the dog hangs off the edge while they sleep — joints dangling off the rim get zero support, and the dog will quietly migrate to the floor (or your sofa) instead.

Measure your dog from nose to tail base while they sleep in their favourite position, then add 15–20 cm (6–8 inches). For large breeds like Labradors and German Shepherds that means a bed around 100–110 cm long; for giant breeds like Great Danes, look for true XL/XXL beds — a standard “large” is built for a 30 kg dog, not a 60 kg one.

Bigger beds also need thicker foam. A 4-inch slab that supports a terrier will bottom out under a mastiff. For dogs over 40 kg, insist on 5 lb density foam, 12 cm (5 inches) or thicker.

Great Dane sprawled on an extra-large flat orthopedic dog bed.

Washable covers that survive real life

An orthopedic bed is an investment — senior dogs drool, shed, and have the occasional accident — so the cover matters as much as the foam:

  • Removable, machine-washable covers are non-negotiable. The cover should come off easily (a full-length zip, not a tiny slot) and go back on without a wrestling match.
  • A waterproof liner between the cover and the foam is the difference between a washable cover and a ruined bed. One accident soaking into memory foam is the end of that foam — it can’t be washed and it won’t dry properly.
  • Durable fabrics like canvas or microfibre outlast plush fleece, which pills and mats within months. If your dog likes to “dig” before lying down, avoid anything with a loose weave.

Plan to wash your dog’s bed every 2–4 weeks; a good orthopedic bed is built to survive years of that routine.

Removable canvas cover being unzipped from an orthopedic dog bed, revealing the waterproof liner.

What to avoid

  • Egg-crate “orthopedic” toppers. The bumpy foam looks medical and does almost nothing. It compresses flat within weeks.
  • Beds filled with shredded foam or poly-fill. They develop lumps and dead spots exactly where your dog lies, creating pressure points — the opposite of what you paid for.
  • Beds that sleep hot with no remedy. Dense memory foam retains body heat. That’s a bonus in a draughty house and a problem for a hot-sleeping senior — if your dog pants on foam beds, pair the orthopedic bed with a cooling setup or consider one of our elevated dog beds for summer.
  • No listed foam density. A manufacturer that won’t tell you the density is telling you everything.

Safety notes

  • A new orthopedic bed can take a few nights — some dogs distrust the different feel. Put a worn t-shirt of yours on it; familiar scent does more than any “calming” marketing.
  • Dogs with severe arthritis should see the vet before you shop: pain management and the bed work together, and neither replaces the other.
  • Keep the bed on a non-slip surface. A low, heavy foam slab sliding on a hard floor turns getting up into a skating accident for a stiff dog — a rug or rubber mat underneath fixes it.
  • Check the bed every few months with the knee test. All foam eventually softens; when your knee bottoms out, the bed has retired.

How to choose in 3 steps

Step 1 — Measure. Measure your sleeping dog nose-to-tail and add 15–20 cm. Write it down; this is your minimum bed length.

Step 2 — Match the foam. 4 lb density for most dogs, 5 lb for dogs over 40 kg or with severe arthritis. Demand the number on the label — no number, no sale.

Step 3 — Check the entry. Low profile, dipped or ramped front edge, waterproof liner, removable washable cover. If it ticks all four, buy it.

The bottom line

An orthopedic bed won’t cure arthritis, but it changes the hours your dog spends on it — which, for a senior, is most of the day. Buy for foam density, low entry and a washable waterproof-covered build, size it honestly for your dog’s weight, and expect to pay for real foam rather than the word “orthopedic” on a poly-fill cushion. Your stiff old friend will tell you the difference the first morning they get up without the pause.

If you’re still browsing styles, our roundup of dog bed ideas covers the full range — orthopedic is one strong option among several worth knowing about.

FAQs

Are orthopedic dog beds worth it for a young dog?
For a healthy young dog, a good-quality standard bed is fine — but for large and giant breeds, starting on supportive foam early can be a smart investment, since these breeds are far more prone to joint problems later.

How long do orthopedic dog beds last?
A quality 4–5 lb density foam bed typically keeps its support for 3–5 years of daily use. When the knee test shows your knee reaching the floor through the foam, it’s done.

Can arthritic dogs sleep on elevated beds?
Some can, and the airflow helps hot sleepers — but most arthritic dogs do better on a low, thick orthopedic slab because there’s nothing to climb and no edge pressing into sore joints. If in doubt, orthopedic first.

Do orthopedic beds help with hip dysplasia?
They relieve the symptoms — even weight distribution means less pressure on the hips — but they don’t treat the condition. Pair the bed with your vet’s management plan: weight control, appropriate exercise and any prescribed medication.

What is the best foam density for a senior dog with arthritis?
4 lb density memory foam, at least 10 cm (4 inches) thick, is the right call for most senior dogs. Go to 5 lb density if your dog weighs over 40 kg or their arthritis is advanced.