Dog-safe Christmas dinner plate — plain turkey, carrots and green beans for dogs.

Christmas Dinner for Dogs: What’s Safe and What to Avoid

Christmas dinner is the best meal of the year, and your dog knows it. Those eyes under the table are not admiring the tablecloth — they’re waiting for something to land. The good news: your dog can join in, safely, with a plate of their own. The bad news: half the classic Christmas spread is off-limits, and some of it is genuinely dangerous.

The rule of thumb is simple. Your dog can have the plain, boring parts: unseasoned turkey meat, plain vegetables, a little plain potato or sweet potato. Anything fatty, salty, seasoned, or containing the big five — chocolate, xylitol, grapes/raisins, onion/garlic, macadamia nuts — stays on the human side of the table.

Here’s the full breakdown, item by item, so you can plate up a dog-safe Christmas dinner with confidence.

The five-second rule
Before anything reaches your dog’s plate, check: is it plain? Is it boneless? Is it onion- and garlic-free? Was it cooked without alcohol, stock, or added fat? If yes to all four, you’re probably fine. If any answer is no, skip it.

The safe list: what dogs CAN have

These are the building blocks of your dog’s Christmas plate. All of them should be served plain — no butter, no gravy, no seasoning.

Plain turkey meat (boneless, skinless)

The centrepiece. Turkey breast meat is lean, high in protein, and perfectly fine for dogs — provided it’s plain. Strip off the skin (it’s all fat and seasoning) and remove every bone. Cooked turkey bones splinter, and no bone — Christmas dinner or otherwise — should ever reach a dog. Serve a few small pieces mixed into their normal dinner, or as a festive topper.
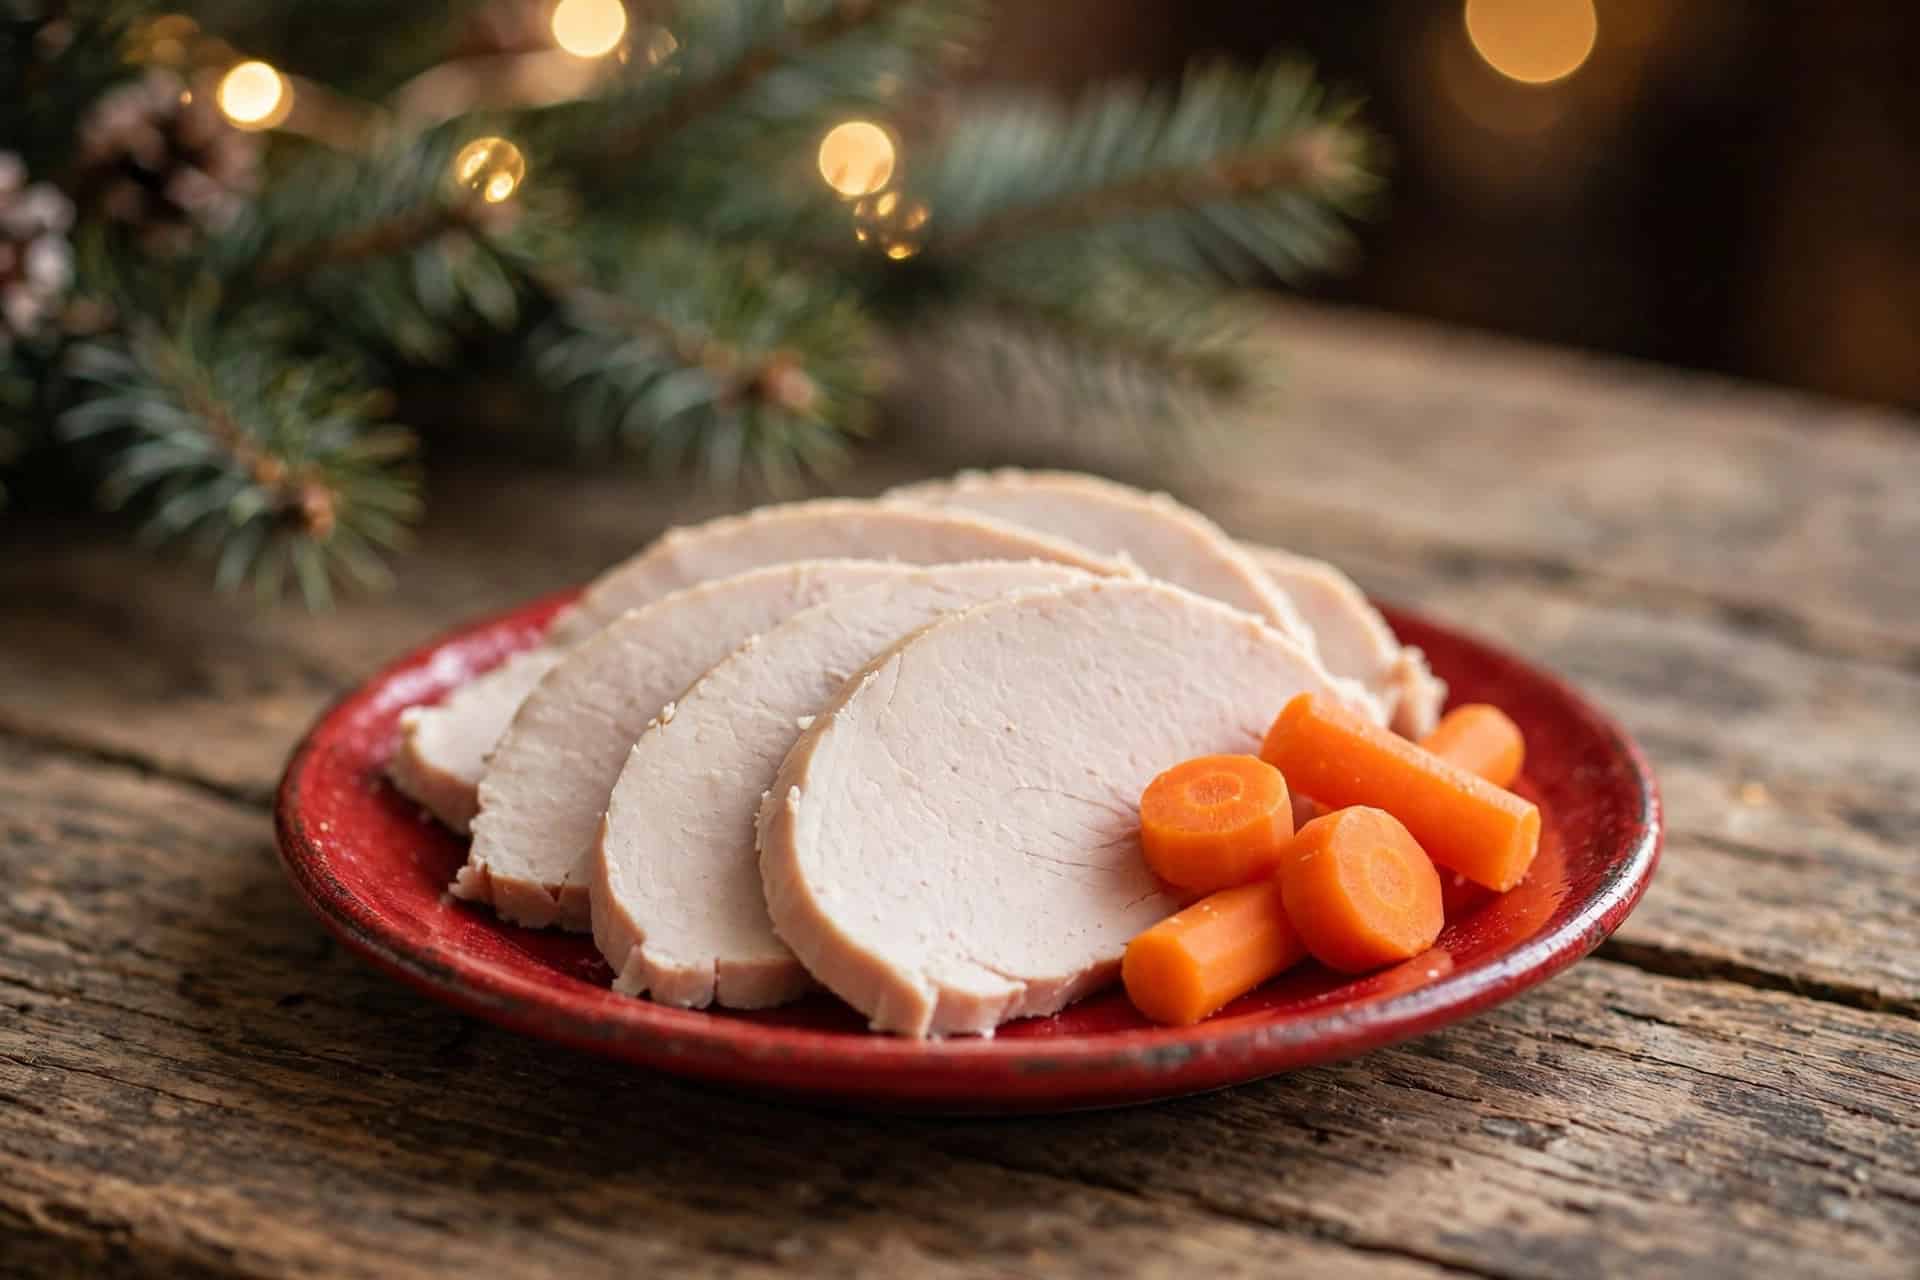
Plain sliced turkey breast for dogs with carrots

Carrots, green beans and peas

The classic veg trio is dog-safe and mostly boring in the best way. Carrots are great raw or cooked; green beans should be plain (no butter, no almonds, no casserole topping); peas are fine straight from the pod or the freezer bag. If your veg went into a buttered or seasoned dish, set some aside before the butter — a five-second habit that makes Christmas dog-proof.
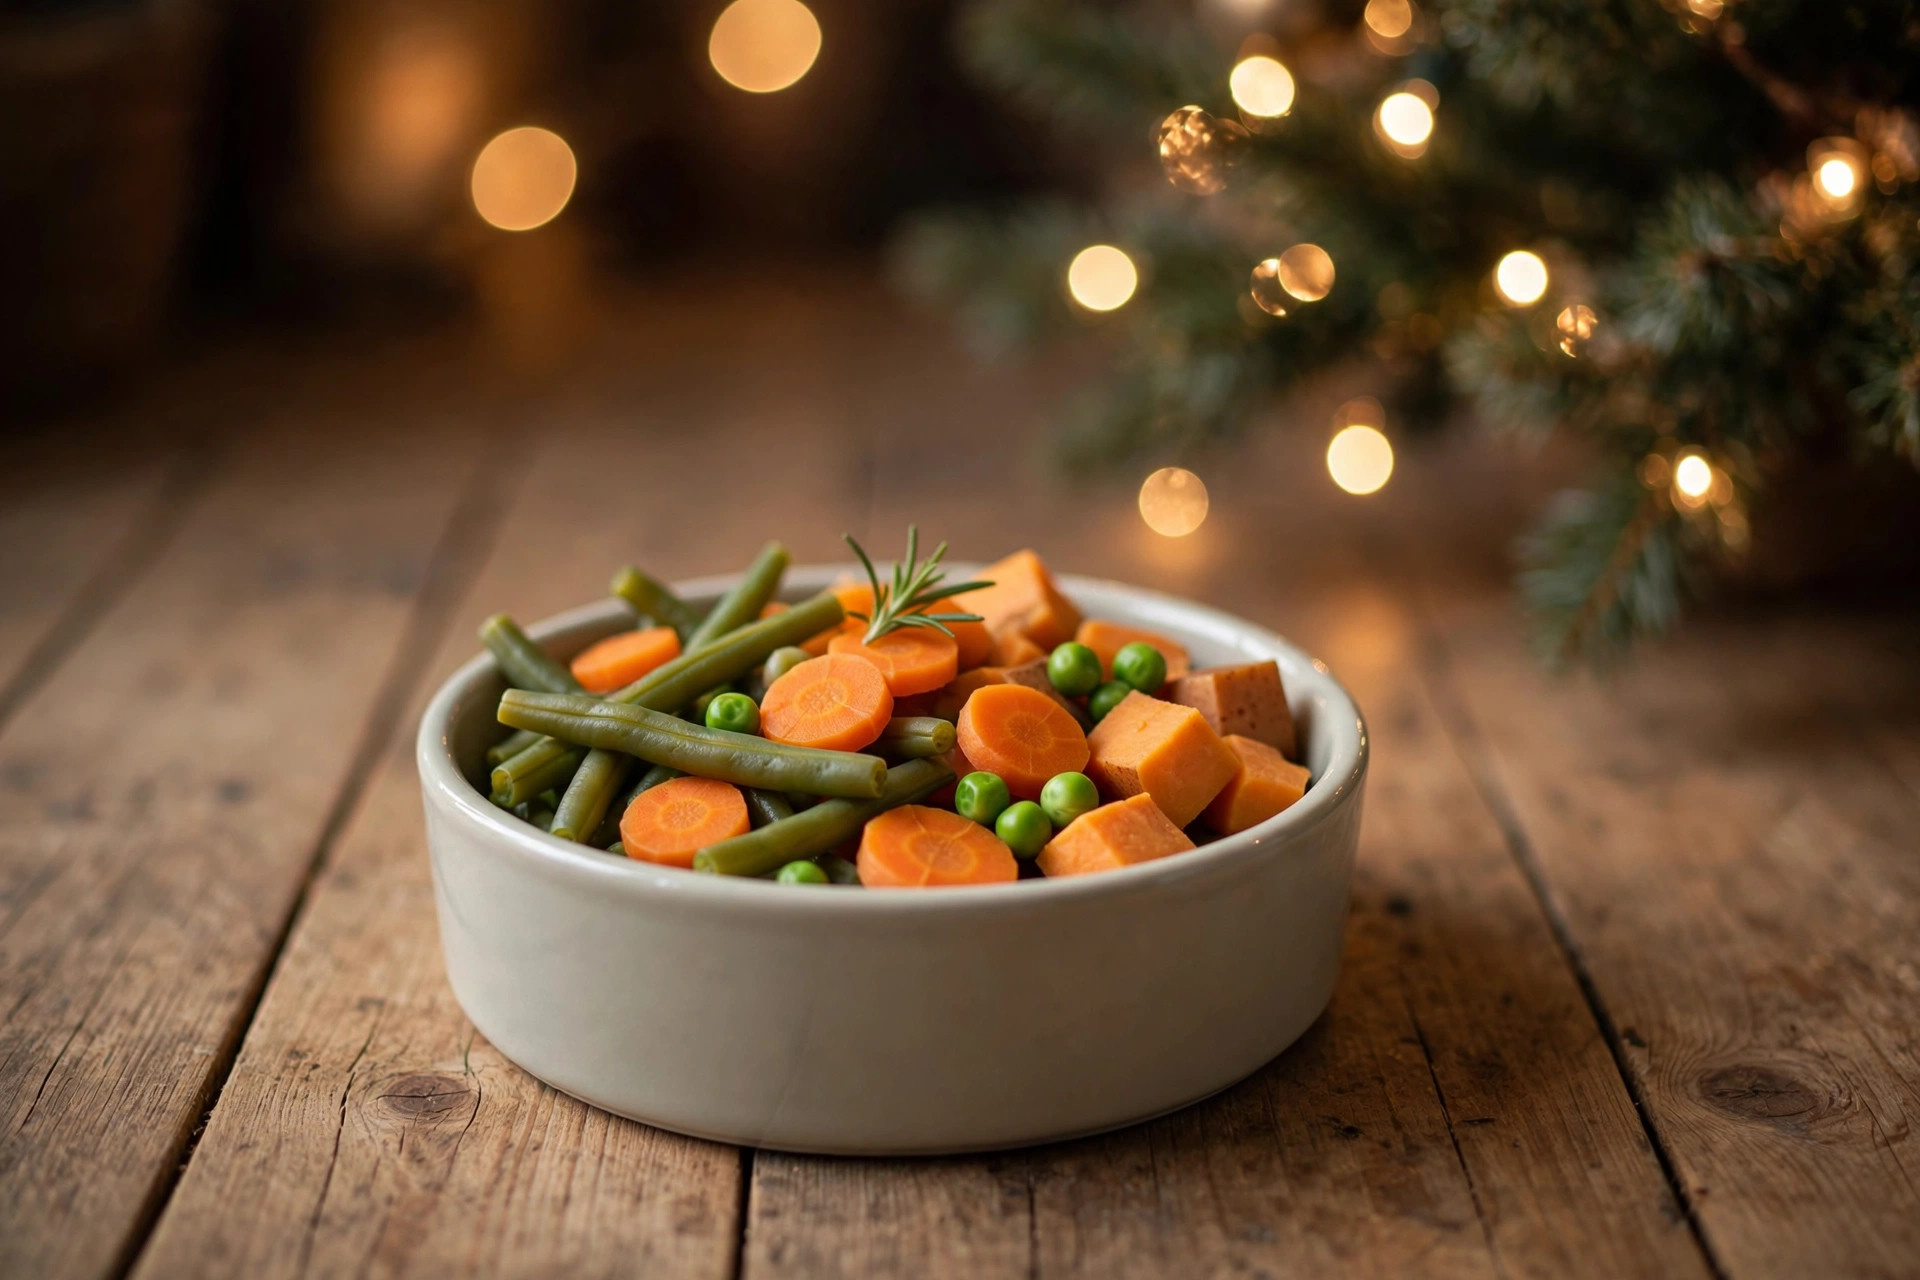
Bowl of plain Christmas vegetables for dogs

Plain potatoes and sweet potato

Mashed potato with butter and cream is a human luxury; plain boiled potato is a dog-safe filler. The same goes for sweet potato — roasted or mashed plain, it’s one of the healthiest treats you can give. Keep the portion small; starchy veg is rich, and a dog that’s used to kibble doesn’t need a mountain of it.

Cranberries (plain, unsweetened)

Fresh cranberries are safe for dogs in small amounts — they’re tart, so most dogs only nibble a few anyway. What dogs can’t have is cranberry sauce: it’s packed with sugar, and some recipes include alcohol, orange liqueur, or xylitol. A teaspoon of plain cooked cranberries is festive and safe; the jarred sauce stays away.

A little apple (no core, no seeds)

Sliced apple is a safe, crunchy addition to the dog’s plate — it’s the traditional accompaniment to pork and goose, and dogs like it too. Just skip the core and seeds (they contain tiny amounts of cyanide compounds) and don’t use cooked apple that’s been through a sugary or spiced sauce.

The danger list: what dogs must NOT have

This is the list that matters most. Christmas kitchens are full of things that look harmless and aren’t.
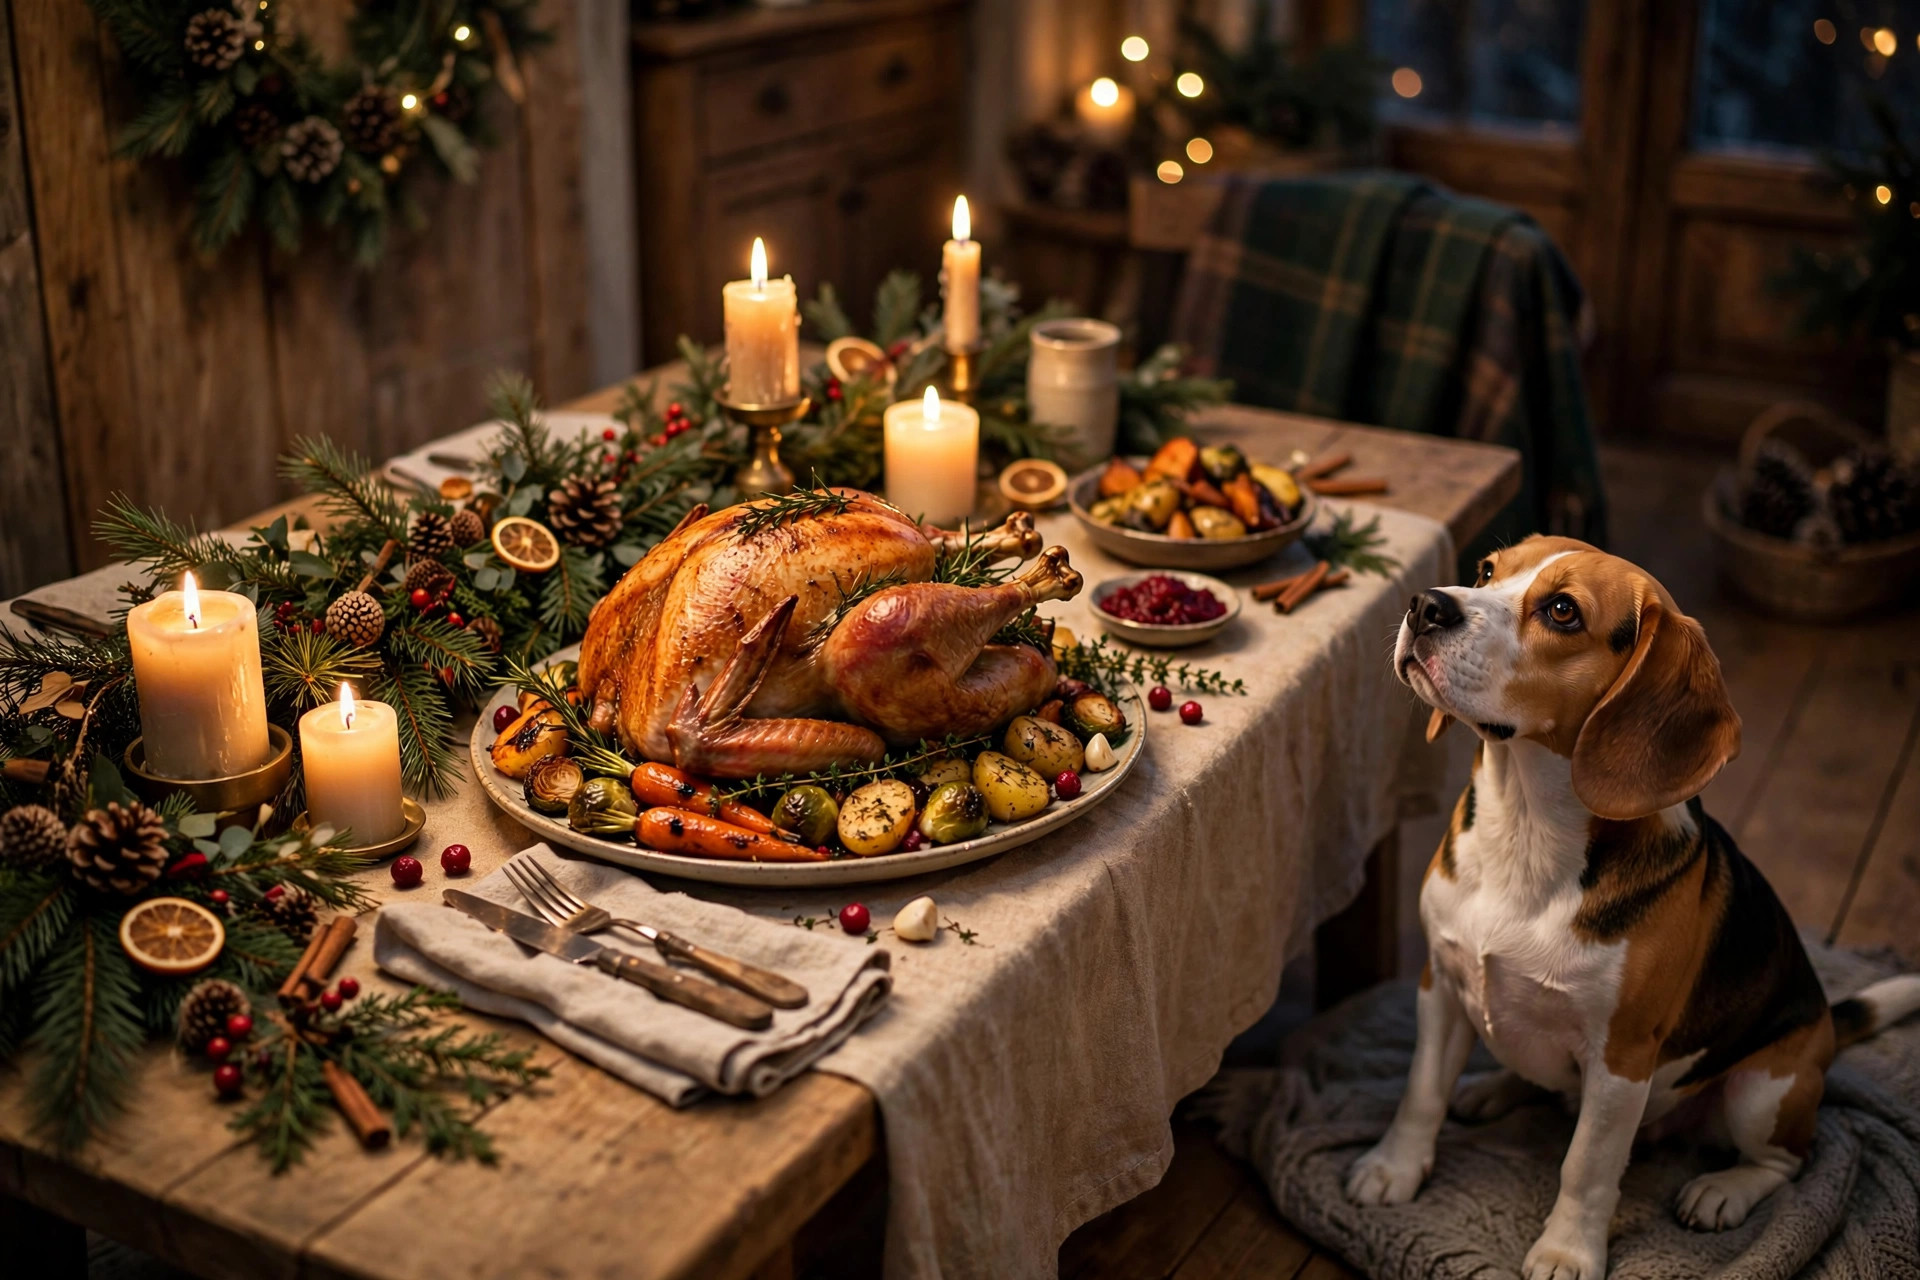
Dog sitting beside a Christmas dinner table looking up

Bones — all of them

Cooked poultry bones are the classic Christmas emergency. They splinter into sharp fragments that can tear the throat, stomach or intestines. Turkey wishbones, drumstick bones, goose carcasses — none of it. Put carcasses straight into a lidded bin, not an open bowl on the counter.

Stuffing and gravy

Both are loaded with the things dogs can’t have. Stuffing typically contains onion, garlic, butter, and sometimes sausage meat or dried fruit. Gravy is essentially concentrated fat and salt with onion or stock flavour. A tiny lick won’t kill anyone, but a bowl of it can trigger pancreatitis — an emergency vet visit on Christmas Day is nobody’s idea of festive.

Mince pies, Christmas pudding and fruit cake

Every single one is a grape/raisin risk. Mince pies and Christmas pudding are packed with dried fruit, and grapes and raisins are among the most toxic foods for dogs — even a small amount can cause kidney failure in some dogs. Add the alcohol (brandy butter, flaming pudding) and these are a hard no, kept well out of reach.

Chocolate in any form

Christmas means chocolate everywhere: advent calendars, selection boxes, liqueurs, yule log. Chocolate contains theobromine, which dogs can’t process, and dark chocolate is the worst of it. If chocolate goes missing and you suspect your dog ate it, call the vet with the type and estimated amount — don’t wait for symptoms.

Nuts, especially macadamia

Macadamia nuts are toxic to dogs. Other nuts aren’t outright poisonous but are high in fat and a choking risk. Keep the nut bowl out of paw’s reach, and sweep up shells — nut shells can cut mouths and block intestines.

Alcohol

This one sounds obvious, but dogs lap at spilled drinks and get into punch bowls. Alcohol poisoning in dogs is fast and dangerous. Keep all drinks above dog height and mop spills immediately.

Onion and garlic

They hide in everything: stuffing, gravy, roasted veg, sauces. Both damage dogs’ red blood cells, and the damage is cumulative — it builds up over days. Anything from the dinner that touched onion or garlic powder is off your dog’s plate.

How to serve your dog’s Christmas dinner

Make it special without making it risky:

  • Set aside before you season. The golden rule of dog-safe Christmas: portion out the plain meat and veg before the butter, gravy, stuffing and seasoning go in. A separate small bowl, kept aside during cooking, is all it takes.

  • Keep it small. A dog’s Christmas plate should be a side portion — maybe a quarter of their normal meal’s worth of extras — not a second full dinner. Rich food in big quantities means an upset stomach, even when every ingredient is technically safe.

  • Mix it into their normal food. The safest Christmas dinner is mostly their regular food with a few safe festive additions on top. Novel food plus excitement plus a full house is already a lot for a dog’s digestion.

  • No table scraps begging loop. It’s lovely to share, but once one guest feeds the dog, every guest feeds the dog. Nominate one person to handle the dog’s plate, and ask everyone else to keep their hands off the muzzle.

What to do if your dog eats something they shouldn’t

It happens every Christmas — a dropped mince pie, a bin raid, a helpful toddler. Here’s the triage:
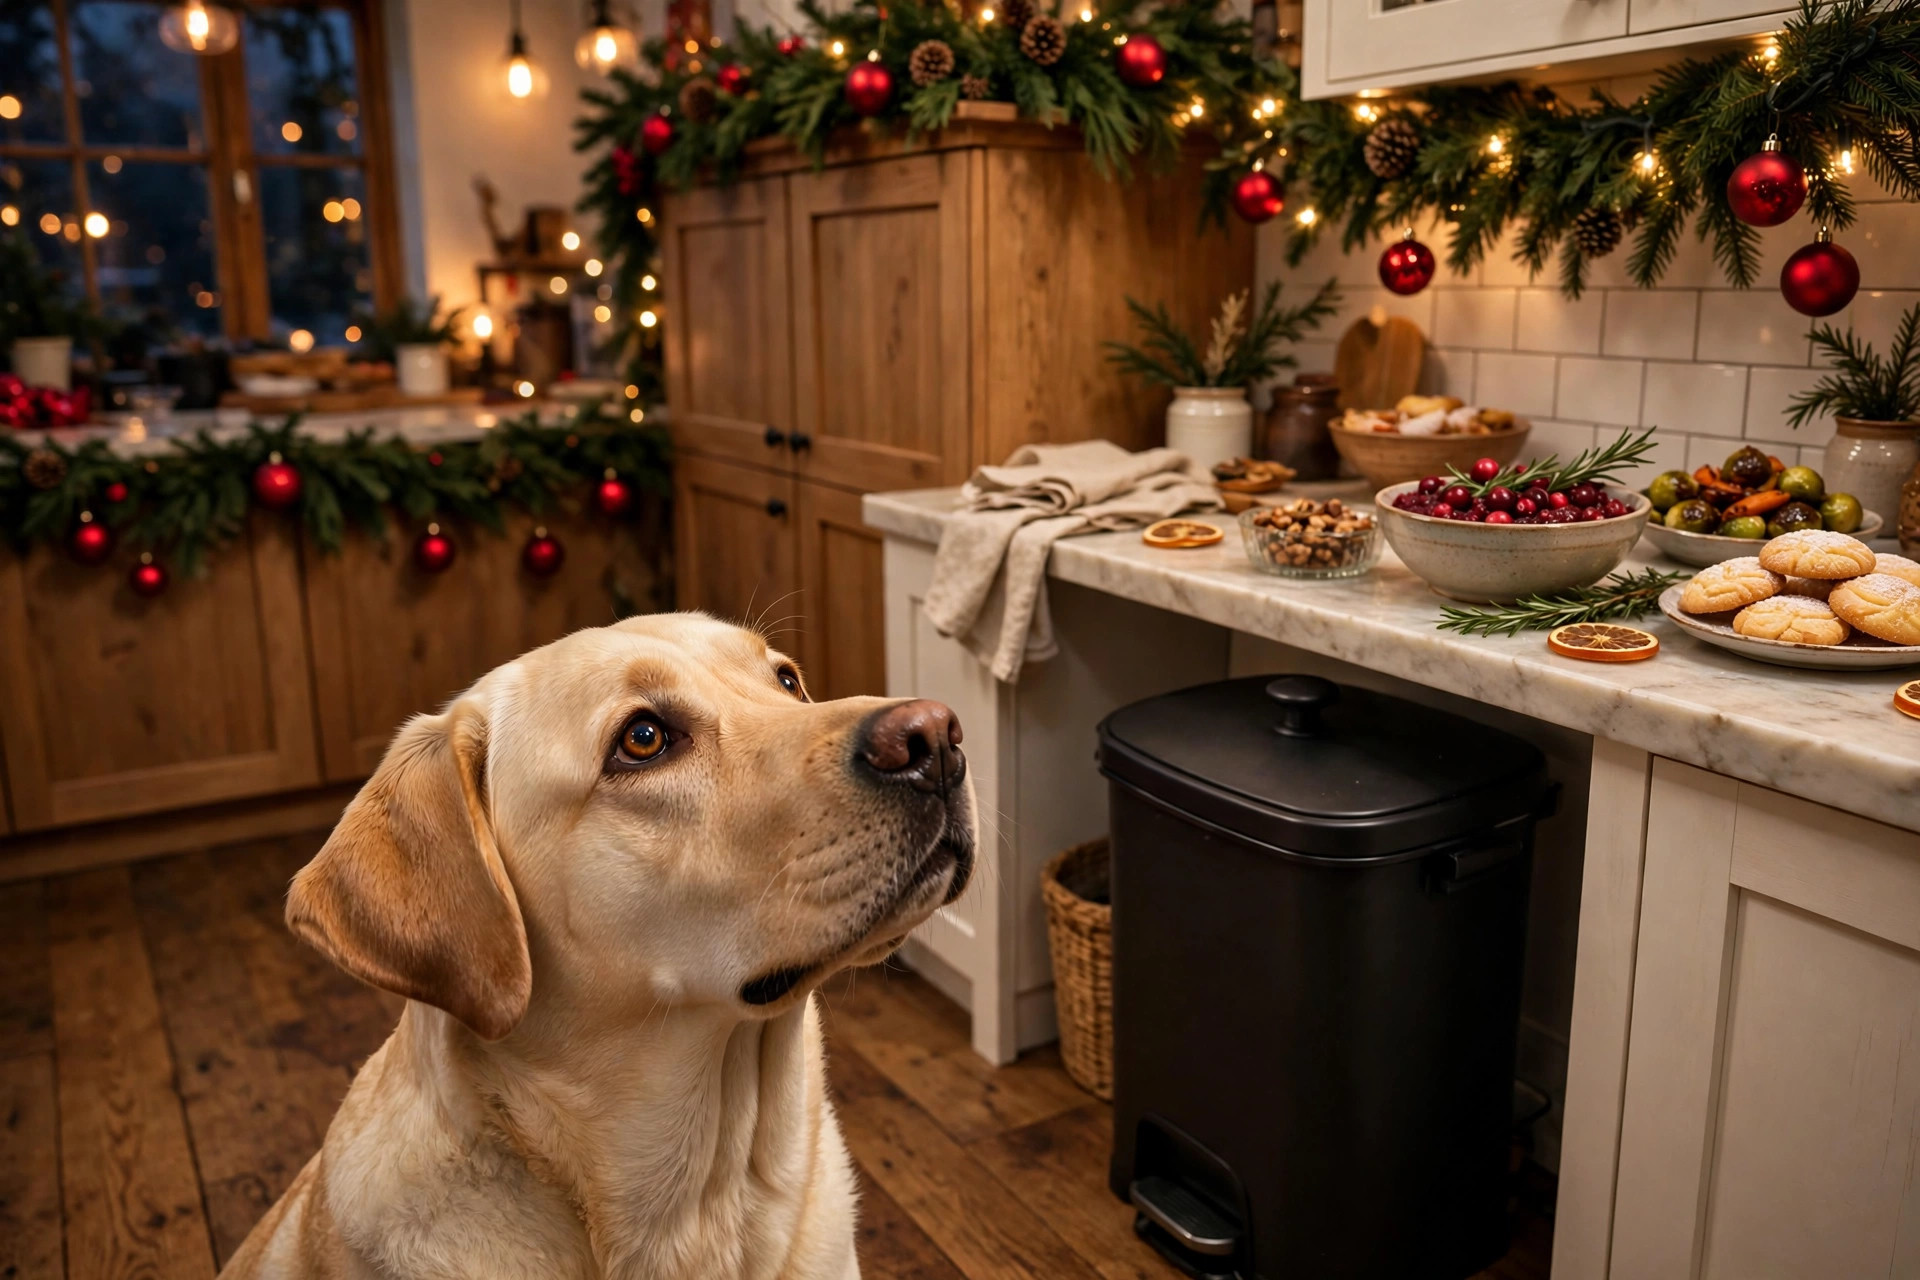
Dog in a Christmas kitchen near food on the counter

  1. Work out what and how much. Check what food is missing and roughly how much the dog could have eaten.

  2. Call your vet or the emergency vet line. Christmas Day vets are busy; calling early with the food name, amount and your dog’s weight gets you the fastest answer. Don’t wait for symptoms with raisins, chocolate or xylitol.

  3. Don’t induce vomiting unless told to. Some foods (like fatty foods) shouldn’t be vomited back up, and some dogs shouldn’t be made to vomit at all. Follow the vet’s instructions.

  4. Save the packaging. If it was a shop-bought item, keep the wrapper — the ingredient list tells the vet exactly what they’re dealing with.

Save your vet’s holiday opening hours on your phone before the big day. A two-minute check now beats a frantic search at 8pm on Christmas Day.

FAQs

Can dogs eat turkey on Christmas?
Yes — plain, boneless, skinless turkey meat is safe for dogs in small amounts. No skin, no bones, no gravy, no stuffing. The plain breast meat you set aside before seasoning is the perfect share.

What Christmas foods are toxic to dogs?
The big ones: chocolate, grapes and raisins (mince pies, Christmas pudding, fruit cake), macadamia nuts, onion and garlic, xylitol (sugar-free sweets), alcohol, and cooked bones. Rich fatty foods like gravy and stuffing can also cause pancreatitis.

Can my dog have Christmas dinner leftovers?
Some of them: plain turkey meat, plain veg, plain potato. But leftovers are risky because they’re already seasoned, sauced and mixed together. Only share the parts you set aside plain — never the finished plate.

How much turkey can I give my dog?
A few small pieces as part of their meal — roughly a quarter of their normal dinner’s worth of extras. Turkey is lean, but a sudden large amount of any new food can upset a dog’s stomach, especially on an already exciting day.

Homemade gingerbread-style dog biscuits shaped like stars and Christmas trees cooling on a wire rack

5 Christmas Dog Treats to Bake as Gifts (Dog-Safe, No Chocolate)

Christmas gift lists start earlier than you think — and if you’re anything
like me, your dog is the first name on the list. Store-bought dog treats
are fine, but homemade Christmas dog treats make a genuinely lovely gift:
for your own pup’s stocking, for the dog-obsessed friend in your life, or
as a batch to hand out at the family Christmas dinner.

These 5 recipes are all dog-safe, use everyday ingredients, and each one
packs well in jars or gift boxes — because a pile of warm biscuits is a
present, but a pile of warm biscuits in a ribbon-tied box is a gift. I’ve
also included packaging and shelf-life notes under every recipe so your
gifts arrive fresh.

Just like our other homemade treat recipes, everything below skips the
things dogs can’t have and keeps it simple enough to bake in an afternoon.

Before you bake — the Christmas safety rules
1. No chocolate, ever. Christmas baking is full of it — keep your
batch dog-only, and decorate with carob (dog-safe) if you want a
chocolatey look.
2. No nutmeg. It sneaks into human gingerbread recipes, but nutmeg
is toxic to dogs in quantity. These recipes use ginger and cinnamon
only — skip any “holiday spice mix” with unknown ingredients.
3. Xylitol check, as always. Peanut butter and any sugar-free
ingredient must be xylitol-free (also sold as “birch sugar” or “wood
sugar”). Read the label every time.
4. Watch the gift pile. Grapes, raisins (mince pies!), macadamia
nuts and alcohol are all common at Christmas and all dangerous for
dogs. Keep your dog’s gift box well away from the human one.

1. Gingerbread-Style Pup Cookies

The headliner. These look and smell like proper Christmas gingerbread —
minus the nutmeg, molasses overload and everything else dogs shouldn’t
touch. Ginger and cinnamon are fine for dogs in these small amounts, and
the cookie-cutter shapes make them perfect for gifting.

Ingredients

  • 2½ cups (250 g) oat flour (or finely ground rolled oats)
  • 1 tbsp ground ginger
  • 1 tsp ground cinnamon
  • 1 egg
  • ¼ cup (60 ml) unsweetened applesauce
  • 2 tbsp honey (optional, dogs can have small amounts)

Method

  1. Heat the oven to 175°C / 350°F. Line two baking trays.
  2. Whisk the flour, ginger and cinnamon together. Stir in the egg,
    applesauce and honey to form a firm dough — add a spoon of flour if
    it’s sticky, a splash of water if it crumbles.

  3. Roll out to about 6 mm (¼ inch) thick. Cut stars, trees and hearts
    with Christmas cutters (or a knife — rustic is fine).

  4. Bake 20–25 minutes until firm and lightly golden. Cool completely
    on a wire rack.

Makes ~30 small cookies. Keeps 2 weeks in an airtight tin, 3 months
frozen. Gift them in: a small kraft box lined with tissue, or a glass jar
with a ribbon and a hand-written tag (“Baked for [dog’s name] with love”).

Homemade gingerbread-style dog biscuits shaped like stars and Christmas trees cooling on a wire rack

2. Cranberry Apple Bites

Red, festive, and naturally sweet-tart. Cranberries are safe for dogs in
small amounts and give these bites their Christmas colour; apple keeps
them moist. No dyes needed — holiday colour straight from fruit.

Ingredients

  • 1 cup (120 g) fresh or frozen cranberries (no added sugar)
  • 1 small apple, peeled and grated
  • 2 cups (200 g) oat flour
  • 1 egg
  • 1 tbsp coconut oil, melted

Method

  1. Heat the oven to 175°C / 350°F. Line a baking tray.
  2. Blitz the cranberries to a rough chop (frozen is fine — no need to
    thaw). Mix with grated apple, egg and coconut oil.

  3. Fold in the oat flour to form a soft dough.

  4. Roll into small balls (about 2 cm / ¾ inch), flatten slightly, and
    bake 18–22 minutes until set. Cool completely.

Makes ~24 bites. Keeps 1 week in an airtight tin in the fridge, 2 months
frozen. Gift them in: a small cellophane bag tied with twine and a sprig
of rosemary — they look like tiny Christmas baubles.

Red cranberry apple dog treats in a cellophane gift bag tied with twine and a sprig of rosemary

3. Frozen “Snow” Yoghurt Pops

Not every Christmas treat comes out of the oven. These frozen pops are
the easiest recipe on this list — mix, freeze, gift. They’re especially
good for dogs in warm climates, or as a light after-dinner treat when the
baked goods are getting a bit much.

Ingredients

  • 1 cup (250 g) plain Greek yoghurt (xylitol-free)
  • ½ banana, mashed
  • 2 tbsp unsweetened shredded coconut
  • A handful of blueberries (for decoration)

Method

  1. Stir the yoghurt, banana and coconut together until smooth.
  2. Spoon into silicone moulds (star or tree shapes if you have them —
    ice-cube trays work too). Press a blueberry into the centre of each.

  3. Freeze at least 4 hours, until solid. Pop out and serve.

Makes ~12 pops (depends on mould size). Keep frozen — they’ll last
2–3 months. Gift them in: a small freezer bag inside an insulated pouch
with a tag reading “keep frozen — serve straight from the freezer”. These
are best gifted to someone local, on the same day.

Frozen star-shaped yoghurt dog treats with blueberries and a golden retriever waiting behind

4. Peanut Butter Candy-Cane Twists

These are the showpiece: two-tone twisted biscuits that look like tiny
candy canes but contain zero sugar. One half is classic peanut butter
dough, the other is tinted red with beetroot powder — a dog-safe way to
get that peppermint-swirl look.

Ingredients

  • 1 cup (260 g) smooth peanut butter (xylitol-free!)
  • ¾ cup (180 g) plain pumpkin purée
  • 2 eggs
  • 2½ cups (300 g) wholemeal or oat flour, divided
  • 1 tbsp beetroot powder (for the red half)

Method

  1. Heat the oven to 175°C / 350°F. Line a baking tray.
  2. Mix the peanut butter, pumpkin and eggs, then divide into two bowls.
    Mix 1¼ cups flour into each bowl to form two doughs — add the
    beetroot powder to one half.

  3. Roll a small rope of each dough (about the thickness of a pencil),
    twist them together, and bend the top into a cane hook.

  4. Bake 20–25 minutes until firm. Cool completely.

Makes ~16 twists. Keeps 2 weeks in an airtight tin, 3 months frozen.
Gift them in: stood upright in a small jam jar like a bouquet of candy
canes — tie the jar with ribbon and add a tag. This is the gift that gets
photographed.

Two-tone peanut butter candy cane dog biscuits standing in a glass jam jar with a red ribbon

5. Sweet Potato Wreath Chews

The simplest and the healthiest: one ingredient, sliced thin and
dehydrated (or slow-baked) into chewy “wreath” rings. Sweet potato is a
favourite for good reason — most dogs go mad for it, and it keeps well
without refrigeration.

Ingredients

  • 2 large sweet potatoes, scrubbed
  • (Optional) a pinch of cinnamon

Method

  1. Heat the oven to its lowest setting (about 120°C / 250°F). Line
    trays with baking paper.

  2. Slice the sweet potatoes into 6 mm (¼ inch) rounds. Use a small
    round cutter (or a bottle cap) to punch out the centre of each slice
    — that’s your wreath hole.

  3. Arrange on the trays, dust very lightly with cinnamon if you like,
    and bake 3–4 hours, flipping halfway, until dried but still a little
    pliable — chewy, not brittle.

  4. Cool completely. They’ll crisp up slightly as they cool.

Makes ~20 wreaths. Keeps 3–4 weeks in a paper bag or airtight jar at
room temperature. Gift them in: a clear jar with a wide red ribbon —
the orange rings stacked inside look like a string of mini wreaths.

Kraft gift box of assorted homemade Christmas dog treats with a red ribbon and gift tag

How to package dog treats as gifts

The packaging is what turns baking into gifting. A few rules I’ve
learned the hard way:

  • Always include a fresh-by date. Write it on the tag: “Best by
    [date], keep in an airtight tin.” Nobody wants to guess.

  • List the ingredients on the tag. The other dog’s owner may have
    allergy concerns — a simple list (“oats, peanut butter, egg,
    pumpkin”) is a kindness.

  • Separate by type. Put the frozen snow pops in their own bag (they
    melt), and keep the chewy wreaths away from the soft bites so nothing
    goes soggy.

  • Don’t use real chocolate anywhere in the gift box — not even a
    decorative chocolate coin on top. It sends the wrong signal, and one
    dropped box is all it takes.

FAQs

Can dogs eat Christmas cookies?
Human Christmas cookies are usually a no — chocolate, nutmeg, xylitol
and macadamia nuts are all common in them. These recipes are built
dog-first, so they’re the safe way to let your pup join in.

How far ahead can I bake Christmas dog treats?
The baked recipes (gingerbread cookies, cranberry bites, candy-cane
twists) freeze beautifully for up to 3 months. Bake a batch now, freeze
it, and you’ll have gifts ready all December without a last-minute
panic.

What should I never put in dog treats at Christmas?
Chocolate, xylitol (birch sugar), nutmeg, grapes and raisins, macadamia
nuts, alcohol, and onion or garlic powder. When in doubt, leave it out —
plain ingredients are always safest.

Can puppies have these treats?
Mostly yes, in small pieces — but skip the honey for very young puppies
and keep portions tiny. As always, introduce one new treat at a time and
watch for any tummy upset.

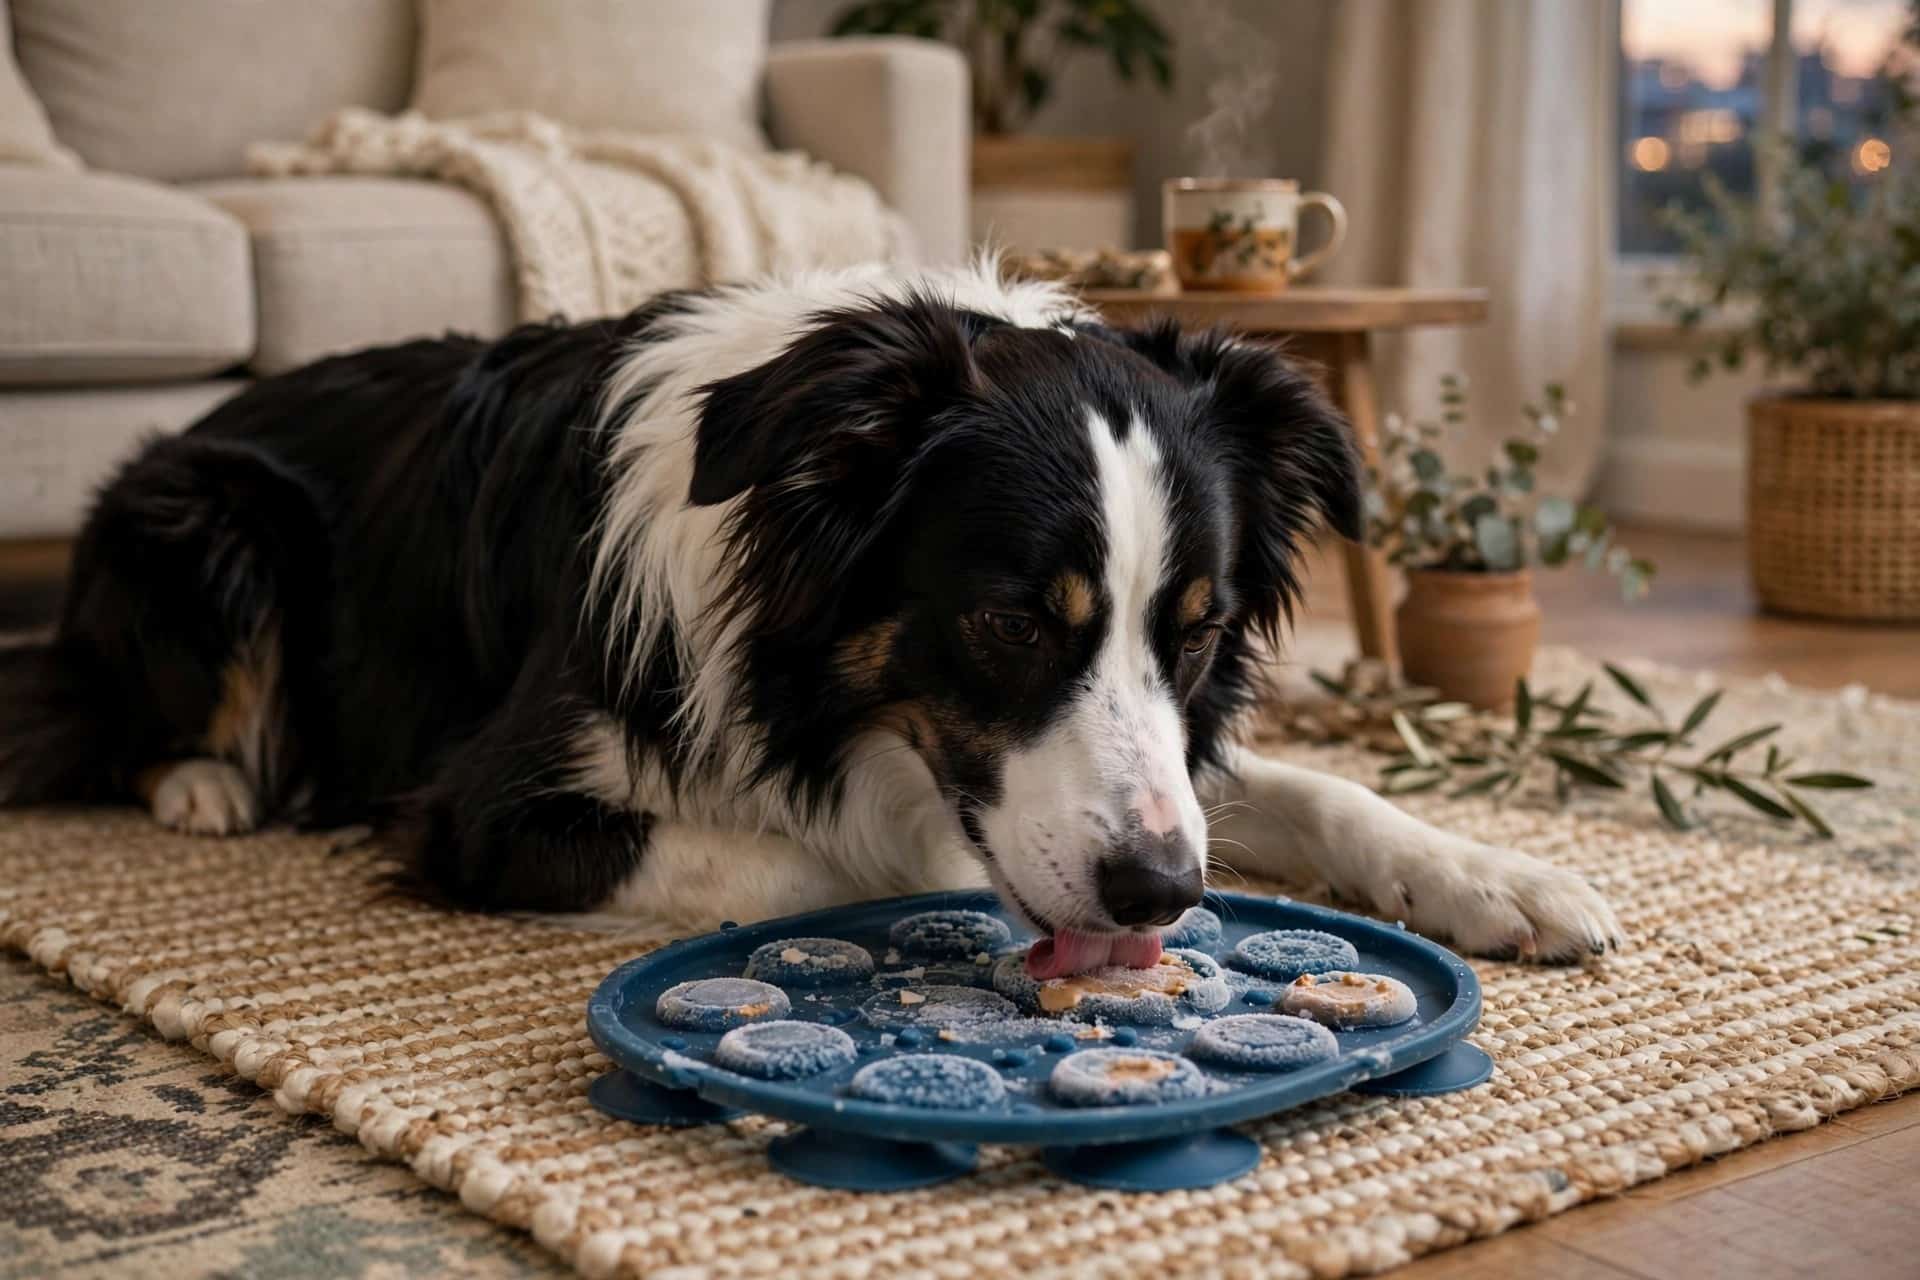
Dog enjoying a pumpkin lick mat — an easy freezable enrichment treat

10 Easy Lick Mat Recipes for Dogs (Freezable Treats That Calm & Enrich)

If your dog inhales dinner in nine seconds and then spends the evening
looking for trouble, a lick mat might be the cheapest upgrade you ever
make. It’s a simple silicone mat with a textured surface: spread it with
something tasty, freeze it, and let your dog work at it lick by lick.

Licking is naturally soothing for dogs — it releases calming endorphins,
which is why lick mats have become a go-to for fireworks nights, bath
time, crate training and dogs who just need a job to do. Freezing the
spread stretches a two-minute snack into twenty minutes of quiet,
focused enrichment, and it slows down fast eaters at the same time.

Here are 10 easy lick mat recipes for dogs, from a two-ingredient
classic to a shiny-coat sardine smash. Every one freezes well, so you
can batch-prep a week of calm in one go.

Calm dog enjoying a frozen lick mat on a rug

Before You Start: The Basics

You only need three things:

  • A silicone lick mat (suction cups on the back stop it sliding)
  • Dog-safe spreads and toppings from the recipes below
  • Freezer space for a flat tray or plate

Safety first, every time:
– Peanut butter must be xylitol-free — check the label; xylitol
(sometimes listed as “birch sugar”) is extremely toxic to dogs.
– Always supervise. A determined chewer can bite chunks off a mat —
take it away once the food is gone.
– Treats and toppers should stay under 10% of your dog’s daily
calories. These recipes are enrichment, not meals.
– Introduce new ingredients one at a time, in small amounts,
especially for puppies and dogs with sensitive stomachs.
– Wash the mat with hot soapy water after every use — the grooves
trap food.

The 10 Lick Mat Recipes

1. Pumpkin Peanut Butter Classic

The one to start with. Spread 3 tbsp pumpkin purée (plain purée, not
pie filling) mixed with 1 tbsp xylitol-free peanut butter across the
mat in a zigzag. Freeze 2–3 hours. Pumpkin is gentle on digestion and
most dogs lose their minds for this combo.

2. Banana Yoghurt Swirl

Mash half a ripe banana into 3 tbsp plain Greek yoghurt (no
added sugar or sweeteners). Swirl it into the grooves and freeze 2
hours. Probiotics from the yoghurt plus potassium from the banana make
this the gut-friendly option.

Blueberry and Greek yoghurt swirl spread on a silicone lick mat

3. Blueberry Kefir Cooler

Pour 4 tbsp plain kefir over the mat and press a small handful of
blueberries
(halved for small dogs) into it. Freeze 2–3 hours.
Antioxidant-rich, tangy, and brilliant for hot afternoons.

Sweet potato mash with fresh parsley spread on a lick mat

4. Sweet Potato & Parsley Mash

Spread 4 tbsp mashed cooked sweet potato over the mat and scatter
1 tsp finely chopped fresh parsley on top. Freeze 2 hours. Sweet
potato brings fibre and beta-carotene; parsley is the classic
doggy-breath helper in small amounts.

5. Bone Broth Gelatin Layer

Warm 100ml low-sodium bone broth (no onion or garlic), pour it
thinly over the mat so it settles into every groove, then chill in the
fridge 1 hour to set, or freeze 2 hours for a longer session. Hydrating,
joint-friendly, and ideal for senior dogs.

6. Apple & Cinnamon Crunch

Spread 3 tbsp unsweetened applesauce, sprinkle with a pinch of
Ceylon cinnamon
and 1 tbsp finely diced apple (no seeds, no core).
Freeze 2 hours. Smells like apple pie; the diced apple keeps a little
crunch even frozen.

7. Sardine Smash (Shiny-Coat Special)

Mash 2 sardines in water (drained, no added salt) with 1 tbsp
mashed cooked egg
and spread thinly. Freeze 1–2 hours — this one is
pungent, so maybe an outdoor mat. The omega-3s are fantastic for skin
and coat; once a week is plenty.

8. Watermelon Mint Refresher

Blend a cup of seedless watermelon with 2 mint leaves, pour
over the mat and freeze 2 hours. Mostly water, so it’s the lightest
recipe here — perfect post-walk cool-down in warm weather.

9. Golden Carrot & Turmeric

Mix 3 tbsp finely grated carrot into 3 tbsp plain yoghurt with
¼ tsp turmeric and a tiny pinch of black pepper (it helps the
turmeric absorb). Freeze 2 hours. A gentle anti-inflammatory boost that
suits active and older dogs alike.

10. Berry Oat Smoothie

Blend a handful of strawberries, 3 tbsp rolled oats and 3
tbsp plain yoghurt
into a thick smoothie, spread and freeze 2–3
hours. The oats make it extra filling — a good one before you head out
and want the mat to last.

Stack of prepared frozen lick mats stored in a freezer

Freezing & Storage Tips

  • Spread thinly. A thin layer frozen hard lasts far longer than a thick
    layer served soft.

  • Freeze mats flat on a tray; once solid, stack them with baking paper
    between each.

  • Prepped mats keep up to a week in the freezer. Thaw 2–3 minutes at
    room temperature so your dog’s tongue doesn’t stick.

  • Rotate recipes across the week — novelty is half the enrichment.

FAQs

How long will a lick mat keep my dog busy?
A soft spread lasts 2–5 minutes; frozen, most dogs get 15–25 minutes.
Determined lickers finish faster — spread thinner and freeze longer.

Can puppies use lick mats?
Yes, from around 8–10 weeks, with soft, simple recipes like the banana
yoghurt swirl. Keep portions tiny and always supervise.

How often can I give a lick mat?
Once a day is fine for most dogs as part of their treat allowance.
Lower-calorie recipes like watermelon or bone broth suit daily use;
richer ones like the sardine smash are a weekly treat.

How do I clean a lick mat properly?
Hot soapy water and a bottle brush for the grooves, or the top rack of
the dishwasher. Let it dry fully before reusing so no moisture sits in
the texture.

A lick mat won’t fix every behaviour problem — but twenty quiet minutes
while you drink a coffee in peace? That part is very real. Start with
the pumpkin classic, freeze a few spares, and let the licking do the
rest.

Homemade Halloween dog treats — pumpkin ghost biscuits decorated with yoghurt on a baking tray

5 Halloween Dog Treats Your Pup Will Love (Dog-Safe, No Chocolate)

Halloween is all about treats — and your dog knows it. The second the sweet bowls come out, you’ll get the look. The problem: almost everything in a human Halloween haul is off-limits for dogs. Chocolate is toxic, sugar-free sweets can contain xylitol (genuinely dangerous), and raisins are a hard no.

The good news: dog-safe Halloween treats are easy to make at home, and most of them use ingredients you probably already have — pumpkin, peanut butter, oats, applesauce. Here are 5 Halloween dog treat recipes that look spooky, taste amazing (to a dog), and take under an hour. Just like our homemade peanut butter treats, every recipe below is built on simple, dog-safe ingredients.

Before you bake — the 4 rules
1. Peanut butter must be xylitol-free. Check the label: xylitol (also listed as “birch sugar”) is extremely toxic to dogs.
2. Use plain pumpkin purée, NOT pumpkin pie filling — the filling has spices like nutmeg, which dogs shouldn’t eat.
3. Never chocolate. For “chocolatey” decoration, use carob chips — they’re dog-safe and sold in most pet and health-food shops.
4. Treats are treats. Keep them under ~10% of your dog’s daily food, and introduce new recipes one at a time.

Homemade Halloween dog treats — pumpkin ghost biscuits decorated with yoghurt on a baking tray

1. Pumpkin Ghost Bites

The classic. Soft-baked pumpkin biscuits cut into ghosts and “iced” with plain yoghurt faces.

Ingredients

  • 1 cup (240 g) plain pumpkin purée
  • 2½ cups (250 g) oat flour (or finely ground oats)
  • 1 egg
  • 3 tbsp plain Greek yoghurt (for the ghost faces)

Method

  1. Heat the oven to 175°C / 350°F. Line a baking tray.
  2. Mix pumpkin, egg and flour into a firm dough. If it’s sticky, add flour a spoon at a time.
  3. Roll out to about 6 mm (¼ inch) thick. Cut ghost shapes with a cutter, or a knife — wobbly ghosts are fine, they’re ghosts.
  4. Bake 25–30 minutes until firm. Cool completely.
  5. Pipe or dab on yoghurt faces (two eyes, one surprised mouth). Serve once the yoghurt has set a little.

Makes ~24 small biscuits. Keeps 1 week in an airtight tin, 2 weeks in the fridge, 3 months frozen.

Peanut butter mummy bone dog treats with yoghurt bandages and carob chip eyes

2. Peanut Butter Mummy Bones

Crunchy peanut butter and pumpkin biscuits with yoghurt “bandages”.

Ingredients

  • ½ cup (130 g) smooth peanut butter (xylitol-free!)
  • ¾ cup (180 g) plain pumpkin purée
  • 1 egg
  • 2 cups (240 g) wholemeal flour (or oat flour)
  • 2–3 tbsp plain Greek yoghurt + a few carob chips, to decorate

Method

  1. Heat the oven to 175°C / 350°F.
  2. Stir peanut butter, pumpkin and egg together, then mix in the flour to form a dough. Add a splash of water if it crumbles.
  3. Roll to 6 mm (¼ inch), cut bone shapes, bake 20–25 minutes until golden and hard.
  4. Cool fully. Drizzle yoghurt in zigzag “bandage” stripes and press on two carob chips for eyes.

Makes ~20 bones. Storage as above.

Homemade apple and cinnamon dog cookies cooling on a wire rack

3. Apple & Cinnamon Cauldron Cookies

Warm-spiced, naturally sweet, and the easiest dough on this list — no rolling pin battles, just drop and flatten.

Ingredients

  • 1 cup (240 g) unsweetened applesauce
  • 1 egg
  • 2 cups (200 g) oat flour
  • 1 tsp cinnamon

Method

  1. Heat the oven to 175°C / 350°F.
  2. Mix everything into a soft dough.
  3. Drop teaspoons of dough onto a lined tray and flatten with a fork.
  4. Bake 18–22 minutes until set and lightly golden.

Makes ~30 small cookies. A good pick for older dogs — bake 5 minutes less for a softer chew.

Frozen berry and yoghurt Halloween dog treats in pumpkin-shaped moulds

4. Frozen “Bloody” Berry Pops

No-bake, two ingredients, and the red berry layer makes them look properly Halloween-y in photos — very pin-worthy.

Ingredients

  • 1 cup (245 g) plain yoghurt (check: no xylitol, no artificial sweeteners)
  • ½ cup (75 g) strawberries or raspberries

Method

  1. Blend the berries until smooth.
  2. Spoon a layer of yoghurt into silicone moulds (pumpkin or skull shapes if you have them), then a layer of berry purée. Swirl with a cocktail stick for a “bloody” marbled look.
  3. Freeze at least 4 hours. Pop out and serve outside or on an easy-clean floor — they melt red.

Makes ~12 pops depending on mould size. Keeps 1 month in the freezer.

Sweet potato jack-o'-lantern dog chews with carved faces on a baking tray

5. Sweet Potato Jack-o’-Lantern Chews

One ingredient, endless patience payoff: chewy sweet potato rounds with little carved faces.

Ingredients

  • 2 large sweet potatoes
  • Optional: 1 tsp coconut oil and a pinch of turmeric for deeper orange colour

Method

  1. Heat the oven to 120°C / 250°F (low and slow is the trick).
  2. Slice the sweet potatoes into rounds about 6 mm (¼ inch) thick.
  3. If you like, cut tiny triangle eyes into a few rounds with a small knife or a straw.
  4. Lay on a lined tray (brush lightly with coconut oil if using) and bake 2½–3 hours, turning halfway, until chewy-dry at the edges.
  5. Cool completely — they firm up as they cool.

Makes ~25 chews. Keeps 2 weeks in the fridge. Great for dogs who can’t have grains.

Quick safety recap

  • ✅ Pumpkin, peanut butter (xylitol-free), apples, berries, sweet potato, oats, plain yoghurt, carob — all dog-safe in treat-sized amounts.
  • ❌ Chocolate, xylitol/birch sugar, raisins and grapes, nutmeg, cooked bones, and anything “sugar-free” you haven’t label-checked.
  • 🎃 Real pumpkin décor: plain pumpkin flesh is fine for dogs, but mouldy or painted pumpkins are not — keep carved pumpkins out of reach once they’re past their best.

FAQs

Can puppies have these treats? Yes, in small pieces, from about 12 weeks — start with the softer recipes (1 and 3 baked a little less) and just one or two pieces the first day.

My dog has a sensitive stomach. Which recipe is gentlest? The Pumpkin Ghost Bites. Pumpkin is famously easy on digestion, and there are only three ingredients to keep track of.

Can I freeze the baked biscuits? Yes — all the baked recipes freeze for up to 3 months. Defrost at room temperature for an hour before serving.

Final word

Your dog doesn’t know what Halloween is — but a tray of pumpkin ghosts might convince them it’s the best day of the year. Bake one batch this weekend, and tell us in the comments which recipe got the biggest tail wag.

Pin this for later 📌 — and if your pup is more of a savoury soul, try our homemade peanut butter treats next.

Apple Crisp Dog Treats Recipe

Apple crisp dog treats combine the natural sweetness of fresh apples with wholesome oats and nutritious ingredients to create treats that dogs absolutely crave. Apples provide essential vitamins, minerals, and dietary fiber that support digestive health and overall wellness while offering natural breath-freshening properties. The crispy texture delivers satisfying crunch that encourages thorough chewing, promoting dental health and reducing plaque buildup. This straightforward recipe requires minimal preparation time while producing treats that remain fresh for extended periods. The combination of natural fruit flavors and crispy texture makes these treats ideal for training rewards, special occasions, or daily treats that support your dog’s nutritional needs.

Ingredients

This recipe requires two medium apples (cored and finely diced), one cup rolled oats, one-half cup natural peanut butter (xylitol-free), one egg, one-quarter cup honey, and one-half cup whole wheat flour. Optional additions include one-quarter teaspoon cinnamon or one-half teaspoon vanilla extract for enhanced flavor. All ingredients should be fresh, dog-safe, and of high quality to ensure maximum nutritional benefit and safety for your canine companion.

Instructions

Begin by preheating your oven to 350°F (175°C) to achieve the perfect crispy texture. In a large mixing bowl, combine one-half cup natural peanut butter with one egg, mixing thoroughly until completely incorporated. Add two medium diced apples (cored and finely diced) and one-quarter cup honey, stirring until evenly distributed throughout the mixture. Gradually add one cup rolled oats, mixing continuously until the mixture becomes thick and manageable.

Stir in one-half cup whole wheat flour until the dough reaches a firm consistency. If desired, add cinnamon or vanilla extract at this stage, mixing until the flavoring is evenly distributed. Transfer the dough to a lightly floured surface and roll to approximately one-quarter inch thickness.

Using dog-bone-shaped cookie cutters or other pet-friendly shapes, cut out individual treats. Place treats on a parchment-lined baking sheet, spacing them approximately one inch apart to allow for even baking and proper air circulation. Bake for twenty to twenty-five minutes until the treats achieve a light golden color and firm, crispy texture throughout.

Remove from the oven and allow to cool completely on the baking sheet before transferring to an airtight container for storage. The treats will continue to crisp as they cool, achieving optimal texture and crunchiness.

Nutritional Benefits

Apples provide vitamin C, potassium, and dietary fiber essential for immune support and digestive health. Rolled oats deliver beta-glucans and antioxidants that support heart health and sustained energy. Peanut butter contributes protein and healthy fats for muscle development and coat health. Honey offers natural antimicrobial properties and trace minerals. The combination creates treats addressing multiple nutritional needs while remaining easily digestible.

Storage and Serving

Store baked treats in an airtight container at room temperature for up to two weeks or refrigerate for one month. Freeze for up to three months for extended storage. Serve one to three treats daily depending on your dog’s size and weight, incorporating them into the recommended 10% daily treat allowance. Always introduce new treats gradually to monitor for any adverse reactions.

Conclusion

Apple crisp dog treats deliver wholesome, delicious nutrition in every bite. This easy recipe combines fresh fruit with nutritious ingredients while requiring minimal time and effort. Your dog will eagerly anticipate these satisfying, crunchy homemade treats.

Crunchy Peanut Butter Dog Cookies – Easy Homemade Recipe

Crunchy peanut butter dog cookies deliver the perfect combination of satisfying texture and irresistible flavor that dogs absolutely crave. The crunchy texture provides natural dental benefits through gentle abrasion while encouraging thorough chewing, which promotes oral health and reduces plaque buildup. Peanut butter offers exceptional nutritional value with high protein content, healthy fats, and essential vitamins that support muscle development, coat health, and overall wellness.

This straightforward recipe requires minimal ingredients and preparation time while producing treats that rival commercial options in quality and nutrition. The baking process creates cookies that remain fresh for extended periods, making them ideal for training rewards, special occasions, or daily treats.

Ingredients

This recipe calls for one cup natural peanut butter (xylitol-free), one-half cup coconut oil, one egg, two cups whole wheat flour, and one-quarter cup honey. Optional additions include one-half teaspoon vanilla extract or one-quarter teaspoon cinnamon for enhanced flavor. All ingredients should be fresh, dog-safe, and of high quality to ensure maximum nutritional benefit and safety for your canine companion.

Instructions

Begin by preheating your oven to 325°F (163°C) to achieve the perfect crunch without burning the cookies. In a large mixing bowl, combine one cup natural peanut butter with one-half cup coconut oil, mixing thoroughly until the ingredients reach a uniform consistency. Add one egg and mix until completely incorporated. Gradually add two cups whole wheat flour, stirring continuously until the dough becomes thick and manageable. Stir in one-quarter cup honey, mixing until evenly distributed throughout the dough. If desired, add vanilla extract or cinnamon at this stage.

Transfer the dough to a lightly floured surface and roll to approximately one-quarter inch thickness. Using dog-bone-shaped cookie cutters or other pet-friendly shapes, cut out individual cookies. Place cookies on a parchment-lined baking sheet, spacing them approximately one inch apart to allow for even baking and air circulation.

Bake for twenty-five to thirty minutes until the cookies achieve a light golden color and firm, crunchy texture throughout. The cookies should feel solid when cooled but may retain slight softness in the center. Remove from the oven and allow to cool completely on the baking sheet before transferring to an airtight container for storage.

Nutritional Benefits

Peanut butter provides exceptional protein content essential for muscle development and maintenance. Coconut oil contributes healthy fats that support skin and coat health while offering anti-inflammatory benefits. Whole wheat flour delivers fiber for digestive support and sustained energy release. The combination creates treats that address multiple nutritional needs while remaining easily digestible and gentle on sensitive stomachs.

Storage and Serving

Store baked cookies in an airtight container at room temperature for up to ten days or refrigerate for three weeks. Freeze for up to three months for extended storage. Serve one to three cookies daily depending on your dog’s size and weight, incorporating them into the recommended 10% daily treat allowance. Always introduce new treats gradually to monitor for any adverse reactions.

Conclusion

Crunchy peanut butter dog cookies provide wholesome, delicious treats that support your dog’s health and happiness. This easy recipe delivers exceptional nutrition in every bite while requiring minimal time and effort. Your dog will eagerly anticipate these satisfying, crunchy homemade cookies.

Peanut Butter Balls for Dogs – Step-by-Step Homemade Recipe

Peanut butter balls for dogs represent a delightful frozen treat that combines natural protein, healthy fats, and irresistible flavor in one delicious package. These no-bake treats require minimal preparation time while delivering exceptional nutritional value through wholesome, dog-safe ingredients. Peanut butter provides essential protein and healthy fats that support muscle development and coat health, while the frozen format offers cooling relief during warm weather. This straightforward recipe yields treats that dogs absolutely love, making them perfect for training rewards, special occasions, or simply showing your furry friend extra affection. The step-by-step approach ensures success even for first-time treat makers.

Ingredients

You will need one cup natural peanut butter (xylitol-free), one-half cup coconut oil, one-quarter cup honey, and one cup rolled oats. Optional additions include one-half teaspoon vanilla extract or one-quarter teaspoon cinnamon for enhanced flavor. All ingredients should be dog-safe and of high quality to ensure maximum nutritional benefit and safety for your canine companion.

Step-by-Step Instructions

Step 1: Prepare Your Workspace
Begin by gathering all ingredients and materials. Line a baking sheet with parchment paper or silicone mats. Prepare a small bowl of water for moistening your hands, which prevents the mixture from sticking during the ball-forming process.
Step 2: Combine Base Ingredients
In a medium mixing bowl, combine one cup natural peanut butter with one-half cup coconut oil. Mix thoroughly until the ingredients are completely blended and reach a uniform consistency. The coconut oil helps create the frozen texture while adding nutritional value.
Step 3: Add Sweetness and Texture
Stir in one-quarter cup honey, mixing until evenly distributed throughout the peanut butter mixture. Add one cup rolled oats gradually, stirring continuously until the mixture reaches a thick, moldable consistency. If desired, add vanilla extract or cinnamon at this stage, stirring until the flavoring is evenly distributed.
Step 4: Form the Balls
Moisten your hands slightly with water to prevent sticking. Scoop approximately one tablespoon of mixture and roll between your palms to form a compact ball. Place each completed ball on the prepared baking sheet. Continue until all mixture is formed into balls, spacing them approximately one inch apart.
Step 5: Initial Freezing
Place the baking sheet in the freezer for one hour until the balls become firm. This initial freezing prevents the balls from losing their shape during the final storage process.
Step 6: Final Storage
Transfer the frozen balls to an airtight container for long-term freezing. Store for up to three months in the freezer. Alternatively, refrigerate for up to one week if serving within a shorter timeframe.

Serving and Storage

Serve one frozen ball as an occasional treat or training reward. Frozen treats provide cooling relief during warm weather while naturally lasting longer than room-temperature treats. Always supervise your dog while enjoying frozen treats to prevent choking hazards. Thaw slightly if your dog has sensitive teeth or prefers softer treats.

Conclusion

Peanut butter balls for dogs deliver homemade goodness in frozen form. This easy step-by-step recipe requires minimal effort while providing maximum enjoyment for your canine companion. Your dog will eagerly anticipate these wholesome, delicious treats.

Sweet Potato Carrot Dog Treats: Nutritious Homemade Recipe

Sweet potato and carrot dog treats represent an exceptional combination of two nutrient-dense vegetables that dogs naturally enjoy. Sweet potatoes provide exceptional nutritional value with high beta-carotene content, supporting eye health and immune function while offering natural sweetness that appeals to canine palates.
Carrots contribute essential vitamins, minerals, and fiber while promoting dental health through their natural abrasive texture. Together, these vegetables create treats that address multiple nutritional needs while remaining gentle on sensitive digestive systems. This straightforward recipe requires minimal ingredients and preparation time, making it perfect for busy pet parents seeking wholesome homemade alternatives to commercial treats.

Ingredients

This recipe calls for two cups finely grated sweet potato, one and one-half cups finely grated carrot, one egg, and one-half cup whole wheat flour. Optional additions include one-quarter teaspoon cinnamon for anti-inflammatory benefits or one tablespoon honey for enhanced natural sweetness. All ingredients should be fresh and of high quality to maximize nutritional benefit for your dog. Organic produce is recommended when possible to minimize pesticide exposure.

Step-by-Step Instructions

Begin by preheating your oven to 350°F (175°C). In a large mixing bowl, combine the grated sweet potato, grated carrot, egg, and whole wheat flour. Mix thoroughly until all ingredients are well incorporated and the mixture reaches a consistent, slightly crumbly texture. If the mixture appears too dry, add water one tablespoon at a time until reaching the desired consistency. Stir in cinnamon and honey if desired, mixing until evenly distributed throughout the dough.
Spoon the mixture onto a parchment-lined baking sheet, forming small mounds approximately one inch in diameter. Flatten each treat slightly with the back of a spoon to ensure even baking and consistent thickness. Bake for twenty to twenty-five minutes until the treats achieve a light golden color and firm texture throughout. The treats should feel solid when cooled but may retain slight chewiness inside. Remove from the oven and allow to cool completely on the baking sheet before transferring to an airtight container for storage.

Nutritional Benefits

Sweet potatoes deliver exceptional nutritional value with high levels of beta-carotene, which converts to vitamin A in your dog’s body, supporting vision and immune function. The natural fiber content promotes digestive health and regular bowel movements while supporting healthy weight management.
Carrots provide additional vitamins, minerals, and antioxidants while their natural texture supports dental health through gentle abrasion. Together, these vegetables create treats that support multiple aspects of canine health while remaining easily digestible and gentle on sensitive stomachs.

Storage and Serving Guidelines

Store baked treats in an airtight container at room temperature for up to seven days or refrigerate for two weeks. Freeze for up to three months for extended storage. Serve one to three treats daily depending on your dog’s size and weight, incorporating them into the recommended 10% daily treat allowance. Always introduce new treats gradually to monitor for any adverse reactions, particularly if your dog has never consumed sweet potatoes or carrots previously.

Conclusion

Sweet potato and carrot dog treats provide nutritious, delicious options that support your dog’s overall health. This easy recipe delivers wholesome nutrition in every bite while requiring minimal time and effort. Your dog will enjoy these naturally sweet, flavorful treats while you appreciate the confidence of providing carefully crafted, nutrient-dense homemade nutrition.
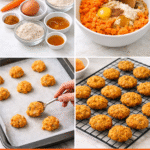
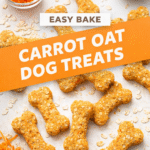
Carrot Oat Dog Treat Recipe

Carrot Oat Dog Treat Recipe

Carrot oat dog treats combine two nutritional powerhouses into delicious, crunchy bites that dogs absolutely love. Carrots provide essential vitamins, minerals, and natural fiber while supporting dental health through their natural abrasive texture. Oats offer sustained energy release, soluble fiber for digestive support, and valuable nutrients including manganese and phosphorus.
This easy bake recipe requires minimal ingredients and preparation time, making it perfect for busy pet parents seeking wholesome homemade alternatives to commercial treats. The combination of natural sweetness from carrots and the hearty texture of oats creates treats that satisfy your dog’s cravings while supporting their overall health and wellness.

Ingredients

The simplicity of this recipe makes it accessible for all skill levels. You will need two cups finely grated carrots, one and one-half cups rolled oats, one-half cup natural peanut butter, one egg, and one tablespoon honey. Optional additions include one-half teaspoon cinnamon for anti-inflammatory benefits or one-quarter cup coconut oil for enhanced skin and coat health. All ingredients should be fresh and of high quality to ensure maximum nutritional benefit for your dog.

Step-by-Step Instructions

Begin by preheating your oven to 350°F (175°C). In a large mixing bowl, combine the grated carrots, rolled oats, natural peanut butter, and egg. Mix thoroughly until all ingredients are well incorporated and the mixture reaches a consistent texture. The mixture should hold together when pressed but remain slightly crumbly. If the mixture appears too dry, add one tablespoon of water at a time until reaching the desired consistency. Stir in honey and optional cinnamon if desired, mixing until evenly distributed throughout.
Spoon the mixture onto a parchment-lined baking sheet, forming small mounds or using a cookie scoop for uniform sizing. Flatten each treat slightly with the back of a spoon to ensure even baking. Bake for twenty to twenty-five minutes until the treats achieve a light golden color and firm texture. The treats should feel solid when cooled but remain slightly chewy inside. Remove from the oven and allow to cool completely on the baking sheet before transferring to an airtight container.

Nutritional Benefits

Carrots provide beta-carotene, which converts to vitamin A in your dog’s body, supporting eye health and immune function. The natural fiber content aids digestive health and promotes regular bowel movements. Oats deliver soluble fiber that helps maintain healthy cholesterol levels and provides sustained energy throughout the day.
Peanut butter contributes healthy fats and protein essential for muscle maintenance and development. The combination creates treats that address multiple nutritional needs while remaining gentle on sensitive digestive systems.

Storage and Serving Guidelines

Store baked treats in an airtight container at room temperature for up to seven days or refrigerate for two weeks. Freeze for up to three months for extended storage. Serve one to three treats daily depending on your dog’s size and weight, incorporating them into the recommended 10% daily treat allowance. Always introduce new treats gradually to monitor for any adverse reactions, particularly if your dog has never consumed carrots or oats previously.

Conclusion

Carrot oat dog treats represent an excellent choice for pet parents seeking nutritious, homemade alternatives. This easy bake recipe delivers wholesome nutrition in every bite while requiring minimal time and effort. Your dog will enjoy these crunchy, flavorful treats while you appreciate the confidence of providing carefully crafted, nutrient-dense nutrition.

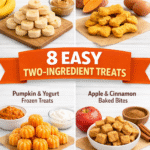
Easy Homemade Two-Ingredient Dog Treats

Two-ingredient dog treats prove that homemade pet nutrition doesn’t require complicated recipes or extensive ingredient lists. These simple combinations deliver wholesome nutrition while requiring minimal preparation time, making them perfect for busy pet parents. Whether you’re looking for frozen treats, baked biscuits, or no-bake options, these eight recipes demonstrate how easily you can create delicious treats using just two basic ingredients. Your dog will enjoy these simple yet satisfying treats while you appreciate the convenience and cost-effectiveness of homemade pet treats.

Recipe 1: Banana & Peanut Butter Frozen Bites

Mash one ripe banana with one-half cup natural peanut butter. Spoon into ice cube trays and freeze for four hours. These naturally sweet treats require no baking and provide quick energy and healthy fats.

Recipe 2: Sweet Potato & Egg Biscuits

Combine two cups grated sweet potato with two beaten eggs. Bake spoonfuls at 350°F for twenty-five minutes until firm. Sweet potatoes provide fiber and beta-carotene while eggs add protein.

Recipe 3: Pumpkin & Yogurt Frozen Treats

Mix one cup pumpkin puree with one cup plain Greek yogurt. Freeze in ice cube trays overnight. This combination offers digestive support and probiotics for gut health.

Recipe 4: Apple & Cinnamon Baked Bites

Blend two cups unsweetened applesauce with one-quarter teaspoon cinnamon. Bake at 325°F for thirty minutes until dried. Apples provide natural fiber while cinnamon supports anti-inflammatory benefits.

Recipe 5: Carrot & Coconut Oil Treats

Combine two cups finely grated carrot with two tablespoons melted coconut oil. Bake at 350°F for twenty minutes. Carrots support dental health and vision while coconut oil promotes healthy skin and coat.

Recipe 6: Peanut Butter & Oat Biscuits

Mix one cup natural peanut butter with one and one-half cups rolled oats. Form into small biscuits and bake at 325°F for twenty minutes. Oats provide fiber and sustained energy release.

Recipe 7: Blueberry & Banana Frozen Bites

Blend one cup fresh blueberries with one ripe banana. Freeze in silicone molds for six hours. Blueberries offer antioxidants while bananas provide potassium and natural sweetness.

Recipe 8: Chicken Broth & Rice Bites

Simmer one cup low-sodium chicken broth with one cup cooked rice until combined. Freeze in ice cube trays overnight. This savory combination provides hydration and easily digestible carbohydrates.

Benefits of Two-Ingredient Treats

Two-ingredient treats offer exceptional convenience without sacrificing nutritional value. These simple combinations eliminate concerns about artificial additives, preservatives, or unnecessary fillers. The minimal ingredient list makes these treats ideal for dogs with food sensitivities or allergies, as you control exactly what enters your dog’s diet. Preparation requires minimal time investment while costs remain significantly lower than commercial alternatives.

Storage and Serving Guidelines

Store baked treats in airtight containers at room temperature for five days or refrigerate for two weeks. Freeze for up to three months for extended storage. Frozen treats can be served directly from the freezer or thawed slightly depending on your dog’s preference. Serve one to three treats daily depending on your dog’s size, incorporating them into the recommended 10% daily treat allowance. Always introduce new treats gradually to monitor for any adverse reactions.

Conclusion

Two-ingredient dog treats demonstrate that simplicity and nutrition go hand in hand. These eight recipes provide quick, convenient options for pet parents seeking wholesome homemade alternatives. Your dog will enjoy these simple yet satisfying treats while you appreciate the ease, affordability, and quality of homemade pet nutrition
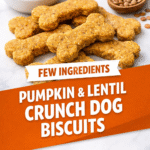
Pumpkin & Lentil Crunch Dog Biscuits

Pumpkin & Lentil Crunch Dog Biscuits

Pumpkin and lentil dog biscuits combine two nutritional powerhouses into treats that dogs absolutely love. Pumpkin provides fiber and digestive support while lentils deliver plant-based protein and essential nutrients. These five recipes showcase different variations of this wholesome combination, each offering unique flavor profiles and nutritional benefits. Whether your dog requires additional fiber, protein supplementation, or simply enjoys delicious homemade treats, these biscuits deliver both taste and nutrition in every bite.

Recipe 1: Classic Pumpkin & Red Lentil Biscuits

Combine one cup pumpkin puree with one-half cup cooked red lentils, one cup whole wheat flour, one egg, and one tablespoon honey. Mix until well combined, then roll out and cut into bone shapes. Bake at 350°F for twenty-five minutes until firm. Red lentils provide excellent protein and break down easily for superior digestibility.

Recipe 2: Pumpkin, Lentil & Sweet Potato Crunch

Mix one cup pumpkin puree with one-half cup cooked green lentils, one-half cup grated sweet potato, one cup oat flour, and one egg. Form into small biscuits and bake at 325°F for thirty minutes until crispy. Sweet potato adds natural sweetness and beta-carotene while green lentils provide sustained protein release.

Recipe 3: Pumpkin Lentil & Carrot Crunch Bites

Combine one cup pumpkin puree with one-half cup cooked lentils, one-half cup finely grated carrot, one cup brown rice flour, one egg, and one-quarter teaspoon turmeric. Bake at 350°F for twenty-eight minutes until golden. Carrots enhance vision health while turmeric provides anti-inflammatory benefits.

Recipe 4: Apple & Pumpkin Lentil Biscuits

Mix one cup pumpkin puree with one-half cup cooked lentils, one-half cup finely chopped apple, one cup whole wheat flour, one egg, and one-half teaspoon cinnamon. Bake at 325°F for thirty-two minutes until thoroughly baked. Apples provide natural fiber and digestive enzymes while cinnamon supports blood sugar regulation.

Recipe 5: Pumpkin Lentil & Spinach Power Biscuits

Combine one cup pumpkin puree with one-half cup cooked lentils, one-half cup finely chopped spinach, one cup oat flour, one egg, and one tablespoon coconut oil. Form into biscuits and bake at 350°F for twenty-six minutes. Spinach provides iron and antioxidants while coconut oil supports skin and coat health.

Nutritional Benefits

Lentils provide complete protein with all essential amino acids, making them valuable for muscle maintenance and development. Pumpkin’s high fiber content supports digestive health and promotes regular bowel movements. Together, these ingredients create treats that address common nutritional needs while remaining gentle on sensitive digestive systems. The variety of recipes allows you to rotate flavors while maintaining consistent nutritional support.

Storage and Serving Guidelines

Store baked biscuits in an airtight container at room temperature for up to seven days or refrigerate for two weeks. Freeze for up to three months for extended storage. Serve one to three biscuits daily depending on your dog’s size, incorporating them into the recommended 10% daily treat allowance. Always introduce new treats gradually to monitor for any adverse reactions, particularly if your dog has never consumed lentils previously.

Conclusion

Pumpkin and lentil dog biscuits provide nutritious, delicious options that support your dog’s overall health. These five recipes demonstrate how simple, wholesome ingredients create satisfying treats with exceptional nutritional value. Your dog will enjoy these crunchy, flavorful biscuits while you enjoy the confidence of providing carefully crafted, nutrient-dense treats.
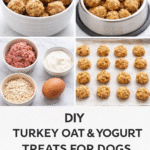
DIY Turkey, Oat & Yogurt Treats for Dogs

DIY Turkey, Oat & Yogurt Treats for Dogs

Treat your furry friend to something special with these homemade Turkey, Oat & Yogurt Treats! They are a fantastic, healthy alternative to store-bought snacks and are incredibly easy to make. Packed with lean protein from the turkey and gut-friendly probiotics from the yogurt, these treats are as nutritious as they are delicious. Plus, they are completely flour-free, making them a great option for dogs with grain sensitivities.

Let’s gather our ingredients and get started!

Ingredients:

  • 1 cup cooked, shredded turkey (ensure no bones or skin)

  • 1 ½ cups rolled oats

  • ½ cup plain, unsweetened yogurt (ensure it is xylitol-free)

  • 1 large egg

  • 2 tablespoons chopped fresh parsley (optional, for fresh breath)

Now, let’s mix everything together to create the perfect treat dough.

Instructions:

  1. Preheat: Preheat your oven to 350°F (175°C) and line a baking sheet with parchment paper.

  2. Combine Ingredients: In a large bowl, combine the shredded turkey, rolled oats, yogurt, egg, and parsley (if using).

  3. Mix Well: Stir with a large spoon until all the ingredients are thoroughly mixed and form a cohesive, slightly sticky dough.

  4. Form Treats: Using your hands or a small scoop, form the dough into small, bite-sized balls (about 1 inch in diameter).

  5. Place on Tray: Place the balls on the prepared baking sheet, leaving a little space between each one. You can flatten them slightly with your fingers or a fork if you prefer a cookie shape.

  6. Bake: Bake for 18-22 minutes, or until the treats are golden brown and firm to the touch.

  7. Cool: Let the treats cool completely on the baking sheet before serving them to your pup.

The result will be a batch of irresistible, golden-brown treats your dog will love!

Storage: Store these treats in an airtight container in the refrigerator for up to one week. For longer storage, you can freeze them for up to 3 months. Just thaw a few at a time as needed

Easy Homemade Dog Treats Without Flour

Easy Homemade Dog Treats Without Flour

Looking for simple, flour-free dog treat recipes? You’ve come to the right place! These homemade dog treats are packed with wholesome ingredients and are free from common allergens like wheat flour. They’re easy to make and your pup is sure to love them. We’ve included a few of our favorites below, complete with images of the finished products!

1. Sweet Potato & Peanut Butter Bites

These soft and chewy bites are a classic for a reason. The combination of sweet potato and peanut butter is irresistible to most dogs.

Ingredients:

  • 1 cup cooked, mashed sweet potato

  • 1/2 cup creamy peanut butter (xylitol-free)

  • 2 eggs

Instructions:

  1. Preheat your oven to 350°F (175°C) and line a baking sheet with parchment paper.

  2. In a bowl, mix all the ingredients until well combined.

  3. Roll the dough into small balls and place them on the baking sheet. You can flatten them slightly with a fork.

  4. Bake for 15-20 minutes, or until they are firm to the touch.

  5. Let them cool completely before serving.

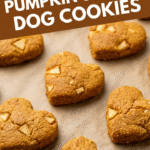
2. Pumpkin & Apple Dog Cookies

Pumpkin is great for digestion, and the apple adds a nice crunch and sweetness. These heart-shaped cookies are perfect for showing your pup some love!

Ingredients:

  • 1 cup pure pumpkin puree (not pumpkin pie filling)

  • 1 apple, peeled, cored, and grated

  • 1 egg

  • 2 1/2 cups rolled oats (or oat flour for a smoother texture)

Instructions:

  1. Preheat oven to 350°F (175°C). Line a baking sheet with parchment paper.

  2. Combine pumpkin, grated apple, and egg in a bowl.

  3. Gradually add the oats until a dough forms that you can roll out.

  4. Roll the dough to about 1/4 inch thickness on a floured surface (use oat flour) and cut out shapes with a cookie cutter.

  5. Place on the baking sheet and bake for 25-30 minutes until golden and firm.

  6. Cool completely before serving.

3. Frozen Yogurt & Banana Pupsicles

These frozen treats are a perfect way to cool your dog down on a hot day. They’re super simple to make and only require three ingredients!

Ingredients:

  • 1 ripe banana

  • 1 cup plain, unsweetened yogurt

  • 1 tablespoon honey (optional)

Instructions:

  1. In a blender or food processor, combine all ingredients until smooth.

  2. Pour the mixture into a silicone mold (like the paw print ones pictured) or an ice cube tray.

  3. Freeze for at least 4 hours, or until solid.

  4. Pop them out and give one to your pup for a refreshing treat!

4. Chicken & Rice Balls

A simple and bland option, perfect for dogs with sensitive stomachs. These are a great way to use up leftover chicken and rice.

Ingredients:

  • 1 cup cooked, shredded chicken breast

  • 1/2 cup cooked white or brown rice

  • 1 egg

  • 1 tablespoon parsley (optional)

Instructions:

  1. Preheat oven to 350°F (175°C).

  2. In a bowl, mix all ingredients until well combined.

  3. Roll the mixture into bite-sized balls.

  4. Place on a parchment-lined baking sheet and bake for 15-20 minutes.

  5. Let them cool before serving.

5. Carrot & Coconut Drops

These small, crunchy treats are packed with fiber and healthy fats. They’re a perfect size for training!

Ingredients:

  • 1 cup grated carrots

  • 1/2 cup coconut flour

  • 2 eggs

  • 2 tablespoons coconut oil, melted

Instructions:

  1. Preheat oven to 325°F (165°C). Line a baking sheet with parchment paper.

  2. In a large bowl, whisk the eggs and melted coconut oil.

  3. Stir in the grated carrots and coconut flour. Mix until a dough forms.

  4. Scoop small amounts of dough (about a teaspoon) and roll into balls, then flatten slightly.

  5. Place on the baking sheet and bake for 20-25 minutes or until golden.

  6. Cool completely on a wire rack.

Homemade Dog Treats Without Flour

Homemade Dog Treats Without Flour

Flour-free dog treats offer an excellent solution for dogs with grain sensitivities, allergies, or digestive issues. By eliminating flour entirely, you create treats that are naturally gentle on sensitive systems while maintaining delicious flavors dogs love.
These five recipes showcase how simple ingredients like fruits, vegetables, proteins, and natural binders can create satisfying treats without any grain products. Whether your dog requires a grain-free diet or you simply prefer alternative options, these recipes deliver wholesome nutrition in convenient treat form.

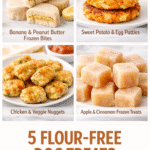
Recipe 1: Banana and Peanut Butter Bites

Mash two ripe bananas with one-half cup natural peanut butter until well combined. Spoon the mixture into silicone molds or ice cube trays and freeze for at least four hours. These naturally sweet treats require no baking, making them quick and convenient. The banana provides natural sweetness and fiber while peanut butter adds protein and healthy fats.

Recipe 2: Sweet Potato and Egg Patties

Combine two cups grated sweet potato with two beaten eggs and one-quarter teaspoon turmeric. Drop spoonfuls onto a baking sheet and bake at 350°F for twenty-five minutes until golden and firm. These vegetable-based patties provide excellent nutrition from sweet potatoes’ beta-carotene and fiber without any grain products.

Recipe 3: Chicken and Vegetable Nuggets

Mix two cups shredded cooked chicken with one cup finely grated zucchini, one-half cup grated carrot, and one egg. Form into small nuggets and bake at 375°F for twenty minutes until cooked through. These protein-rich treats combine lean meat with nutrient-dense vegetables for balanced nutrition.

Recipe 4: Apple and Cinnamon Frozen Treats

Blend two cups unsweetened applesauce with one-half cup plain Greek yogurt and one-quarter teaspoon cinnamon. Pour into ice cube trays and freeze overnight. These refreshing treats offer probiotics from yogurt, fiber from apples, and anti-inflammatory benefits from cinnamon, all without any flour.

Recipe 5: Pumpkin and Coconut Oil Bites

Combine one cup pumpkin puree with two tablespoons coconut oil and one tablespoon honey. Spoon into silicone molds and freeze for six hours. These simple treats provide pumpkin’s digestive benefits, coconut oil’s healthy fats, and honey’s natural sweetness without requiring any flour or baking.

Benefits of Flour-Free Treats

Flour-free treats eliminate common allergens that affect many dogs, particularly wheat and grains. These treats often digest more easily, making them ideal for dogs with sensitive stomachs or inflammatory bowel conditions. The natural ingredients used in flour-free recipes typically provide superior nutrition compared to commercial treats containing grain fillers and artificial additives.

Storage and Serving Guidelines

Refrigerate unbaked treats for up to one week or freeze for up to three months. Baked treats remain fresh at room temperature for five days or refrigerated for two weeks. Serve one to three treats daily depending on your dog’s size, incorporating them into the recommended 10% daily treat allowance. Always introduce new treats gradually to monitor for any adverse reactions.

Conclusion

Flour-free homemade dog treats provide nutritious, delicious options for dogs requiring grain-free diets. These five recipes demonstrate how simple, wholesome ingredients create satisfying treats without flour. Your dog will enjoy these healthy alternatives while you enjoy the confidence of knowing exactly what they’re consuming.
Long-Lasting Homemade Dog Treats

Long-Lasting Homemade Dog Treats

Long-lasting homemade dog treats serve a dual purpose: they provide mental stimulation and entertainment while keeping your dog occupied for extended periods. Unlike quick-consumption treats, these durable chews encourage natural chewing behaviors and can help reduce destructive tendencies. By making these treats at home, you control every ingredient, ensuring your dog receives wholesome nutrition without artificial additives. These five recipes offer variety in flavors and textures while maintaining the durability dogs need for extended enjoyment.

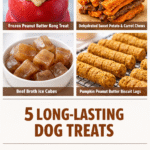
Recipe 1: Frozen Peanut Butter Kong Treats

Mix one cup natural peanut butter with one-half cup plain yogurt. Stuff the mixture into Kong toys and freeze for at least four hours. This combination creates a long-lasting treat that takes dogs considerable time to work through, providing mental engagement and satisfying their natural chewing instincts.

Recipe 2: Sweet Potato and Carrot Chews

Slice sweet potatoes and carrots lengthwise into quarter-inch strips. Arrange on a baking sheet and bake at 250°F for three hours until completely dehydrated and hardened. These naturally chewy treats provide fiber and nutrients while lasting significantly longer than fresh vegetables, offering hours of chewing satisfaction.

Recipe 3: Beef Broth Ice Cubes

Simmer low-sodium beef broth for thirty minutes, then pour into ice cube trays and freeze overnight. These savory frozen treats melt slowly in your dog’s mouth, providing hydration and flavor while keeping them engaged during warm weather. The gradual melting process extends treat duration considerably.

Recipe 4: Pumpkin and Peanut Butter Biscuit Logs

Combine one cup pumpkin puree, one-half cup natural peanut butter, one and one-half cups whole wheat flour, and one egg. Roll the dough into thick logs, approximately one inch in diameter. Bake at 325°F for forty-five minutes until extremely hard and dense. These substantial biscuits require significant chewing effort, making them ideal for extended entertainment.

Recipe 5: Chicken and Rice Stuffed Bones

Simmer shredded chicken with cooked rice until well combined. Pack this mixture into marrow bones or hollowed beef bones, then freeze for at least six hours. Dogs must work diligently to extract the filling, providing extended mental stimulation and satisfying their natural foraging instincts.

Benefits of Long-Lasting Treats

Long-lasting treats offer multiple advantages beyond simple entertainment. They promote dental health through natural abrasion, reduce anxiety through focused activity, and provide appropriate outlets for chewing behavior. These treats also help manage weight by providing satisfaction without excessive calories when portions are controlled appropriately.

Storage and Safety Guidelines

Store frozen treats in the freezer for up to three months. Refrigerated treats remain fresh for up to one week. Always supervise your dog while enjoying treats, and remove any small pieces that could pose choking hazards. Consult your veterinarian before introducing new treats, especially for dogs with dietary sensitivities or health conditions.

Conclusion

Long-lasting homemade dog treats combine entertainment, nutrition, and behavioral benefits into simple, affordable options. By rotating these five recipes, you provide variety while keeping your dog mentally stimulated and physically satisfied. Your dog will reward your effort with contentment and healthy chewing habits.