Dog eating from a spiral maze slow feeder bowl.

Slow Feeder Dog Bowls: Do They Actually Work?

If your dog inhales dinner in under a minute, you are not alone. Plenty of dogs treat mealtimes like a competitive sport — and while it can be funny to watch, fast eating comes with real downsides: swallowed air, vomiting shortly after eating, bloating risk, and a brain that barely registers it had food at all. Slow feeder dog bowls are the simple gadget promising to fix exactly that: raised ridges, mazes and swirls inside the bowl that force your dog to eat around the obstacles.

But do they actually work? For most dogs, yes — with a few honest caveats. Here is the full, vet-informed guide: what fast eating really does, the three main styles of slow feeders, how to match the bowl to your dog’s muzzle, and how to clean them without the frustration.

Why fast eating is worth fixing

Eating at speed is not just a manners problem. Dogs that regularly gulp food:

  • Swallow more air, which means burping, flatulence and post-meal vomiting.
  • Risk bloat (gastric dilatation-volvulus). Speed of eating is a known contributing factor to GDV, the life-threatening stomach twist that large, deep-chested breeds are prone to. A slow feeder is not a guarantee against bloat — but reducing the frantic gulping removes one recognised risk.

  • Get less mental stimulation from meals. Foraging is enrichment. A dog that finishes in 40 seconds gets none of the “work” that a ten-minute meal provides, which often shows up as begging sooner, raiding bins, or general restlessness.

If your dog eats so fast it vomits, regurgitates, or coughs, mention it to your vet — a slow feeder helps, but very frantic eating can also flag competition anxiety or a medical issue worth checking.

Do slow feeder bowls actually work?

In short: yes, for most dogs, in a measurable way. A standard meal from a flat bowl takes a speed-eater well under a minute. The same meal from a maze-style slow feeder typically takes five to ten minutes — the ridges physically break the “one big mouthful” strategy.

A few honest caveats so you buy with open eyes:

  • Some dogs solve them too well. Clever dogs learn to flip the bowl or shove it around the floor. A rubber base, a non-slip mat, or a weighted bowl solves most of this.

  • Flat-faced breeds need the right design. Pugs, French bulldogs and shih tzus cannot reach food in deep, narrow mazes. They need shallow, wide designs (more below).

  • They are not a substitute for vet advice. If your dog eats fast because of resource guarding, anxiety or competition with other pets, address that separately — feed dogs apart and speak to your vet or a behaviourist.

The 3 styles of slow feeders
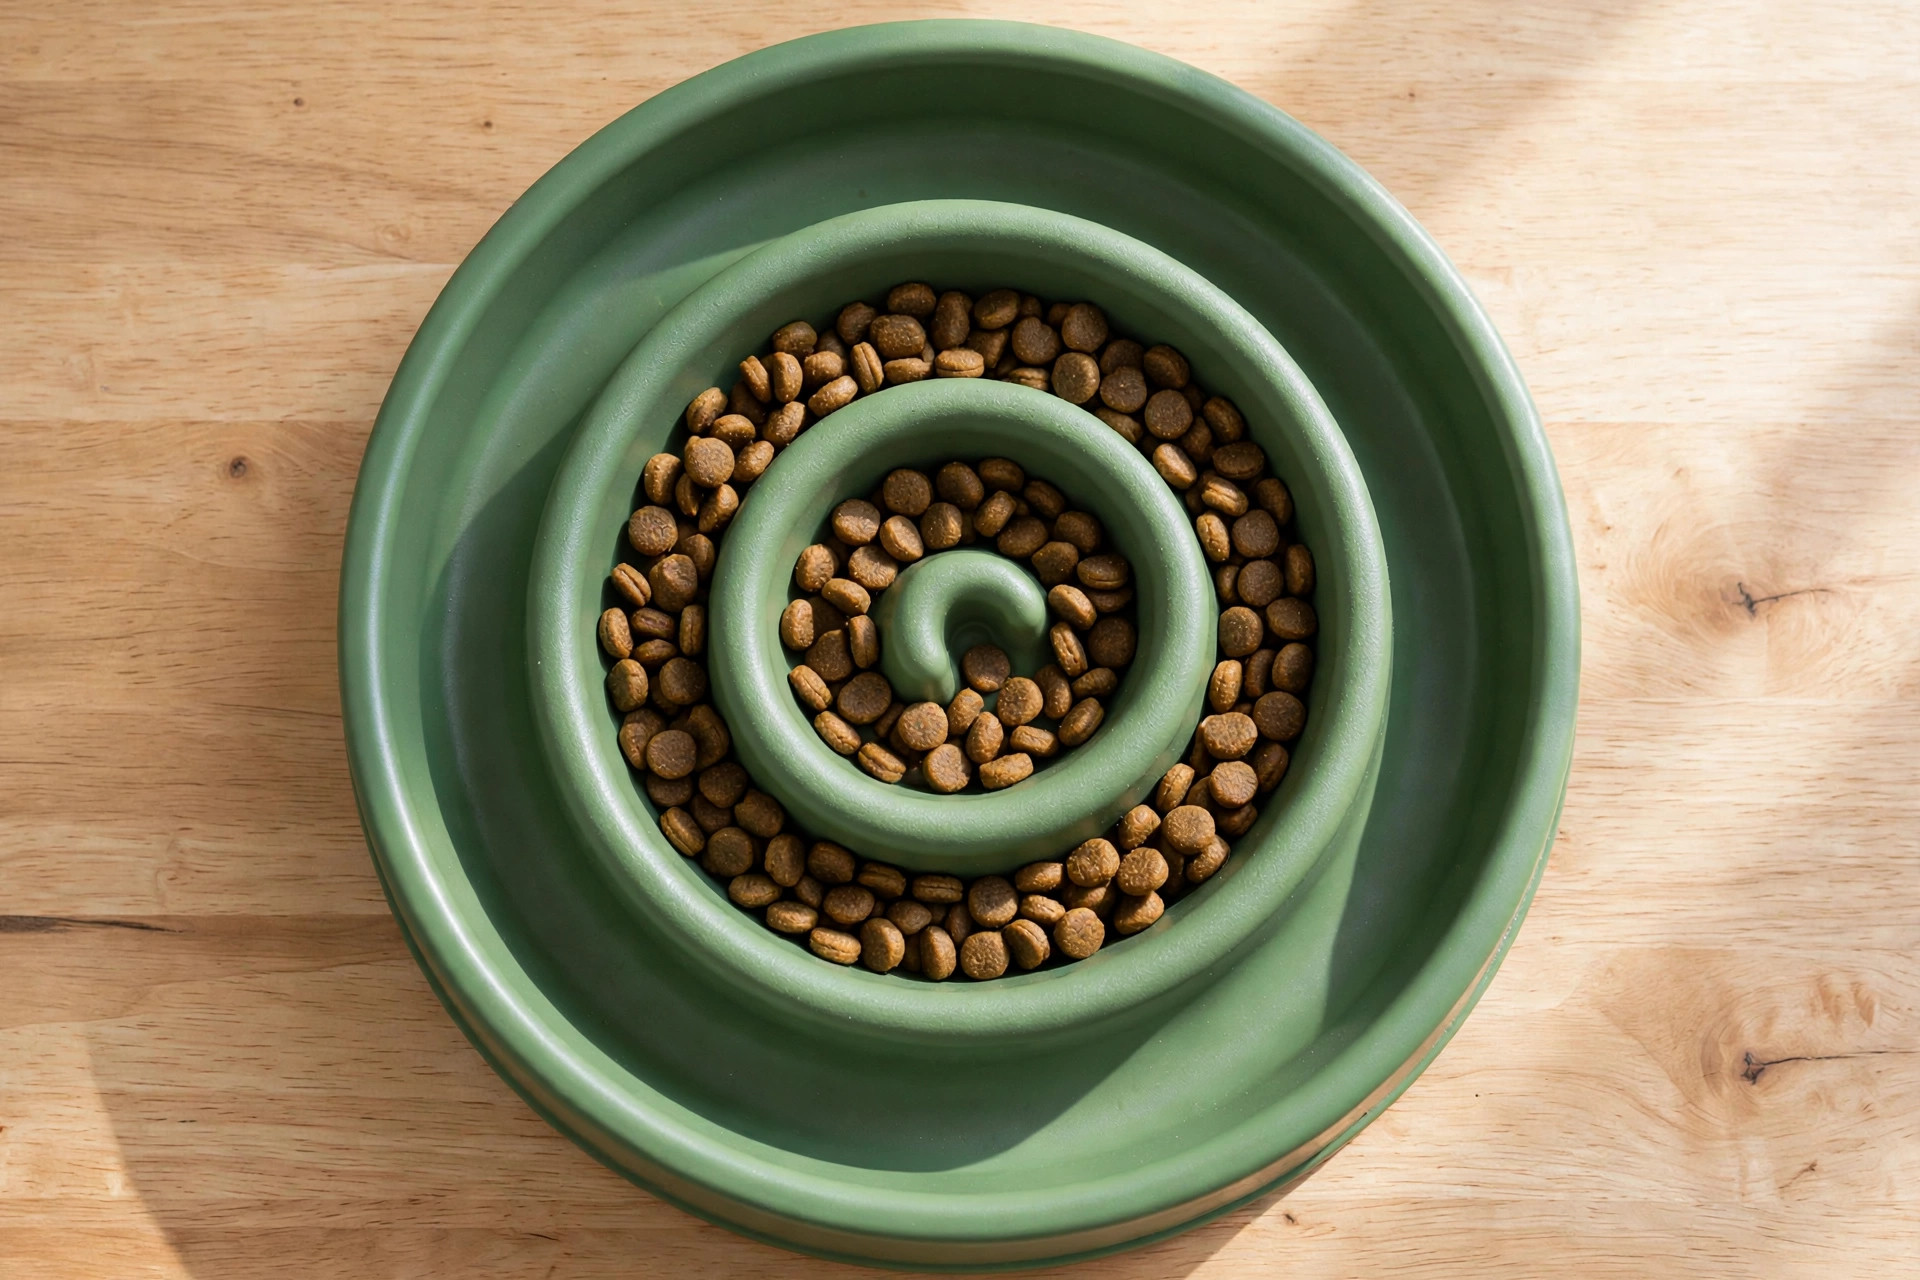
Overhead close-up of a spiral maze slow feeder bowl filled with kibble.

1. Maze and spiral bowls (the classic)

The raised swirls, bumps and channels inside the bowl force the tongue to work between obstacles. These are the most effective at physically slowing eating, they are dishwasher-safe (check the product), and they come in difficulty levels from “gentle bumps” to “diabolical labyrinth.” Start gentle for puppies and seniors; go complex for the competitive eaters.

2. Lick mats

Flat silicone mats with shallow grooves — you spread wet food, yoghurt or peanut butter over them and the dog licks rather than gulps. They slow wet meals beautifully and double as calming enrichment (licking releases calming endorphins). We have a whole set of lick mat recipes for dogs if you want to start. Best for: wet food feeders, anxious dogs, crate-time occupation.

3. Snuffle mats

Fabric strips tied to a rubber base — you scatter kibble in the “grass” and the dog forages with nose and paws. Closest to natural feeding behaviour and fantastic mental stimulation, though trickier to wash than a plastic bowl. Our DIY snuffle mat for dogs shows how to make one from a sink mat and fleece. Best for: dry kibble, clever dogs that need a job, rainy-day boredom.
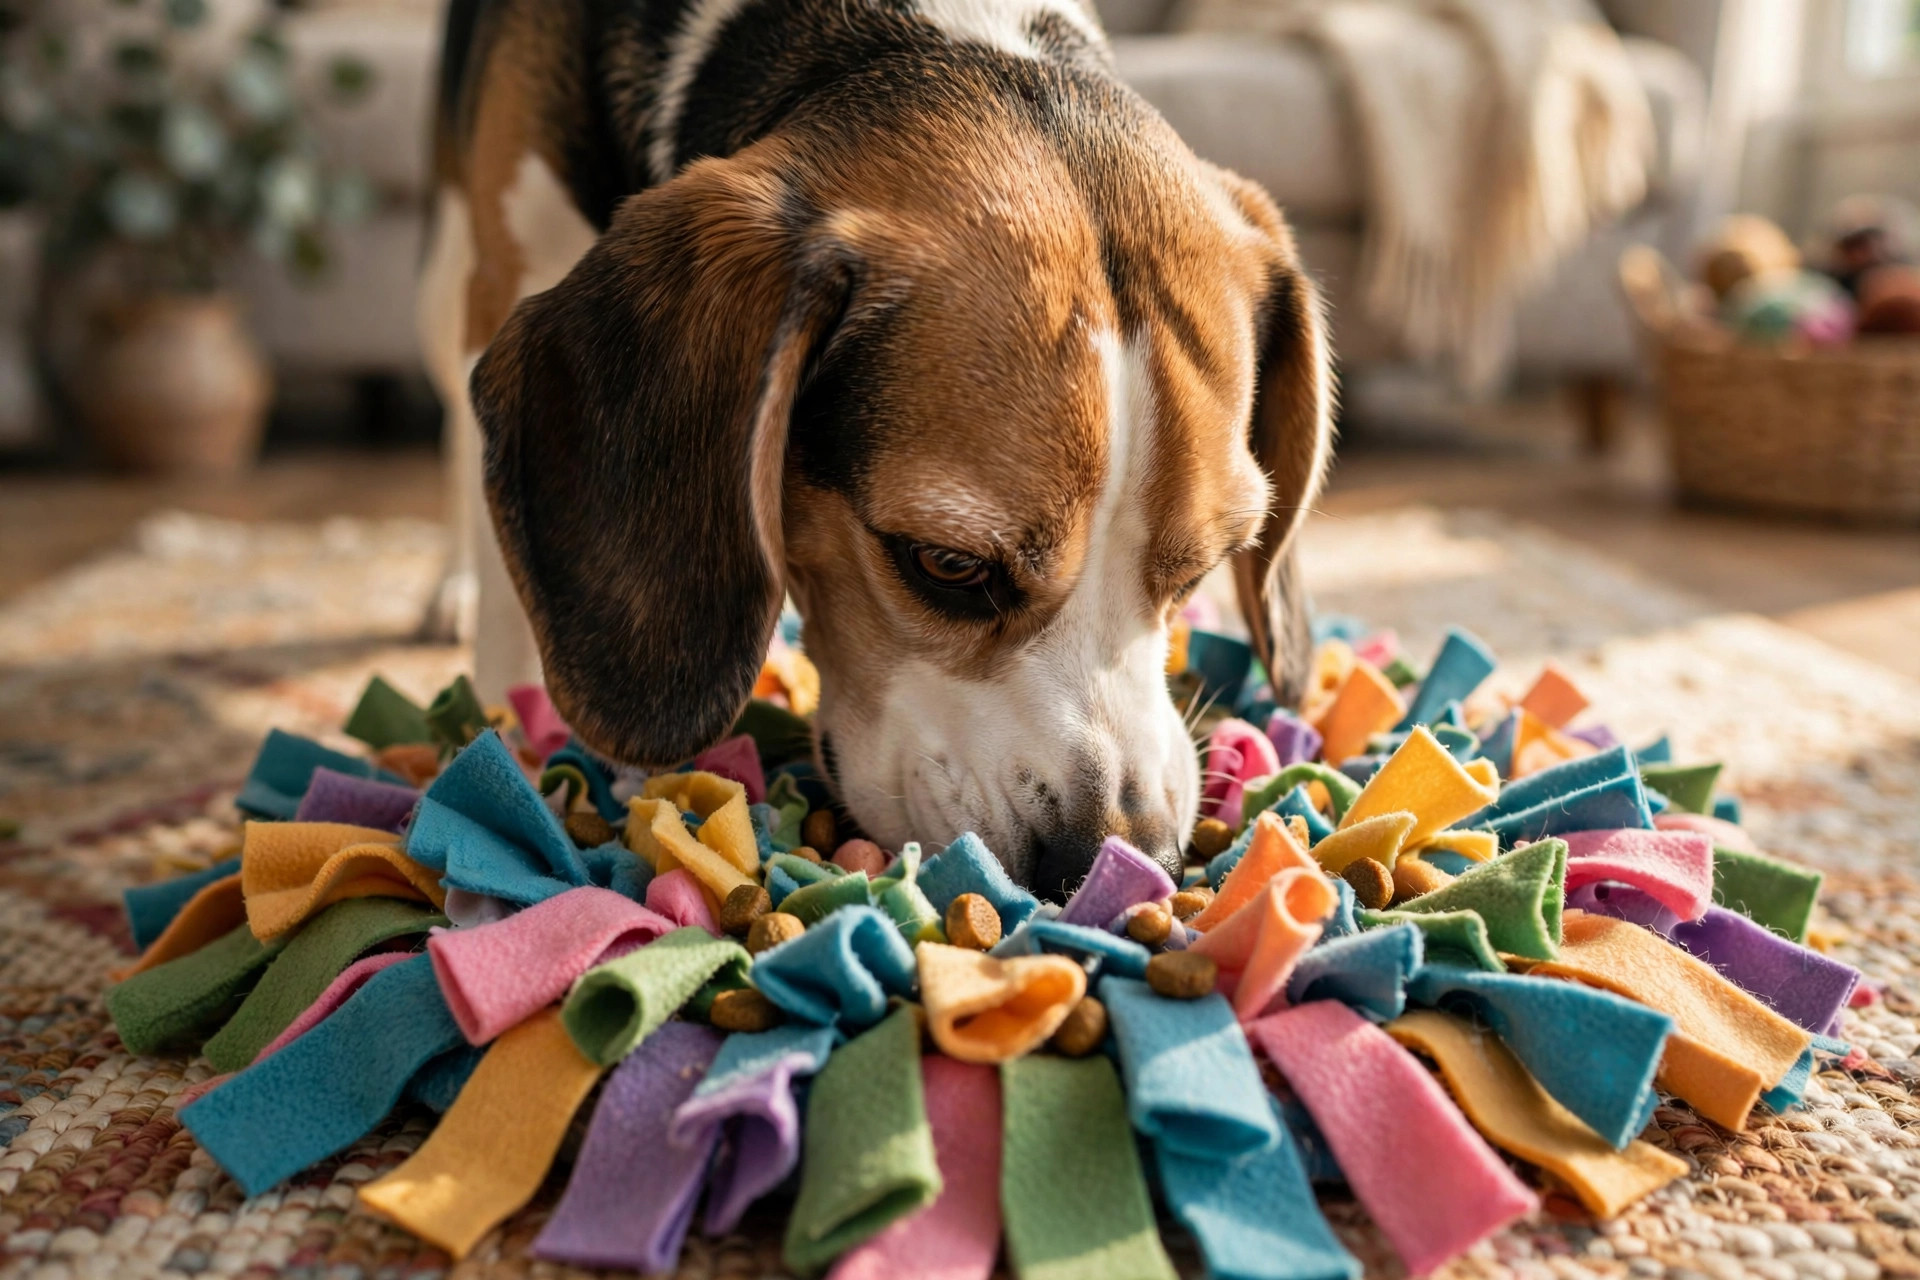
Beagle foraging for kibble in a colourful snuffle mat.

How to pick the right one for your dog

  • Muzzle shape. Deep mazes suit long-snouted breeds (labradors, shepherds, greyhounds). Flat-faced breeds need shallow, wide ridges they can reach with a short tongue. Puppies do best starting on the easiest pattern.

  • Material. Food-grade silicone and melamine bowls are the common picks; stainless steel slow feeders exist if you prefer them. Avoid cheap plastic with strong chemical smells. Whatever you choose, it must be washable — slow feeders have dozens of grooves where food hides.

  • Size. The bowl should hold your dog’s full meal comfortably with room to spare. A too-small maze means the dog just eats from the top of the ridges.

  • Difficulty. Match it to the eater. A mildly quick eater needs only gentle bumps; a championship gulper needs a proper maze. You can always upgrade.

  • Non-slip base. Non-negotiable. A bowl that slides or flips teaches your dog that dinner is a sport, which is the opposite of the point.
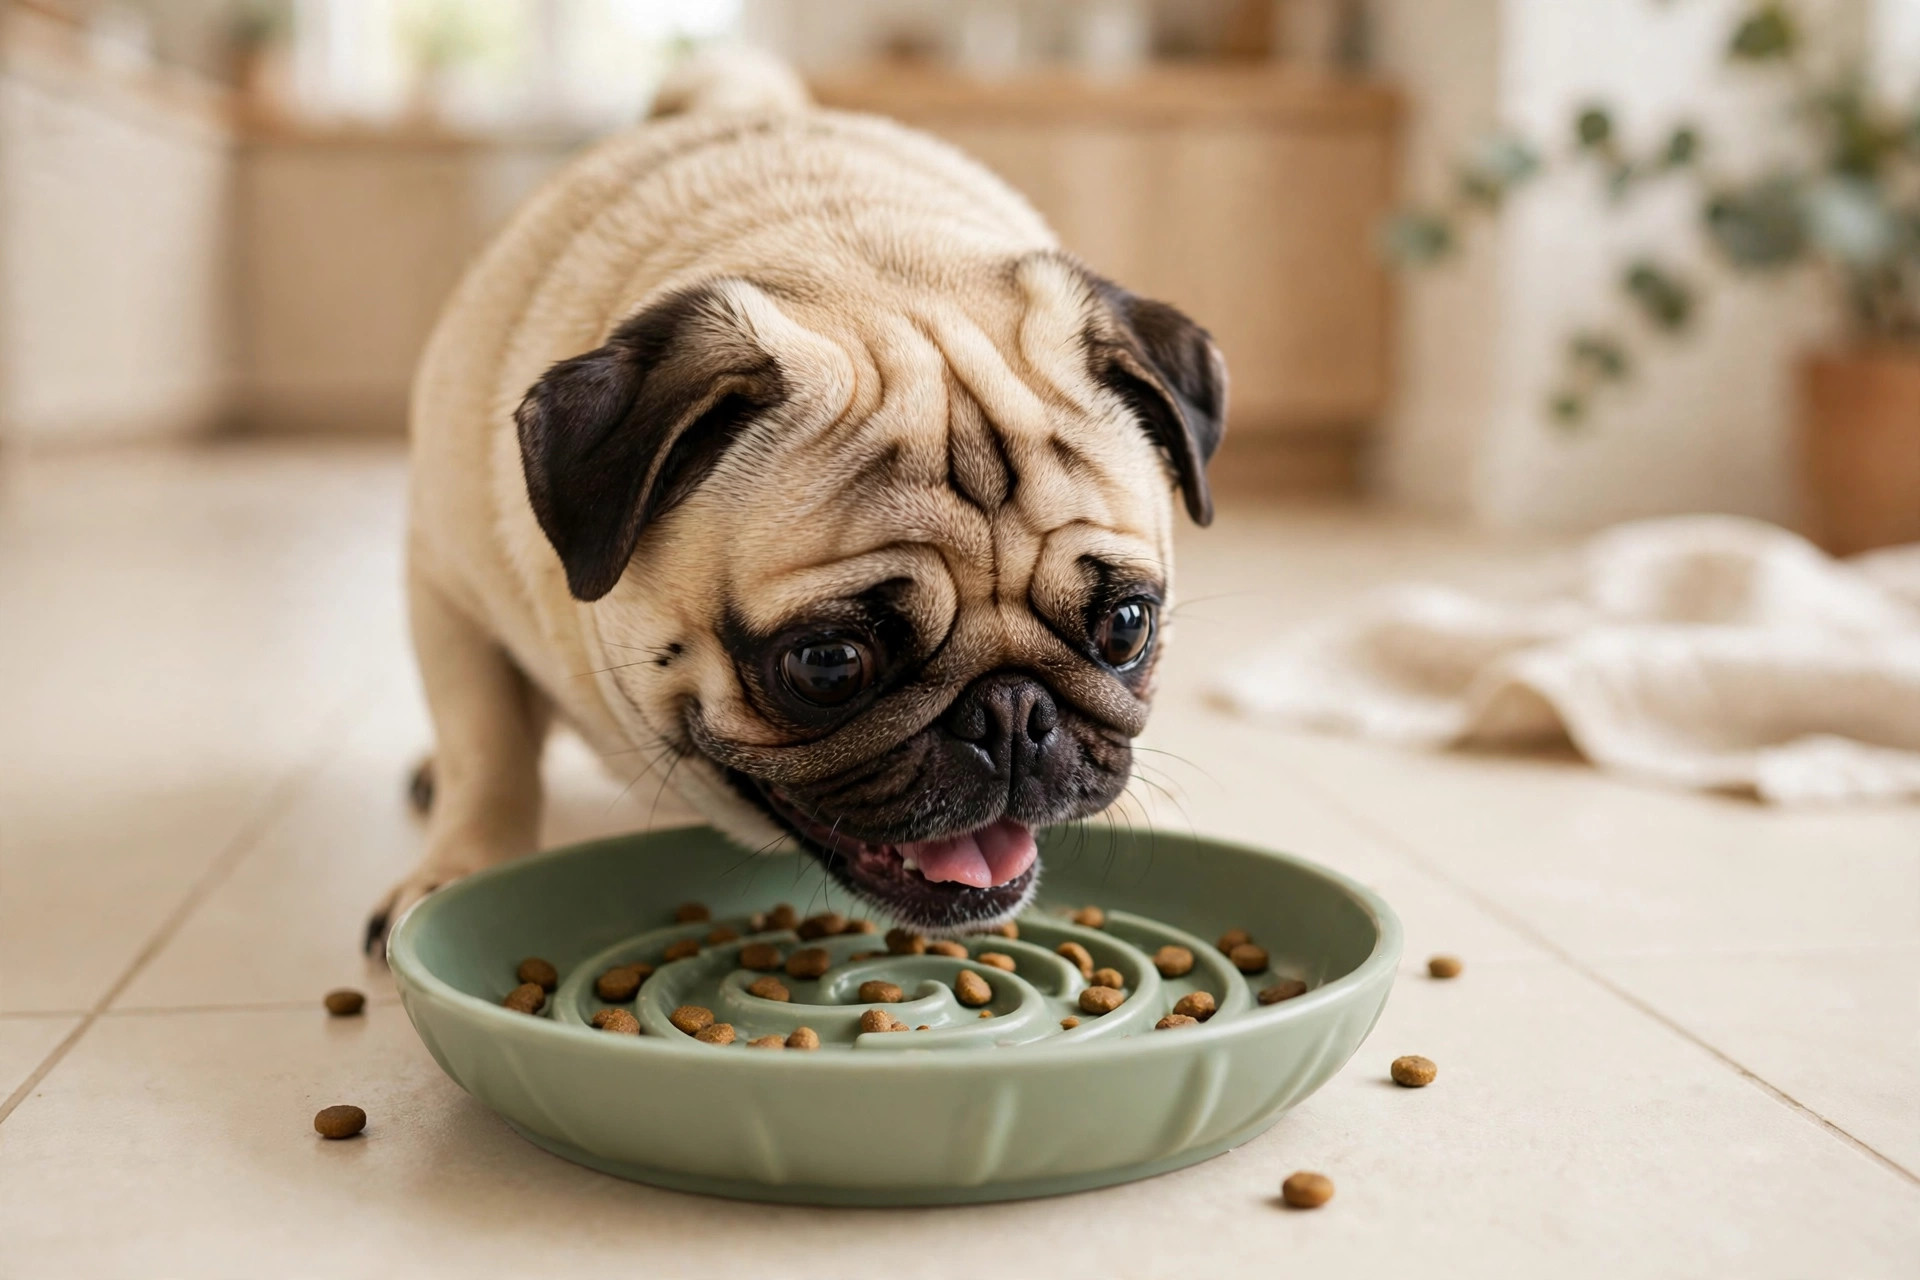
Pug eating from a shallow wide slow feeder bowl.

How to introduce it (without the tantrum)

Some dogs look at a maze bowl like it personally offended them. Transition smoothly:

  1. Start easy. Use the shallowest pattern with a few high-value treats scattered on top so the first experience is rewarding.

  2. Supervise the first meals. Some dogs try to chew the ridges, especially plastic ones. Watch, redirect, and do not leave a chewer alone with it.

  3. Expect the floor show. A week of learning is normal. Most dogs settle into the new routine and start enjoying the “puzzle.”

  4. Keep the old bowl. If your dog refuses entirely or the bowl makes them anxious, feeding should never be stressful — go back to the flat bowl and try scatter feeding or a snuffle mat instead.

Cleaning — the part nobody mentions
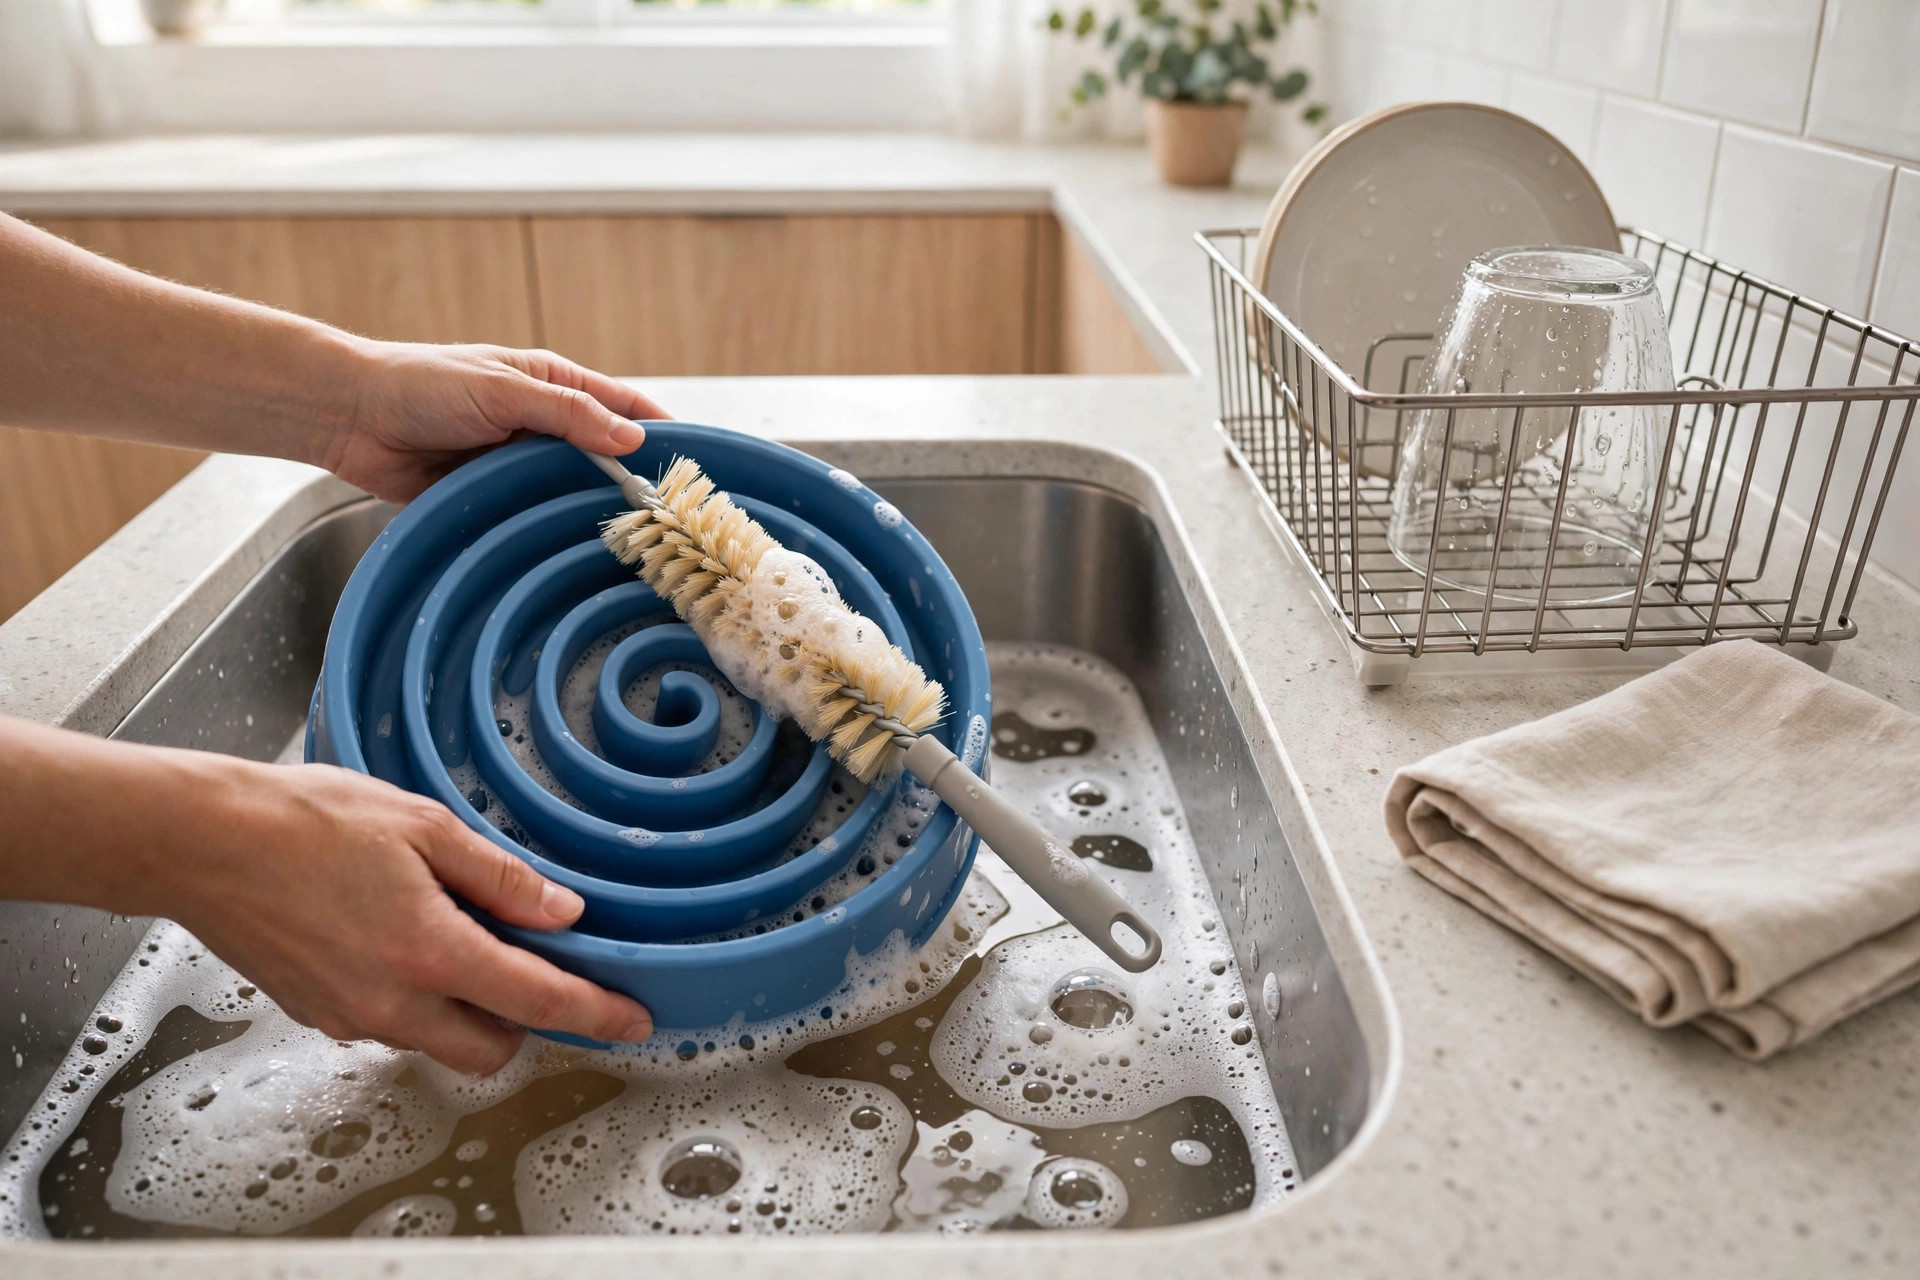
Washing a spiral maze slow feeder bowl with a bottle brush in the kitchen sink.

Slow feeders are groovy, literally. Dried food lodged in maze channels can go mouldy, so wash the bowl after every meal — warm soapy water and a bottle brush reach the channels far better than a sponge. Dishwasher-safe bowls make this painless (check the product label; high heat warps cheap plastic). Snuffle mats go in the washing machine in a laundry bag; air-dry them. Lick mats are the easiest: rinse or pop in the dishwasher.

Safety notes – Inspect plastic slow feeders regularly for chew marks and rough edges — retire any bowl that is cracked or has sharp plastic. – Wash the bowl after every meal; trapped food in the grooves can harbour bacteria and mould. – Feed dogs separately if there is competition at mealtimes — a slow feeder helps the speed, not the anxiety. – If fast eating is paired with vomiting, coughing or weight loss, see your vet before buying gear.

FAQs

Will a slow feeder stop my dog vomiting after eating? Often, yes — most post-meal vomiting in speed-eaters comes from swallowed air and huge unchewed mouthfuls, and slowing the meal down fixes exactly that. If the vomiting continues, see your vet.

Can puppies use slow feeder bowls? Yes — start with the easiest pattern and always supervise, since puppies may try to chew the ridges. It is also great early training for calm mealtimes.

Are slow feeders good for flat-faced dogs? Yes, but pick a shallow, wide design. Deep narrow mazes frustrate pugs and French bulldogs because they cannot reach the food with a short tongue.

Maze bowl vs lick mat — which is better? Different jobs. Maze bowls slow dry kibble best; lick mats slow wet food and add calming enrichment. Many owners use both — kibble in the bowl, wet food on the mat.

How long should a meal take? A good target is 5–10 minutes for a standard meal. If your dog is still done in under two minutes, step up the difficulty.

Final word

Slow feeder bowls are one of the rare pet gadgets that genuinely do what they claim: most speed-eaters go from a 45-second inhale to a five-minute meal, which means less air, less vomiting, and a calmer dog. Match the design to your dog’s muzzle, introduce it kindly, wash it properly — and dinner becomes the enrichment it should have been all along.
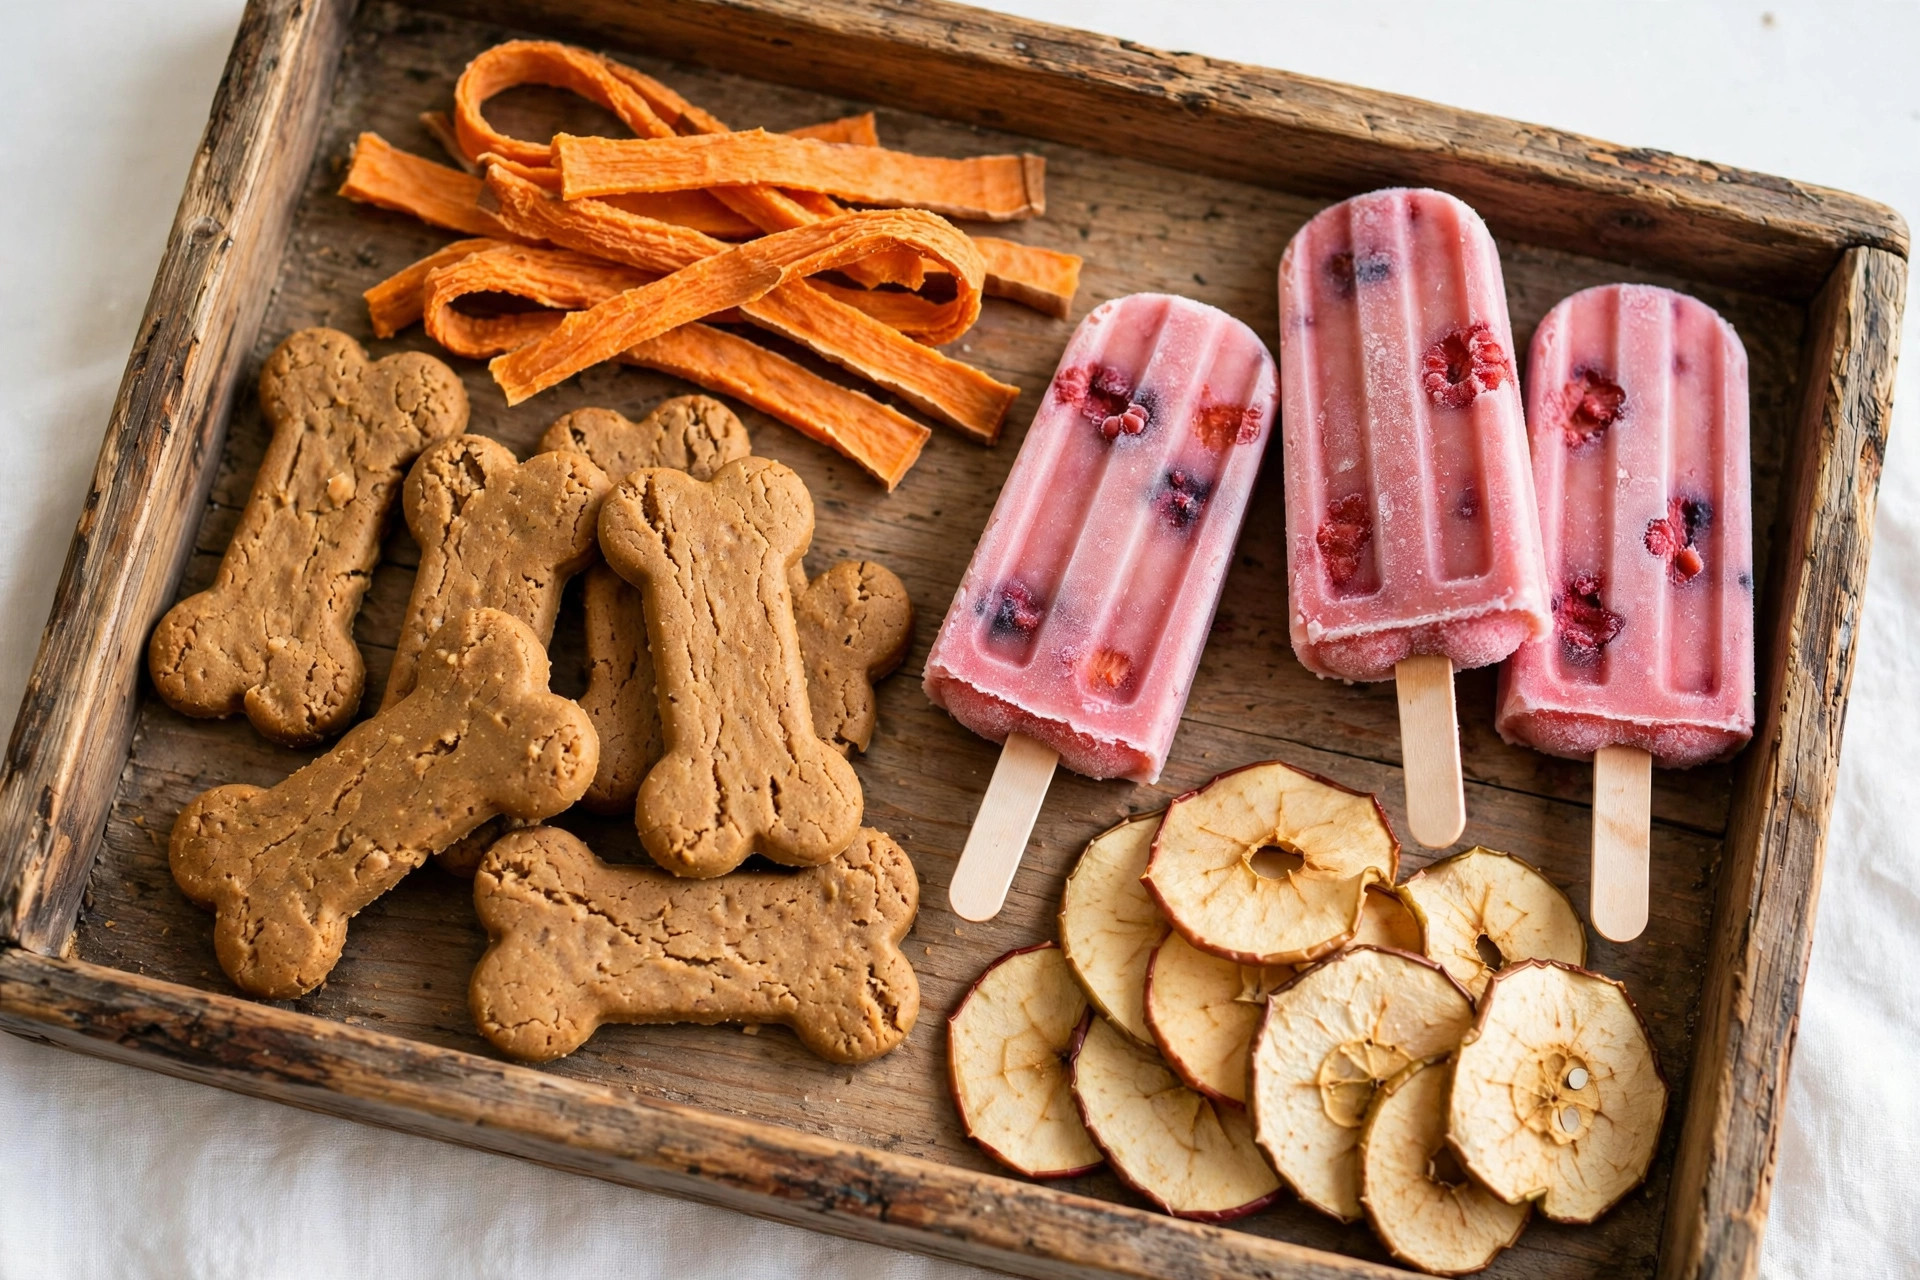
Single-ingredient dog treats — dehydrated chicken, beef liver, salmon skin and sweet potato chews arranged on parchment paper.

Single-Ingredient Dog Treats: What Counts, What to Avoid & Easy DIY Ideas

If you’ve ever squinted at the back of a dog treat bag and wondered what half the words even mean, you’re not alone. Treat labels read like chemistry experiments: “natural flavour”, “mixed tocopherols”, “menadione sodium bisulfite complex” — on a bag of something your dog eats every single day.

That’s exactly why single-ingredient dog treats are booming. The idea is beautifully simple: one ingredient. Chicken breast. Beef liver. Sweet potato. Nothing else. No fillers, no flavour enhancers, no mystery powders. What you see is what your dog gets — and for dogs with allergies, sensitive stomachs, or picky humans, that transparency is gold.

This guide covers what “single-ingredient” actually means on a label, the proteins and produce worth rotating through, the red-flag additives to dodge, and 5 single-ingredient DIY treats you can make this weekend.

What does “single-ingredient” actually mean?

On an honest label, it means the treats contain one food item and nothing else — for example, freeze-dried chicken breast should list exactly that: “chicken breast”. No salt, no oil, no preservatives (freeze-drying and dehydrating preserve the food naturally).

But read carefully, because marketing stretches the term:

  • “Made with single ingredients” is not the same as single-ingredient. It can still hide glycerin, “natural flavours” or tocopherols at the bottom of the label.
  • “Single-protein” only promises one meat source — the treat can still contain ten other ingredients (binders, starches, colourings).
  • Ingredient splitting tricks the eye: a label that lists “chicken breast, chicken, chicken fat” is not single-ingredient, however premium it sounds.

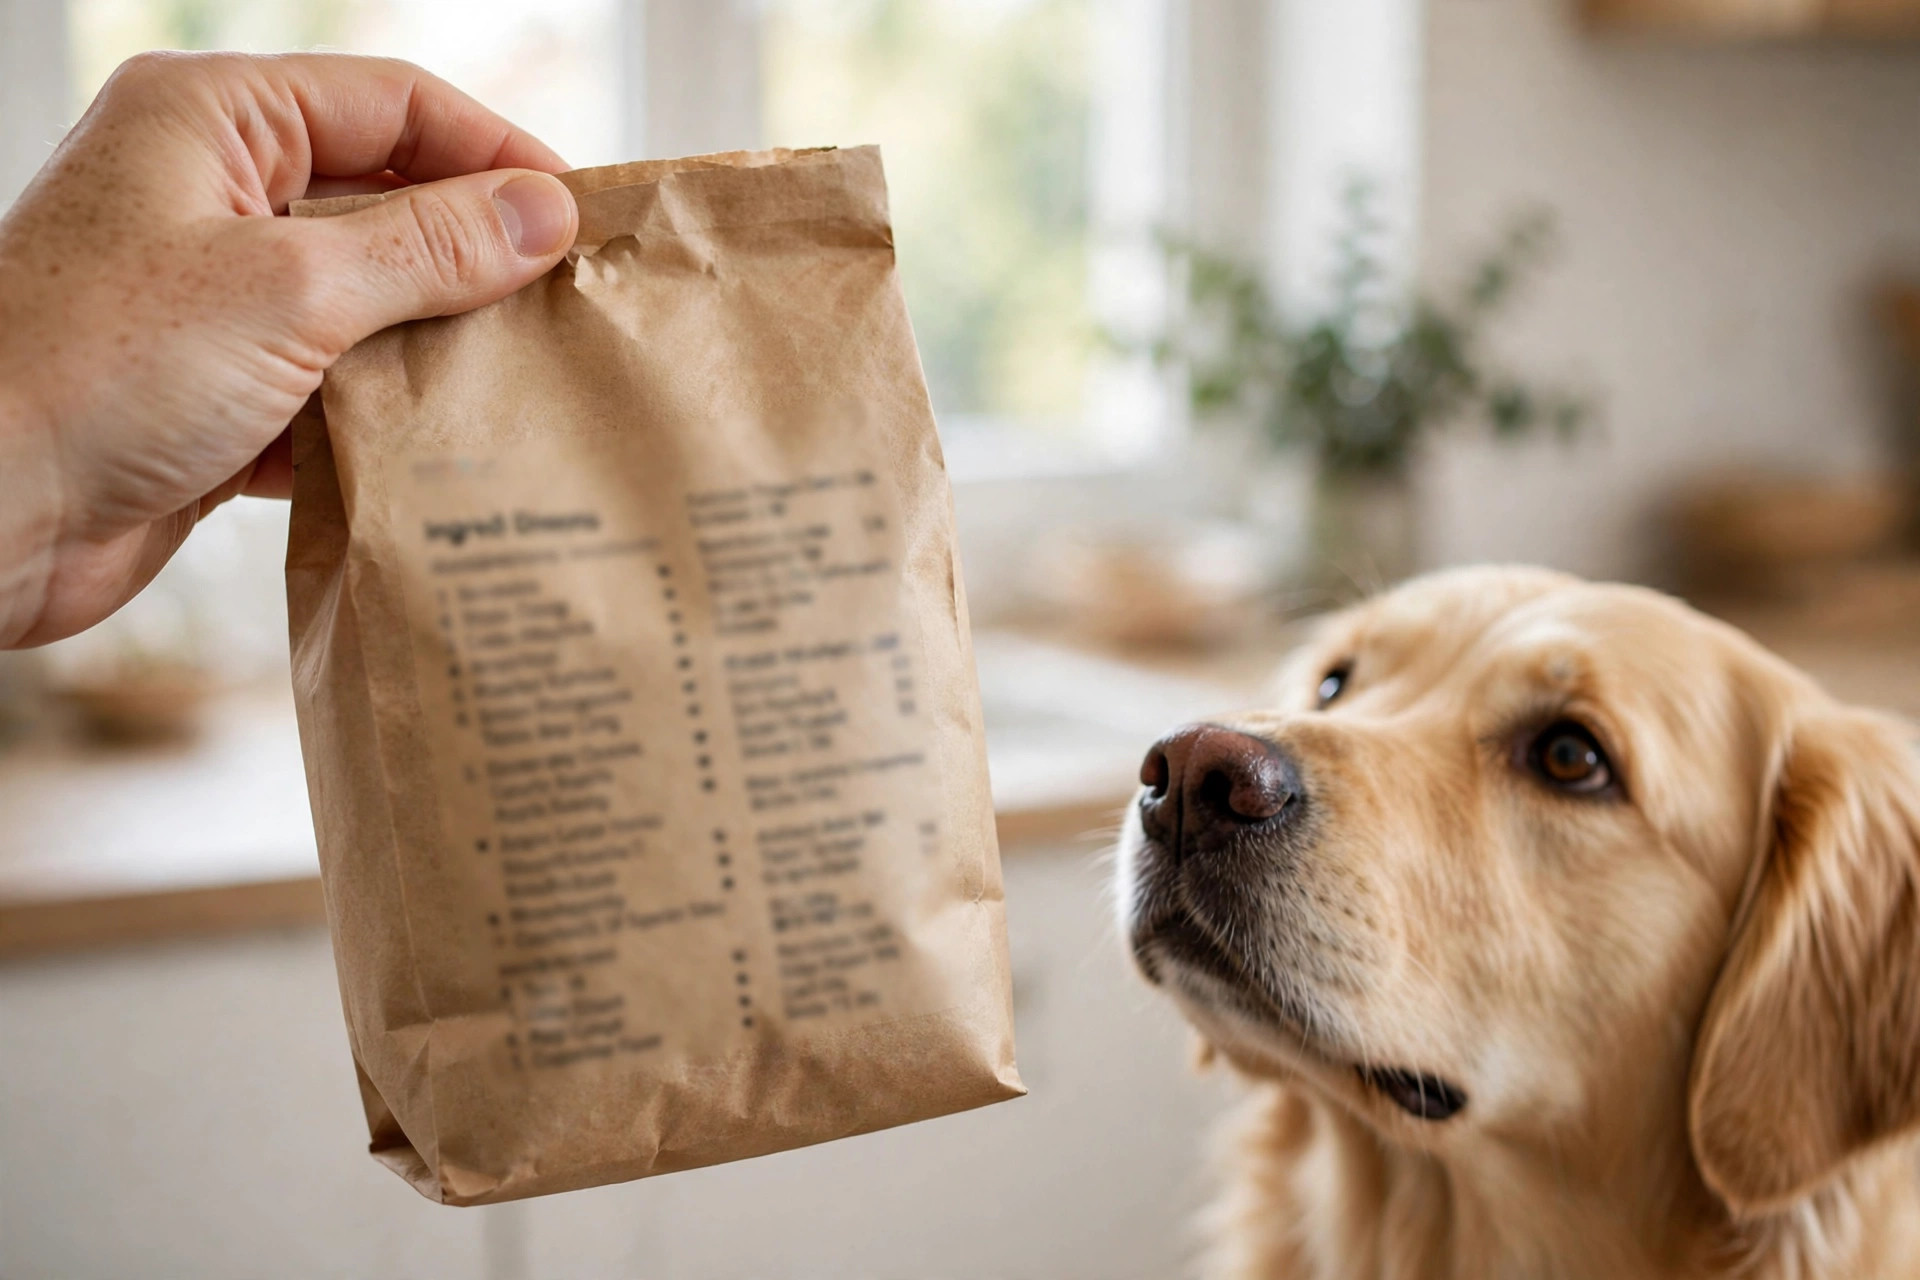
The test is simple: if the ingredient list has more than one item — or anything you can’t buy in a grocery store — it’s not a true single-ingredient treat.

Owner reading the ingredient list on a dog treat bag with a golden retriever watching.

Why dog owners are switching to single-ingredient treats

Allergy detective work. When a dog is itchy or has tummy trouble, vets run elimination diets. Single-ingredient treats let you reward your dog without introducing five mystery ingredients that muddy the results.

Sensitive stomachs. Fewer ingredients means fewer things to react to. Dogs with chronic soft stools often do noticeably better on simple treats.

Senior dogs. Older dogs with kidney or liver concerns benefit from treats without added sodium, phosphorus-rich meals, or rendered by-products.

Training clarity. High-value, smelly single-ingredient proteins (freeze-dried liver, salmon) are the gold standard for recall training — and you know exactly what’s in every reward.

Proteins worth rotating

Variety matters — rotating proteins reduces the chance of your dog developing a sensitivity to any one of them, and it keeps training rewards exciting.

  • Chicken breast — lean, cheap, universally loved. Dehydrated strips are the classic starter DIY treat.
  • Beef liver — the highest-value training treat in most trainers’ pouches. Nutrient-dense, so keep pieces tiny.
  • Salmon — rich in omega-3s for skin and coat. Dried salmon skins make an incredible crunchy chew.
  • Turkey breast — a gentle, low-fat option; great for dogs who are sensitive to chicken.
  • Duck breast — a novel protein worth trying if your dog reacts to common poultry.
  • Lamb lung — light, airy, and easy to break into small training bits.

One caution: organs like liver and kidney are vitamin-A and nutrient powerhouses, which is exactly why portion size matters — a little goes a long way.

Fruits and veggies that work as single-ingredient treats

Not every single-ingredient treat has to be meat. These are all dog-safe as the sole ingredient:

  • Sweet potato — sliced and slow-baked into chews; the natural sweetness makes them a favourite.
  • Pumpkin — plain purée frozen into cubes, or dehydrated into crisps.
  • Apple — thin rings, seeds removed (seeds contain amygdalin — toss the core).
  • Banana — sliced and dehydrated into chewy chips; naturally sweet, so use sparingly.
  • Carrot — frozen whole carrots are a classic teething soother; dehydrated carrot chips crunch beautifully.
  • Blueberry — frozen blueberries are tiny, easy training rewards with almost no calories.

Fruits to never use: grapes and raisins are toxic to dogs, even in small amounts. Skip them entirely.

Red-flag additives to avoid on treat labels

When a “simple” treat label sneaks in extras, these are the ones to watch for:

  1. “Natural flavour” / “animal digest” — vague by design; often used to make low-quality treats palatable.
  2. Vegetable glycerin / glycerine — a humectant that keeps soft treats chewy; harmless in tiny amounts but a sign the treat isn’t truly single-ingredient.
  3. Carrageenan — a thickener linked to gut irritation in sensitive animals; common in soft-moist treats.
  4. Menadione (vitamin K3) — a synthetic vitamin K supplement with no place in a treat; a marker of cheap formulation.
  5. Rendered meals (“meat and bone meal”, “poultry by-product meal”) — undefined source, undefined quality.
  6. Added sugars, corn syrup, molasses — treats don’t need sweeteners; they’re there for shelf appeal to humans.
  7. Artificial colours (Red 40, Yellow 5, Blue 2) — purely cosmetic; dogs don’t care what colour their treat is.
  8. BHA / BHT / ethoxyquin — synthetic preservatives; choose treats preserved by dehydration or freeze-drying instead.

5 easy single-ingredient DIY treats

You don’t need a dehydrator to start (though it helps). An oven on its lowest setting with the door cracked works for all of these.

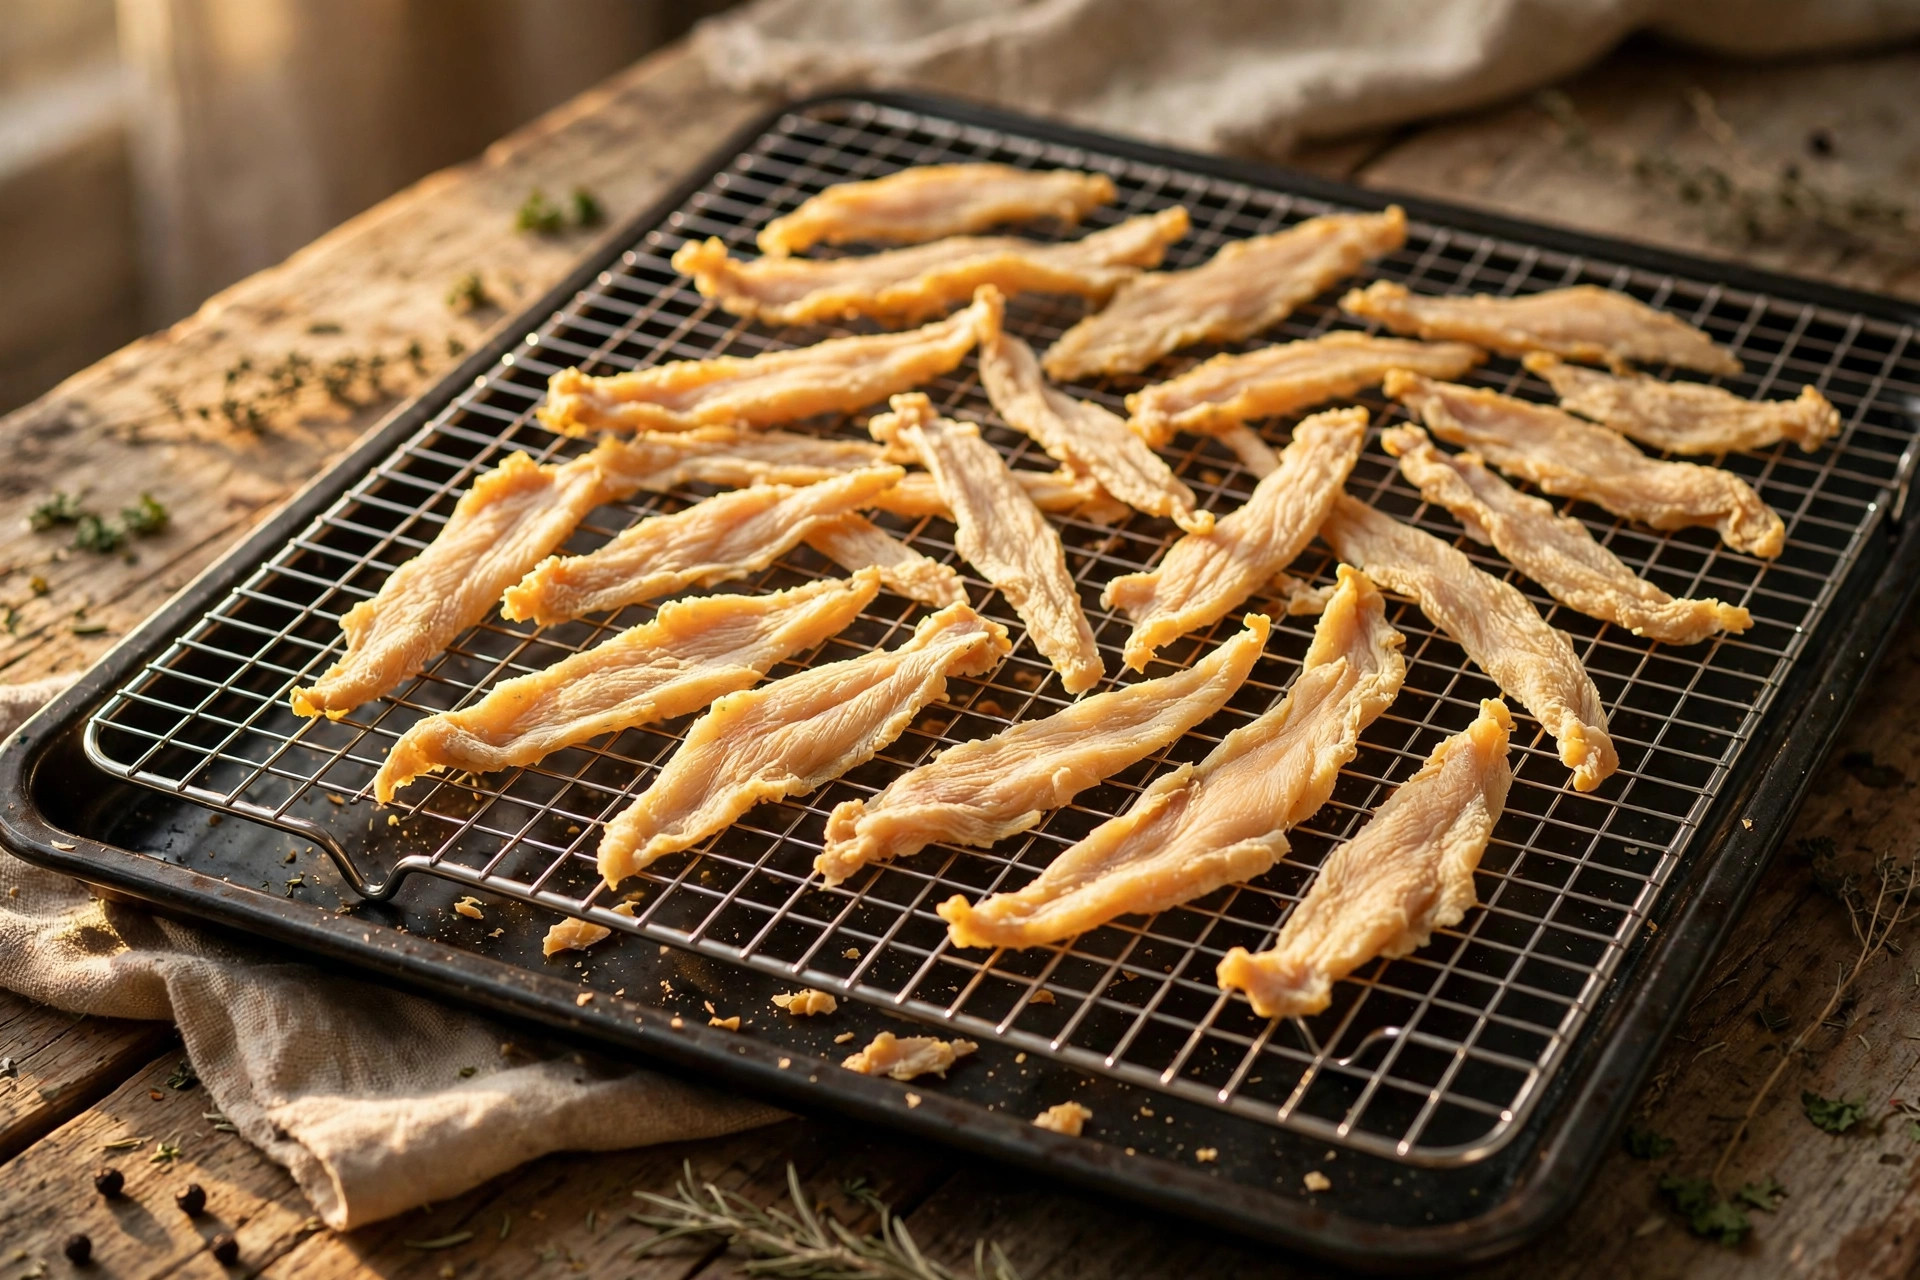
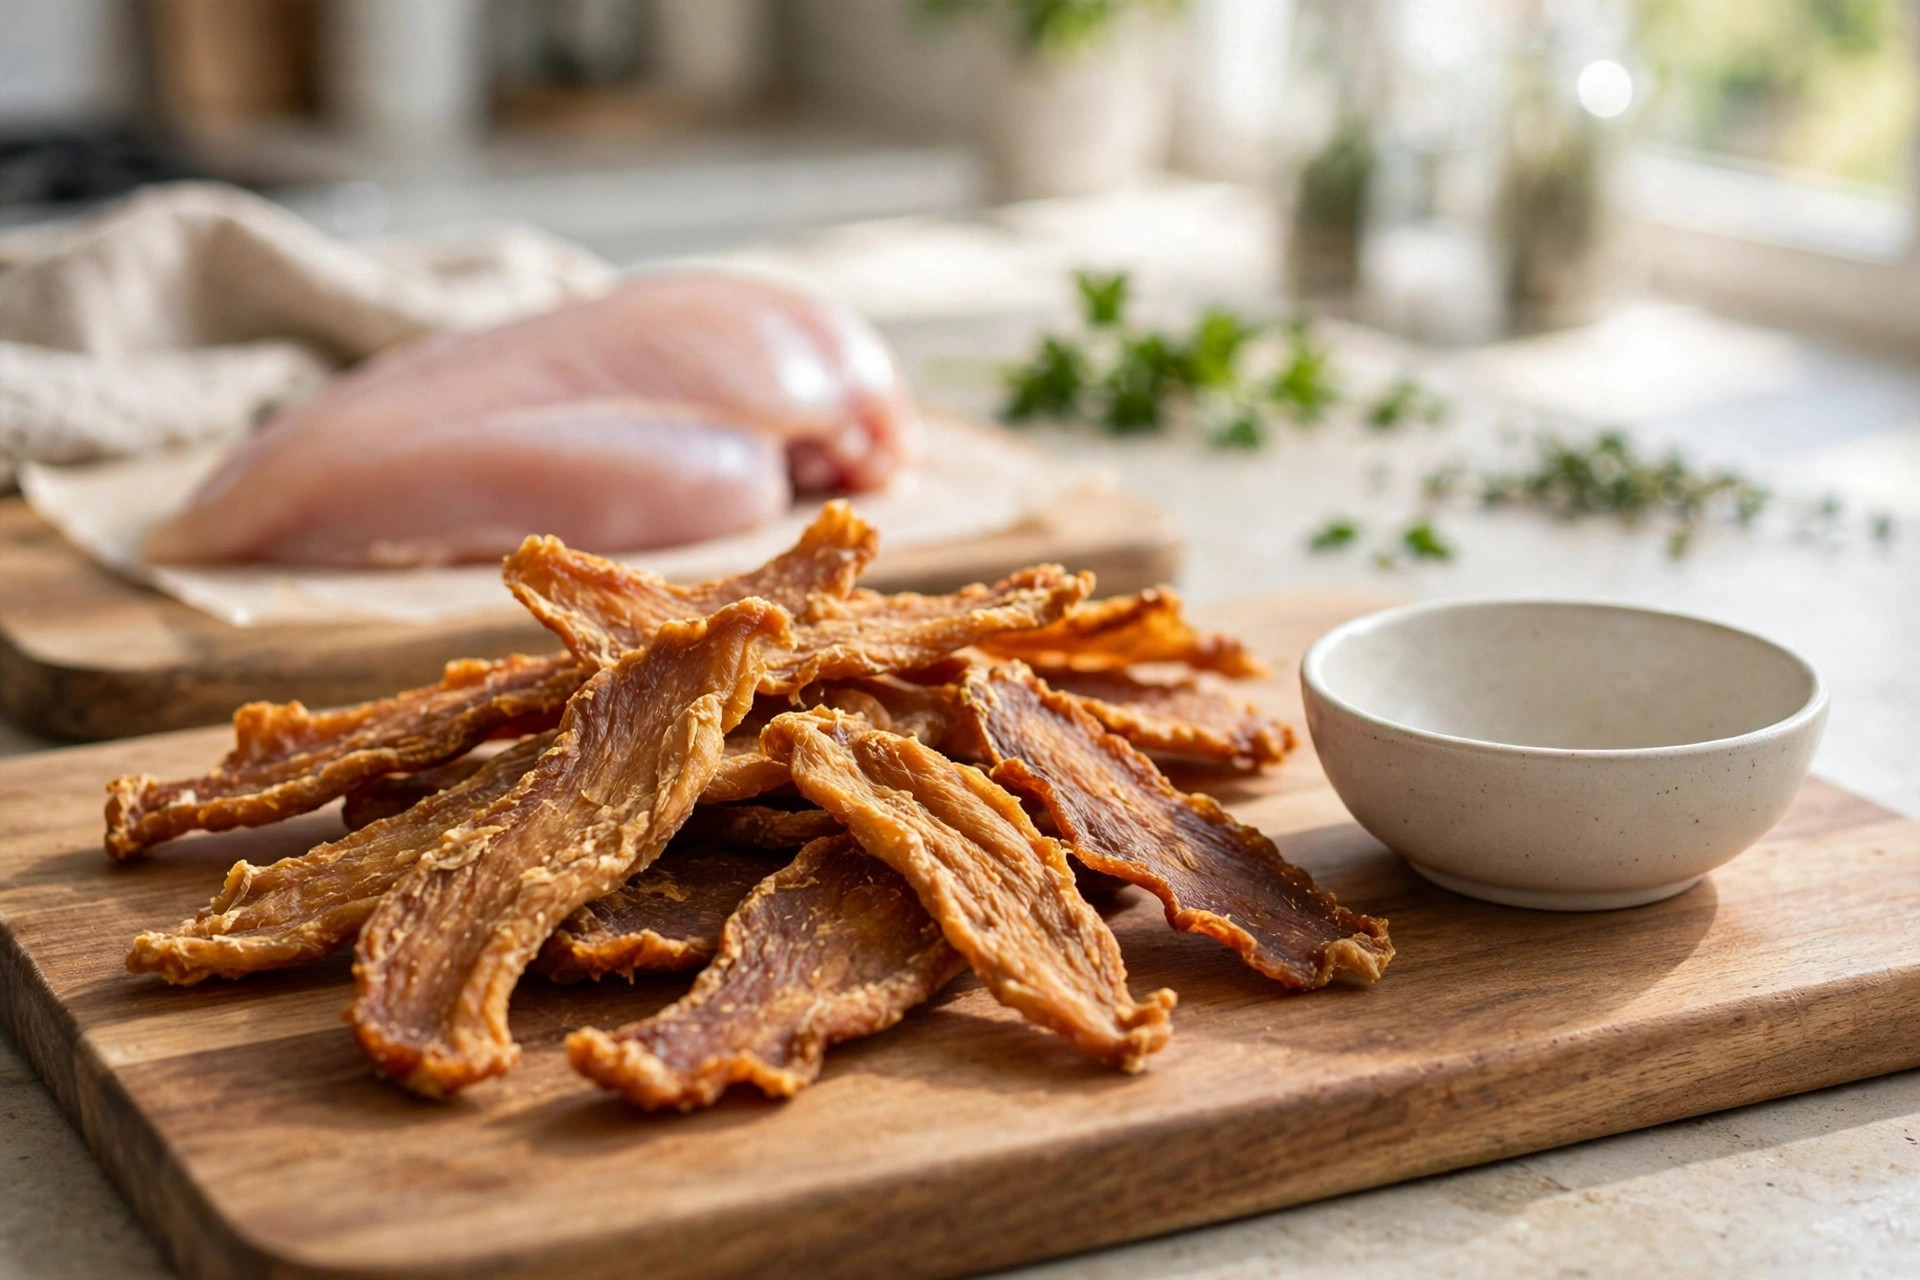
1. Dehydrated chicken breast strips

Slice chicken breast into 5 mm strips against the grain. Lay on a rack over a tray and dry at 75°C / 170°F for 4–6 hours until completely dry and leathery. They should snap, not bend.

Dehydrated chicken breast strips on a wire rack — homemade single-ingredient dog treats.

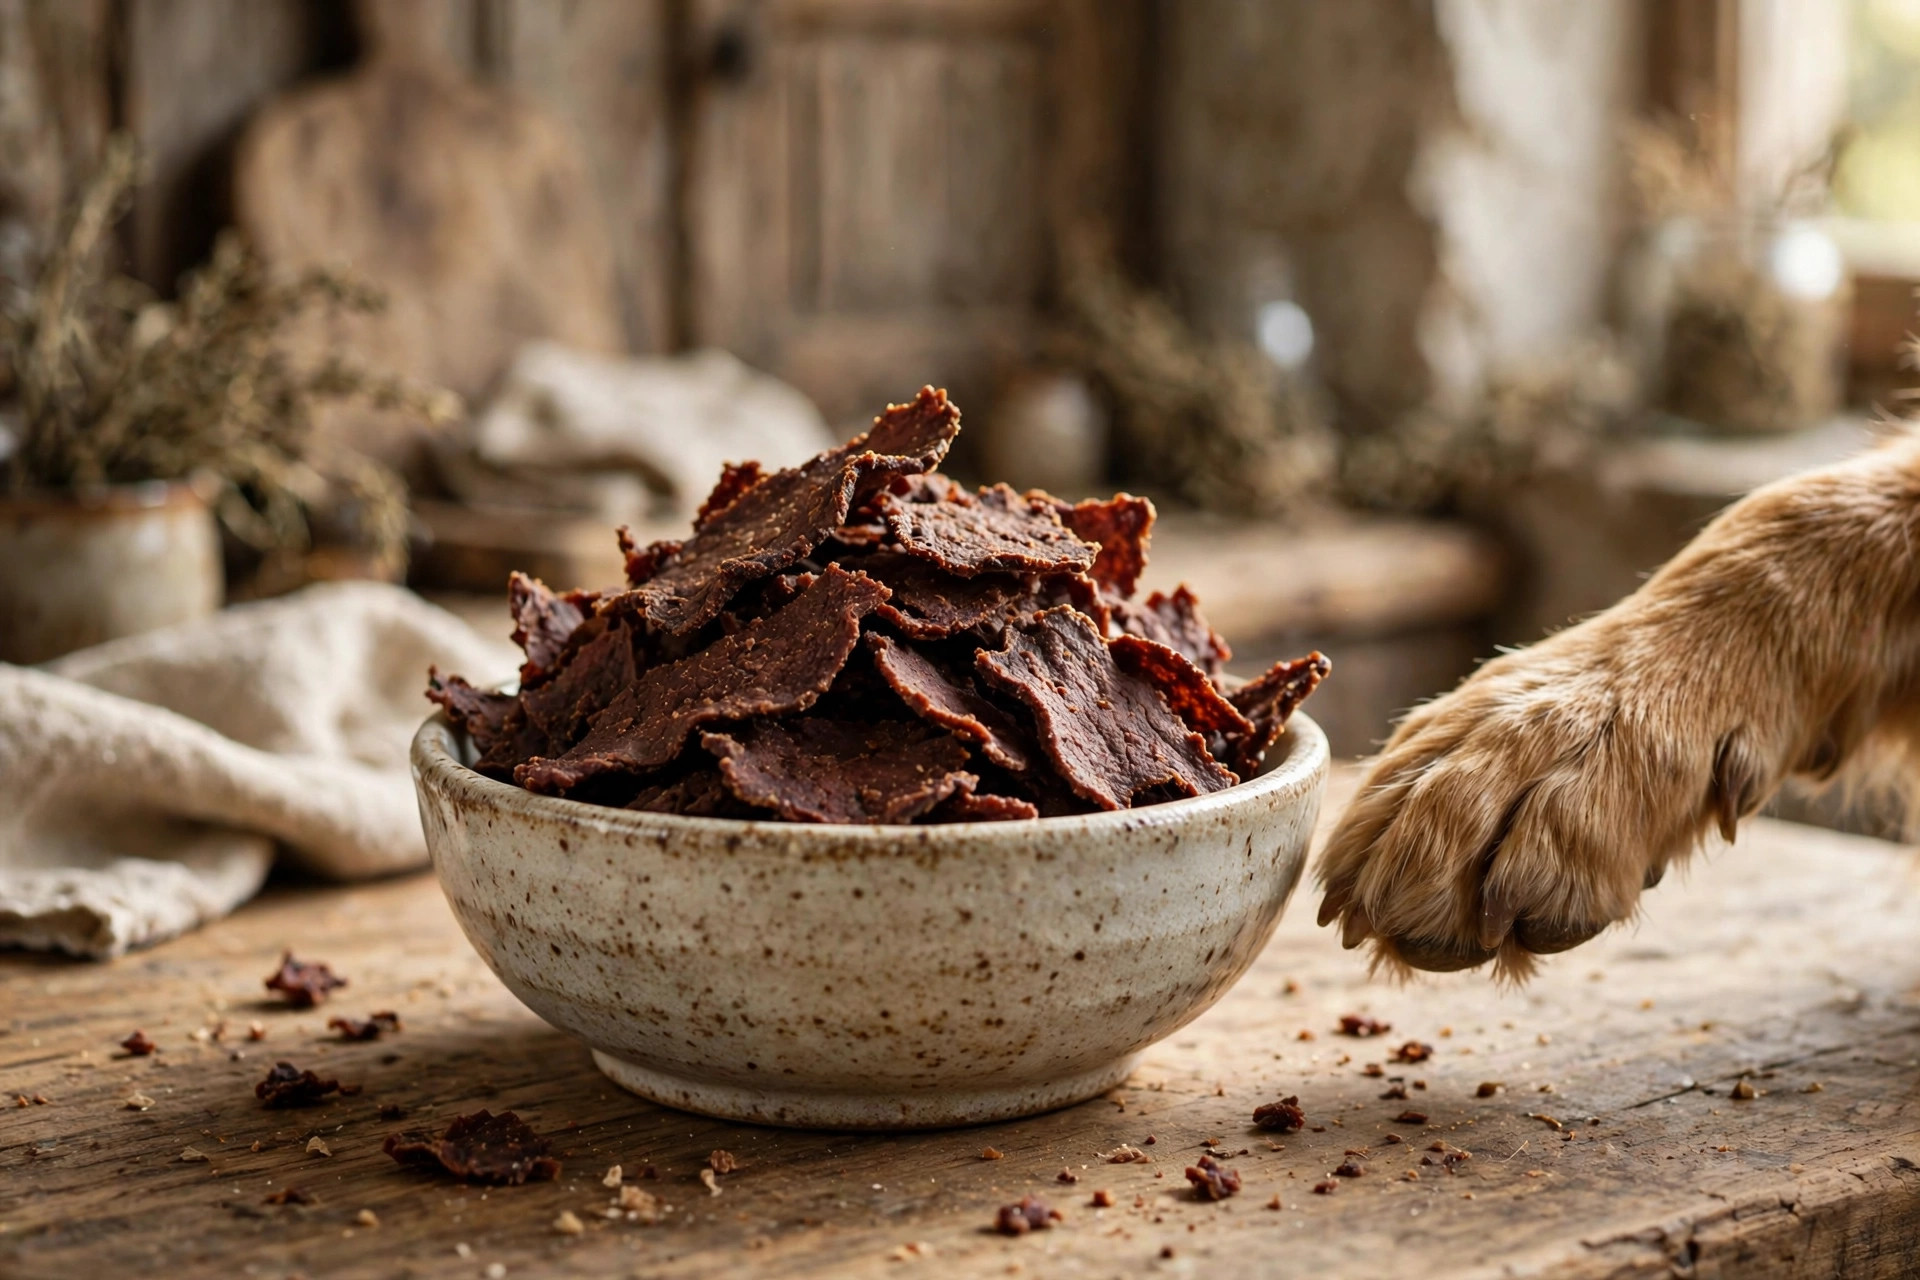
2. Beef liver crisps

Slice liver while it’s still slightly frozen (much easier). Dry at 75°C / 170°F for 5–7 hours until brittle. Break into pea-sized training bits — liver is rich, so small pieces only.

Dehydrated beef liver crisps in a ceramic bowl with a dog's paw reaching in.

3. Salmon skin crunchies

Save the skins when you cook salmon fillets. Scrape off excess fat, lay flat, and dry at 75°C / 170°F for 3–4 hours until crisp. Omega-3 packed and dogs go wild for them.

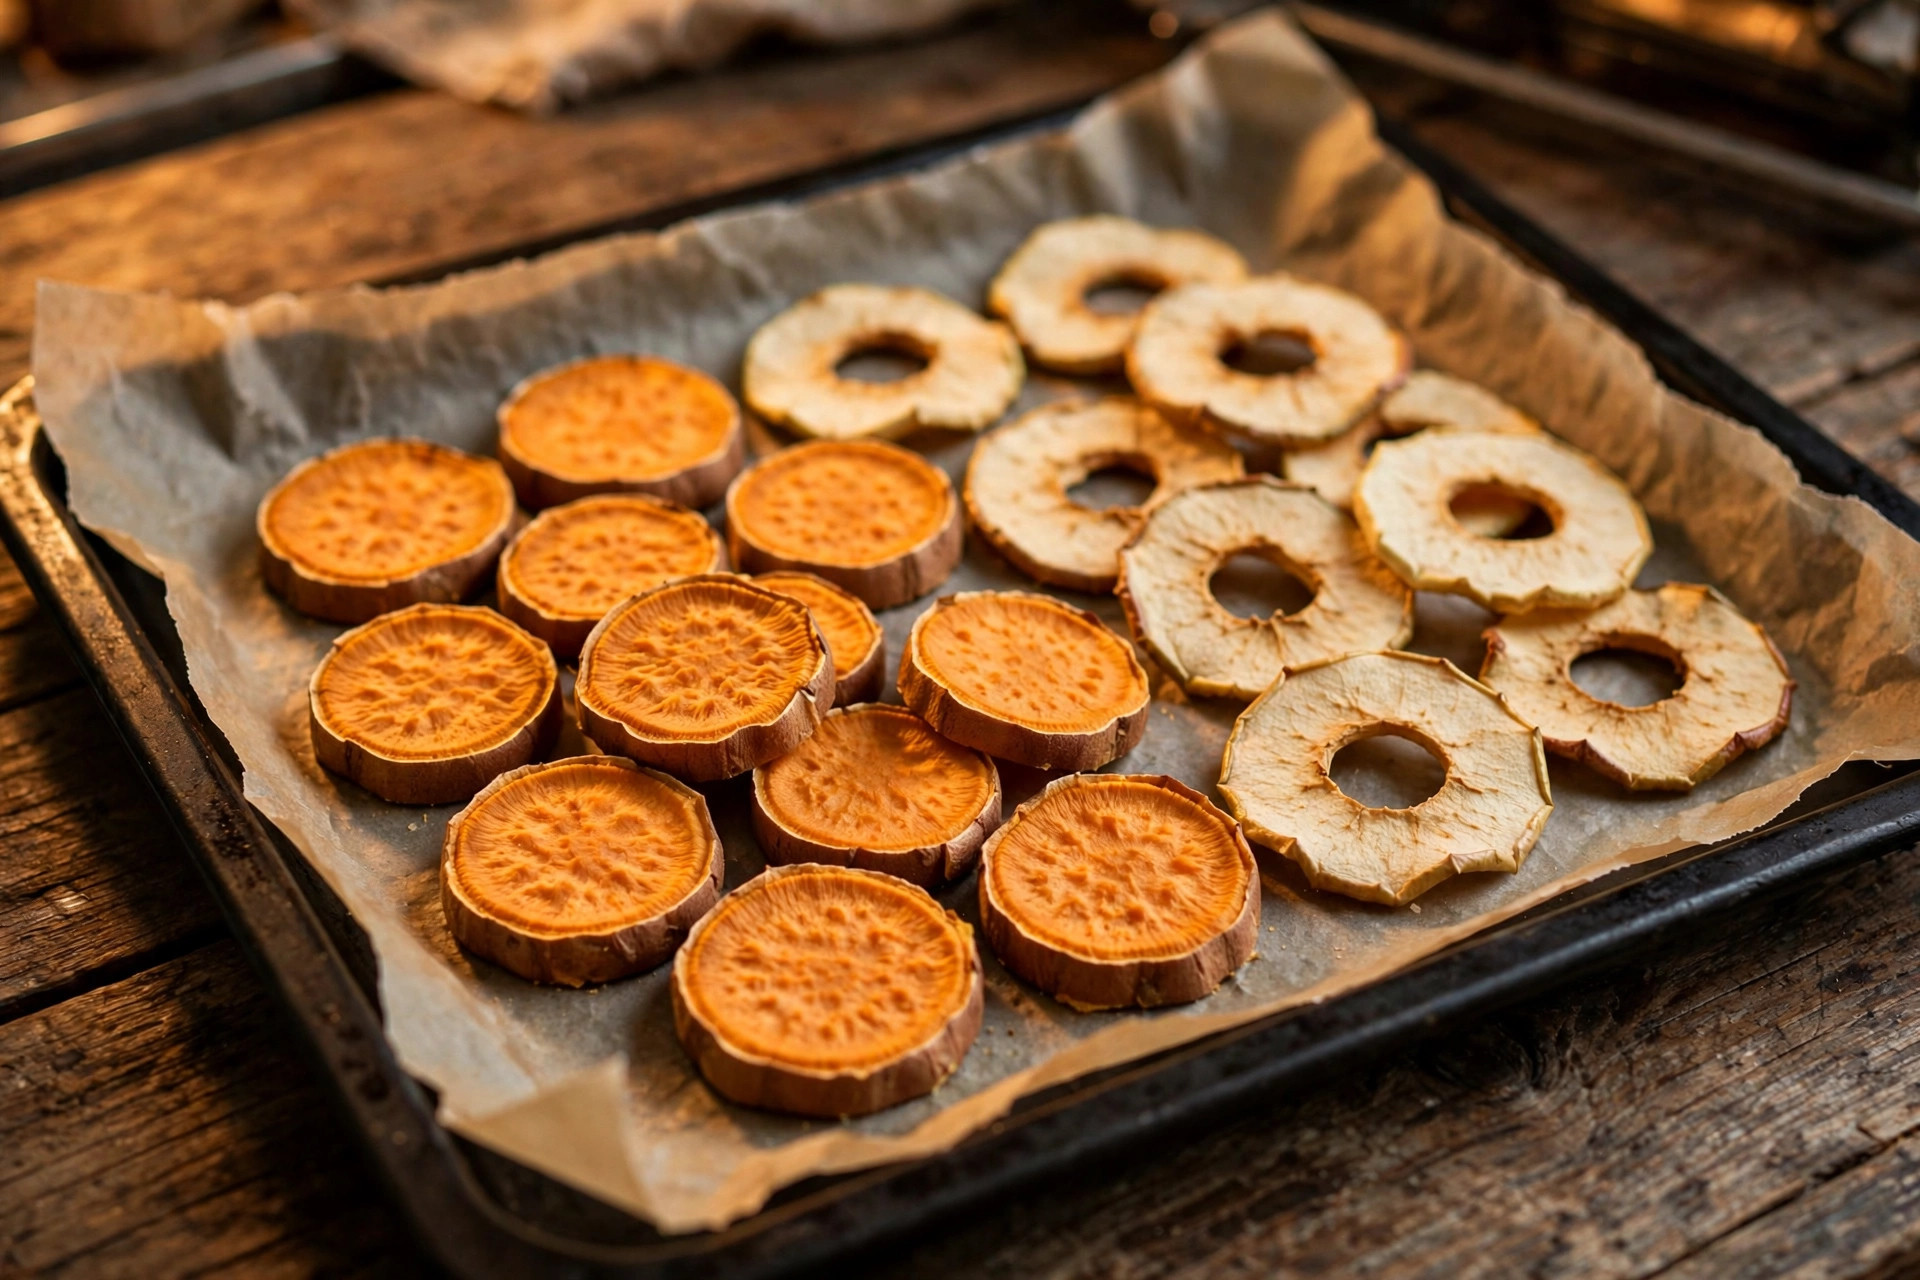
4. Sweet potato chews

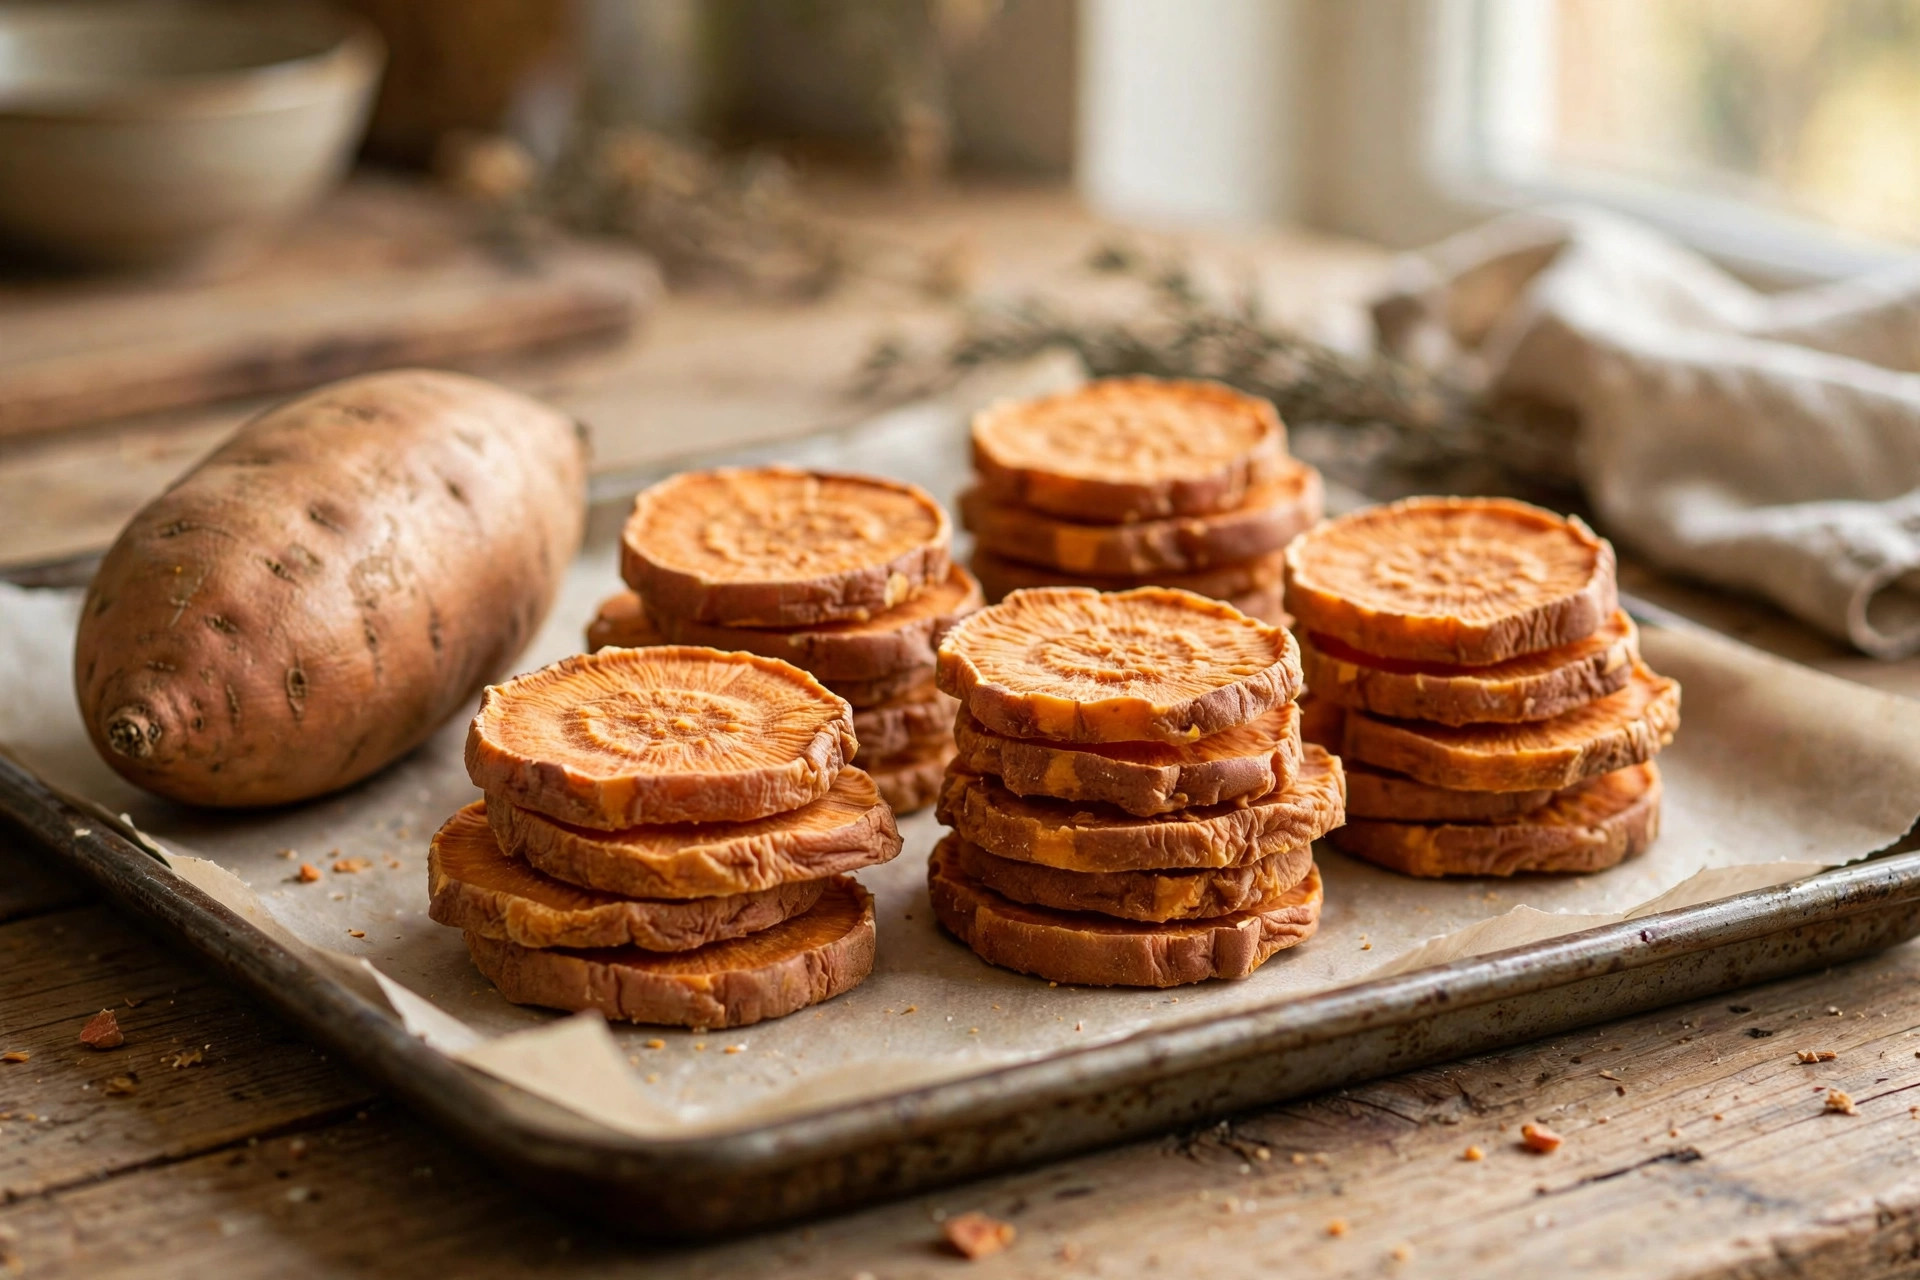
Slice sweet potato into 6 mm rounds. Bake low and slow at 120°C / 250°F for 2½–3 hours, flipping halfway. They firm up as they cool — chewy at the edges, soft in the middle.

Sweet potato chews and dried apple rings on a baking tray.

5. Apple rings

Core an apple and slice into 5 mm rings. Dry at 70°C / 160°F for 4–5 hours until leathery. A naturally sweet, almost zero-calorie chew.

Storage: fully dried treats keep 2–3 weeks in an airtight jar at room temperature, or 2 months in the freezer. If a treat feels soft or smells off, toss it — without preservatives, moisture is the enemy.

Safety notes

  • Dry completely. The single biggest DIY mistake is under-drying. Any residual moisture invites mould. When in doubt, dry longer.
  • Cool before storing. Trapped steam in a sealed jar undoes hours of dehydrating.
  • Supervise new chews. Even single-ingredient chews can splinter or be swallowed whole by enthusiastic gulpers — watch the first few.
  • Introduce one protein at a time. Especially for allergy-prone dogs, add a new treat protein every few days so you can spot reactions.
  • Treats are still treats. Keep all treats — however wholesome — under ~10% of daily calories.

FAQs

Are single-ingredient treats better than regular treats?
For most dogs, yes in one clear way: you know exactly what’s in them. They’re especially valuable for allergy-prone, senior, or sensitive dogs. A high-quality multi-ingredient treat isn’t “bad” — it’s just harder to audit.

Can puppies have single-ingredient treats?
Yes — they’re actually ideal for puppies, since fewer ingredients means easier digestion and clearer allergy tracking. Use tiny pieces and stick to gentle proteins like chicken or turkey at first.

Freeze-dried vs dehydrated — which is better?
Both preserve food without additives. Freeze-drying retains slightly more nutrients and gives a lighter, crunchier texture; dehydrating is cheaper to do at home. Either beats a treat preserved with BHA.

My dog is allergic to chicken. What single-ingredient treats can I use?
Try novel proteins: duck, turkey, lamb lung, or salmon. Single-ingredient treats shine here — with a one-item label, you always know the protein source.

How do I know a store-bought treat is truly single-ingredient?
Flip the bag. The ingredient list should have exactly one item, in plain language. If you see anything you can’t buy at a grocery store, put the bag back.

Final word

Single-ingredient treats are the closest thing to a “what you see is what you get” promise in the treat aisle. Whether you buy freeze-dried or dry your own this weekend, you’re giving your dog rewards with nothing to hide. Start with chicken strips — they’re cheap, nearly foolproof, and if our natural dehydrated treats roundup is anything to go by, your dog will be obsessed by batch two.

Pin this for later 📌 — and if you want more from-scratch ideas, browse our Dog Treats category next.

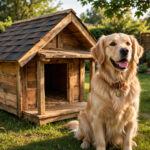
Golden retriever sitting in front of a handmade wooden dog house with a slanted roof in a sunny backyard.

DIY Dog House Ideas: 9 Builds for Every Budget

A store-bought dog house can cost anywhere from a little to a lot — and half of them are too small, too flimsy, or made of plastic that turns your backyard into a sauna. Building your own changes the maths completely: with a weekend, some reclaimed timber and basic tools, you can give your dog a sturdy, well-sized shelter that fits your yard and your budget.

Below are 9 DIY dog house ideas, ordered from “an afternoon and almost no money” to “a proper weekend carpentry project”. Every build includes the sizing rule, the weatherproofing basics, and the safety notes that keep a nice project from becoming a vet visit.

The golden rule of sizing: the house should be tall enough for your dog to stand and turn around, and long enough for them to stretch out — but no bigger. An oversized house feels cold and empty in winter, because your dog’s body heat can’t warm the space.

Budget builds (under a day, minimal tools)

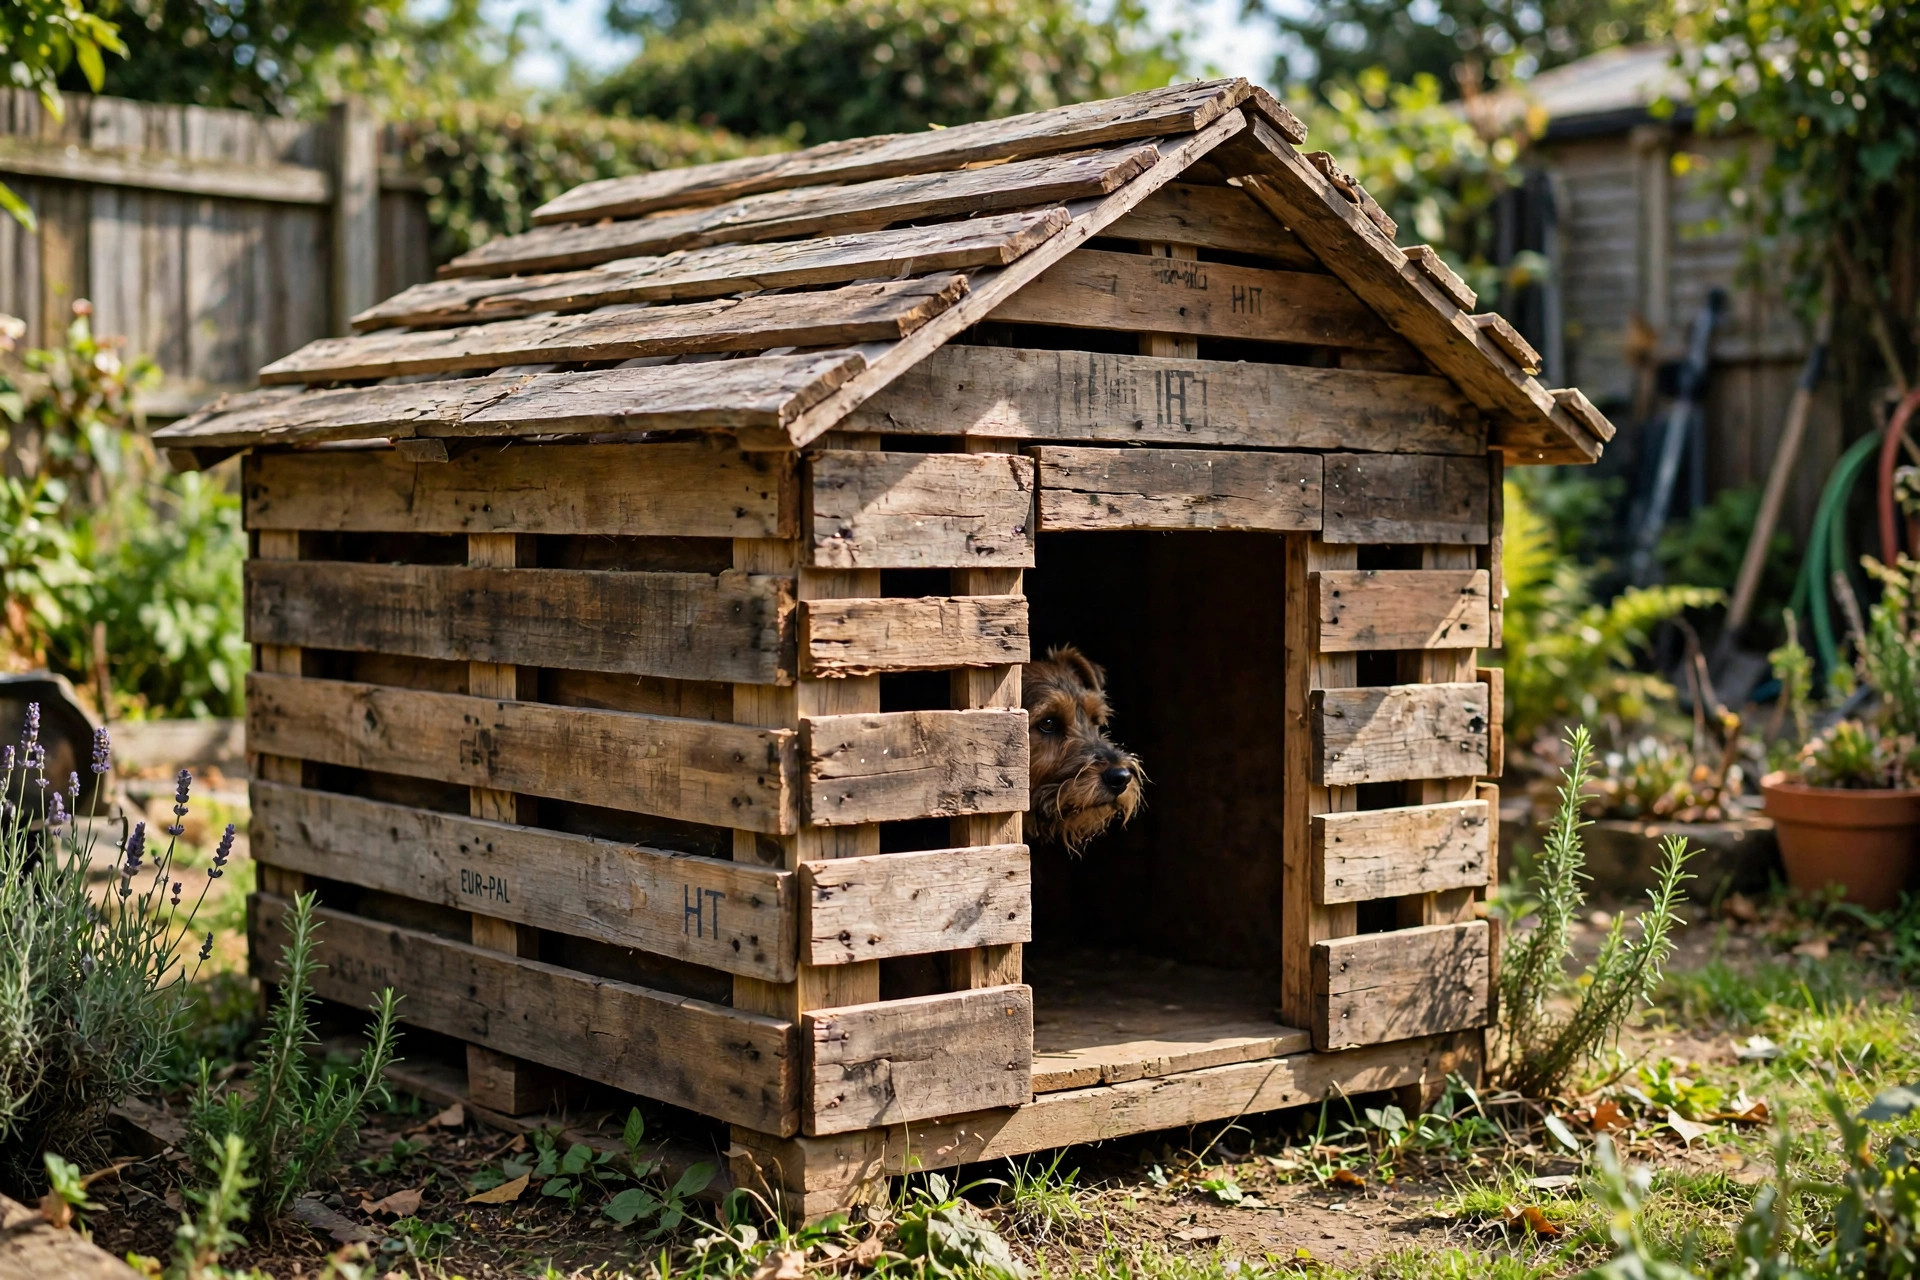
1. The pallet dog house

The classic. Pallets are free or nearly free, and two or three of them give you walls, a floor frame and most of a roof. Break them down (a reciprocating saw or just a hammer and pry bar), sand the slats smooth, and screw them into a simple box shape with a pitched roof. Raise it 10 cm off the ground on short legs or bricks so air flows underneath and the floor stays dry.

Safety note: check pallets for the HT (heat-treated) stamp — avoid MB (methyl bromide) treated wood. Sand every surface your dog’s mouth can reach, and sink or pull any protruding nails.

Rustic dog house built from reclaimed wooden pallet slats with a small terrier peeking out.2. The crate-and-plywood shell

Got a big plastic or wire crate your dog outgrew? Build a simple plywood box around it — walls, floor and a sloped lid — and you’ve turned a boring crate into a proper little house. This is the fastest build on this list: four panels, a roof, and some hinges on the lid so you can lift it for cleaning. The crate inside gives your dog the familiar den feel, and the shell keeps rain and sun off.

3. The insulated barrel house

A food-grade plastic barrel (ask bakeries and food wholesalers — they often give them away) laid on its side makes a surprisingly cosy den. Cut a doorway in one end with a jigsaw, sand the edge smooth, and line the inside with a layer of closed-cell foam board glued under a plywood inner skin. Barrels shed rain naturally and the curved walls stay warm — this is the cheapest build that genuinely works for cooler weather.

Weekend carpentry builds

4. The classic pitched-roof kennel

The build most people picture: 2×2 framing, tongue-and-groove or plywood walls, a pitched roof with real shingles or roofing felt. Add a front porch overhang of 20–30 cm — it keeps rain out of the doorway and gives your dog a dry spot to sit and supervise the garden. Ventilation matters: leave a small vent gap under the roof ridge so hot air escapes in summer.

Paint the outside with exterior paint or wood stain, and line the floor with a removable panel you can hose off. Dogs are gloriously muddy; plan for it.

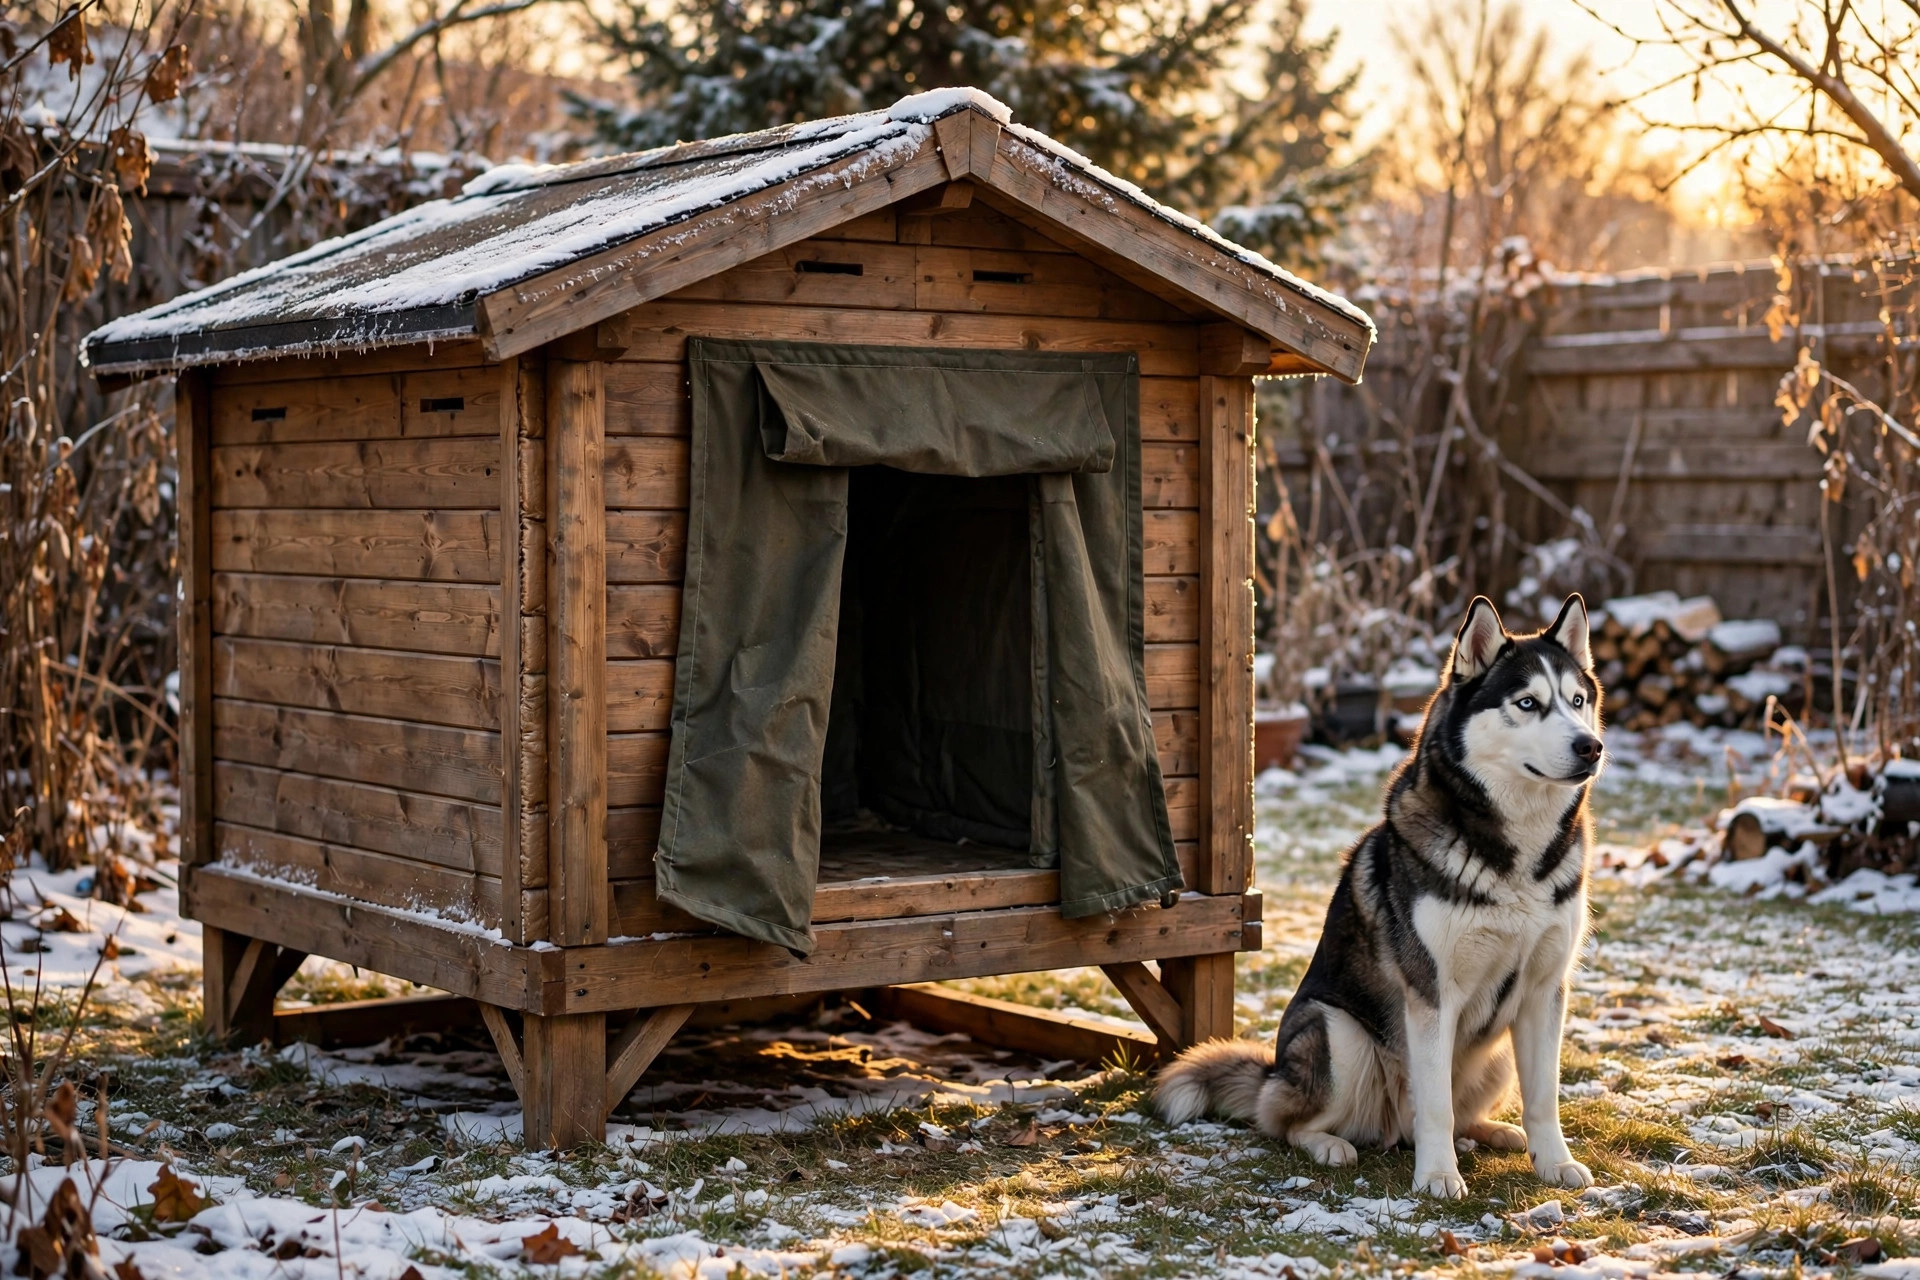
5. The insulated winter dog house

If your dog spends real time outside in cold weather, insulation is not optional — it’s the whole point of the build. Sandwich rigid foam board between the outer wall and an inner plywood skin on all sides, floor and roof. Cut the doorway smaller than usual (about 10 cm taller than your dog’s shoulders) and hang a heavy fabric or vinyl flap over it to block wind. A raised floor plus insulation keeps the interior noticeably warmer than the air outside.

Never heat a dog house with electric heaters, heat lamps or heated mats left running unattended — fires and burns are a real risk. A well-built insulated house plus deep, dry bedding is warm enough.

Insulated wooden winter dog house with a fabric flap door and raised floor in a snowy yard, husky beside it.6. The dog house with a run

Combine a medium-sized house with an attached fenced run and your dog gets shelter plus safe outdoor space in one project. Build the house first, then frame a run of kennel panels or welded-wire mesh off the front, with a small doorway cut between them. Give the run a shaded half and a sunny half, and bury the mesh 20–30 cm underground or lay an L-shaped footer so diggers don’t tunnel out.

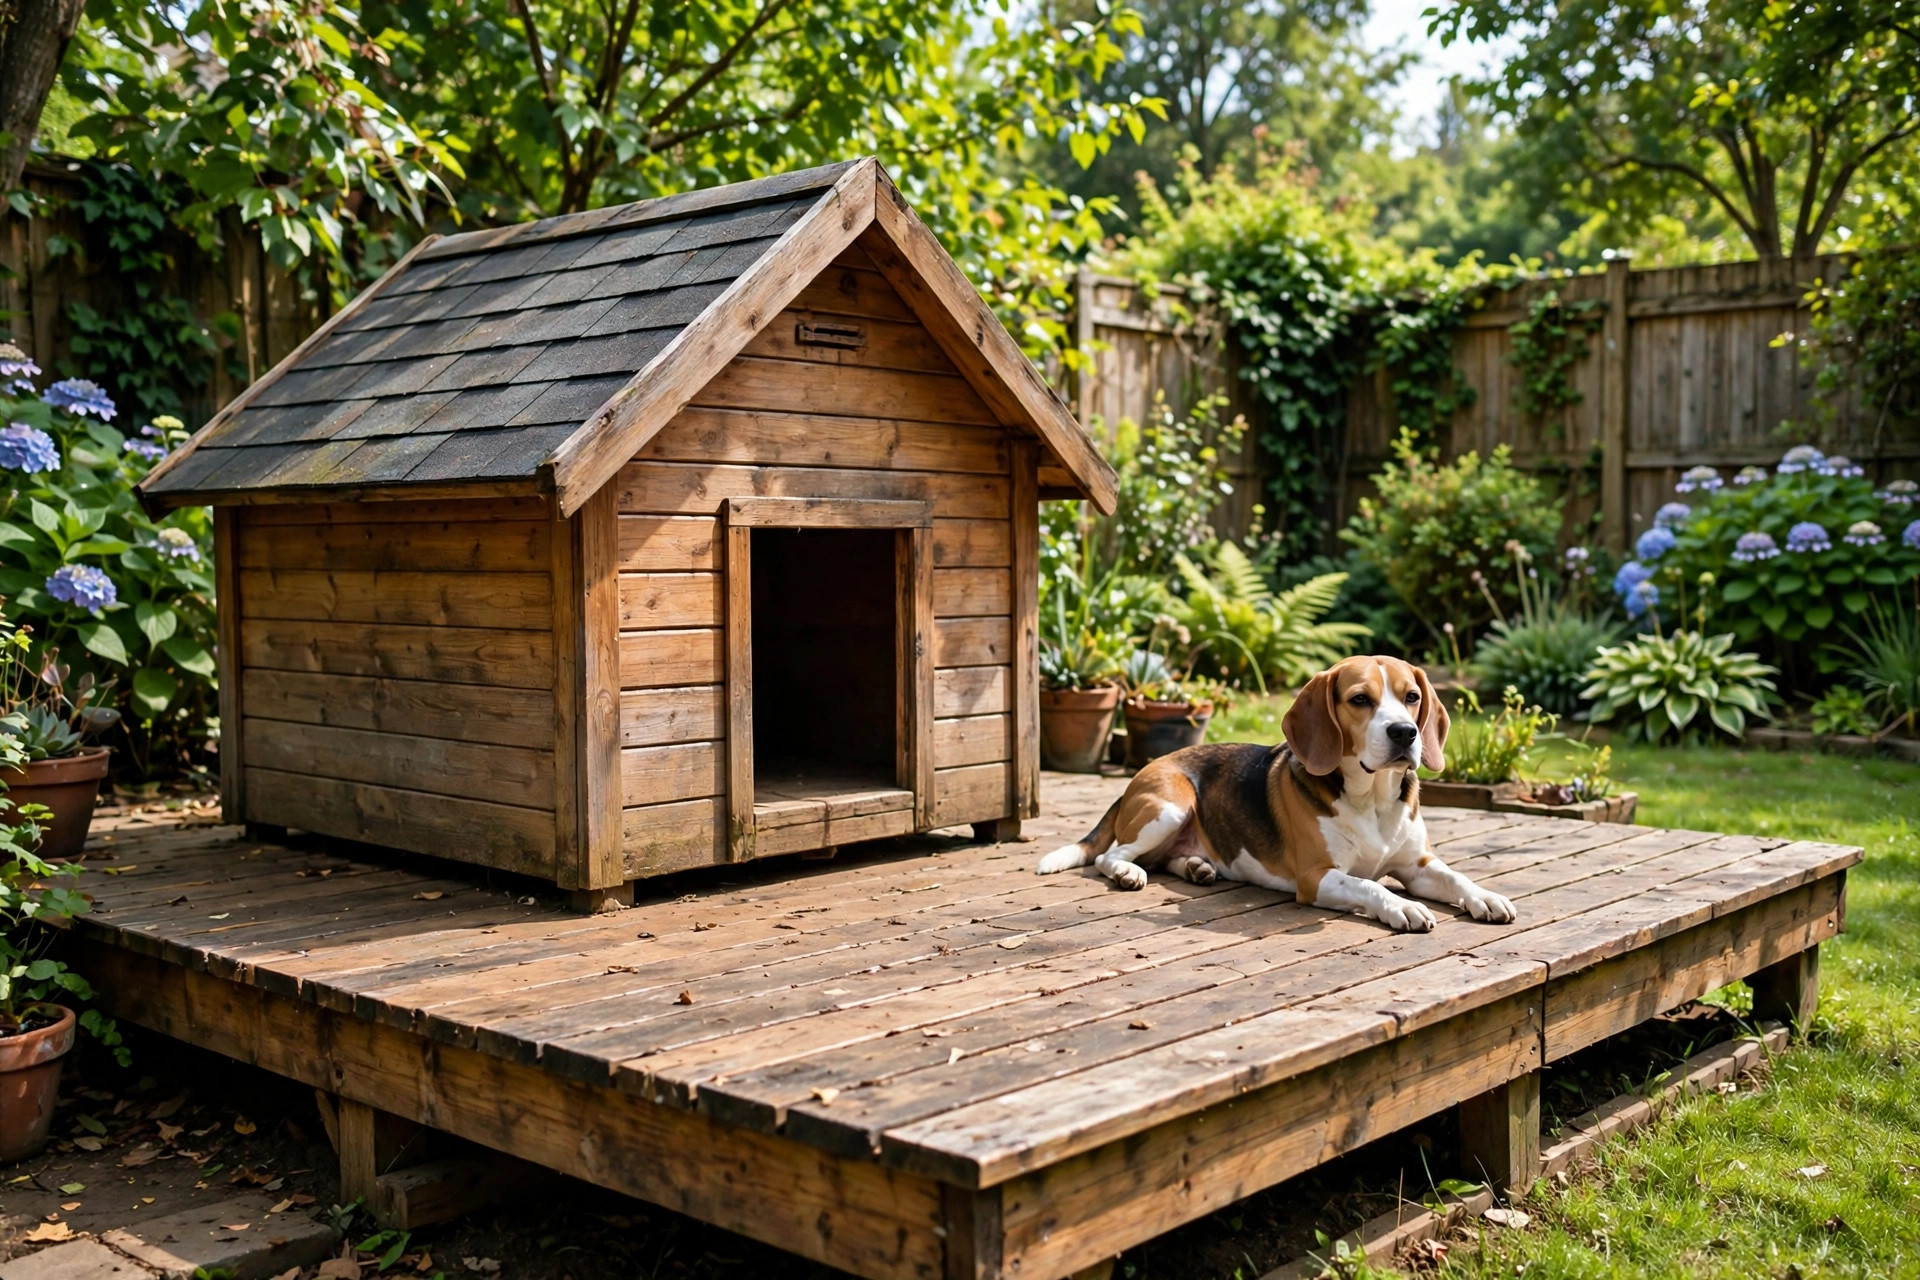
7. The raised deck dog house

Damp ground is the enemy of every dog house. Build the house on a sturdy deck platform 30–40 cm off the ground and you solve drainage, damp and even most pests in one move. The deck doubles as a lounging spot your dog will probably prefer to the house itself. Use pressure-treated timber for the deck structure (not for any surface your dog chews) and make sure the steps or ramp aren’t slippery when wet.

Wooden dog house on a raised deck platform with a beagle lounging beside it in a backyard.Indoor builds

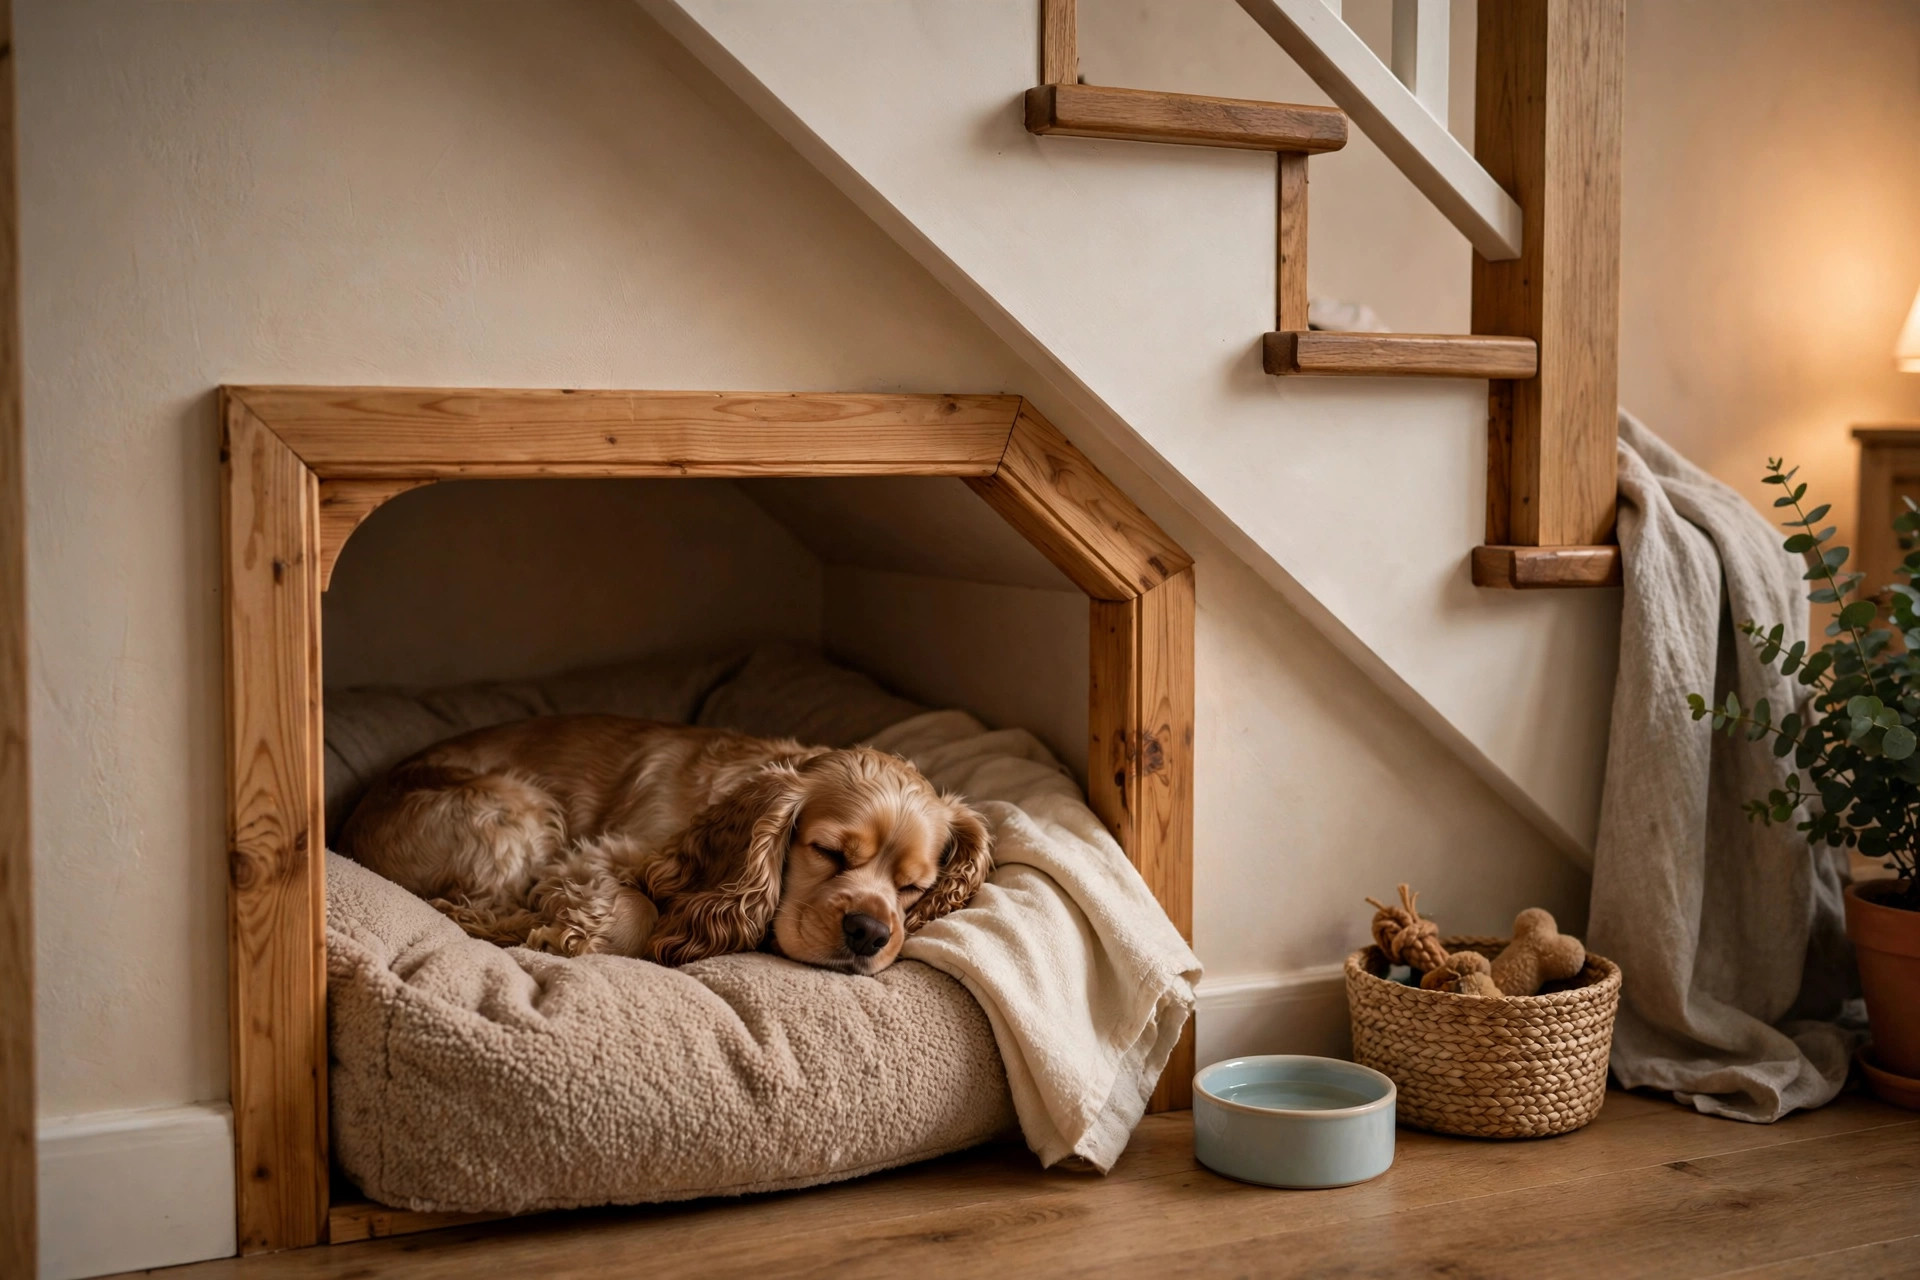
8. The furniture-grade indoor dog nook

Not every “dog house” goes outside. Turn a side table, the space under the stairs, or a low cabinet into a built-in dog nook: add a cushion, a curtain or low door for den-feel, and ventilation at the back. Dogs that sleep in your bedroom will often abandon their expensive bed for a quiet dark corner — this just makes that corner deliberate. Keep the entrance wide enough that a nervous dog never feels trapped.

Cozy indoor dog nook built under a staircase with a sleeping cocker spaniel on a cushion.9. The corner-frame nook with a roof
Two walls, a roof panel and a front rail — the simplest indoor structure that still reads as a “house” to your dog. Frame it from timber battens, drape it with washable fabric or bolt on plywood panels, and you have a den that fits any room corner. Because it’s light, you can move it with the seasons: next to the radiator in winter, by the garden door in summer. Add a machine-washable cushion and it’s done.
Weatherproofing basics (every outdoor build)

  • Elevate the floor 10–40 cm off the ground — damp rises, dogs get cold, and rot follows. This single step matters more than any paint.
  • Slope the roof at least 10 degrees and overhang every wall by 15–30 cm. Water should never run down a wall.
  • Face the doorway away from prevailing wind and rain. A flap or small porch helps in exposed spots.
  • Seal and paint all exterior wood with exterior-grade products, and re-seal every year or two. Interior surfaces: seal with a water-based, non-toxic finish only.
  • Ventilate. A house that’s airtight in summer becomes an oven. A ridge vent or two small louvered vents near the roof line is enough.
Safety checklist before your dog moves in

  1. No exposed fasteners. Every screw head should be countersunk or capped; pull or hammer flat every staple and nail.
  2. No treated wood where your dog can chew — no pressure-treated, creosote or MB-stamped timber on interior or chewable surfaces.
  3. No toxic finishes inside the house. Water-based, pet-safe products only, and let everything cure fully before the dog moves in.
  4. The doorway test. Your dog should walk in and turn around without scraping. Too big is worse than slightly snug in cold climates.
  5. Check it seasonally. Tighten screws, re-seal wood, replace bedding, and look for wasp nests in spring — they love roof overhangs.

FAQs

What size should a DIY dog house be?

Big enough for your dog to stand up, turn around and lie stretched out — and not much bigger. Measure your dog: the interior height should be about 25% taller than their shoulder height, and the length roughly equal to their nose-to-tail-base measurement. A house that’s too large loses body heat fast in winter.

Can a dog house be too warm?

Yes. A plastic house in full summer sun can be dangerously hot inside. Always place outdoor houses in partial shade, give them ventilation near the roof, and check the interior temperature on hot afternoons. If it’s uncomfortable for your hand, it’s too hot for your dog.

How do I keep a dog house dry inside?

Elevate it, slope the roof, overhang the walls, face the door away from rain, and use bedding that drains and dries — straw works better than blankets in wet weather, and it should be replaced when damp.

Is plywood safe for a dog house?

Exterior-grade plywood is fine for walls and roofs once sealed. Avoid OSB and chipboard for outdoor builds — they swell and crumble when wet. For any surface a determined chewer can reach, use solid timber instead.

Three balanced homemade dog food bowls with chicken, turkey and beef recipes and a golden retriever watching.

Homemade Dog Food Recipes: 7 Balanced Bowls to Rotate

More dog parents are taking dinner back into their own kitchens — and
not just because of the recall headlines. Homemade dog food means you

control every ingredient: no mystery fillers, no artificial
preservatives, no ingredients you can’t pronounce. You can tailor the
bowl to your dog’s age, activity level, allergies and taste, and many
dogs simply eat more enthusiastically when the bowl smells like real
food.

But there’s a catch worth taking seriously: a bowl that looks
wholesome can still be nutritionally incomplete. Dogs need the right
balance of protein, fat, fibre, vitamins and minerals — and missing a

single nutrient over months can cause real problems. That’s why this
guide isn’t just a list of tasty mixes. You’ll get a simple balancing
framework, seven complete-bowl recipes you can rotate through the
week, the foods that must never go in the pot, and honest guidance on
when to loop in your vet or a canine nutritionist.

How to build a balanced homemade dog bowl

Every recipe below follows the same easy framework. Aim roughly for
this breakdown per meal:

  • 40–50% lean protein. Chicken, turkey, lean beef, salmon or eggs. Protein builds and maintains muscle, and it’s the most important macronutrient in the bowl.
  • 25–35% cooked complex carbs. Brown rice, sweet potato, pumpkin, oats or quinoa give steady energy and fibre for digestion.
  • 15–25% vegetables and fruit. Carrots, green beans, peas, spinach, blueberries or apple (no seeds) add vitamins, minerals and antioxidants.
  • A source of healthy fat. A drizzle of salmon oil or a little coconut oil supports skin, coat and brain health. Go easy — too much fat triggers digestive trouble.
  • Calcium and micronutrients. Dogs on homemade diets commonly miss calcium. Talk to your vet about a balanced canine multivitamin or a calcium supplement — do not rely on guesswork.

Portion-wise, most adult dogs need roughly 2–3% of their body weight in food per day (split into two meals), but active, senior and small breeds differ a lot. Use this as a starting point and adjust by weight, energy and stool quality — your vet can fine-tune it in one visit.

1. Classic chicken and rice comfort bowl

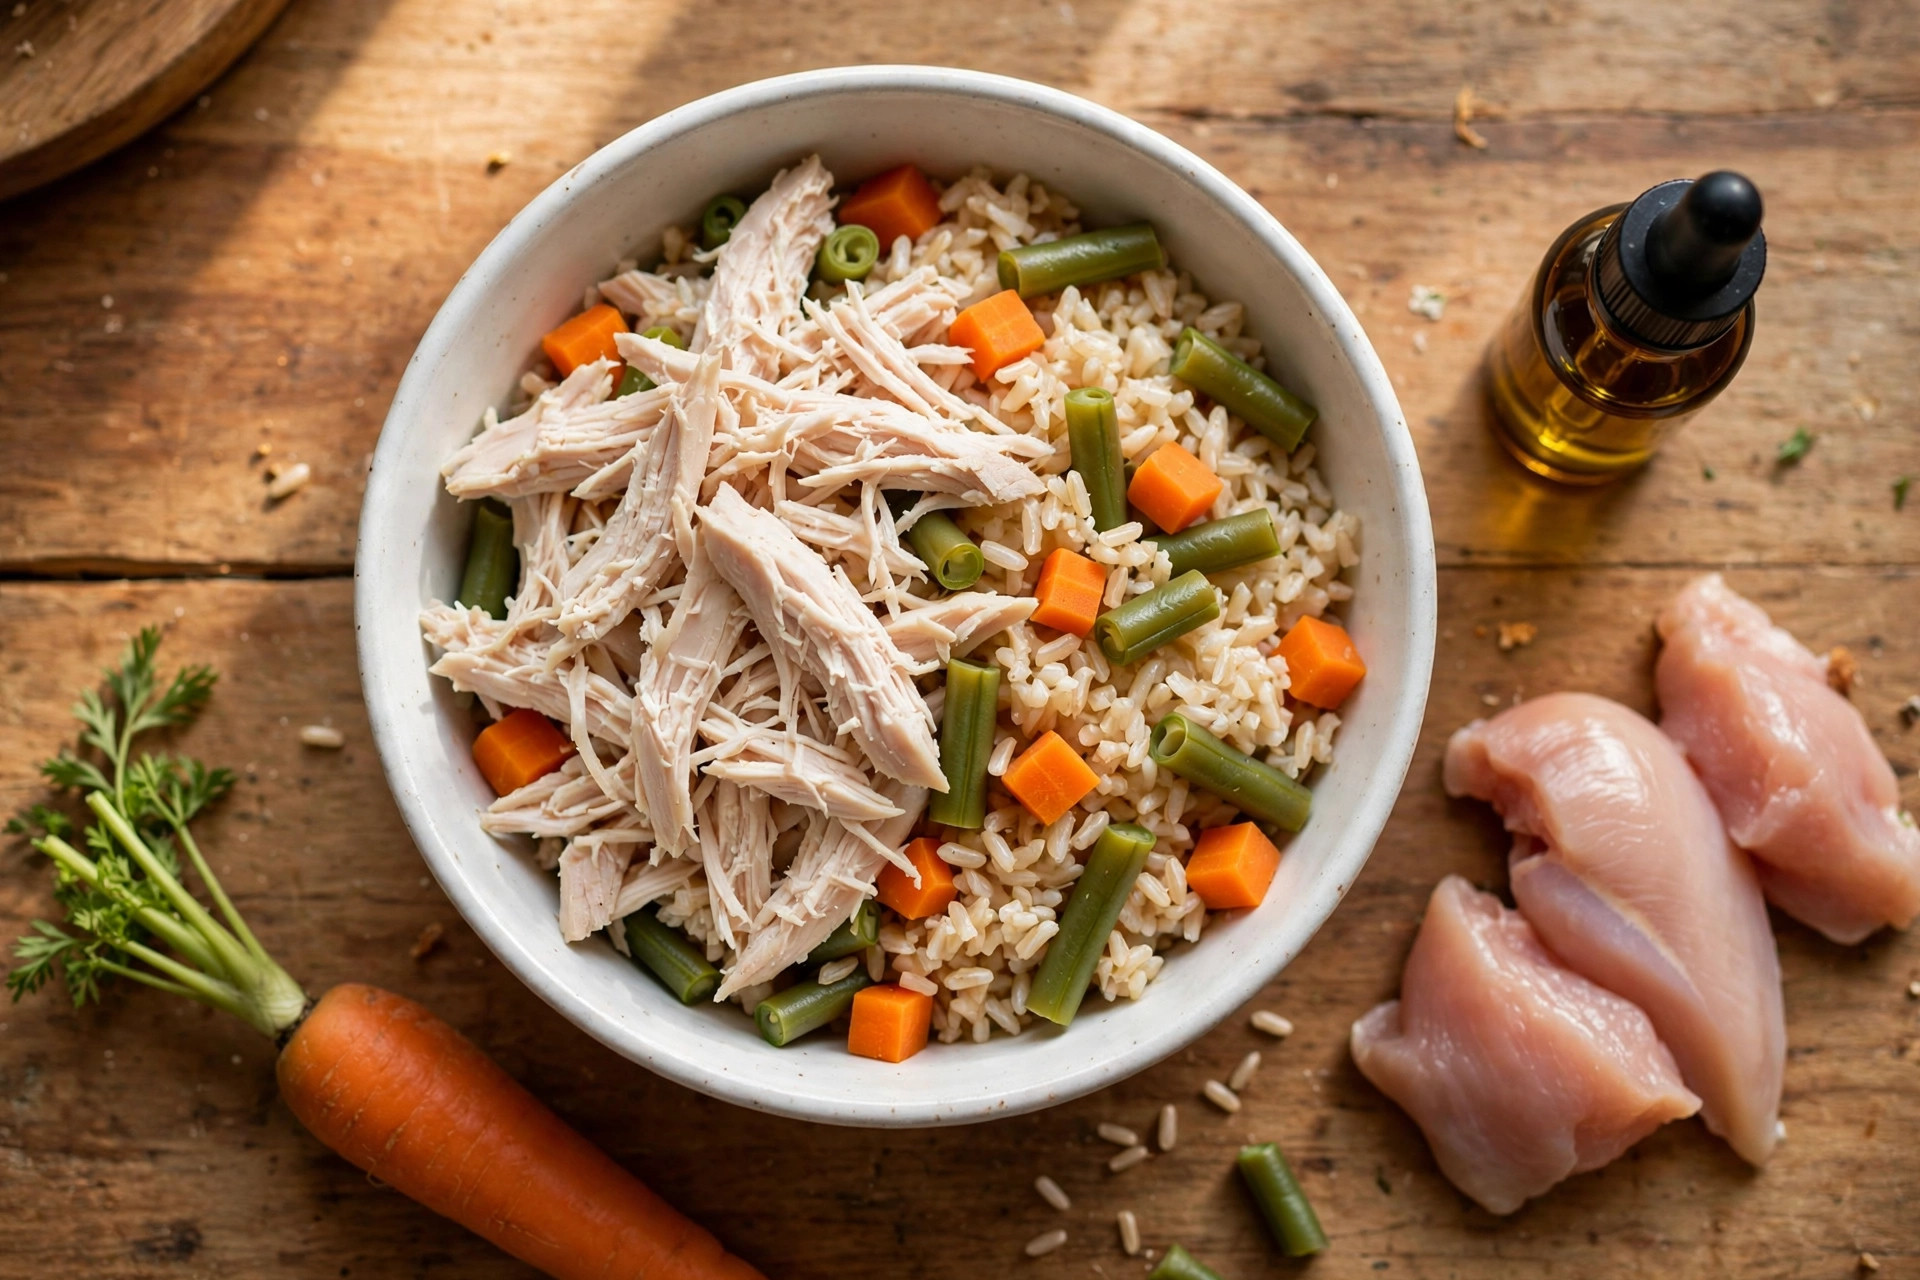
The go-to recipe vets have recommended for decades — and for good reason. Poach 2 cups of skinless chicken breast, cook 1.5 cups of brown rice, and steam 1 cup of diced carrots and green beans. Shred the chicken, fold everything together with a teaspoon of salmon oil, and let it cool completely before serving. It’s gentle on stomachs, easy to digest, and the recipe most recovering dogs already know and love. Makes about 4 cups.

Overhead shot of a homemade chicken and rice dog food bowl with carrots, green beans and salmon oil.

2. Turkey, sweet potato and pea bowl

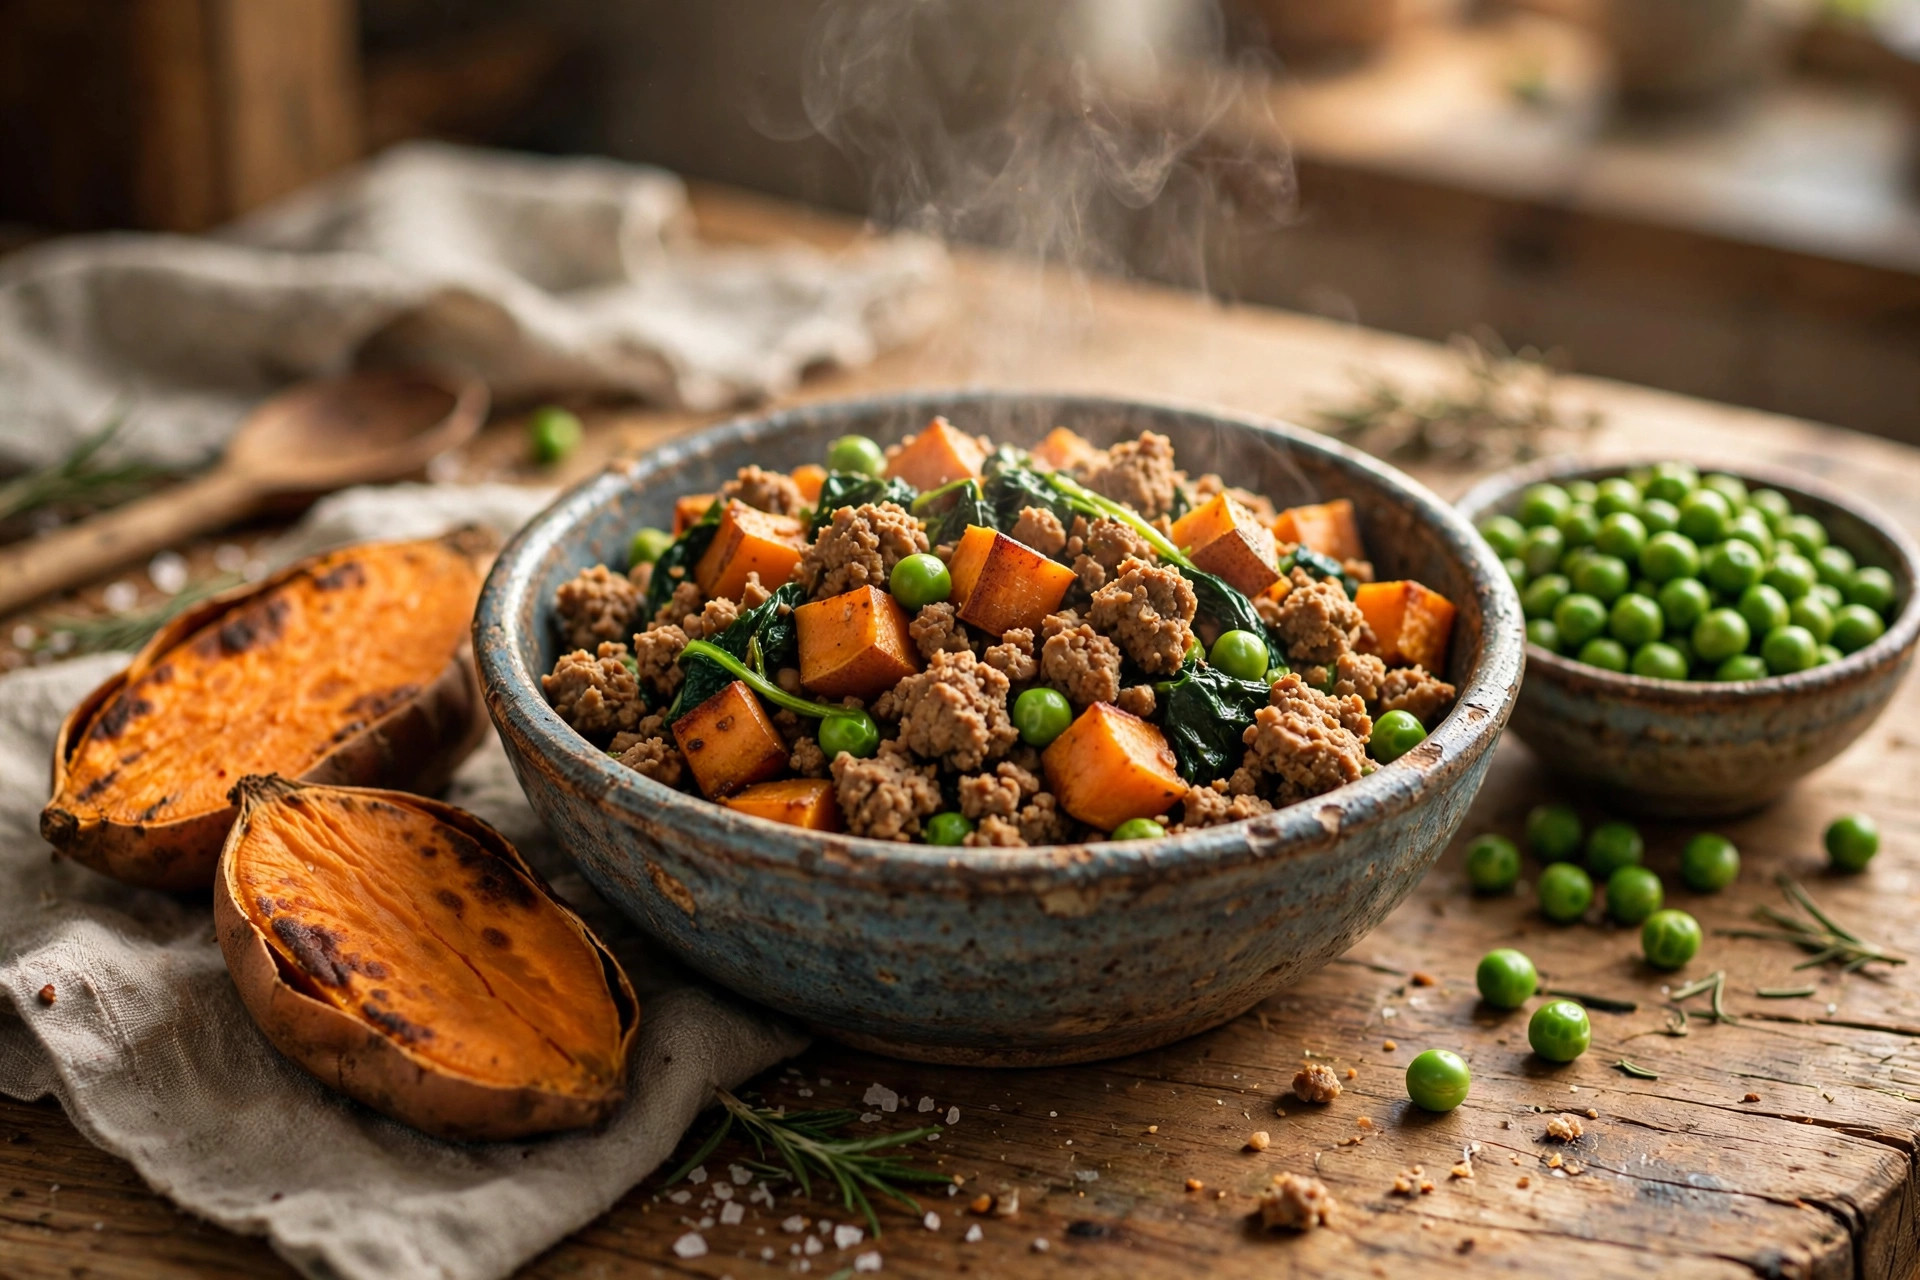
A leaner, fibre-rich option that fussy dogs tend to demolish. Brown 2 cups of ground turkey (93% lean) until cooked through, then add 1.5 cups of cubed cooked sweet potato and 1 cup of peas. Stir through a handful of wilted spinach at the end for iron and antioxidants. Sweet potato brings slow-release energy and vitamin A, while turkey is one of the leanest proteins around — great for dogs watching their waistline.

Homemade turkey, sweet potato and pea dog food bowl with roasted sweet potato halves.

3. Beef, pumpkin and spinach power bowl

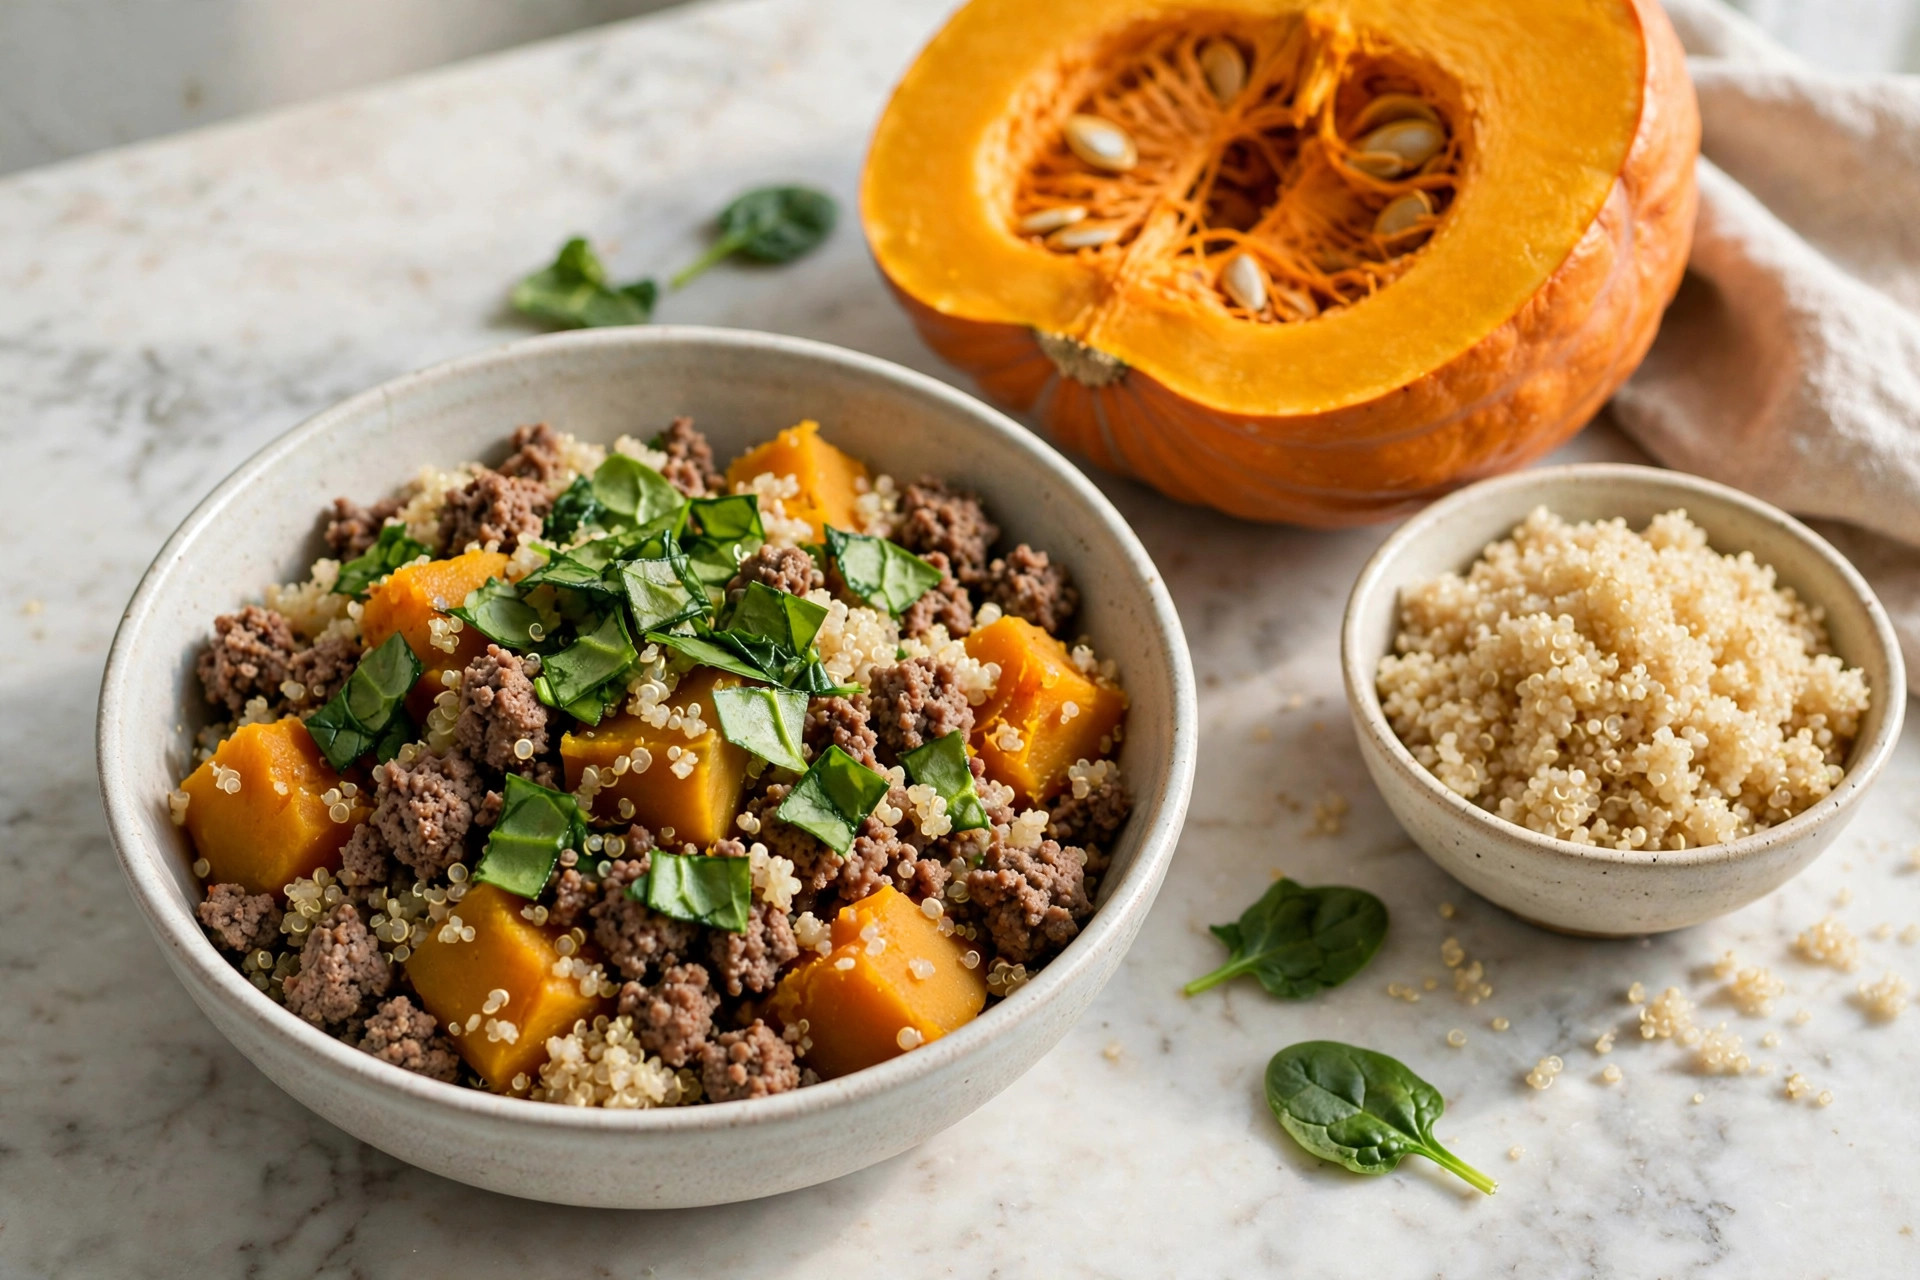
For active dogs that need a little more oomph. Brown 2 cups of lean ground beef (90% lean), then fold in 1.5 cups of plain cooked pumpkin (not pie filling), 1 cup of cooked quinoa and a generous handful of chopped spinach. Pumpkin is the digestive all-rounder: it firms up loose stools and loosens up constipation. Quinoa adds complete plant protein on top of the beef.

Homemade beef, pumpkin and quinoa dog food bowl with fresh pumpkin and spinach.

4. Salmon and sweet potato shine bowl

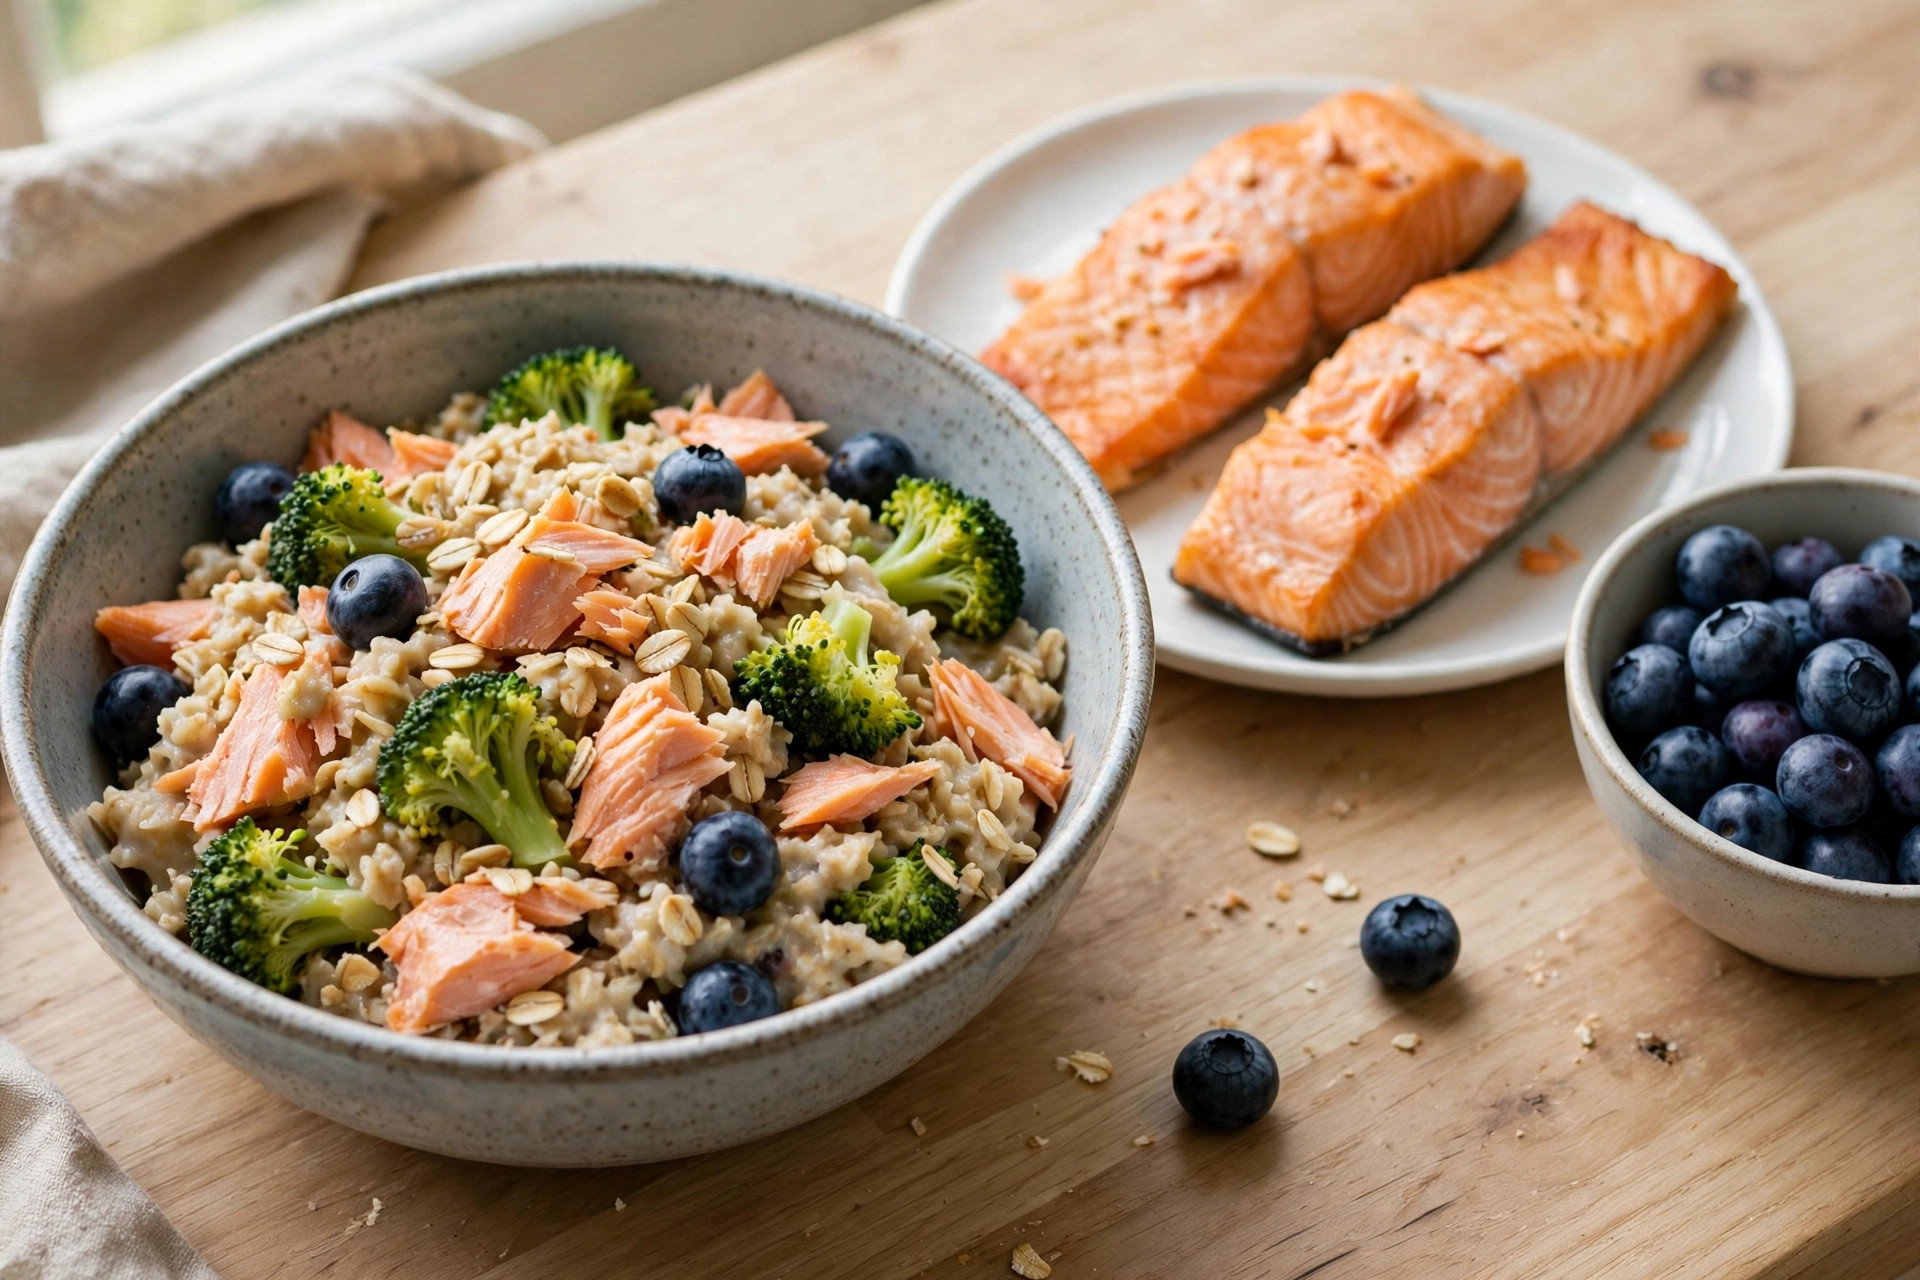
An omega-3 hero for skin, coat and joints. Bake or poach 2 salmon fillets until fully cooked and flake out every bone — check carefully, as fish bones are dangerous. Mix with 1.5 cups of cooked oats, 1 cup of steamed broccoli florets (chopped small) and half a cup of blueberries. The EPA and DHA in salmon are some of the best-studied nutrients in canine nutrition, linked to healthier skin and reduced joint inflammation.

Homemade salmon, oat, broccoli and blueberry dog food bowl.

5. Egg, rice and veggie breakfast bowl

A quick, budget-friendly bowl for lighter days. Scramble 4 eggs (plain, no butter or seasoning), then combine with 1.5 cups of cooked brown rice, 1 cup of mixed steamed veg (carrots, peas, green beans) and a drizzle of coconut oil. Eggs are a near-perfect protein with excellent bioavailability, and this one comes together in under 20 minutes — ideal for busy mornings or as a recovery meal.

6. Chicken, pumpkin and apple harvest bowl

A cosy, fibre-forward option with a touch of natural sweetness. Poach 2 cups of diced chicken thigh (trimmed of skin), stir in 1 cup of cooked pumpkin, 1 cup of cooked oats, half a cup of finely diced apple (no seeds, no core) and 1 cup of steamed green beans. Apple adds vitamin C and crunch appeal, and most dogs go slightly mad for the sweet-savoury combo. Keep portions of fruit modest — a little goes a long way.

7. Turkey, blueberry and spinach superfood bowl

The antioxidant flagship of the rotation. Brown 2 cups of ground turkey, then mix with 1 cup of cooked brown rice, half a cup of blueberries, a big handful of wilted spinach and a teaspoon of salmon oil. Blueberries are low in sugar and packed with anthocyanins; spinach adds iron, calcium and vitamin K. This one photographs beautifully, too — expect your dog to stare at it like it owes them money.

Foods that must never go in the pot

Homemade cooking is wonderful right up until a forbidden ingredient slips in. These are the hard no’s — memorise them:

  • Onion and garlic (including onion/garlic powder) — damage red blood cells and can cause life-threatening anaemia.
  • Grapes and raisins — can trigger sudden kidney failure, even in small amounts.
  • Chocolate, cocoa and coffee — theobromine and caffeine are toxic to dogs.
  • Xylitol (birch sugar) — found in some peanut butters and sugar-free products; causes rapid insulin release and liver failure. Always read the peanut butter label.
  • Macadamia nuts — cause weakness, vomiting and tremors.
  • Cooked bones — splinter and can puncture the digestive tract; never use them as chews from your cooking.
  • Excess salt, spices and rich sauces — season the human food, keep the dog’s bowl plain.

Homemade vs store-bought: an honest comparison

Homemade wins on control and freshness. You choose the protein quality, skip the additives and adjust for allergies, age or appetite dips. Dogs with sensitive stomachs or food intolerances often do better on a simple homemade diet, and it’s genuinely rewarding to watch a picky eater finally clean the bowl.

Store-bought wins on guaranteed completeness. Commercial foods labelled “complete and balanced” (look for the AAFCO statement) have been formulated and tested to hit every nutrient target. Replicating that at home long-term takes planning and usually a vet-recommended supplement — which is why many nutritionists suggest a hybrid: a good kibble base with homemade toppers from the recipes above. Best of both worlds.

When to talk to your vet

Cooking at home is a joy, not a DIY nutrition degree — so bring your vet into the plan in these cases:

  • Puppies and seniors have very different nutrient targets; homemade-only diets need professional formulation for both.
  • Dogs with kidney, liver, heart or pancreatic disease need prescription-level adjustments — never wing it.
  • If your dog loses weight, develops a dull coat, or has persistent digestive issues on a homemade diet, that’s a red flag for a nutrient gap; get bloodwork and a diet review.
  • Before going 100% homemade long-term, ask your vet to recommend a balanced supplement or refer you to a board-certified veterinary nutritionist. One conversation now prevents problems later.

Rotate through the seven bowls, keep the framework in mind, keep the forbidden list on the fridge — and enjoy the part where your dog follows you to the kitchen with enormous hopeful eyes. That’s the real pay-off.

FAQs

Can I feed my dog homemade food every day?
Yes, as long as the diet is balanced over time. Rotate proteins and carbs, add a vet-recommended supplement for calcium and trace minerals, and have your vet review the plan — especially for puppies, seniors or dogs with health conditions.

How much homemade food should I feed my dog?
Start with 2–3% of body weight per day, split into two meals, then adjust. A 10 kg dog gets roughly 250–300 g a day; a 30 kg dog roughly 600–900 g. Active dogs need more, couch potatoes less — monitor weight and body condition monthly.

Is homemade dog food cheaper than kibble?
Not usually. Homemade costs more per meal than mid-range kibble (protein is the pricey part), but it’s comparable to premium fresh brands — and you get full ingredient control in return.

Can dogs eat the same homemade food as humans?
Sharing a plain, unseasoned portion is fine in principle, but human recipes often contain onion, garlic, salt or rich sauces that are unsafe for dogs. Cook the dog’s portion plain and add your seasonings to your own plate.

What’s the easiest starter recipe?
The classic chicken and rice bowl (recipe 1) — three ingredients, gentle on every stomach, ready in 30 minutes, and a reliable base you can build on as you get confident.

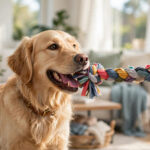
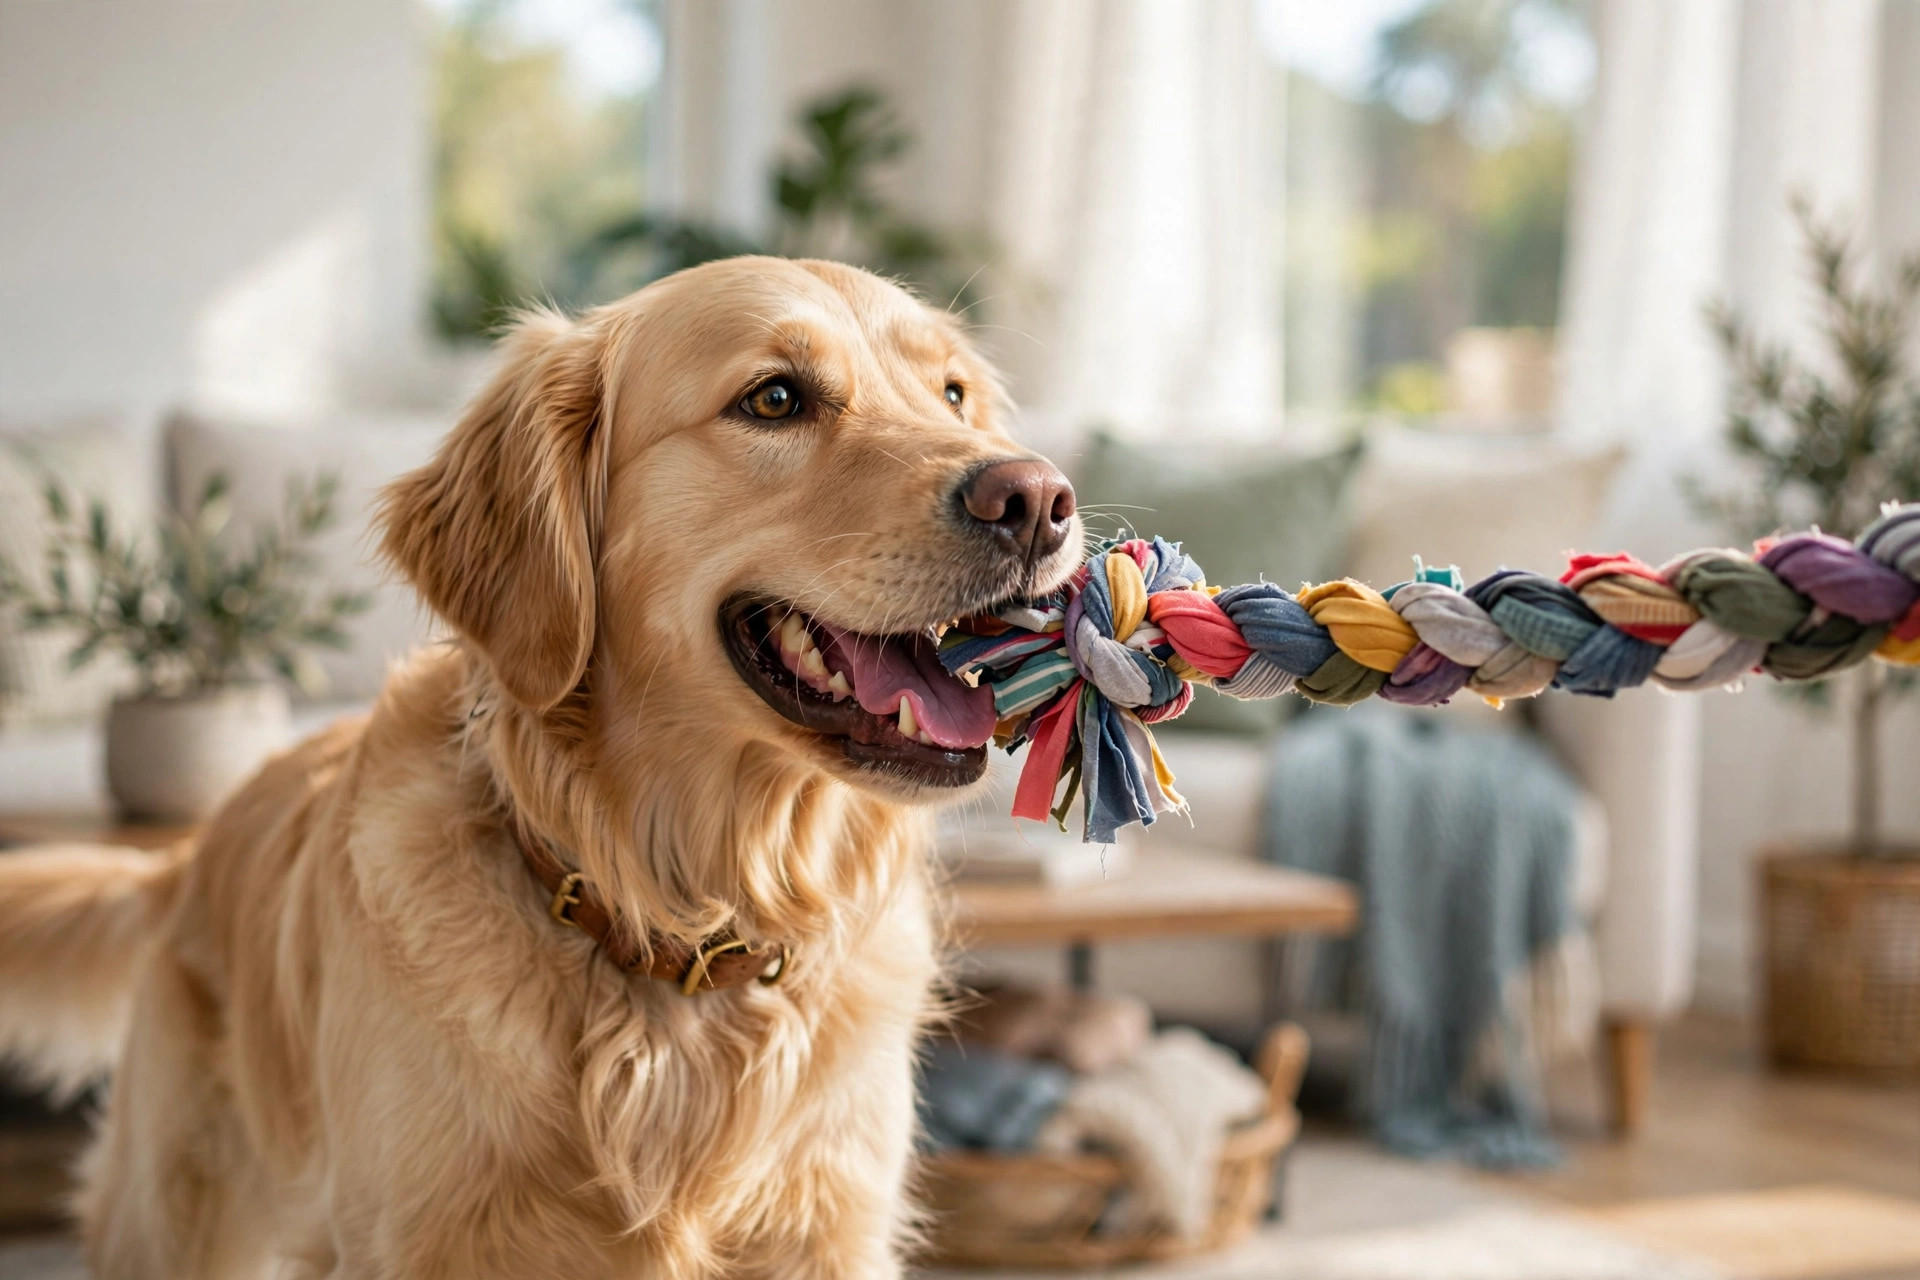
Golden retriever tugging a colourful braided t-shirt rope dog toy in a living room.

DIY Dog Toys from Old Clothes: 7 Easy Makes

Before you bag up those worn-out t-shirts, frayed jeans and single socks, pause. To a dog, your old clothes are a treasure chest of toys — soft, chewy, full of interesting textures, and carrying your scent, which most dogs find deeply comforting. DIY dog toys from old clothes cost nothing, take minutes to make, and keep perfectly good fabric out of landfill.

Most of these need no sewing at all. If you can cut a straight line and tie a knot, you can make all seven. Grab the rag bag and let’s go.

Prep: turning clothes into toy material

Wash everything first, even if it looks clean. Then strip anything a dog shouldn’t chew or swallow: buttons, zips, drawstring toggles, plastic eyelets, wire underwires and decorative beads. Cut away seams that are already fraying badly — loose threads are the main thing dogs unravel and swallow. Old cotton t-shirts, fleece jumpers, flannel pyjamas and denim are the best fabrics. Avoid fabrics treated with heavy waterproofing or strong chemical finishes, and skip anything shed-loads of micro-fibres on first touch.

A pair of sharp fabric scissors makes everything ten times easier. Cutting against the grain of a t-shirt (across the body, below the armpits) gives you long, stretchy strips that are ideal for braiding.

1. The classic braided t-shirt tug rope

The king of DIY dog toys, and it takes about ten minutes. Lay an old t-shirt flat and cut three strips, each about 4 cm wide and 60–80 cm long — longer for big dogs. Knot the three strips together at one end, then braid them tightly all the way down, keeping even tension. When you reach the end, tie a big chunky knot and trim the tails to about 8 cm.

T-shirt fabric stretches slightly, so the tug has a satisfying give that dogs love. Make a second one and you’ll never run out of fetch-and-tug games. Two or three colours braided together look great and photograph beautifully for social media.

Golden retriever tugging a colourful braided t-shirt rope dog toy in a living room.

2. The no-sew fleece knot ball

Old fleece jackets and blankets make gloriously squishy toys. Cut a fleece garment into strips about 3 cm wide and 40 cm long — you’ll need around 12 of them. Gather them in a bundle, tie one tight knot dead centre, then fan the strips out in all directions. Trim the ends so the ball is roughly round, about 10 cm across.

This toy is soft enough for gentle chewers and puppies, bouncy enough to chase, and light enough to throw indoors without risking your windows. The knot core gives it just enough weight to roll interestingly.

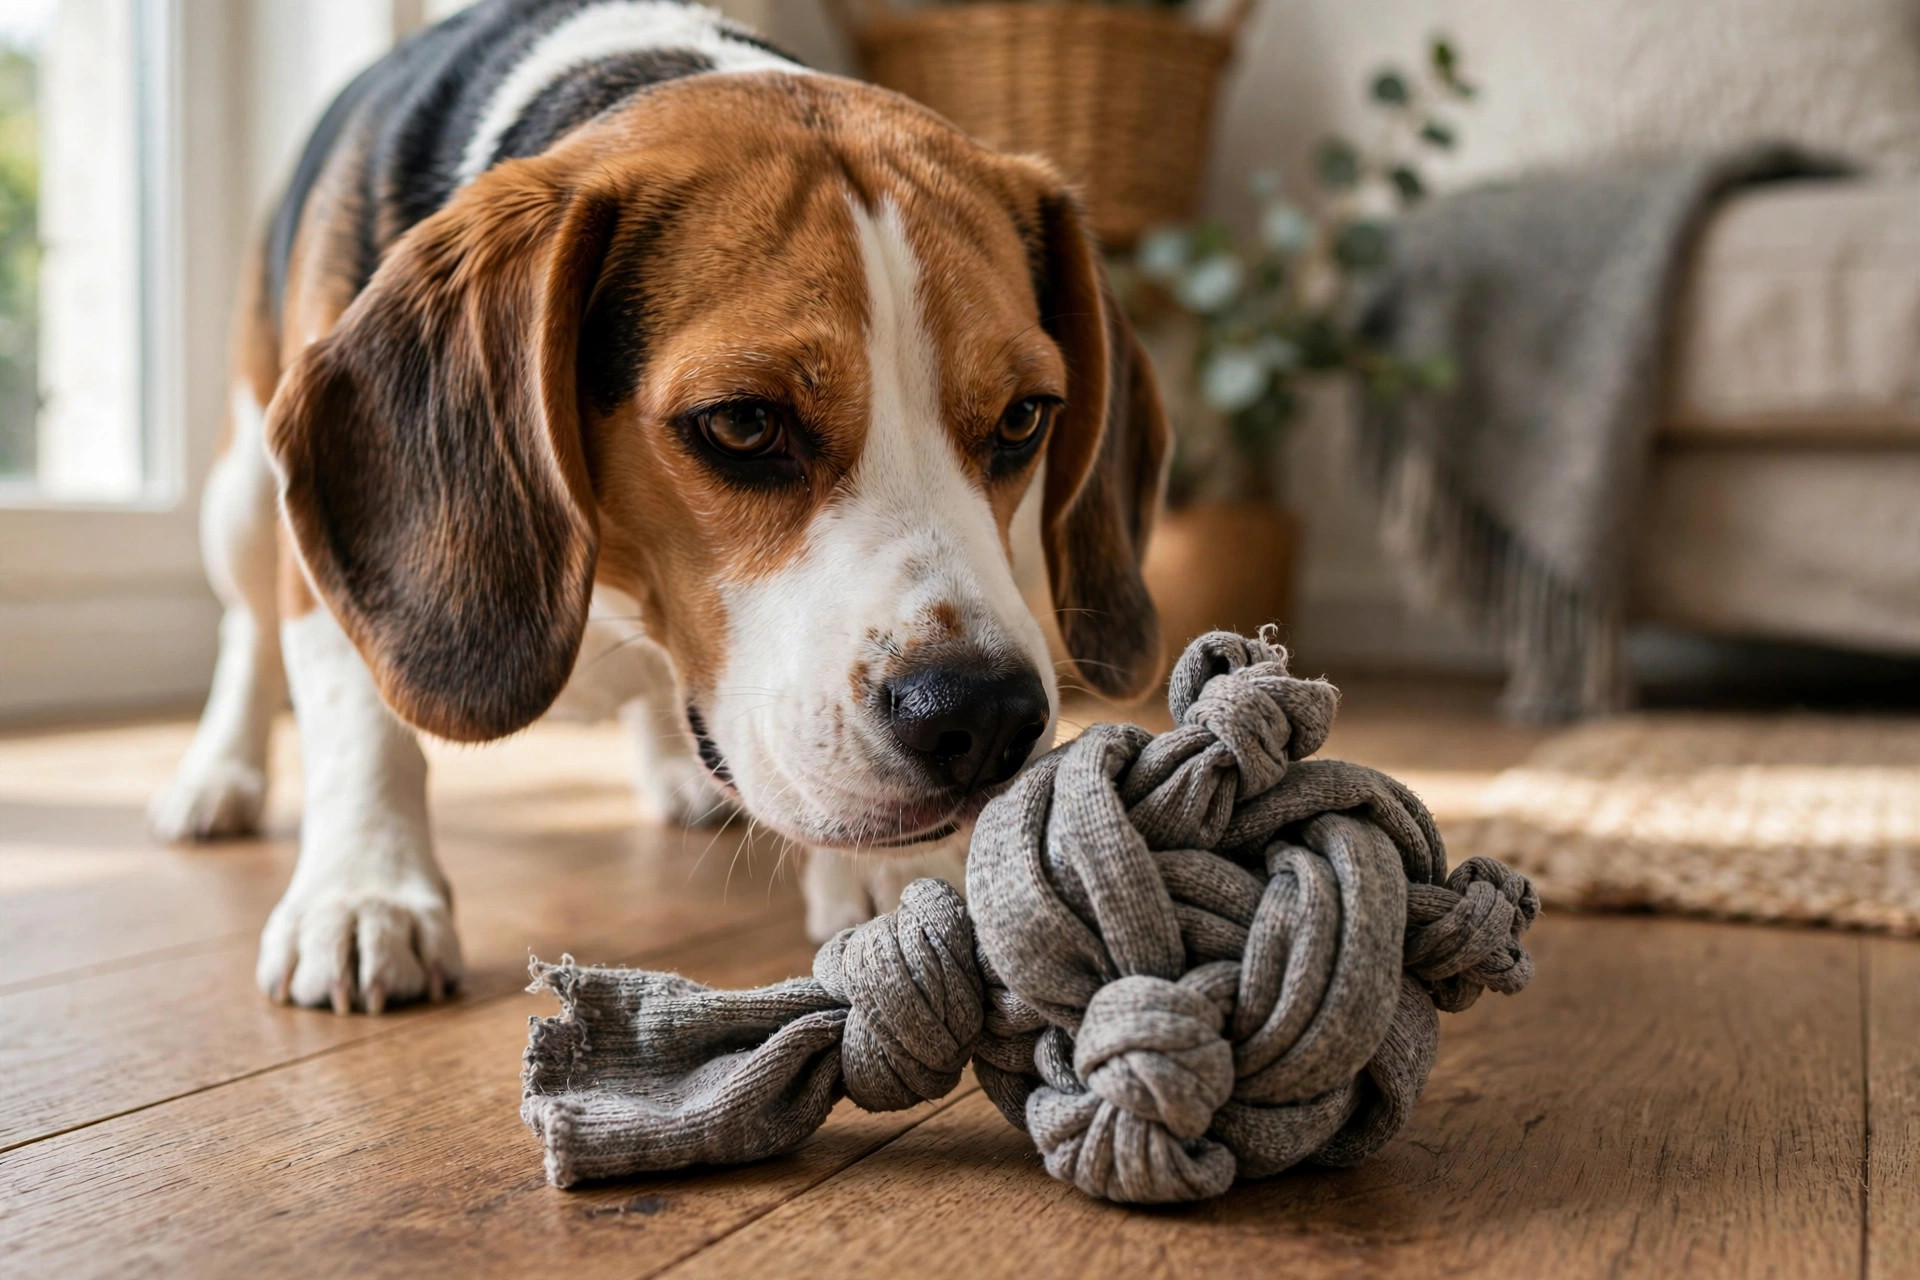
3. The sock-and-bottle crinkle toy

That single sock from the laundry void finally has a purpose. Take a clean empty plastic water bottle (squeeze it empty, keep the cap ON tightly — or better, tape the cap on), and slide it inside a thick sports sock or an old woolly sock. Tie a firm knot in the sock above the bottle to lock it in place. The crinkle sound drives most dogs wild.

This one works best as a supervised-play toy rather than a leave-it-in-the-crate toy: the appeal is the noise, and enthusiastic chewers can eventually compress the bottle. Replace the bottle when it stops springing back.

Beagle nosing a homemade sock crinkle dog toy on a wooden floor.

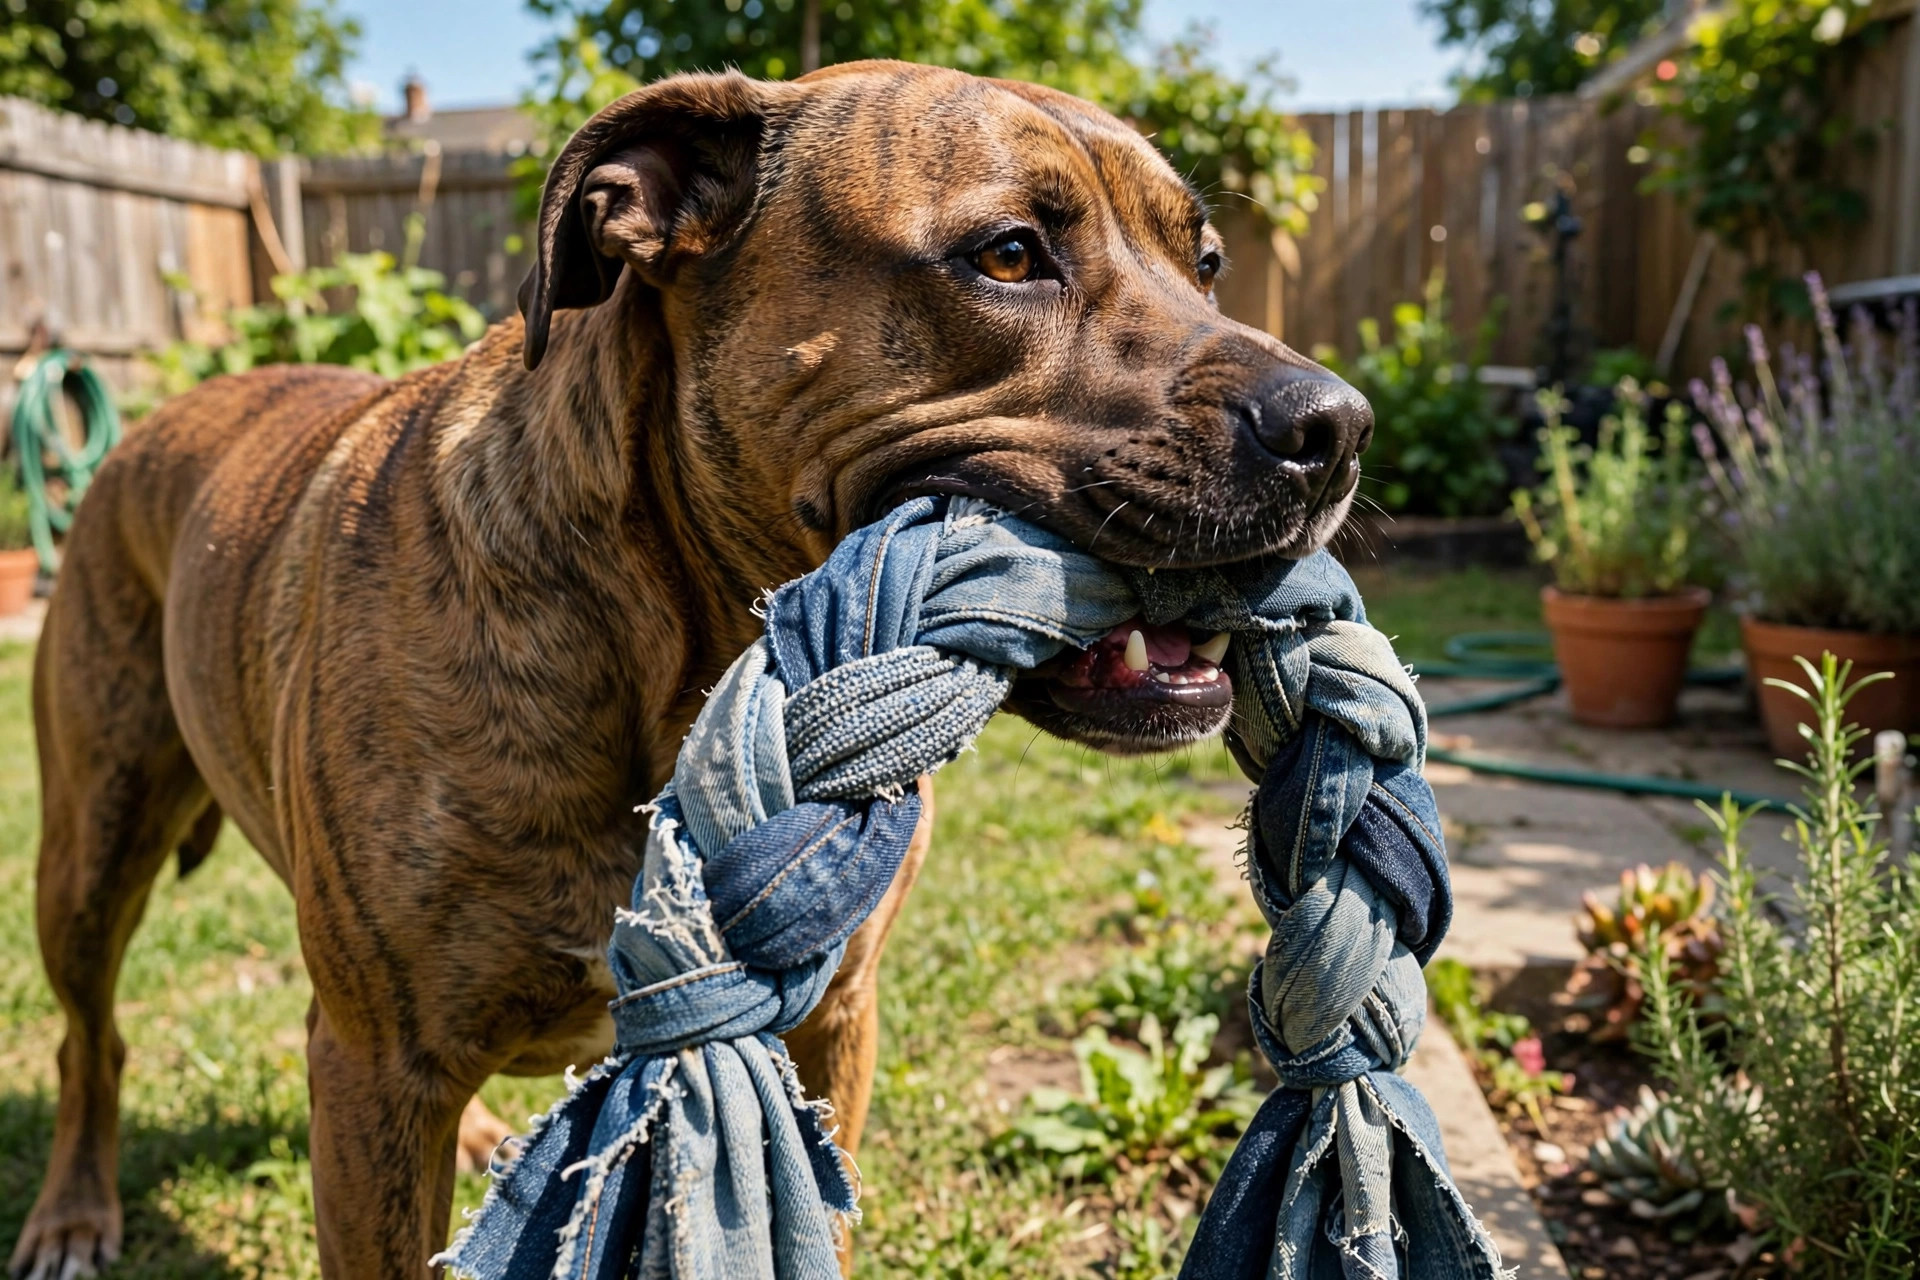
4. The double-handle denim tug

Denim is the heavyweight fabric of DIY dog toys — it stands up to serious tugging. Cut two strips from an old pair of jeans, each about 5 cm wide and 70 cm long. Knot them together in the middle with a big overhand knot, then braid the two pairs of ends loosely for about 20 cm on each side. Tie a knot at each end so your hands have something to grip, and trim.

The double handles mean two people (or one person and a very determined dog) can play tug properly without hands sliding onto teeth. Denim softens with washing and lasts far longer than t-shirt fabric — this is the toy to make for power chewers.

Sturdy dog chewing a braided denim tug toy in a backyard.

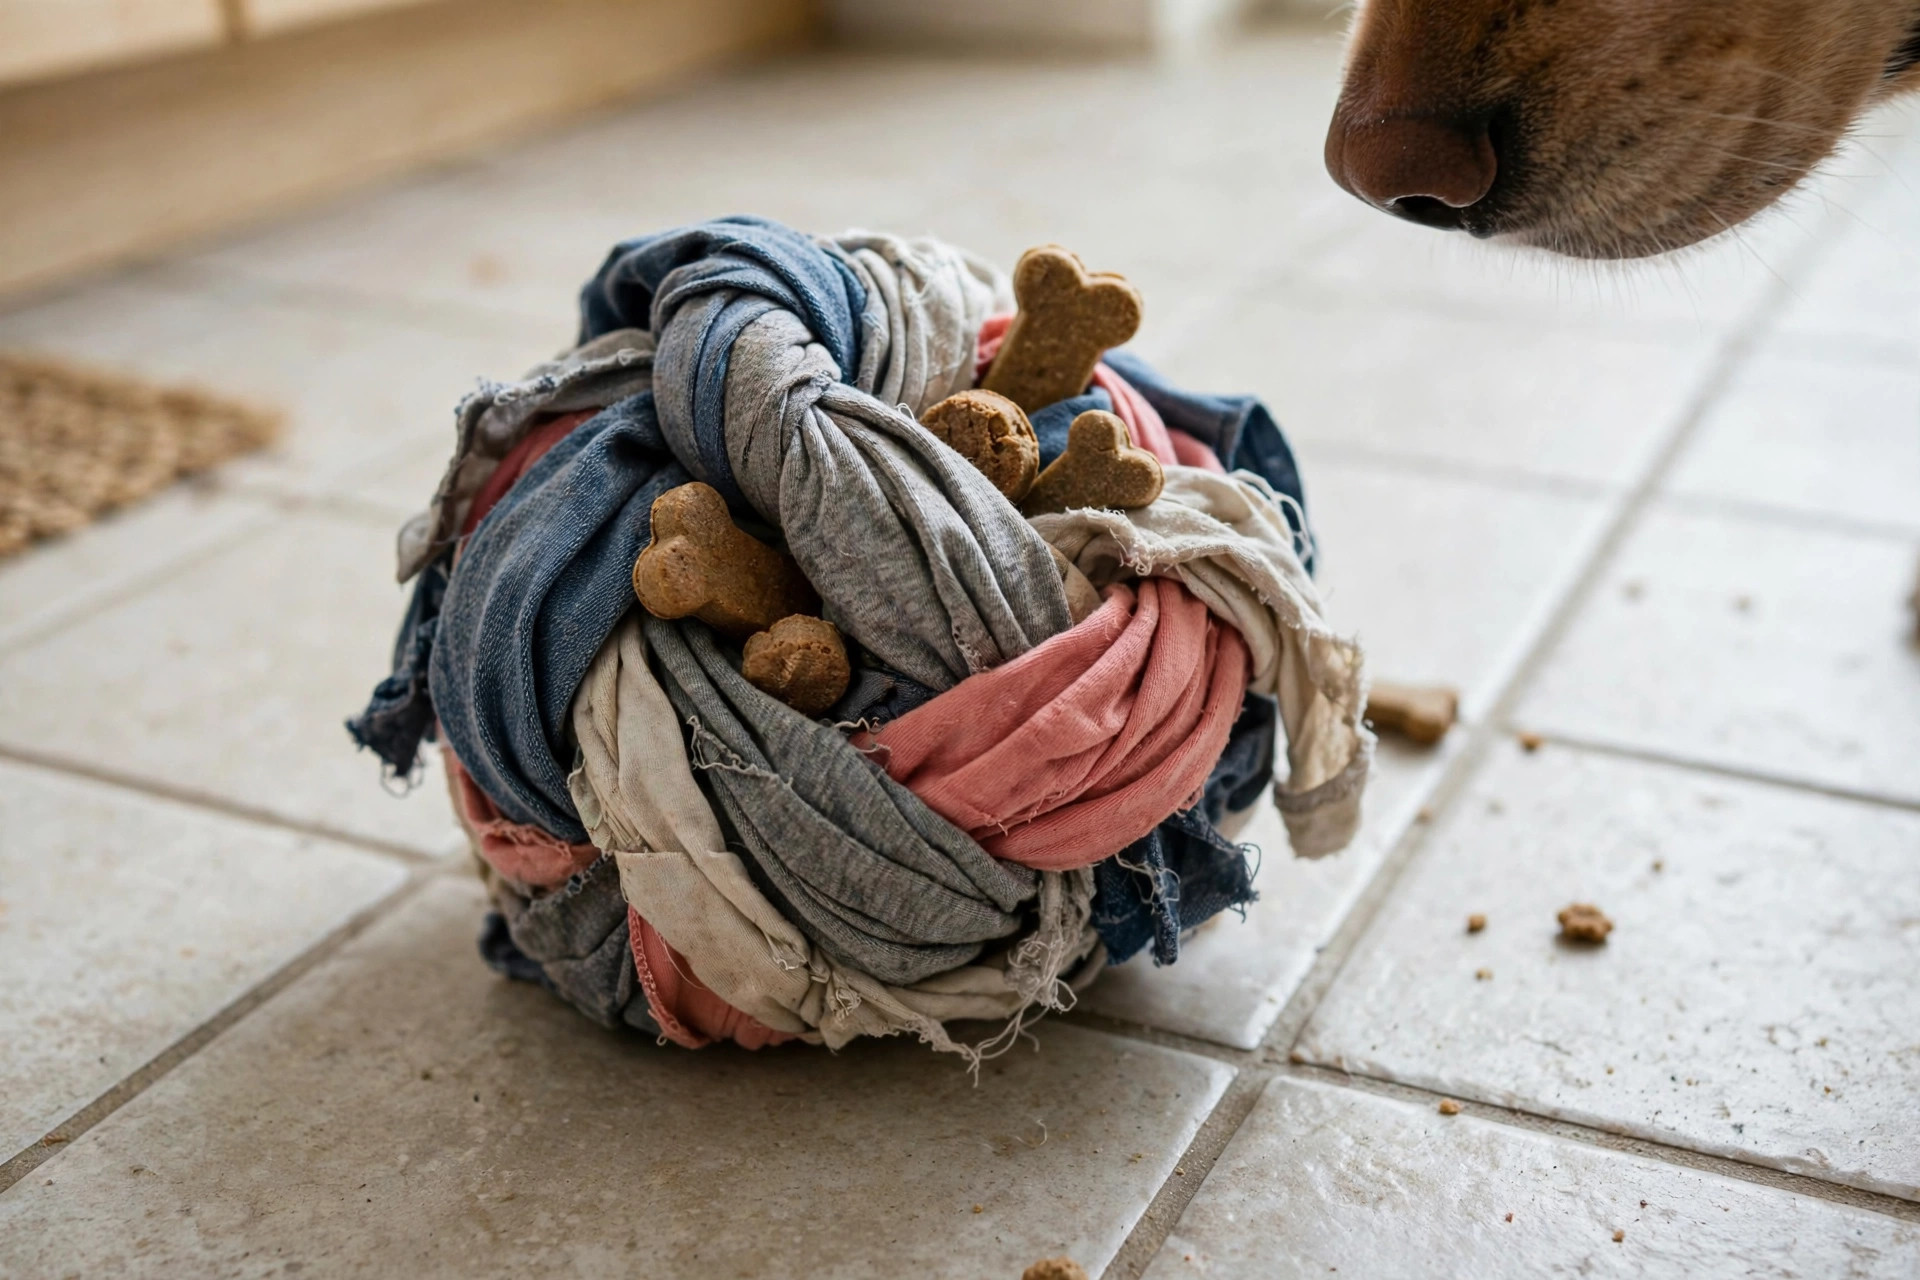
5. The treat-dispenser rag ball

Cut three t-shirt strips about 4 cm wide and 45 cm long. Lay them in a star shape on the table, drop 4–5 small treats into the centre, then gather all the ends up and tie one tight knot above the treats, letting the strip tails flop down. The dog has to nose and paw the ball to work treats out through the fabric folds.

It’s a brilliant rainy-day brain game — five minutes of sniffing and problem-solving tires a dog out more than a twenty-minute amble. Start with smelly treats so they understand the game, and use small, soft treats that can poke through the folds.

Knotted rag ball of t-shirt strips with dog treats tucked among the folds.

6. The fringe fetch rope

Take one t-shirt strip (4 cm × 90 cm) as your core. Cut 8–10 shorter strips (4 cm × 25 cm) and tie each one around the core with a lark’s head knot: fold the short strip in half, loop it under the core, and pull the two ends through the loop. Space them evenly along the core, then knot the two core ends together into a loop handle.

You get a fringed, floppy rope that flies well, is easy to spot in long grass, and has dozens of biteable edges. Dogs that like “worrying” a toy — grabbing and shaking it — go mad for fringe.

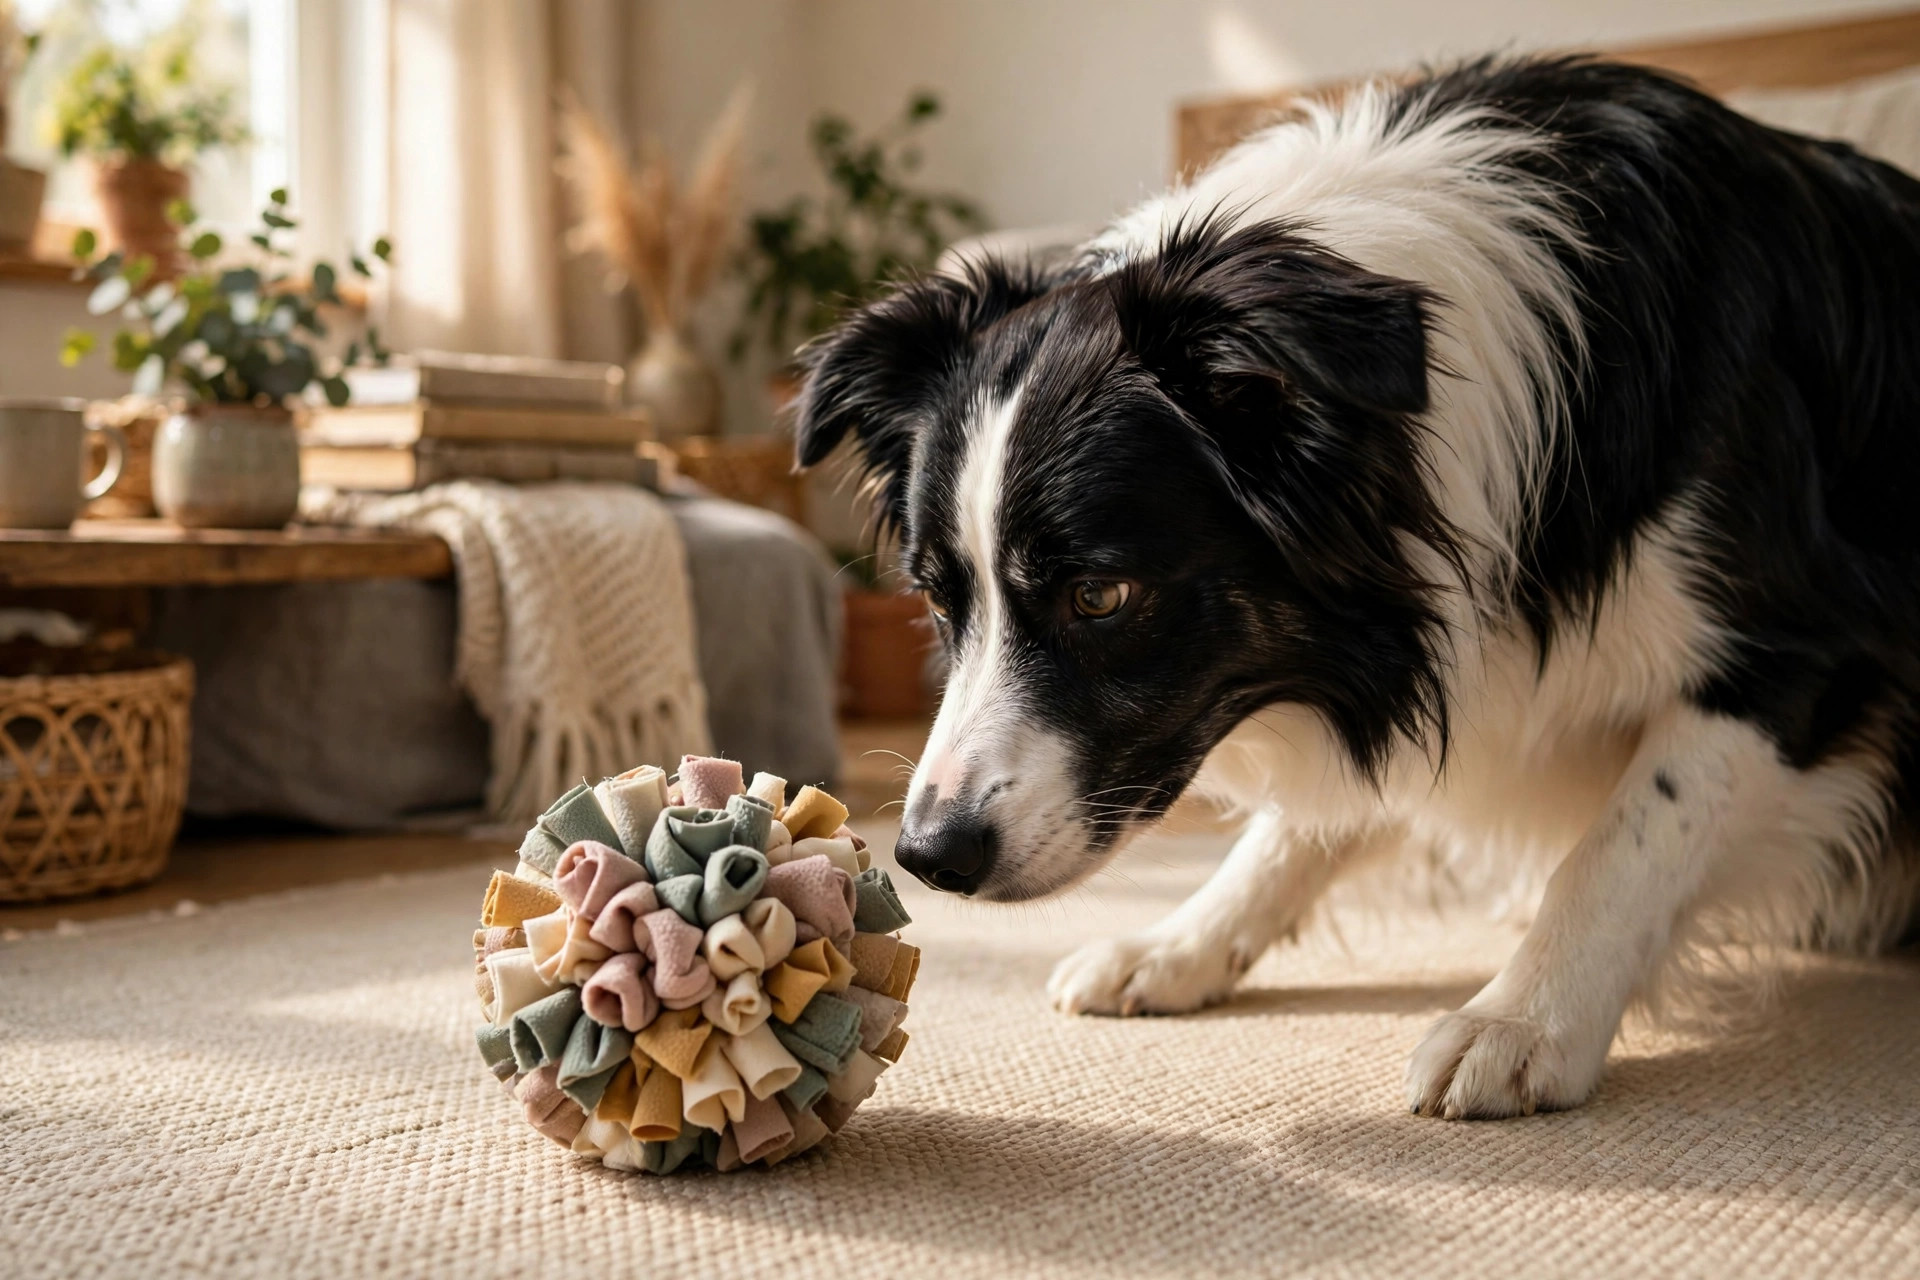
7. The fleece snuffle cloth

Dogs experience the world through their noses, and snuffle toys turn that into a game. Cut a fleece garment into 20–25 strips, each about 3 cm wide and 15 cm long. Tie every strip with a single knot onto a cheap rubber sink mat (or knot them all together into one thick braid if you don’t have a mat). Scatter kibble or treats among the strips.

Your dog will spend ten happy minutes snuffling, pushing strips aside and hunting out every last morsel. It’s genuinely calming for anxious dogs — sniffing lowers a dog’s heart rate. Wash the strips every few weeks to keep it fresh.

Border collie sniffing a handmade fleece snuffle ball on a rug.

Safety notes — read before you play

  • Supervise, always. DIY toys are for interactive play, not for leaving a dog alone with. If a dog starts eating fabric rather than chewing it, the game is over — swallowed threads and fabric scraps can cause intestinal blockages that need surgery.

  • Inspect before every play session. Re-tie loosening knots, trim fraying edges, and retire any toy that’s falling apart. A two-minute check beats a vet bill.

  • Know your chewer. Gentle mouthers can enjoy fleece and t-shirt toys for months. Power chewers that shred fabric in minutes should stick to denim toys (idea 4) and only under close supervision.

  • No small detachable parts. This is why we remove buttons, zips and toggles before we start. A knot is fine; a bead is a choking hazard.

  • Watch for string ingestion. Long threads are worse than fabric chunks — linear foreign bodies are one of the nastiest things a vet sees. If your dog is a thread-puller, knot toys tighter and retire them sooner.

  • Wash the toys. They get slobbery. Most survive a normal machine wash at 30–40°C; air-dry the bottle toy rather than machine-drying it.

Washing and upkeep

Toss t-shirt, fleece and denim toys in the washing machine at 30–40°C with your normal detergent — skip fabric softener, which coats the fibres and can irritate skin. Air-dry; tumble drying shrinks cotton strips and can warp braided toys out of shape. The bottle crinkle toy should be hand-washed and air-dried so the bottle keeps its shape. A quick inspection after each wash is a good moment to retire anything on its last legs.

FAQs

Are DIY dog toys from old clothes safe? Yes for supervised play, provided you prepare the fabric properly: washed, stripped of buttons/zips/toggles, with fraying seams removed. Supervise every session and retire toys that fall apart. If your dog eats fabric instead of chewing it, stick to commercial toys rated for their chew style.

What fabrics are best for homemade dog toys? Cotton t-shirts (stretchy, soft), fleece (squishy, no fraying), flannel (gentle) and denim (toughest, best for strong chewers). Avoid fabrics with heavy chemical treatments and anything that sheds loose fibres at a touch.

How do I stop my dog destroying a DIY toy in minutes? You can’t fully — that’s what toys are for. But denim braided tightly (idea 4) survives longest, and rotating two or three toys keeps novelty high so no single toy gets the full demolition treatment. Retire shredded toys promptly.

Can puppies play with these? Absolutely — the fleece knot ball (idea 2) and snuffle cloth (idea 7) are ideal for puppies: soft on baby teeth, light, and the snuffling builds confidence. Supervise closely, as puppies chew indiscriminately.

My dog only wants the toy with my smell on it. Normal? Completely normal. Your scent is comfort to a dog. Tuck a worn (unwashed) t-shirt strip into a new toy for anxious dogs or new puppies settling in — it works like a security blanket.

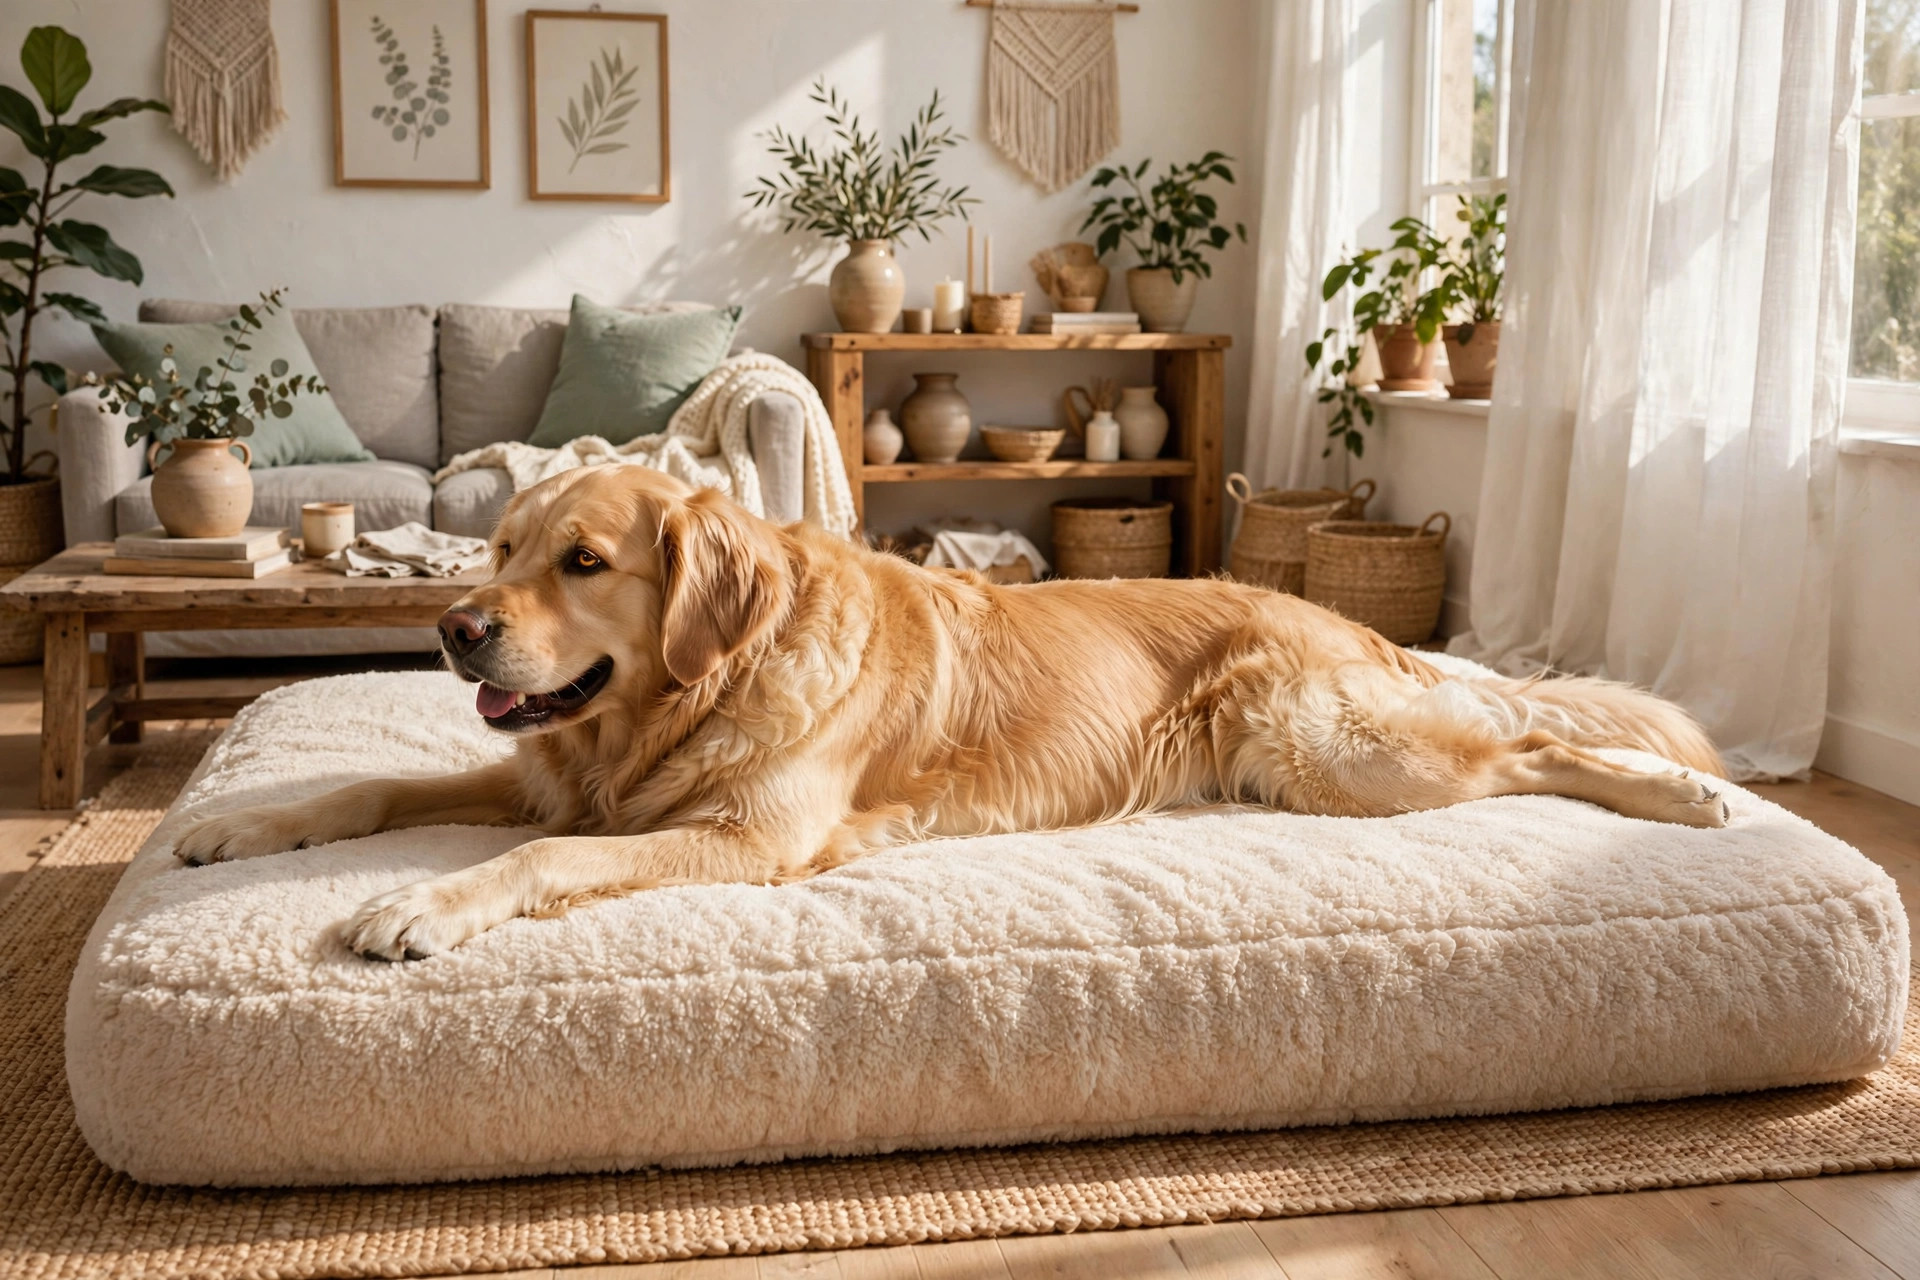
Golden retriever sprawled on a large plush rectangular dog bed in a bright living room

10 Dog Bed Ideas for Every Kind of Sleeper (Sprawlers, Burrowers & Seniors)

Golden retriever sprawled on a large plush rectangular dog bed in a bright living room

Watch your dog sleep for five minutes and you’ll learn more than any product
review could tell you. Some dogs sprawl like they’ve paid rent; others
bulldoze every cushion into a nest and burrow underneath. Seniors press
against something solid, puppies gnaw whatever’s chewable. One bed does not
fit all — and a dog that sleeps better is, unscientifically but observably, a
better-behaved dog.

Here are 10 dog bed ideas matched to sleeper type, with the materials and
shapes that suit each one, plus sizing, washing and safety notes at the end.

For the sprawlers

1. The oversized rectangle mat

Sprawlers need surface area, not walls. A thick rectangular pillow mat —
about 10 cm of fill — gives them room to fling all four legs without sliding
off onto hard floor. Best pick for large breeds, hot sleepers, and multi-dog
piles. Look for a non-slip base so it stays put on wooden floors.

2. The low-profile floor cushion

Flat, wide and slightly overstuffed, these suit dogs that sprawl but still
want something to push against — the cushion edge becomes a headrest. A
removable, washable cover is non-negotiable here, since big flat surfaces
collect the most hair.

For the burrowers and nesters

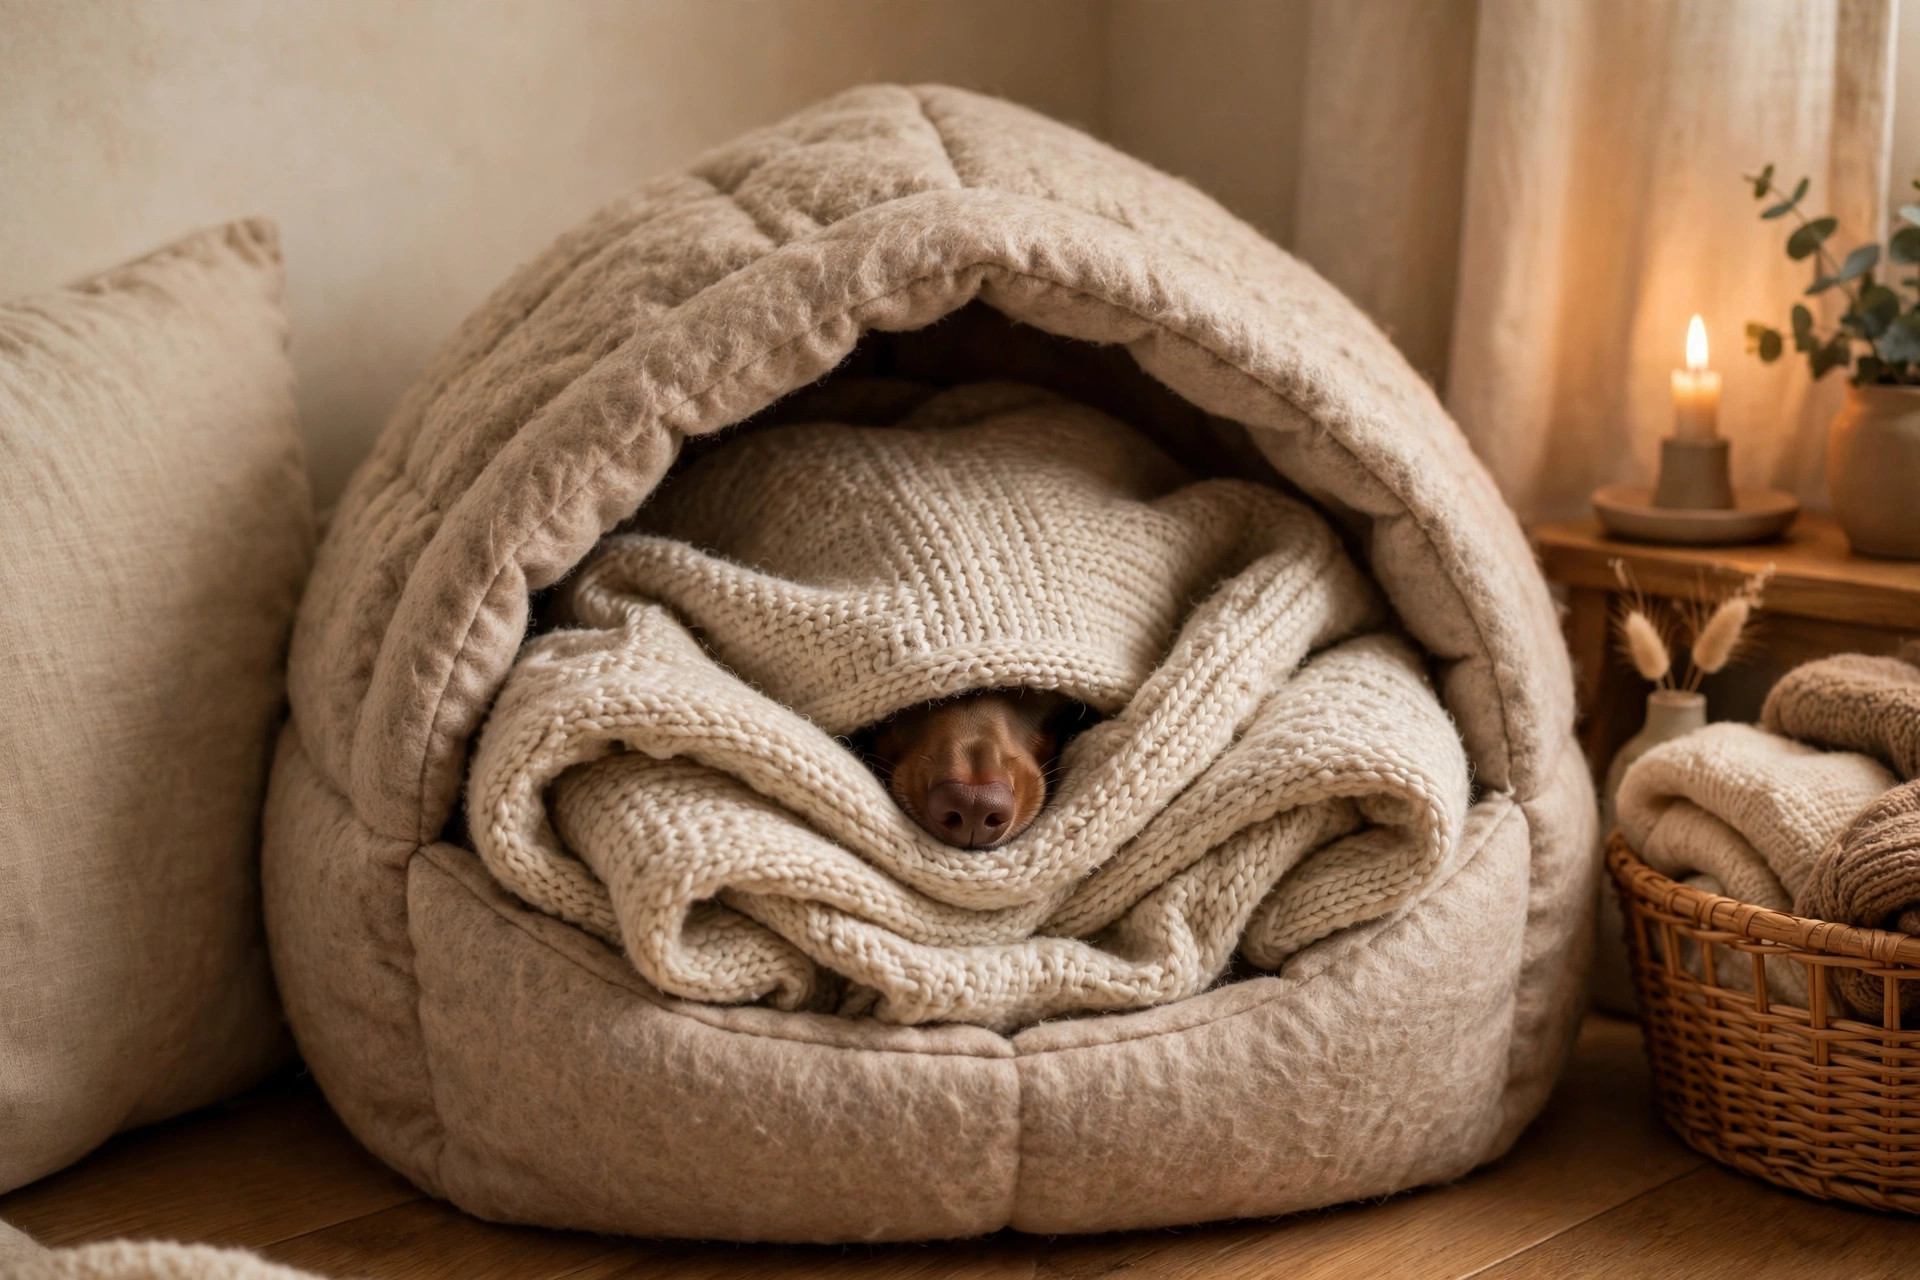
3. The hooded cave bed

Part bed, part blanket fort: a rounded bed with a low hood or attached
blanket flap. Burrowers shove their noses under the flap and settle —
fantastic for anxious dogs, dachshunds, terriers and any dog that used to
sleep under your duvet. The hood also muffles household noise, which many
light sleepers love.

4. The blanket-topped donut bed

A classic donut with an extra-soft blanket layer folded into the centre.
Nest-diggers can paw, circle and knead the blanket exactly as they would
your sofa cushions, while the raised rim gives them something to curl
against. Choose one with a washable liner — digging dogs are dusty dogs.

Dachshund burrowed under a knitted blanket inside a hooded cave-style dog bed

For the seniors

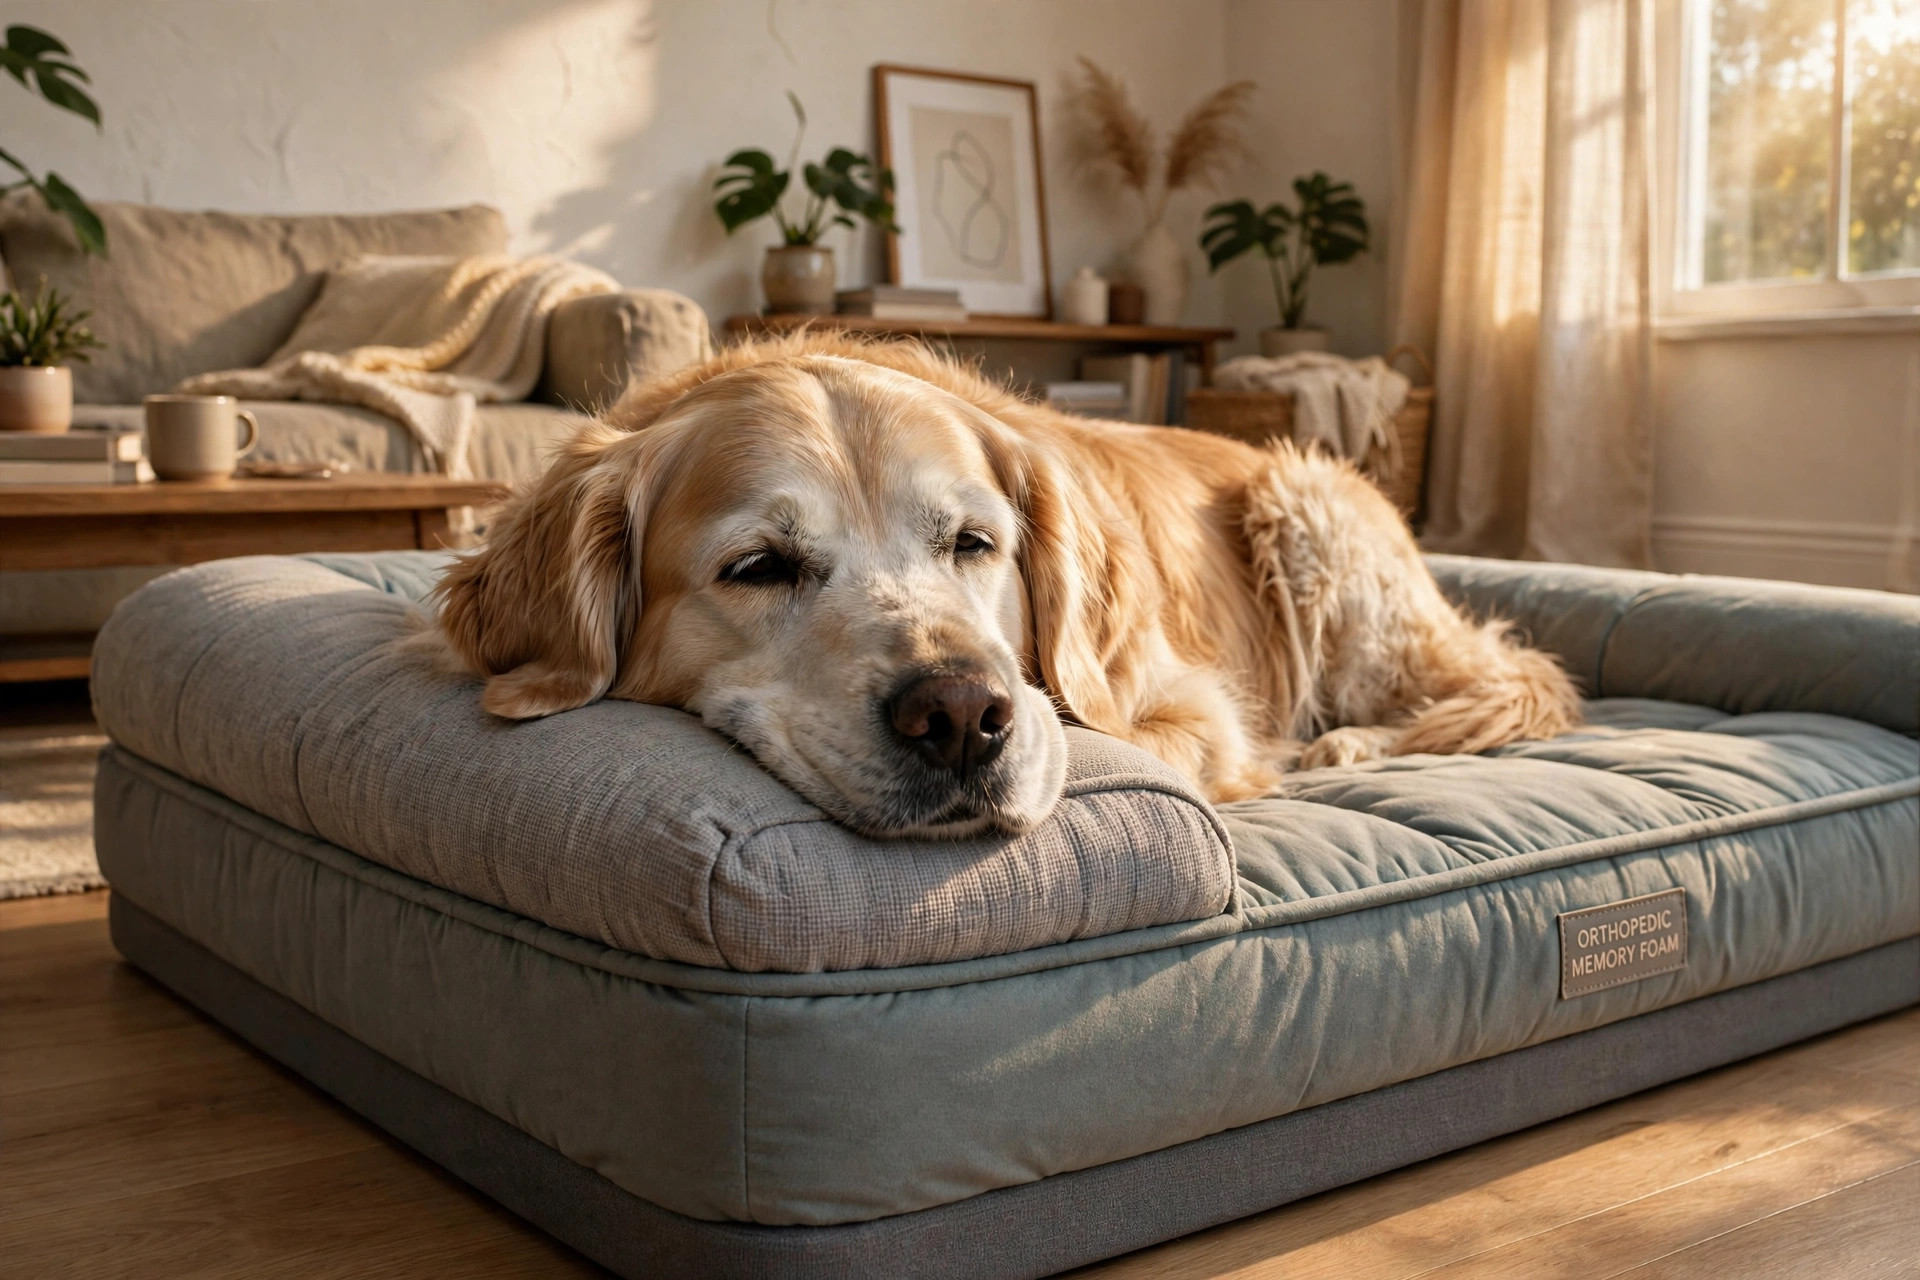
5. The orthopedic memory-foam bed

The single biggest upgrade you can make for an older dog. Real memory foam
(at least 7–8 cm of it, not “egg-crate” convoluted foam) distributes weight
away from stiff hips and elbows. Seniors that grumble when standing up often
change noticeably within a week of getting proper support. Flat rectangular
shapes beat bolsters here — arthritic dogs step in more easily and sprawl
without climbing.

6. The low bolster bed

For seniors that still love leaning: a bed with one low, wide bolster side
instead of four tall walls. They can press a hip against the cushion and
drop their head onto it, without needing to clamber over a rim. Make sure the
bolster is firm — soft squishy rims collapse under a leaning dog and
frustrate them.

Senior golden retriever resting on a grey orthopedic memory-foam dog bed

For the chewers and puppies

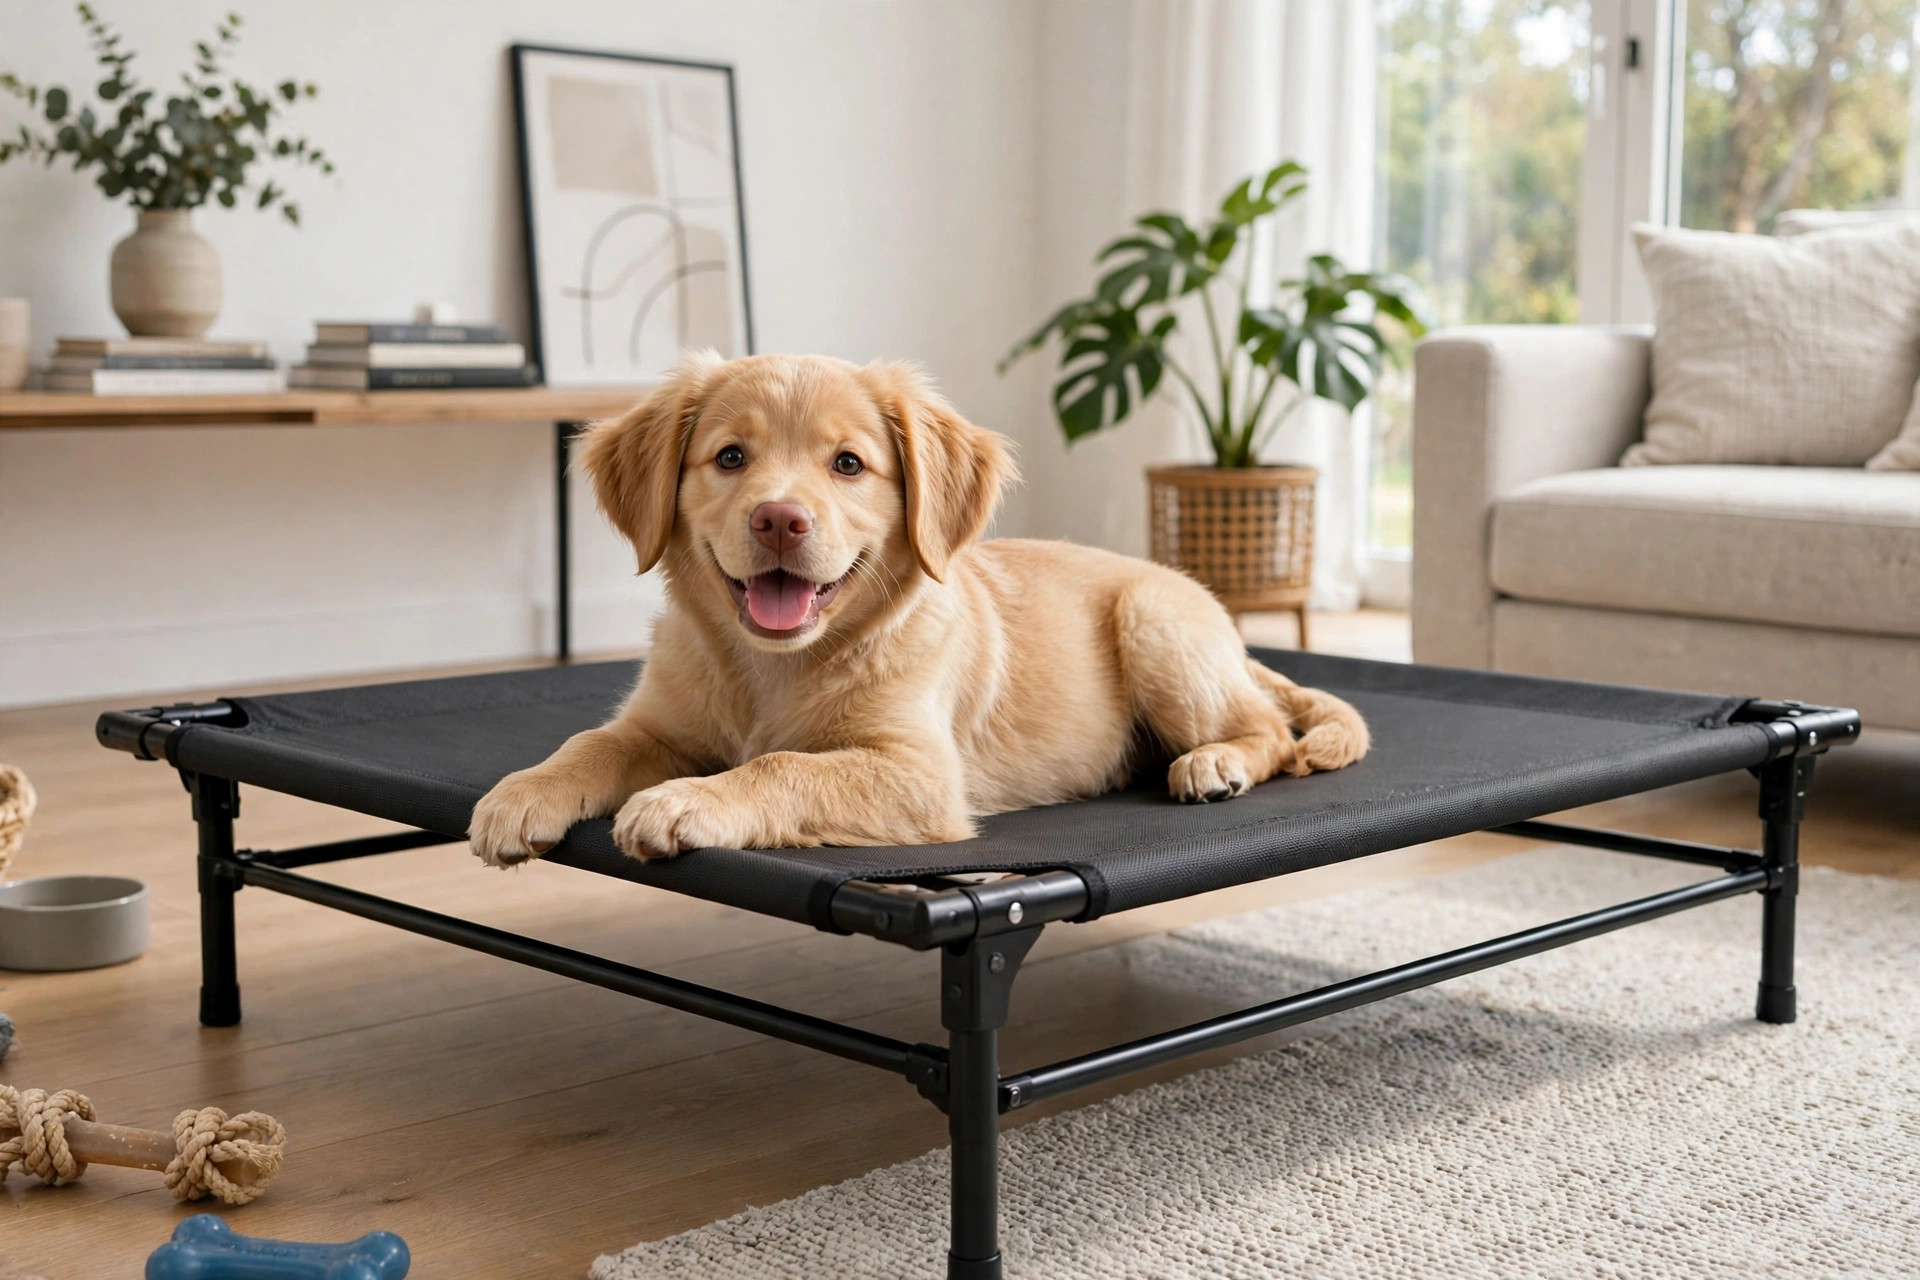
7. The chew-proof cot

Raised camp-style cots (a taut fabric panel on a metal or PVC frame) remove
almost everything chewable: no stuffing, no seams at tooth height, no corners
to worry. They also keep hot puppies cool and stay dry after accidents, since
there’s nothing to absorb them. If your puppy destroys beds for sport, this
is the one — many come with chew-resistant guarantees.

8. The tough rope-twist donut

For the moderate chewer that’s past the puppy-shredding stage: tightly
braided rope or canvas-look fabrics resist claws and teeth far better than
plush. It’s still soft enough for nesting behaviour, but the dense weave
won’t surrender its stuffing at the first nibble. Supervise at first — no
bed is truly indestructible.

Puppy lying on a chew-proof elevated camp-style dog cot

For special sleepers

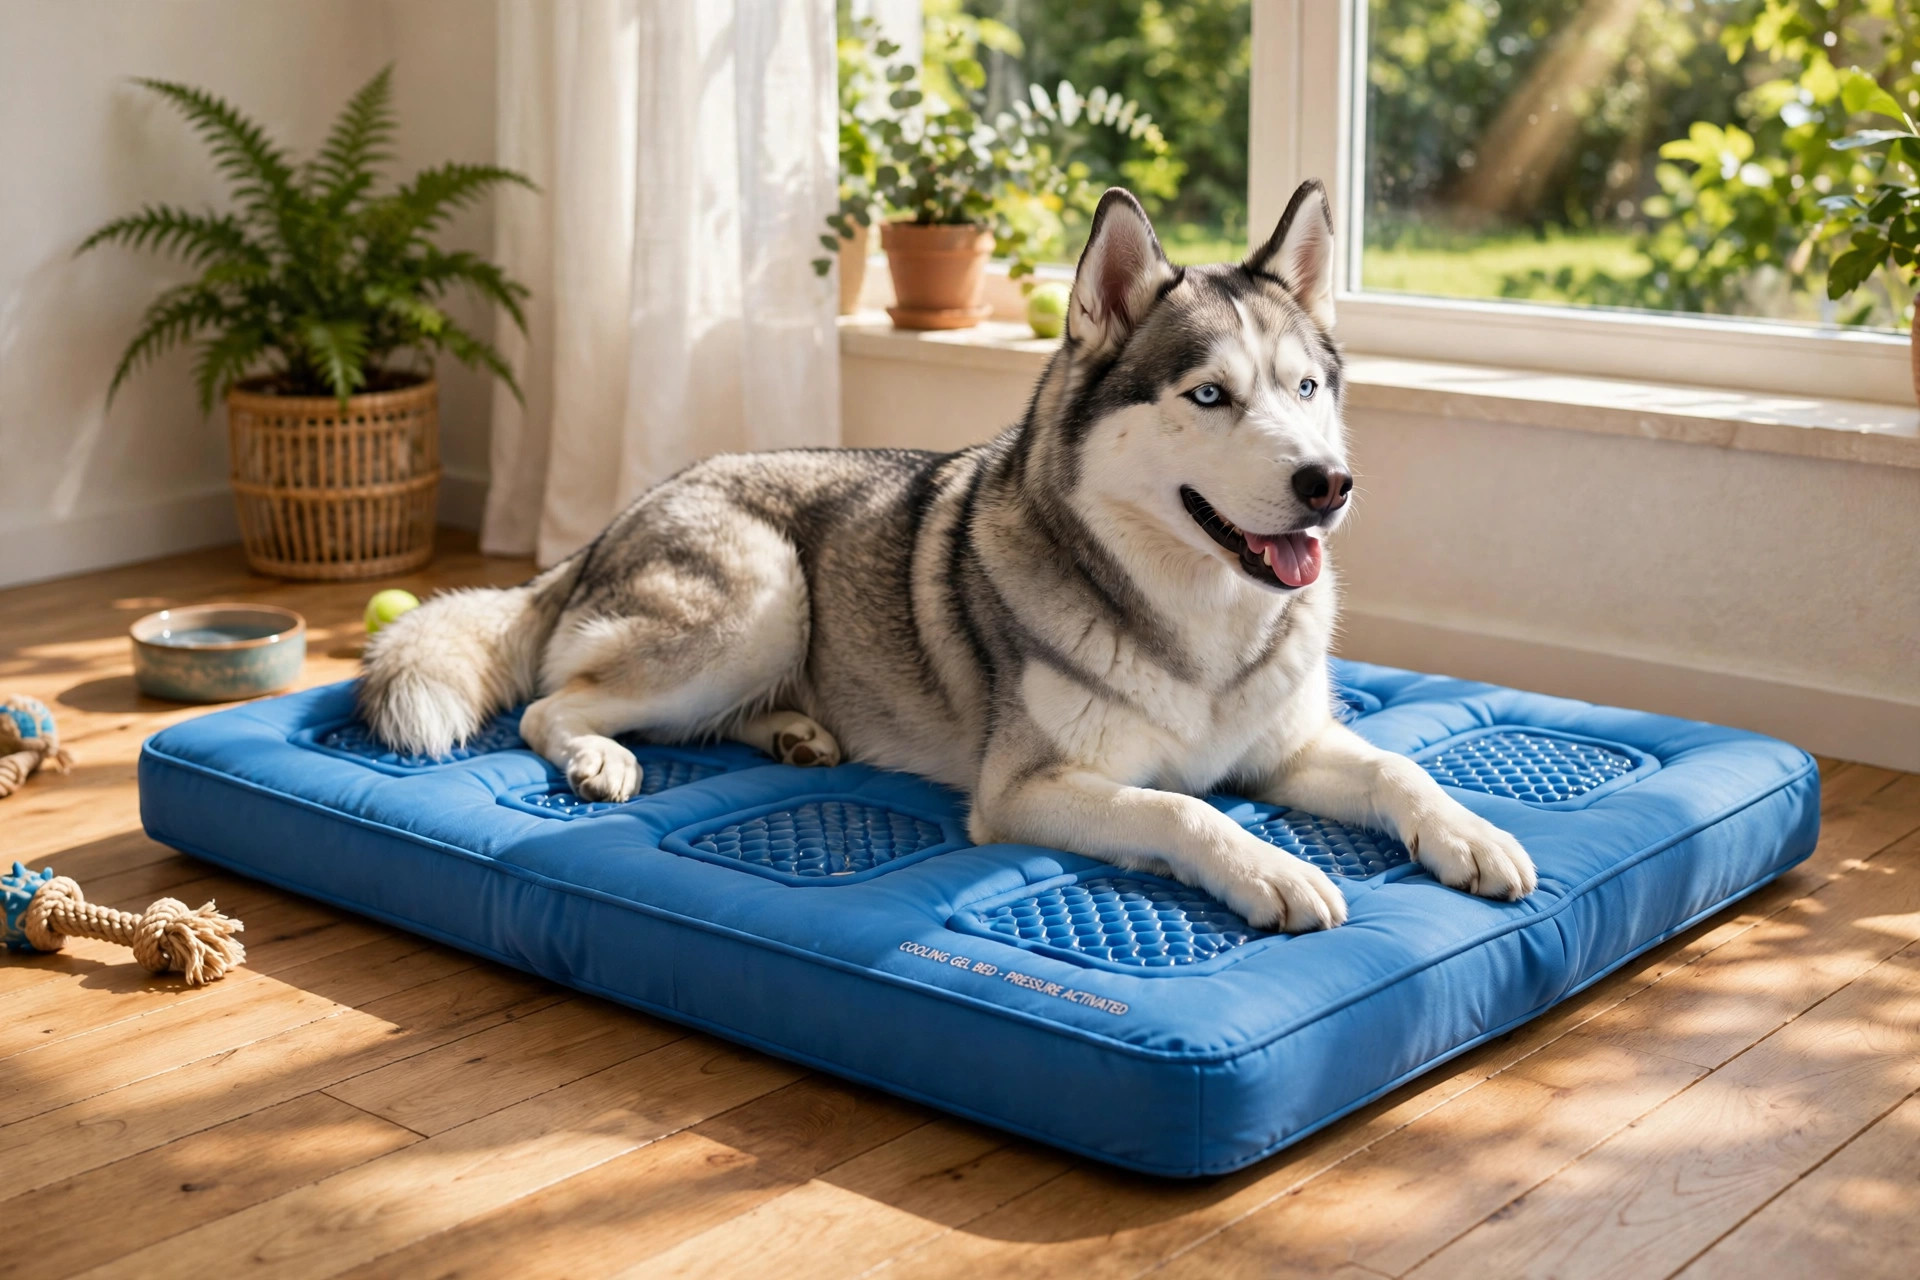
9. The cooling gel bed

Dogs that pant at night or seek out the kitchen tiles are heat-shedders.
Cooling beds use pressure-activated gel pads (no electricity, no water to
fill) that draw heat away for an hour or two at a time. Pair one with a
regular bed: the dog chooses. They’re also brilliant for summer heatwaves and
for thick-coated breeds.

10. The travel-and-crate pad

A thin, foldable pad that goes inside the crate, the car boot or the holiday
rent — same smell, same feel, wherever you are. Routine-sensitive dogs
settle dramatically faster in new places on their own pad. Washable,
lightweight, and cheap enough to keep a spare.

Husky lying on a blue pressure-activated cooling gel dog bed by a sunny window

The sizing rule (measure, don’t guess)

  • Length: dog stretched nose-to-tail, plus 15–20 cm. If in doubt, size up —
    undersized beds are the number-one reason dogs abandon them.

  • Weight: check the bed’s fill rating against your dog’s weight; cheap
    beds flatten within weeks under heavy dogs.

  • Curlers vs sprawlers: measure the dog in its favourite sleeping pose,
    not standing. A donut bed is measured by internal diameter, a rectangle by
    flat length.

Washing and care tips

  1. Removable, machine-washable cover first. Whatever the style, if the
    cover doesn’t zip off, it becomes a smell within a month. Wash at 30–40°C
    with a gentle, unscented detergent.

  2. Foam cores air, don’t wash. Spot-clean memory foam and air-dry it
    fully — trapped damp breeds mildew. Waterproof liners between foam and
    cover are cheap insurance against accidents.

  3. Vacuum between washes. A weekly lint-roll or vacuum stops hair and
    dander baking into the fabric.

  4. Rotate two covers. One on the bed, one in the wash — a bed is never
    “unavailable”, and your dog isn’t forced onto a bare foam core.

Safety notes

  • Chewing risk: no bed is safe to chew unsupervised. If your dog eats
    stuffing or fabric, remove the bed when you leave the room — intestinal
    blockages are genuinely dangerous. The chew-proof cot (idea 7) is the
    safest unattended option.

  • Cedar-filled beds: smell lovely, but cedar oils can irritate some dogs’
    skin and respiratory tracts. If your dog scratches after switching beds,
    the fill is suspect number one.

  • Heated beds: only use vet-designed low-wattage heated beds, never
    human heat pads — dogs can’t move off quickly enough if they overheat, and
    they chew through cords.

  • Bolsters vs puppies: very small puppies can get wedged between a tall
    bolster and a wall; keep flat-sided beds against walls with a small gap,
    or choose low rims until they’re bigger.

FAQs

How often should I replace a dog bed?
When the fill stops springing back — roughly 1–2 years for polyfill, 3–5
for quality memory foam. A flattened bed is decoration, not support.

My dog ignores the expensive bed and sleeps on the sofa. Why?
Usually scent, temperature or location. Put the bed where the dog already
naps (they’ve told you the spot), add a worn t-shirt of yours, and reward
them with treats for settling on it for a few days.

Are elevated cots good for old dogs?
Yes for cool rest and easy cleaning, but very arthritic dogs can struggle
to climb onto taller frames — choose a low one, or stick with orthopedic
foam.

Can dogs share one big bed?
If they choose to pile up, yes — but keep a second bed available. Dogs that
love cuddling at bedtime still want their own space at 3 a.m.

What’s the cheapest bed that isn’t rubbish?
A washable floor cushion (idea 2) with a dense polyfill pad — under most
bed budgets, easy to launder, and honest about what it is.

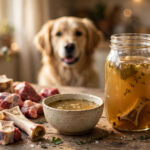
Mason jar of golden homemade bone broth with marrow bones and a golden retriever watching.

Bone Broth for Dogs: Benefits, Recipe & Safety

Simmer bones low and slow and you get something magic: a
golden, collagen-rich broth that dogs go absolutely wild for. Bone
broth has moved from old-fashioned kitchen habit to a genuine
functional food — vets now recognise its collagen and amino acids as
real support for early-stage joint stiffness, gut health and
hydration. And the best part? The safe homemade version costs a
fraction of the store-bought pouches.

But not every broth in your kitchen is dog-safe. This guide covers
what bone broth actually does for dogs, a foolproof slow-simmered
recipe, the three ingredients that must never go in the pot, and the
smart ways to serve it — from picky-eater bribery to frozen summer
treats.

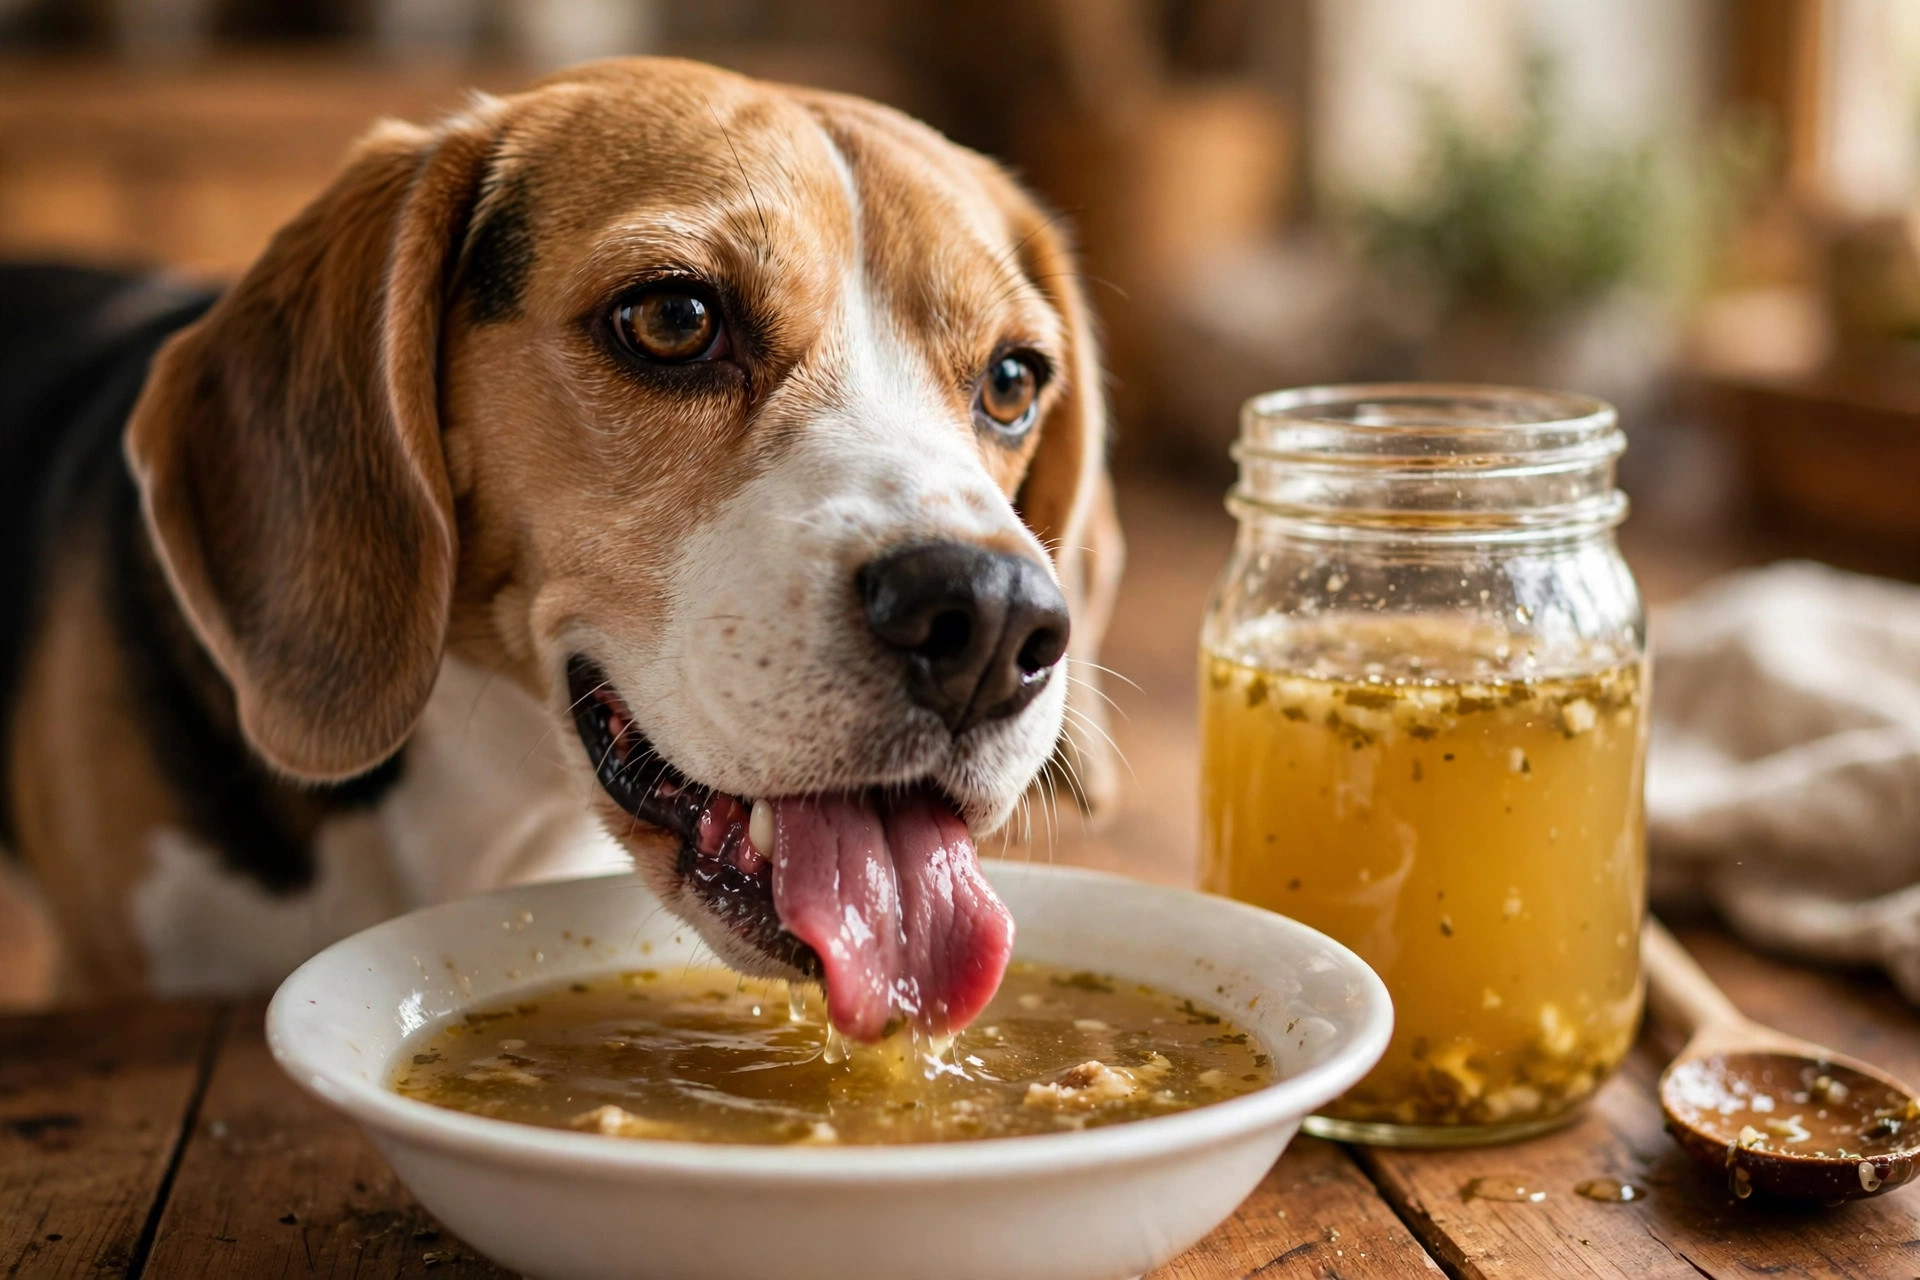
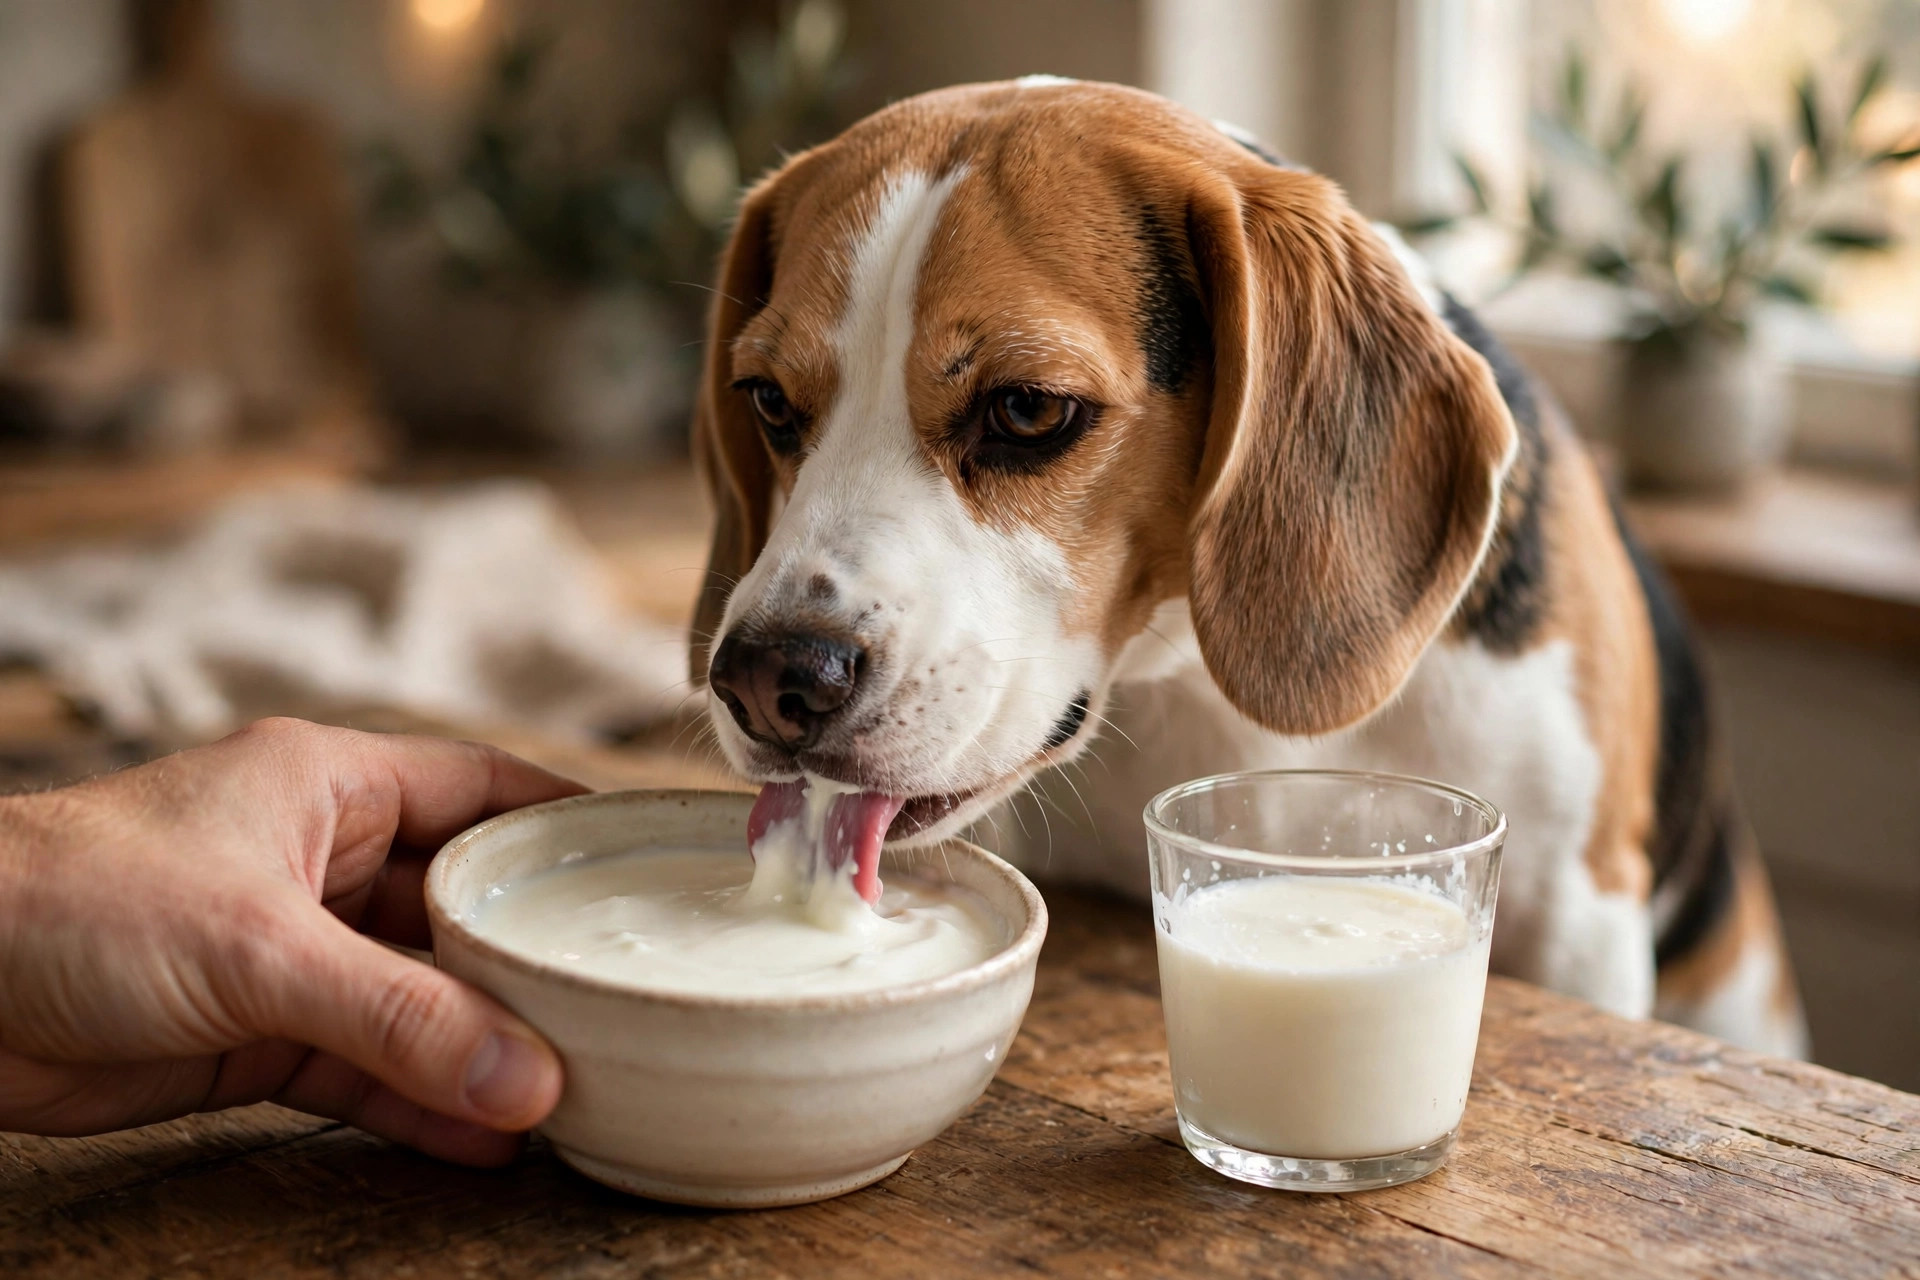
Beagle lapping golden bone broth from a white bowl.

Is bone broth good for dogs?

Yes — plain, dog-safe bone broth is one of the simplest functional
foods you can give your dog. The long, low simmer pulls gelatin,
collagen, amino acids and minerals out of the bones and connective
tissue into the liquid. Here’s what that means in practice:

  • Joint support. Collagen breaks down into glucosamine, chondroitin
    and hyaluronic acid — the same compounds in joint supplements. In
    2026, veterinary boards formally recognised bone broth collagen as
    a reasonable dietary support for dogs showing early signs of
    arthritis. It won’t rebuild a damaged joint, but it is a genuinely
    useful daily topper for seniors and active dogs.

  • Gut health. Gelatin helps support the mucosal lining of the
    digestive tract, which is why bone broth is the classic “bland
    recovery food” vets suggest after stomach upsets. It’s gentle,
    hydrating and easy to digest.

  • Hydration. Many dogs — especially those on dry kibble — don’t
    drink enough water. A splash of broth on dinner or a warm bowl on a
    cold day gets meaningful extra fluid into them without a fight.

  • Appetite and palatability. Bone broth is the picky-eater cheat
    code. A quarter-cup drizzled over kibble turns a boring bowl into
    something irresistible, which matters a lot for recovering, senior
    or fussy dogs that need to eat.

  • Skin and coat. The amino acids (glycine, proline) and collagen
    support skin elasticity and coat condition from the inside out.

  • Post-illness recovery. Warm, bland and easy to digest, broth is
    ideal for dogs bouncing back from vomiting, diarrhoea or surgery —
    ask your vet about timing after a GI episode.

Think of it as a daily health topper rather than a meal: a
nutritional sidekick that makes the main diet work harder.

Store-bought vs homemade: which is better?

The grocery aisle now stocks “pet bone broth” pouches, and some are
perfectly fine — but homemade wins on three counts: cost (pennies
per batch from bones you’d otherwise bin), control (you know
exactly what went in), and concentration (homemade slow-simmered
broth gels in the fridge; most commercial broths don’t, because
they’re too dilute to carry much collagen).

If you buy instead of making, check the label ruthlessly: no onion
or garlic (powdered counts), no excessive salt, no “natural flavours”
you can’t identify, and no xylitol in flavoured products. Plain,
low-sodium pet-formulated broth is the safe pick.

The safe homemade bone broth recipe

This is the classic slow-simmered version — set it up in five
minutes, then let time do the work.

What you need

  • Bones: 1–1.5 kg of raw or roasted beef marrow bones, knuckles,
    oxtail or chicken carcasses/feet. A mix of meaty bones and joint-y
    bones gives the best gel. Chicken feet are collagen gold if you can
    find them.

  • Water: enough to cover the bones by 3–5 cm.

  • Apple cider vinegar: 1–2 tablespoons. This is the secret
    ingredient — the mild acid helps pull minerals and collagen out of
    the bones. Your dog won’t taste it.

  • Optional veg: a carrot or two and a stalk of celery, roughly
    chopped. Dog-safe and adds flavour. (Optional — skip if your dog
    has a sensitive stomach.)

The 3-step method

Step 1 — Load the pot. Put the bones in your largest pot or slow
cooker, cover with water, and add the apple cider vinegar (and veg if
using). Let it sit for 30 minutes before heating — this gives the
acid a head start on the bones.

Step 2 — Simmer low and slow. Bring to a gentle boil, skim off
any foam that rises, then drop to the lowest simmer. Cook for
12–24 hours (slow cooker on LOW is ideal and the safest
hands-off option). The broth should barely bubble. Top up with water
if it drops below the bones.

Step 3 — Strain, cool, store. Strain everything through a fine
mesh sieve — remove every bone and bone fragment, as cooked bones
are brittle and dangerous. Cool the broth, refrigerate overnight, and
skim the fat cap off the top in the morning. What remains should
wobble like jelly when cold: that’s the collagen, and it’s exactly
what you want.

Storage: fridge 4–5 days in sealed jars; freezer 3–4 months (freeze in ice-cube trays for single servings).

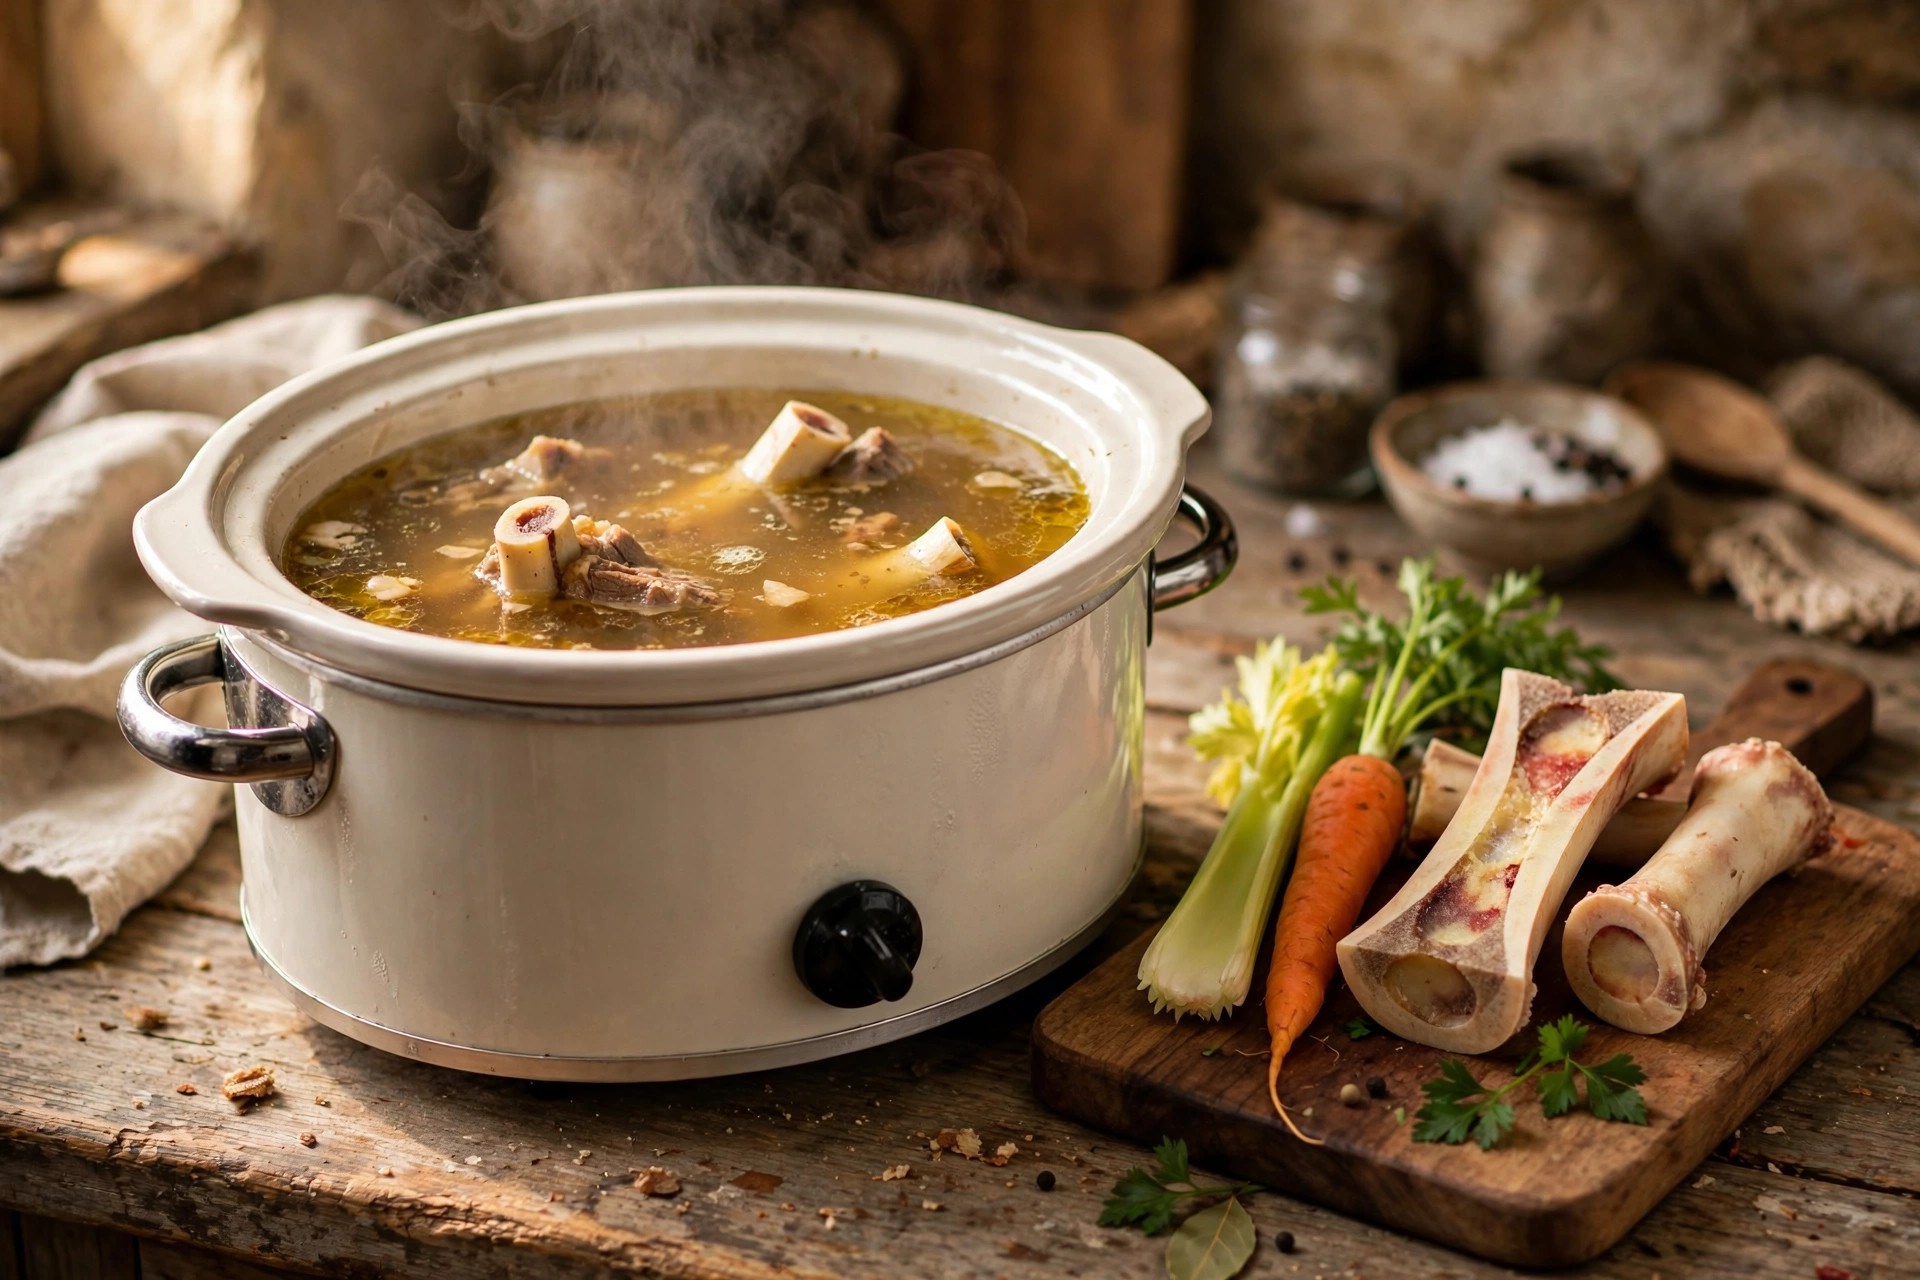
Slow cooker of simmering homemade bone broth with beef bones, carrot and celery.

The 3 ingredients that must never go in the pot

Regular cooking broth and dog broth look the same — but three common
soup ingredients are genuinely dangerous for dogs: (1) Onion (all
forms)
— damages dogs’ red blood cells and can cause haemolytic
anaemia; (2) Garlic — toxic to dogs in meaningful amounts, and
broth concentrates it; (3) Excess salt / stock cubes — far too
salty for dogs and usually contain onion powder too. Also skip leeks,
chives and unidentified soup bases.

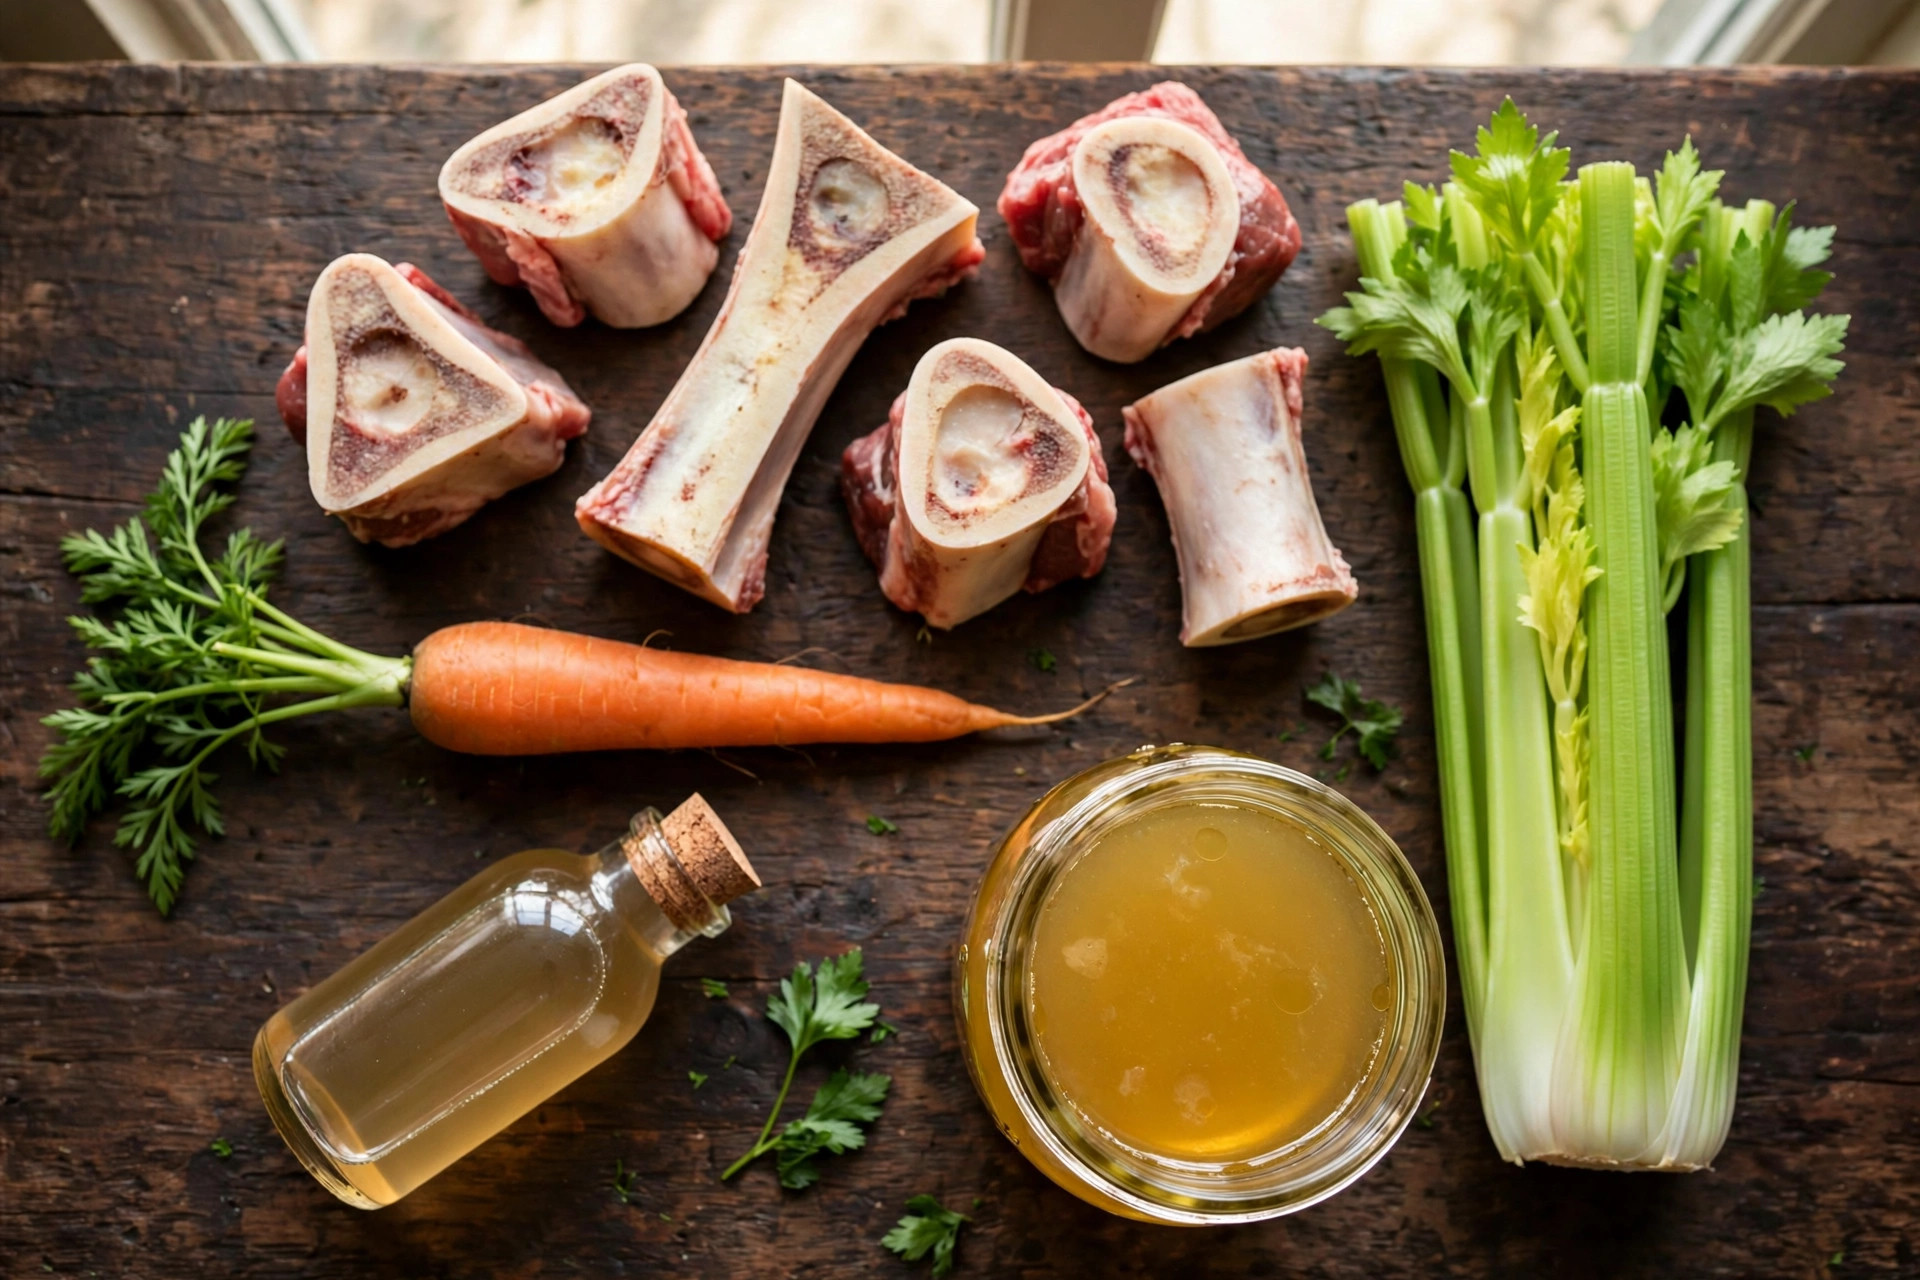
Dog-safe bone broth ingredients flat-lay: marrow bones, carrot, celery, apple cider vinegar.

How much bone broth can a dog have?

Broth is a topper, not a meal — keep it to roughly 5–10% of daily
calories
: small dogs (under 10 kg) 2–4 tablespoons/day; medium dogs
(10–25 kg) ¼–½ cup/day; large dogs (over 25 kg) ½–1 cup/day. Start
small the first few days. Dogs with kidney disease, on sodium-
restricted diets or on medication: check with the vet first.

5 smart ways to serve bone broth

  1. The kibble upgrade. Pour a warm quarter-cup over dry food and let it soak 5 minutes.

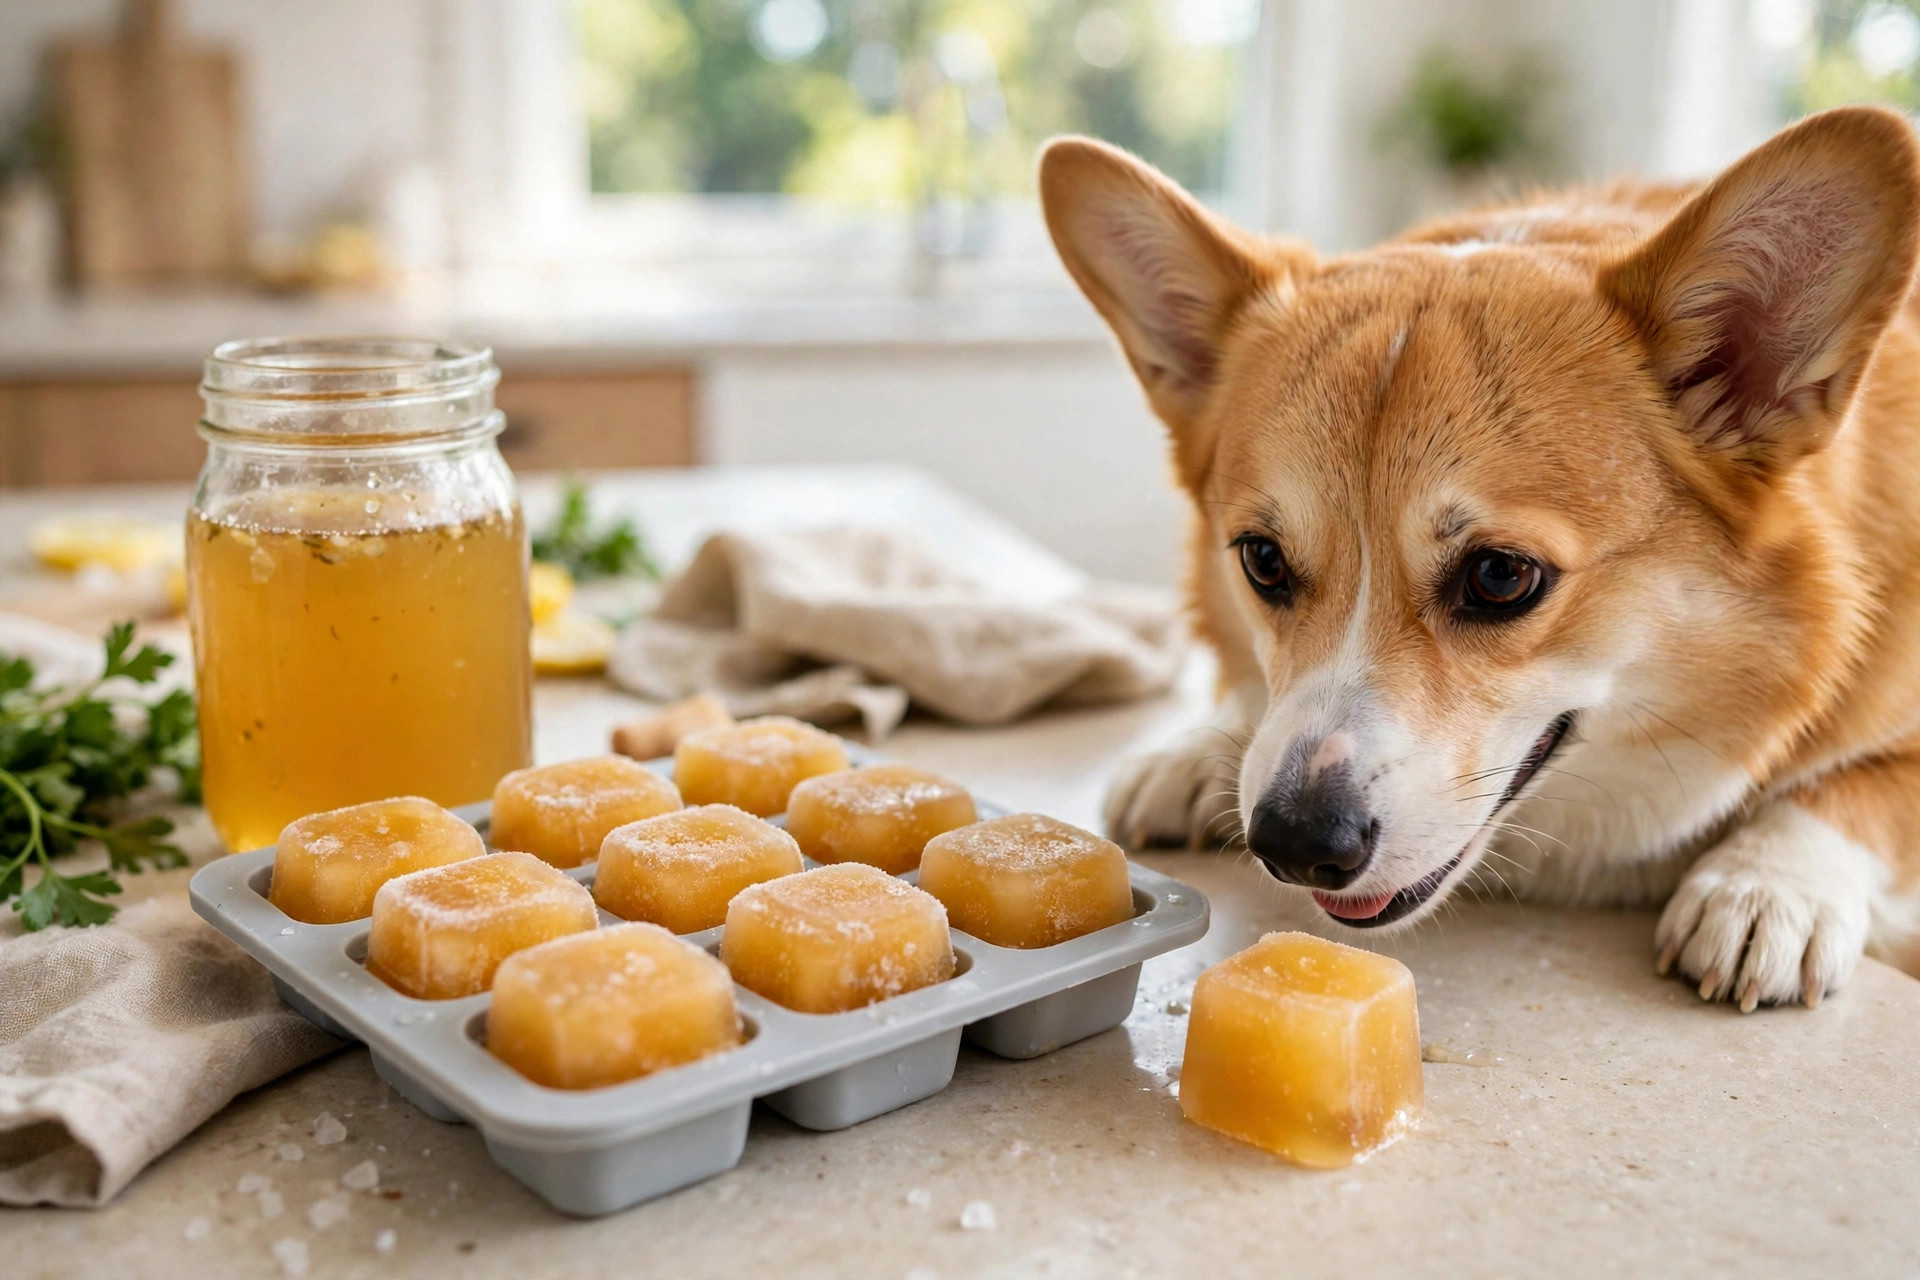
  2. Frozen broth cubes. Freeze in ice-cube trays for a cooling summer chew.

  3. The warm-up bowl. A small warm bowl on a cold evening for senior dogs.

  4. Post-walk recovery. A few tablespoons after a long hike help rehydration.

  5. Medication helper. Soak a pill pocket in broth to make medicine time easier.

Corgi with frozen bone broth cubes in an ice cube tray.

Bone broth for puppies, seniors and sick dogs

Puppies: fine in small amounts from ~8 weeks (soften kibble during
weaning). Senior dogs: bone broth’s best audience — collagen for
stiff joints, warmth and extra hydration for ageing kidneys.
Recovering dogs: small, frequent sips of plain broth once vomiting
has stopped — always follow the vet’s timing guidance.

The bottom line

Bone broth earns its superfood reputation honestly: real collagen for
joints, gelatin for the gut, hydration for kibble-fed dogs, and a
flavour dogs find irresistible — all from bones, water, vinegar and
patience. Make it plain, keep onion and garlic far away from the pot,
skim the fat, and serve it as a topper rather than a meal.

FAQs

Is bone broth good for dogs every day? Yes, plain homemade
broth is safe as a daily topper in sensible amounts (5–10% of daily
calories). Dogs with kidney disease or on sodium-restricted diets
should check with their vet first.

Can dogs have store-bought bone broth? Only if pet-formulated
or verified plain: no onion or garlic in any form, low sodium, no
xylitol. Homemade is safer and cheaper.

Why didn’t my bone broth gel? Usually too much water, too
short a simmer, or too few joint-y bones (knuckles, feet, oxtails gel
best). Aim for 12–24 hours at a bare simmer.

Can I give my dog the bones from the broth? No — never.
Cooked bones splinter and can cause choking or intestinal injury.
Strain out and discard every bone; serve only the liquid.

How long does homemade bone broth last? 4–5 days refrigerated
in sealed jars, or 3–4 months frozen. Freeze in ice-cube trays for
single servings.

Is bone broth good for dogs with upset stomachs? Plain,
fat-skimmed broth is a classic gentle recovery food — hydrating and
easy to digest. Offer small amounts once vomiting has stopped, and
follow the vet’s guidance.

Golden retriever beside wrapped Christmas gifts with a chew toy.

25 Thoughtful Christmas Gifts for Dogs (2026 Guide)

Some dogs could not care less about the wrapping paper. But every dog
owner knows the truth: the best part of Christmas morning is watching
your dog discover that a present is actually for them. Nose in the box,
tail going like a windmill, new toy squeaking within seconds.

The trouble is the choice. Pet store shelves are crammed with festive
plushes, edible “chocolate”, crinkly stocking fillers and gadgets with
glowing reviews — and not all of them are safe, well-made or worth your
money. So we did the homework: 25 thoughtful Christmas gifts for dogs
in 2026, organised by budget, with the safety notes that actually matter
buried in plain sight.

A quick word before the list: the best gift is always attention. A new
toy is wonderful, but twenty minutes of play with you beats any squeaker.

Stocking fillers — under £10 / $12

Small budgets, big tail wags. These are the gifts that fill the toe of
the stocking and get destroyed by Boxing Day.

  1. Natural rubber chew toy. The classic. Look for one-piece,
    non-toxic rubber that can be stuffed with treats — it lasts longer
    than plush and cleans up in seconds.

  2. Squeaky festive plush. Dogs love the crinkle-squeak combo. Buy
    ones with reinforced stitching, and supervise heavy chewers — if
    your dog de-stuffs toys, plush is a supervised-play gift, not a
    leave-them-alone one.

  3. Lick mat. Smear with plain yoghurt, mashed banana or peanut
    butter, freeze it, and you have a 20-minute calming activity. Our
    lick mat recipes
    give you ten to start with.

  4. Natural treats pouch. Skip the mystery “dog chocolate” drops
    (more on that below) and choose single-ingredient treats — freeze-
    dried liver, sweet potato chews or dried fish skins. Our
    natural treats round-up
    covers the best options.

  5. Snuffle mat. Shredded fleece hides kibble and turns dinner into
    a foraging game. Brilliant mental enrichment for rainy winter days.

  6. Tennis ball multipack — the good ones. Cheap balls shed fuzz
    that some dogs swallow; buy proper dog-safe balls without abrasive
    felt glue.

  7. Carrot stick chew bundle. Dehydrated carrot chews are cheap,
    crunchy and safe — a genuinely healthy stocking filler.

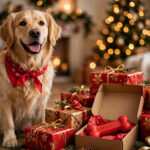
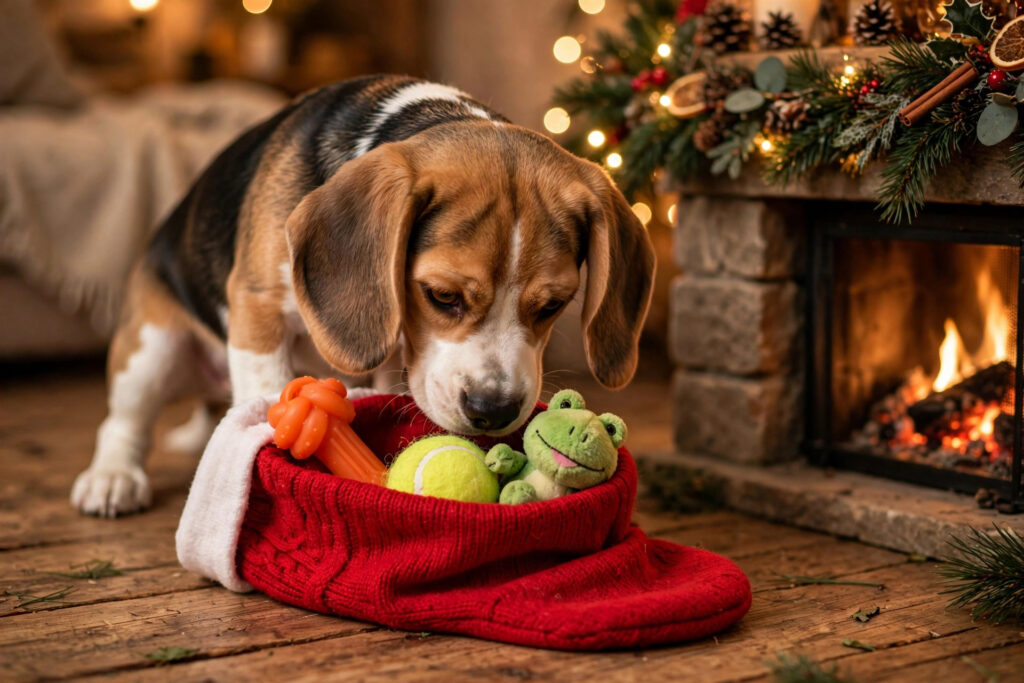
Beagle puppy sniffing a Christmas stocking filled with dog toys.

Thoughtful picks – £10–£30 / $12–$35

The sweet spot: gifts that last past January and earn their shelf space.

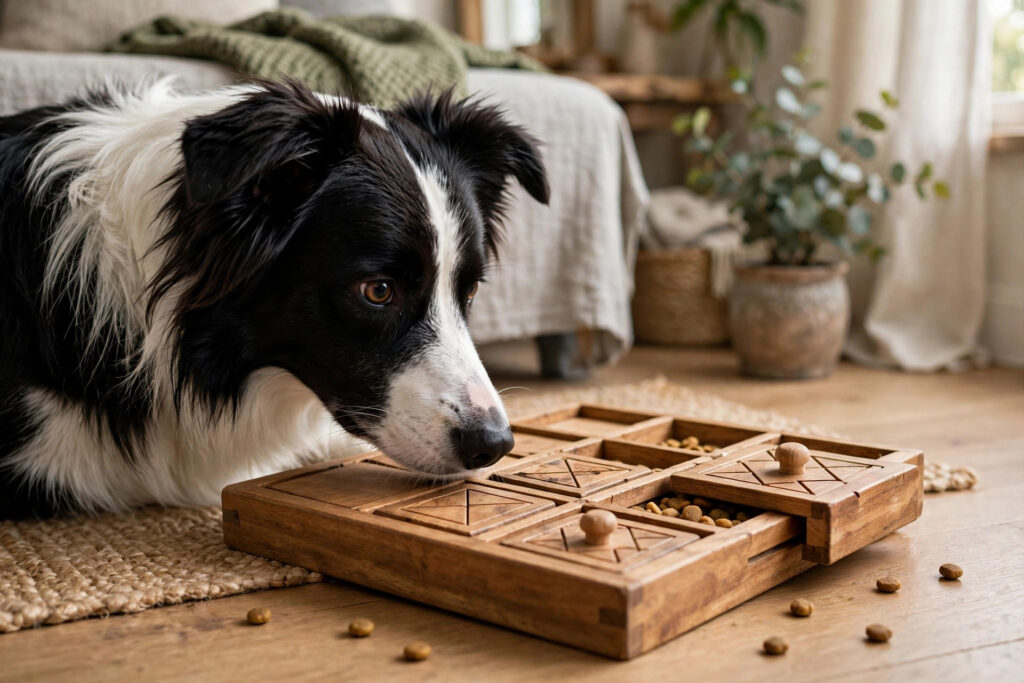
  1. Puzzle feeder. A sliding-puzzle or spinning treat dispenser slows
    fast eaters and exercises the brain. Start with an easy level so your
    dog learns the game before the difficulty ramps up.

  2. Durable tug rope. Hand-knotted cotton rope with no loose fraying
    — watch for unravelled strands, which can be swallowed. Replace when
    it starts to fray.

  3. Calming enrichment bundle. A lick mat plus a long-lasting chew
    (yak cheese chew or bully stick) makes a ready-made relaxation kit
    for firework season and visitors. Supervise chews, always.

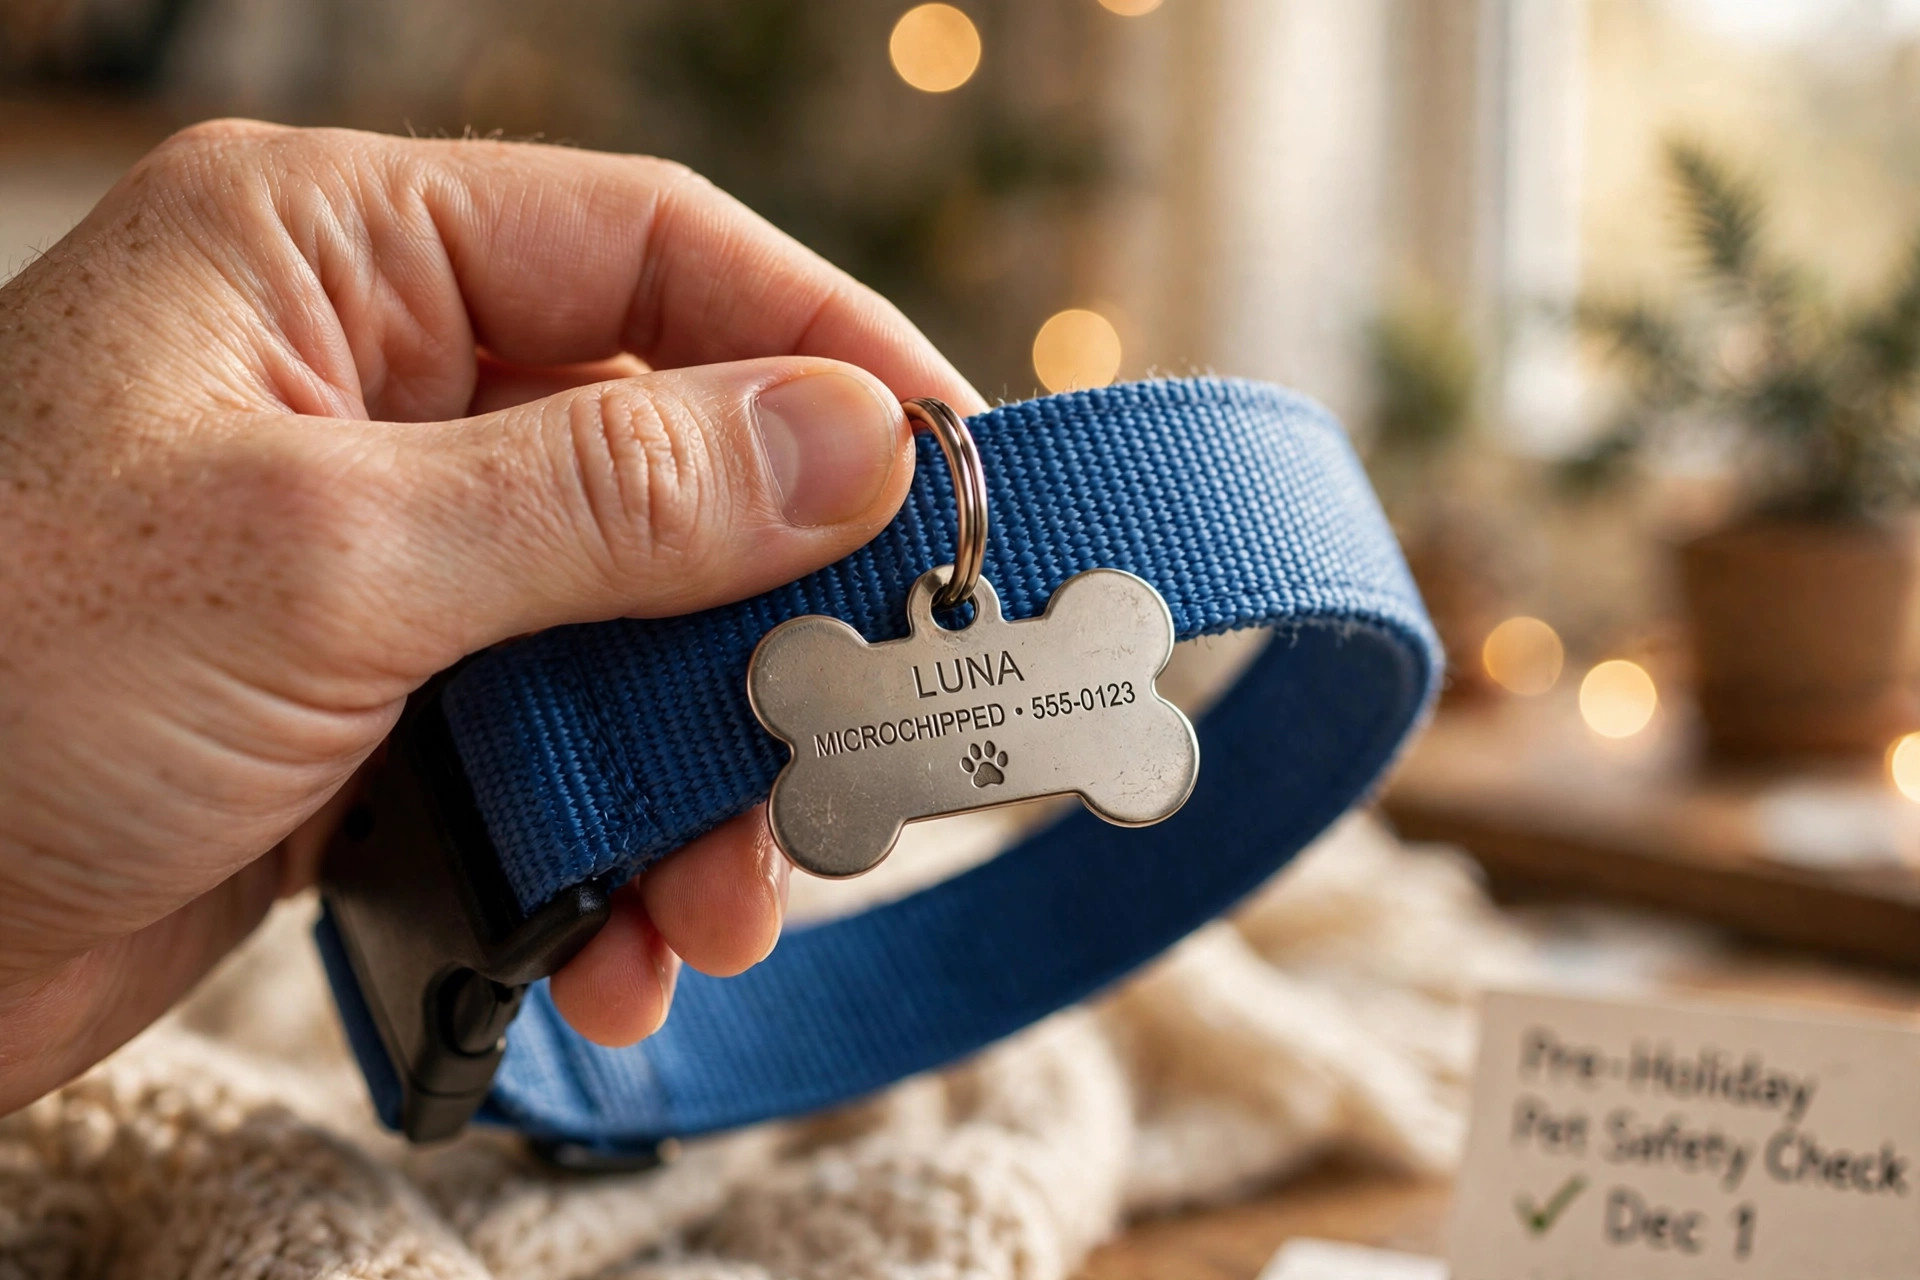
  4. Personalised collar or ID tag. A new engraved tag is practical
    and festive — and winter walks with early darkness are exactly when
    good ID matters. Reflective collars earn bonus points.

  5. Doggy advent calendar. Buy one made specifically for dogs with
    a clear ingredient list — never share your chocolate calendar, and
    check human versions for xylitol before even considering them.

  6. Cozy fleece blanket. Their own blanket for the sofa stops the
    great cushion war and gives them a “place” cue for training.

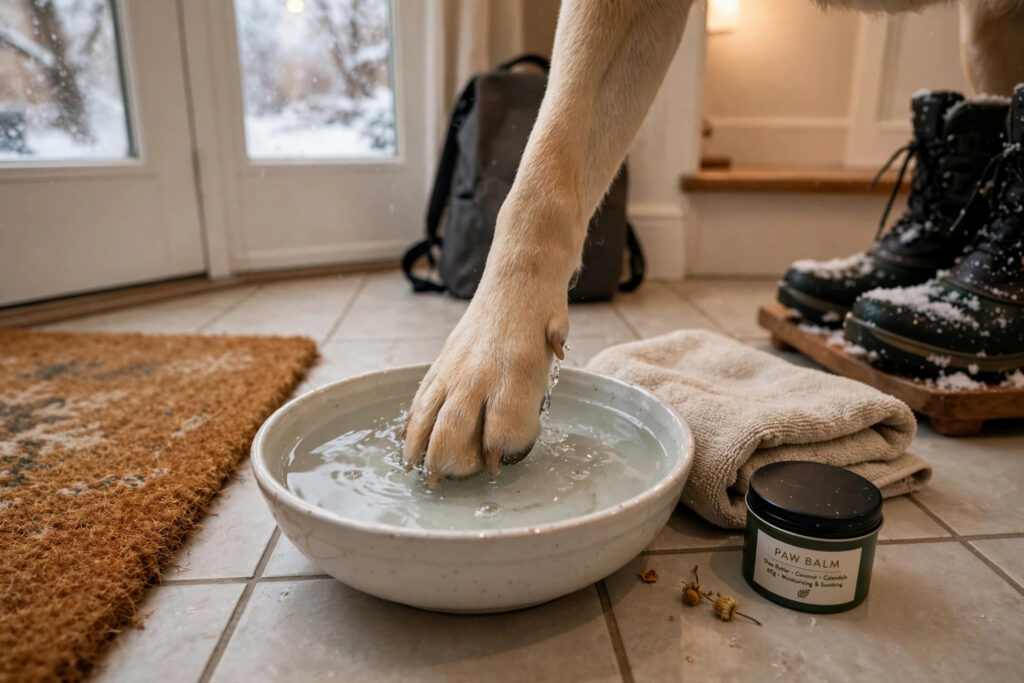
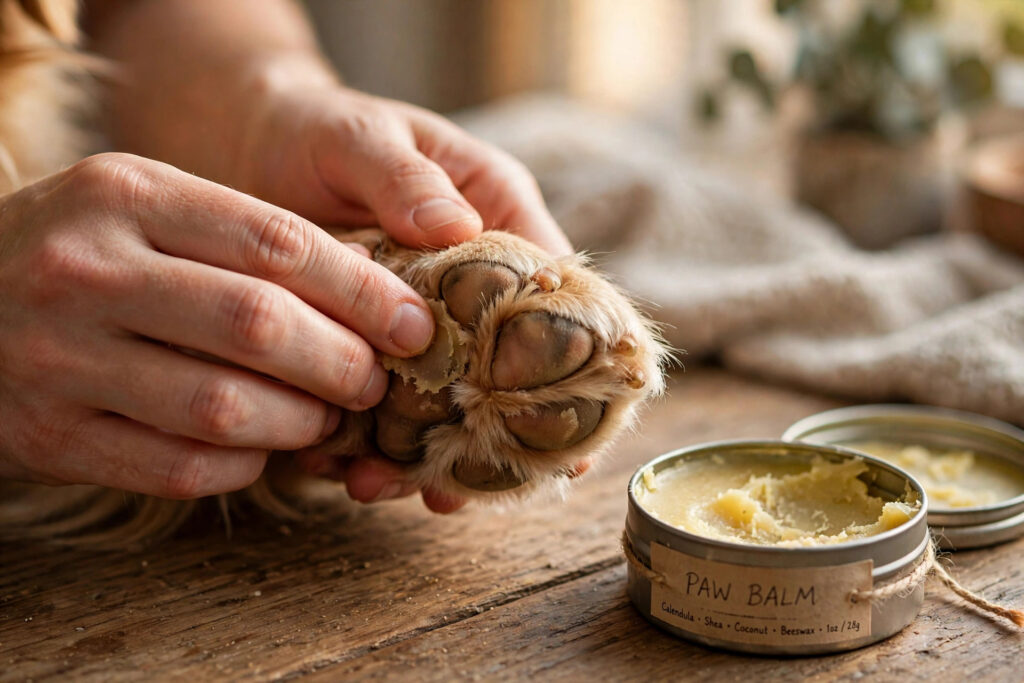
  7. Paw balm. Winter salt and ice are brutal on pads. A tin of
    natural paw balm is the gift that says “I pay attention.” Our
    winter paw care guide
    explains the full routine.

  8. Slow-feeder bowl. Turns a 30-second inhale into a 5-minute meal,
    reducing gulping and bloat risk. Pick the maze depth for your dog’s
    nose shape — flat-faced breeds need shallow patterns.

  9. Flirt pole. A giant cat-wand for dogs: incredible exercise in a
    small garden, and brilliant for high-energy breeds on dark winter
    evenings. Use on grass, keep sessions short.

Border collie solving a wooden puzzle feeder toy.

Proper splurges — £30+ / $35+

For the dog who has everything, or the owner who has decided this is
the year.

  1. Orthopaedic dog bed. Memory-foam beds genuinely help older dogs
    and big breeds. Buy the right size — nose-to-tail plus a few inches
    — with a washable cover. You will thank yourself in February.

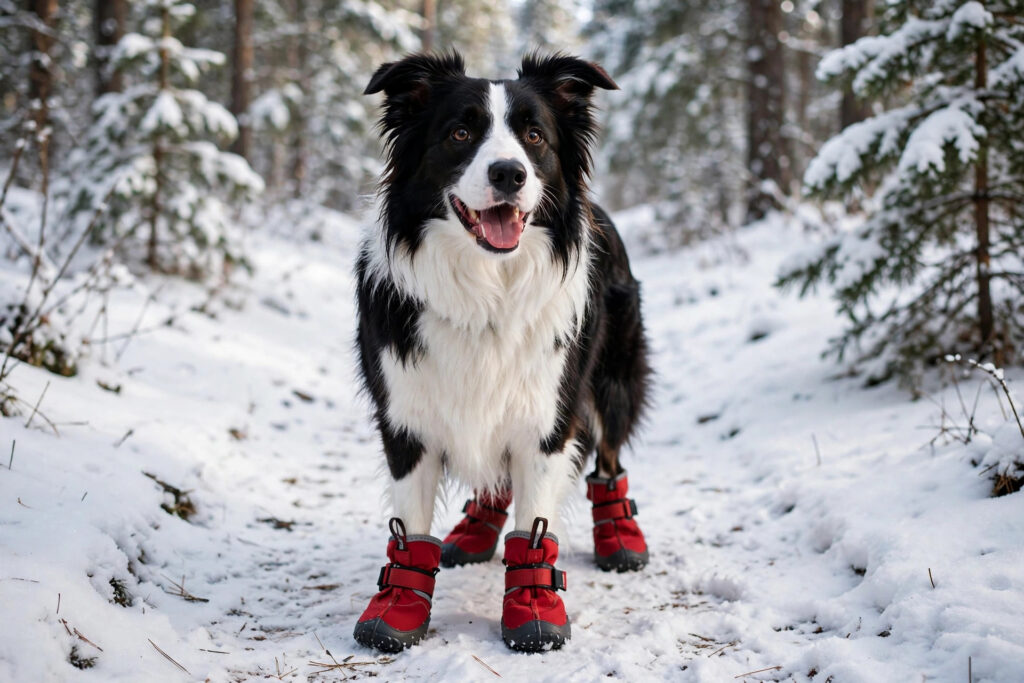
  2. Dog boots (set of 4). Salt-burned pads are a winter reality in
    many places. Proper boots with velcro straps stay on; cheap ones do
    not. Introduce them indoors first, with treats, or Christmas morning
    will be comedy rather than comfort.

  3. Automatic ball launcher. For fetch-obsessed dogs and owners
    with tired arms. Use in the garden with supervision — and check the
    ball size suits your dog’s jaw.

  4. GPS tracker. Clips to the collar and shows your dog’s location
    on your phone. A thoughtful gift for escape artists and rural
    walkers; remember most need a subscription.

  5. Heated dog bed or self-warming mat. Reflective self-warming
    mats need no electricity and are safer than plug-in pads — a lovely
    gift for senior dogs who feel the cold.

  6. Subscription treat box. A monthly box of treats and toys keeps
    the Christmas spirit going all year. Check the treats are
    single-ingredient or clearly labelled, and match the box size to
    your dog.

Cocker spaniel sitting beside a decorated Christmas tree with presents.

Gifts for the dog lover (for the human, really)

  1. Custom pet portrait. From a favourite photo — the gift that
    makes owners cry in a good way. Order early; artists book up by
    late November.

  2. “Dog mum/dad” Christmas jumper. Festive, ridiculous,
    mandatory.

  3. Donation to a rescue in their dog’s name. Many rescues run
    Christmas appeals. For the person whose dog truly has everything,
    this is the most thoughtful gift on the list.

What NOT to buy — the safety notes

Christmas is peak season for well-meaning but risky gifts. A few hard
rules:

  • No “dog chocolate” mystery products. Some are carob-based and
    fine; others are low-quality with vague labels. If you would not eat
    the ingredient list yourself, do not give it to your dog.

  • No rawhide. It is cheap, festive-looking and everywhere — and it
    swells in the stomach, can contain processing chemicals, and causes
    choking and blockages. Choose yak chews, bully sticks or collagen
    sticks instead.

  • No small squeakers for power chewers. If your dog can de-stuff a
    toy in minutes, squeakers are a swallowing hazard. Buy “no-stuffing”
    or rubber toys instead, and supervise.

  • No cooked bones. Christmas dinner leftovers are not gifts —
    cooked bones splinter. Raw meaty bones are a separate discussion for
    another article; cooked bones are a flat no.

  • No essential-oil or heavily fragranced products. Dogs’ noses are
    up to 100,000 times more sensitive than ours. That pine-scented toy
    is misery in a stocking.

  • Check every treat label for xylitol (also listed as birch
    sugar) — it is extremely toxic to dogs, and it hides in “sugar-free”
    festive treats. Our
    Christmas dinner guide
    has the full safe/unsafe food lists.

Safety note: supervise all new toys and chews the first few
times. The most expensive gift in the world is the emergency vet
visit — and most of those are preventable with five minutes of
watching how your dog plays.

Wrapping it up (literally)

Dogs do not care about the paper, but the ritual is half the fun. Let
them sniff the parcel, help them “unwrap” (tear an edge to start),
and keep the ribbon and tape out of reach — ribbon is a linear foreign
body waiting to happen if swallowed.

The best Christmas gift for your dog is not on this list, because it
is not a product: it is you, present, playing, walking the long way
home. The toy is just the excuse.

Merry Christmas — from our pack to yours.

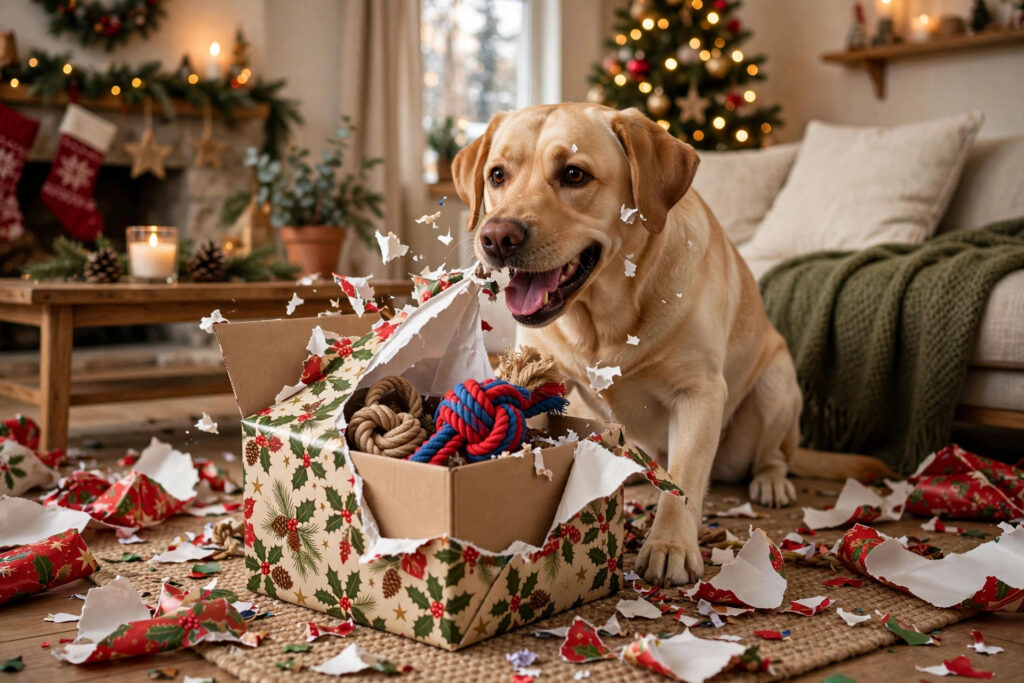
Labrador joyfully unwrapping a Christmas gift box with rope toys.

FAQs

When should I buy Christmas gifts for my dog?
Order personalised items (portraits, engraved tags) by late November.
Everything else, aim to buy by mid-December — popular toys sell out
and delivery slots fill up fast in the final week.

Are advent calendars for dogs safe?
Dog-specific ones with clear ingredient lists are fine. Never share a
human chocolate calendar — chocolate is toxic to dogs — and check any
“sugar-free” treats for xylitol (birch sugar), which is extremely
toxic.

What is the best Christmas gift for a puppy?
For puppies, prioritise safe chewing: a natural rubber chew toy, a
small lick mat and a snuffle mat. Avoid small squeakers and anything
with stuffing they can pull out and swallow.

What should I avoid buying as a dog Christmas gift?
Avoid rawhide, cooked bones, mystery-ingredient “dog chocolate”,
small-squeaker plushes for power chewers, and heavily scented
products. Always check treat labels for xylitol.

How much should I spend on my dog at Christmas?
There is no right number. A £5 lick mat used daily beats a £50 gadget
ignored by New Year. Spend on what your dog will actually use — and
remember the best gift is your time.

Labrador with dog multivitamin chews and a supplement bottle next to a kibble bowl.

Dog Multivitamins: Do Dogs Need Them? A Vet-Backed Guide

Walk down any pet-supply aisle and you’ll see them: colourful tubs of dog multivitamins promising shinier coats, stronger joints and more energy. Search interest in dog vitamins has climbed steeply over the past two years, and plenty of owners are reaching for the bottle. But here’s the question worth asking first — does your dog actually need one?

For many healthy dogs eating a complete, balanced food, the honest answer is no. A daily multivitamin can make a real difference for the right dogs, but it can also be a waste of money — or, in a few cases, genuinely risky. This guide explains which dogs benefit, which nutrients matter, how to read a label like a sceptic, and when supplements can do more harm than good.

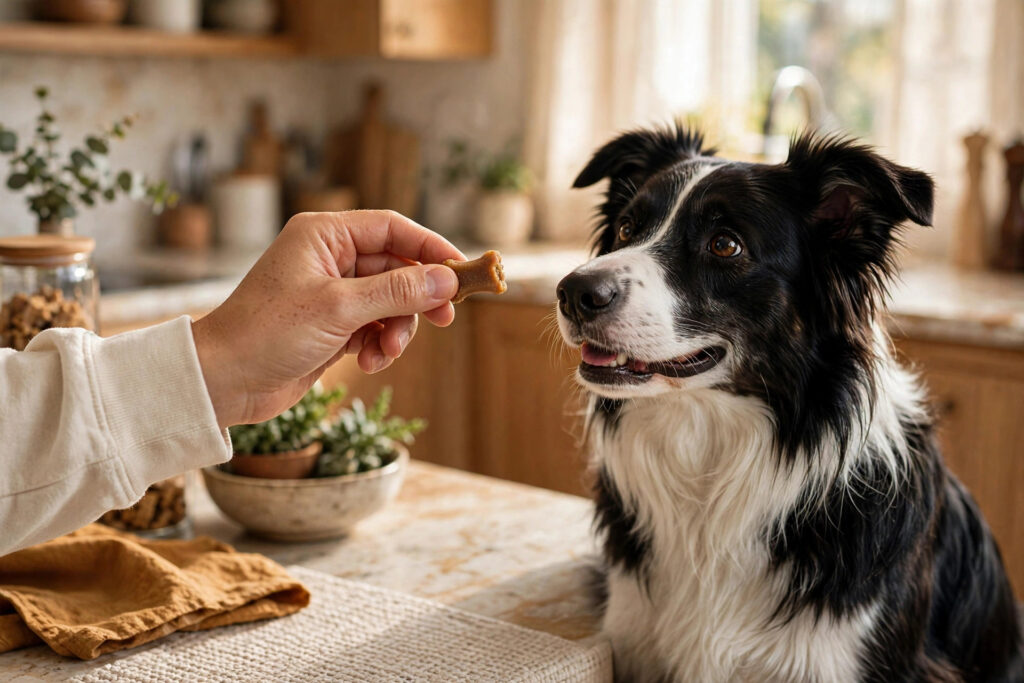
Owner offering a dog vitamin chew to a border collie.

Does my dog need a multivitamin?

A dog eating a quality complete and balanced food — one that meets AAFCO nutrient profiles or equivalent standards — already gets all the vitamins and minerals it needs. Adding a multivitamin on top of that is like watering an already-soaked plant: the excess usually just passes through, and you pay for the privilege.

The dogs who genuinely benefit are the ones with a gap — in their diet, their health, or their life stage:

  1. Dogs on homemade or raw diets. Home-cooked meals are wonderful, but almost none are nutritionally complete without careful formulation. A multivitamin formulated for dogs is often the safety net a vet recommends for homemade feeders.

  2. Senior dogs. Ageing dogs absorb some nutrients less efficiently, and senior formulas often add joint and antioxidant support.

  3. Dogs with digestive or liver issues. Poor absorption means deficiencies even on good food — but this should be vet-guided, with bloodwork.

  4. Picky eaters. Dogs that self-restrict to a few foods may miss key nutrients over time.

  5. Pregnant or nursing dogs. Nutritional demands skyrocket; most need a purpose-built prenatal supplement, not an off-the-shelf multivitamin.

Safety note: if your dog is on a balanced commercial diet and is healthy, ask your vet before adding any supplement. More is not better — fat-soluble vitamins (A, D, E, K) accumulate in the body and can reach toxic levels, unlike water-soluble ones that are mostly excreted.

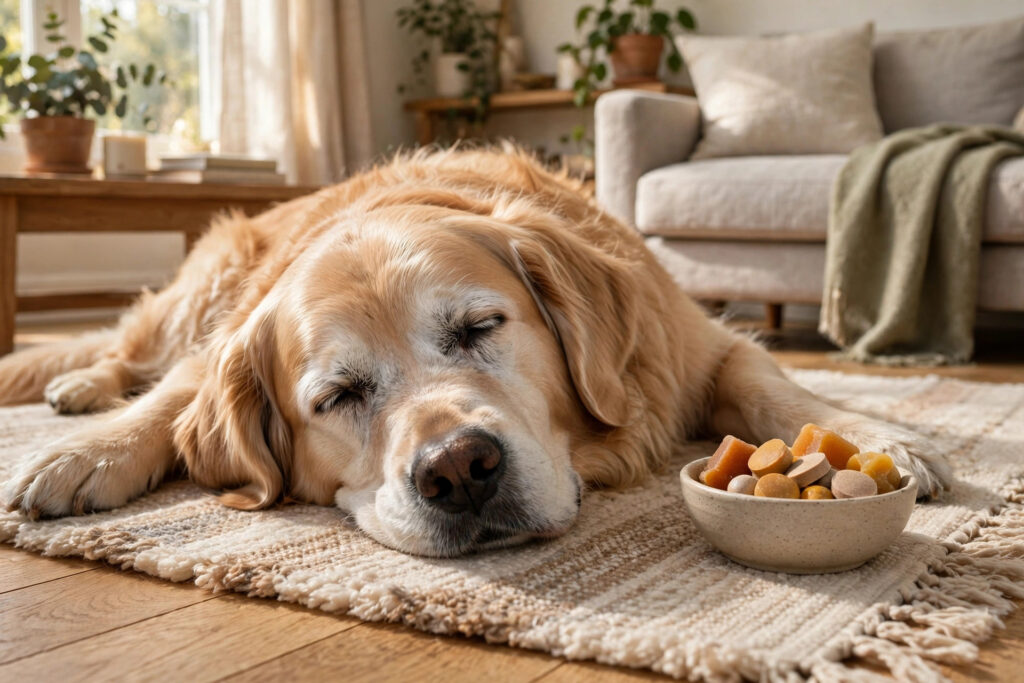
Senior golden retriever resting with a bowl of dog vitamin chews.

Which nutrients actually matter for dogs

A good dog multivitamin isn’t a random alphabet soup. These are the nutrients with real jobs behind them:

  • Vitamin A — vision, skin, coat and immune function. Important, but toxic in excess — don’t stack multiple sources.

  • B vitamins (complex) — energy metabolism, nervous system health and appetite. Water-soluble, so deficiency is a bigger risk than overdose for healthy dogs.

  • Vitamin D — calcium absorption and bone strength. Dogs can’t make it from sunlight the way people do, so diet matters; too much causes dangerous calcium build-up.

  • Vitamin E — antioxidant protection for cells, skin and coat.

  • Vitamin C — dogs make their own, so it’s not essential, but extra antioxidant support can help senior or stressed dogs.

  • Calcium & phosphorus — bone strength in the right ratio (roughly 1.2:1 calcium to phosphorus); the ratio matters as much as the amount, especially in growing large breeds.

  • Zinc — skin, coat, immune function and wound healing. Zinc deficiency shows as skin and coat problems.

  • Iron — red blood cell production; anaemia is rare on good food but matters for some dogs.

  • Omega-3 fatty acids (EPA/DHA) — brain, joint and skin support. Not always in a “multivitamin”, but often bundled in and worth having.

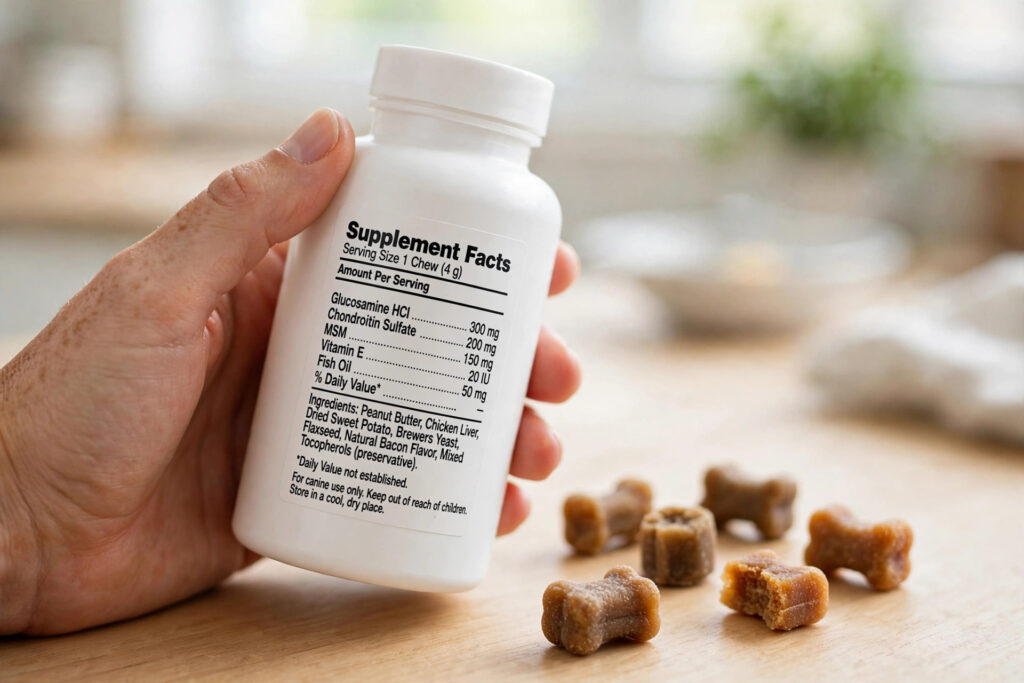
  • Glucosamine & chondroitin — joint support common in senior multivitamins; evidence is moderate but consistent for mild joint stiffness.

When vitamins can be harmful

This is the part the colourful tubs don’t advertise. Supplements can hurt in a few well-documented ways:

  • Fat-soluble vitamin toxicity. Vitamins A and D build up in the liver and body fat. Excess vitamin A causes joint pain, bone issues and liver damage; excess vitamin D causes dangerous calcium deposits in organs and kidneys. This is the biggest risk of stacking a multivitamin on top of an already-complete food.

  • Calcium imbalance in puppies. Large-breed puppies given extra calcium can develop skeletal deformities. Never supplement a growing large-breed puppy’s calcium without vet guidance.

  • Iron overdose. Iron is one of the more toxic nutrients in overdose — keep all supplements, human and dog, where your dog can’t chew the bottle.

  • Xylitol and other nasties. Some products — especially flavoured chews — contain xylitol (also labelled birch sugar), which is extremely toxic to dogs. Check every label, every time you buy.

  • Masking a real problem. A dull coat or low energy that “needs vitamins” might be hypothyroidism, kidney disease or a diet problem. Supplements can delay the diagnosis that actually fixes things.

How to read a dog vitamin label like a sceptic

The supplement shelf is full of confident claims. Run every product through this checklist:

  • Formulated for dogs, not humans. Dog products use appropriate doses and dog-safe ingredients; human gummies often contain xylitol.

  • Specific nutrient amounts, not fairy dust. The label should list actual amounts per chew/scoop — not just “a proprietary blend of vitamins”. Vague blends hide tiny doses.

  • AAFCO-style balance. Look for products designed to complement a complete diet, with nutrient levels in sensible ranges — not mega-doses.

  • No xylitol / birch sugar. This is non-negotiable. Check the inactive ingredients too.

  • Quality markers. Third-party testing seals (NASC certification is the pet industry’s own quality mark) and a manufacturer with a real address and customer line.

  • Realistic claims. “Supports skin health” is fine. “Cures arthritis” or “guaranteed energy boost” is marketing noise — walk away.

And remember the simplest test: if the product can’t tell you exactly what’s in each dose, you don’t want it in your dog.

Hand holding a dog supplement bottle showing the Supplement Facts label.

Choosing the right form: chews, powders, liquids

The best supplement is the one your dog will actually take every day:

  • Soft chews — easiest for most dogs and the most popular form; check for fillers and flavourings, and confirm no xylitol.

  • Powders — sprinkled over food; easy to adjust the dose, good value, but fussy dogs may notice the taste.

  • Liquids — precise dosing with a syringe, ideal for tiny dogs or dogs that won’t chew; can be mixed into food.

  • Tablets — precise and cheap, but pilling a reluctant dog gets old fast.

Whatever you choose, introduce it gradually — start with half the dose for a few days to make sure it agrees with their stomach — and give it consistently. Like probiotics, vitamins need weeks of steady use before you judge the results.

What about natural food sources?

Before reaching for a bottle, know that several whole foods are naturally rich in the nutrients dogs need:

  • Blueberries and leafy greens — antioxidant vitamins (A, C, K).
  • Pumpkin puree — vitamin A, fibre, and a gentle gut helper.
  • Eggs — B vitamins, vitamin D, and complete protein.
  • Oily fish (sardines, salmon) — omega-3s EPA and DHA for skin, coat and joints.

  • Liver (small amounts) — vitamin A and iron — but go easy, since excess vitamin A is exactly what we’re avoiding.

Whole foods are a lovely daily topper and great maintenance nutrition, but they’re not a substitute for a vet-guided supplement when a real deficiency exists. And keep portions sensible: even good foods are extras on top of a balanced diet — treats and toppers should stay under 10% of daily calories.

Beagle sniffing bowls of blueberries, pumpkin puree, eggs and sardines.

The bottom line

Multivitamins are a tool, not a ritual. For a healthy dog on complete food, they’re unnecessary. For homemade feeders, seniors, picky eaters and dogs with absorption issues, they’re one of the simplest, highest-value things you can add — with your vet’s blessing.

Buy the boring, well-labelled product from a reputable maker, skip the miracle claims, keep xylitol off the ingredient list, and never stack supplements on top of each other without checking the total dose. Your dog’s nutrition is mostly decided by the food bowl — the vitamin bottle is the fine print.

FAQs

Do dogs need multivitamins every day?
Most healthy dogs on a complete, balanced commercial food do not need a daily multivitamin. Dogs on homemade diets, seniors, picky eaters, and dogs with certain health conditions often benefit — but check with your vet first.

Are dog multivitamins safe?
Quality dog-formulated multivitamins are safe when used as directed. The risks come from excess fat-soluble vitamins (A, D), calcium imbalance in growing puppies, and xylitol in flavoured chews. Never give human vitamins without vet approval.

What is the best vitamin for a senior dog?
There is no single best one — senior dogs benefit most from products combining antioxidants (vitamins E and C), omega-3s, and joint support (glucosamine). Choose a senior-specific formula and ask your vet to match it to your dog’s bloodwork.

Can I give my dog human multivitamins?
Not without vet guidance. Human products are dosed for people, may contain xylitol or other dog-unsafe ingredients, and can deliver dangerous excesses of vitamins A and D at dog body weights.

How long before I see results from dog vitamins?
For coat and skin improvements, most owners notice a difference in 4–8 weeks of consistent daily use. Joint and energy changes can take longer. If nothing changes after 2–3 months, talk to your vet — supplements may not be the answer.

Dog lifting its paw on a salt-covered snowy winter pavement

Winter Dog Paw Care: Salt, Ice & Dry Pads

Winter is the hardest season of the year for your dog’s paws. Road salt and chemical de-icers burn and crack paw pads, ice balls wedge painfully between toes, snowmelt soaks through, and dry indoor heating sucks the last of the moisture out. A dog limping mid-walk in January is almost always a paw problem — and almost always preventable.

The good news: winter paw care is a simple routine, not a project. A minute before the walk, three minutes after it, and a weekly check is all it takes to get your dog through the season with soft, intact pads.

Why winter wrecks paw pads

A dog’s paw pads are tough, but they’re not invincible. Three things attack them in winter:

Salt and de-icers. Rock salt and chemical melts (calcium chloride, magnesium chloride) irritate and burn paw pads on contact, then dry them out as they sit. Worse, most dogs lick their paws when they get home — and ingesting de-icer salts can cause vomiting, diarrhoea and, in large amounts, electrolyte problems. Assume every treated pavement is contaminated.

Ice and snow packing. Snow compacts between the toes into painful ice balls that stretch the skin and make dogs limp or chew at their feet. Dogs with feathered feet (spaniels, huskies, poodles) suffer most.

Dry air. Indoor heating drops humidity to desert levels, and pads that have been wet all walk dry out and crack when they come inside. Cracked pads hurt with every step — and tiny cracks can split deeper if ignored.

The pre-walk routine: wax or boots

Border collie wearing red winter dog boots on a snowy trail

You have two defences, and they work best in combination.

Paw wax (every winter walk). A layer of paw wax or balm before every walk creates a breathable barrier between the pad and the salt. Rub a pea-sized amount into each pad and between the toes, about 5 minutes before you head out so it sets. Wax doesn’t make paws salt-proof — it buys you time and keeps pads supple. Reapply on walks longer than 30 minutes.

Dog boots (the heavy-duty option). For walks on freshly salted streets, boots beat wax outright — nothing touches the pad. The catch: most dogs hate boots at first. Introduce them indoors with treats for a few days before expecting a normal walk, and check the fit — a boot that’s too tight cuts circulation; too loose twists and falls off. Carry a spare: one lost boot is a salted paw.

The combo: wax under boots on the worst days (boots come off mid-walk more often than you’d think). Wax alone on quiet, untreated paths.

The post-walk routine: rinse, check, moisturise

Dog paw being rinsed in a bowl of lukewarm water after a winter walk

This three-minute ritual after every winter walk prevents 90% of paw problems.

  1. Rinse. Fill a shallow basin with lukewarm — never hot — water and dunk each paw, swishing gently. This dissolves salt and de-icer residue before your dog licks it off. No basin? A damp flannel and a bottle of lukewarm water work.
  2. Check. Dry each paw and look: between the toes for ice balls or matted fur, on the pads for cuts, cracks or redness, and around the nails for swelling. Catching a small crack now beats treating a split pad in a week.
  3. Moisturise. Massage a thin layer of paw balm into the pads while they’re still slightly damp. This is when dry winter pads drink moisture in.

DIY paw balm (5 minutes, pennies per batch)

Hands applying homemade paw balm to a dog paw pad

Store-bought balms work fine, but a homemade batch costs a fraction and you know exactly what’s in it.

Ingredients

  • 4 tbsp coconut oil
  • 2 tbsp shea butter
  • 2 tbsp beeswax pellets (or grated beeswax)
  • 1 tsp vitamin E oil (optional, for extra conditioning)

Method

  1. Melt the coconut oil, shea butter and beeswax together in a heatproof bowl over simmering water.
  2. Stir in the vitamin E oil if using, then pour into a small tin or jar.
  3. Let it set at room temperature — about an hour.

Rub a thin layer into each pad before walks (as your pre-walk wax) or after the post-walk rinse. Keeps 3 months in a cool cupboard. Safety note: it’s lick-safe, but keep the tin away from enthusiastic chewers — beeswax in quantity isn’t dinner.

Store-bought picks: what to look for

If you’d rather buy, look for balms where the first ingredients are natural waxes and butters (beeswax, shea butter, coconut or olive oil) and nothing you can’t pronounce. Avoid anything with tea tree oil, artificial fragrance or essential oils at high concentrations — a dog will lick whatever you put on, so treat it like food. Unscented or lightly scented is best.

Don’t forget the fur between the toes

Trim the hair between the paw pads flush with the pad surface through winter. Long tufts collect snow, form ice balls, and trap salt against the skin — the single biggest cause of winter limping in long-haired breeds. A quick trim every two to three weeks, plus keeping nails short (long nails splay the toes and expose more skin), makes an enormous difference. If you’re nervous with scissors near paws, ask your groomer to do a “paw tidy” — it’s a five-minute job.

Salt-burn first aid

If your dog suddenly limps on a salted pavement, lifts a paw and won’t put it down, or you notice red, irritated pads after a walk:

  1. Get off the salted surface immediately.
  2. Rinse all four paws thoroughly in lukewarm water — a bottle of water poured over each paw works on the street.
  3. Pat dry and apply paw balm.
  4. Watch for licking. Persistent licking, swelling, bleeding cracks or refusal to walk need a vet visit — chemical burns can go deeper than they look, and cracked pads can get infected.

When to see the vet

Most winter paw issues resolve with the rinse-and-balm routine. See your vet if: a crack is bleeding or won’t close after a few days, the paw is swollen or hot, your dog suddenly won’t bear weight, or there’s discharge or a bad smell between the toes (possible infection). Also call if your dog may have swallowed a lot of de-icer — vomiting, drooling or lethargy after licking salted paws warrants a check.

FAQs

Can I use Vaseline on my dog’s paws?
In a pinch, yes — plain petroleum jelly is non-toxic and creates a barrier. But paw-specific waxes and balms stay on better and condition the pads; Vaseline is a stopgap, not a routine.

Are dog boots really necessary?
Not for every dog. If your winter walks are mostly on untreated paths and you use wax plus the post-walk rinse, many dogs do fine without boots. They’re worth it for city dogs on heavily salted pavements, and for any dog that already has cracked pads.

How often should I apply paw balm?
Before every winter walk as a barrier, and after the post-walk rinse as a moisturiser. In deep winter, a nightly balm massage keeps pads supple even on rest days.

My dog licks the balm straight off — what now?
Apply it right before you head out (the walk distracts them) or just before bedtime. A lick-safe balm is harmless in small amounts; the bigger risk is no protection at all. Boots solve this too.

Is road salt dangerous if my dog eats it?
Small licks usually just irritate the mouth. Larger amounts of rock salt or chemical de-icers can cause vomiting, diarrhoea, excessive thirst and, rarely, sodium poisoning — which is why the post-walk rinse matters as much as the barrier.

Dog resting calmly in a cozy safe-space crate indoors during New Year's Eve fireworks

New Year’s Eve Fireworks and Dog Anxiety: A 4-Week Calm-Down Plan

If your dog trembles, pants, hides in the bathroom or tries to bolt the second the fireworks start, you’re not alone — roughly half of all dogs show real fear of fireworks. And New Year’s Eve is one of the loudest nights of the year.

The good news: the calendar is on your side. Firework fear responds best to preparation started 4–6 weeks ahead, and right now you’ve got exactly that window. This guide gives you a simple desensitization plan you can start today, a safe-space setup for your home, a minute-by-minute plan for the big night, and honest guidance on when your vet should be part of the team.

Why dogs fear fireworks (and why telling them “it’s fine” doesn’t work)

Dogs hear far better than we do — sounds that are loud to us are startling at a level we can’t fully appreciate. Worse, fireworks are unpredictable: no warning, no pattern, and flashes of light to go with the booms. For a nervous dog, that’s the recipe for genuine panic, not mild annoyance.

Fear also tends to get worse with age if nothing is done. Each New Year’s Eve where a dog panics teaches their brain that the bangs are something to panic about. That’s why starting early matters — you’re rewriting that lesson before the next lesson arrives.

The 4-week desensitization plan (start today)

Dog listening to soft firework sounds on a phone during a desensitization training session

Desensitization means teaching your dog that boom-sounds predict good things, not danger. It works, but only if you go gradually and never push past what your dog can handle. Plan on one short session a day, 5–10 minutes, with high-value treats (cheese, chicken, whatever your dog loves most).

Weeks 1–2: sounds at whisper volume. Play firework sounds from a phone or speaker at the lowest volume where your dog notices but doesn’t react. Every few booms, deliver a treat — the order matters: sound first, then treat. You’re building the association “boom = snack time”. If your dog stiffens, drools, leaves or stops taking treats, the volume is too high. Turn it down and carry on.

Week 3: a little louder, still relaxed. Nudge the volume up one notch every few days. Keep sessions short and end on a win — a session where the dog stayed relaxed is perfect, even if it’s brief. Practice in different rooms so the lesson isn’t tied to one spot.

Week 4: realistic volume in the evening. By now the volume should be clearly audible but below panic level. Run some sessions in the evening, dim the lights, and let the sounds play in the background while your dog chews a stuffed Kong or lick mat. If you hit a wall at a certain volume, don’t fight it — drop back down for a few days. Patience beats pressure every time.

The golden rule: desensitization should always look boring. If your dog is showing fear, you’re going too fast. Slow down, not out — you’ll still make progress.

Free firework soundtracks are easy to find on video sites and streaming apps; look for tracks made for dog desensitization, which ramp in intensity.

Set up a safe space (do this once, keep it up through January)

Dog resting calmly in a cozy safe-space crate indoors during New Year's Eve fireworks

A safe space is a den-like spot your dog can retreat to — not a punishment zone, but a cosy bolt-hole they chose themselves.

  1. Pick the spot. An interior room away from outside walls and windows is best — noise and vibration carry less. A crate with the door left open, or a corner behind the sofa, both work.
  2. Make it cosy and sound-dampened. Thick blankets, their bed, a worn T-shirt that smells like you. Heavy curtains or blankets over nearby windows cut the flashes.
  3. Add white noise. A fan, TV, or radio on a normal channel takes the edge off the silence between booms. Some dogs prefer “through a dog’s ear” classical playlists.
  4. Load it with long-lasting chews. A frozen stuffed Kong, a lick mat, or a safe chew gives them something to do with the anxiety. Licking is genuinely calming for dogs — it lowers their heart rate.
  5. Introduce it now. Feed meals and treats in the safe space for the next few weeks so it becomes the best spot in the house, long before the first firework.

Your New Year’s Eve evening timeline

Even with weeks of prep, the night itself needs a plan. Here’s one that works:

Morning and afternoon

  • Walk and exercise your dog well — a tired dog copes better. Aim for the long walk well before dusk, while it’s still quiet.
  • Feed dinner early, around the usual time or a little before. Don’t change the routine; routine is reassuring.

Before the fireworks start (evening)

  • Take them out for a final toilet break before dark, on a lead, even in a fenced garden — panicking dogs scale fences.
  • Close all windows, curtains and doors. Turn on the TV or music and set up the safe space with fresh chews.
  • Check their collar and ID tag are on, and that your contact details are current with the microchip registry. More dogs go missing on fireworks nights than any other.

Close-up of a dog's collar with an engraved ID tag for holiday fireworks safety

During the fireworks (midnight)

Owner calmly comforting a nervous dog indoors during New Year's Eve fireworks

  • Stay calm and behave normally — dogs read our body language obsessively. If you’re jumpy, they’ll assume there’s something to jump about.
  • It’s fine to comfort a scared dog. The old advice that comforting “rewards” fear is outdated — gentle petting and a calm voice lower stress, they don’t teach panic.
  • Don’t force them out of hiding. If they choose the bathroom or under the bed, let them. Being “brave” isn’t the goal; feeling safe is.
  • Never leave a firework-fearful dog home alone on New Year’s Eve. If you must go out, a trusted person should stay with them.

Calming aids worth trying (start these before the night)

Dog wearing a snug gray calming pressure wrap indoors

  • Pressure wraps (like a Thundershirt): gentle, constant pressure calms many dogs, similar to swaddling. Buy it now and let your dog wear it for short, happy sessions so it doesn’t arrive as a surprise on NYE.
  • Calming supplements and pheromone diffusers: products with casein, L-theanine or dog-appeasing pheromone (DAP) help some dogs. Effects vary — test them on a normal evening first so you know what you’re working with.
  • Anxiety medication from your vet: for dogs with severe firework phobia — shaking, drooling, trying to escape, injuring themselves — talk to your vet now, not on December 30th. Some anti-anxiety medications need weeks to reach full effect, and vets get booked up in December. This is the single most underused option for dogs that truly suffer.

When fear becomes an emergency

Most firework anxiety is managed at home, but call your vet promptly if your dog: tries to chew or claw through doors, windows or crates; pants, drools and shakes for hours; injures themselves; or has a heart condition and shows extreme distress. And if your dog ever bolts during fireworks, don’t chase — a running dog in a panic state can run into roads. Note the direction, and call for them calmly once they’ve stopped running.

FAQs

Can you fully cure a dog’s fear of fireworks? You can often reduce it dramatically, especially in young dogs and with early, gradual desensitization. Some dogs become genuinely relaxed; others just cope much better. Severe phobias usually need a vet-led plan, and that’s okay.

Should I comfort my scared dog or ignore them? Comfort them. Calm, gentle reassurance reduces stress hormones. What doesn’t help is frantic fussing or scolding — be the calm presence you’d want.

Are “calming” fireworks-night treats safe? Most are, but check ingredients as with any treat: no xylitol (birch sugar), no chocolate, nothing you wouldn’t otherwise feed. Treats are 10% of the day’s food at most — an anxious dog with an upset stomach has two problems instead of one.

My dog is fine with thunder but terrified of fireworks — why? Thunder usually comes with warning signs dogs learn (pressure changes, rain) and builds gradually. Fireworks arrive without warning at full volume, often late at night when the dog is already settling. Different trigger, different reaction.

Golden retriever beside a Thanksgiving table with a small plate of dog-safe turkey and pumpkin.

Thanksgiving Foods for Dogs: 10 Safe (and 8 to Never Share)

Every Thanksgiving, it happens the same way. The turkey comes out, the dog appears at your elbow, and someone at the table slips a plate of scraps under it “just this once.” The intention is sweet — the problem is that half the traditional Thanksgiving spread is genuinely dangerous for dogs, from rich gravy to chocolate pie.

The good news: your dog doesn’t have to sit out Thanksgiving dinner. Plenty of holiday foods are perfectly safe when served plain and in small amounts — and a little planning turns the riskiest meal of the year into one your dog can enjoy too. Here’s the full safe/avoid guide, portion rules, and exactly what to do if your dog counter-surfs something they shouldn’t.

The safe list: 10 Thanksgiving foods you CAN share

Dog-safe Thanksgiving foods — plain turkey, pumpkin, green beans and sweet potato in a bowl.

1. Plain turkey breast (white meat) The star of the show is fine — as long as it’s plain. Boneless, skinless turkey breast is lean protein dogs digest easily. No seasoned skin, no butter baste, no garlic-herb rub. Serve a few small pieces, not a plateful.

2. Plain pumpkin purée Straight from the can — NOT pumpkin pie filling. Plain pumpkin is gentle on digestion and most dogs love the taste. A spoonful or two on top of their regular food makes a perfect Thanksgiving topper.

3. Sweet potatoes (plain) Mashed or baked, no marshmallows, no brown sugar, no butter. Sweet potatoes are one of the best dog-safe Thanksgiving sides — just serve them plain.

4. Green beans (plain) Fresh, steamed or boiled with nothing added. They’re low-calorie, crunchy, and dogs often go mad for them. Avoid canned green beans with added salt.

5. Carrots (plain) Cooked or raw, unseasoned. A classic enrichment chew — and a cooked carrot coin mix-in makes dinner feel special without any risk.

6. Plain mashed potatoes A spoonful of plain mash is fine. No butter, no sour cream, no garlic or onion. (Milk on its own upsets many dogs, so keep it minimal.)

7. Apple slices No seeds, no core, no caramel dip. Fresh apple chunks are a sweet, safe treat — and handy for redirecting begging.

8. Plain cranberries Fresh or frozen unsweetened cranberries are safe (and full of antioxidants). The canned jellied cranberry sauce, though, is mostly sugar — skip it.

9. Plain cooked corn (off the cob) Kernels only — NEVER the cob, which can cause a dangerous intestinal blockage. A tablespoon of plain kernels is a fine garnish.

10. Peanut butter (xylitol-free) Stuff a Kong with xylitol-free peanut butter before the meal starts and your dog will be too busy to beg. Check the label — xylitol (birch sugar) is extremely toxic to dogs.

The danger list: 8 Thanksgiving foods to NEVER share

Dangerous Thanksgiving foods for dogs — turkey bones, gravy, stuffing, chocolate pie and grapes.

  • Turkey skin and bones. Skin is pure fat — a known trigger for pancreatitis. Cooked bones splinter and can tear the gut.

  • Gravy. Fatty, salty, often made with onion or garlic drippings.

  • Stuffing/dressing. Almost always contains onion and garlic (both toxic to dogs), plus rich broth and butter.

  • Onions and garlic. In any form — raw, cooked, powdered. They damage red blood cells and toxicity builds up over days.

  • Chocolate desserts. Toxic at surprisingly small amounts — keep all pies and cakes out of nose reach.

  • Raisins and grapes. Even a few can cause kidney failure in some dogs. Check bread rolls and salads too.

  • Pumpkin pie / pie fillings. Sugar, spices (nutmeg is unsafe for dogs), butter — none of it belongs in a dog’s bowl.

  • Alcohol and raw dough. Raw bread dough expands in the stomach; alcohol is toxic even in small quantities. Keep both behind closed doors.

Portion rules — the 10% Thanksgiving rule

Treats and table scraps combined should stay under ~10% of your dog’s daily calories — even on a holiday. For a medium dog that’s roughly a small handful of turkey plus a spoonful or two of sides. Guests are the wildcard: one “just a little piece” from four people becomes a full meal. Put the rule in writing (yes, really) and give well-meaning relatives a job that doesn’t involve feeding — like handing out the Kong treats.

Senior dogs, puppies, and sensitive stomachs: if your dog is new to any of the safe foods above, introduce them 2–3 days BEFORE Thanksgiving in tiny amounts. A holiday is the worst time to discover a new food doesn’t agree with your dog.

Make your dog a Thanksgiving plate

The easiest way to include your dog safely: build a small plate before you sit down.

Homemade dog Thanksgiving plate with plain turkey, pumpkin, green beans and sweet potato.

  1. A palm-sized portion of plain turkey breast, cut into bite-size pieces.
  2. A tablespoon each of plain pumpkin and plain green beans.
  3. A drizzle-free spoonful of plain sweet potato.
  4. Serve it in their own bowl when you sit down to eat — they’ll feel like part of the celebration, and begging drops to almost zero.

What to do if your dog steals something

Dogs are faster than guests. If yours scores a plate:

Dog happily chewing a peanut butter Kong during Thanksgiving dinner.

  1. Check what was taken. A few bites of turkey are fine; stuffing, bones, chocolate, grapes or anything with onion/garlic is not.

  2. Remove what’s left and keep the dog calm — panicking makes it harder to see symptoms.

  3. Don’t induce vomiting unless your vet tells you to — some foods are worse coming back up.

  4. Call your vet or the pet poison helpline immediately if the food contained bones, chocolate, grapes/raisins, xylitol, or onion/garlic. Note the time and the amount — the vet will ask.

  5. Watch for 24–48 hours. Vomiting, diarrhoea, loss of appetite, or belly pain after a rich meal can signal pancreatitis — that needs a vet, not wait-and-see.

FAQs

Can dogs eat turkey skin? No. Turkey skin is mostly fat and a common trigger for painful, expensive pancreatitis. Stick to plain breast meat with the skin removed.

Is canned pumpkin safe for dogs? Yes — as long as it’s 100% plain pumpkin, not pumpkin pie filling. Pie filling contains sugar and spices like nutmeg that dogs shouldn’t have.

Can my dog eat Thanksgiving leftovers? A small container of plain turkey and pumpkin leftovers is fine for a day or two. Skip anything seasoned, saucy, or from the danger list above.

What Thanksgiving foods are toxic to dogs? Chocolate, xylitol, grapes/raisins, onions, garlic, alcohol, and cooked bones are the big ones. Rich fatty foods like skin and gravy can also cause pancreatitis.

How much turkey can a dog have? Keep treats under ~10% of daily calories: for a medium dog, a few ounces of plain turkey. More than that risks an upset stomach or worse.

Final word

Thanksgiving is about sharing — and with a little prep, your dog gets to join in safely. Set aside the plain turkey and pumpkin BEFORE the butter and seasonings go on, brief the guests, and stuff a Kong for the main event. The best Thanksgiving memory your dog can have is feeling included — not a midnight trip to the emergency vet.

Pin this guide 📌 — and if your dog loves pumpkin, our christmas dinner for dogs guide covers holiday safety for the whole season.

Dog-safe Christmas decor — decorated tree with shatterproof ornaments and a calm dog beside it.

How to Dog-Proof Your Christmas Decor (Tree, Lights & All)

The Christmas tree goes up, the lights go on, and within minutes your dog has decided the whole thing is a gift shop built just for them. Baubles are for batting, tinsel is for tasting, and that warm pine smell is suspicious enough to investigate at close range.

Dogs and Christmas decor can absolutely coexist — thousands of dog households do it every year — but it takes a little planning. Every December, vets see the same parade of festive emergencies: shattered ornaments, swallowed tinsel, chewed light cords, poisoned tree water, and eaten holly berries. Almost all of it is preventable with a dog-proofing pass before the season starts.

Here’s how to make your Christmas decor dog-safe, room by room, starting with the big one: the tree.

The tree: anchor it like you mean it

A real or artificial tree is the single biggest Christmas risk for a dog — it’s tall, it wobbles, and it’s covered in interesting things. A medium dog body-slamming a tree at play speed will topple most stands.

  • Anchor the tree. Tie the top of the tree to a wall hook or window frame with clear fishing line or a discreet ribbon. It’s invisible from the front and it turns a catastrophic topple into a harmless wobble.

  • Use a heavy, stable stand. For a real tree, choose the widest, heaviest stand you can find and fill it properly. If you have a large, excitable dog, consider a corner position with furniture on two sides — harder to hit at full sprint.

  • Gate it if you must. A decorative baby gate, a low fence, or a ring of wrapped presents around the base (yes, really) keeps a curious puppy or a brand-new rescue at a safe distance while they learn the rules. There’s no shame in a tree barrier in year one.

Tree water: the hidden toxin

This is the one most dog owners miss. The water in a real tree’s stand becomes a chemical soup within days — pine sap, needle oils, preservatives, and sometimes fertiliser from the farm. It’s also mildly stagnant, which dogs find irresistible.

Tree water can cause stomach upset, drooling and diarrhoea, and in rare cases it’s much worse if preservatives were added. Cover the stand so your dog can’t drink from it: a tree skirt pulled tight, a fitted stand cover, or even an upside-down plastic bowl with a hole for the trunk works. Refresh the water often and never add preservatives if a dog can get near the tree.

Ornaments: shatterproof is non-negotiable

Glass baubles are beautiful and absolutely terrible around dogs. One batted ornament becomes a pile of razor-sharp glass on the floor — and dogs don’t wear shoes.

  • Swap glass for shatterproof. Plastic, fabric, wood and felt ornaments look festive and bounce instead of breaking. Keep your heirloom glass for the top half of the tree, well above nose and tail height.

  • Hang fragile ornaments high. Anything precious, glass or sentimental goes on the top third of the tree. The bottom third is the dog zone — tough ornaments only.

  • Ditch the hooks for ribbon. Metal ornament hooks are sharp little gut-punchers if swallowed. Tie ornaments on with ribbon or string, and keep spare hooks in a closed tin, not a bowl on the side table.

Shatterproof Christmas ornaments hung with ribbon, dog nose nearby

Tinsel, ribbons and garlands: the linear foreign body problem

Tinsel is the worst Christmas decoration for dogs, full stop. Dogs love shiny, dangly things, and tinsel is nearly impossible for them to resist — and it’s one of the most dangerous things they can swallow.

Long, stringy material doesn’t pass through a dog’s gut the way a chewed toy piece might. It can saw through the intestinal wall as the gut tries to move it along — vets call this a linear foreign body, and it’s a surgical emergency. The same goes for ribbons, curling ribbon, beaded garlands, and string lights’ spare wire.

The safest move: skip tinsel entirely if you have a dog, especially a puppy or a known chewer. Use wide fabric garlands, wooden bead strings, or paper chains instead — nothing long, thin and dangly at dog height.

Christmas tree with fabric garlands instead of tinsel, beagle beside it

Lights: beautiful, chewable, dangerous

A dog that chews a live light cord can get an electrical burn to the mouth, a shock, or worse. Puppies are the prime suspects, but plenty of adult dogs find a dangling cord irresistible.

  • Run cords along walls, not across floors. Tape them down with cord covers or run them behind furniture so there’s nothing loose at chewing height.

  • Unplug when you’re out. Lights off and unplugged whenever the dog is unsupervised — this one rule prevents almost every light-related accident.

  • Check for heat. Older incandescent strings get genuinely hot. LED strings run far cooler and use less power — they’re the dog-safer choice, and they won’t burn a curious nose.

  • Watch the low-hanging bulbs. Big, shiny bulbs at the bottom of the tree are chew toys to a puppy. Keep the lowest lights a foot or two up, or use unbreakable LED ornaments at the base.

LED Christmas lights with cords taped along the wall, dachshund sleeping nearby

The toxic plant hit list

Christmas greenery looks innocent and much of it is not. Here’s what to keep out of reach — or out of the house:

  • Poinsettia. Mildly toxic: the milky sap irritates the mouth and stomach. A nibble usually means drooling and a sore tummy, not an emergency — but put them on high shelves anyway.

  • Mistletoe and holly. Both are genuinely dangerous. Mistletoe berries can cause vomiting, diarrhoea, low blood pressure and, in large amounts, heart problems. Holly berries and leaves cause intense stomach upset. Hang mistletoe high — properly high — and skip holly garlands at dog height.

  • Christmas cactus and amaryllis. Amaryllis bulbs are the toxic part; the flowers cause stomach upset. Christmas cactus is only mildly irritating, but keep them all on shelves just in case.

  • Lilies (sometimes in Christmas bouquets) are a cat emergency more than a dog one, but don’t bring them into a mixed-pet home.

Pine needles themselves are mildly toxic and sharp — vacuum under the tree regularly, especially with a real tree, and pick up fallen needles before your dog does.

Poinsettias and mistletoe kept on high shelves out of a dog's reach

Candles, fireplaces and potpourri

  • Candles and wagging tails don’t mix. A happy tail can sweep a candle off a coffee table in one wag. Use flameless LED candles around dogs — they flicker convincingly and can’t burn the house down. If you must burn real candles, put them in enclosed lanterns, on high shelves, and never leave them lit in a room with an unsupervised dog.

  • Fireplace screens are mandatory. An open fire with a dog asleep in front of it is a Christmas card waiting to happen — until an ember pops. Keep a sturdy screen in front of any open flame, always.

  • Simmer pots and potpourri. Liquid potpourri is the dangerous one: it’s concentrated essential oils that burn the mouth and oesophagus if a dog drinks it. Dried potpourri is safer but still keep it out of reach. Simmering citrus and cinnamon on the stove is the dog-friendly way to make the house smell like Christmas.

Gifts, stockings and the wrapping-paper gauntlet

Christmas morning is a minefield of small, swallowable, toxic things:

  • Wrap the dog’s presents, not just yours. Dogs get excited by tearing paper — channel it: wrap a new chew toy and let them join in. It’s the safest outlet for the wrapping-paper frenzy.

  • Chocolate and food gifts go up high. Selection boxes, chocolate oranges, food hampers and advent calendars are dog poison in pretty packaging. Keep them on high shelves or in closed cupboards until they’re opened — then the wrappers go straight in a lidded bin.

  • Ribbon and bows are tinsel’s cousins. Pick up every scrap of ribbon, string and tape as you unwrap. A bored dog and a floor full of curling ribbon is a vet visit waiting to happen.

  • Small toy parts. If the kids got LEGO, batteries or anything with small parts, the post-unwrapping tidy-up is a dog-safety operation. Button batteries are a genuine emergency if swallowed.

The snow globe and the fake snow

Snow globes look magical and contain ethylene glycol (antifreeze) or similar fluids in some older ones — extremely toxic to dogs. Keep them on high shelves and out of the “shake it!” zone. Artificial snow spray is mildly toxic and irritating; sprayed low on windows or mirrors, a dog can lick it off. Use it high or skip it.

A dog-safe decorating checklist

Do this once, before the tree goes up, and the whole season gets easier:

  1. Anchor the tree to the wall and cover the water stand.
  2. Swap the bottom-third ornaments for shatterproof ones; ribbon instead of hooks.
  3. Remove tinsel; replace with fabric garlands or paper chains.
  4. Tape down light cords, switch to LED, unplug when out.
  5. Move poinsettias, mistletoe and holly out of reach.
  6. Swap real candles for flameless; screen the fireplace.
  7. Put chocolate, food gifts and small toy parts up high.
  8. Save your vet’s holiday opening hours on your phone.

Done right, your Christmas looks exactly as festive — and your dog gets to enjoy every minute of it with you, safely.

FAQs

Is a real or artificial Christmas tree safer for dogs? Artificial trees avoid the toxic tree-water problem and the needle drop, so they’re slightly safer. But a real tree is fine if you cover the water stand, vacuum needles regularly, and anchor the tree well. The bigger risks — ornaments, lights, tinsel — are identical for both.

Are poinsettias really poisonous to dogs? Mildly, not lethally. The sap irritates the mouth and stomach, causing drooling and an upset tummy, but a nibble is rarely an emergency. Mistletoe and holly are the ones to genuinely worry about — keep those well out of reach.

How do I stop my dog from drinking the Christmas tree water? Cover the stand completely — a tight tree skirt, a fitted stand cover, or a bowl with a hole for the trunk. Refresh the water often, and never add preservatives or fertiliser if a dog can access the tree.

What Christmas decorations are most dangerous for dogs? Tinsel (linear foreign body emergency), glass ornaments (shards), chewed light cords (electrical burns), tree water (toxins), mistletoe and holly berries, liquid potpourri, real candles near wagging tails, and snow globes with antifreeze-type fluids.

Natural homemade dog treats — bone biscuits, sweet potato chews, frozen berry pops and apple chips on a wooden tray.

12 Natural Dog Treats With Simple Ingredients (No Nasties)

Walk down any pet aisle and half the bags shout “natural” at you. But here’s the thing: in pet food, natural isn’t a tightly regulated word. A treat can call itself natural and still pack in glycerin, vague “meat meals”, and enough sugar to make a nutritionist wince.

The most reliable way to keep treats natural is the same way it’s always been: make them yourself, from ingredients you’d put in your own cooking. Below are 12 natural dog treat ideas — all tested, all built on short ingredient lists, and all free of the additives that make dog owners read labels twice. Many use fewer than five ingredients.

Before you bake — the 4 rules
1. Peanut butter must be xylitol-free. Check the label: xylitol (also listed as “birch sugar”) is extremely toxic to dogs.
2. Use plain pumpkin purée, NOT pumpkin pie filling — the filling has spices like nutmeg, which dogs shouldn’t eat.
3. Never chocolate, grapes, raisins, or macadamia nuts. For “chocolatey” decoration, use carob chips — they’re dog-safe.
4. Treats are treats. Keep them under ~10% of your dog’s daily food, and introduce new recipes one at a time.

What “natural” should actually mean

When you bake at home, natural is simple: a recognisable ingredient, minimal processing, no artificial colours, flavours or preservatives. When you buy, use this quick checklist:

  • ✅ Named whole ingredients first (“sweet potato”, “peanut butter”, “oats”)
  • ✅ Short ingredient list — under 10 is a good sign
  • ❌ Avoid: artificial colours, added sugars, propylene glycol, vague terms like “meat and animal derivatives”, and anything “sugar-free” that might hide xylitol

Homemade wins every time — and it’s cheaper too. Here’s where to start.

Natural homemade dog treats — bone biscuits, sweet potato chews, frozen berry pops and apple chips on a wooden tray.

Baked biscuits (longest lasting)

1. Peanut Butter & Oat Bones
Our classic homemade peanut butter treats — just peanut butter, banana, egg and oats, baked until crunchy. Dogs lose their minds over these, and there’s nothing in them you couldn’t eat yourself (though we’d recommend your own snacks too).

Homemade peanut butter dog biscuits cooling on a wire rack.

2. Pumpkin Oatmeal Pup Cookies
Pumpkin is the gentlest ingredient in a dog’s pantry — great for digestion. These soft pumpkin and oat cookies take 20 minutes and one bowl. Full method: see the pumpkin oatmeal recipe post.

3. Carrot & Oat Squares
Grated carrot, oats, a spoonful of coconut oil. Naturally sweet, crunchy, and a good one for dogs who need a lighter treat — carrots are low in calories and high in fibre.

4. Apple & Cinnamon Bites
Unsweetened applesauce, oat flour, a pinch of cinnamon, one egg. Drop-spoon cookies, baked 18–22 minutes at 175°C / 350°F. Softer bake for older dogs: take them out 5 minutes early.

No-bake & frozen (easiest)

5. Frozen Berry Yoghurt Pops
Plain yoghurt (xylitol-free!) and a handful of strawberries or raspberries, layered in silicone moulds and frozen. See our frozen berry treats post for the marbled technique — two ingredients, zero baking, huge tail-wag payoff.

Frozen berry yoghurt pops for dogs in a pink silicone mould with fresh raspberries.

6. Peanut Butter Banana Ice Cubes
Mash one banana into ½ cup plain yoghurt with a tablespoon of xylitol-free peanut butter. Pour into ice cube trays, freeze overnight. Perfect for hot days — and for stuffing into Kongs.

7. Watermelon “Popsicles”
Seedless watermelon blended with a little coconut water, frozen in moulds. Hydrating, low-calorie, and dogs genuinely seem to like the ice-cold crunch. Remove any seeds first — even in “seedless” fruit, check.

Chews & jerky (slow and satisfying)

8. Sweet Potato Chews
One ingredient, sliced thin and baked low and slow (120°C / 250°F for about 3 hours) until chewy. Our sweet potato chews guide walks through it — the chewiness keeps dogs occupied, and they’re naturally grain-free.

Homemade dried sweet potato chews for dogs stacked on a baking tray.

9. Apple Chips
Core and slice an apple into thin rounds, bake at 120°C / 250°F for 2 hours, flipping once. Crisp, sweet, and a nice breath-freshener too. Skip the cinnamon if your dog’s stomach is fussy.

10. Chicken Jerky Strips
Slice chicken breast 3 mm thin, bake at 110°C / 230°F for 3–4 hours until completely dry. No salt, no marinade, no seasoning — just chicken. Cool fully and refrigerate; they keep about 2 weeks.

Homemade chicken jerky strips for dogs on a wooden cutting board.

Protein bites (training gold)

11. Salmon & Pumpkin Bites
Tinned salmon (in spring water, drained), pumpkin purée and oat flour, baked into pea-sized bites. Stinky to humans, irresistible to dogs — ideal high-value training rewards. Our salmon treat post has the full recipe.

12. Turkey & Blueberry Meatballs
Lean turkey mince, a handful of blueberries and an egg, rolled small and baked at 175°C / 350°F for 18 minutes. Soft, smelly (in a good way), and freezer-friendly for a month.

How to store homemade treats

  • Baked biscuits: 1 week in an airtight tin, 2 weeks in the fridge, 3 months in the freezer.
  • Frozen treats: 1 month in a sealed container — label them, because frozen berry pops look suspiciously like human desserts.
  • Jerky & chews: fridge only, 2 weeks max. They contain no preservatives — that’s the point, so respect the shelf life.
  • General rule: if it smells off, bin it. Homemade treats have no preservatives by design.

FAQs

Are natural dog treats better than store-bought?
Not automatically — but homemade natural treats let you control every ingredient, avoid additives, and skip the preservatives that give commercial treats their long shelf life. Store-bought can be fine if the ingredient list is short and transparent.

Can I give my puppy these treats?
Yes, in small pieces, from about 12 weeks. Start with the softer recipes (the apple bites and protein bites) and introduce one new recipe per day.

What should I avoid in shop-bought “natural” treats?
Artificial colours, added sugars, propylene glycol, vague “meat derivatives”, and anything labelled sugar-free that could contain xylitol. If the ingredient list reads like a chemistry exam, it’s not natural.

How many treats per day?
Treats — homemade or not — should stay under about 10% of your dog’s daily calories. For a medium dog that’s roughly 20–30 small biscuits’ worth of room, depending on size.

Final word

Natural shouldn’t need a marketing department. Pick a recipe from the list, check your peanut butter label once, and bake a batch this weekend — your dog won’t care about the packaging, but they’ll absolutely notice the difference.

Pin this for later 📌 — and if you’re baking for the holidays, our Christmas dog treats are next on your list.

Happy golden retriever with probiotic foods — yoghurt, chews and kibble bowl for dog gut health

Dog Probiotics: Benefits, Best Types & How to Choose the Right One

If your dog has a sensitive stomach, itchy skin, or seems to catch every bug going, the answer might not be another food swap — it might be their gut. The digestive tract holds the majority of your dog’s immune system, and probiotics are the friendly bacteria that keep that whole system running smoothly.

Searches for dog probiotics have climbed sharply over the past year, and for good reason: owners are seeing real, visible differences — firmer stools, calmer tummies, shinier coats. This guide covers what probiotics actually are, when your dog needs them, which strains work, and how to pick a product that isn’t just marketing dust in a pretty jar.

Probiotic powder sprinkled over dog kibble

What are probiotics for dogs?

Probiotics are live beneficial bacteria and yeasts that support a healthy gut microbiome — the trillions of microorganisms living in your dog’s digestive tract. Think of the gut as a garden: probiotics are the good plants that crowd out the weeds (harmful bacteria), help break down food, and keep the soil — the gut lining — healthy.

The most studied, dog-appropriate strains include:

  • Enterococcus faecium — one of the most researched probiotics for dogs, often used for diarrhoea support.
  • Lactobacillus acidophilus — helps digestion and nutrient absorption.
  • Bifidobacterium animalis — supports immune health and stool quality.
  • Lactobacillus casei — linked to gut and immune support.
  • Bacillus coagulans — a hardy, spore-forming strain that survives storage and stomach acid well.

Many quality products also include prebiotics — fibres like fructooligosaccharides (FOS) or chicory root that feed the good bacteria. A product with both is called a synbiotic, and it’s generally the better choice.

6 signs your dog might need a probiotic

Not every dog needs a daily probiotic, but these are the classic signals:

  1. Recurring diarrhoea or loose stools. Probiotics are one of the best-supported uses — they help stabilise the gut flora after an upset.
  2. Gassiness and bloating. Excessive wind often means the gut bacteria are out of balance.
  3. After antibiotics. Antibiotics kill good bacteria along with the bad. A probiotic during and after a course helps rebuild the gut. (Give it a few hours apart from the antibiotic dose — ask your vet.)
  4. Stress-related stomach issues. Moving house, boarding, fireworks, new pets — stress disrupts the gut. Boarding kennels and travel are classic trigger points.
  5. Allergies and itchy skin. Gut health and skin health are linked; some dogs with itchiness or recurrent ear infections improve when their gut flora is balanced.
  6. A weak immune system. Dogs that seem to catch every passing bug may benefit, since so much immunity lives in the gut.

Safety note: these are general wellness signs. If your dog has bloody diarrhoea, vomiting that won’t stop, is lethargic, or refuses water, see a vet promptly — a probiotic is not a substitute for veterinary care.

The real benefits of dog probiotics

Here’s what the evidence and owner experience point to:

  • Firmer, more regular stools. The headline benefit — most owners notice a difference in one to two weeks.
  • Better digestion and nutrient absorption. A balanced microbiome breaks food down more efficiently, so your dog gets more from the same food.
  • Stronger immune defences. A healthy gut is the immune system’s front line.
  • Calmer allergic responses. Some dogs show less itching and fewer flare-ups when gut inflammation settles.
  • Faster recovery after digestive illness or antibiotics. Rebuilding the gut flora shortens the bounce-back period.
  • Better breath and less gas. Some of that “dog smell” starts in the gut.

Types of dog probiotics: powder, chews, capsules

Probiotics come in several forms — pick the one your dog will actually take every day:

Dog probiotic capsules, chews and yoghurt flat lay

  • Powders — sprinkled over food. Easy to dose, usually good value, but some dogs notice the taste or texture change.
  • Chews/soft treats — the easiest for fussy dogs, though they can contain more flavourings and fillers. Check the label for xylitol (also called birch sugar) — it must never be in a dog product.
  • Capsules — precise dosing, ideal for larger dogs; can be opened and mixed into food.
  • Pastes — often sold for acute diarrhoea; handy for short-term use.
  • Food-based options — plain unsweetened yoghurt, kefir, and fermented foods contain live cultures. They’re milder than supplements but a great everyday topper — as long as there’s no added sugar, sweeteners, or flavourings.

Whichever form you choose, it has to be given daily and consistently for at least a few weeks before you judge the results.

How to choose a good dog probiotic

The probiotic shelf is a jungle. Here’s how to sort the real thing from the marketing:

  • Named strains on the label. Look for the specific strain (e.g. Enterococcus faecium SF68), not just “contains probiotics”.
  • CFU count in the billions. A meaningful daily dose is typically 1–10 billion CFUs (colony-forming units). Tiny doses are mostly for show.
  • Formulated for dogs. Human probiotics aren’t dangerous in most cases, but dog-specific formulas use strains researched in dogs.
  • Prebiotics included. FOS, inulin or chicory root feed the bacteria and improve results.
  • Guaranteed through expiry. Live bacteria die off; the CFU number should be guaranteed at the end of shelf life, not just at manufacture.
  • Clean label. No xylitol/birch sugar, no artificial sweeteners, minimal fillers and colours.

Price isn’t a perfect guide, but rock-bottom chews with vague labels are a red flag. If in doubt, ask your vet for the brands they actually use — they’ll have seen what works.

Dosage: how much and how often

There is no single universal dose — it depends on the product’s CFU concentration and your dog’s size. General rules:

  • Follow the label. Doses are usually weight-banded (e.g. one chew under 10 kg, two above).
  • Daily for at least 3–4 weeks before judging. Gut flora changes take time.
  • Introduce gradually. Start with half a dose for the first 3–4 days — some dogs get mild gas as the gut adjusts.
  • Pair with prebiotics. Fibre feeds the new bacteria; a spoon of plain pumpkin puree is a cheap, dog-safe helper.

When to talk to your vet first: puppies under 8 weeks, dogs with compromised immune systems, dogs on immunosuppressive drugs, and any dog with a serious ongoing illness. Probiotics are very safe for healthy dogs, but severely ill dogs need professional guidance.

Can dogs get probiotics from food?

Yes — as a gentle daily topper, these food sources contain live cultures:

Beagle licking plain yoghurt from a bowl

  • Plain unsweetened yoghurt — a spoonful a day; check for xylitol on the label, every single time.
  • Plain kefir — often higher in live cultures than yoghurt; start with a teaspoon.
  • Fermented vegetables (small amounts, plain) — some dogs love them, some don’t.

Food sources are milder than supplements, so think of them as gut maintenance rather than treatment. For a dog with a real digestive issue, a proper supplement plus vet advice is the way.

Healthy happy dog running in a meadow

FAQs

Are probiotics safe for dogs? Yes — probiotics are considered very safe for healthy dogs. The most common side effect is mild, temporary gas when you start. Dogs that are severely ill, immunocompromised, or on immunosuppressive medication should have vet approval first.

How long does it take for dog probiotics to work? Most owners notice changes in stool quality within 1–2 weeks of daily use, with fuller benefits over 4–6 weeks. Consistency matters more than anything — a missed day here and there won’t help the gut settle.

Can I give my dog human probiotics? It’s not dangerous in most cases, but it’s not ideal — human products use strains researched in people, and dosing is unclear. Dog-formulated products use strains studied in dogs and are dosed by weight. Use the dog version when you can.

Do probiotics help dogs with allergies? They can help some dogs. The gut and the immune system are tightly linked, and balancing gut flora may calm overactive immune responses — some dogs itch less and have fewer flare-ups. They’re not a cure, but they’re a sensible part of an allergy management plan alongside vet care.

Should I give probiotics every day? For ongoing support, yes — daily and consistently. For short-term situations (after antibiotics, a stomach bug, stressful travel), a course of a few weeks is usually enough. When in doubt, ask your vet what schedule fits your dog.